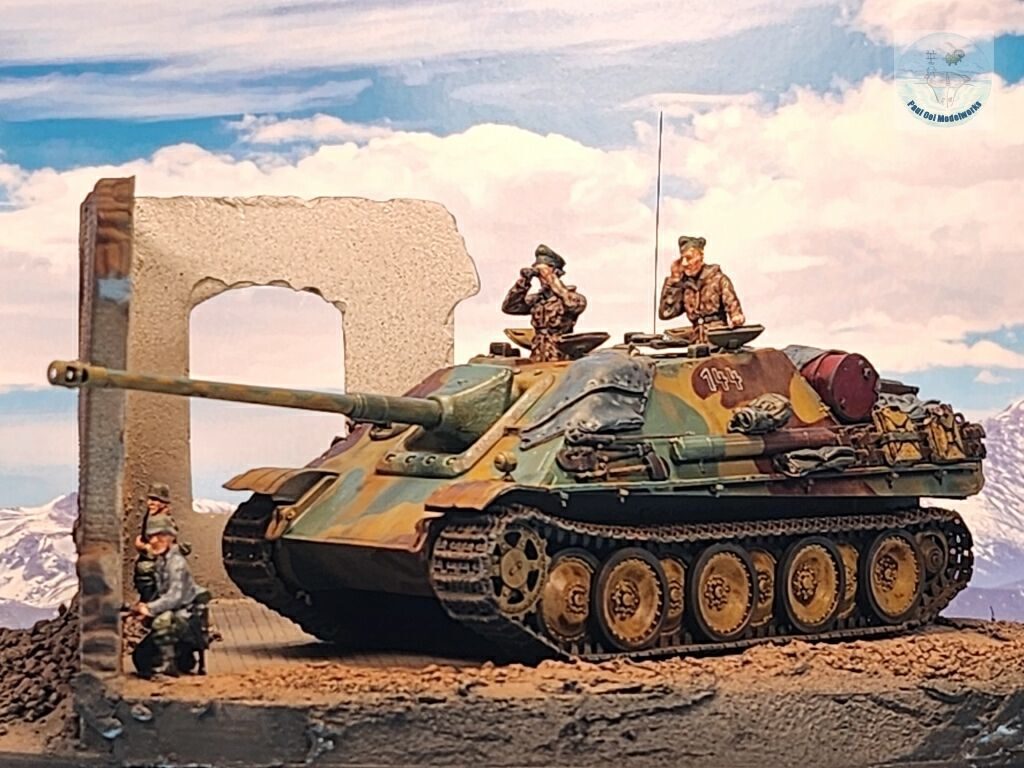
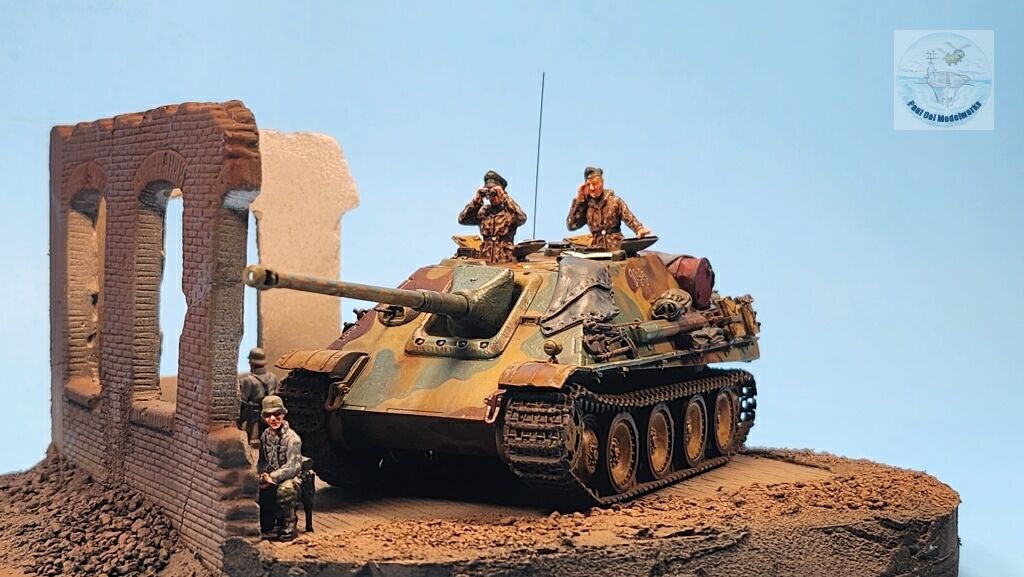
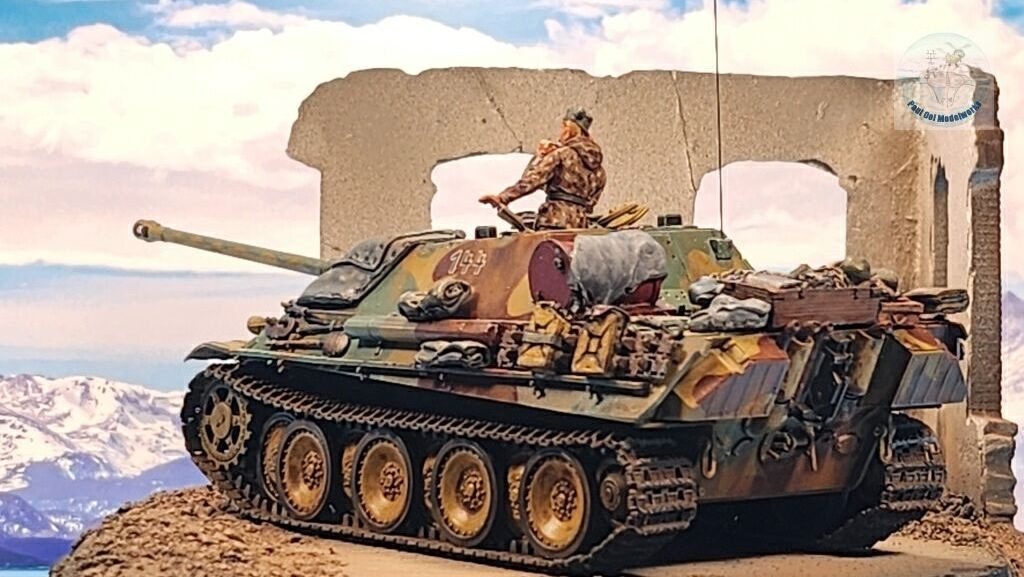
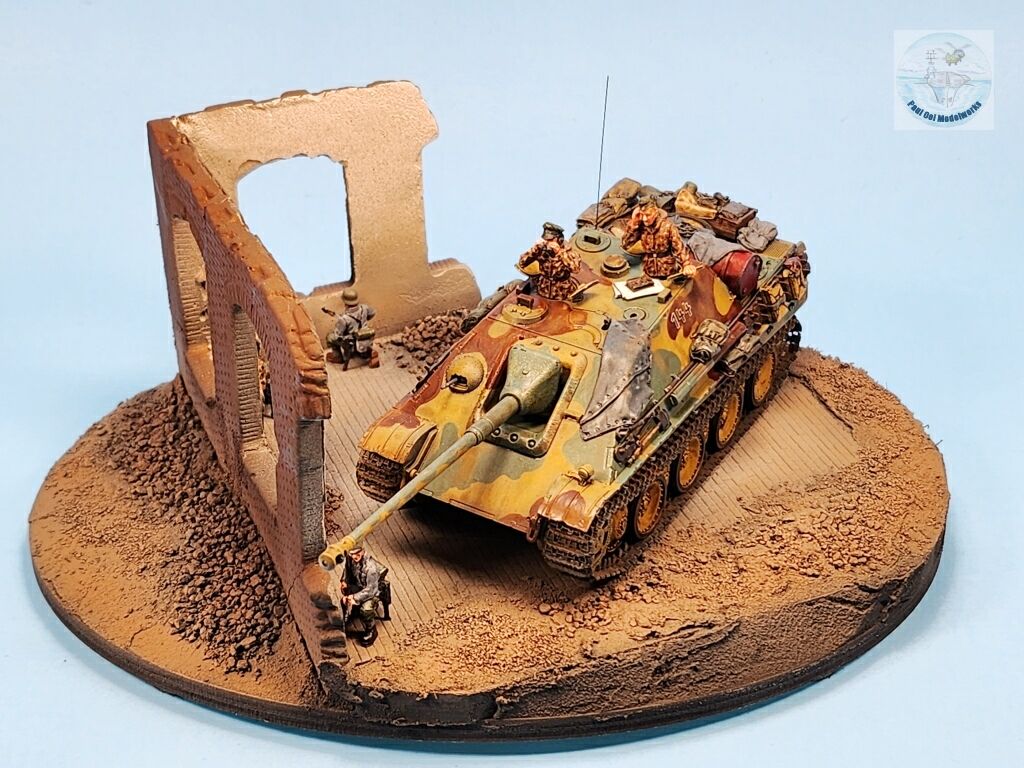
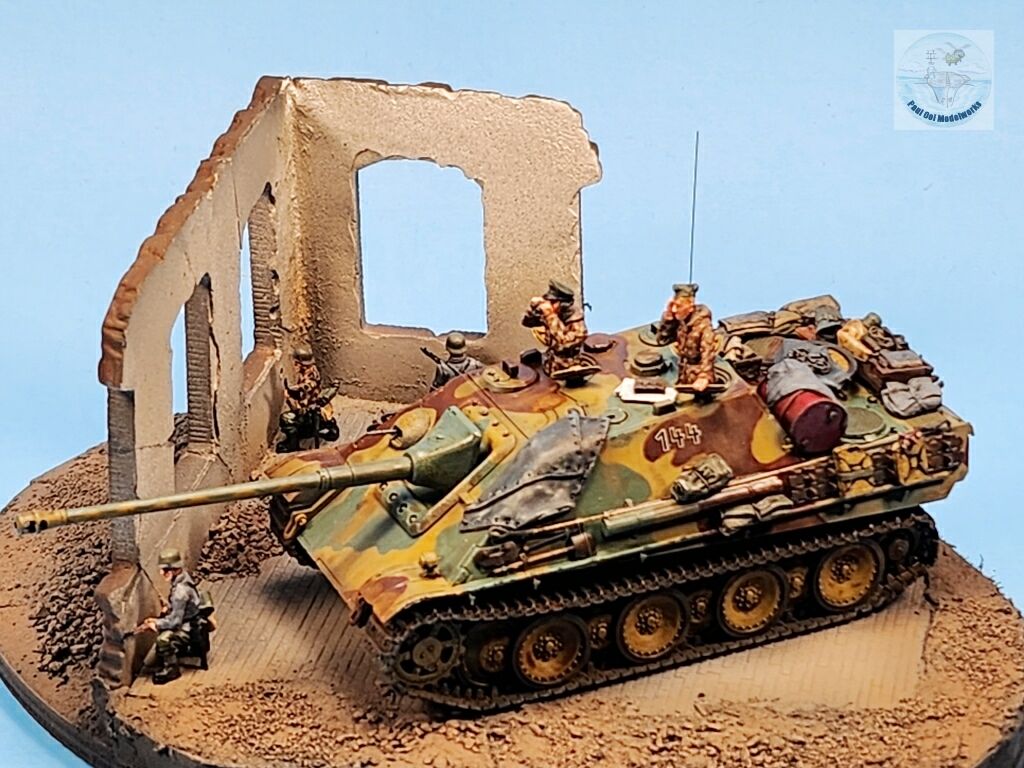
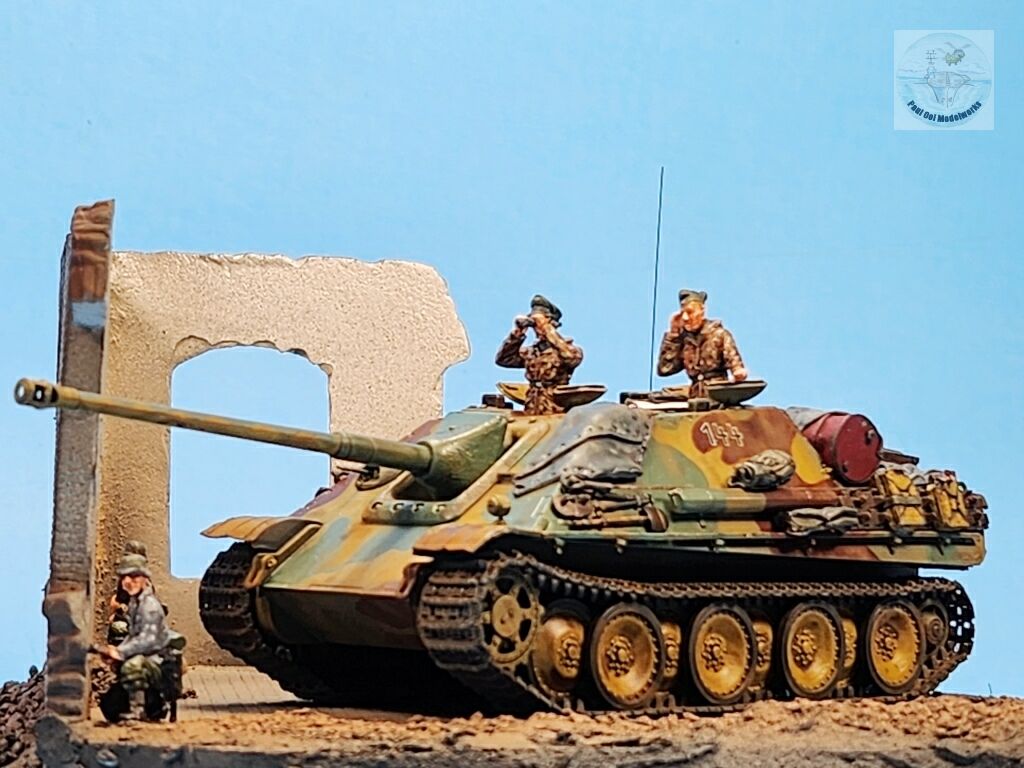
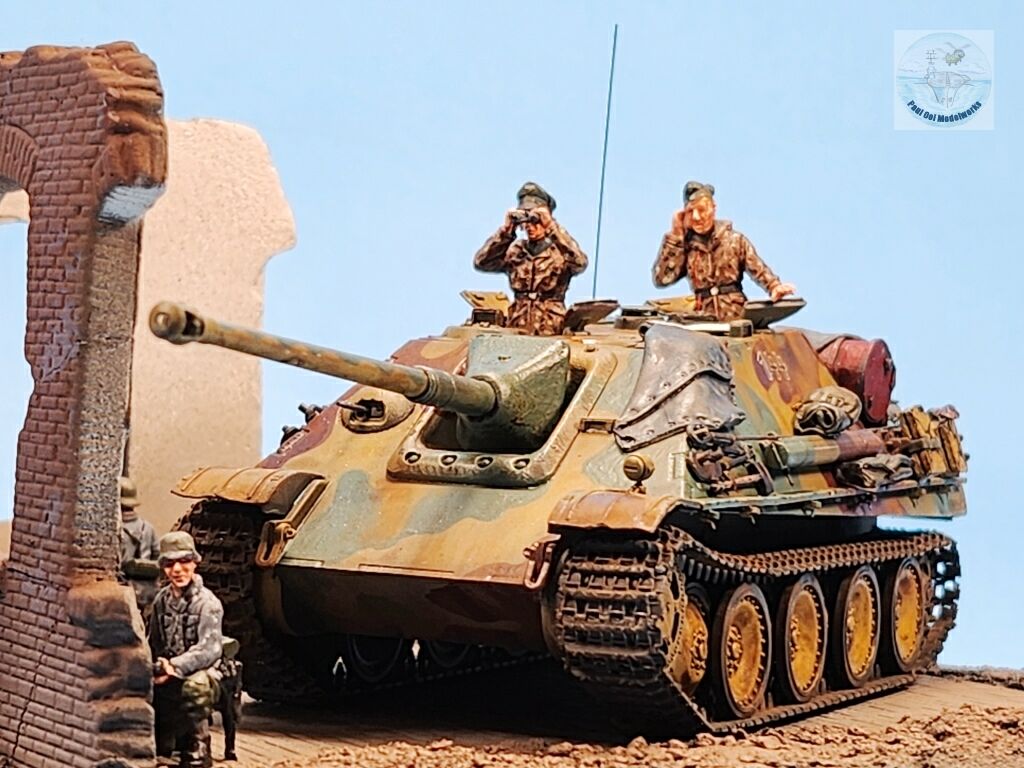
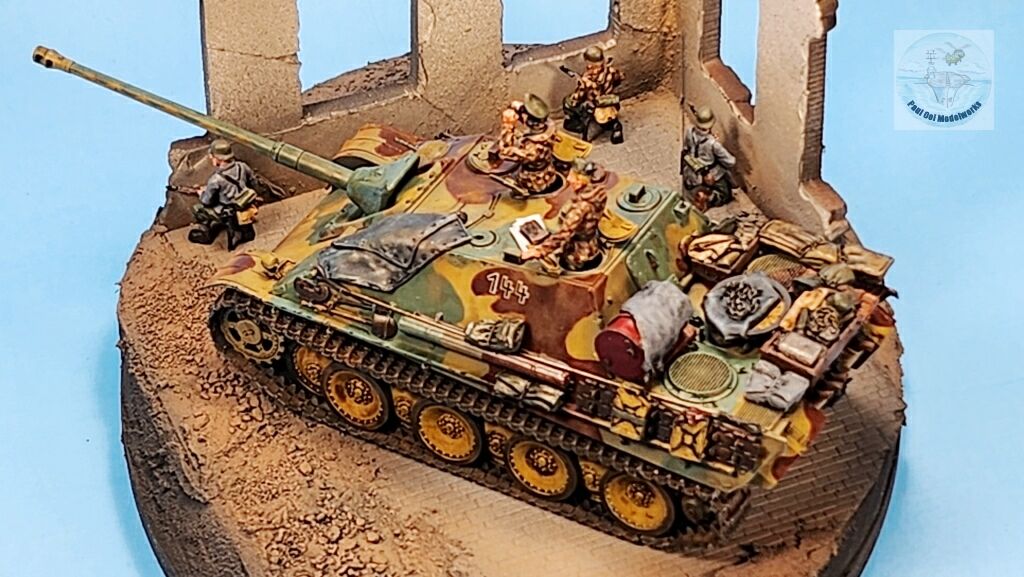
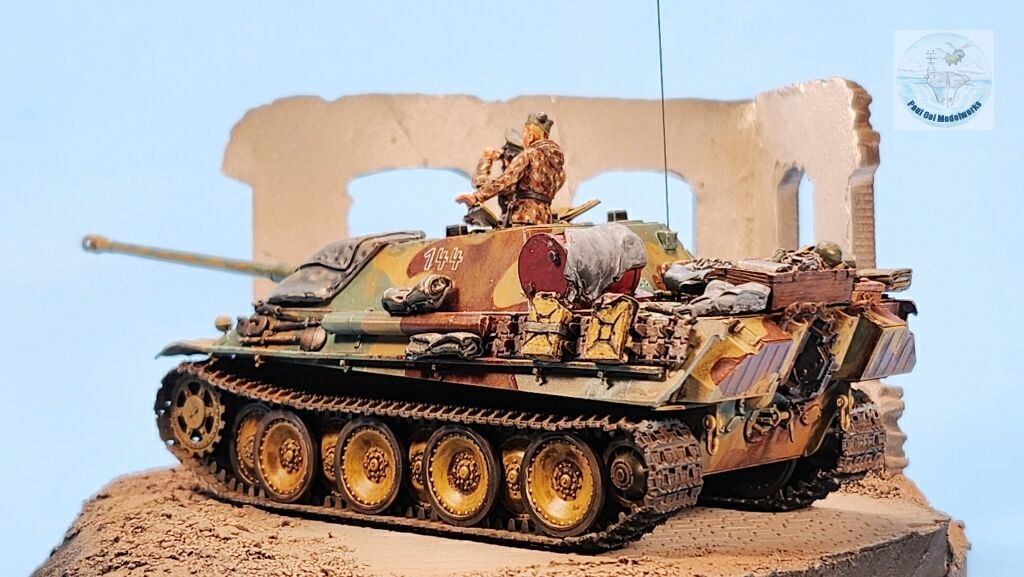
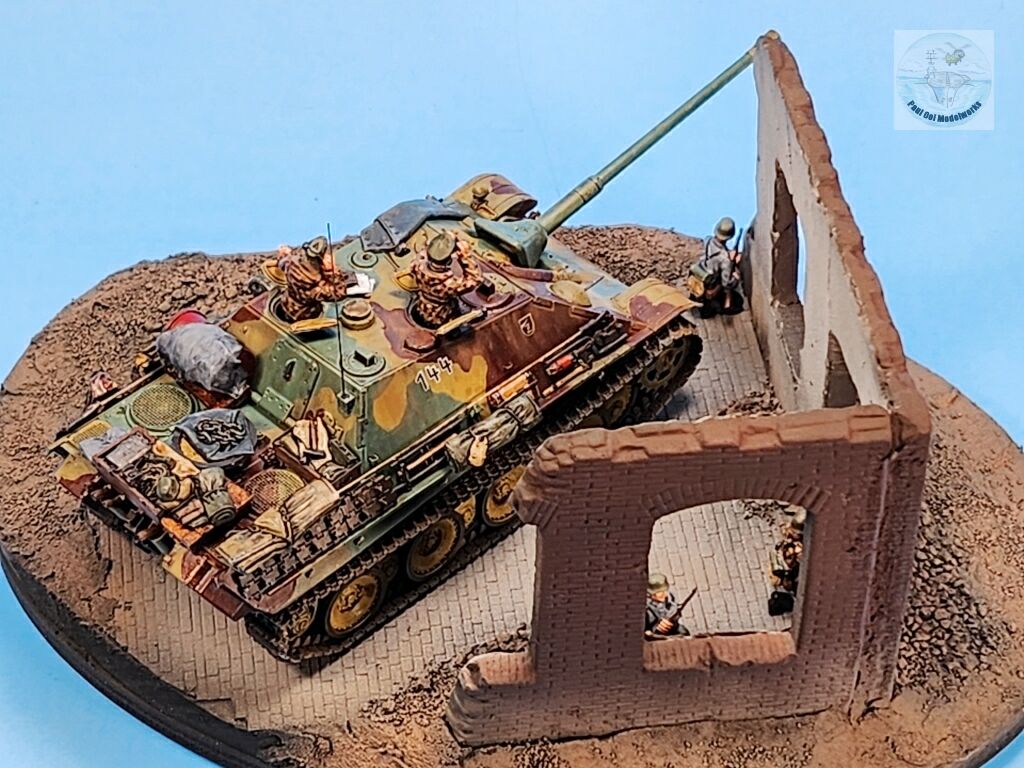
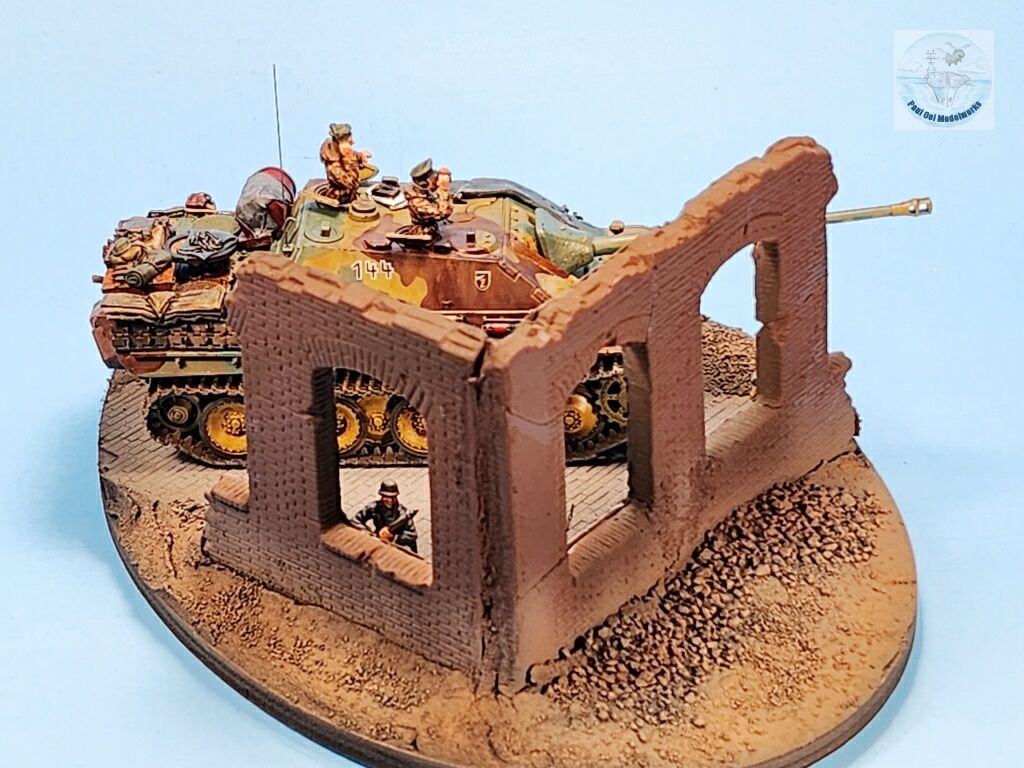
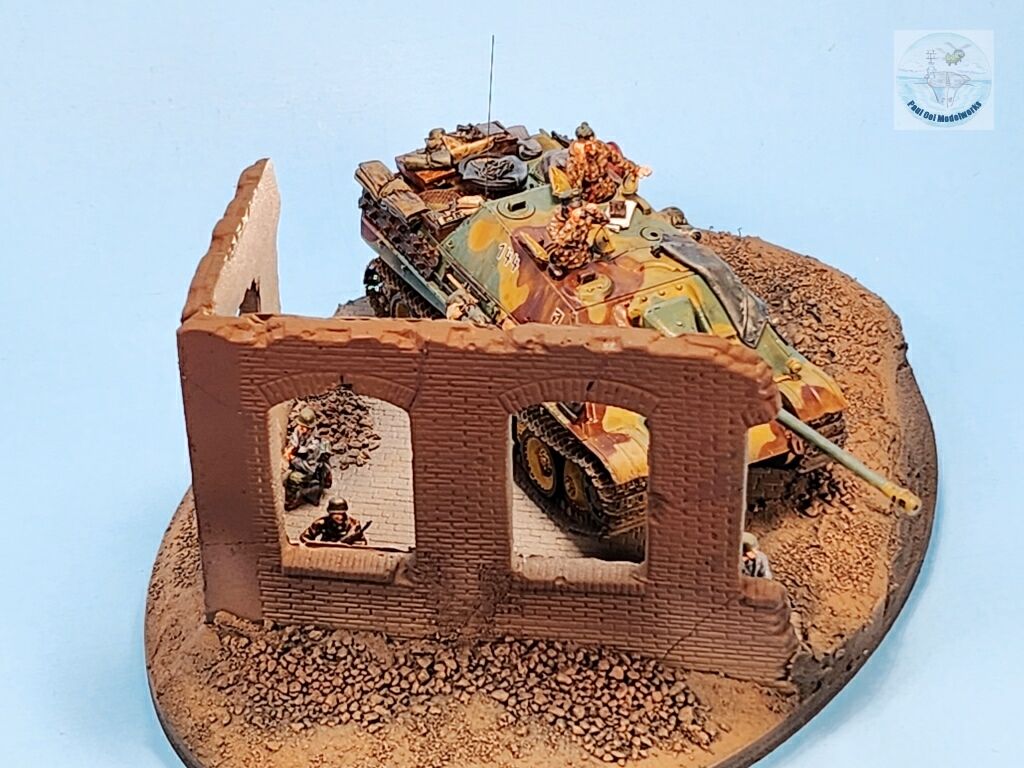
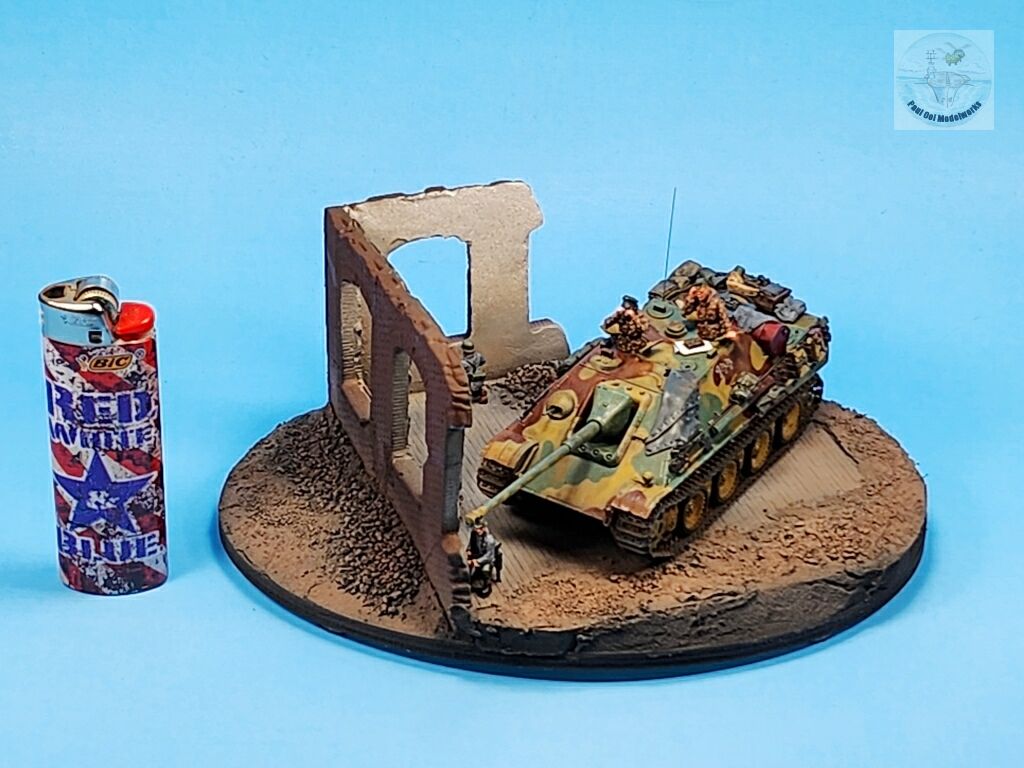
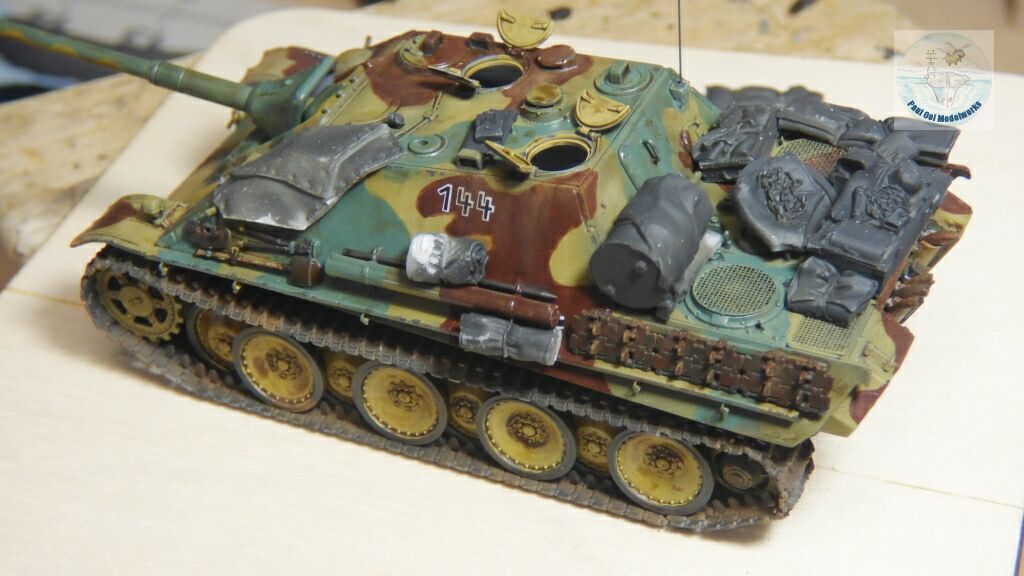
The Jagdpanther Sdkfz. 173 G1 was one of the most fearsome and effective tank destroyers of WW2. Armed with the formidable 88mm PAK43 that was also used on the King Tiger, and covered entirely in sloped armor, the Jagdpanther was very difficult to knock out from the ground. Most of the known losses came from air attacks or were disabled by their own crew after running out of supplies. The self-propelled gun ran on the same Chassis as the Panther Pz.kpfw V, and it was generally reliable and a well balanced fighting vehicle. Only starting production in 1944, the Germans could not produce enough of them to turn the tide of the war because of the disruption of parts from Allied bombings. The Jagdpanther was designed to be used as an ambush attacker and less as a frontal assault vehicle. It was very effective as a defender and could take out virtually all the tanks fielded by the Allies in the Eastern and Western Fronts, including the much vaunted heavy Soviet tanks like the JS and KV models.
This particular tank destroyer belonged to the 9th tank regiment of the 25th Panzer Division that was deployed in Austria in the spring of 1945. The unit was fighting a rearguard action to prevent the Soviets from breaking through into central Austria. The last elements of this unit surrendered to Patton’s army approaching from the West in May 1945.
Gallery


Construction Notes
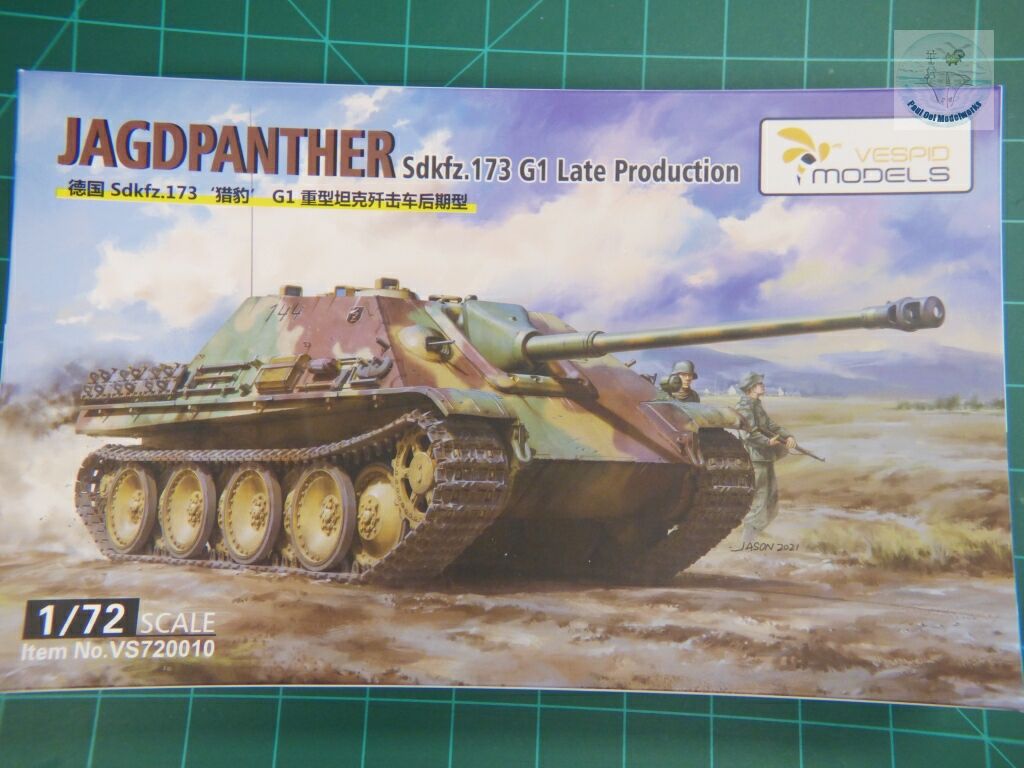


The Vespid Models 1/72 scale AFVs are setting a new standard of fit, detail, and quality for that genre. It is like building a 1/35 scale kit in 1/72 scale. The kit comes with a brass barrel, a resin muzzle brake, photo-etched fret and steel cables. In terms of build difficulty, I would rate this as moderate skill level. It would be a good follow-on model kit for the beginner, and one can achieve very attractive results with some patience. I also included Black Dog’s excellent resin accessories for the Zvezda kit but it works just as well for this Vespid kit.
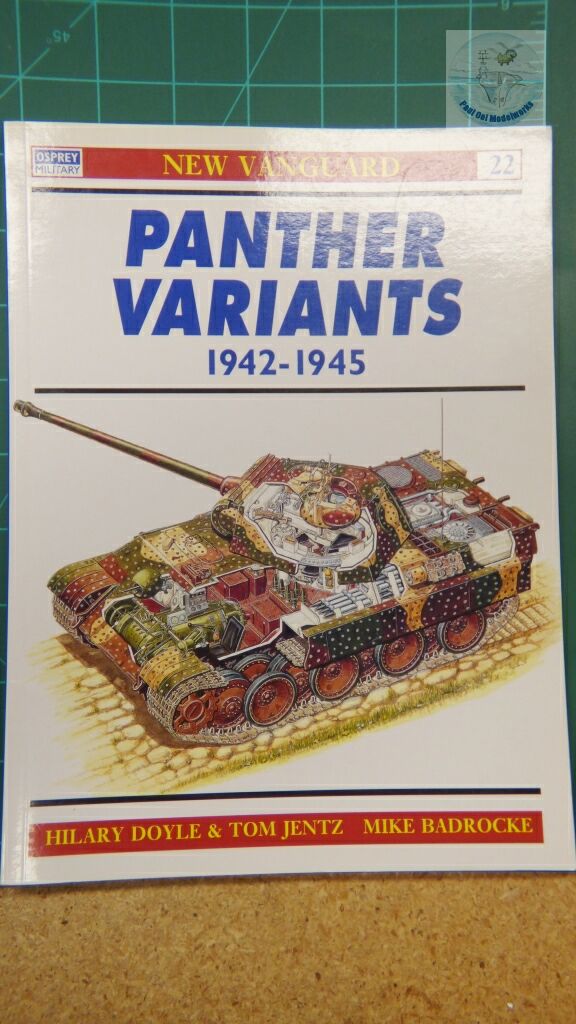
This excellent book from Osprey Military provides a lot of details and tips about the Panther family, including the Jagdpanther.
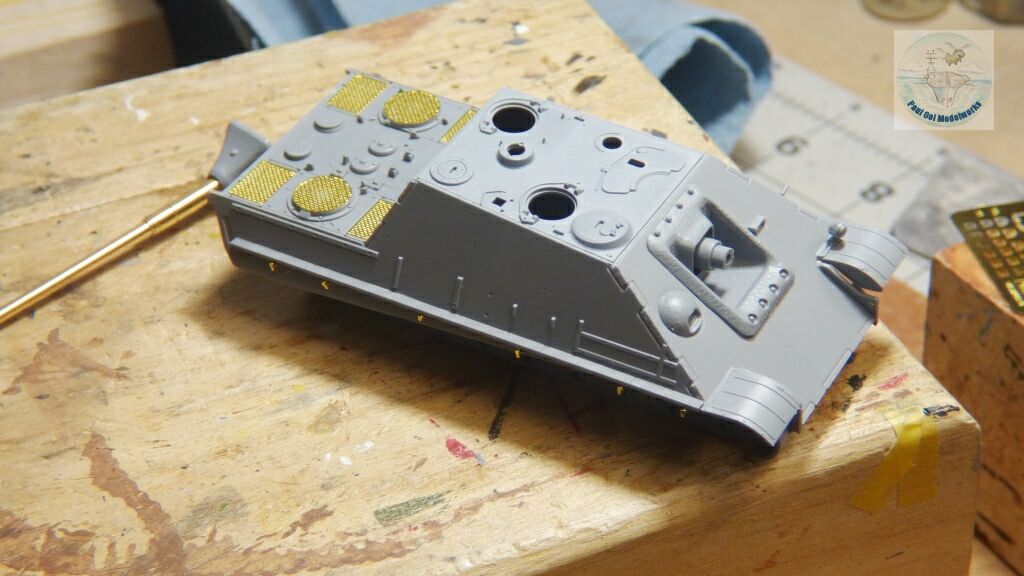
The main hull comprises a large upper half that is relatively fast to build. Note the photoetched engine grills.
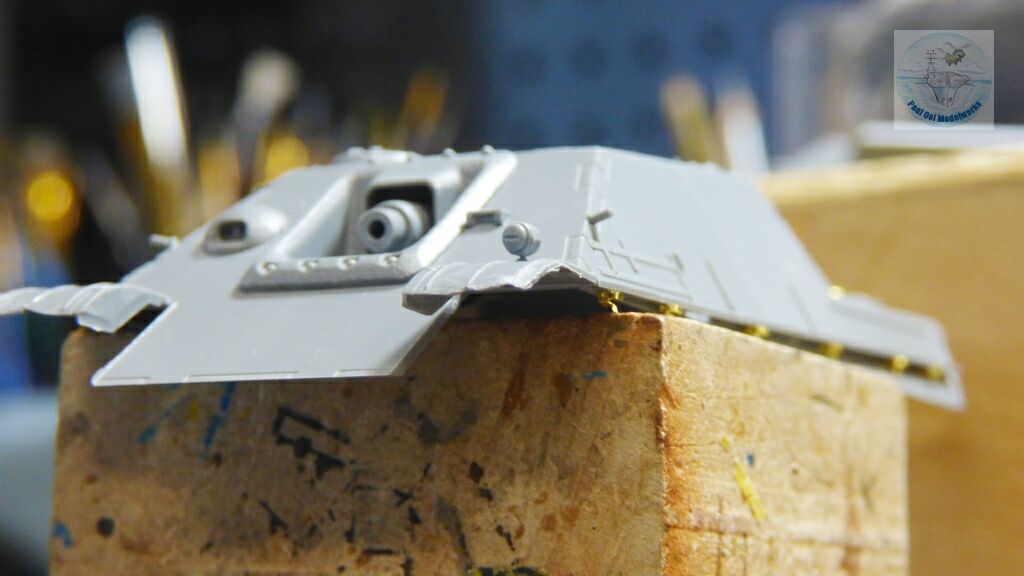
I gave the front mudguards the dented treatment after thinning them with a machine tool.
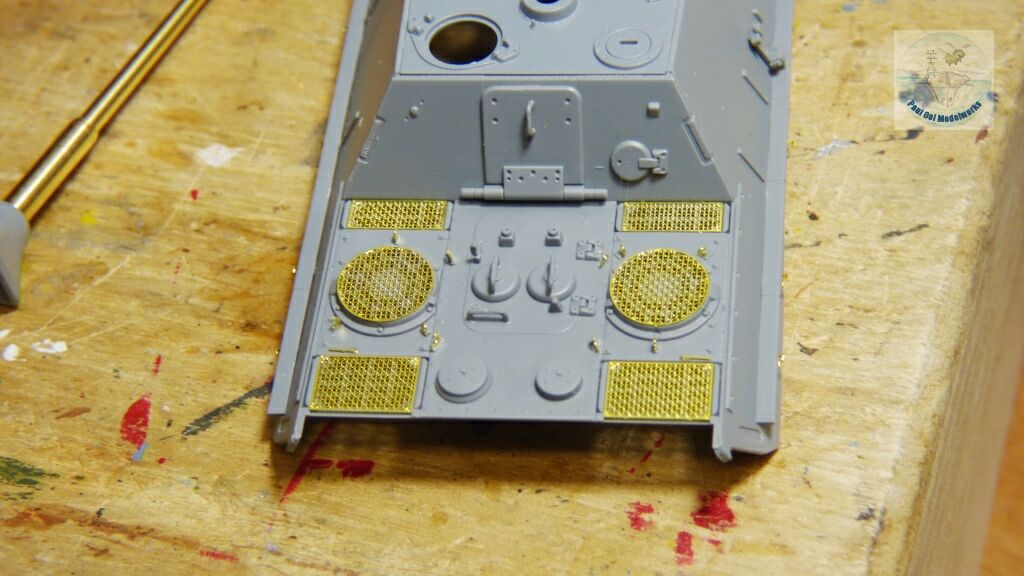
The engine deck detailing is done by cutting off the molded plastic tabs and replacing them with the the photoetched parts. For less experienced modelers, the plastic tabs are pretty acceptable, as the tiny photoetched hooks are a pain to install.
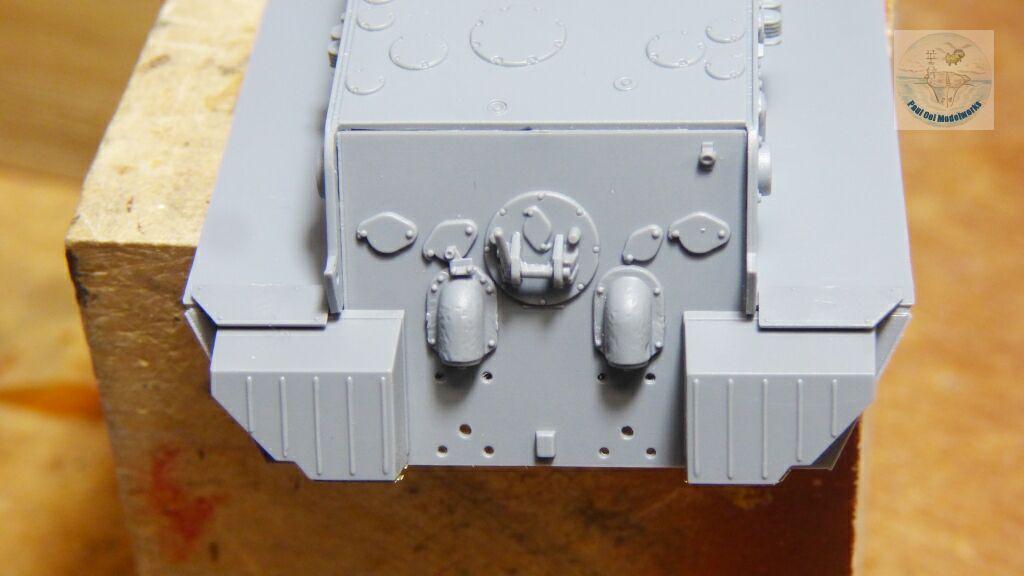
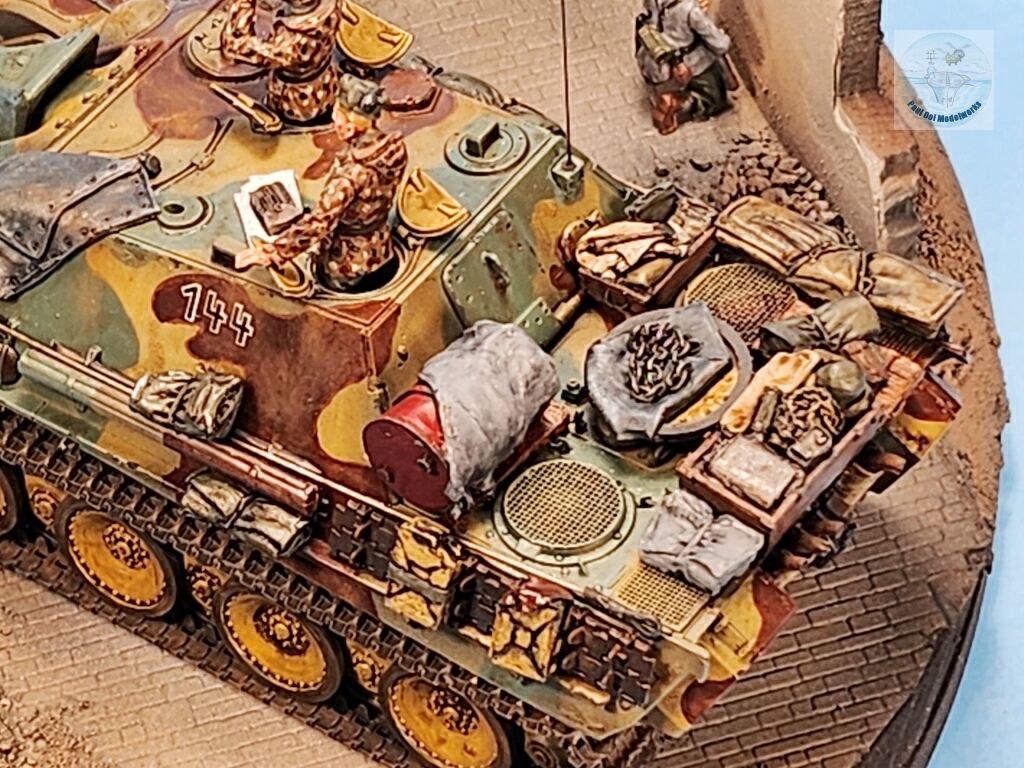
The rear exhaust housing and stowage bins are installed. Note that the exhaust cast iron castings are suitably textured.
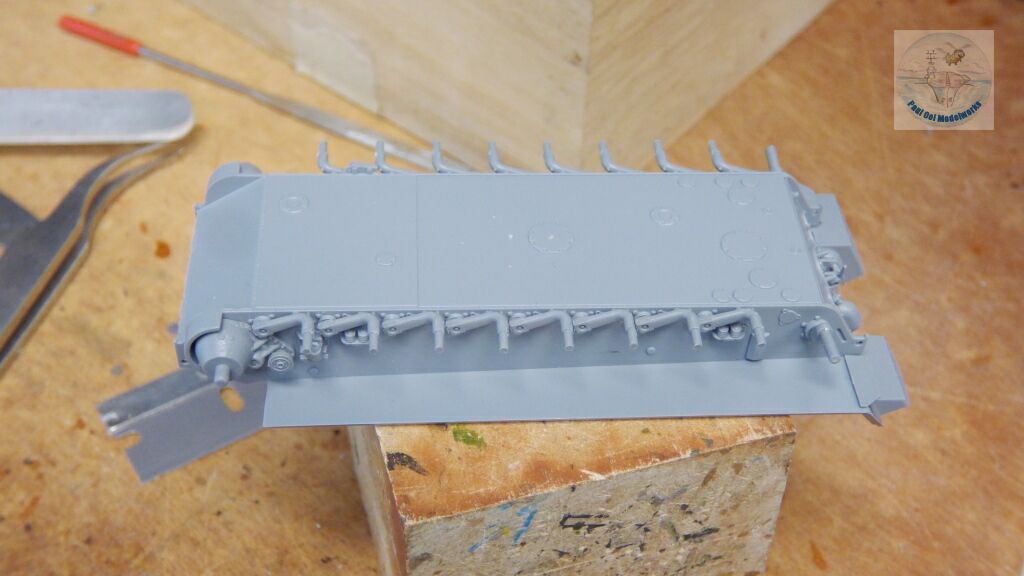
Next, the chassis’ torsion bars and drive housing are installed. To ensure coplanarity of the road wheels, the torsion bars needs to be properly clocked onto their support tabs.
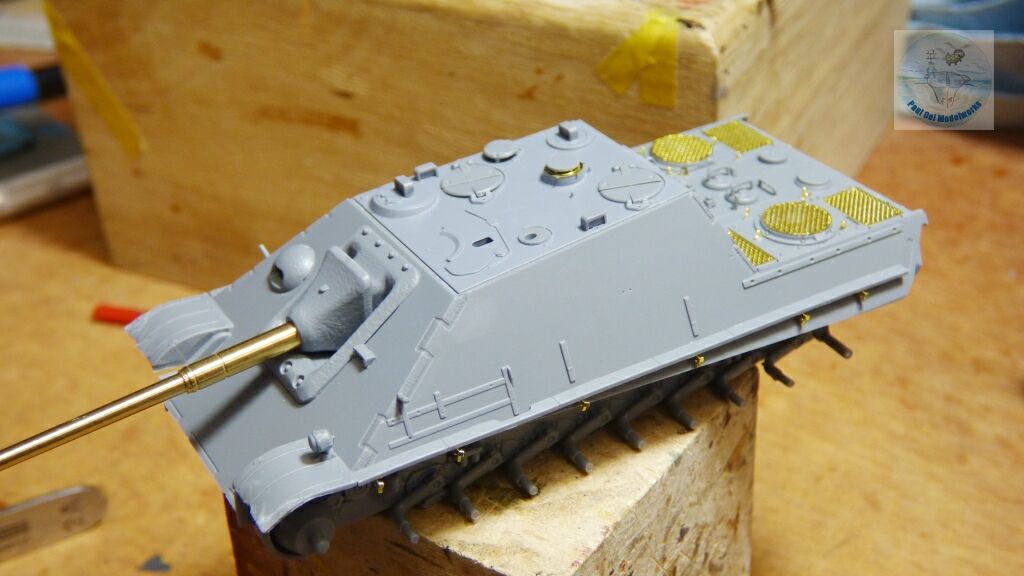
In a relatively short time, the main hull is ready for the spray booth. The gun barrel assembly is dry-fitted here but not yet permanently installed.
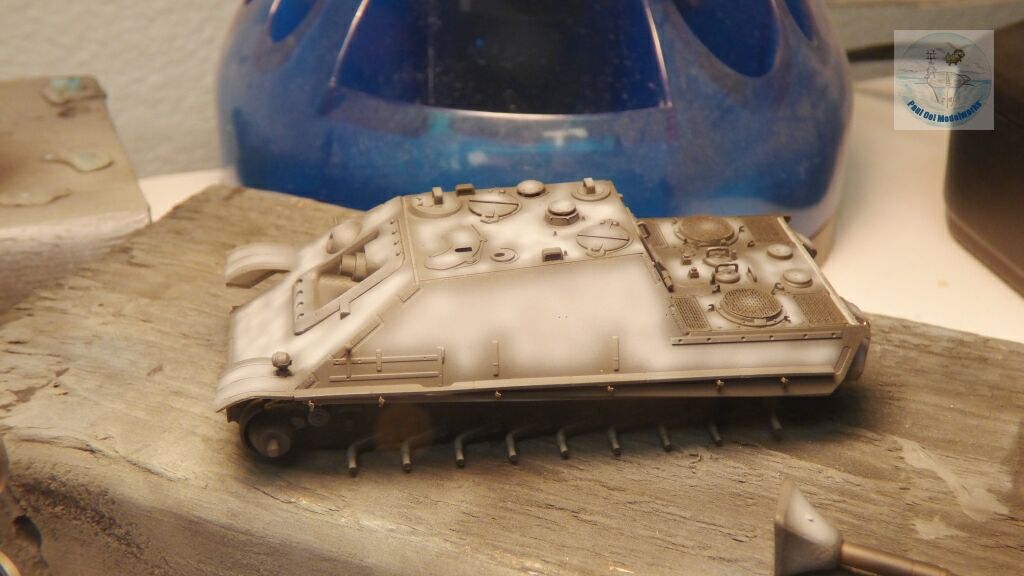
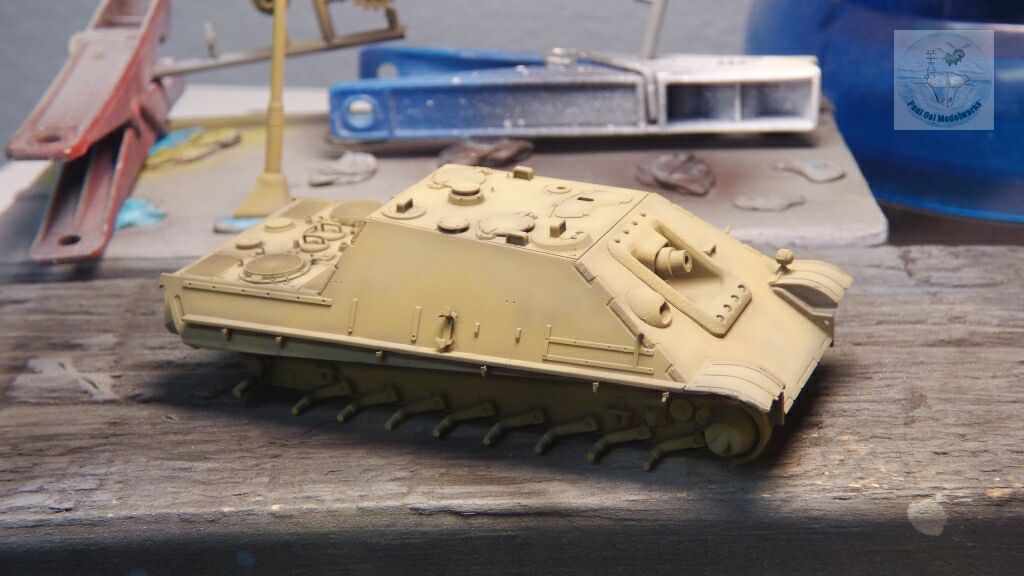
As usual, I undercoat the main hull with NATO Black Tamiya XF-69, and then highlighted with Tamiya Sky Grey XF-19. Then I applied Dark Yellow XF-60 to the entire surface of the main hull and chassis.
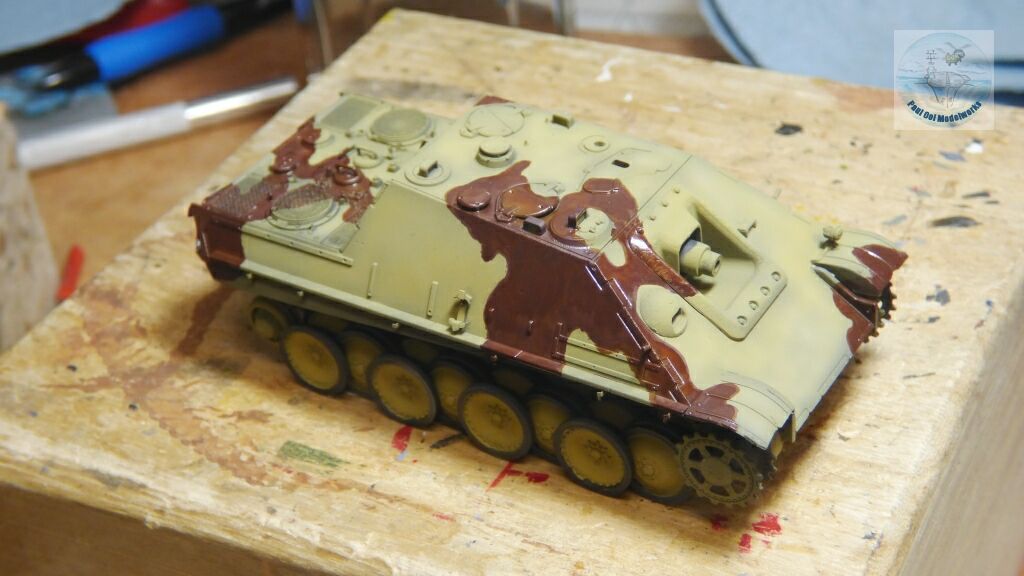
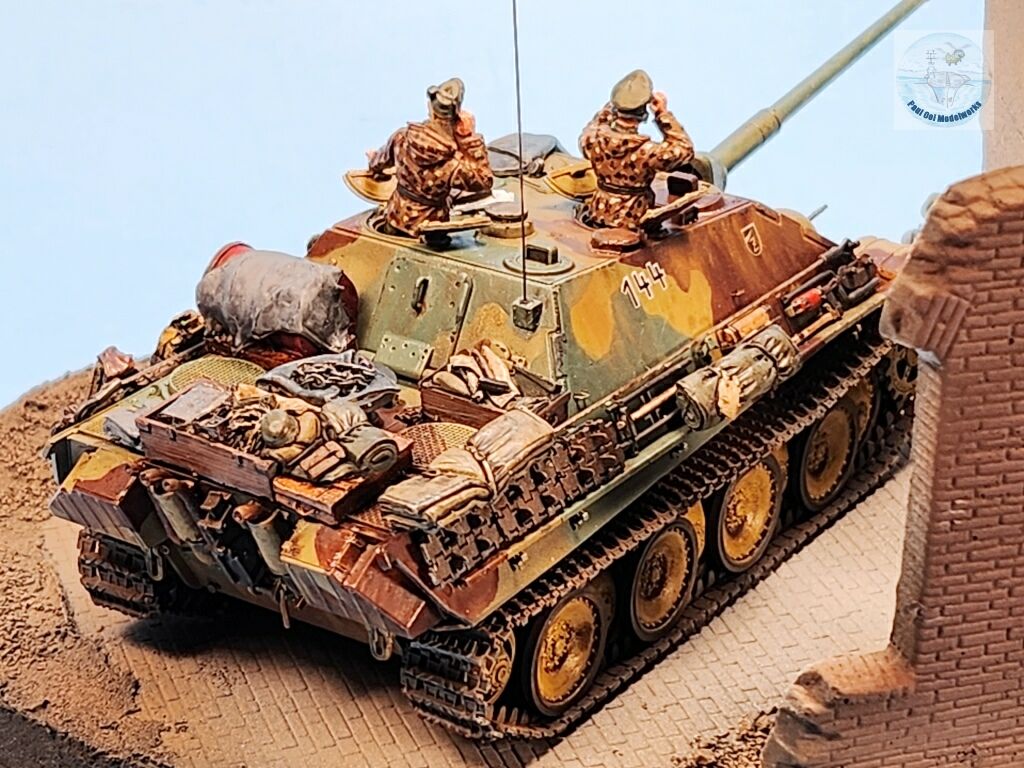
For this particular vehicle, #144 from the 9th regiment of the 25th Panzer Division, I hand-painted Model Master’s Panzer Schokoladenbraun followed by Panzer Olivgrun. Patience is the word, constantly refreshing the brush to keep the paint consistently thin and even. Avoid applying thick coating that would create ridges and thick pasty layers.
The road wheels were painted with NATO Black first, and then the Dark Yellow centers were hand-painted. Just a few decals were needed, and I applied these over an undercoat of Micro Gloss. I sealed the entire paint work under a satin varnish.
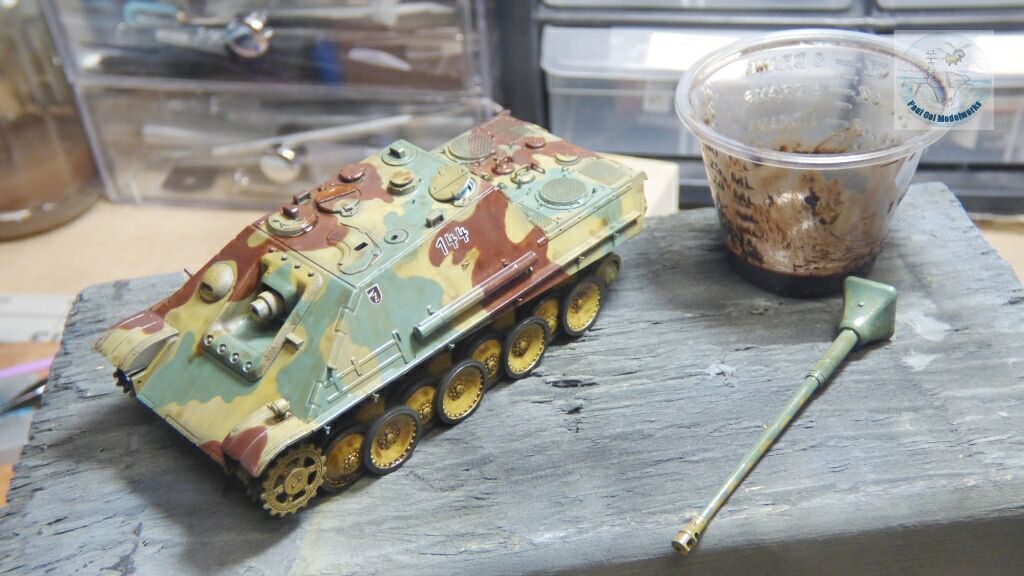
The entire hull and main gun assembly were give an oil-paint wash of 70% Burnt Umber+ 30% Lamp Black.
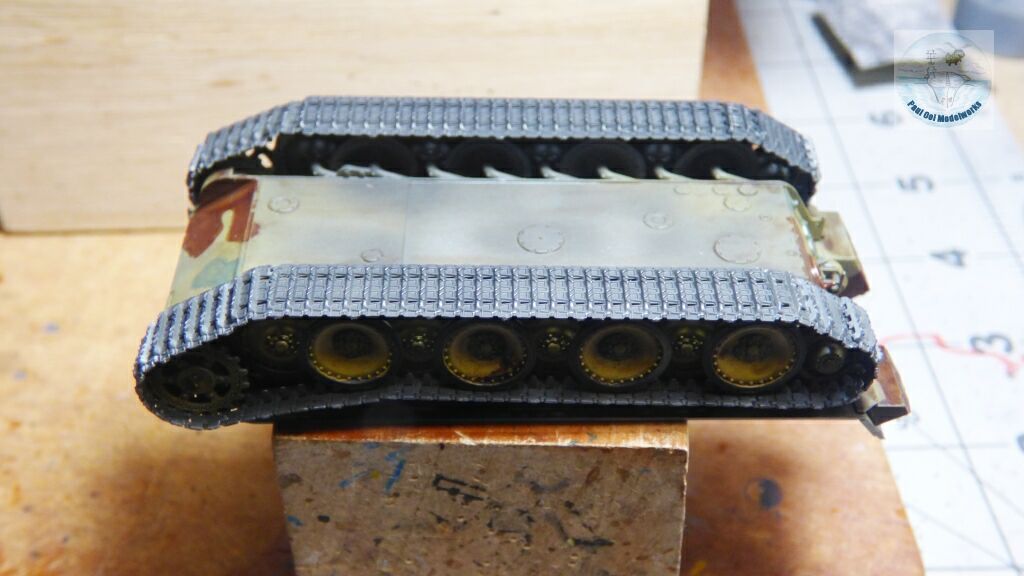
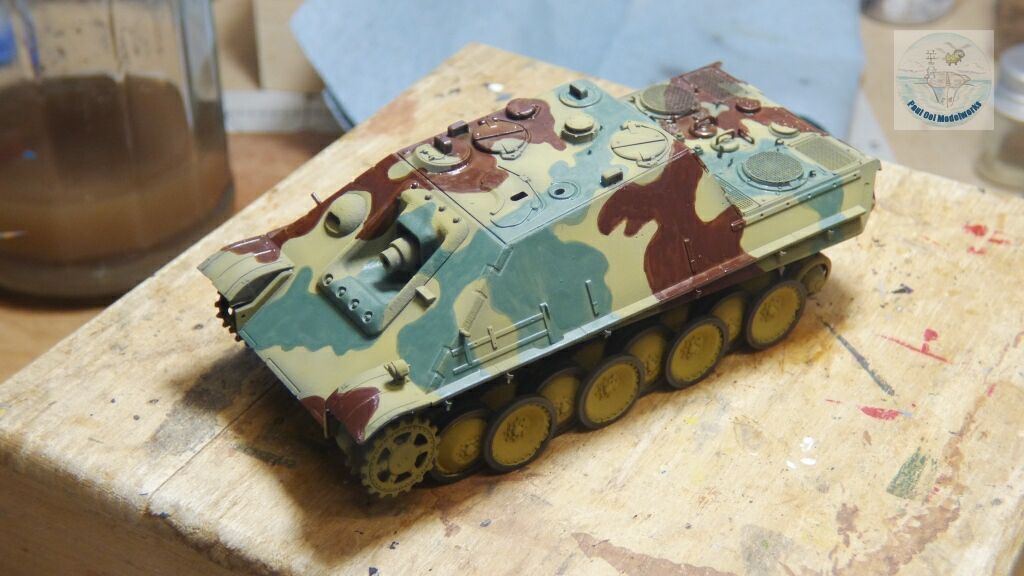
The tank tracks were applied using the multi-piece track instructions from Tutorial 10. Notice that I have not permanently joined the upper hull half onto the chassis as yet.
The tank destroyer gets all its wheels and tracks installed nicely!
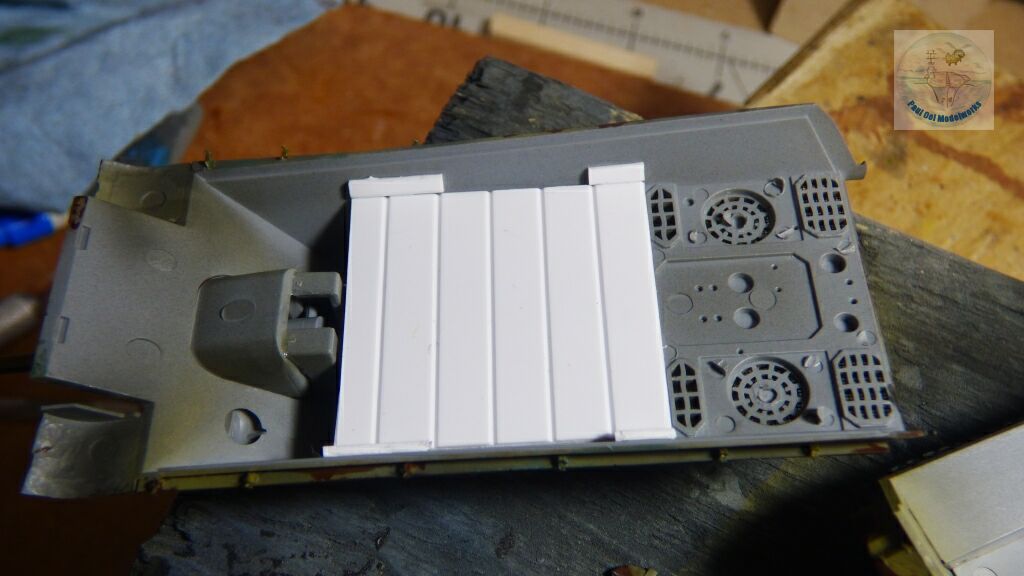
In order to allow the crew figures to stand properly instead of dropping through a cavernous empty hull, I installed a “floor” using Evergreen plastic sheets.
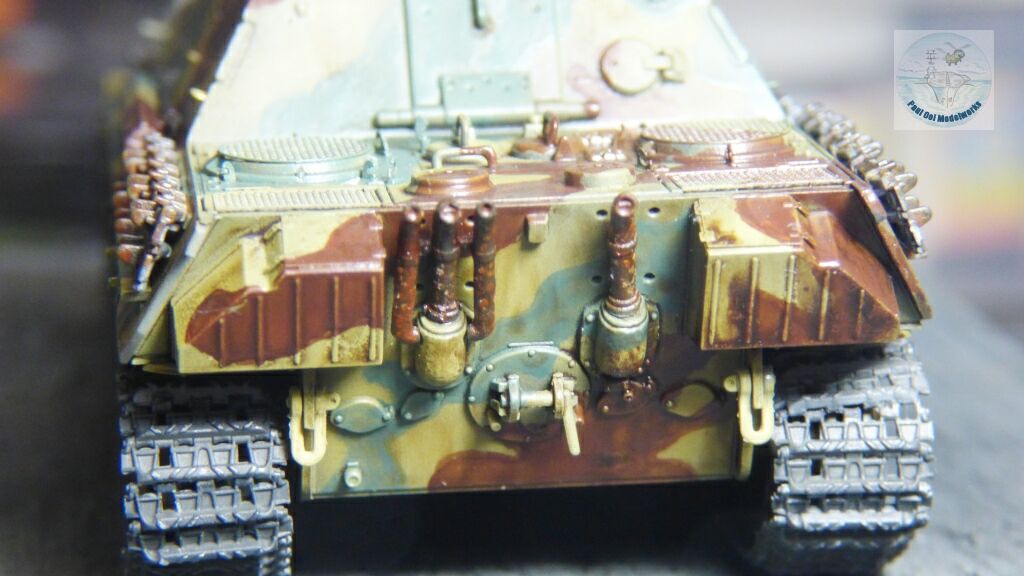
The exhaust pipes are painted and installed to the rear of the main hull. The corroded and rusted look can be achieved using the paint technique that is described in the Tiger 1 of the Ruhr project.
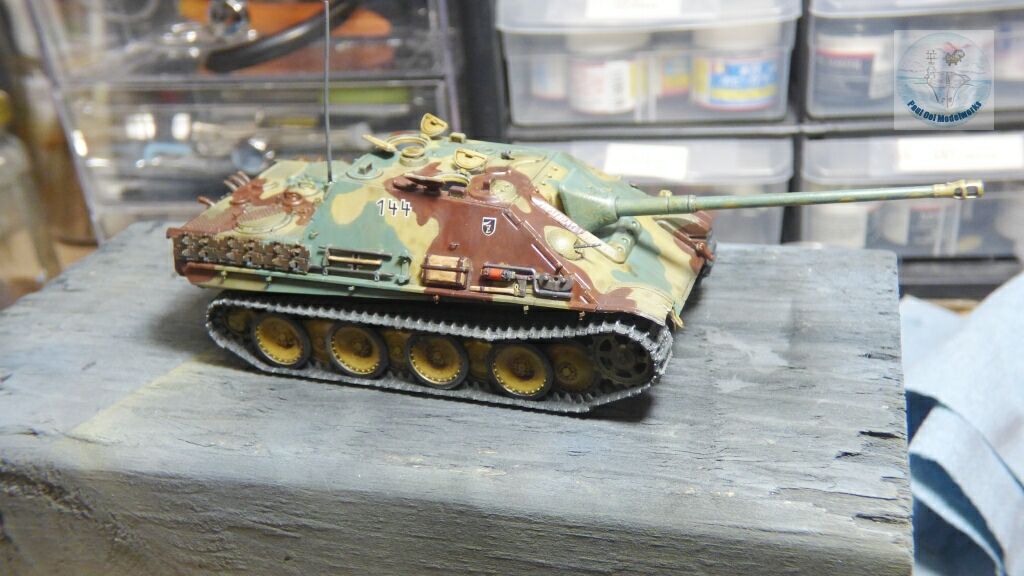
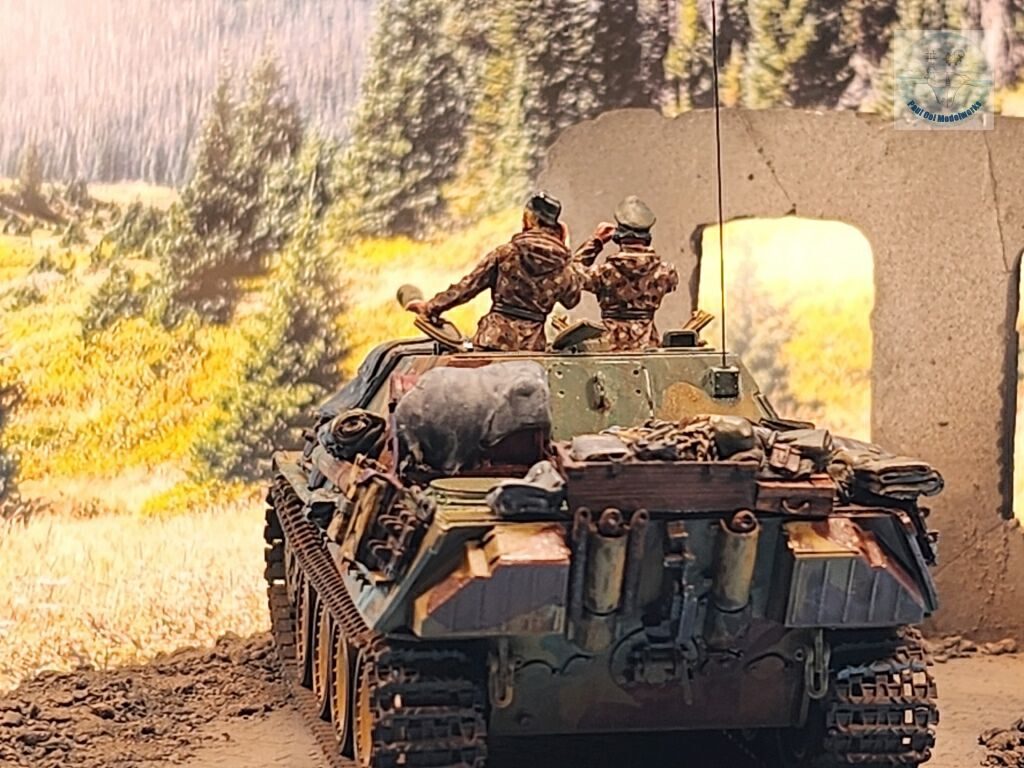
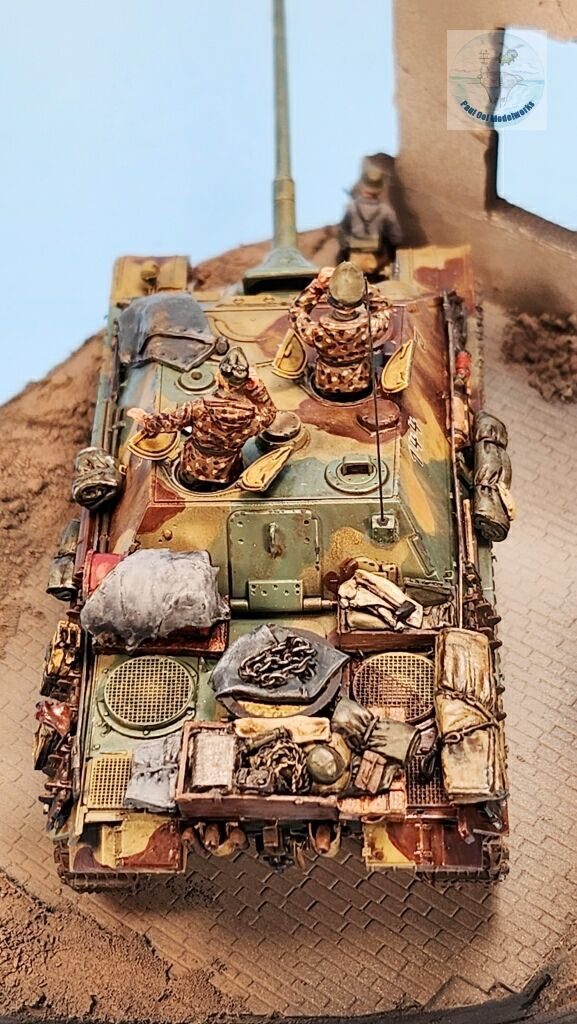
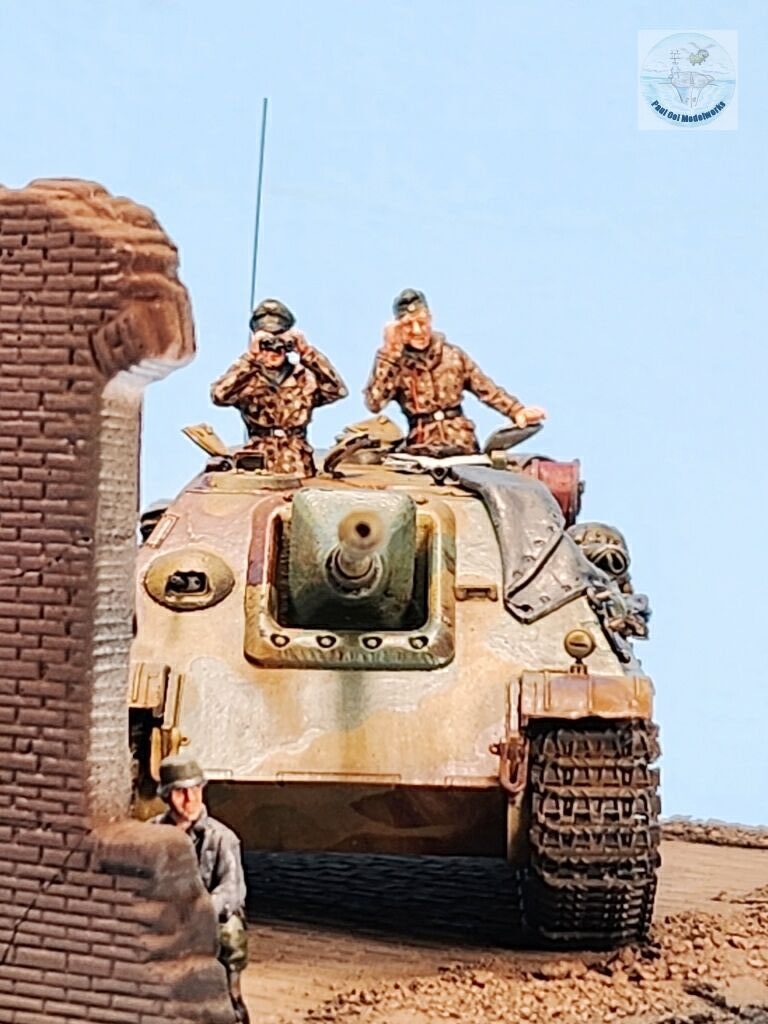
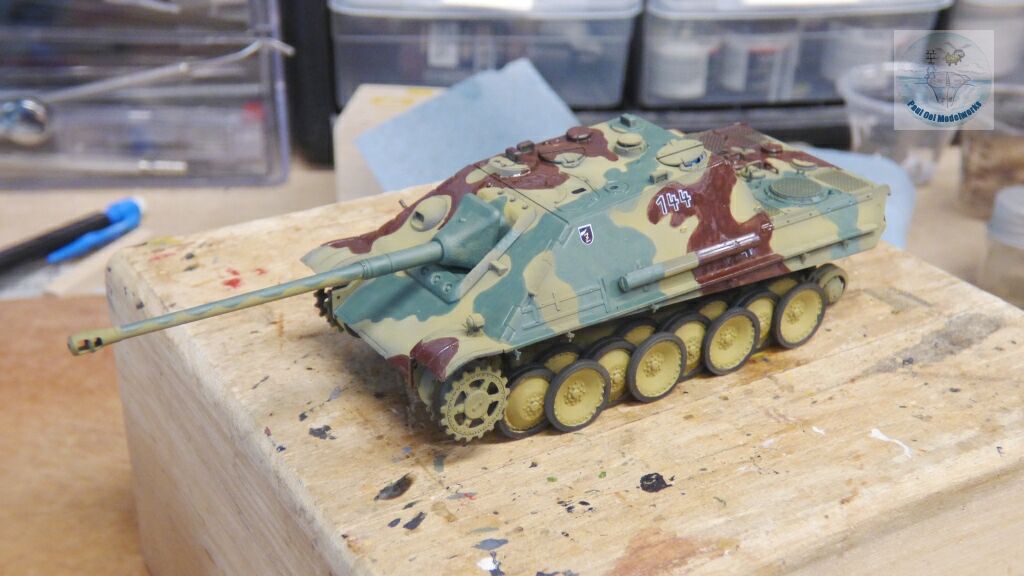
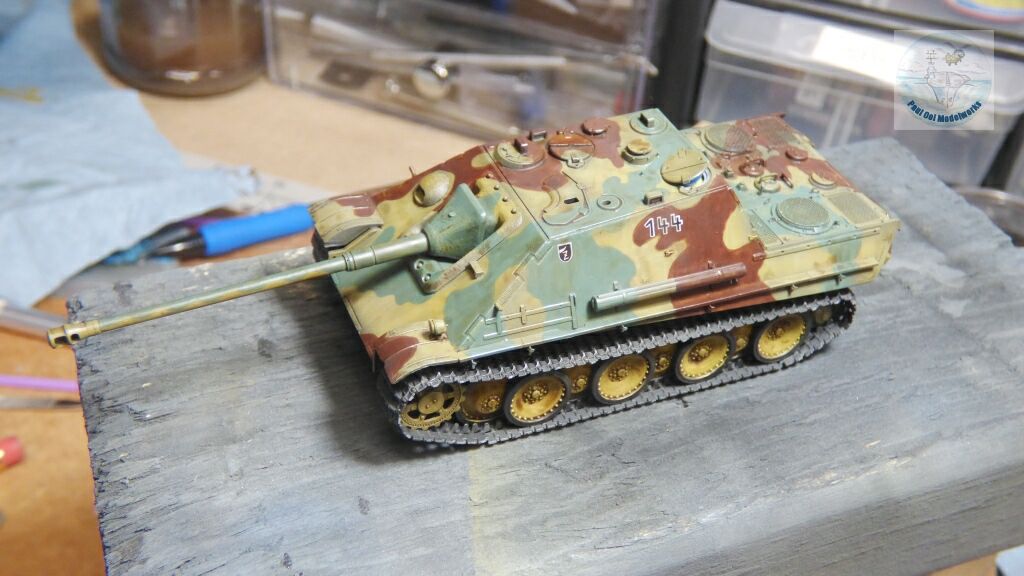
Now comes the fun part of installing all the stowed tools onto the main hull, and spare tracks. Notice that very thick kit-supplied antenna. I decide that was not in scale and replace it with a stretched sprue antenna instead.
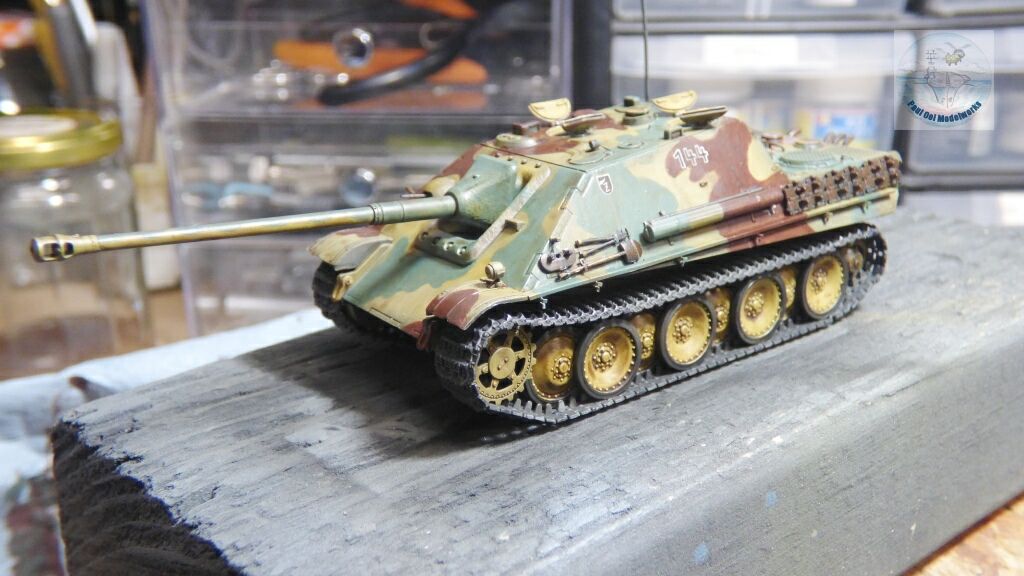
More tools added on the port side of the vehicle.
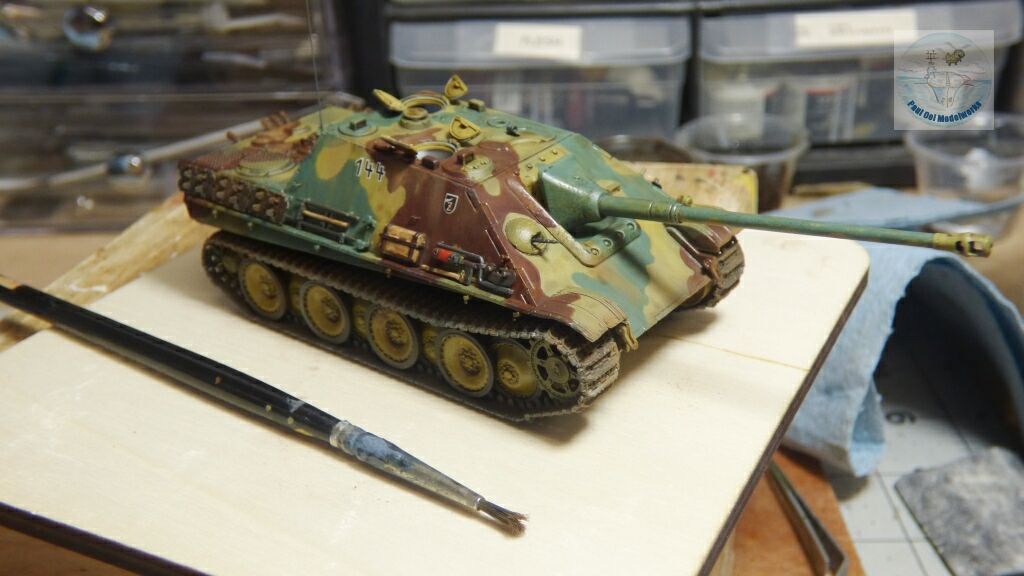
Dust and dirt pigments added using pastel chalks of various hues ranging from black, burnt umber, burnt sienna and bright orange.
The Black Dog resin accessories are dry fitted to get the best seating arrangement. The resin parts have been primed with aqueous NATO Black paint. I do not recommend using enamel or lacquer paints as primer as these tend to react with the resin base material and result in oily and blotchy finish. After priming, you can use the oil-based paints since the aqueous paint acts as a barrier.
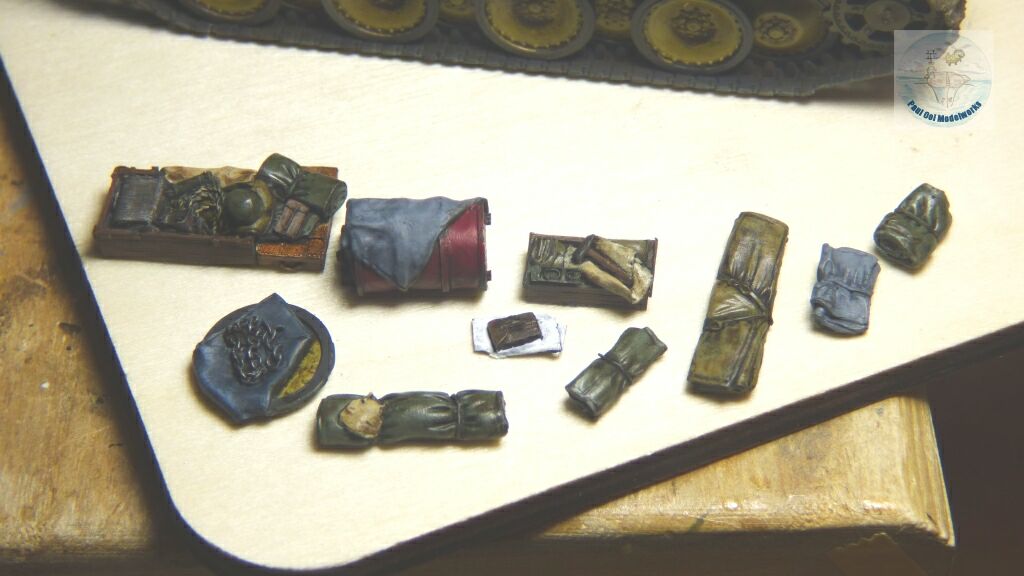
The accessories are painted and then washed in a variety of oil washes ranging from burnt umber + lamp black for brown and green surfaces to Payne’s Grey for grey and blue surfaces.
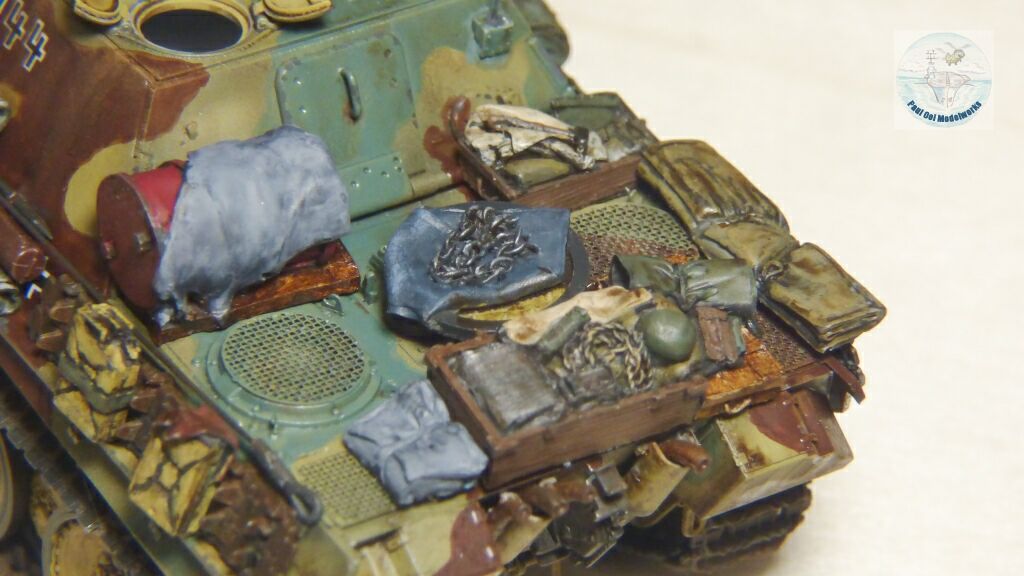
The resin accessories are attached to the engine deck with superglue.
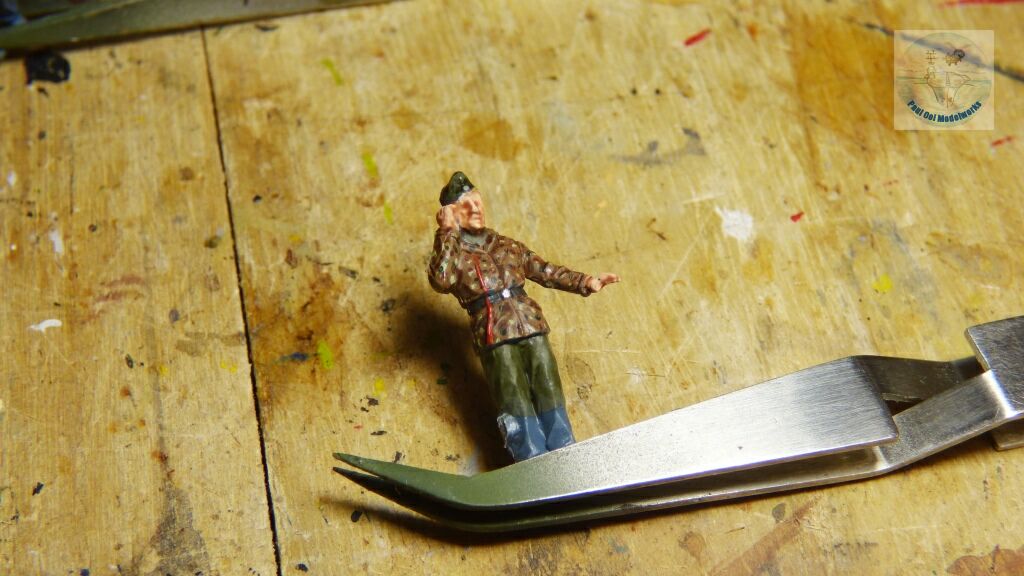
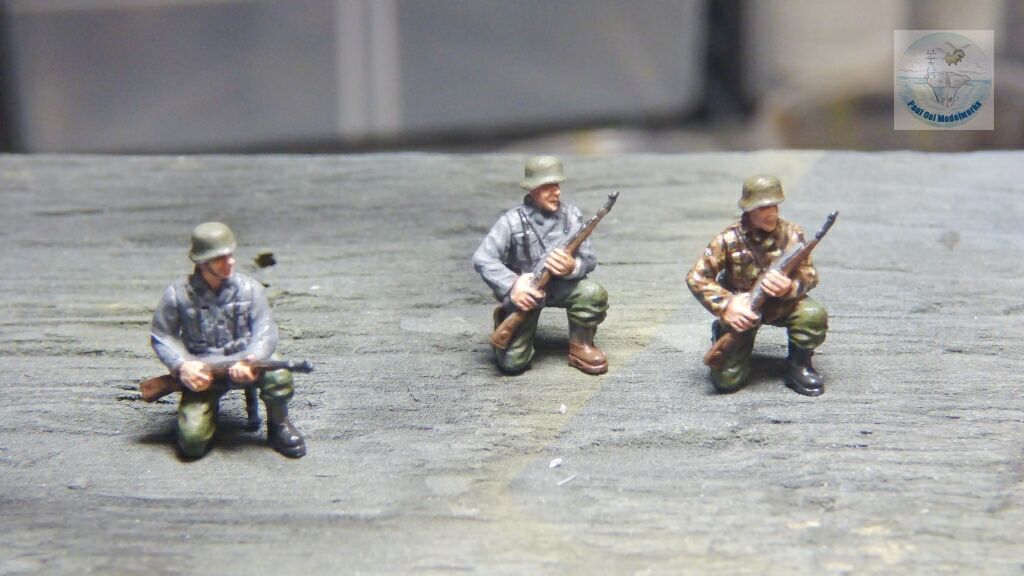
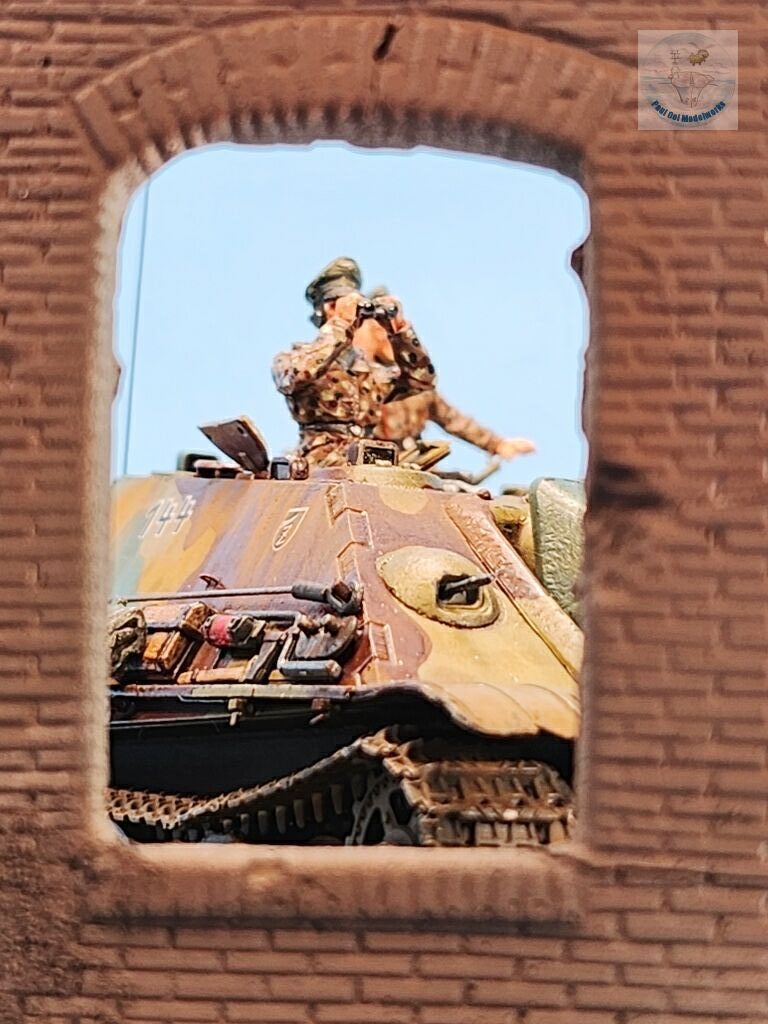
The crew and Panzer grenadier figures came from Caesar Miniatures. I painted these in late war colors and camouflage jackets.

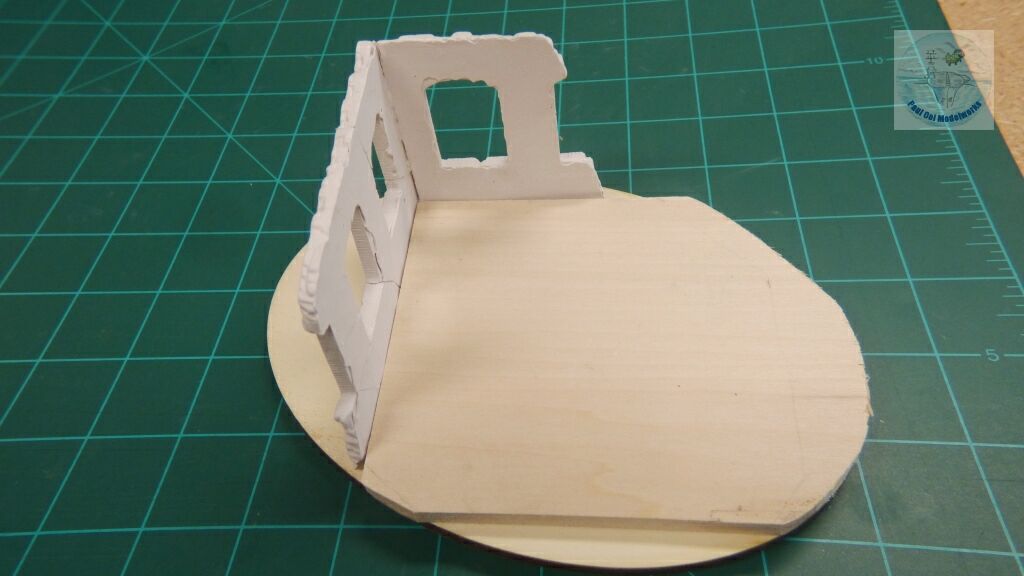
For the base, I started with an oval plaque. I had these 1/72 scale plaster walls (obtainable from suppliers of wargaming terrain) that I mounted with white glue. The interior of the building was raised with a 1/4″ bass wood cut to fit the oval outline.
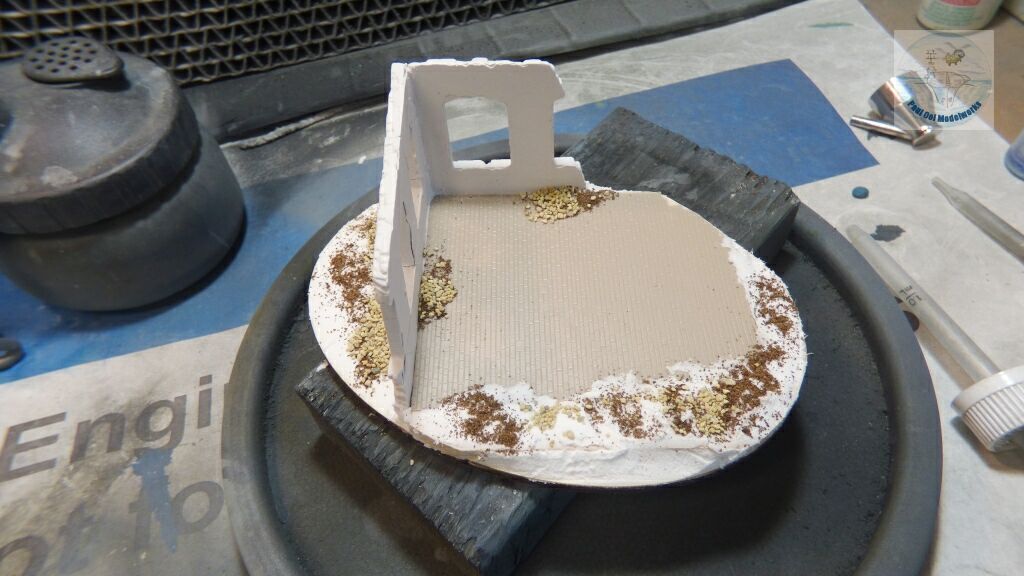 The interior floor was a plastic cobblestone floor sheet glued to the bass wood. Plaster was added to blend into the surrounding area. Talus of various sized are added and attached with diluted white glue dispensed with an eye dropper.
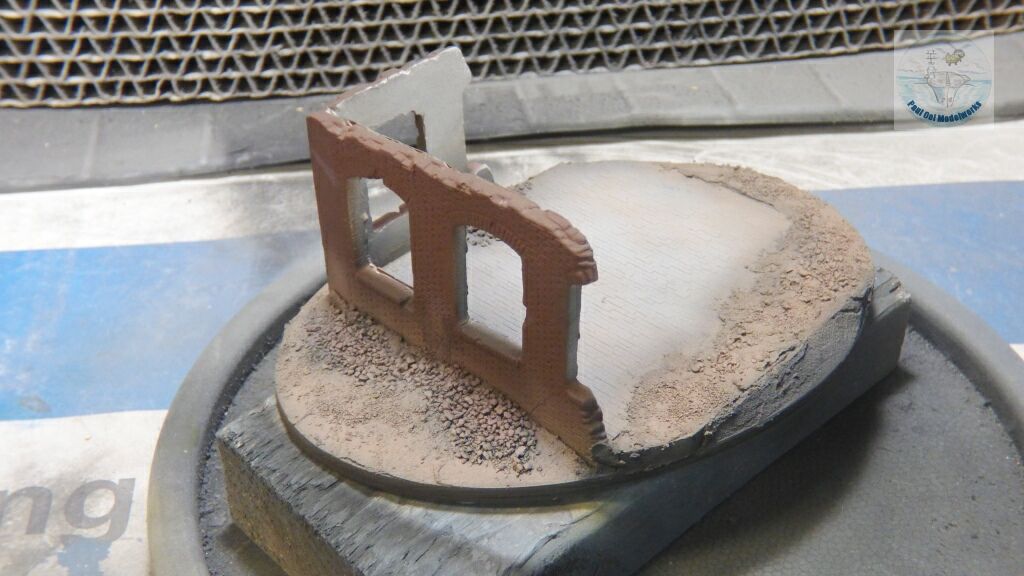 Once the plaster is dry, the base is spray painted in NATO Black, Sky Grey mixed with Buff, Flat Brown (for the brick exterior) and Flat Earth for the dirt.
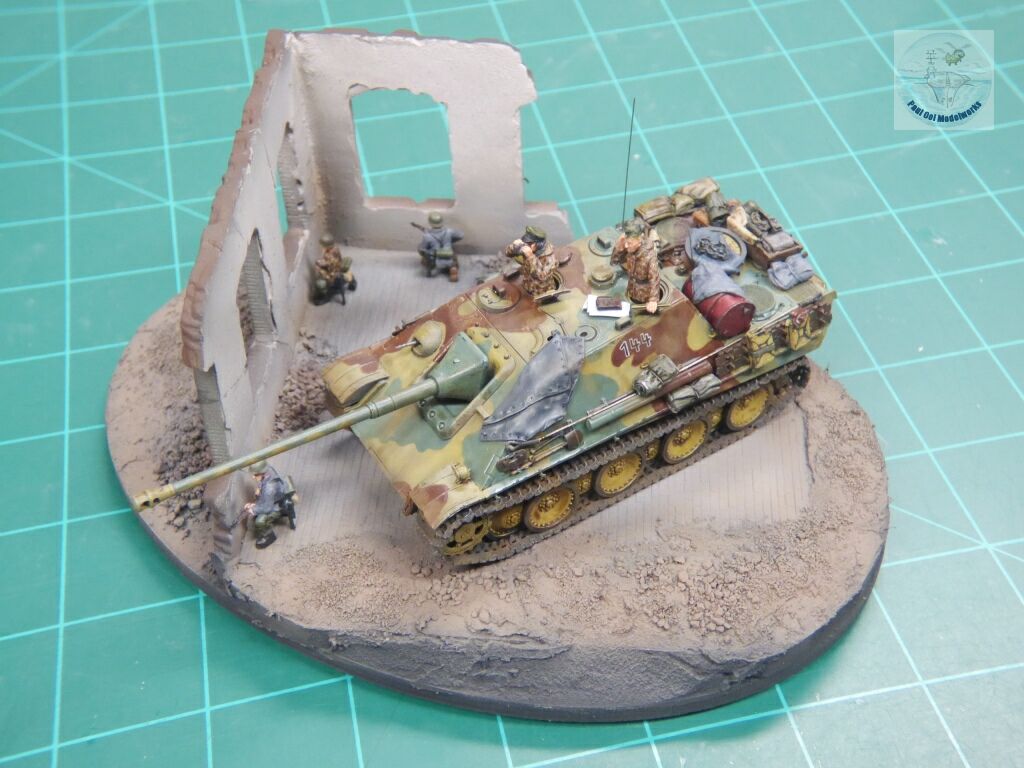
The last bit of fun was the mounting the figures and the tank destroyer.
Leave a Reply