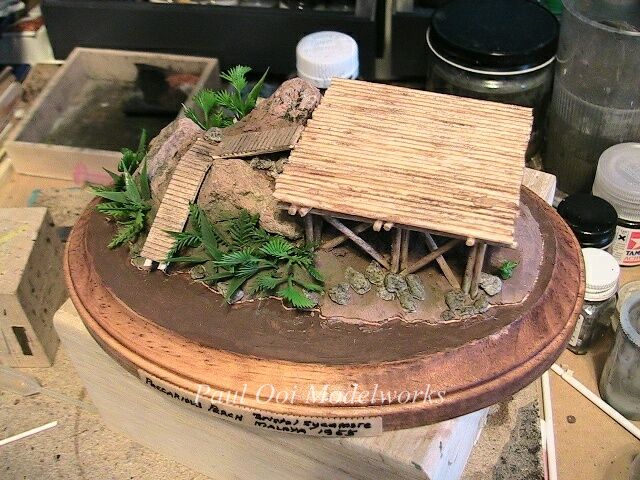
If you want to display your helicopter in a more exotic setting other than the plain flat tarmac or ground clearing, here’s diorama vignette project that can add some interest to the project. The ground that I am portraying here is a crude timber helipad situated on a rocky outcrop with piers to support the structure and can be used for any tropical setting. Such helipads were once used during the infancy of helicopter deployment between the end of WWII and the Vietnam War to support isolated outposts all over South East Asia.

First I start with a pine wooden base, in this case an oval shaped one measuring 6 inches on the major axis and 4 inches on the minor axis. These can be found in your local crafts and hobby store and should be reasonably flat and free of blemishes (holes, cracks, etc.) After sand-papering to get rid of some of the roughness, we are ready for some messy work.

Other things that you will need:
1. Some river rock, preferably between 34/4 to 1 inch in diameter, rough (not tumbled smooth). Select those that will “look like the real thing” without much painting.
2. Coarse grade talus (rock debris) from the railway model section (Woodlands is a common brand)
3. Air hardening modeling clay, in this case I save myself some trouble by getting pre-colored clay (pottery shade) by Creatology. Other brands of air hardening clay will also work.
4. One bag of mini wood dowels (250 in a pack) about 5/64″ diameter available in most craft stores, or use matchsticks and toothpicks
5. Brown and grey acrylic paint (I use Liquitex brand for its great color coverage and smooth consistency)
6. Doll house “wood flooring sheet” 1/32″ x 3″ x 24″ sheet, grooved flooring (or similar)
7. Thick cyno-acrylate (slow drying and gap filling)
8. Thin (instant drying) cyno-acrylate
8. Plastic plants (from florists, craft stores)
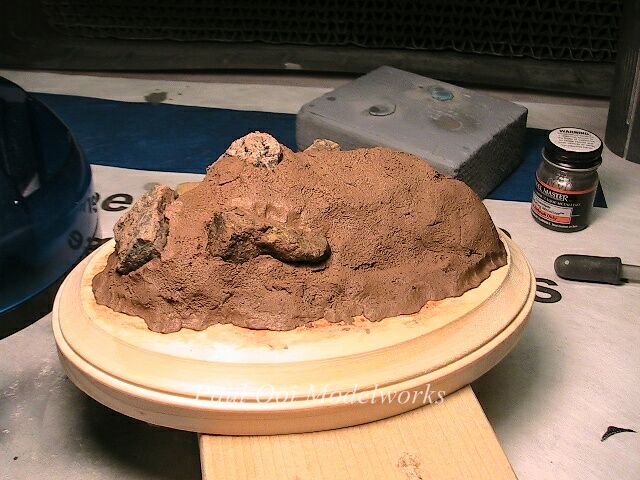
I mix about a fist sized amount of modeling clay with the river rocks and press the mix onto the wooden base, taking care not to stain the sides with clay. One can also pre-mask the edges to keep clean and remove them later once the landscaping is complete. You can also use sculpting knives to get the desired shape. I just use my handy-dandy fingers. Make sure the mix adheres to the base.

To make the best use of the rocks (thy provide weight and bulk for the landscape), have some surfaces show through the mix because nothing looks more like a mountain side than rocks!
The mix takes about 24 hours to cure. For the three hours or so, you can stick all kinds of things into it and they will stay and later be held in place as the mix hardens. This is a good time to work on the wooden structures.

To build the wooden helipad, I start out by building a basic frame by laying 3 dowel rafters parallel to each other and one central stringer across them approximately in the center. Make sure the latter is perpendicular to the 3 rafters. Apply thick CA where the rafters meet the stringer. Once the basic structure is rigid (use accelerator for CA if needed), add stringers to either side of the central stringer in groups of 5. Make sure that the are nicely aligned side by side and also not protruding at the ends (some unevenness is actually attractive but not too much). Apply thin CA and let capillary action do the rest. The stringers actually line up nicely with the glue action. Eventually you will form a square raft to make your helipad.
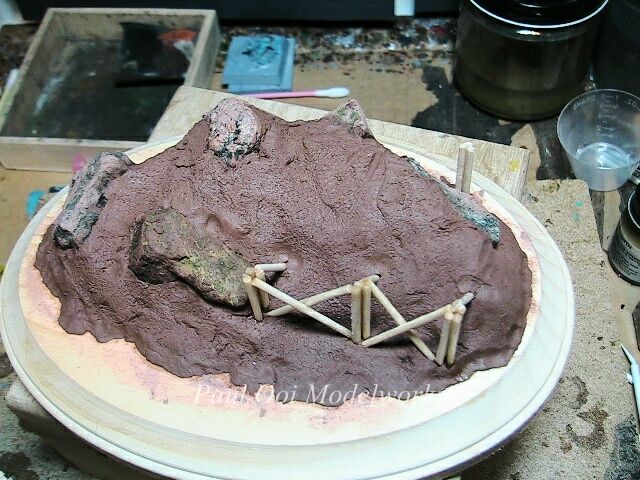
While the platform dries, for the supports for the helipad using more dowels to make a supported frame. Let your imagination and any reference material at hand dictate the layout of the supports so long as they will hold the helipad steady and level. I measure and cut the supports to the same length and push them into the still soft modeling clay. Then, add the cross braces, again measure and cut to length and reinforce the points with thick CA. Make adjustments to the arrangement while the clay is still soft.
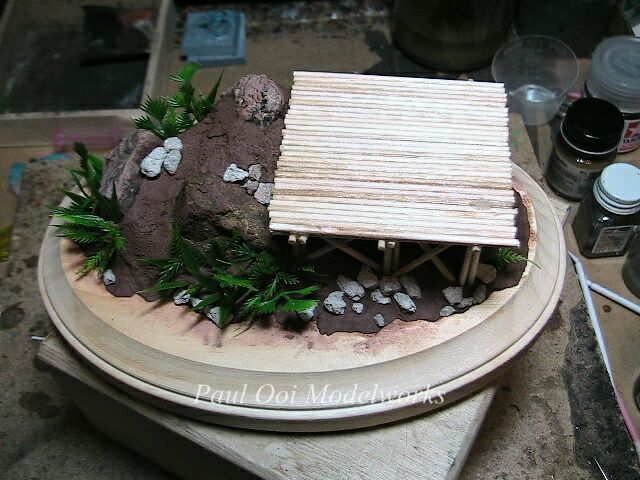

Once the fit of the helipad is good and “looks about right”, you can “plant” the foliage by cutting suitable-sized plastic leaves and sticking them into the modeling clay. Look at pictures of tropical plants to help in arranging the leaves. Go the the floral aisle of the craft store to look for foliage that scale right with the composition. I arranged the plants so that a path forms up the outcrop for access to the helipad. At this time I also add some rock debris at strategic points to complete the look of an outcrop.
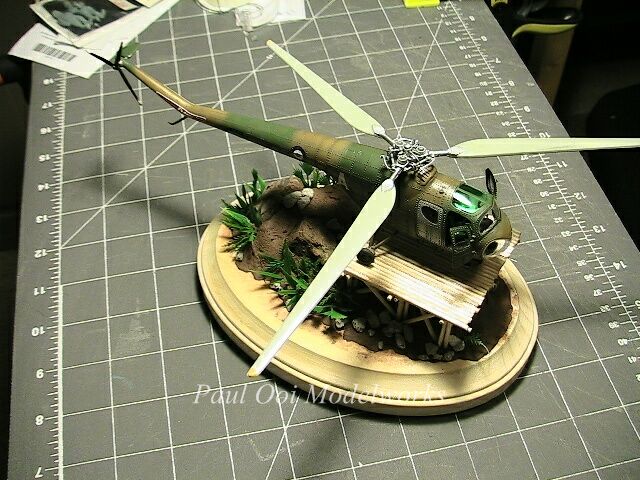
Before permanently gluing down the the helipad, I make some positional checks with the helicopter model. The mix is still soft enough for any fine-tuning needed at this time.

Once the platform is attached, I apply a wash of turpentine and burnt umber oil paint to the wooden structure. I also paint the surrounding wood a mix of medium gray and bunt umber to blend with the soil color. A fine mist of jungle green is airbrushed onto the foliage and the base material to provide a slightly mossy green base and some shade variation to the plastic plants. The paint also reduces the glossiness of the leaves to give it an “in-scale” look.

A brown wash is applied to the rock debris to help blend them into the landscape.

A planked walkway to snake up to the helipad is finally added to finish the setup. I made it out of narrow strips cut out from the doll house “wooden flooring” sheet.

