There are 3 types of model track systems in use in kits these days. The first and oldest is the single piece flexible track that forms a large band that needed to be stretched over the sprocket and roadwheels. The second that came about more recently is the multi-piece track system where sections of track are pre-molded, and smaller sections used to form the curved sections. The last are actual individual tracks that needed to be linked, just like the real thing (think of Model Kasten metal tracks). This tutorial covers the second system, the multi-piece track system.
This method of track assembly has the advantage of not stressing and breaking the sprockets, a common malady when the one piece track is too tightly stretched. You can also spray paint the molded parts with the same paints used for the model (some flexible one-piece tracks are susceptible to dissolving when used with enamel or lacquer paints. See my disaster in my Chi-Ha tank build). The disadvantage, especially for novice builders, is that without careful assembly, you end up with unconvincing gaps in the tracks, and track sections not sitting into the drive sprocket teeth.
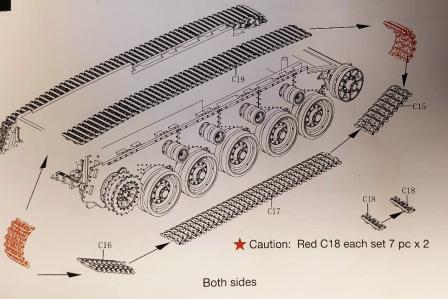
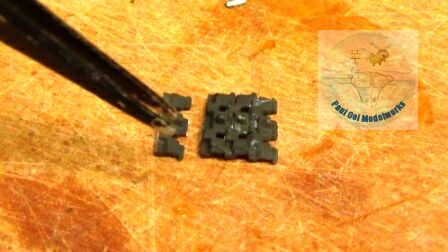
Step 1: Study the assembly diagram and parts properly. Some parts have specific lengths that need to be noted so as not to mix up the sections.
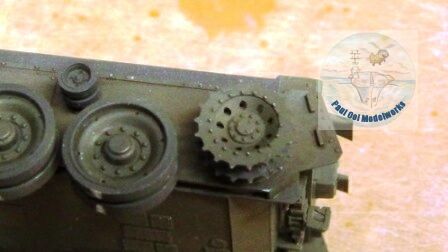
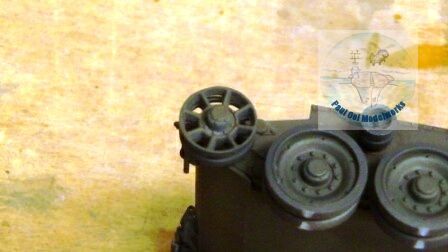
Step 2: Identify the drive or toothed sprocket (left) vs the follower sprocket (smooth wheel, no gear or teeth) on the right. Always start assembly on the driver or toothed sprocket.
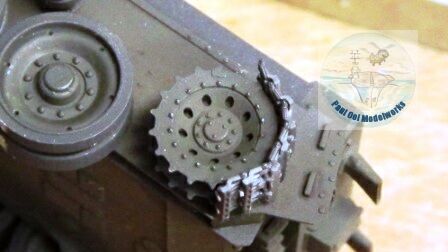
Step 3: Build the curved section that is wrapped around the driver or toothed sprocket. I normally pre-paint the tracks section with Tamiya NATO Black. Final colors and weather can be done later after assembly. These curved sections have to be joined link-by-link. Always use liquid glue so that it gets into the small joints but retain flexibility for a while. DO NOT use cyno-acrylate or tubed polythene glue (too thick) as these will be messy and too rigid. You need the flexibility to nicely wrap around the driver sprocket and mesh the teeth into the tracks without any gaps. NOTE the orientation of the tracks so that they are facing in the correct forward direction.
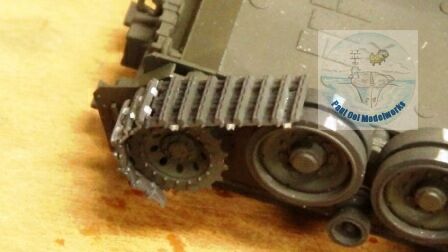 Step 4: Add the bridging piece between the lower end of the drive sprocket to the first road wheel. Use liquid glue to fix to the wheels between the tracks. Make sure that the lower edge of the bridging track does not stick past the roadwheel where it contacts the ground .
Step 5: Lay the flat long section that touches the road wheels, making sure that the spine of the tracks fit between the inner and outer roadwheels. Use liquid glue to attach the track section to the road wheels.
Step 6: Add the bridging piece between the last road wheel and the follower sprocket. Use liquid glue to fix to the wheels between the tracks.
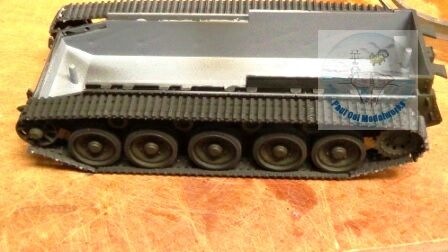
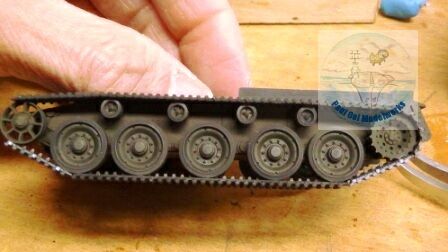
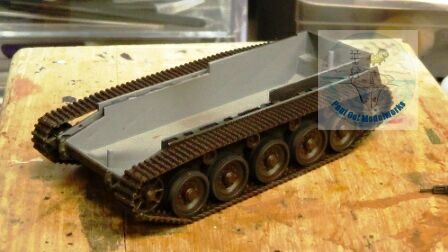
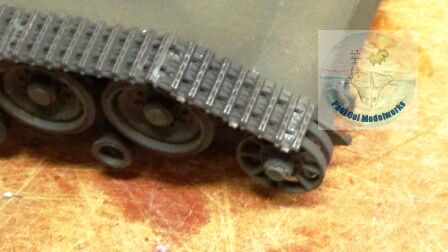
Step 7: Add the top section of the tracks over the top row of followers, again aligning the spine of the tracks to the spacing between the inner and outer followers. Use liquid glue to attach the track section to the followers. This should leave only the curved section around the follower sprocket without tracks. As you can see, your tracks should looks evenly spaced as though they were wrapped around the wheels without any gaps at this stage.
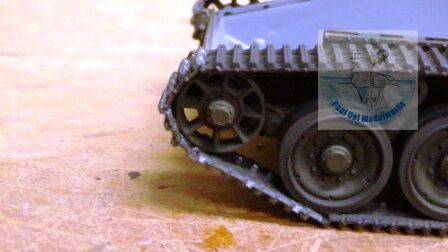 Step 8: Using the same technique in Step 3, build the last curved section to wrap around the follower sprocket. This is where you can determine if you need ore or less track sections to adjust and cover your smooth follower sprocket. Do not be surprised that you sometimes need one more or less track section as called out by the instructions. The important thing is that the tracks are arranged nicely and evenly around the sprocket.
Step 9: Once the tracks are fully set and dried, use paint to touch up all the exposed plastic sections, and weather your tracks for its final appearance.
What brand of glue works best for this process?
Hello Edward,
Tamiya extra thin cement for plastics (green cap) is one of the best. Plastruct Plastic Weld is also very good but it is a bit stronger than Tamiya and should be used moderately.
Paul
Thank you.