
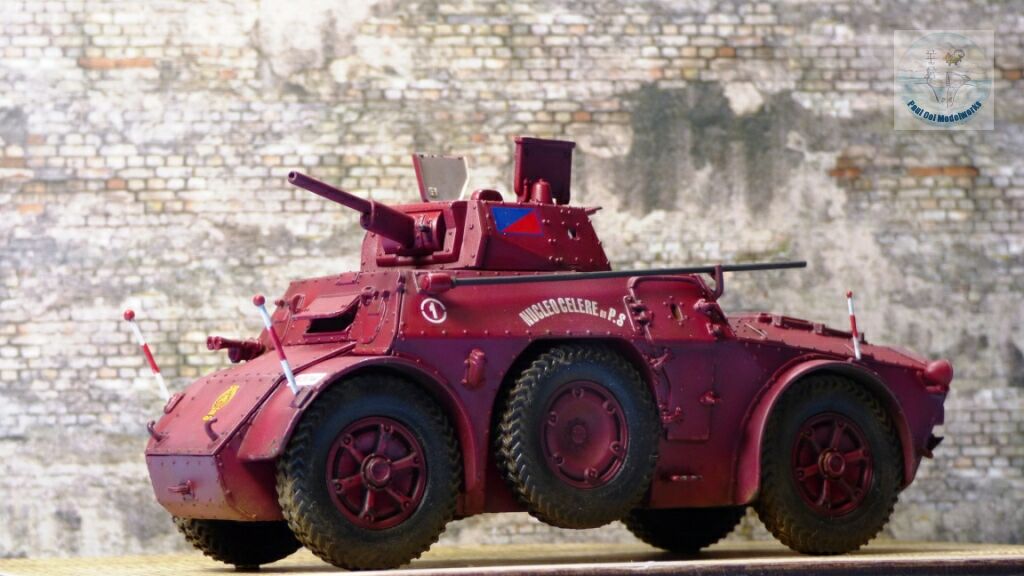
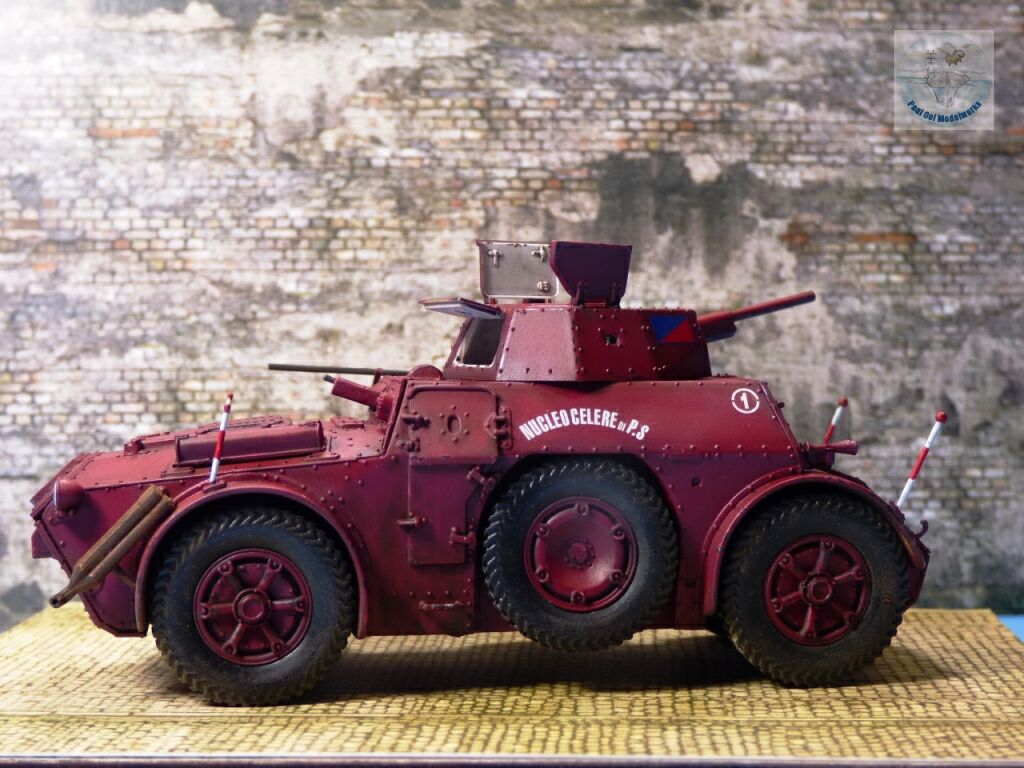
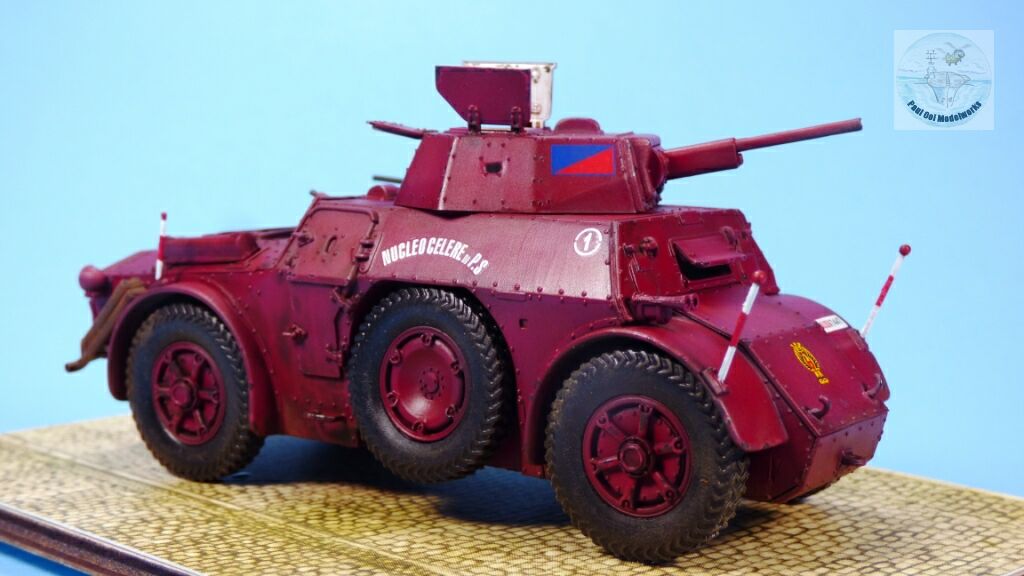
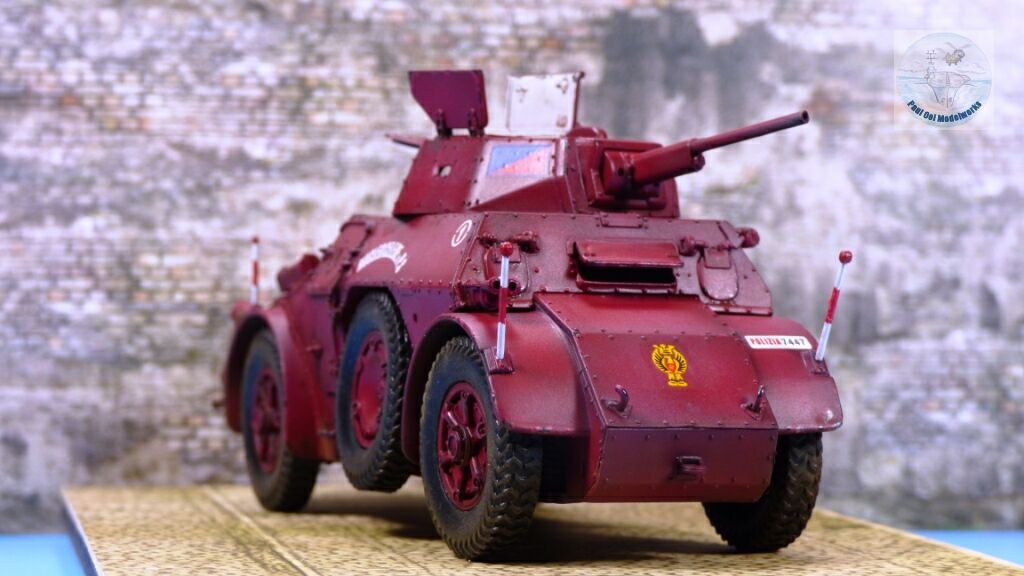
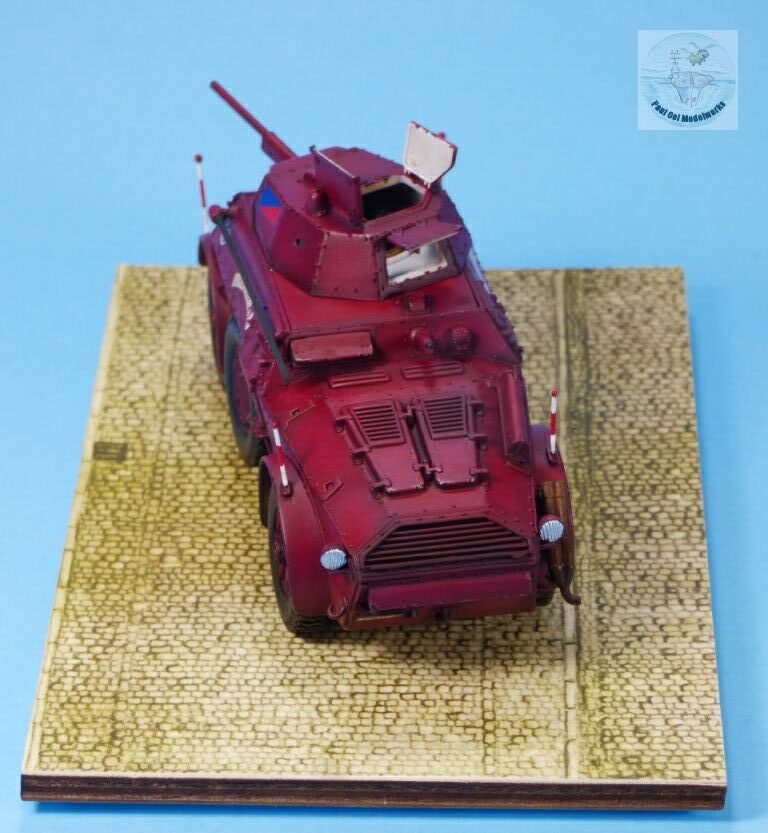
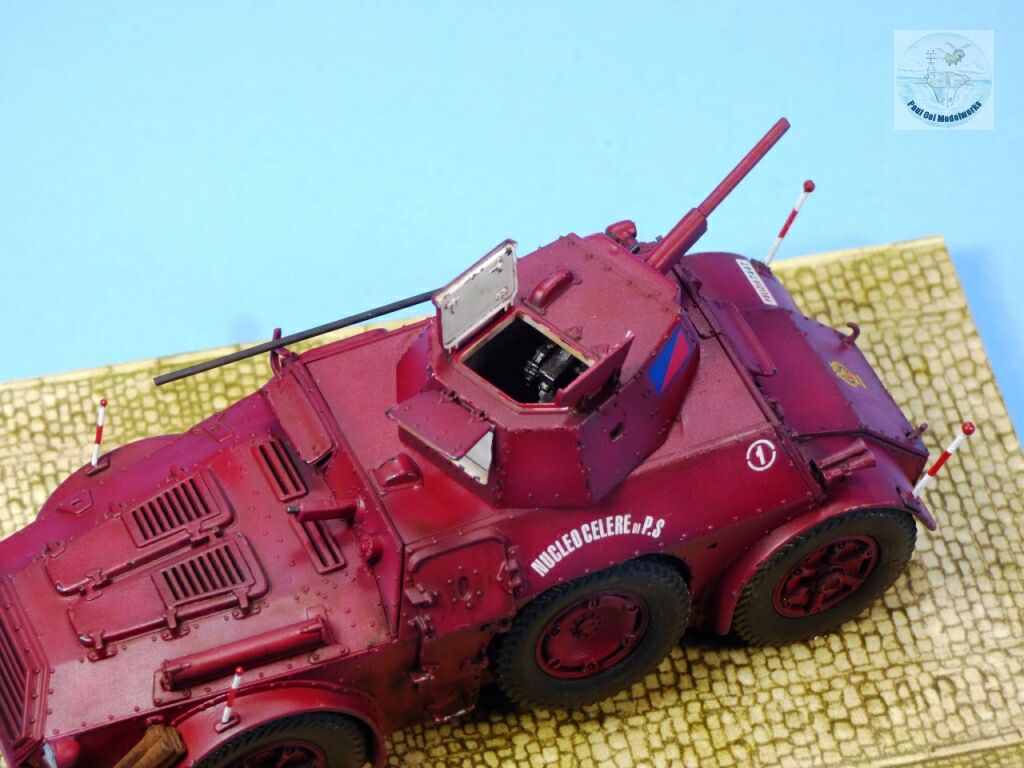
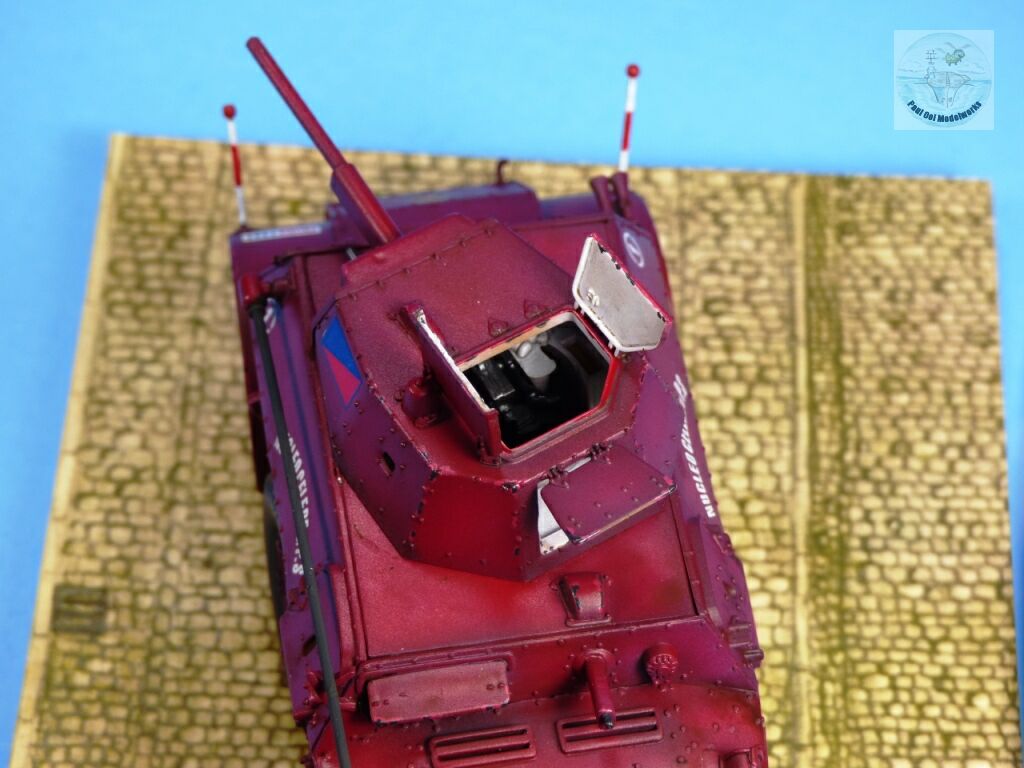
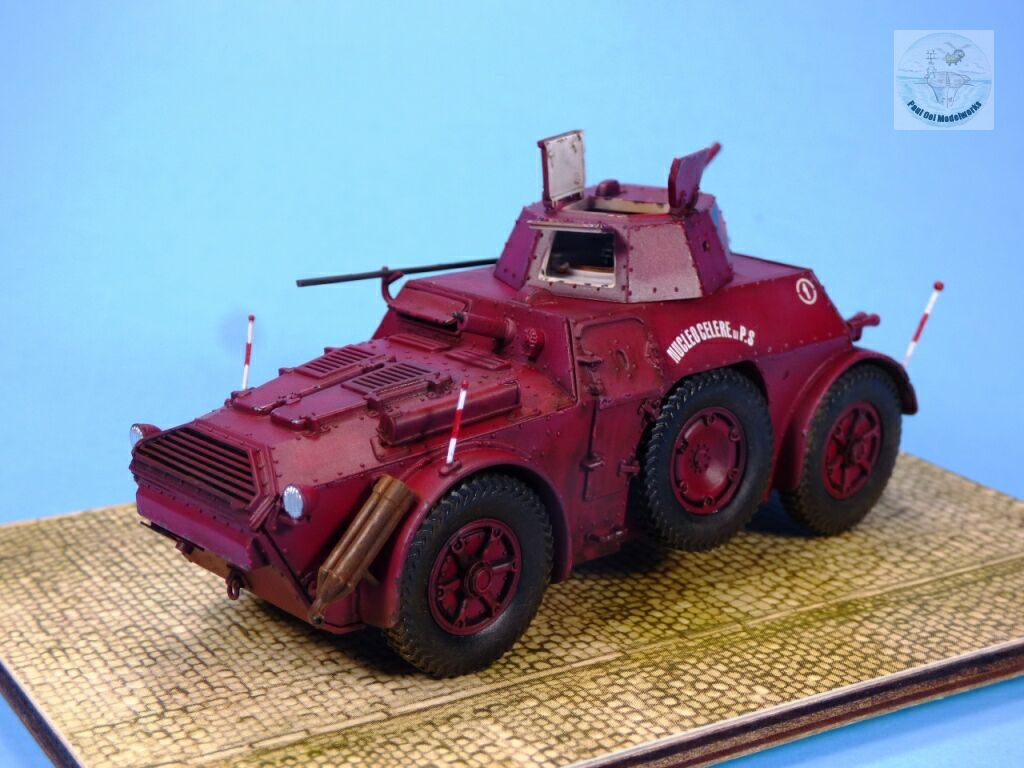
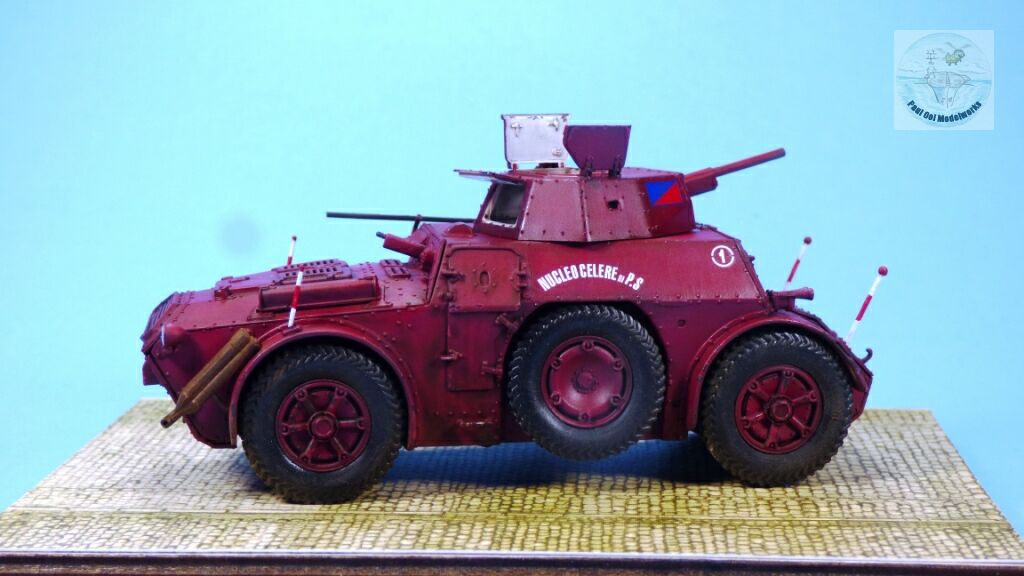
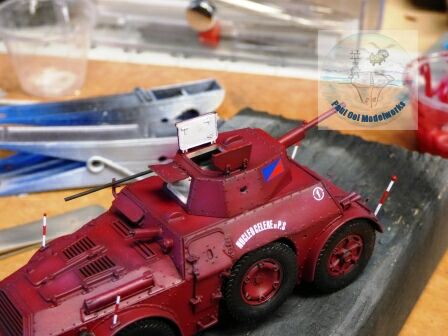
Imagine getting pulled over by a red police armored car! That is exactly what this Autoblinda AB43 of the Polizia di Stato is. Fiat and Ansaldo developed the AB43 for the Royal Italian Army during WW2, but the factory in Genoa ended up under German occupation, and all the AB43s were used by the Wermacht for mostly anti-partisan work. After WW2, Italy faced severe civil unrest in the major cities instigated by the Communists who were active in the trade unions. Since the Italian armed forces were limited in the number of armored vehicles they could deploy, the Italian State Police took on the slack by using the AB43 armored car to control rioting and sabotage in the cities. The AB43 was a good and reliable platform for such work, providing good protection for the crew from small arms fire. It also carried the versatile Breda 20mm cannon, and two Breda 8mm machineguns.
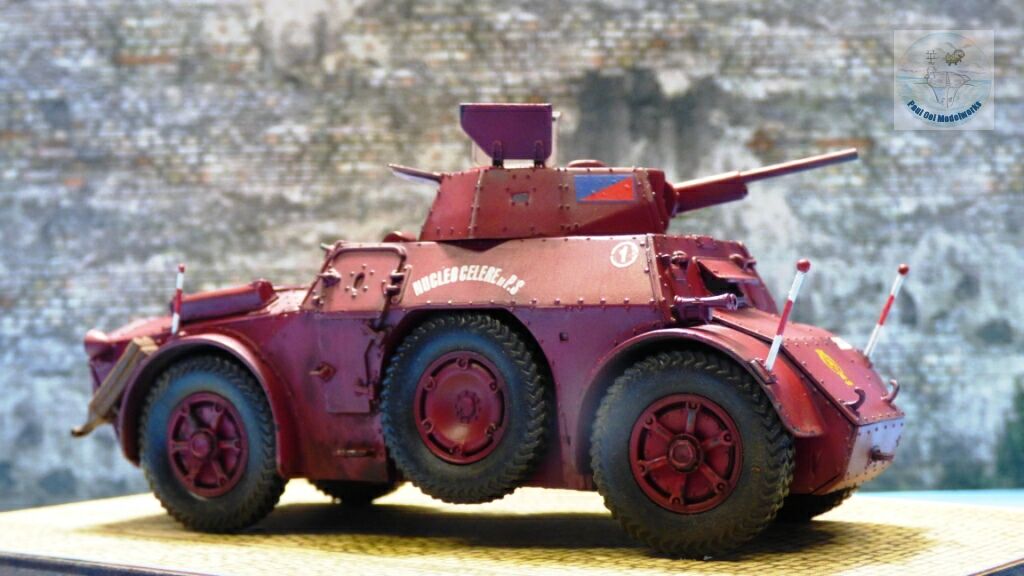
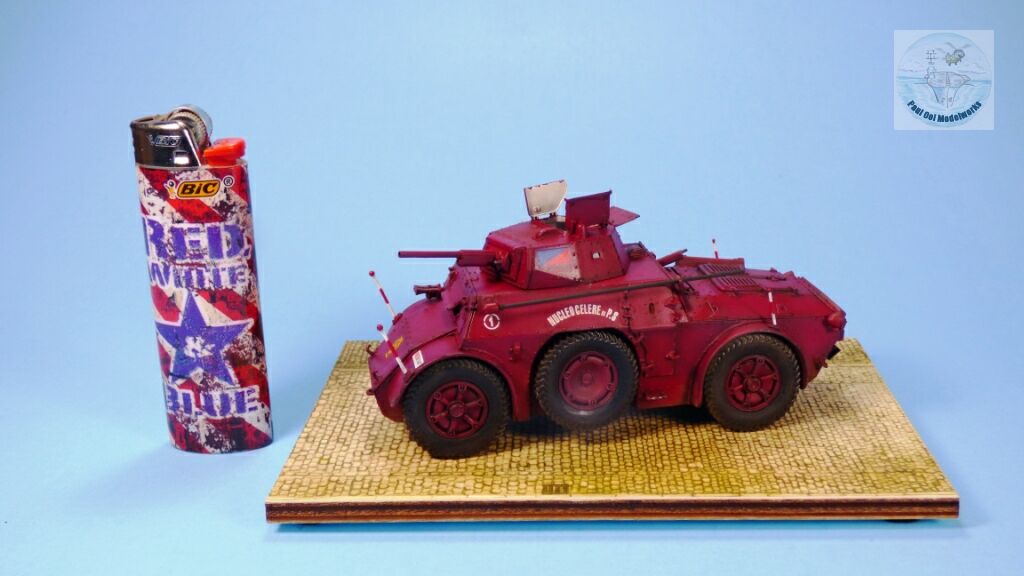
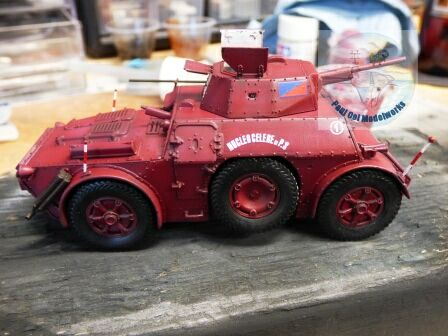
Unlike the wartime version, the police AB43 did not carry fuel jerry cans strapped on the vehicle, and the rear toolbox was also removed. One interesting feature of the Autoblinda armored car was the twin driver seats arrangement. The vehicle can be driven in both directions with equal ease with two sets of steering wheels and pedals. The armored car has a top speed of 90 kph, and a range of 460km. Apart from the unusual dark red color, I was also drawn to the heavy riveted appearance of the armor, giving the Autoblinda a somewhat “steam punk” feel that is hard to beat.
Gallery


Construction Notes
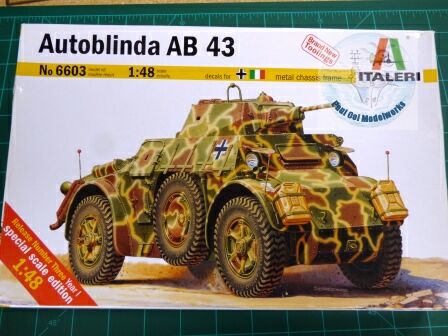
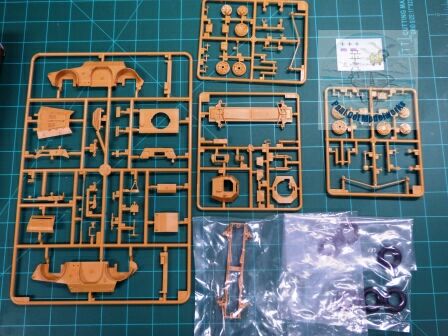
I picked up this 1/48 scale kit about 8 years ago during a store summer sale. I thought that the metal chassis frame was similar to Tamiya’s 1/48 scale complete metal lower chassis, but it was different with only the skeletal chassis frame being cast aluminum. The plastic parts are crisply molded, with good surface details. The fit was decent but could have been better along the hull seams. There were three choices of marking, but I decided to forgo the German ones in favor of the dark red Polizia di Stato livery.
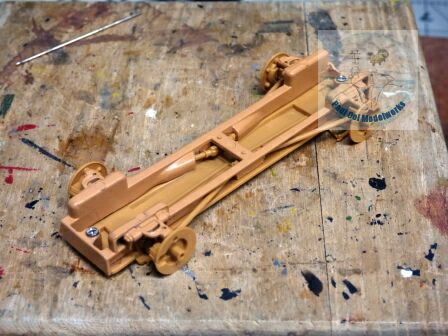 We start with the chassis assembly, combining the aluminum chassis with the plastic axle sub-assemblies. There are two minute screws to attach the metal frame to the plastic underside tray. I ended up reinforcing the screw locations with superglue.
 In preparation for closing up the hull, the interior (visible through the turret hatches) is painted Gloss White.
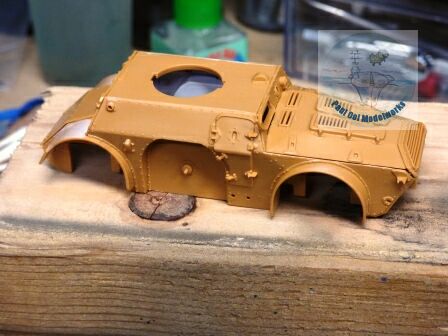 The main hull build was relatively fast but I cannot help noticing the gaps along the edges of the major plates. These were sealed using the techniques found in Tutorial 3 Filling Large Plastic Gaps.
Once the main hull shell is complete, we unite it to the chassis frame with the wheel axials.
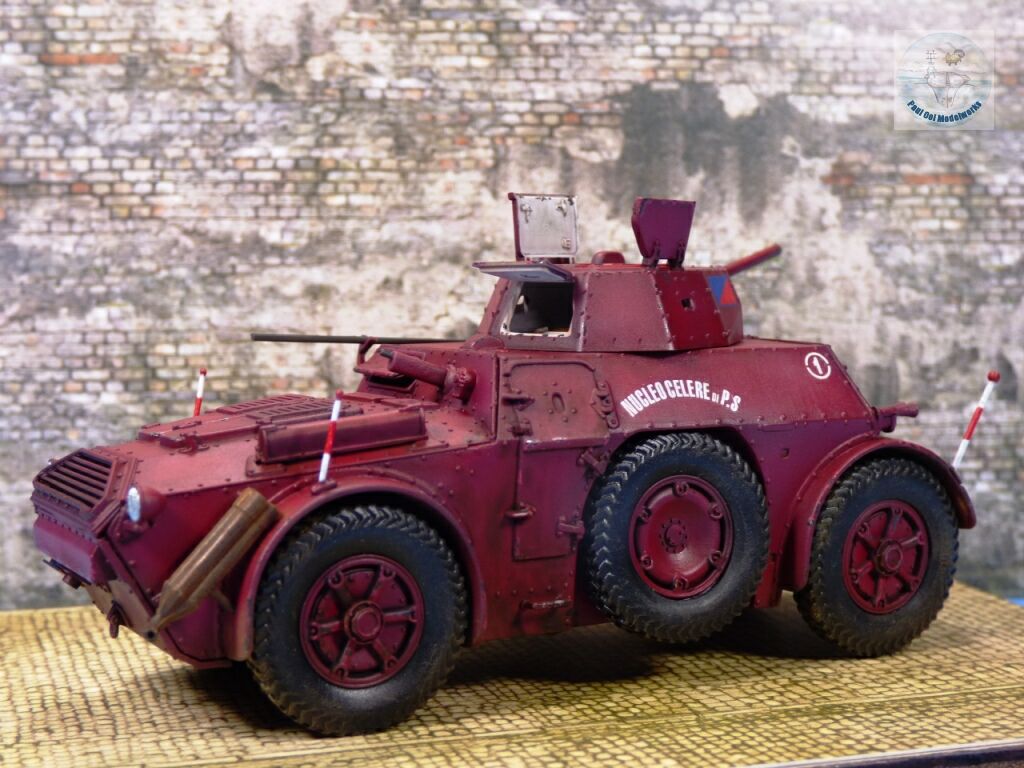
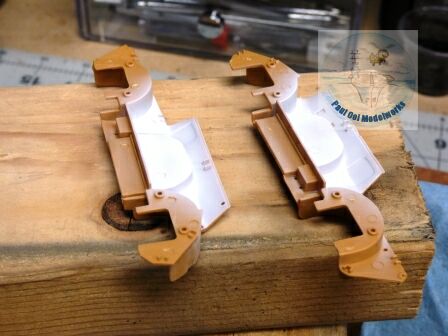
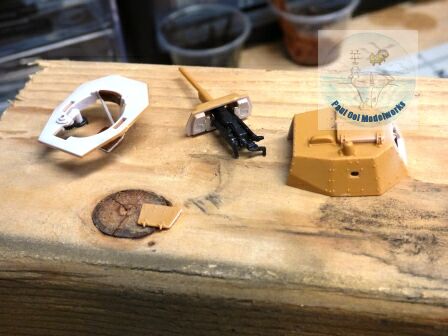 We turn our attention to the turret pieces. The interior of the turret was also painted with Gloss White, while the Breda 20mm gun breach was painted in Model Masters gun metal. Be extra careful with the very fragile suspended struts for the commander/gunner’s seat. The interior while is given a dark grey wash before closing the turret.
 I made sure to have all the hatches (to be positioned open later on) taped in place from the inside in preparation for airbrushing. The turret is fully built except for the taped down hatches.
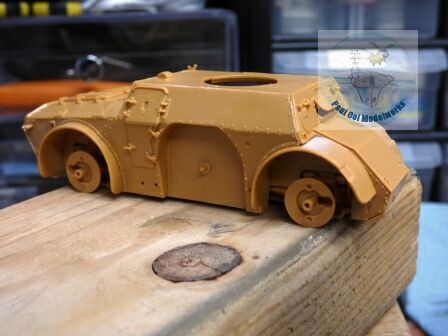
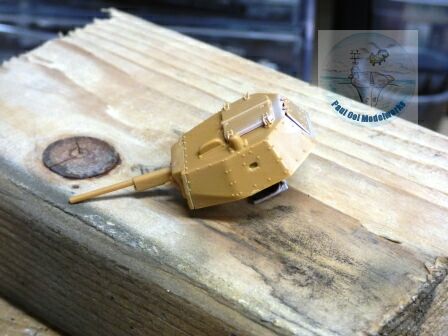
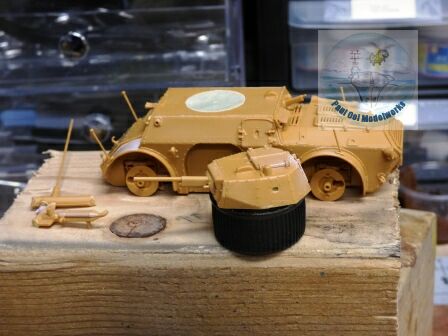 All the main sub-assemblies of the armored car are now ready for the spray booth.
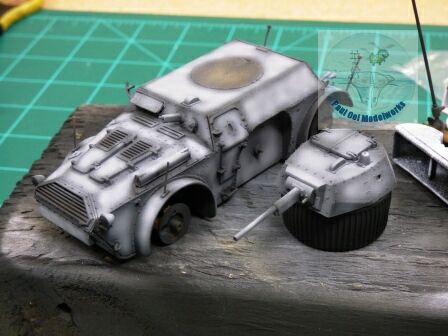
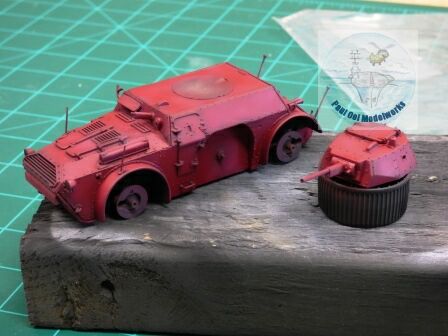
I used my usual undertone of NATO Black followed by Sky Grey highlights. The final vehicle color of Dark Red came from Citadel Paints Khose Red.
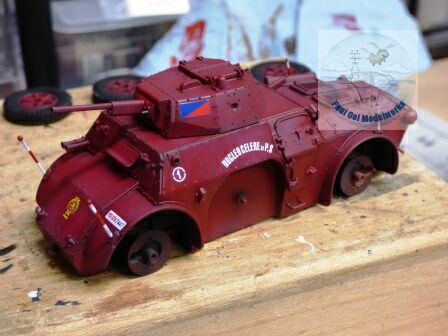

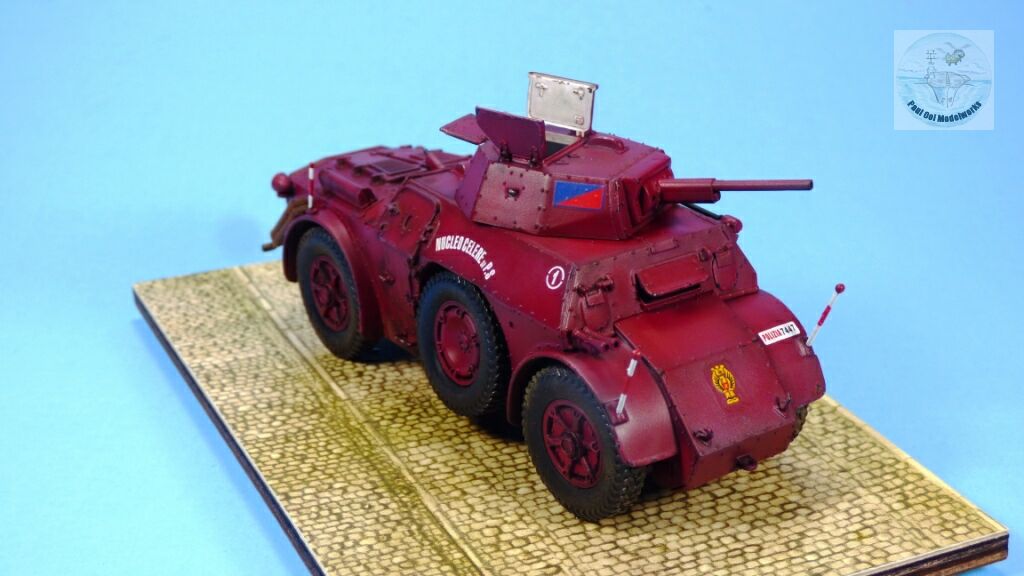
I applied the excellent decals after preparing the surface with brush-applied Decal Gloss Coat. No silvering with this prep! My one complaint about the decal sheet is the rear license plate decal was printed much too large for the surface of the plate number holder, so I had to apply the decal onto a thin plastic card stock, and then cut the stock and glue it to the holder.
Next, wheels on!!!
 The decals are sealed in with a satin varnish. This gives the decals that painted-on look.
 Once the varnish dries the next day, I carefully remove the hatches from the tape, and glue them in their intended opened positions. With the hatches open, the gun breach details in the turret is visible.
 Weathering starts with painted flakes of pink (White + Khose Red), followed by Tamiya NATO Black.
 The whole assembly then gets an oil colors wash of Burnt Umber + Lamp Black.
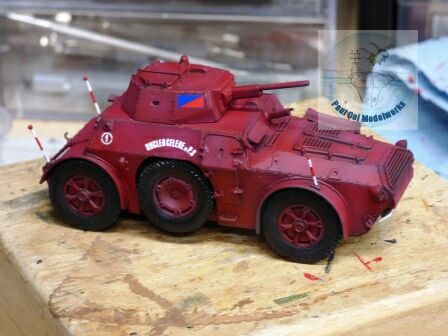
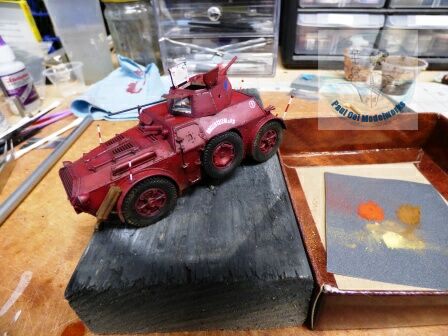 Final weathering of the tires, and vehicle underside is done with pastel chalks. This gives a more subtle effect as compared to airbrushing as it was meant to portray city dirt, not out in the countryside. The bright orangey powder was applied to the exhaust assembly over a coat of buffed Burnt Iron from Model Masters Metallizer, resting on the rear fender (to the left) seen here.
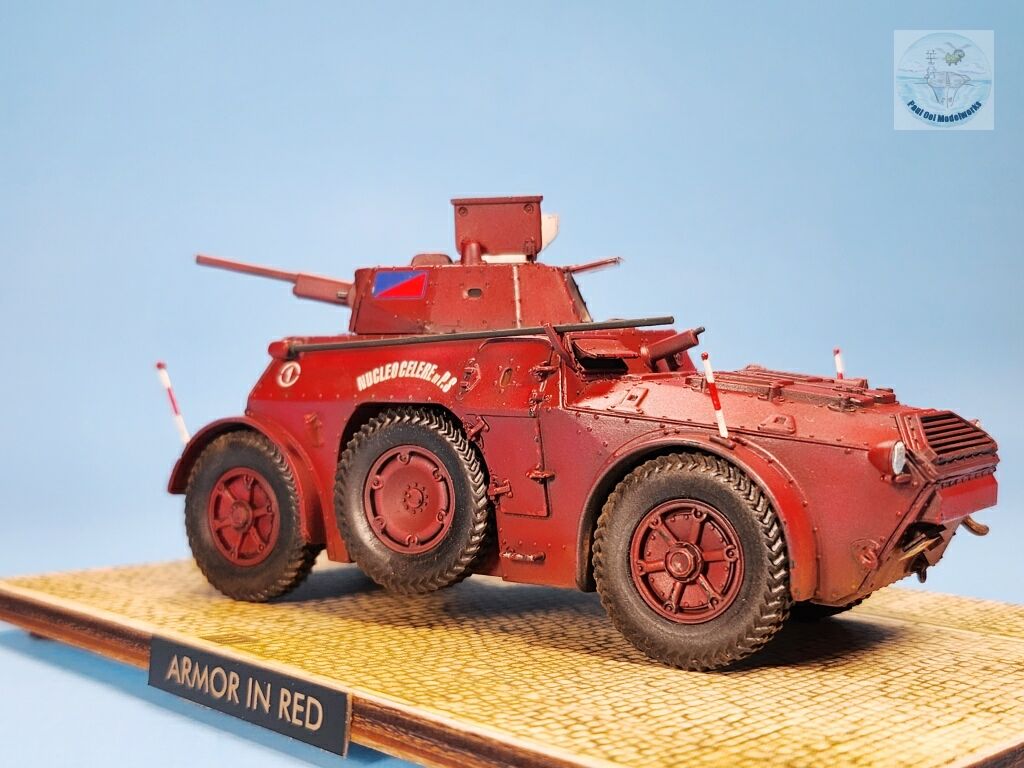
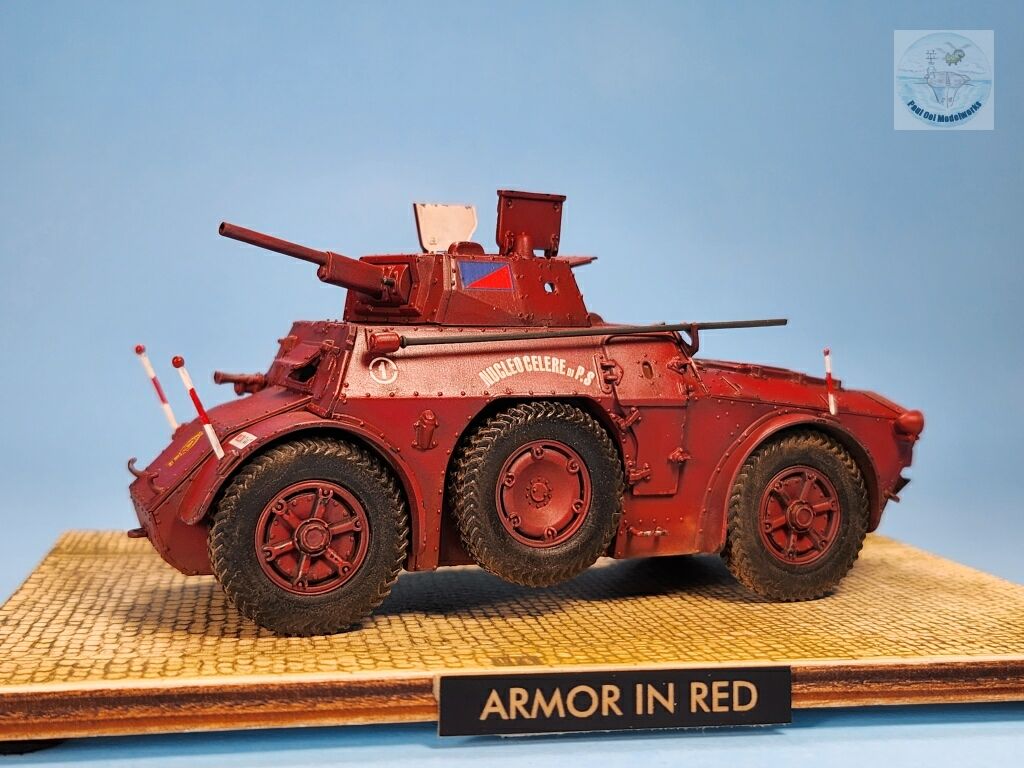
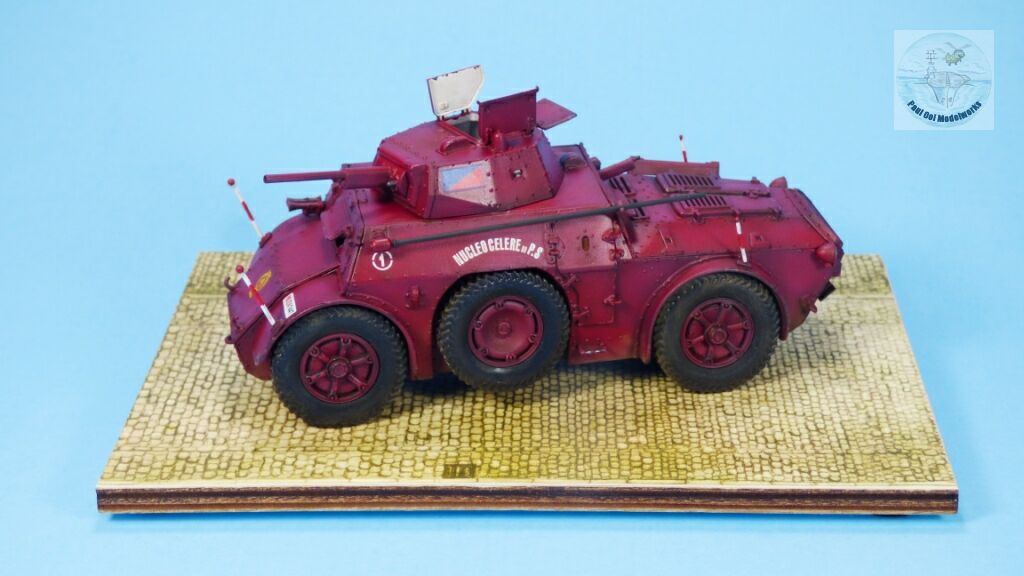
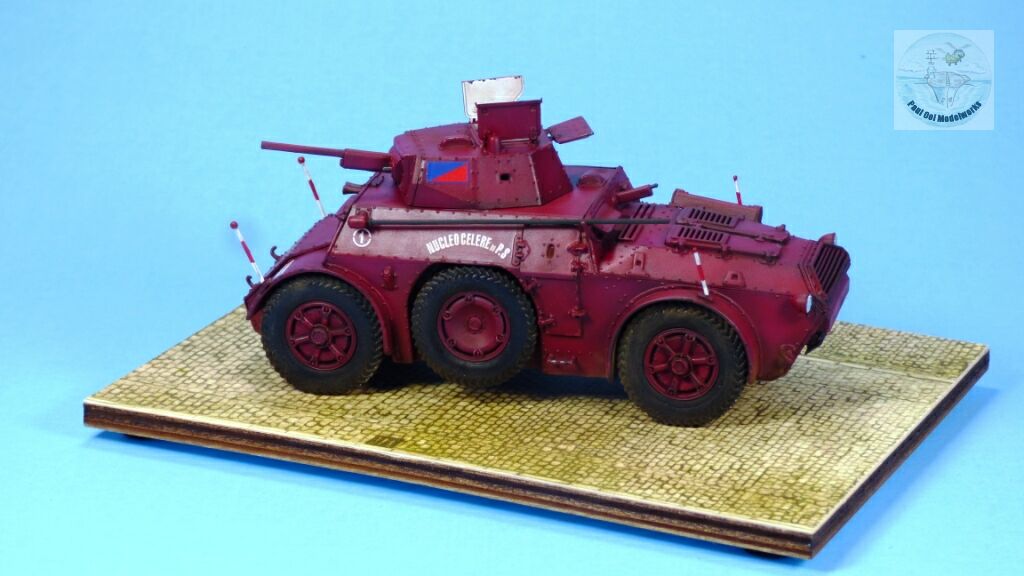
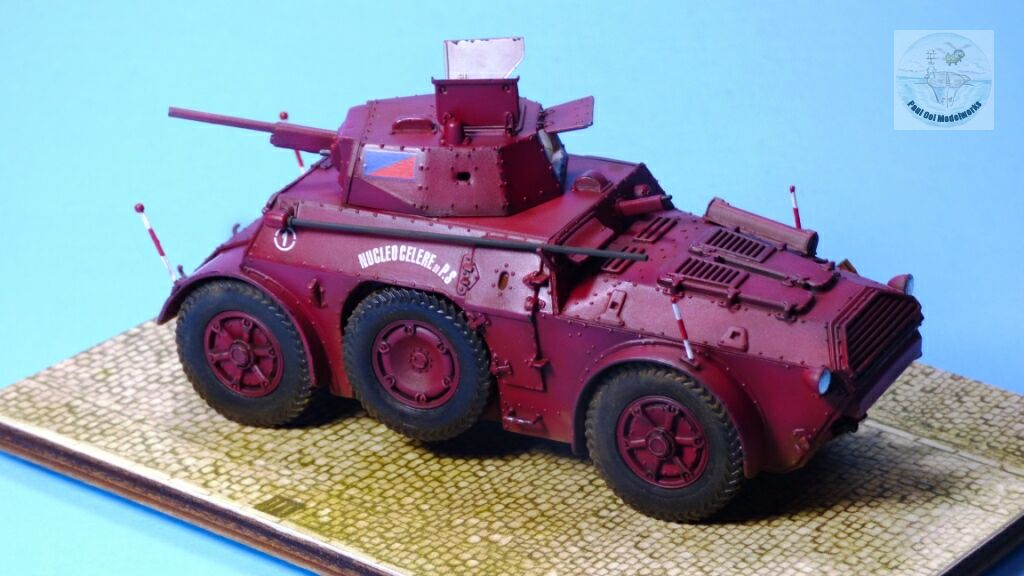
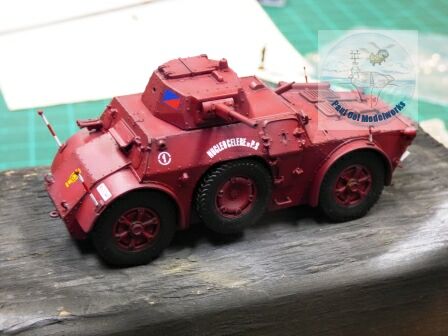
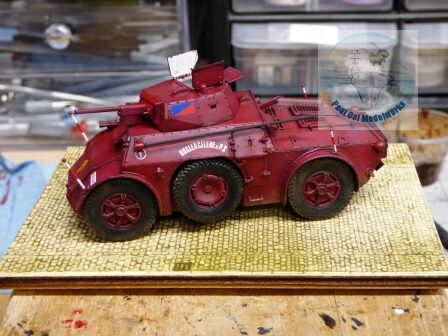 The finished armored car is parked onto a cobblestone base. The Red Armored Car goes to town!
Leave a Reply