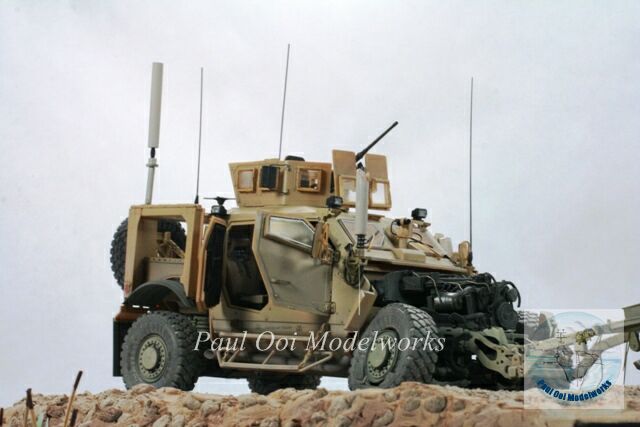
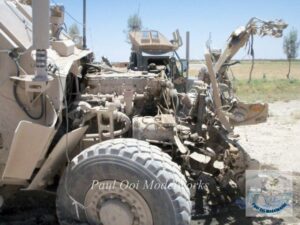
There are some projects that turn into a consuming passion because you REALLY want to do it. Such was the case of portraying the destroyed MRAP that saved the lives of its crew, including the son of a close family friend. About two years ago, my friend Chris asked me if I would ever be interested to build a model of the destroyed MRAP and its mine roller unit as a private commemoration of duty and sacrifice. On the morning of 19th June 2010 while on a road patrol in Helmand Province, a roadside bomb blew up below the front passenger seat position, destroying the front suspension assembly,shattered the hood but because of the double flooring, preserved the lives of those on board. If this had been a Humvee, the explosion would have shredded the passenger cabin.
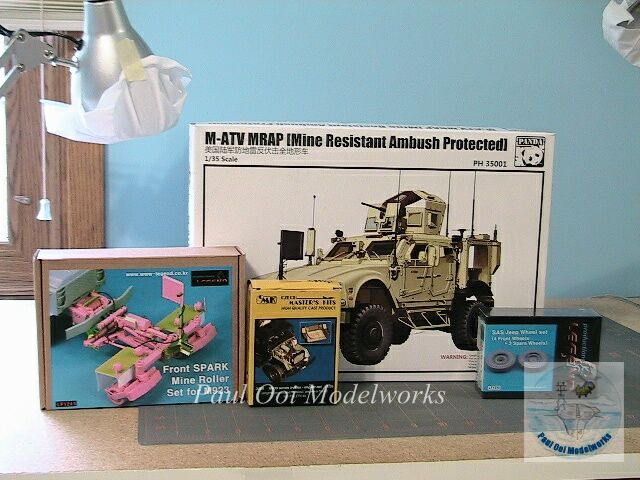
It took a while after that initial conversation to actually get all the necessary parts together. Both Kinetic and Panda launched their 1/35 scale M-ATV MRAP kits at about the same time but the Panda kit became available first at my local store. The kit itself came with 3 photoetch frets. I also bought an engine block from CMK for the M923 truck, which is the closest available match in terms of appearance and size to the M-ATV engine, SPARK Mine Roller (to get some of the parts, not the type of mine roller actually used) and road wheels for WW2 Jeeps (also for scratch building of the actual US Marines Panama City Mine Roller). The whole project took me all of 6 months.
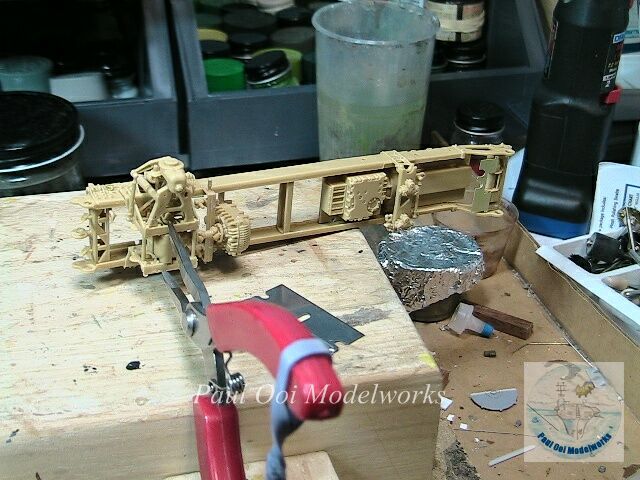
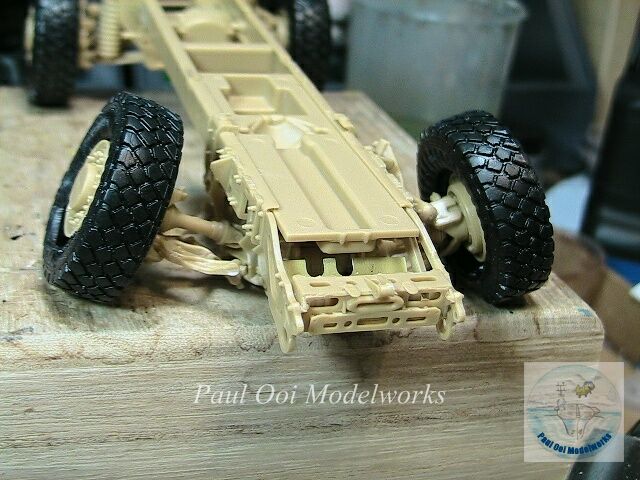
Like most truck assemblies, this one starts with the chassis frame. The Panda kit chassis is very detailed and have individual parts that closely correspond to the real thing. This makes it easier to build the “demolished” suspension later on.
It was extremely important to get both sides of the individually articulated rear suspensions to line up properly or you will get the lifted wheel syndrome at the end of the build, even for a demolished truck.
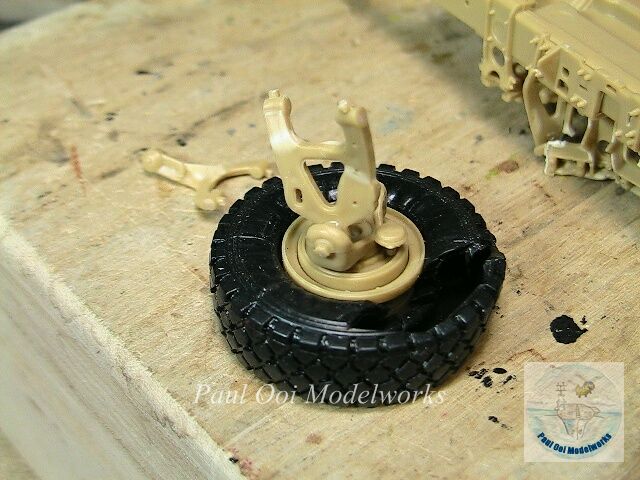
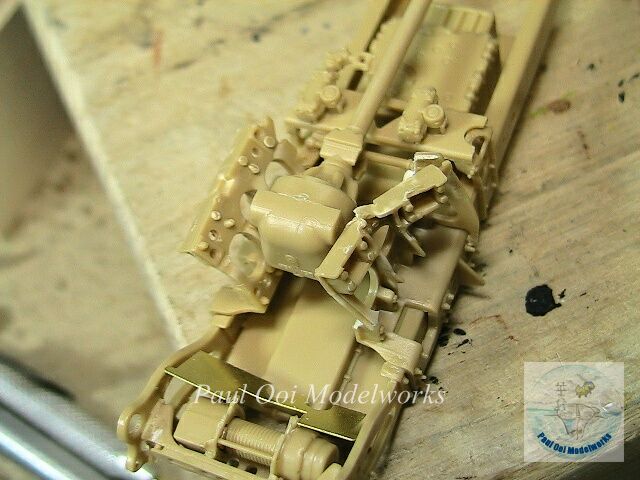
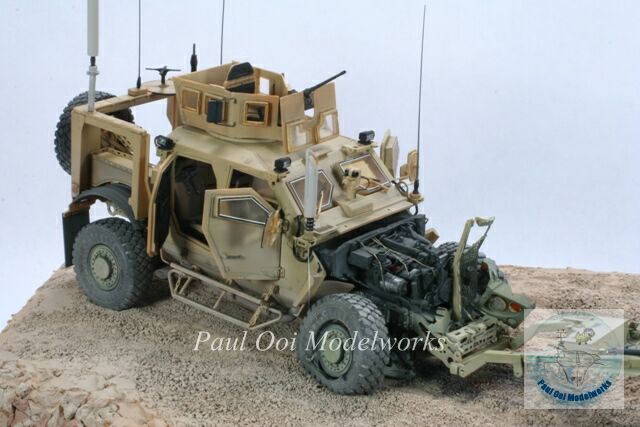
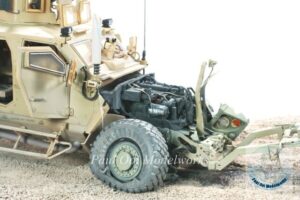
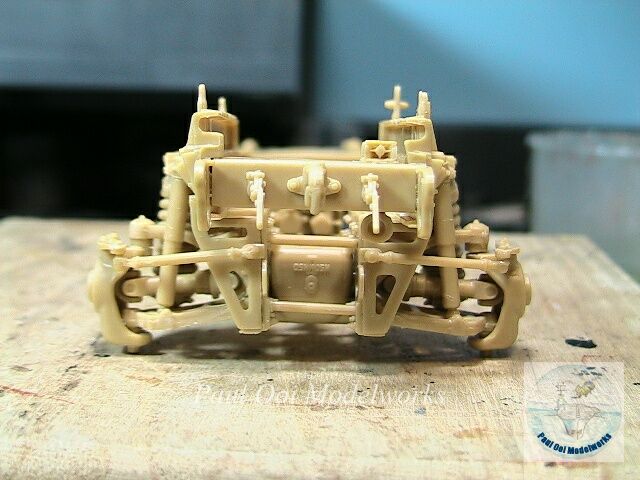
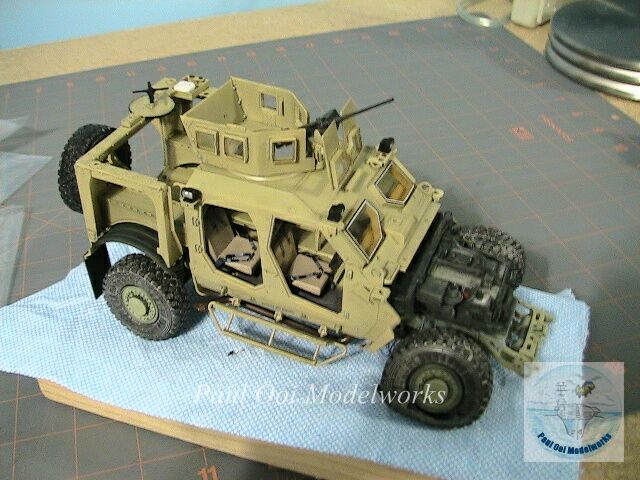
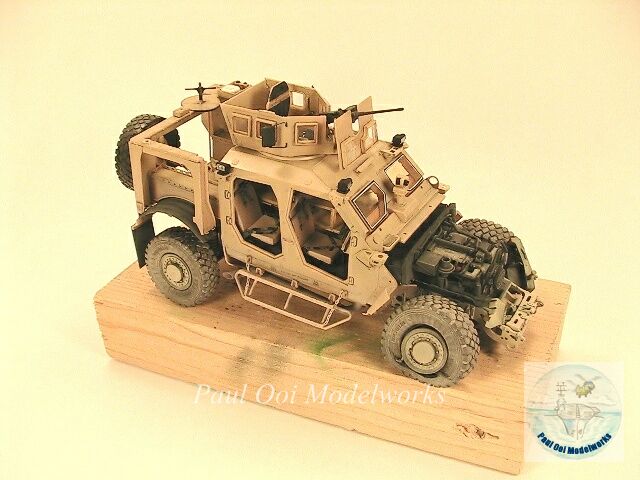
The first major departure from the regular kit build plan is to carefully plot the shattered front suspensions. The large axle supports are carefully twisted into the desired buckled position caused by the tremendous blast from the IED. The wheel forked supports are also suitable twisted, first from the force of the blast then by the high speed torsion as it flails toward a grinding halt. Since this kit came with vinyl wheels, the front two wheels have to be carefully slashed to achieve the final collapsed appearance. To glue down the vinyl tires, I used a flexible vinyl glue called Sureflex Multi-purpose adhesive, then clamped for 2 days.
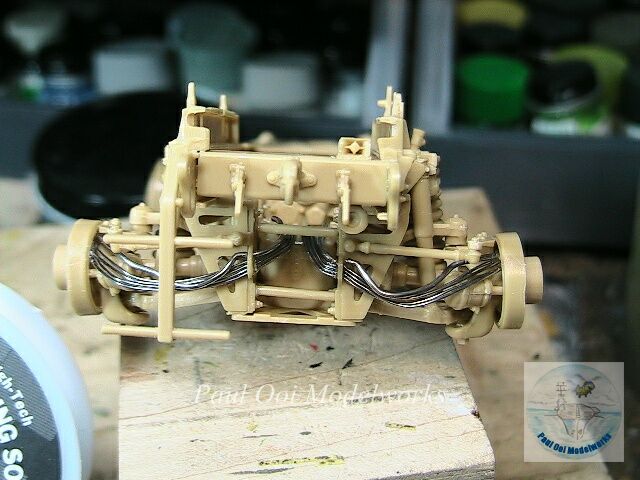
The Oshkosh M-ATV has very visible hydraulic brake lines across the rear axles that were not included in the kit. I made these from fine solder wire for both the rear and front suspensions.
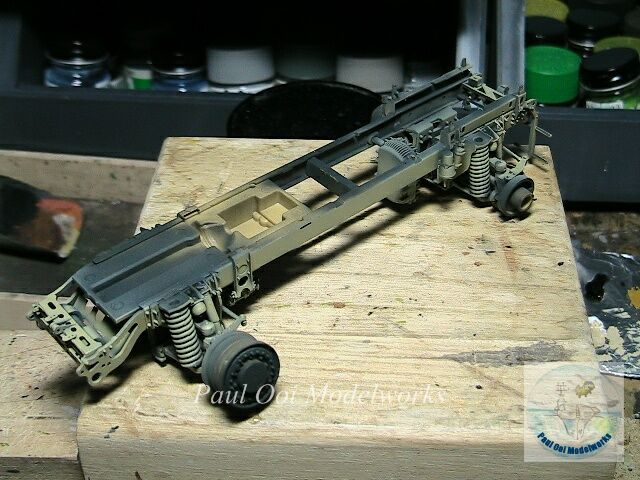
Once the chassis’ main parts have been put together, I undercoated it with Tamiya XF69 Nato Black. This will help to create a good shading for the underside of the truck and also shade the blast area under the engine block.
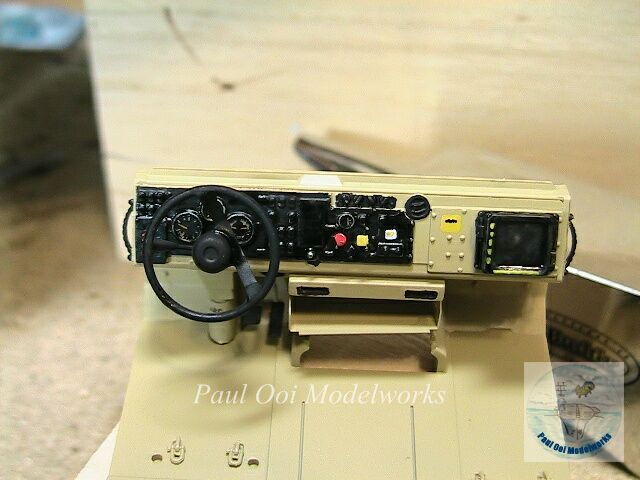
With the chassis prepped, I start working on the main cabin itself. I got most of my reference material from an excellent DVD from AK Interactive entitled Oshkosh M-ATV Photo Walk Around. The Panda kit does not provide a paint guide (!) so the actual photos really helped. The kit does provide excellent detail decals and some of these go onto the dashboard.
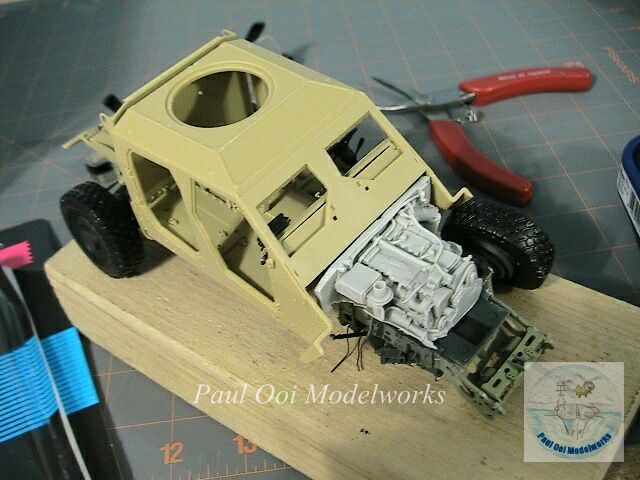
Before going too far with cabin assembly, some dry-fitting is necessary to check the fit of the cabin shell and the resin engine block from CMK.
This truck has an unusual layout, especially in the rear open compartment, so more test fitting is necessary.
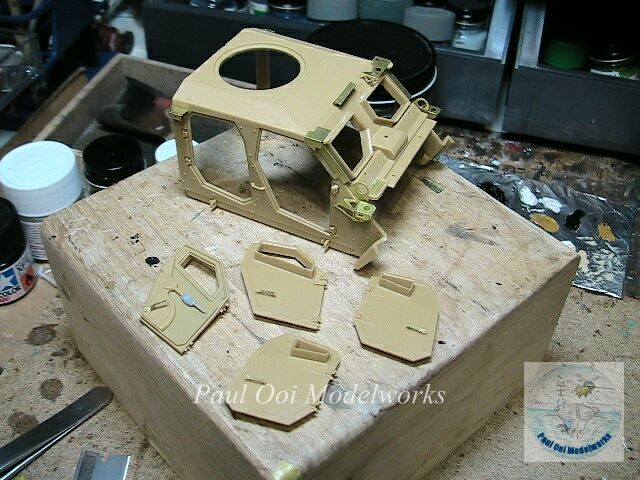
Then I prepare the cabin shell by painting the interior walls Model Master Acrylic 4812 (US Marines Gulf War Sand). All the light brackets and sensor brackets are glued onto the cabin shell. The door units are also built at this time.
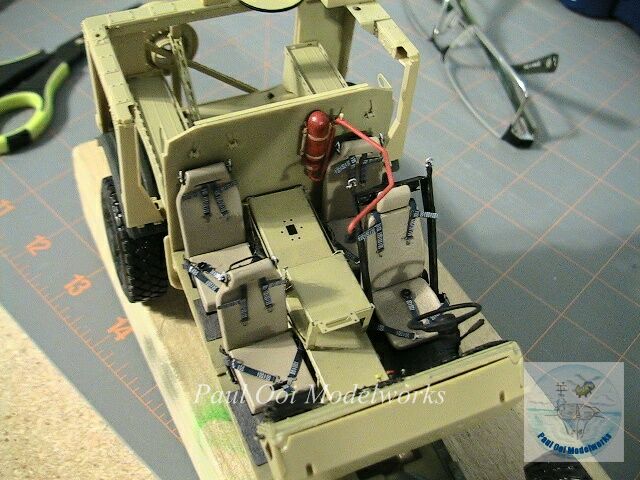
A few more weeks were spent on building the interior. The seats were painted Tamiya XF-57 Buff. I used Eduard’s M-ATV seat belt kit (for Kinetic but adapted here to my Panda kit) which added excellent detail to the interior. Note also the fire fighting unit and spray in the cabin. The Panda interior has this great looking center aisle rack system but no radio set.
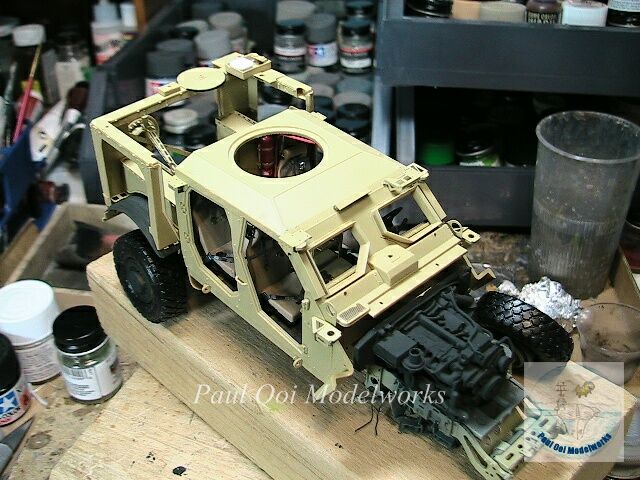
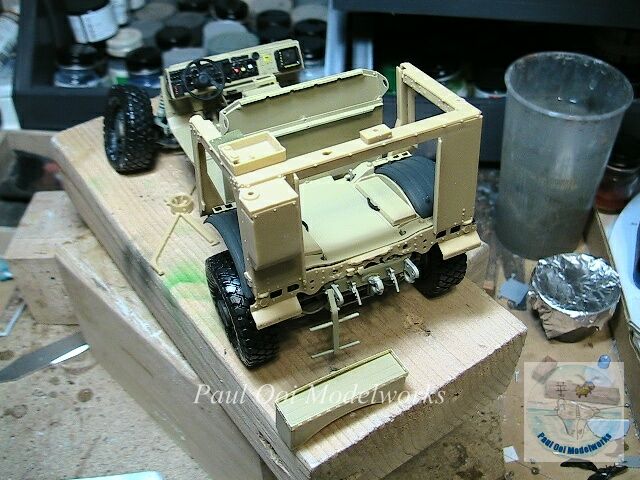
Once the interior is set, I fitted the cabin shell, and also attached the engine block after undercoating it with XF 69 Nato Black.
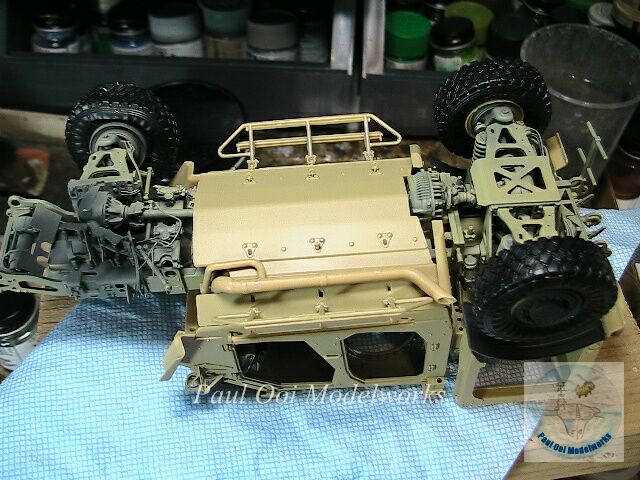
With the interior protected and no antennae or turret on top, I flip the truck over to install the outer floor shell(the life-saver) and the exhaust pipe and muffler. After this, the entire assembly gets another layer of US Marine Gulf War Sand.
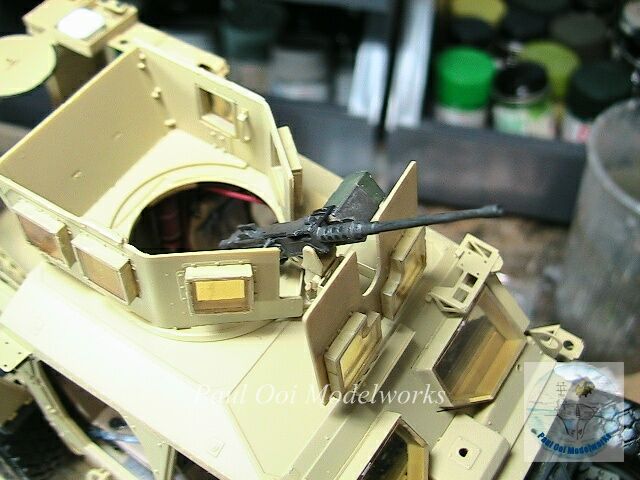
Then I worked on the turret and the 50-caliber machine gun. Initially I tinted the square ballistic glass panels the same bronze tint as the cabin windows and windshield but upon looking closely all all the pictures in my collection, I realized that was a mistake. You will see later pictures where the panels have been restored to clear. I used several fine tip cotton buds with turpentine to get rid of the tint, slowly and carefully.
After painting the engine block using several shades of metallic pencils and dark washes the truck is ready for detailing work. Dark wash is also applied to the whole truck using turpenoid tinted with Payne’s Grey oil paint and a bit of Burnt Umber.
Weathering is done by applying many layers of fine “dust’, a diluted mix of 1/3 XF10 matt white: 2/3 XF57 Buff, concentrating on the underside and a fine dusting for the wheels.
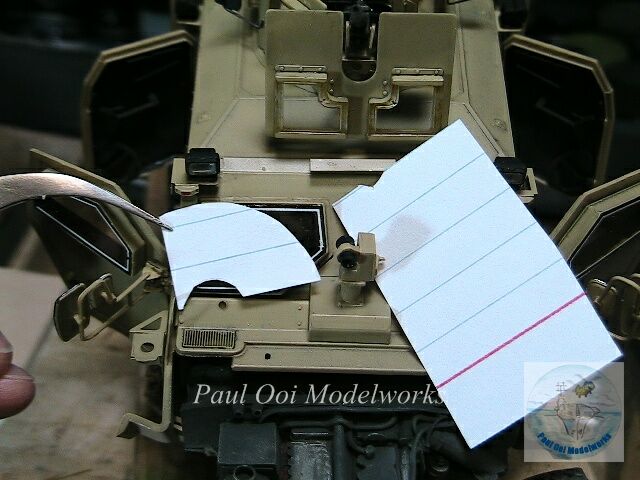
An even more diluted mix of the same spray is applied with very low pressure airbrush setting using a “fan” template that corresponds with the sweep of the wipers on the front windshields.
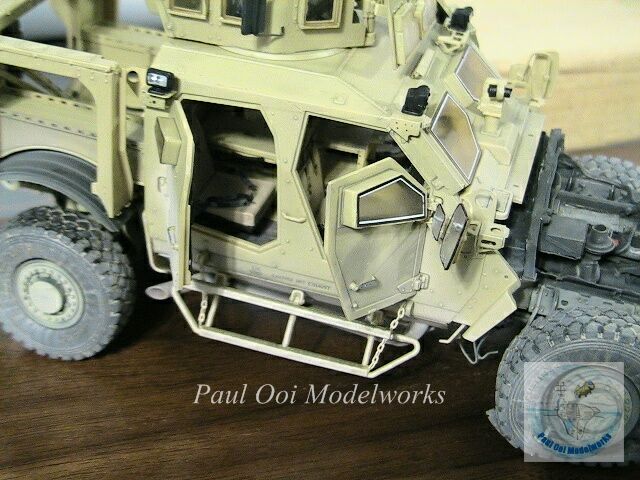
The four doors are similarly weathered, and then carefully fitted to their openings in the open position.
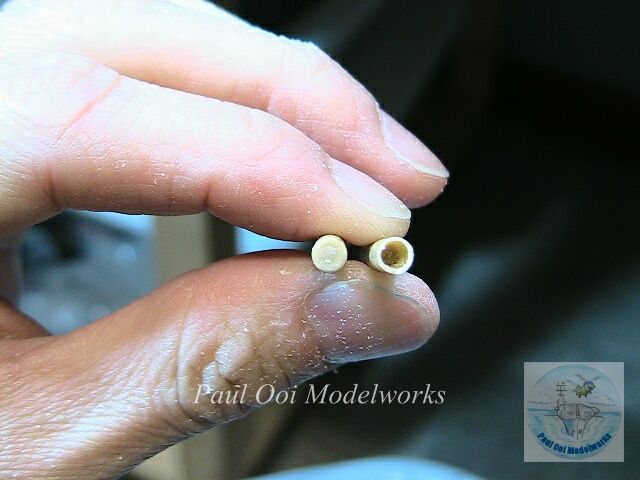
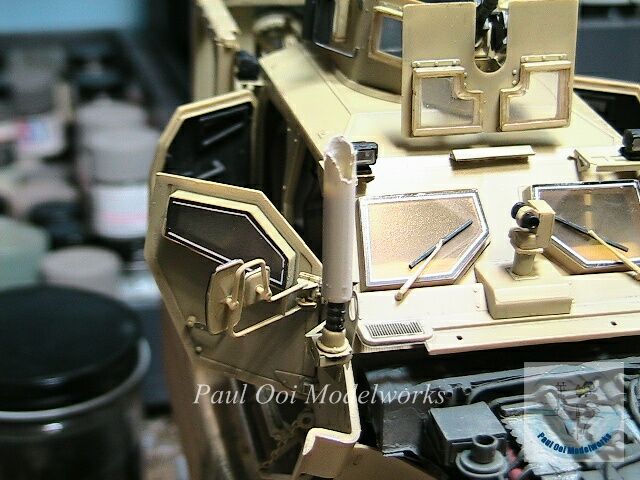
One of the things I noted from the photographs was the front right hand-side antenna housing was shattered by the explosion. The kit provided the molded plastic part but in order to show it shattered, I first have to carefully drill out the part, and make the walls even thinner using my fine grinding machine tool. In the second picture, you can see the end result, including the bit of blue wire from the antenna assembly that hung out after the explosion.
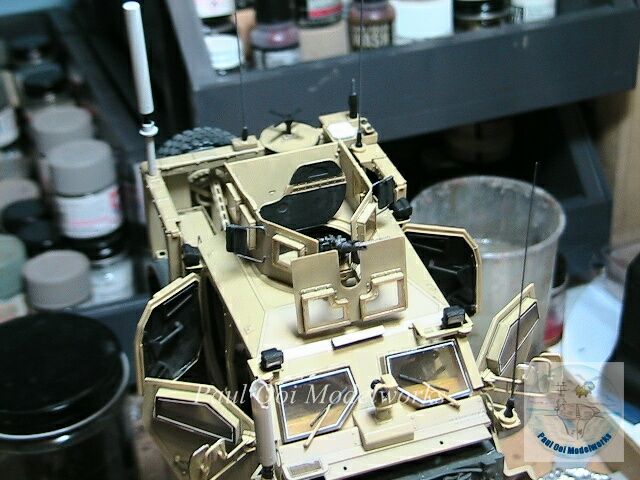
The finishing touches to the M-ATV truck is the attachment of the myriad whip antennae made from stretched sprue (3 of them of differing lengths and mounts types around the vehicle top. I also attached the cables leading to each of the antenna at the end.
The truck is completed and now we move on the the next stage, the scratch-building of the US Marines Panama City Mine Roller to be attached to the front brackets of the M-ATV. All of that will be in Part 2!
Hello sir, I am 3D artist, who loves to make diorama’s in 3D – Some examples, could you share some these pictures with me (I am not able to save them etc) This is just such a sad story that I would like to translate in a 3D scene, with all respect for your friend of course.
Kind Regards
Develtere Matthias
Some examples
https://fbcdn-sphotos-d-a.akamaihd.net/hphotos-ak-prn1/t31/894782_10203252752190580_1536387997_o.jpg
https://scontent-a-ams.xx.fbcdn.net/hphotos-frc1/t31/1939413_10203252751390560_1788236024_o.jpg
https://fbcdn-sphotos-f-a.akamaihd.net/hphotos-ak-prn2/t31/1412438_10202925590211735_1649260260_o.jpg — based on the paladin Hulk 2.0 diorama
https://scontent-a-ams.xx.fbcdn.net/hphotos-prn1/t31/1015207_10203252751030551_1814179818_o.jpg
Hello Mathias,
Thanks for your interest in this diorama. Are you needing to get the original higher resolution file of the photographs? I am not familiar with the 3D process, so perhaps you can tell me a little bit of what is needed here.
Best regards….Paul
Hey Martthias,
Just saw your 3D stuff you linked above. They are very nice, especially of the SF War Pig. Do you have a website as well to show your work?
Good afternoon Paul,
My name is rob ,from Beaumont s/ Sarthe ,not far away from Le Mans france.
I ‘m just viewing your Panda Mrap model,that is giving me some good tips & ideas.I’m building up the same model wich i’ve started nearly a year ago,taking my time.You ‘ve done a great job on your model.
Anyway I need to carry on on mine as I’ve recieved for my birthday the new panda’s cougar 4/4 mrap.
Best regards rob.
Hello Robert,
Congratulations on receiving a new kit (always fun to see what’s inside the box, yes?). It is the same problem for all of us, building time is much longer than getting a new kit. Please feel free to ask me any questions you may have on the M-ATV MRAP.
Paul
Hello Paul Ooi, I found the part 1 to the mine roller M-ATV and it’s totally awesome. You know your modeling as it is great. I have the same kit and i hope to start building it soon with a Spark system. I’m bookmarking your site to see all your wonderful builds. They are very inspirational to me. Thanks for taking your time and sharing your work.
amazing work, and so much attention to fine details!!! Please, sir, can you post some photos of the M-ATV, such like, front/left/right/ back/top /bottom view? Only if you consider that it is possible, I am trying to create a 3d model of this vehicle, and all the references on the internet, are not in my ideal position …..