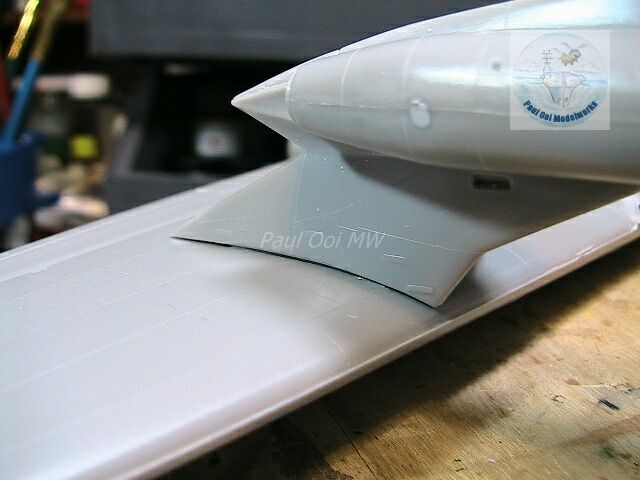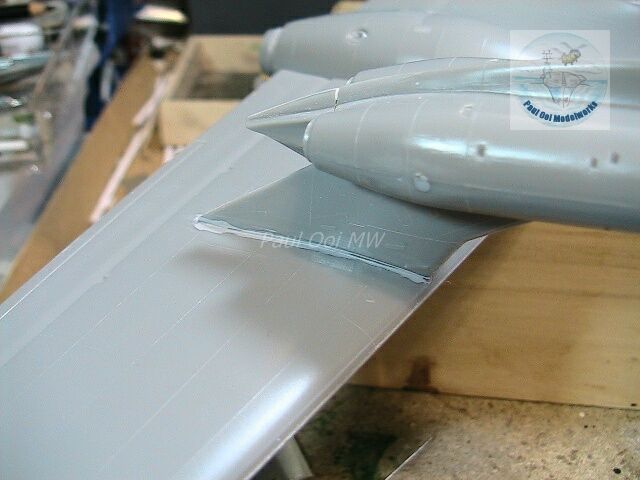
A perennial problem for the plastic modeler, especially when one has to deal with older vintage kits or some short-run kits, is that one may encounter very large gaps in the joints. When the gap is about 1/16″ or larger, no amount of adhesive can bridge the joint. Attempts using gel cynoacrylate glue may give us a gap filler if the seam was short but long joints cannot be so easily dealt with. Here is the method that I use when the seam to fill is long and the gap is large.

First, gauge the size of the gap and pull several sizes of stretched sprue to fit. The technique of stretching sprue from the plastic trees is a very well established one by slowly heating a piece of plastic rod about an inch over an open candle flame and when you feel the material yielding, pull the two ends apart steadily until you get the diameter and length needed. Sometimes, the size of the gap changes along the seam, so two or more stretched sprues with different diameters may be needed. Once the correct size is determined (the sprue should not fall inside the seam, it should fit very snugly or even sit just a little proud of the gap) cut the sprue to the length needed to line the joint.

Lay the sprue carefully to line up with the seam. Leave a little extra on at least one side of the joint. This will help you to have a place to hold the sprue. Then carefully apply liquid polystyrene adhesive along the sprue. Capillary action will pull the liquid between the sprue and the seam. Do not apply too much or you will get pooling along the joint.

Then, using a flat narrow tool (I am using a dental probe), gently push the sprue into the seam. The liquid adhesive melts the sprue a little so you can squeeze the sprue in just enough to seal the seam.

Use a sharp razor or X-acto knife to cut off the excess sprue at the end.

Since this is a large gap, even with the sprue in place, you can still see the contours of the sprue so to smoothen and even out the seam, apply a surfacing agent like Mister Surfacer 500 from Gunze Sangyo. Tamiya also has a similar grey surface treatment agent. Let the agent dry for at least 4 hours.

Sandpaper the joint using a tip abrasive (if available) starting from coarse grit, working through until the final polishing grade. This will remove excess surfacing agent and give a uniform seam surface. An alternative is to roll a small sheet of wet-and-dry sandpaper but do make sure to get into contact with the seam and not to abrade the surrounding details.

Using a fine tipped cotton bud or Q-tip, soak the end with a little lacquer thinner and quickly but steadily remove remaining excess surface agent to get a smooth uniform seam. Do not linger too long with the Q-tip or you will see the thinner melt the plastic around the seam or cause stringing. A firm wipe along the seam in one direction will do the job. If you need to repeat, get a new Q-tip as the previous one will have dissolved plastic on it. A little goes a long way. If you are too nervous about this last step, you can choose to omit it and be satisfied with the sand-papering in the previous step.

Finally, that large unsightly gap has been filled!

