How does one achieve neat painted frames for vacuum formed canopies? Unlike the molded clear hard polystyrene canopies, the flexible and non-rigid nature of the vacuum formed canopies (due to the thin cross section) makes it hard to use the more traditional tape masking method. One of the best methods is to use modeling tape to make the frames.
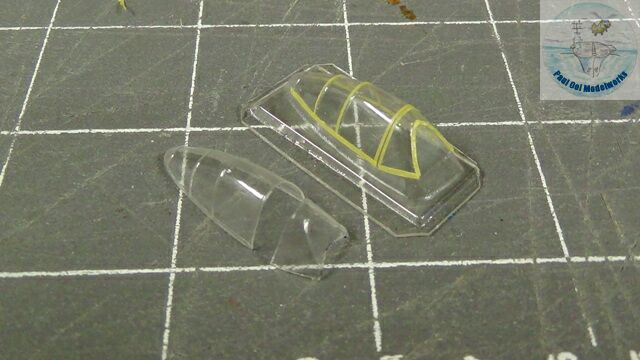
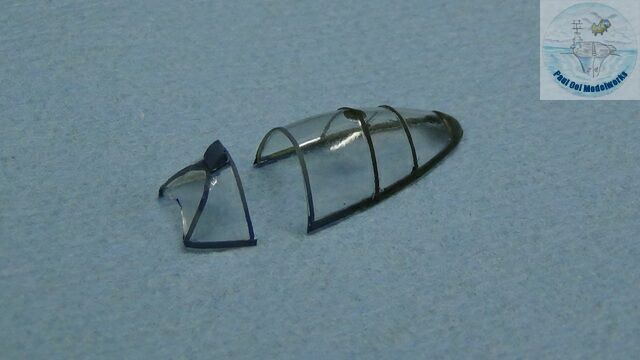
Most kits provide at least two vacuum formed canopies. This is most helpful in case you mistakenly cut one badly and need to replace it. The one on the right is normally how they appear in the kit. To get the proper canopy shape, study the pictures of the final canopy shape and sections carefully before cutting. I start the cutting process by using plastic flush cutters to remove the outer sections. When in doubt whether something is part of the canopy, leave it one until the very end. Do not try to make the final cut on the first pass, rather cut away sections that you know do not belong and work your way down until you get closer to the edge. Then I use a razor cutter or an Xcto #11 blade to par off the final edges.
Using the remaining uncut canopy as a fixture, I cut thin strips of Tamiya masking tape , the thickness of each strip corresponds to the frame thickness (there may be different frame sizes on a single canopy). Then I lay strips directly onto the uncut canopy frame pattern, making adjustments to the curvature and length. It is alright to have overlap between frames. For very curved frames like the from windshield, it is better to use two or three strips overlapping at the ends to form the curves. The finished pattern will look like the picture on the right, while the actual cut canopy is the one on the left. In case you do NOT have a second canopy, you can also use a piece of scrap plexiglass to hold the tape for spray painting.
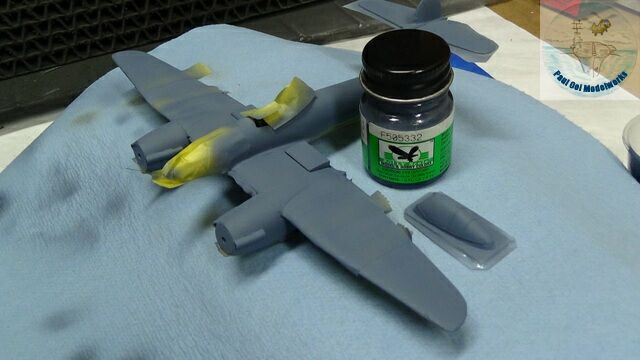
During painting of the upper fuselage, I also spray paint the frames mounted on the spare canopy.
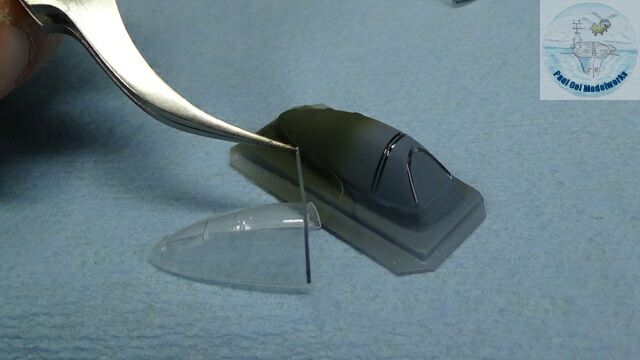
Once dry, I transfer the thin frame strips onto the actual canopy. If some paint chips off the tape you can quickly touch up before applying onto the final canopy. If for whatever reason the tape section do not cover all of the frame on the final canopy (this sometimes happens due to mis-positioning, or slight differences in size between canopies), you can paint in the connecting frame lines using a fine 000 brush.
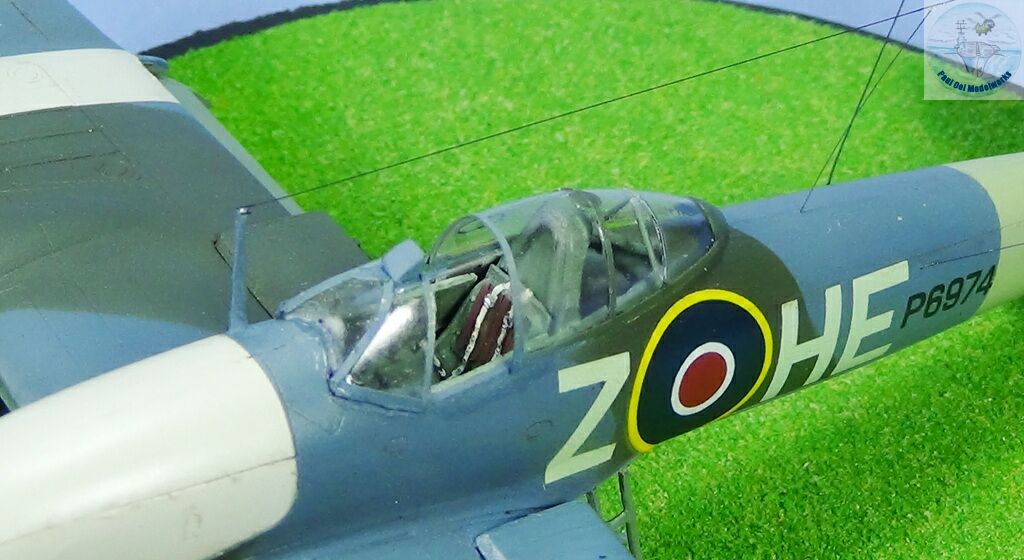
Press down each strip of tap with a rounded blunt object, being careful not to strip the paint off or scratch the canopy. Once applied, the strips should adhere well. The canopy is now ready to be mounted. I use Evergreen Canopy Glue to install the canopy and windshield onto my model aircraft.