• Skip to primary navigation
  • Skip to main content
  • Skip to primary sidebar
  • Skip to footer
  • Home
  • Blog
  • About
  • The Fine Print
    • Disclaimer
    • Copyright
  • Privacy Policy
  • Contact
  • Paul Ooi Modelworks
  • Nav Social Menu

    • Email
    • Instagram
Paul Ooi Modelworks

Paul Ooi Modelworks

Building a better world, one scale model at a time

  • Index
    • Aircraft
      • WW1 Aircraft
      • Inter-War Aircraft
      • WW2 Allied Aircraft
      • WW2 Axis Aircraft
      • Modern Aircraft
    • Armored Fighting Vehicles
      • Artillery
      • WW1 AFVs
      • WW2 AFVs
      • Tractors and Buldozers
      • Cold War AFVs
    • Ships
      • WW1 Ships
      • Inter-War Ships
      • WW2 Allied Ships
      • WW2 Axis Ships
      • Modern Ships
    • NordicCon Show
    • Figures
    • Buildings
    • Sci-Fi
    • Miscellaneous
  • Tutorials
    • Tutorial 1: Making a Wooden Platform Helipad
    • Tutorial 2: Wooden Hard Stand for Aircraft
    • Tutorial 3: Filling Large Plastic Seams
    • Tutorial 4: Diorama, Sicily 1943
    • Tutorial 5: Making a Gun Emplacement with Earthworks
    • Tutorial 6: Basic figure painting (1/35 scale or 54mm)
    • Tutorial 7: Filling Large Mouse Bite Gouges
    • Tutorial 8: Frames for Vacuum Formed Clear Canopies
    • Tutorial 9: Prepared Tank Position Diorama
    • Tutorial 10: Installing Multi-Piece Track System
    • Tutorial 11: Masking and Painting “Bird-Cage” Clear Canopies
    • Tutorial 12 – Aircraft Wing Tip Navigation Lights with Colored Bulbs
    • Tutorial 13 – Installing Wood Laminate Deck for Model Warships
    • Tutorial 14 – Painting a Rusted Muffler and Exhaust Pipe System
    • Tutorial 15 – Painting German Red Oxide Finish for WW2 Tanks
    • Tutorial 16 – Creating a European cobblestone street base
    • Tutorial 17 – Constructing tracks using single track link system
    • Tutorial 18 – Building a small wooden bridge
    • Tutorial 19 – The Wash-and-Dry Figure Painting Method

Tutorial 19 – The Wash-and-Dry Figure Painting Method

Figure painting is always a challenge for all modelers. Previously, I had taught a method using oil paints that require deft brushwork at a minute level. The results are excellent but time-consuming. Also, it is hard on older people (like myself!). This wash-and-dry method is suitable for most popular scale sizes from 1/35 downwards to /144. I would not recommend this for larger scales as the eye will tell the wash effects are too coarse at that level.
The wash-and-dry method has another advantage and that is the use of acrylic paints predominantly, and the washes can either be acrylic or oil base depending on your preference, but neither are very different in their application.
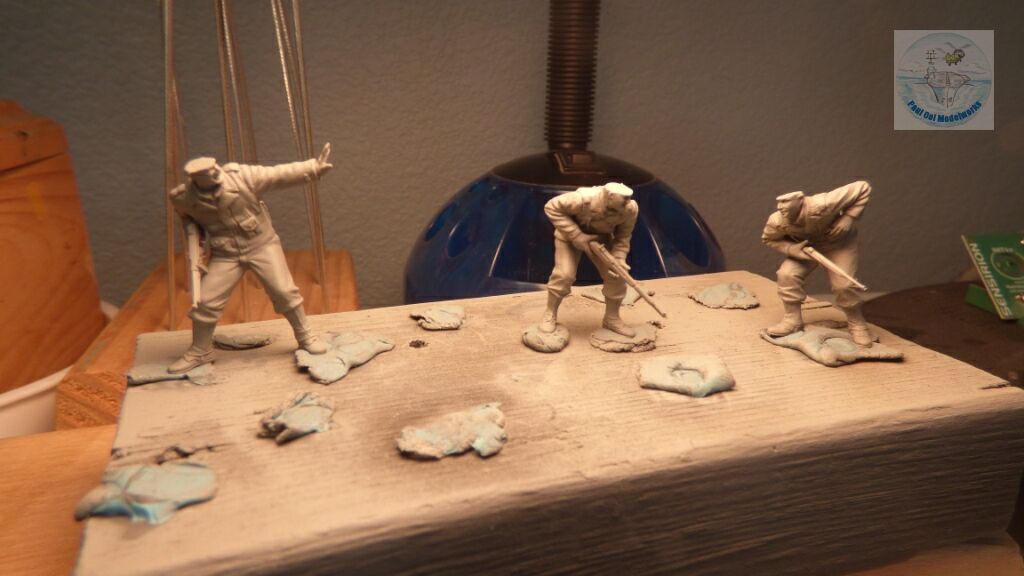
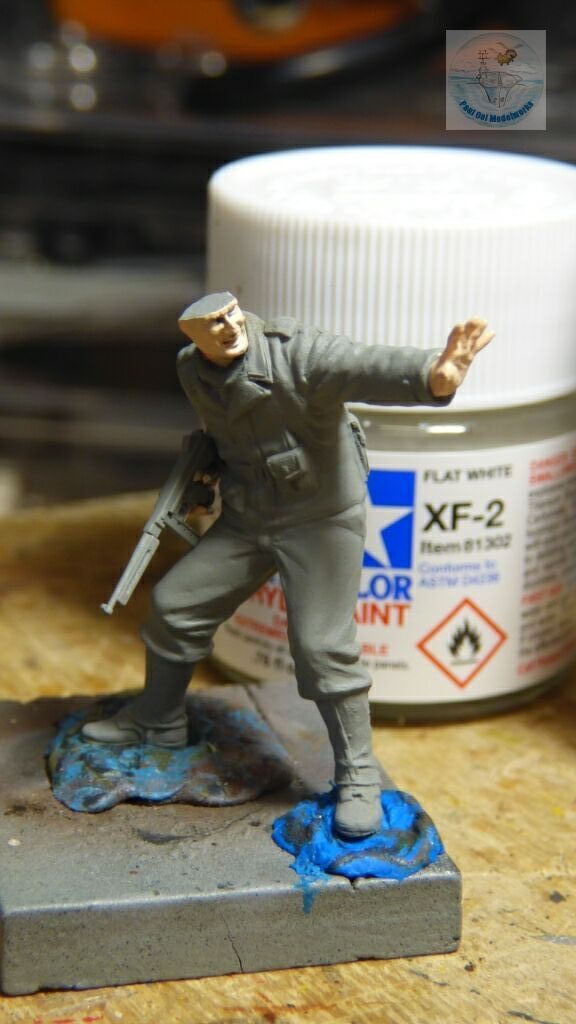
We start with priming the semi-assembled figures in grey primer. Here I used a spray can primer from Armory but any other model spray primer would do.
We start by painting the face and hands with a basic flesh tone. Here, I am using Vallejo acrylic skin tone 70.815. I did use a small amount of Tamiya XF-2 Flat White for the whites of the eyes.
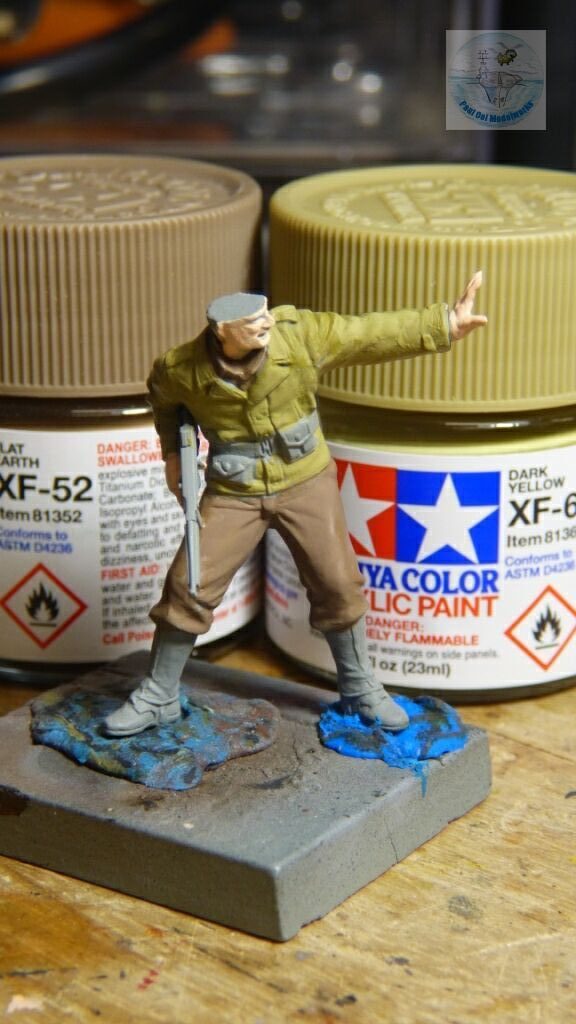
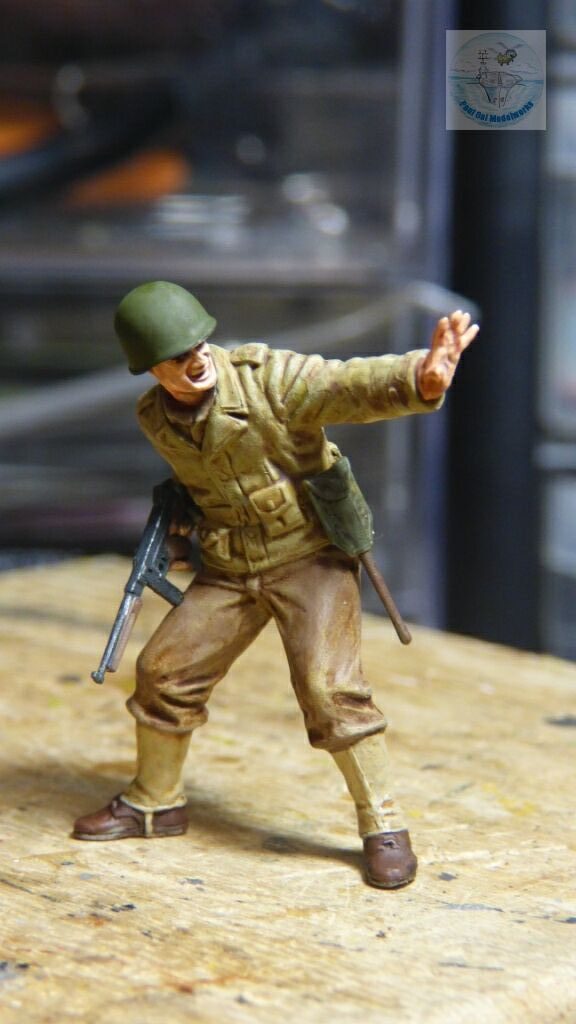
Next, we paint the main clothing articles, the battle dress tunic in Tamiya Dark Yellow XF-60, and then the pants in Tamiya Flat Earth XF-52. Do not worry about shading and highlights. Just concentrate on a neat and even coverage.
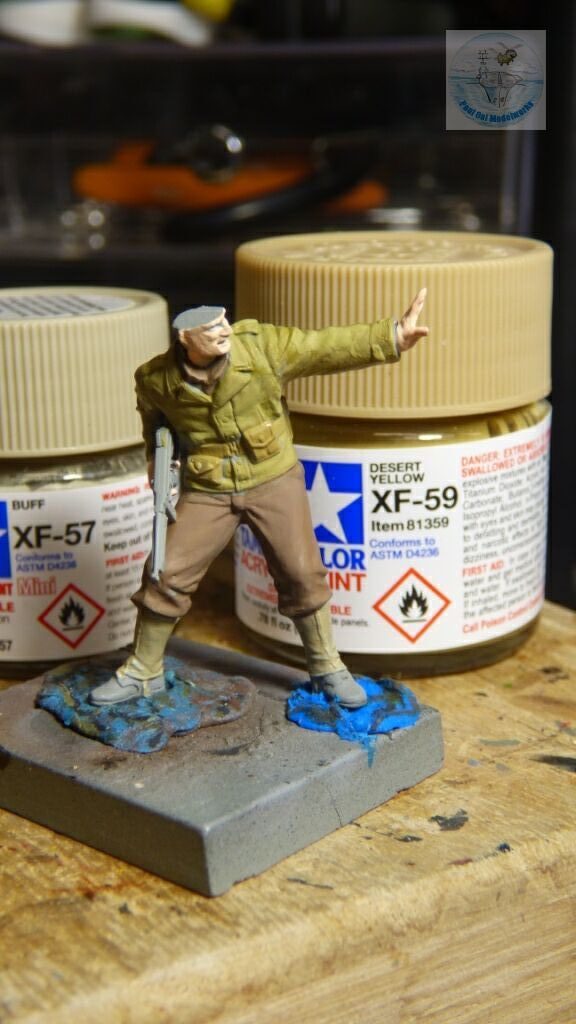
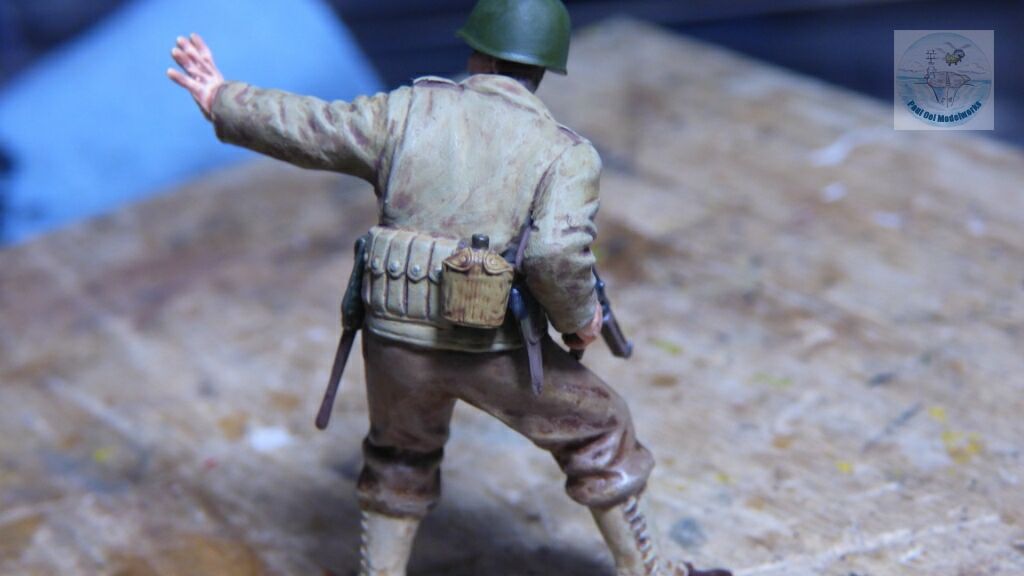
Items that go OVER the basic clothes are painted next. Here, the belt and ammo pouches are painted with Tamiya Desert Yellow XF-59, and the gaiters in Tamiya Buff XF-57.
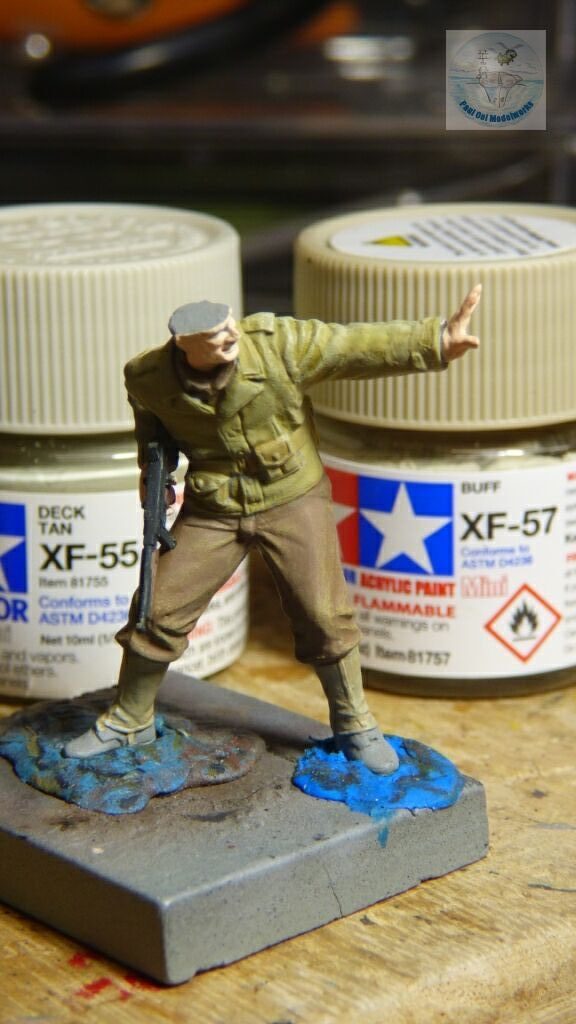
Drybrush highlights over the ridges of clothing. Go one or two tones lighter than the basic clothing color. For the upper tunic, I use Tamiya Deck Tan, and the pants are highlighted with Tamiya Buff XF-57. Use an old fine brush that is past its prime, dip in the paint, and then remove 75-80% of it by rubbing the bristles against a towel or paper tissue. Then apply small amounts of paint on high ridges and raised details, moving the brush perpendicular to the direction of the raised feature.
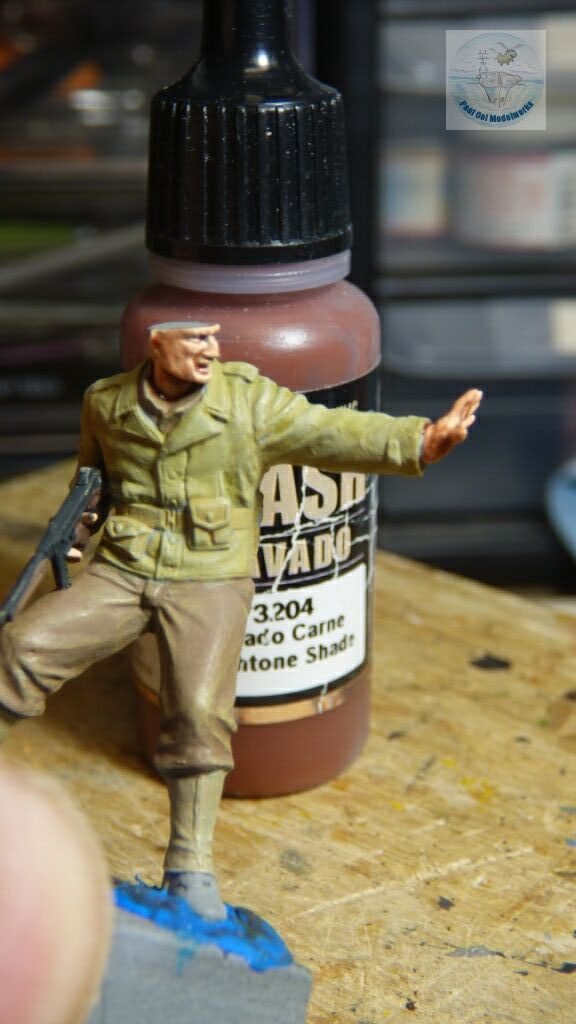
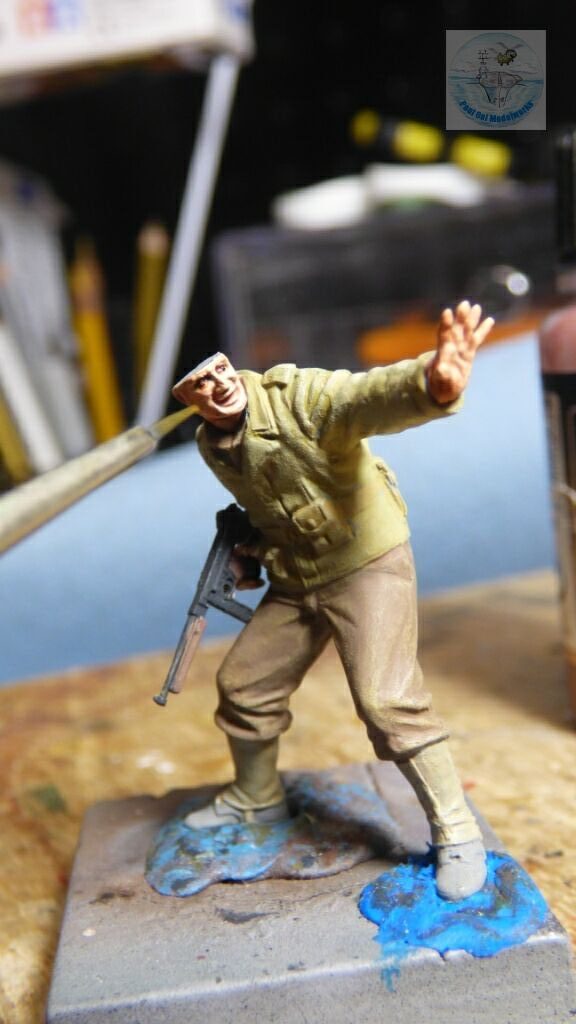
A reddish flesh wash is then applied to the face and hands. This will provide a life-like tone when combined with the skintone paint. Here, I used Vallejo Flesh Wash 73.204.
This step is optional. I painted in the pupils of the eyes and eye brows using Tamiya Red Brown XF-64.
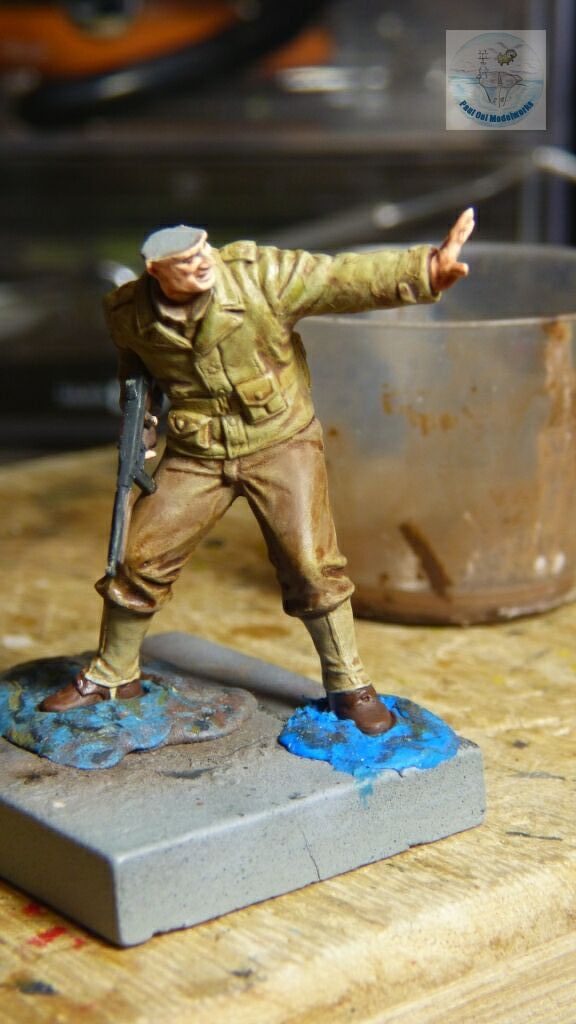
Next, we apply the rest of the wash effect. Washes can be made from acrylic paint diluted 3:1 with the appropriate brand’s thinner. Alternatively, one can use an oil wash. here I use the latter with Burnt Umber diluted with Turpenoid. The advantage of using an oil wash is that does not interact with the base acrylic paint. For the lighter colored battle tunic, I lightened the Burnt Umber wash with Zinc White. At this stage, the hightlight and the shadows emerge from the paintwork.
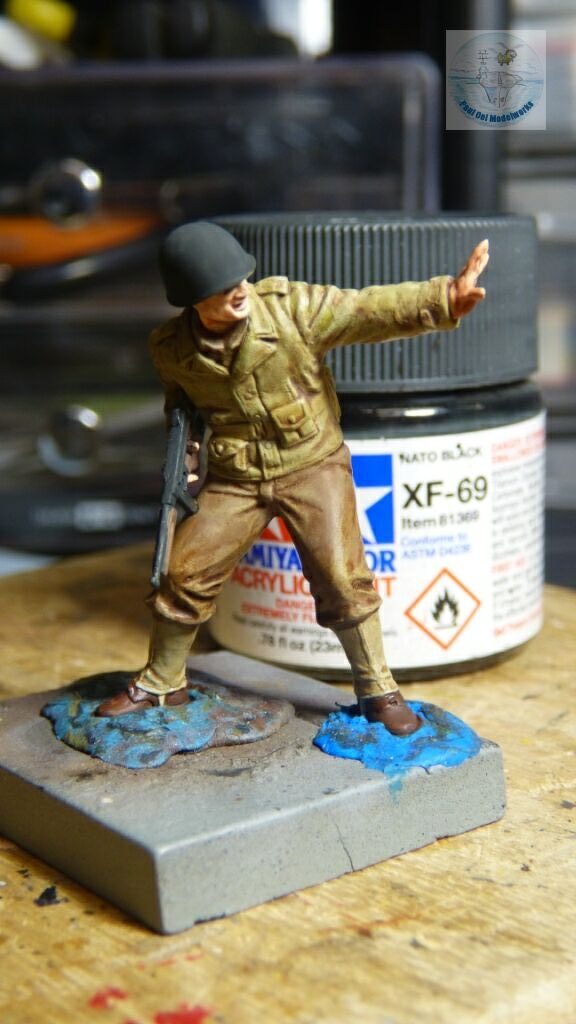
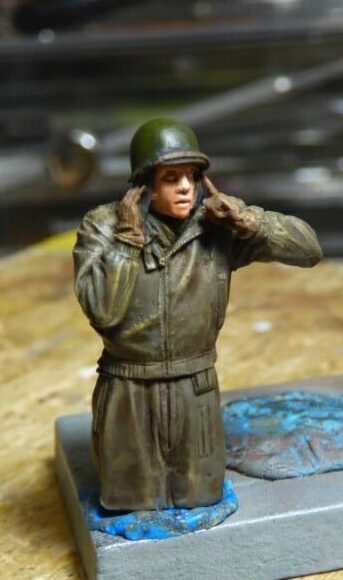
The helmet is added at this point. I primed the helmet with Tamiya NATO Black XF-69.
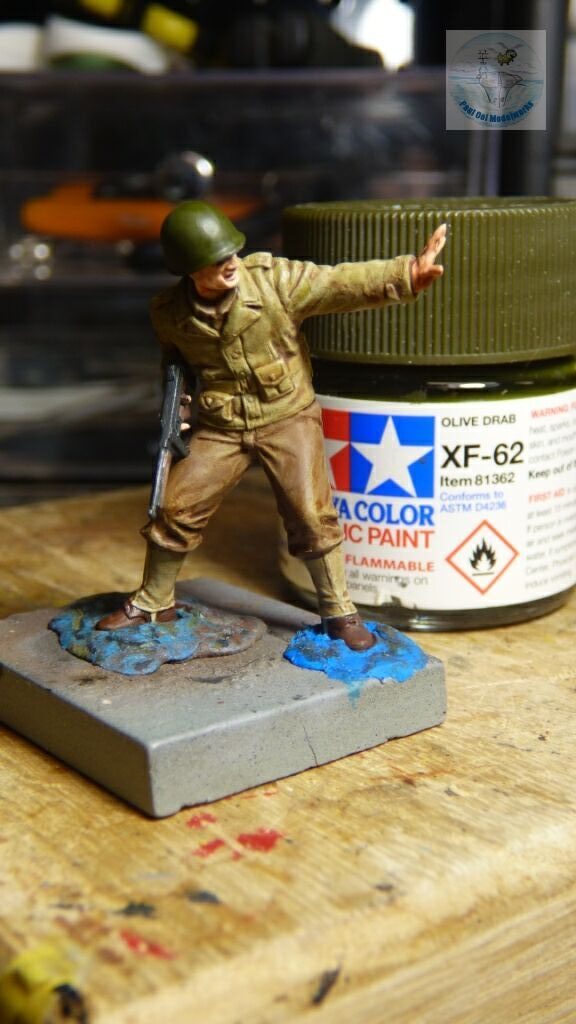
Then the helmet is painted with Tamiya Olive Drab XF-62.
Final details are added now. The water bottle, holstered pistol, and the entrenchment tool, all washed with Burnt Umber oil wash are attached to the figure.

Primary Sidebar

Hey! It is nice to meet you!

Paul Ooi Modelworks welcomes casual visitors browsing, and enjoying the pictures as well as more serious fellow modelers looking for tips and references on the art of making miniatures and relishing in the challenge. I will be more than happy to answer any questions you may have about the models.

Please feel free to leave a comment or a question.

  • Email
  • Instagram

NEVER MISS A POST

Member of International List of Scale Model Related Web Sites

International List of Scale Model Related Web Sites

Paul Ooi Modelworks

NEVER MISS A POST

Sign up for notification on new posts.

Footer

  • Email
  • Instagram

Categories

  • Privacy Policy
  • Disclaimer
  • Copyright

© 2011–2026 · Paul Ooi Modelworks · All Rights Reserved