• Skip to primary navigation
  • Skip to main content
  • Skip to primary sidebar
  • Skip to footer
  • Home
  • Blog
  • About
  • The Fine Print
    • Disclaimer
    • Copyright
  • Privacy Policy
  • Contact
  • Paul Ooi Modelworks
  • Nav Social Menu

    • Email
    • Instagram
Paul Ooi Modelworks

Paul Ooi Modelworks

Building a better world, one scale model at a time

  • Index
    • Aircraft
      • WW1 Aircraft
      • Inter-War Aircraft
      • WW2 Allied Aircraft
      • WW2 Axis Aircraft
      • Modern Aircraft
    • Armored Fighting Vehicles
      • Artillery
      • WW1 AFVs
      • WW2 AFVs
      • Tractors and Buldozers
      • Cold War AFVs
    • Ships
      • WW1 Ships
      • Inter-War Ships
      • WW2 Allied Ships
      • WW2 Axis Ships
      • Modern Ships
    • NordicCon Show
    • Figures
    • Buildings
    • Sci-Fi
    • Miscellaneous
  • Tutorials
    • Tutorial 1: Making a Wooden Platform Helipad
    • Tutorial 2: Wooden Hard Stand for Aircraft
    • Tutorial 3: Filling Large Plastic Seams
    • Tutorial 4: Diorama, Sicily 1943
    • Tutorial 5: Making a Gun Emplacement with Earthworks
    • Tutorial 6: Basic figure painting (1/35 scale or 54mm)
    • Tutorial 7: Filling Large Mouse Bite Gouges
    • Tutorial 8: Frames for Vacuum Formed Clear Canopies
    • Tutorial 9: Prepared Tank Position Diorama
    • Tutorial 10: Installing Multi-Piece Track System
    • Tutorial 11: Masking and Painting “Bird-Cage” Clear Canopies
    • Tutorial 12 – Aircraft Wing Tip Navigation Lights with Colored Bulbs
    • Tutorial 13 – Installing Wood Laminate Deck for Model Warships
    • Tutorial 14 – Painting a Rusted Muffler and Exhaust Pipe System
    • Tutorial 15 – Painting German Red Oxide Finish for WW2 Tanks
    • Tutorial 16 – Creating a European cobblestone street base

Tutorial 16 – Creating a European cobblestone street base

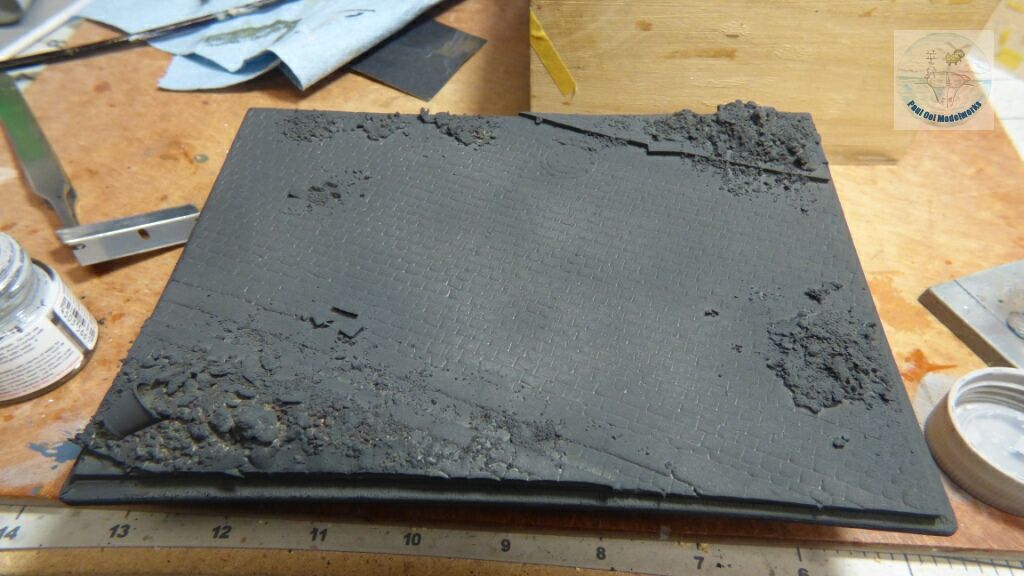
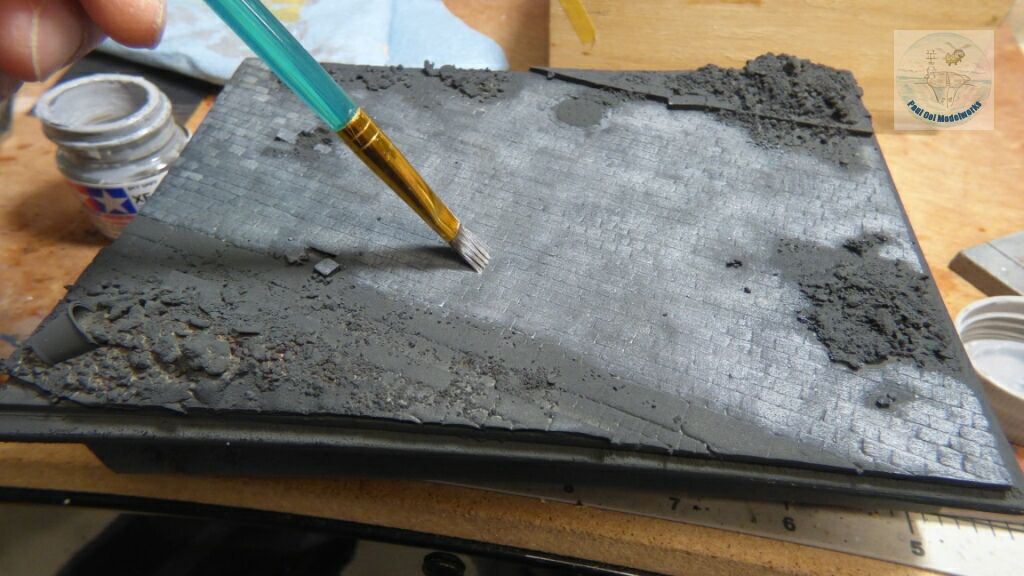
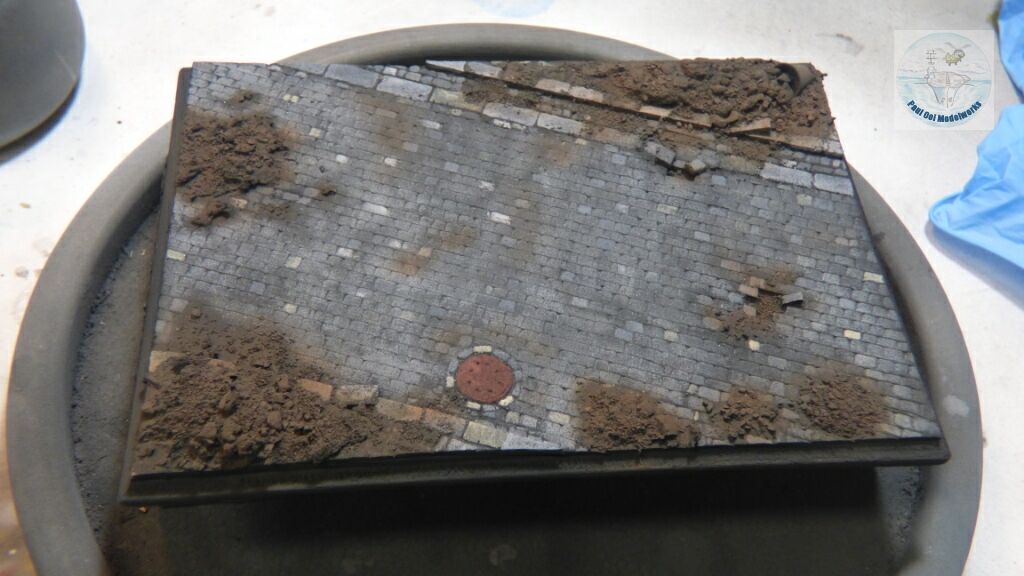
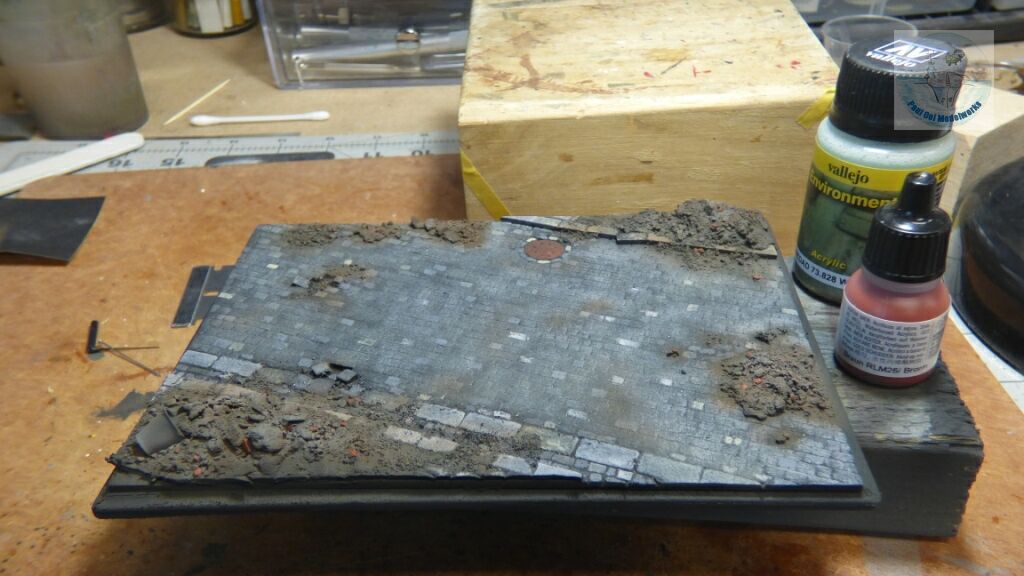
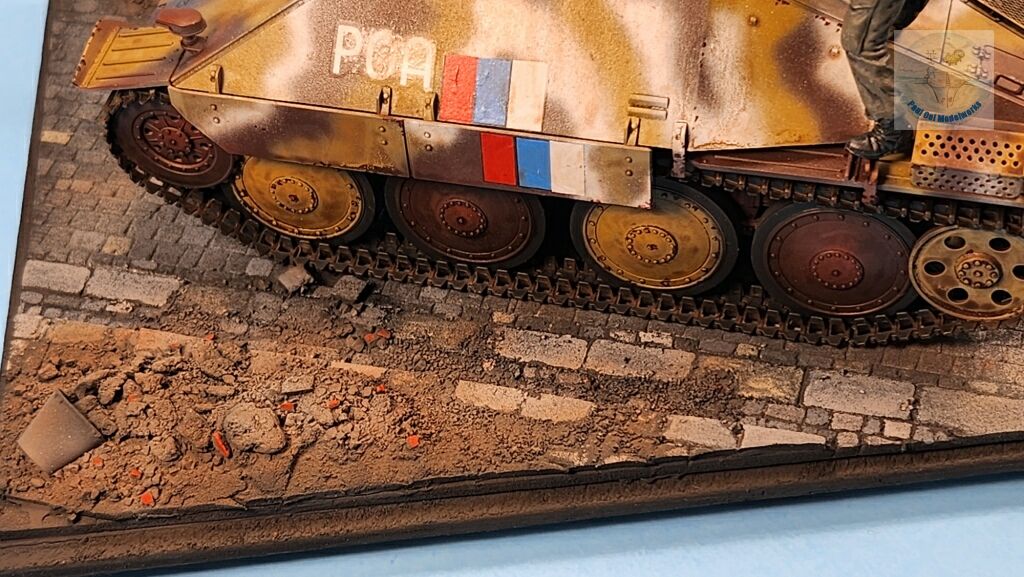
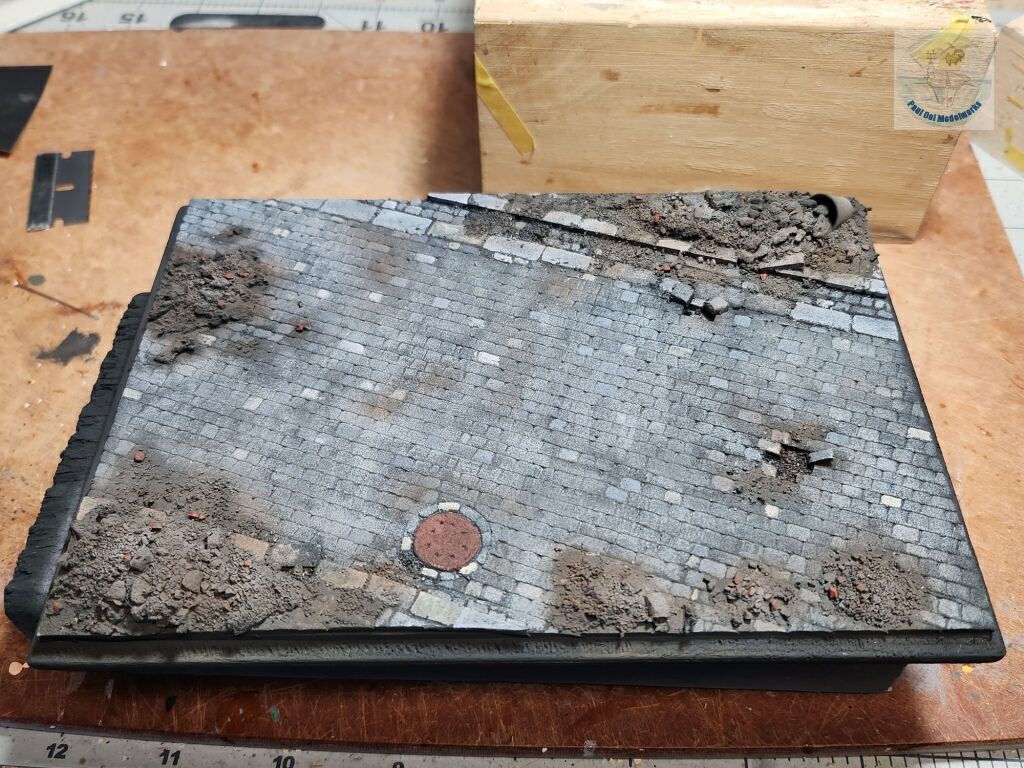
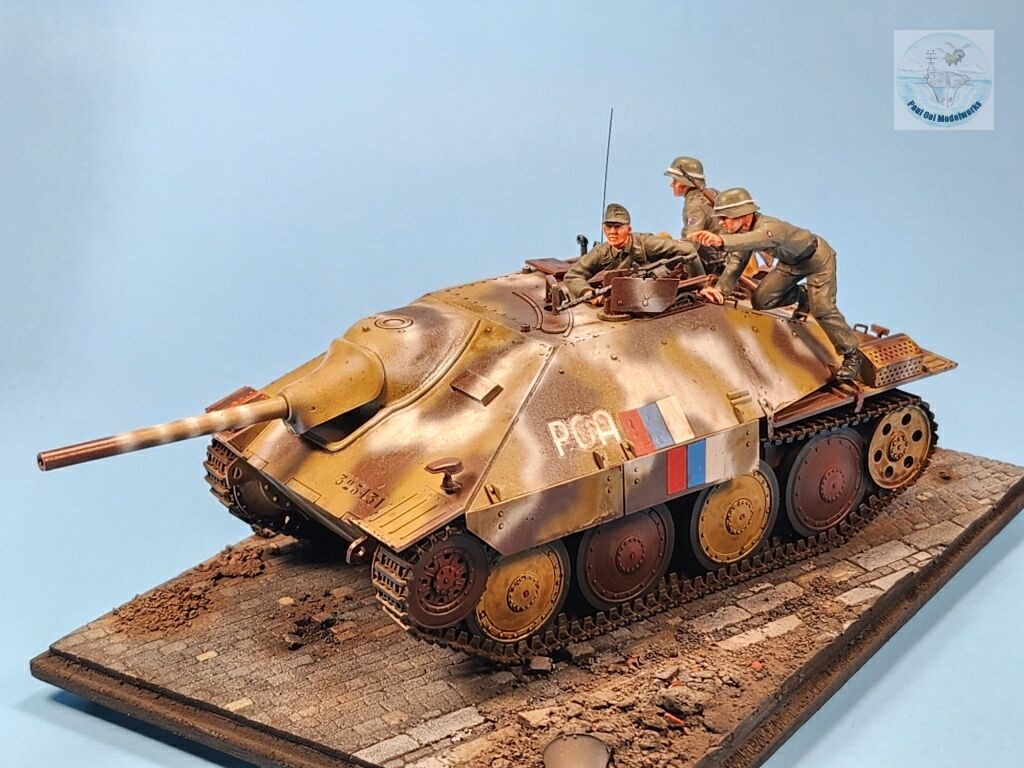
The urban environment is always a challenge to any scale modeler, but one that can really be a lot of fun doing as well. The modern tarred roads are somewhat more universal and  easier to recreate, but less convincing if one goes back to pre-1960s Europe. In the WW2 and earlier periods, the European cobble streets were everywhere in old city centers and could be found whether one was making a village scene in Normandy, or showing an advance through Prague or Warsaw. Making a such a vignette may seem daunting but with some methodology, and patience with the paintwork, the results can be stunning. Let’s get started!

Step 1: set up the layout of your street orientation. Positioning your AFV will help get the best viewer angle, spaces that need to be kept uncluttered for the tracks, and the blank corners to be filled with points of interest.
Step 2: Trace the rough boundaries of your street, or intersection using a pencil onto the base (here it is a piece of plywood). This will help in building the pavement and curb.
Step 3: Using 2mm (1/16″) EVA Foam Sheet, I cut to fit the area of the basic road surface. Use a neutral color like white or light grey so that it would be easier to paint on. The sheet is glued onto plywood base using all-purpose super strength white glue. Notice that the previous pencil guidelines have been re-traced onto this foam layer.
Step 4: Curb and sidewalk pavement EVA foam pieces are traced and cut, then glued onto the base street layer to form the street. The previous pencil traces help to position these sidewalk pieces.
Step 5: Now the exciting bits begin. With the help of a ruler, trace out curb stones, then use them to trace out the square grid for the sidewalk. Depending on the type of paver stone pattern you want, this process can be as simple as using a graft paper to establish the grid or having to trace difficult patterns like herringbone, etc. Then, using a sharp Exacto knife and a steel ruler, start making cuts along the trace lines to form individual stones. You can even cut out foam shapes, and then displace them, like I have done to several curb stones. Notice in the foreground I have carved a manhole with circular brick edging as well.
Step 6: For the main street surface, I use a bricklayer’s staggered pattern of parallel courses. This done by carefully cutting parallel lines spaced 1/8″ apart. Then I come back and start to cut short perpendicular lines to make the form of each rectangular brick/paver, working my way up and down the street. In the process, I can create small potholes by digging out foam rectangles. I also use the sharp wedged ends of a toothpick to widen some gaps between stones.
Closeup of the cutting process and the texture of the foam “stones”. EVA foam is easy to work with, and has a fine grain that does not string or crumble when cut closely. Work one small area at a time. Pencil marks to help alignment is OK as you will be painting over this surface later.
Step 7: Time to sculpt the debris on the road. I start with lightweight wall plaster/spackle. I place these in believable piles as the base to hold the aggregate and ballast of different grades (railroad model sections are good places to get them). I am not worried about the color of the ballast imbedded on the wet plaster as we will be painting over them. We are trying to create the texture and features. Colors will come later. Once the sand and aggregate are in place, I use an eye dropper to spread diluted white craft glue to hold them down. Leave to dry. Any other object that needs to be strewn into the debris pile should be added now, like the bucket that I added to the street corner at the top right.
Step 8: Once the base and the features are firmly attached and cured, I prime the entire base in Tamiya NATO Black XF-69. Priming helps to bring out the features while preparing the surface for the other colors to come. Also a good time to spot any mistakes in the textures that need fixing like a missing row of stones or loose ballast stones.
For the large areas of street cobble stones, I apply a base layer of Tamiya Sky Grey in a dry-brushing technique . The effect does not need to be uniform. In fact we want the variation in shade as it is more realistic to uneven and worn stone streets. If you wish to have a more brownish or warmer pavement color, then use Tamiya Buff XF-57. Work in small areas, ensuring good coverage.
Step 9: Using a finer brush, apply highlights of different shade to individual stones. I used Tamiya Sky Grey , Medium Grey, and Buff to pick out the stones. We can get more variation from these few colors by diluting or strengthening them with thinner. Then I use a fine airbrush setting to apply small patches of Red Brown to the debris piles, being careful not to overdo it. A little goes a long way to provide some contrast without overwhelming the entire street. The manhole cover was painted in Vallejo Primer Red.
Step 10: I use an airbrush to apply some highlight to the debris with Buff, but just enough to create a contrast with the Red Brown pile. Then using a fine brush, I paint out some bricks among the debris pile using Vallejo Brown RLM26. Again, just a few are enough to create the visual interest for the eye of the viewer.
Add wet effect of water running along streets into the sewer or manhole. I use Vallejo Wet Effect to create some interest for the eye.
Once we mount the AFV, the cobblestones create interest but do not overwhelm the AFV itself.


Primary Sidebar

Hey! It is nice to meet you!

Paul Ooi Modelworks welcomes casual visitors browsing, and enjoying the pictures as well as more serious fellow modelers looking for tips and references on the art of making miniatures and relishing in the challenge. I will be more than happy to answer any questions you may have about the models.

Please feel free to leave a comment or a question.

  • Email
  • Instagram

NEVER MISS A POST

Member of International List of Scale Model Related Web Sites

International List of Scale Model Related Web Sites

Paul Ooi Modelworks

NEVER MISS A POST

Sign up for notification on new posts.

Footer

  • Email
  • Instagram

Categories

  • Privacy Policy
  • Disclaimer
  • Copyright

© 2011–2026 · Paul Ooi Modelworks · All Rights Reserved