The SEPECAT (Société Européenne de Production de l’avion Ecole de Combat et d’Appui Tactique) Jaguar A fighter-bomber was the result of a joint development in the 1960s between the UK and France, combining the resources of BAC and Breguet. The aircraft was designed to be a low-flying strike aircraft with reasonably good range to deliver anything from dumb bombs to nuclear warheads. Although the fighter was designed for the perceived battlefronts in Cold War Europe, it ended up being used by France and Britain (and later, India) for many of the bushfire interventions. The French were active in their use of the Jaguars in North and Sub-Sahara Africa for interdiction missions. This was known as Jaguar Diplomacy or la diplomatie du Jaguar. The Jaguar’s last major international deployment was the 1991 Gulf War where units from France and the UK were heavily involved in ground strikes against the Iraqi Republican Guard positions in Kuwait in the weeks leading up to the actual push.
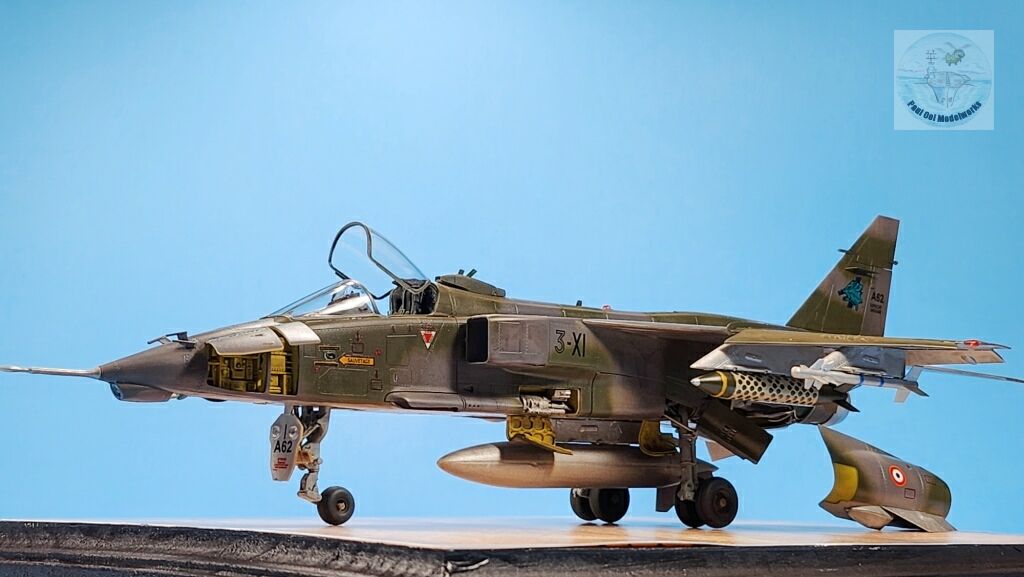
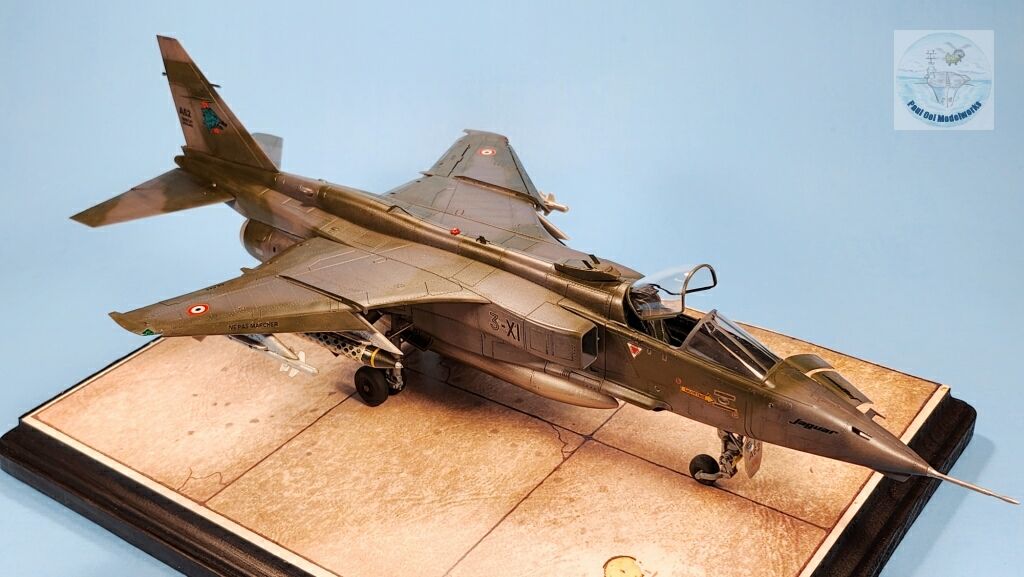
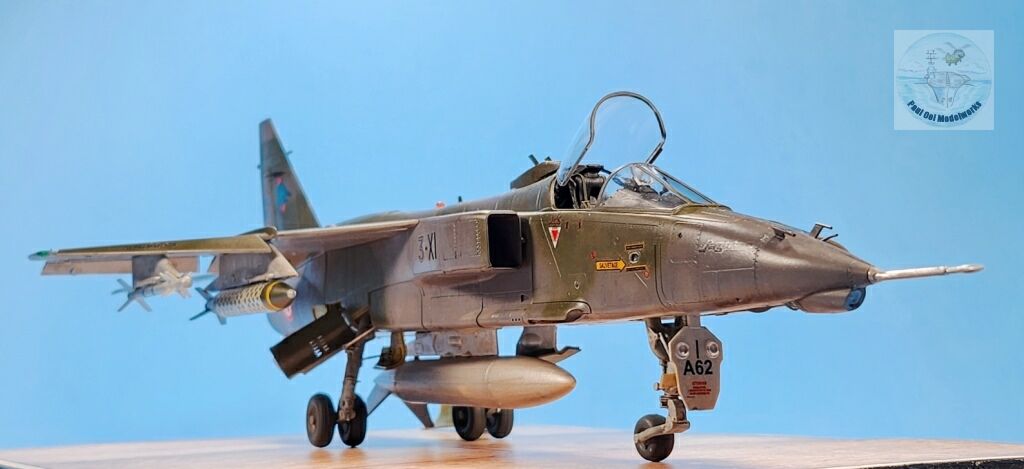
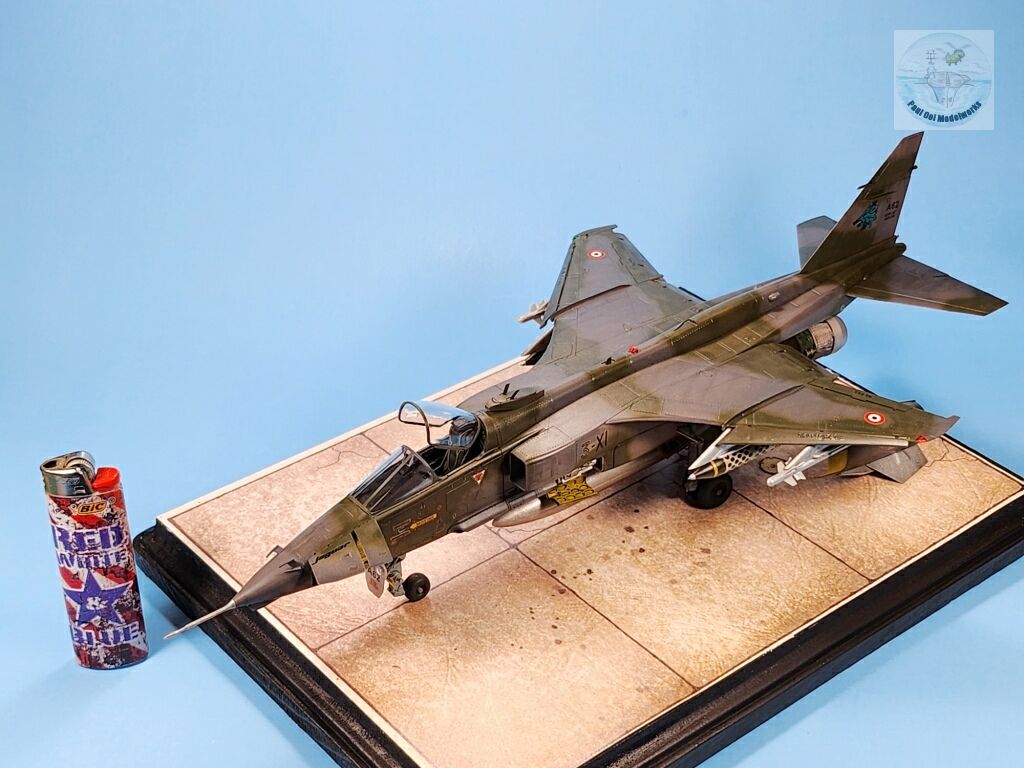
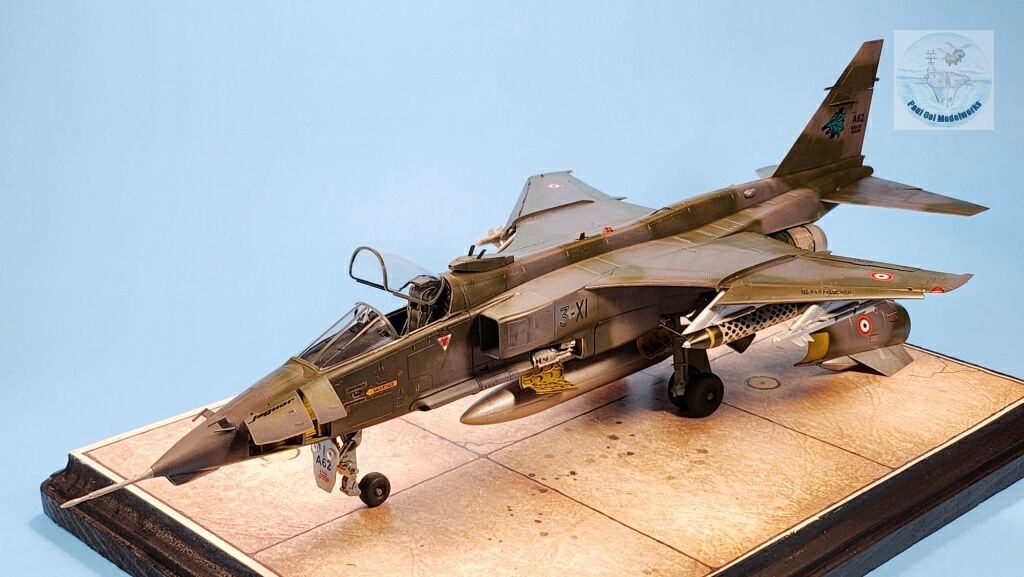
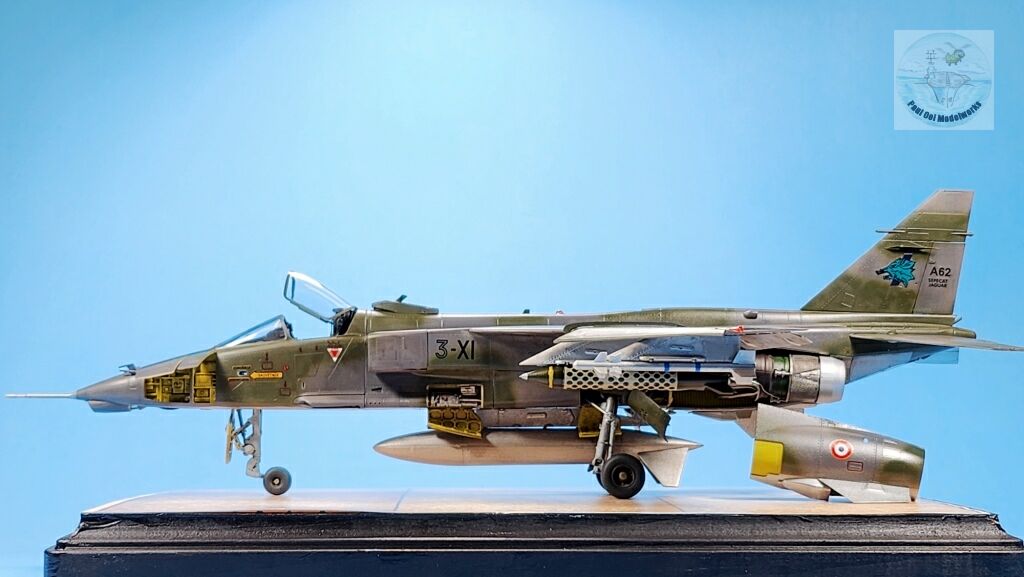
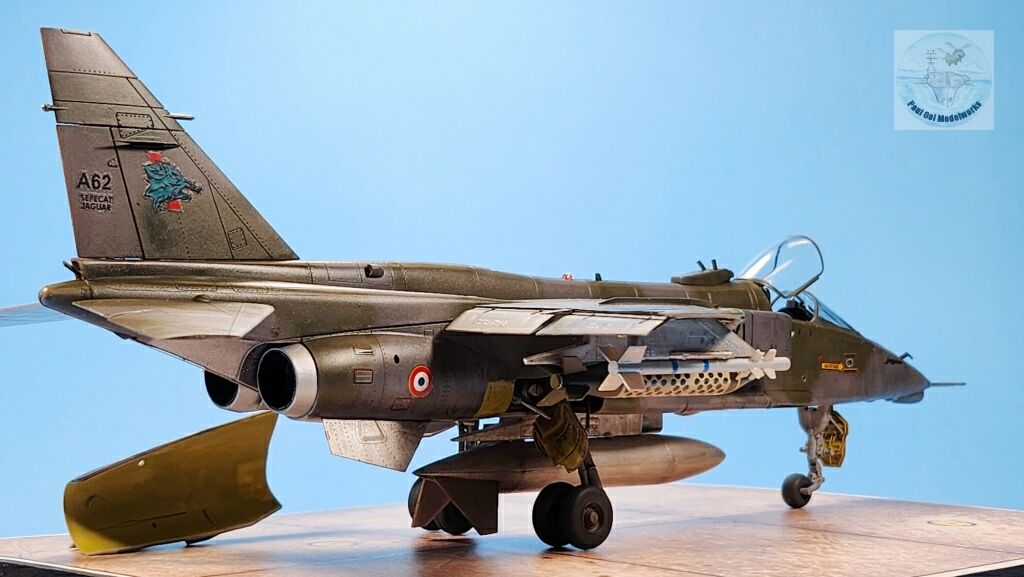
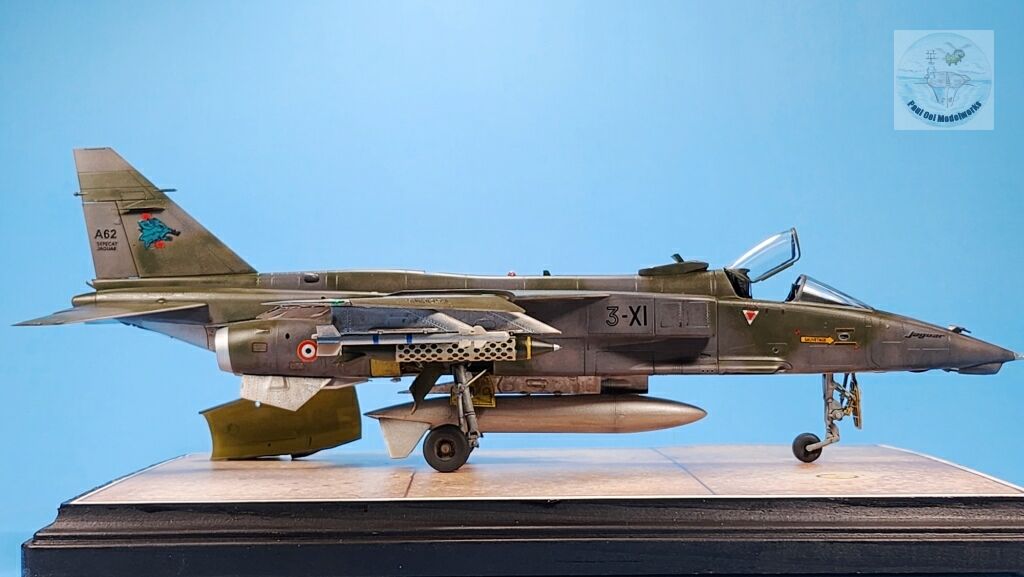
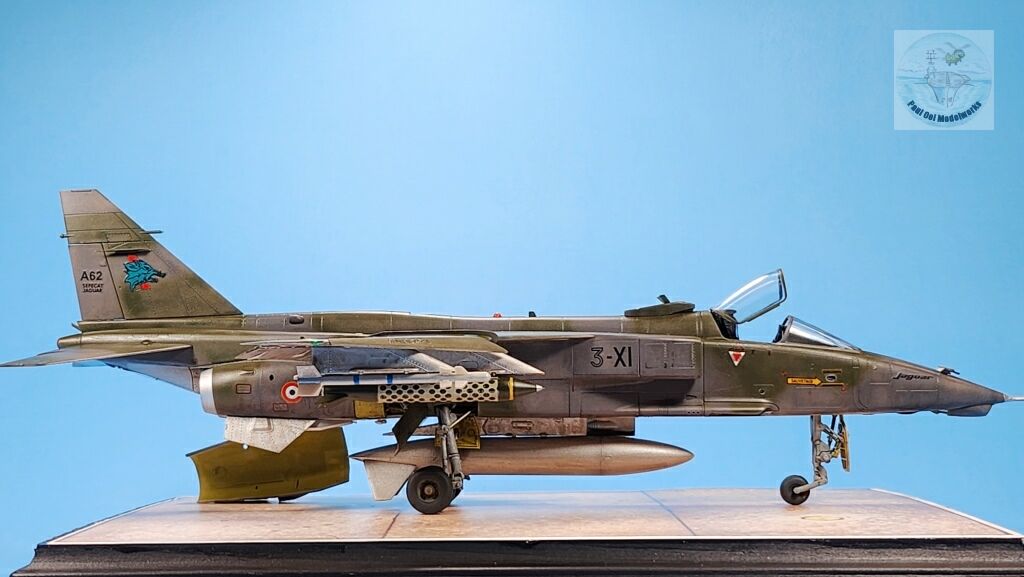
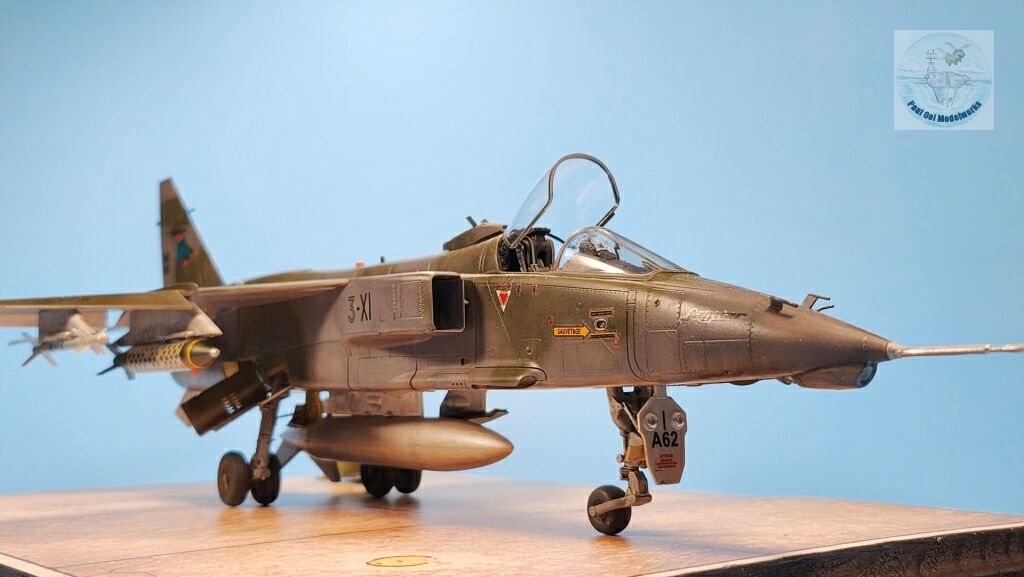
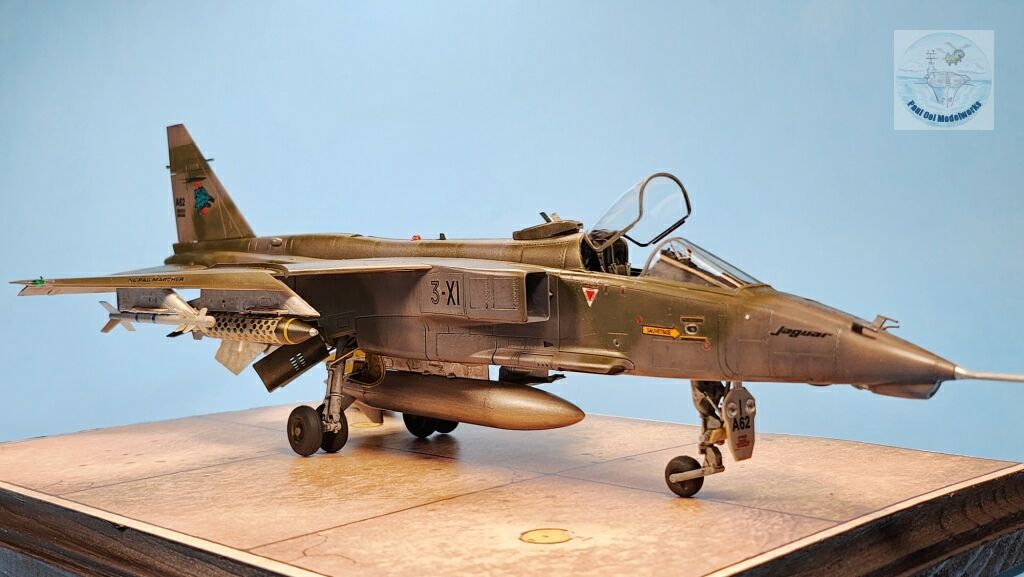
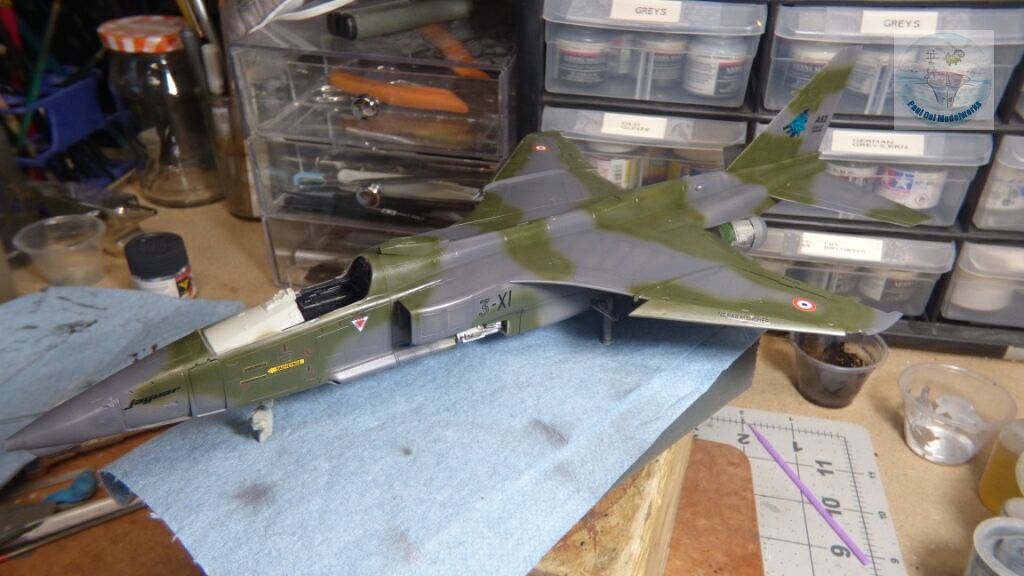
The markings and color scheme that I chose here was a specimen from the French Air Force (Armée de l’air et de l’espace) from the late 1970s. It bore the unit markings of Escadron de Chasse 3/3 Ardennes stationed at Nancy-Ochey Air Base in Northeastern France, with its distinct Boar’s Head with Bar. The aircraft had the typical European theatre camouflage of Dark Sea Grey with Dark Green. This aircraft and its pilot were lost in a crash on 20th June 1979 during a low level flight.
Gallery

Construction Notes
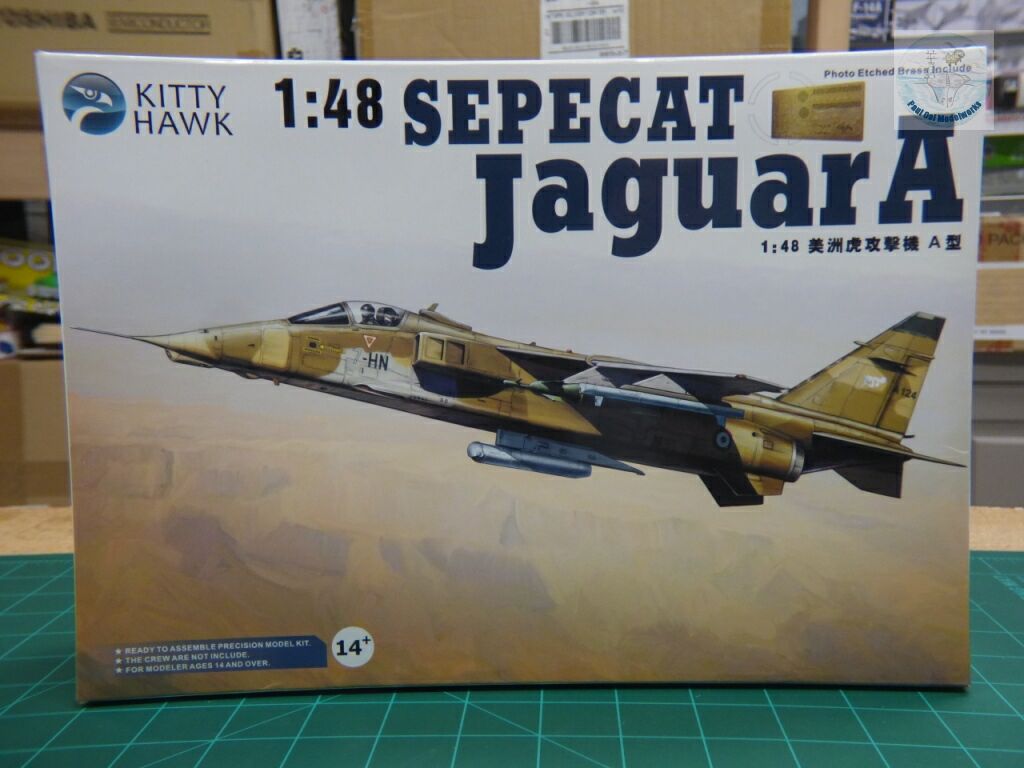
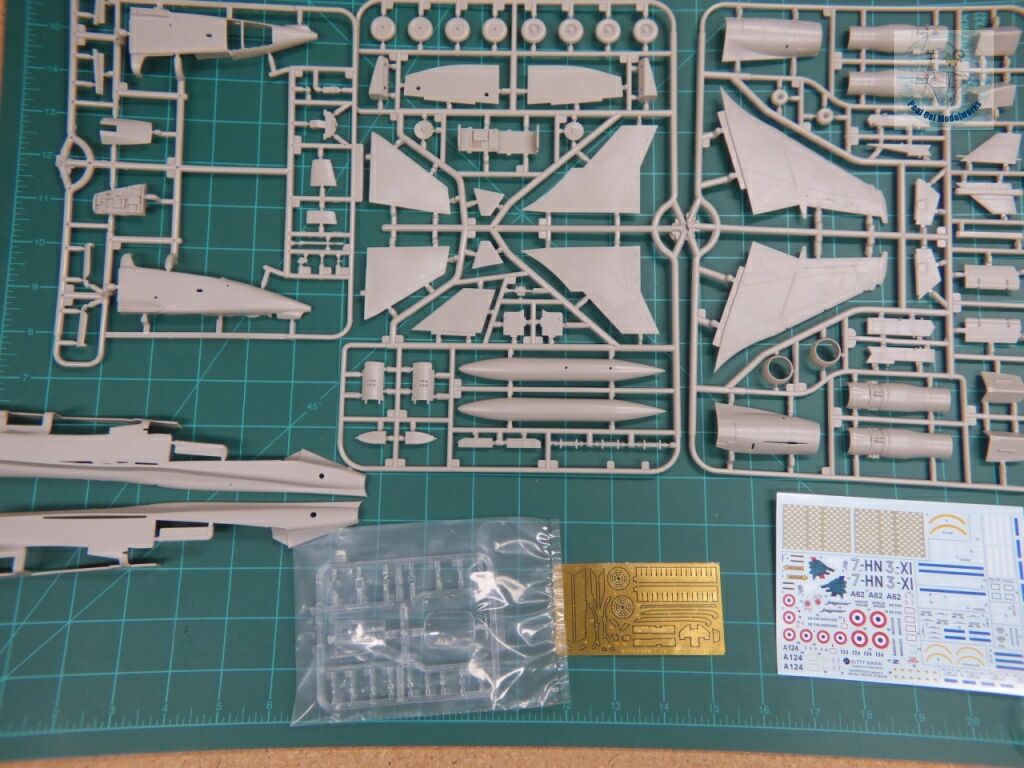
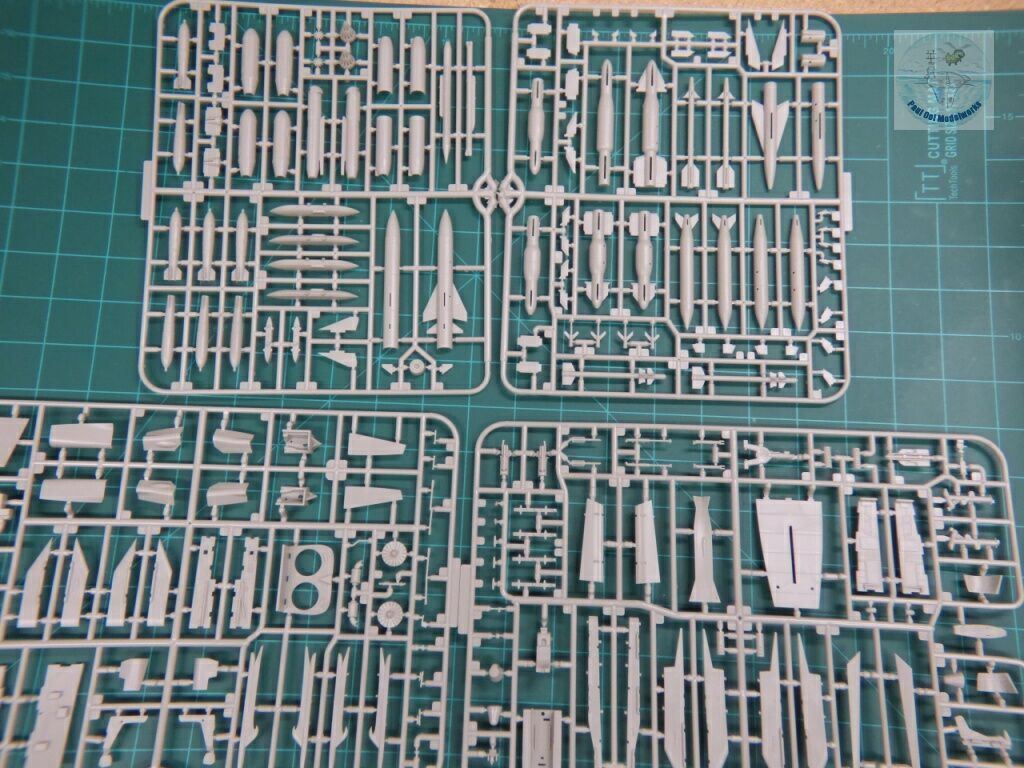
This 1/48 scale kit of the Jaguar A came from 2013 when it was newly launched by the now-defunct Kitty Hawk model company. It was an impressive kit with lots of parts, a phot-etched fret, and a nice decal sheet. The individual parts appeared to be crisp and with good details of the panel lines and rivet holes. But looks are deceiving, as this kit turned out to be a difficult build with some undershot parts (incompletely molded), very poor fit on the underside panels, hopelessly misleading instructions on part references, locations and guesswork on the decals. The worst were the support struts for the main wheels where the kit parts were too short to connect the hole at the well wall to the node on the main landing gear. I do not recommend this kit except for the most experienced builders as there are many pitfalls along the way, but if you can get past the challenges, the final product itself is surprisingly good-looking.
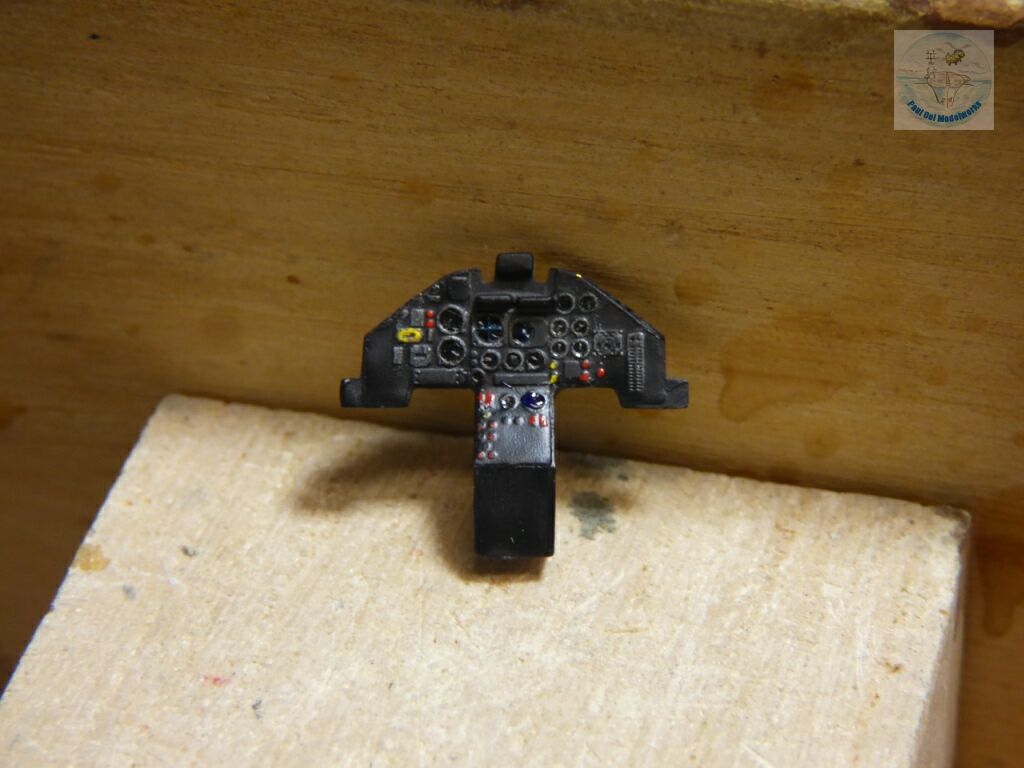
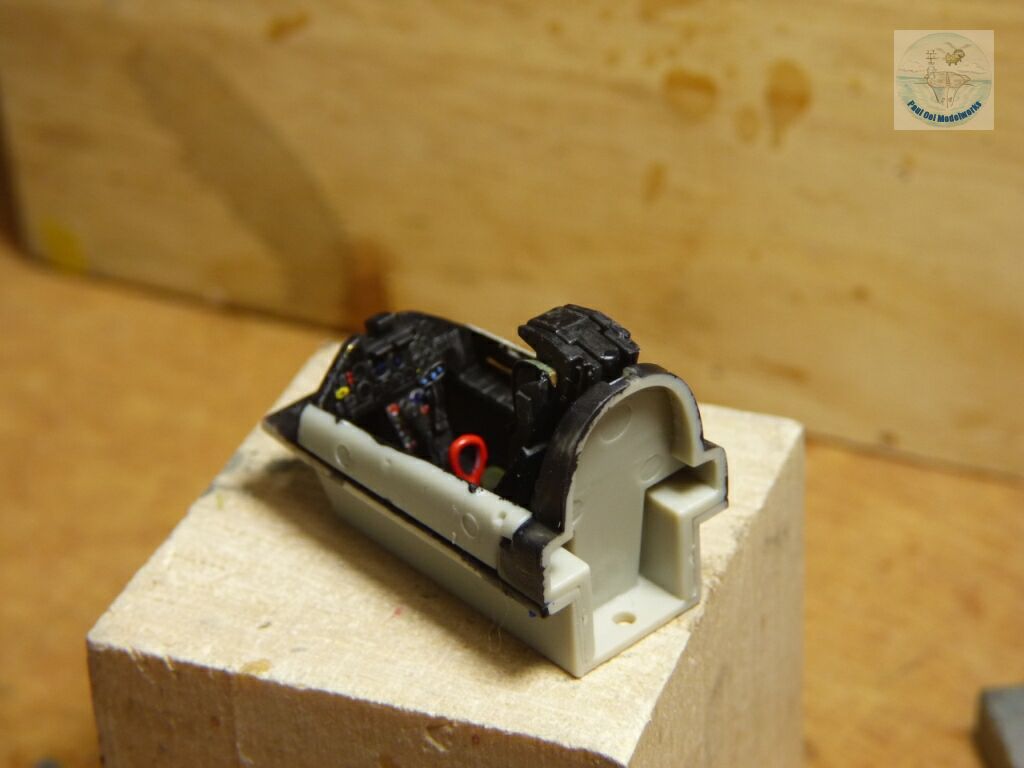
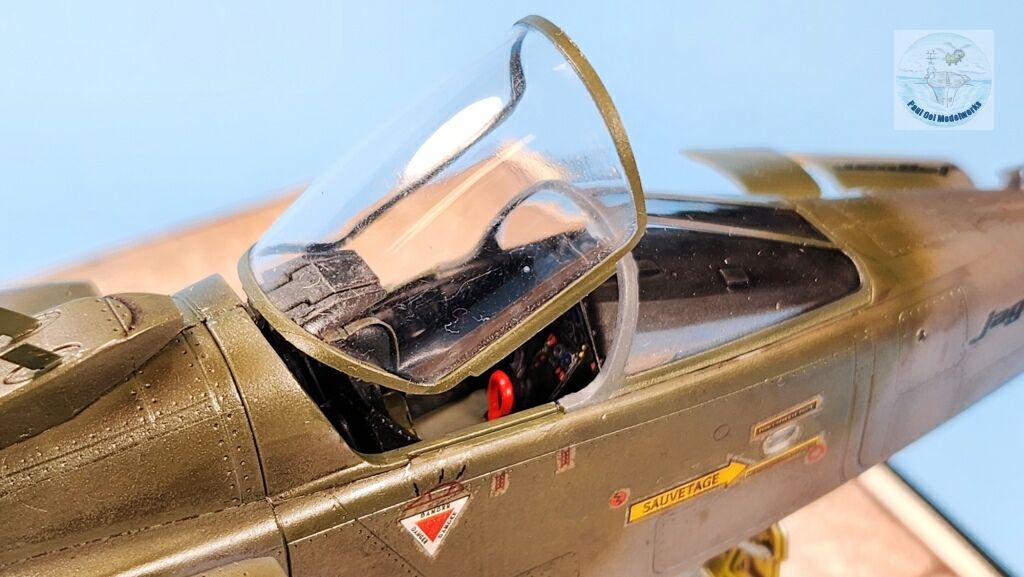
The photoetched instrument panel did not come with a corresponding decal, so it has to be done the old-fashioned way of being hand-painted. The base color is Interior Black, prisma pencil silver highlights, yellow and red highlights.
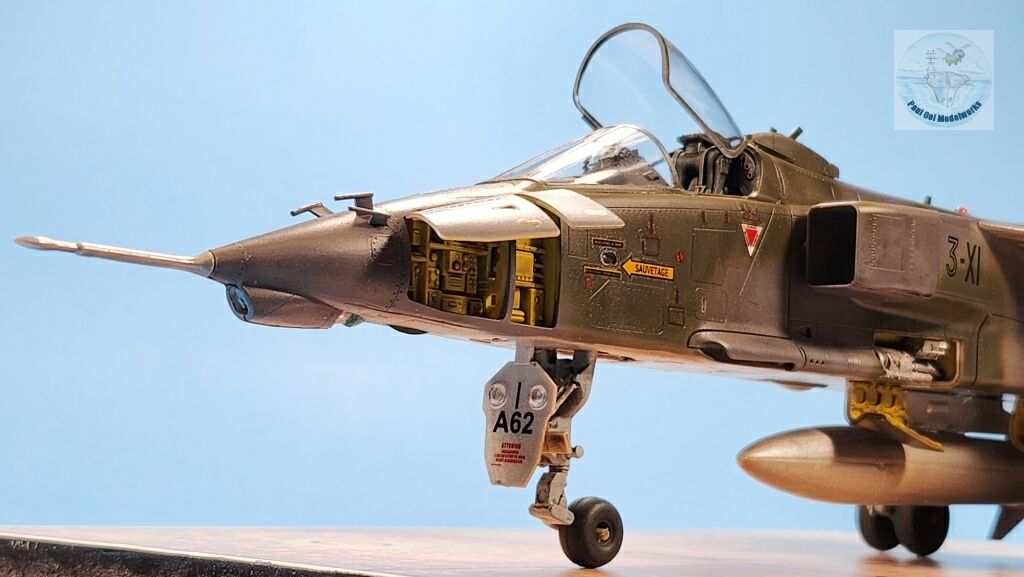
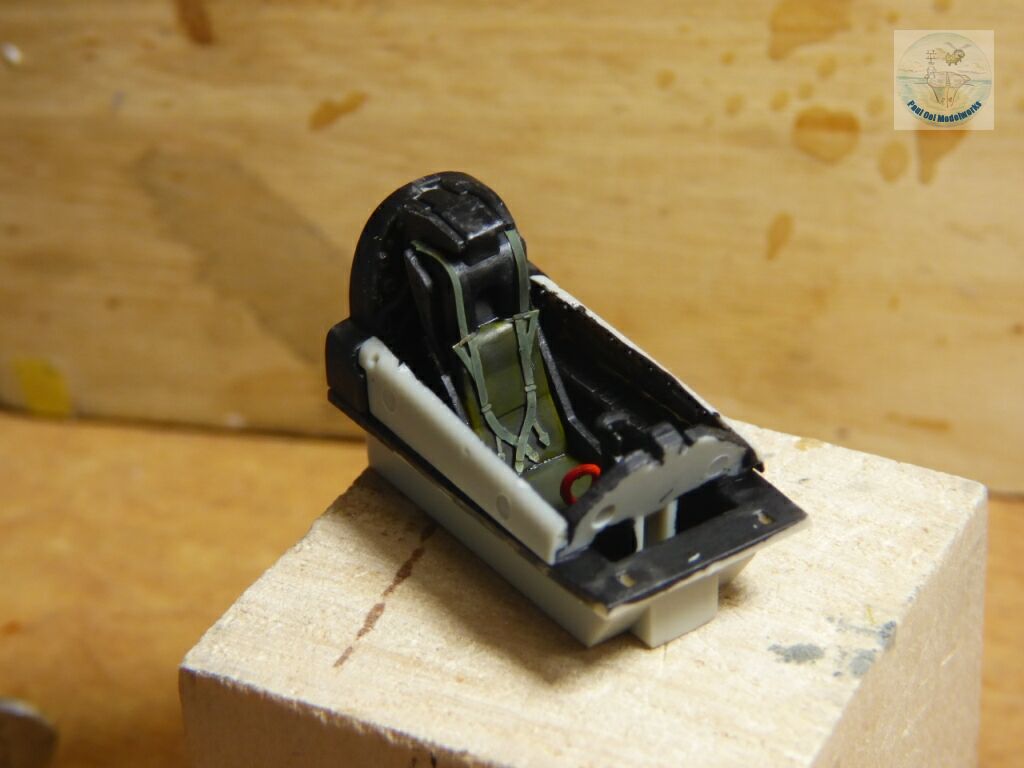
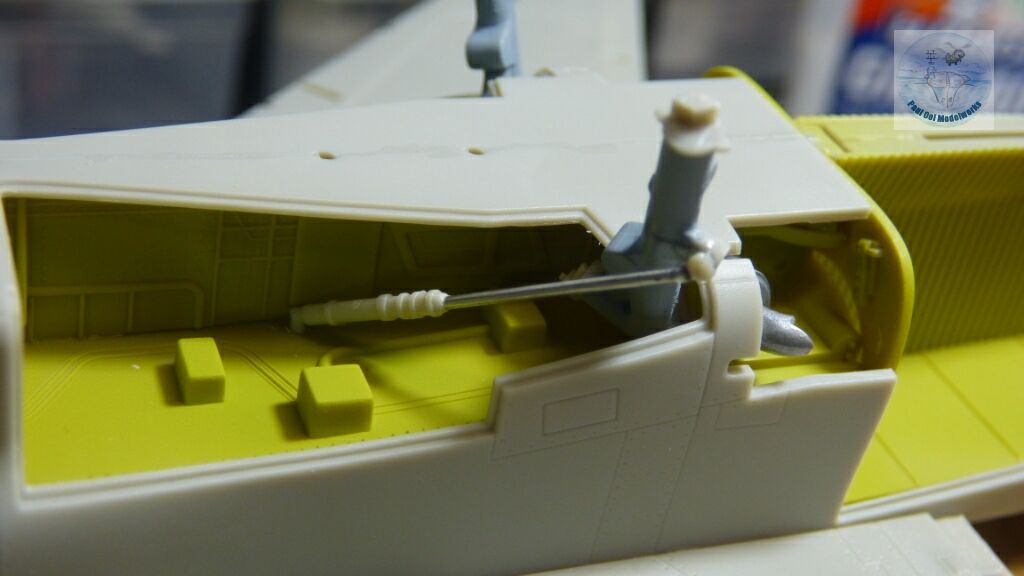
The cockpit tub attaches to the front wheel well (take notice, always tricky) and future access (or lack of) is such that the front wheel strut has to be in place before we close off the front fuselage.
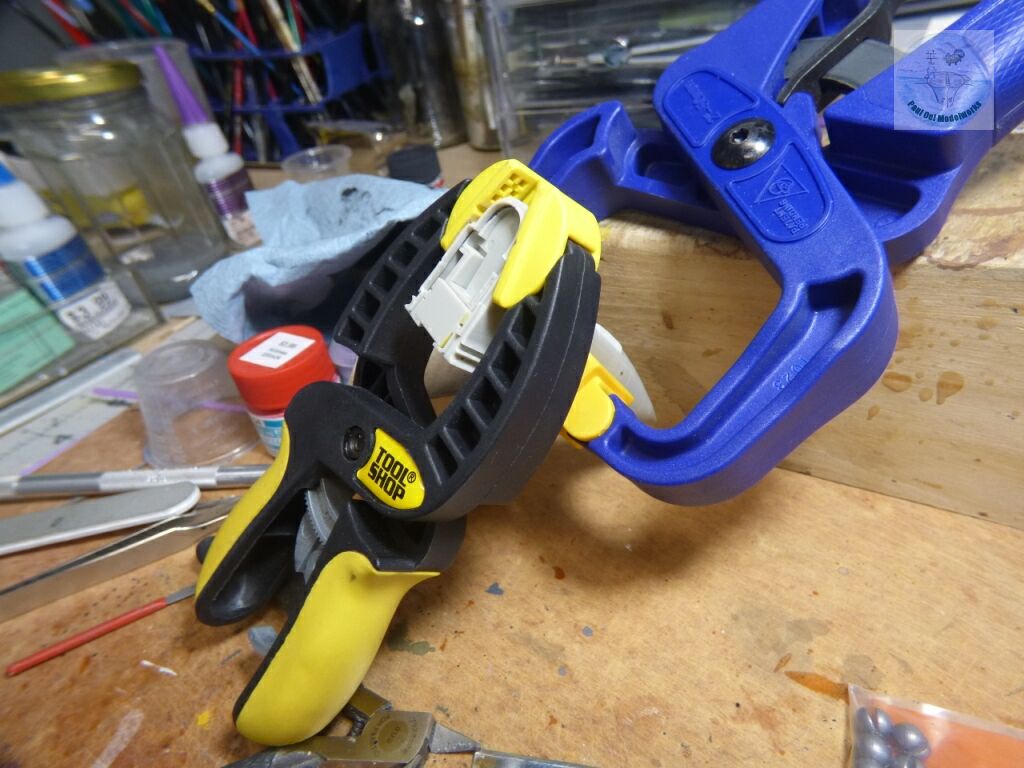
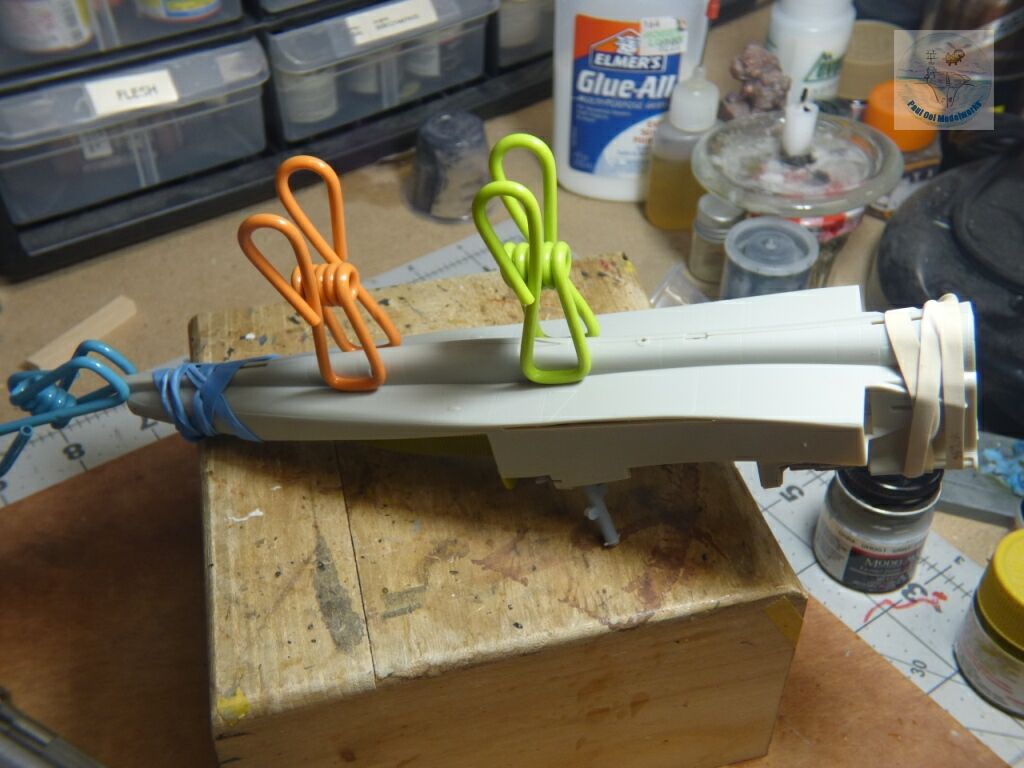
Coaxing the two halves of the front fuselage is one of the hardest. Profuse clamping and rubber-banding were required to get the halves to align properly after I had added ballast weight to the nose cone.
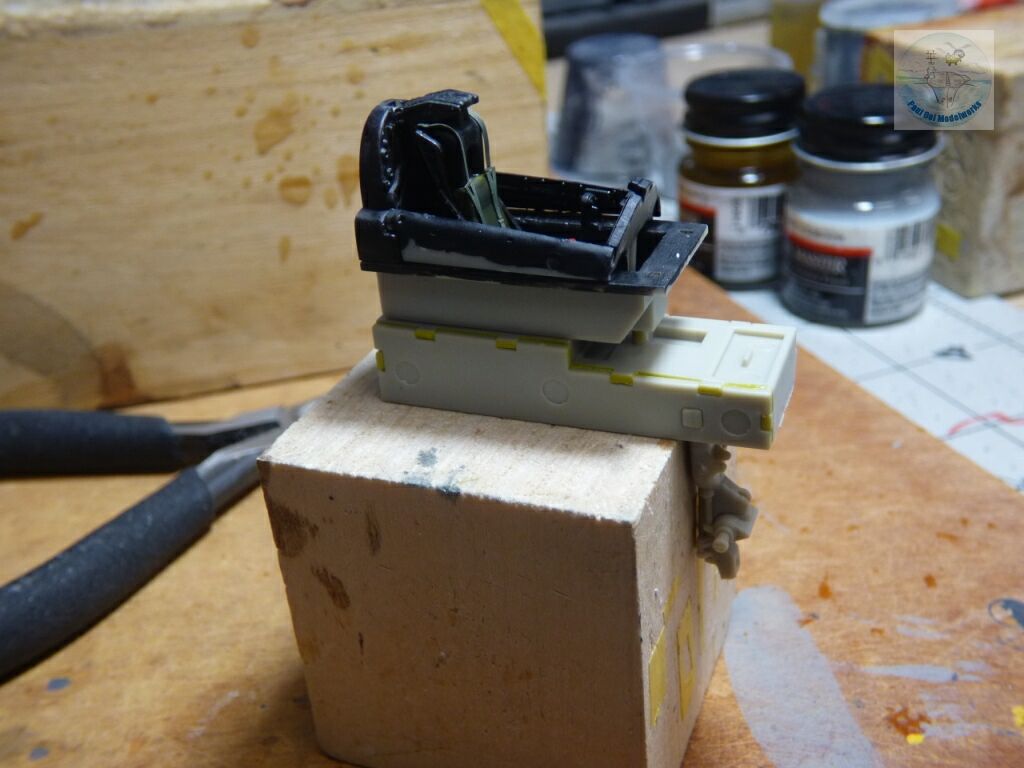
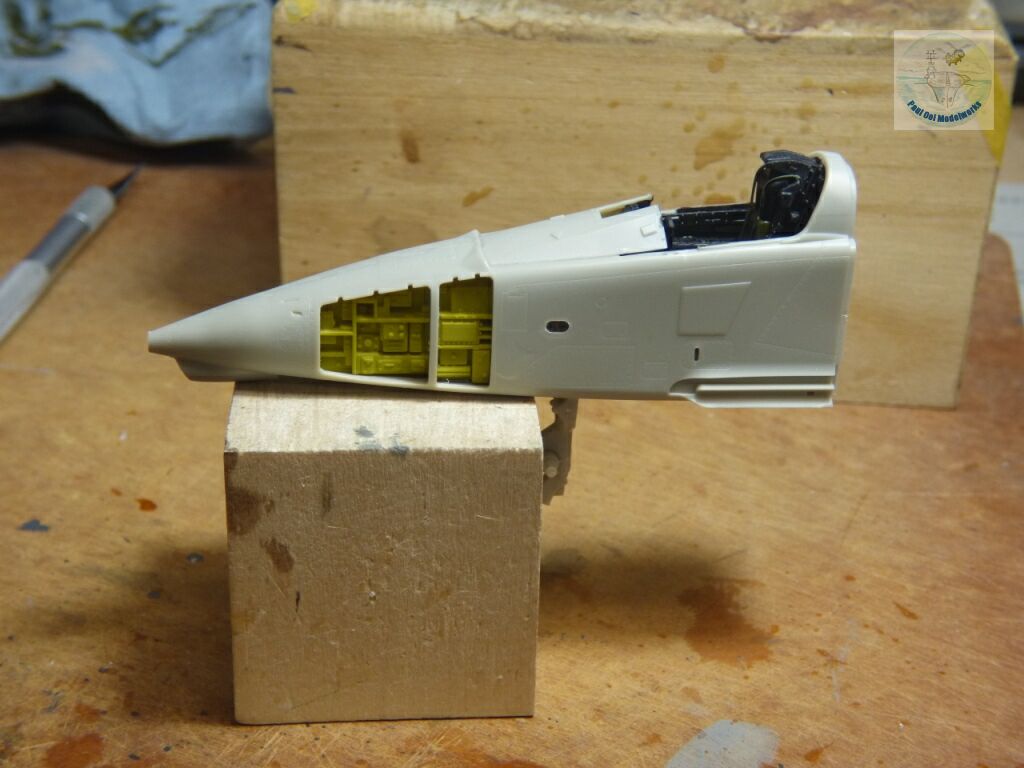
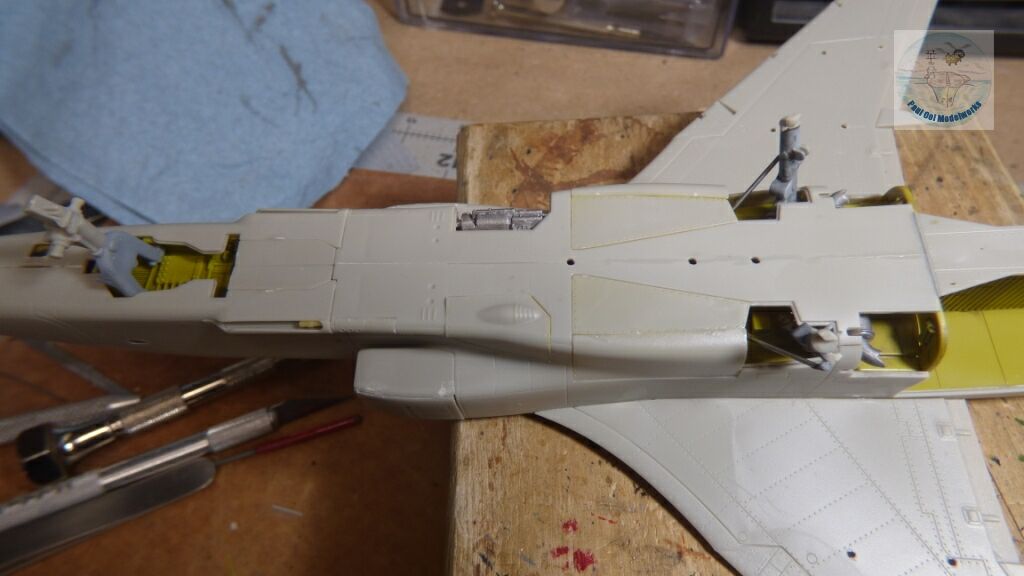
The strange-shaped main fuselage is next, having to fit the ill-fitting boxes of the main wheel wells, air brakes compartment, and the engine compartment. The interior of all these have been painted with Tamiya Yellow Green, very similar to Testors Interior Green.
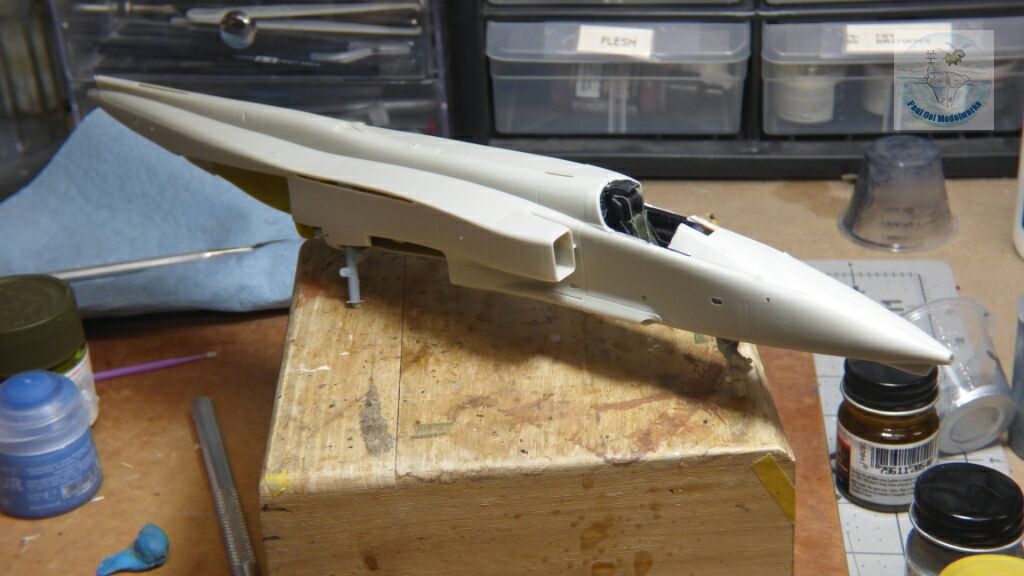
Once the front fuselage was added on, the main fuselage suddenly emerged.
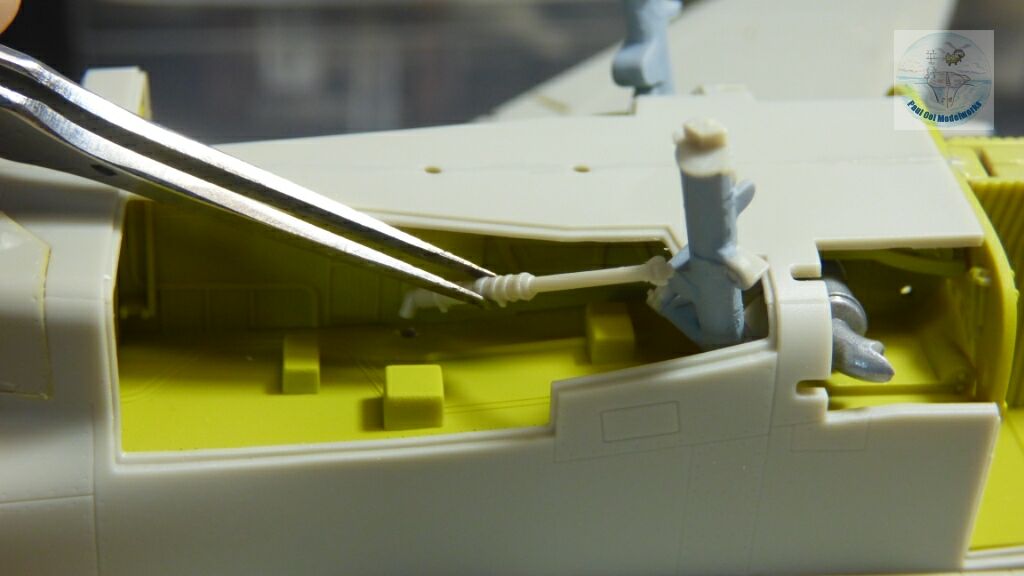
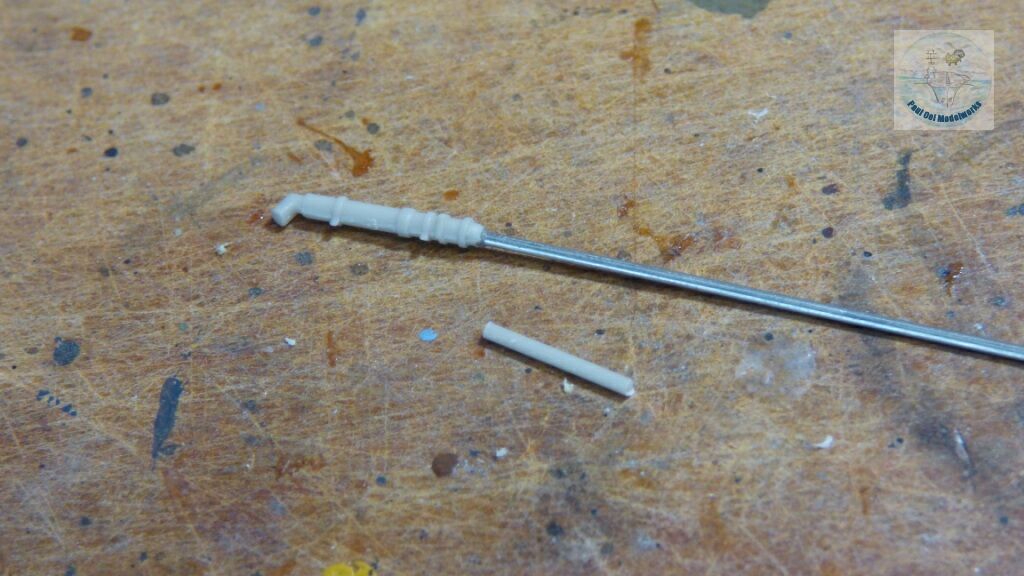
Now we come to one of the main showstoppers! The connecting strut from the wheel well wall to the attachment pivot point on the landing gear was a full 1/4″ short. To fix this, I cut off the extension rod part from the kit part, micro drill the cylinder tip, and replaced it with similar diameter steel rod and cut the length to size once I had measured it against the attachment point. I re-attached the pivot point to the tip of the replacement steel rod, and then back onto the the landing gear.
Time to close some of the panels on the underside. The fit is iffy and needed quite a bit of seam filling.
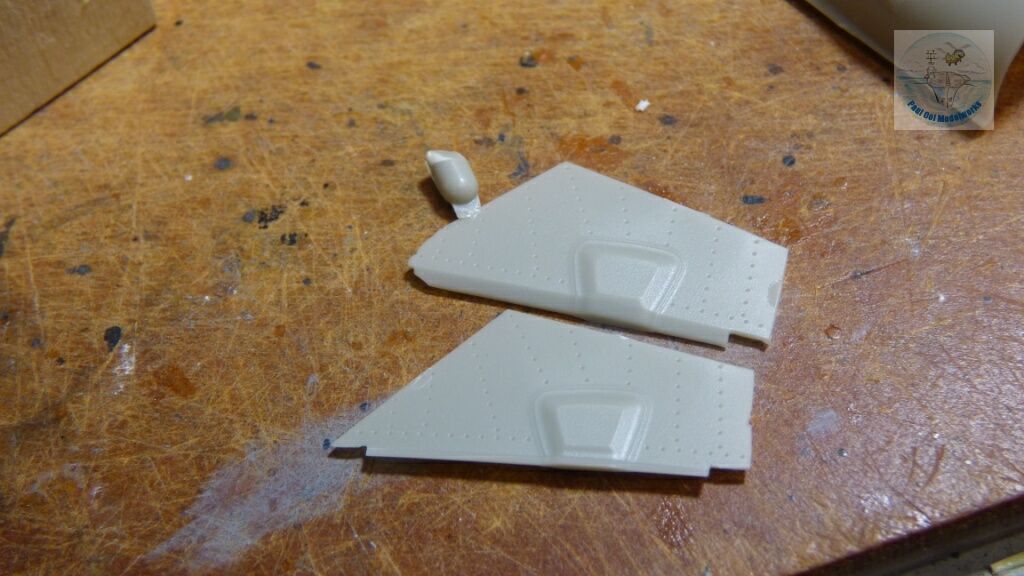
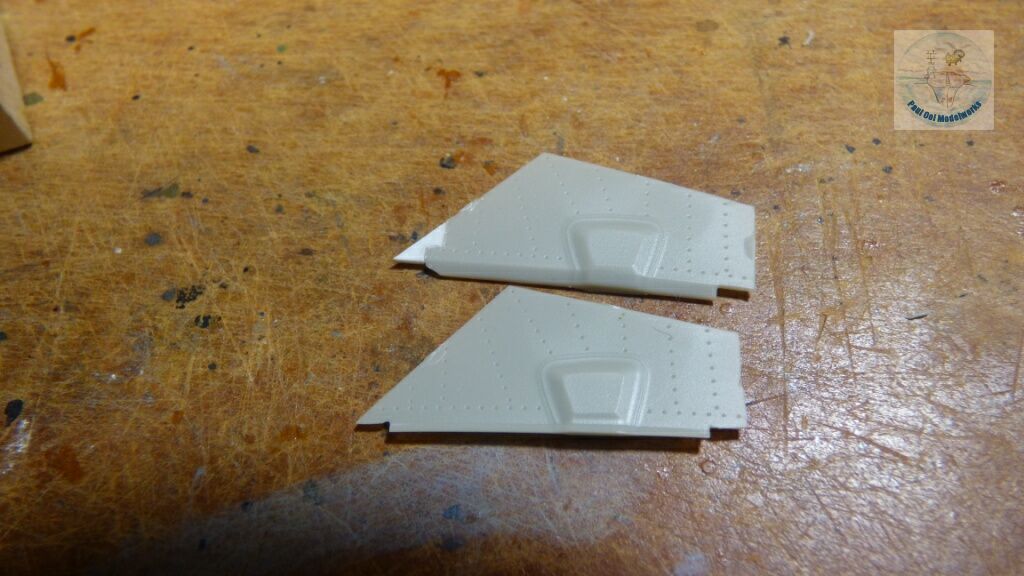
The next challenge: fixing an undershot for the underside stabilizer fins. Notice that the front tip of the top fin is misshapen due to insufficient mold fill. In order to fix this, I cut off the jagged edge of the front edge to a convenient straight edge near a row of rivets. Then I grafted on new Evergreen card stock of suitable thickness. Then I trimmed the edge to match the fin at the bottom with the correct profile.
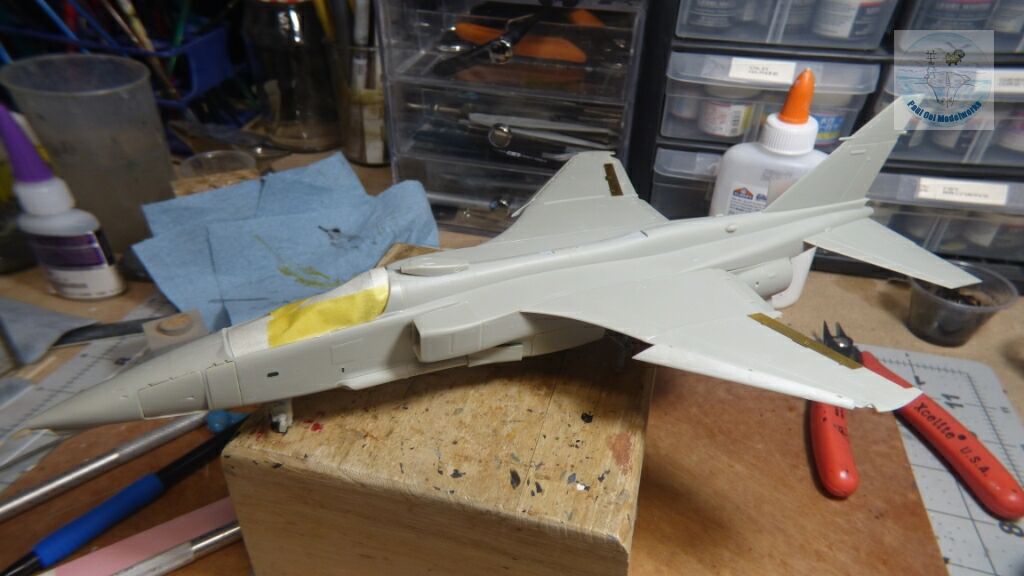
To get the camouflage pattern evenly over the large removable sections of the engine covers, I attach them with masking tape.
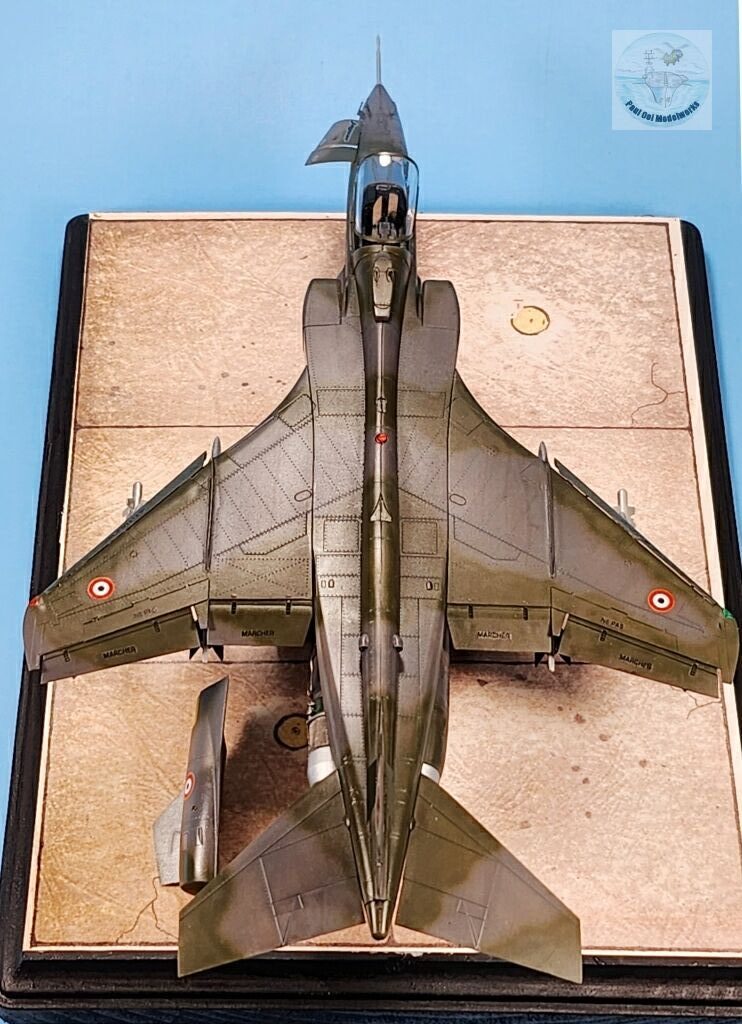
Wing flaps and forward wing edge slats were attached. If one wanted to build these retracted, be prepared for a lot more hard fitting, as these parts were not built to be fitted in those alternate positions.
All sealed up, and ready for the spray booth.
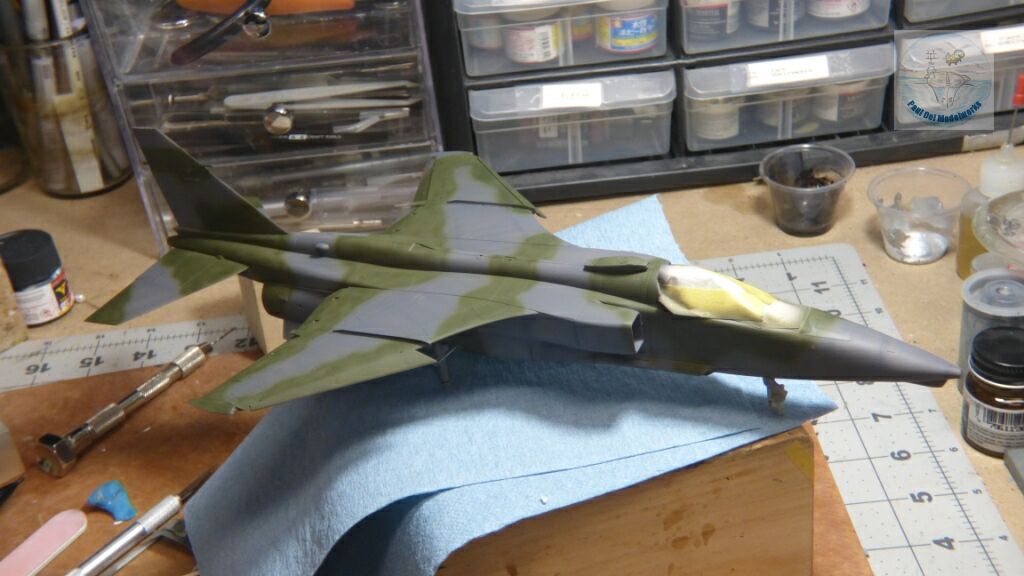
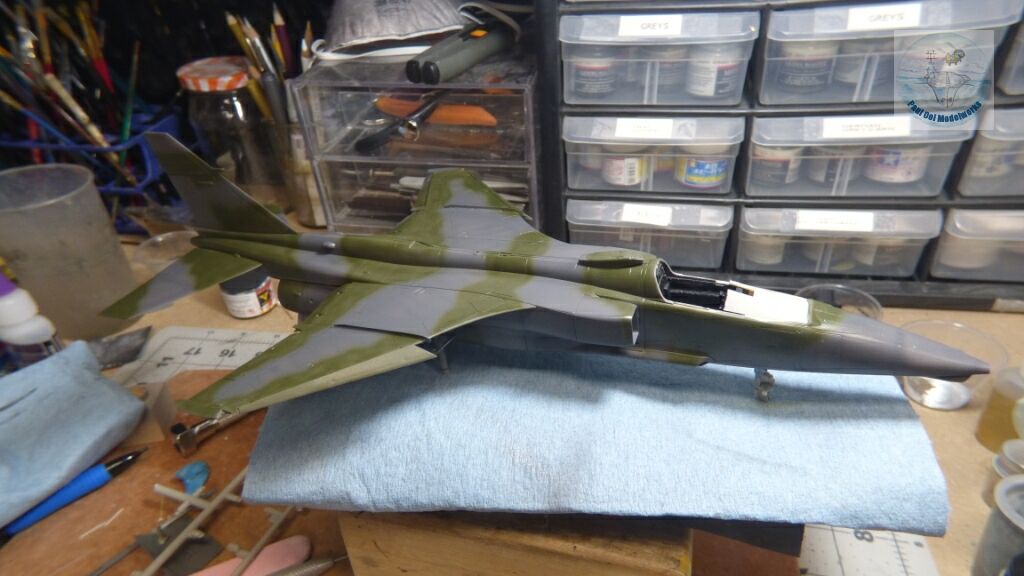
The aircraft underside was painted flat aluminum from Testors Aluminum, then the overall Dark Sea Grey (Mr. Hobby C330), and then the Dark Green (Mr. Hobby C331) applied with a feathered edge using free-hand technique on the Iwata Eclipse paintbrush. After that, the entire aircraft was sealed in Gloss Pledge Floor Polish.
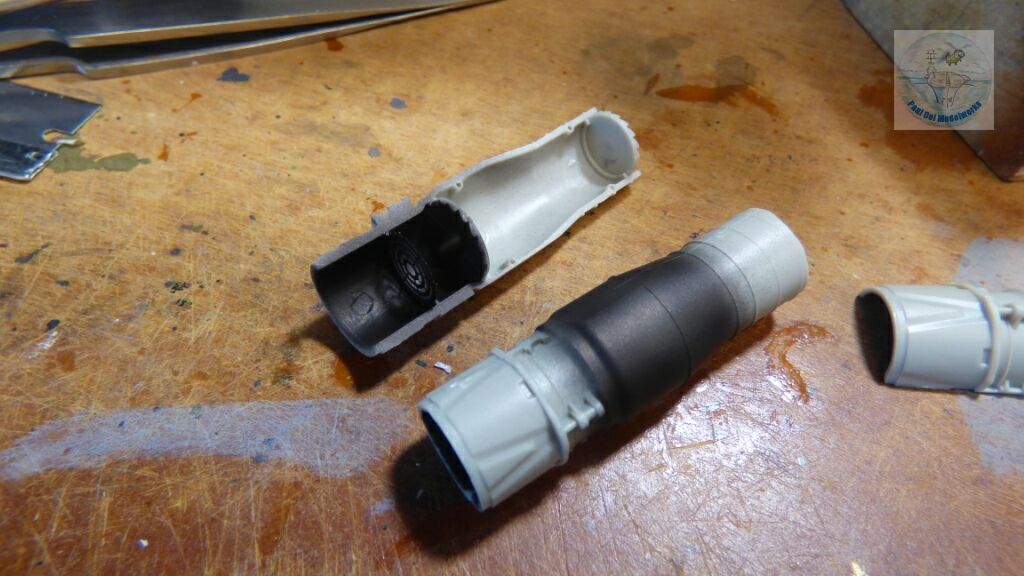
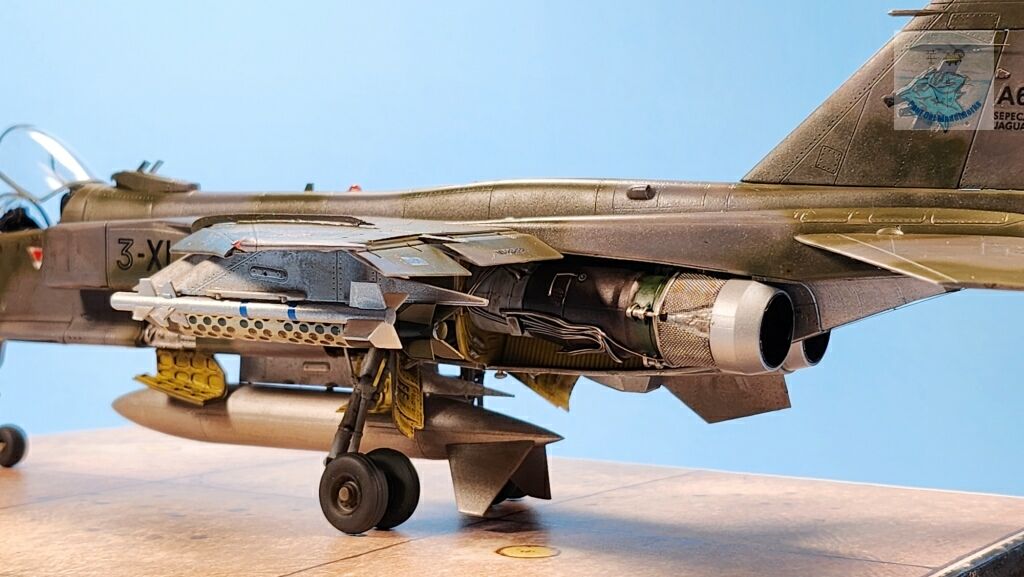
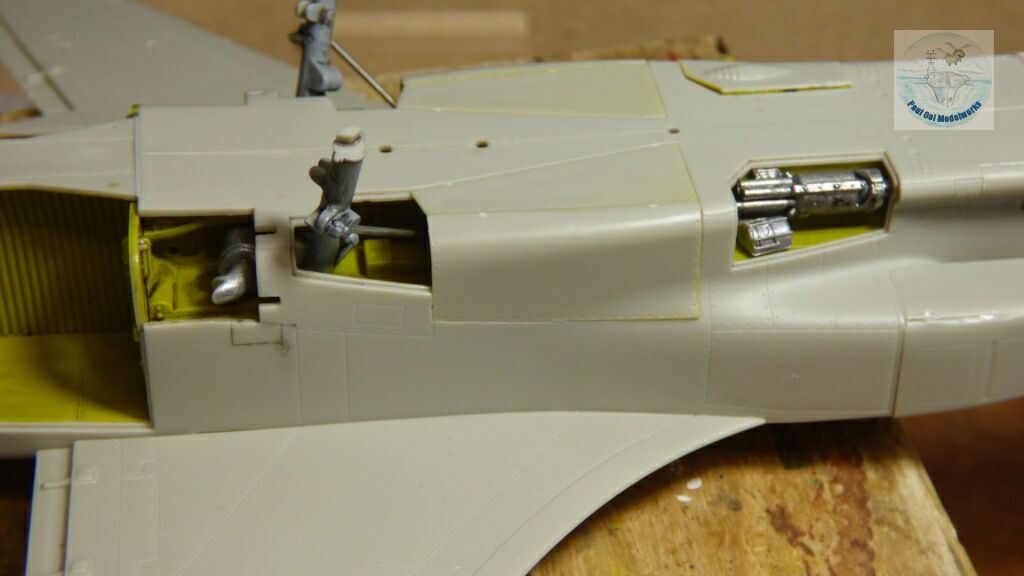
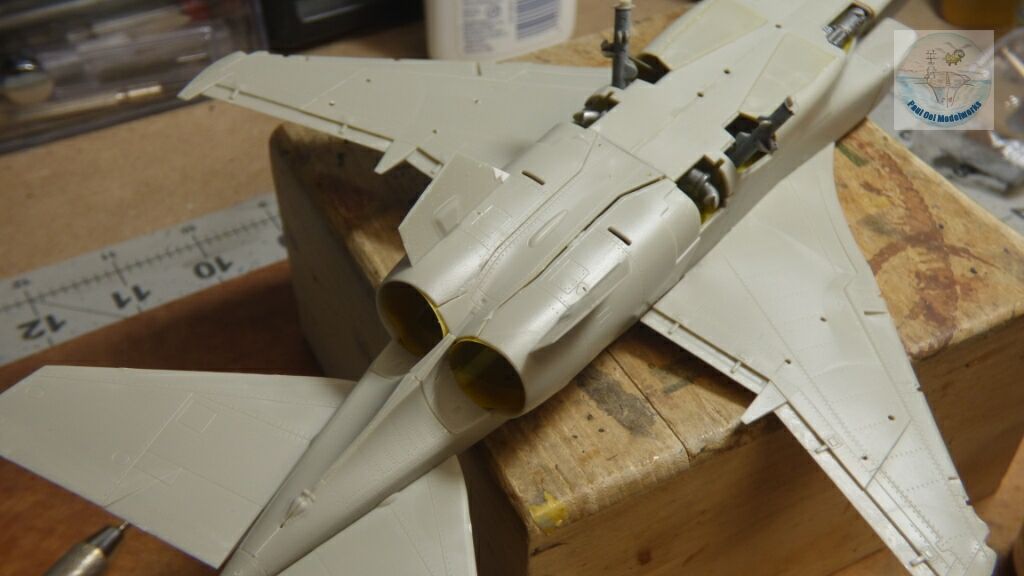
While the fuselage is curing, I started work on the two Merlin Adour turbofan engines. The exhaust end was painted Metallizer Burnt Iron.
I intended to only display one engine exposed, and would close the other one with its fuselage cover. This latter side was left unpainted, with only the exhaust can painted Metallizer Non-buffed Aluminum.
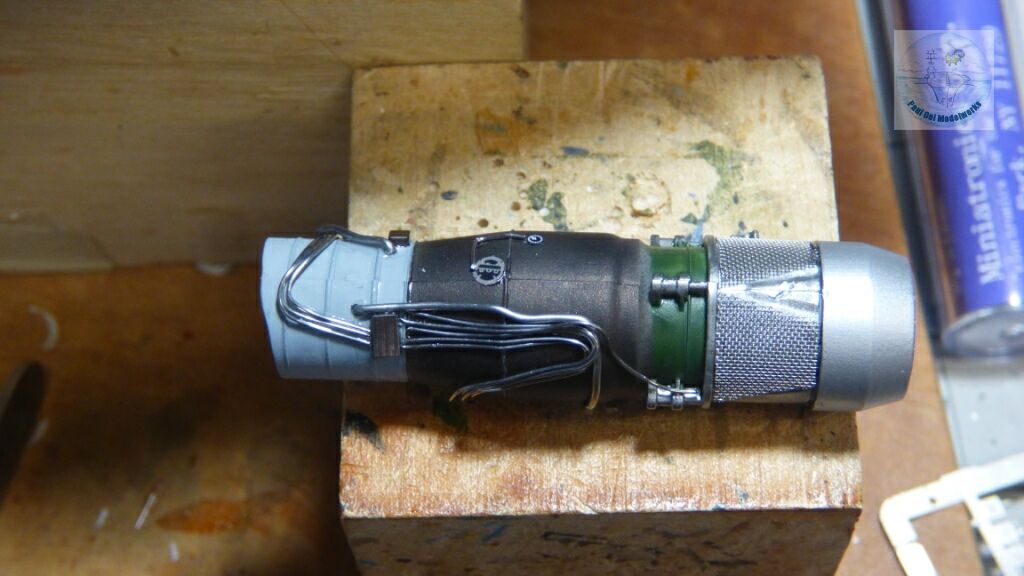
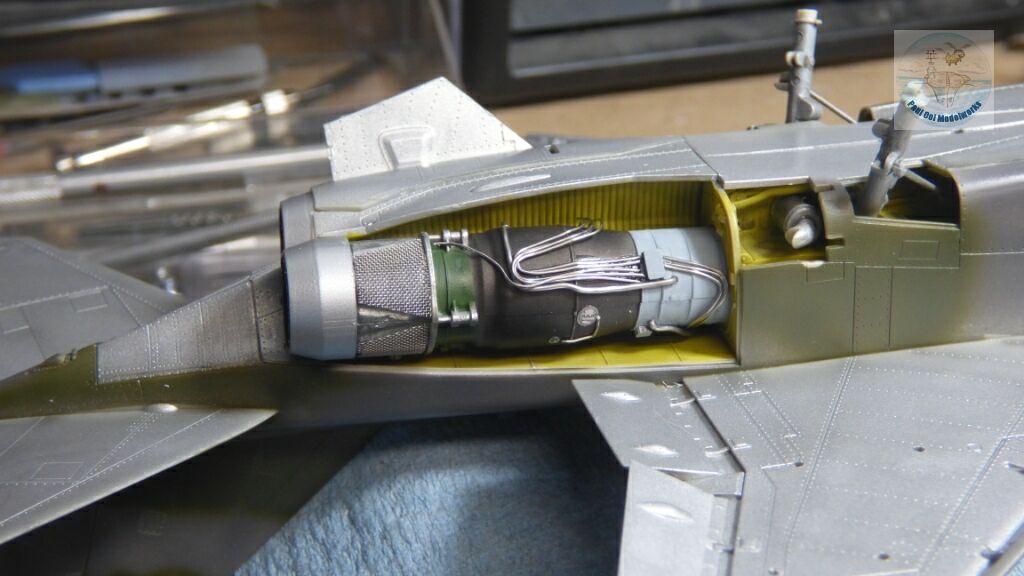
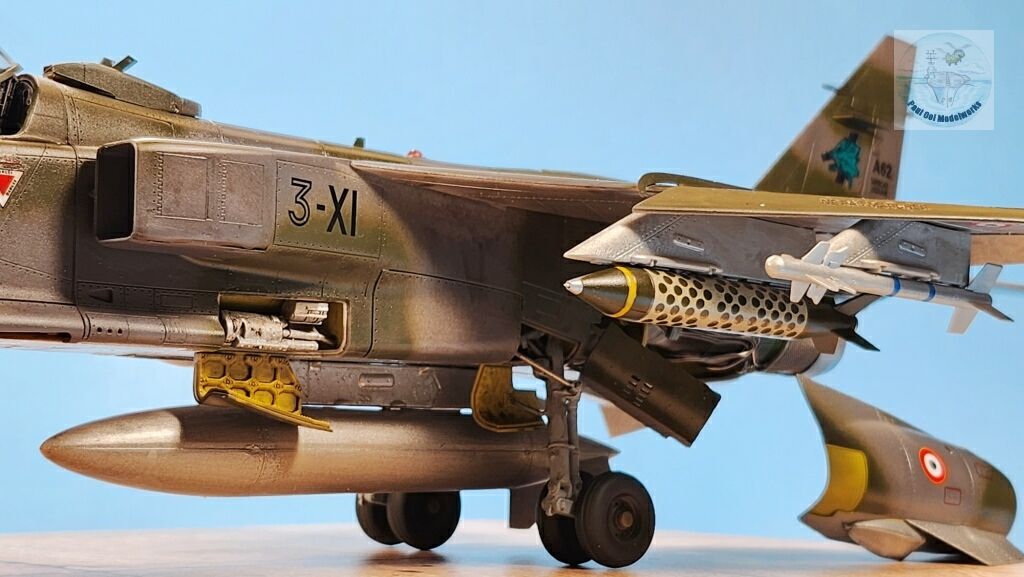
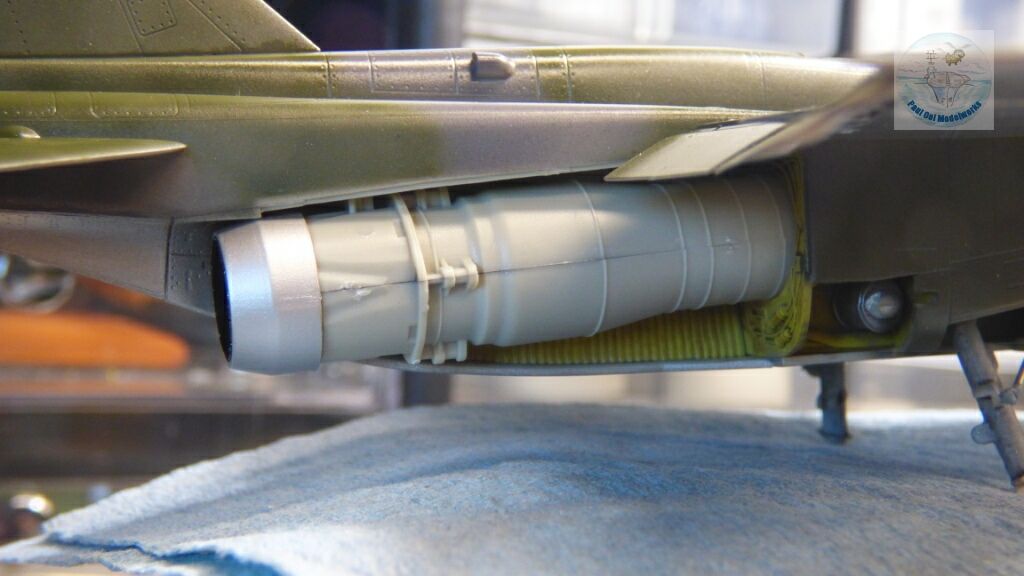
As for the port side engine that is visible, a lot more crazy work went into it. The exhaust end has these heat shields of steel mesh in real life. The best way to simulate that is with…steel mesh. I cut these from an old kitchen oil sieve and they look perfect. Added spare photoetched boxes, solder wire, and voila! A convincing Adour engine.
The decals were pretty good except that some did not have their while underlay which left them very fragile and could not be easily shifted once it slides off the transfer paper.
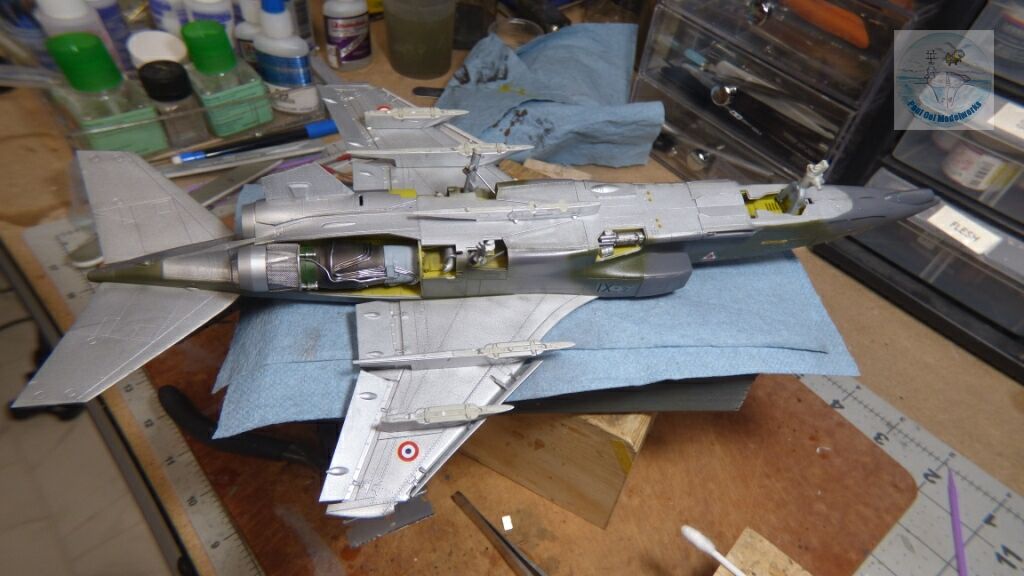
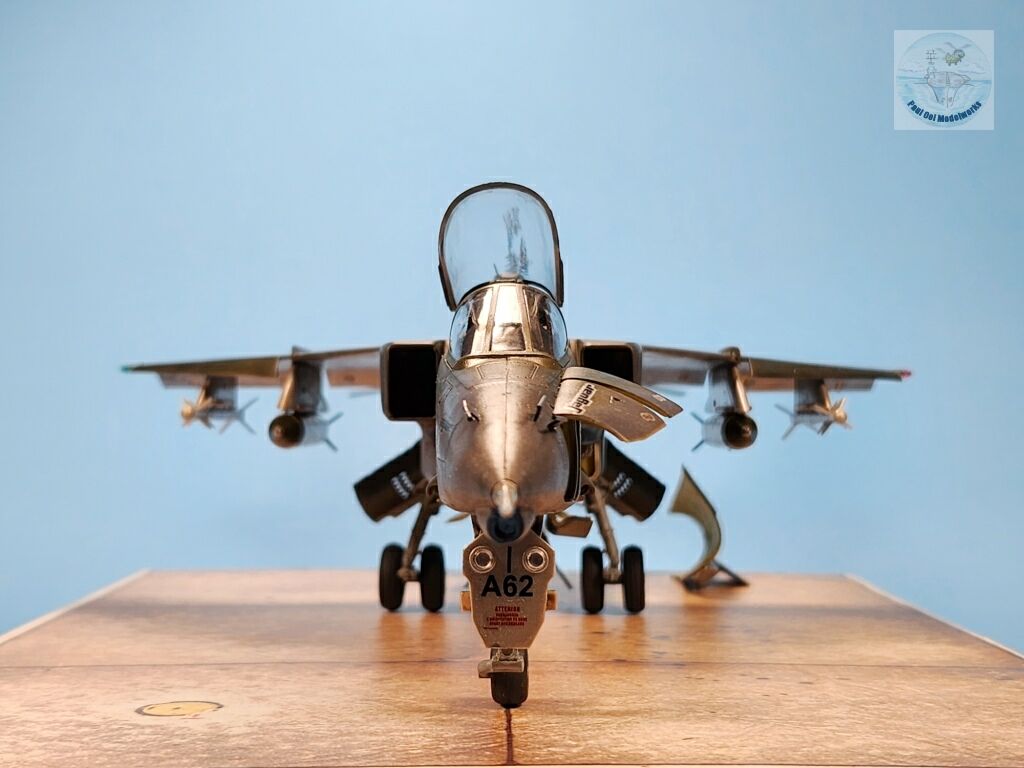
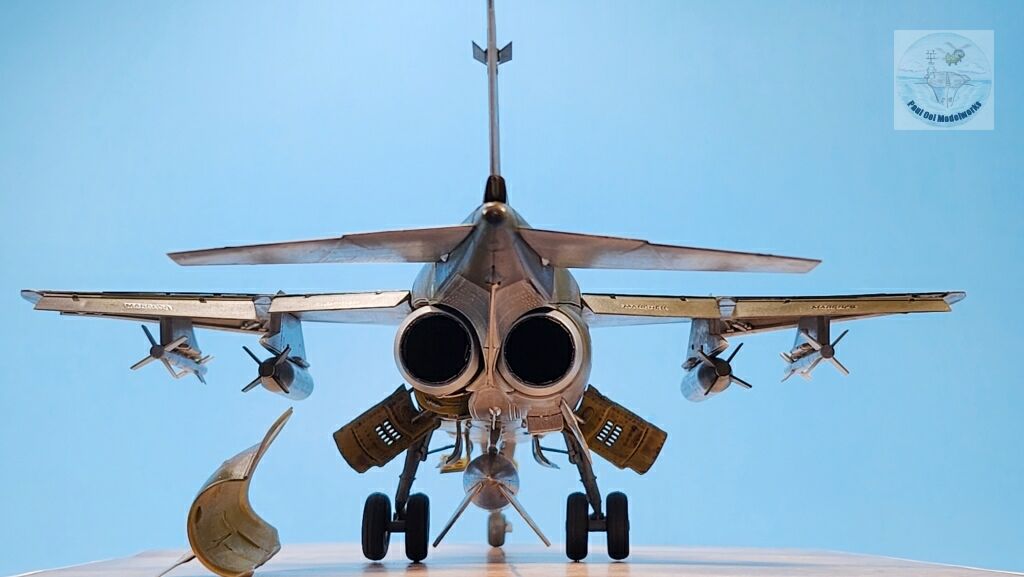
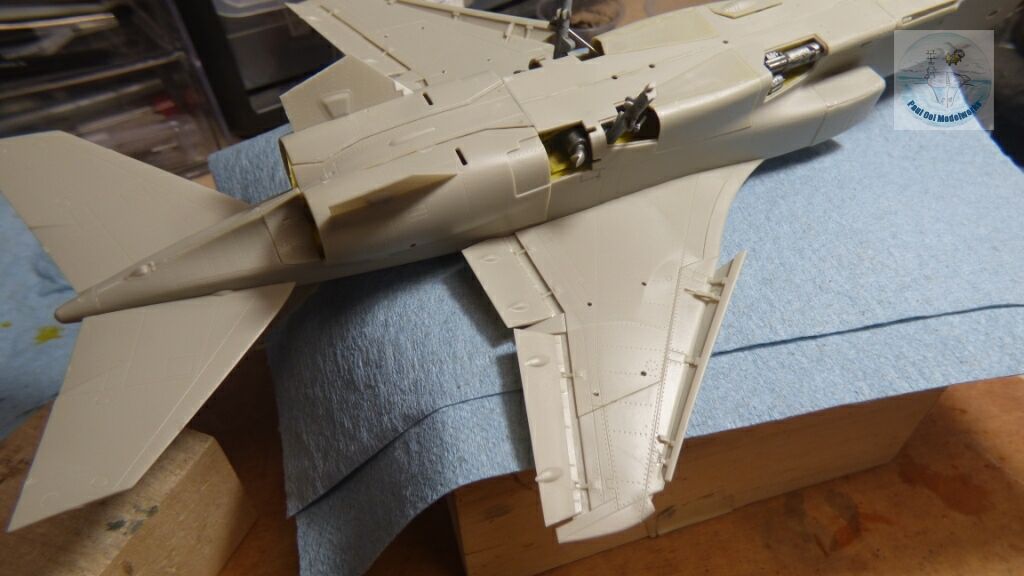
Underside detailing started, first with the wing bomb pylons. The pins tend to be over-sized compared to the locator holes. I had to carefully shave the pins down a little to get meaningful engagement.
If you don’t have landing gear, you don’t have an aircraft model display on a tarmac (you could try hanging it). The joints and alignment on the Jaguar are pretty tricky, and make sure that the wheels sit square (as much as the eyes can tell) before installing the tires.
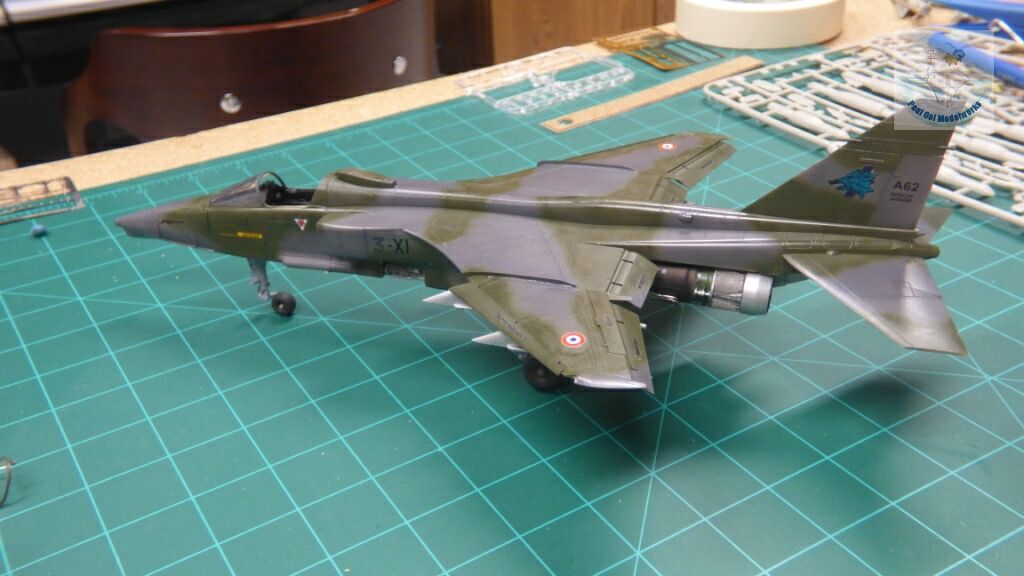
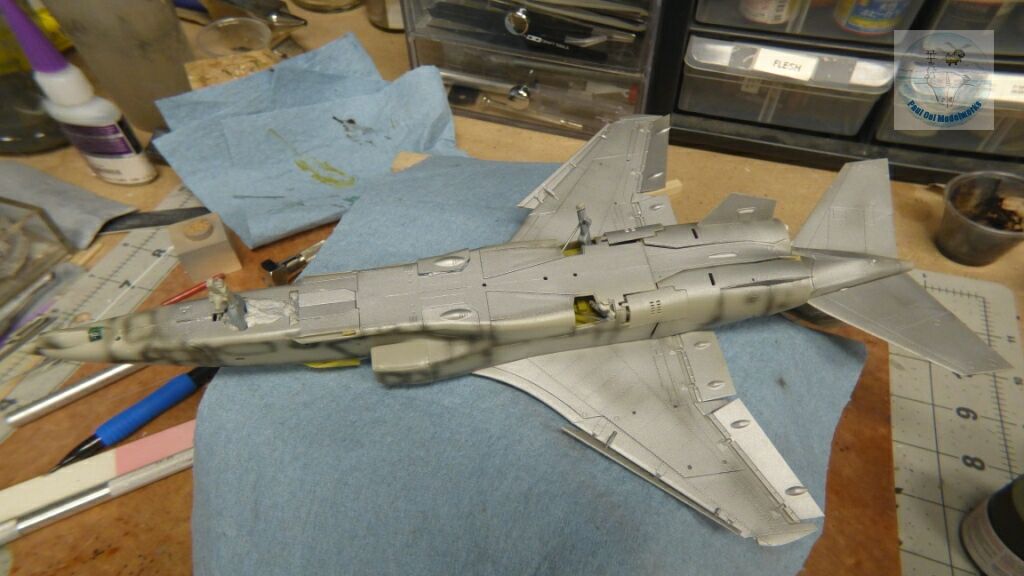
The entire aircraft gets an oil wash of 50% Lamp Black + 50% Burnt Umber. The pictures of the 1970s Jags were pretty streaky with oil and grime.
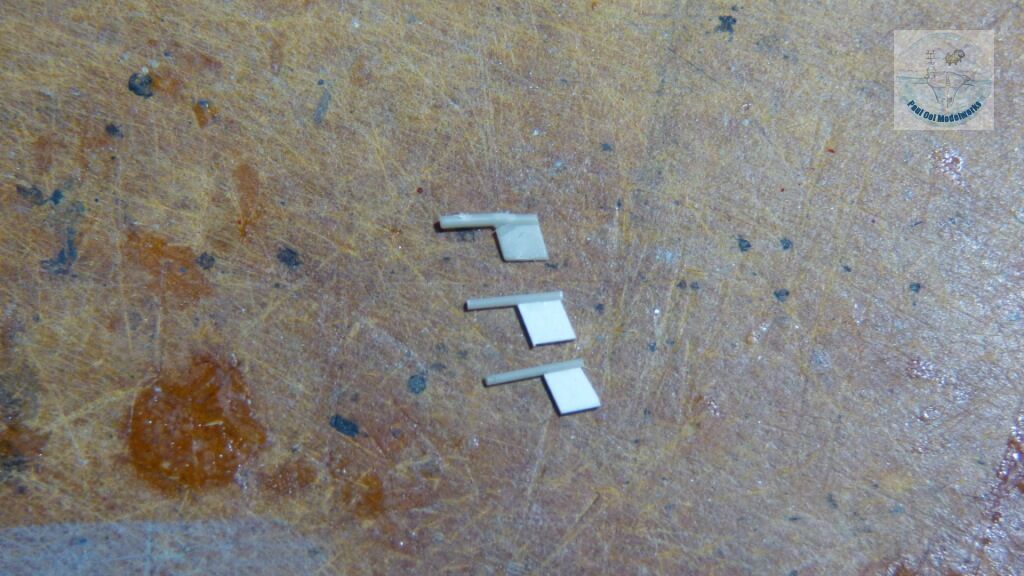
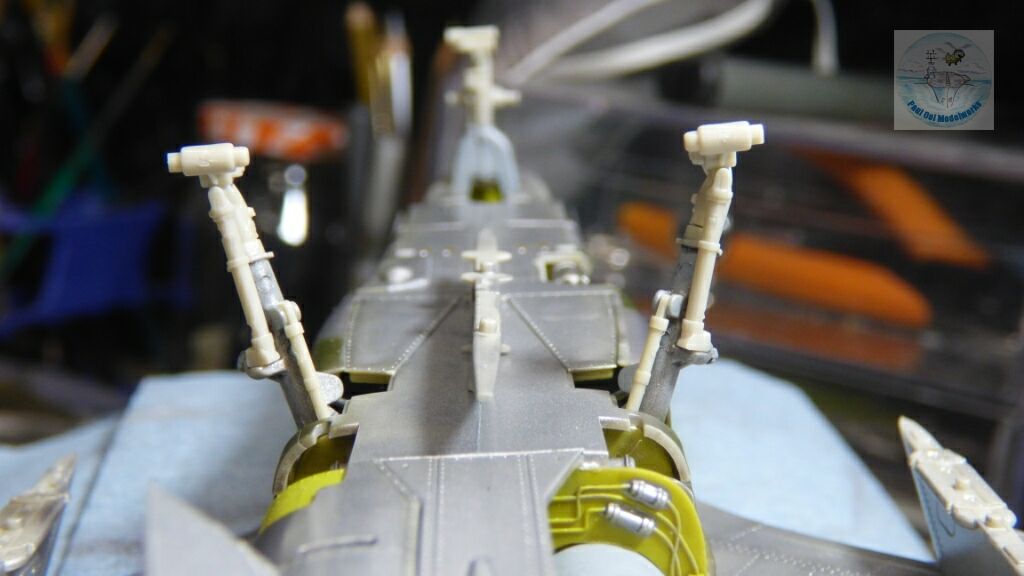
Some last bits. The pitots lining the front above the radome were missing 2 out of 3 parts called for (they only had one on the sprue tree). Had to scratch build two more with stretched sprue and Evergreen card.
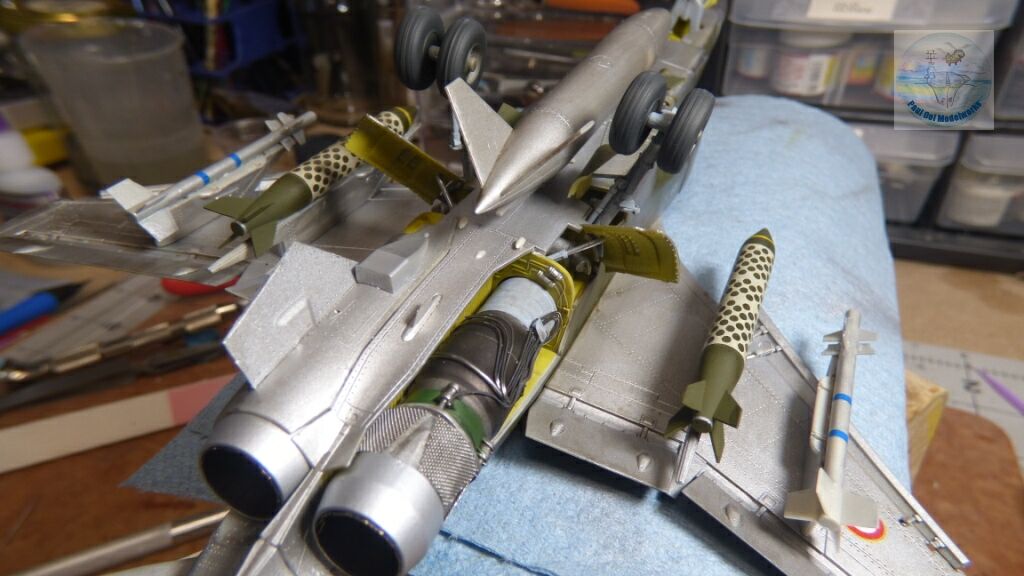
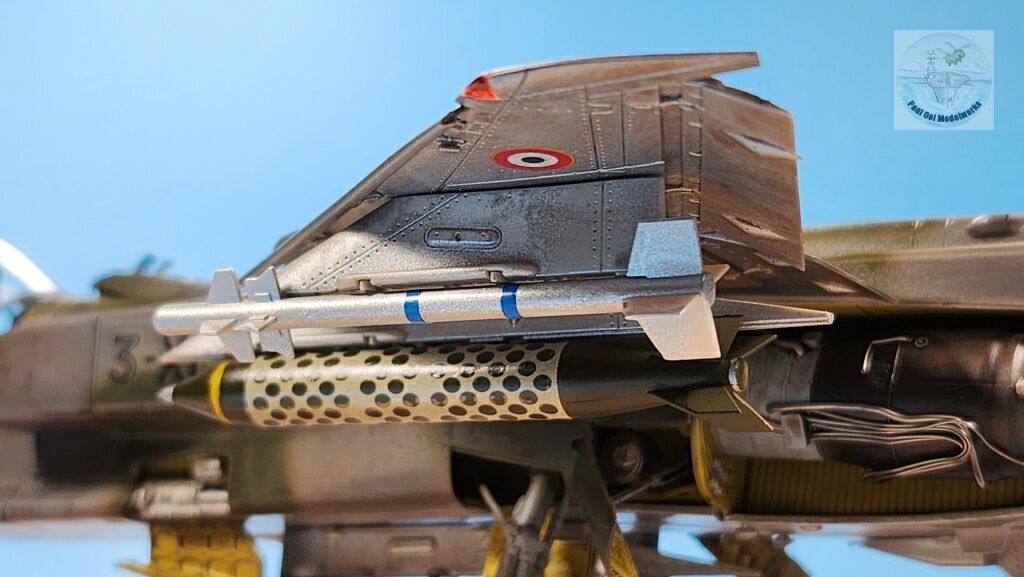
Installed the bombs, missiles, and opened air brakes. The side door struts and air brake hydraulic cylinders were hard to position as the whole area is pretty crammed together.

Final work on the upper exterior surfaces, installation of pitot tubes, canopy and other clear parts, and the final move to glue open the side doors for the forward avionics. Voila!
Leave a Reply