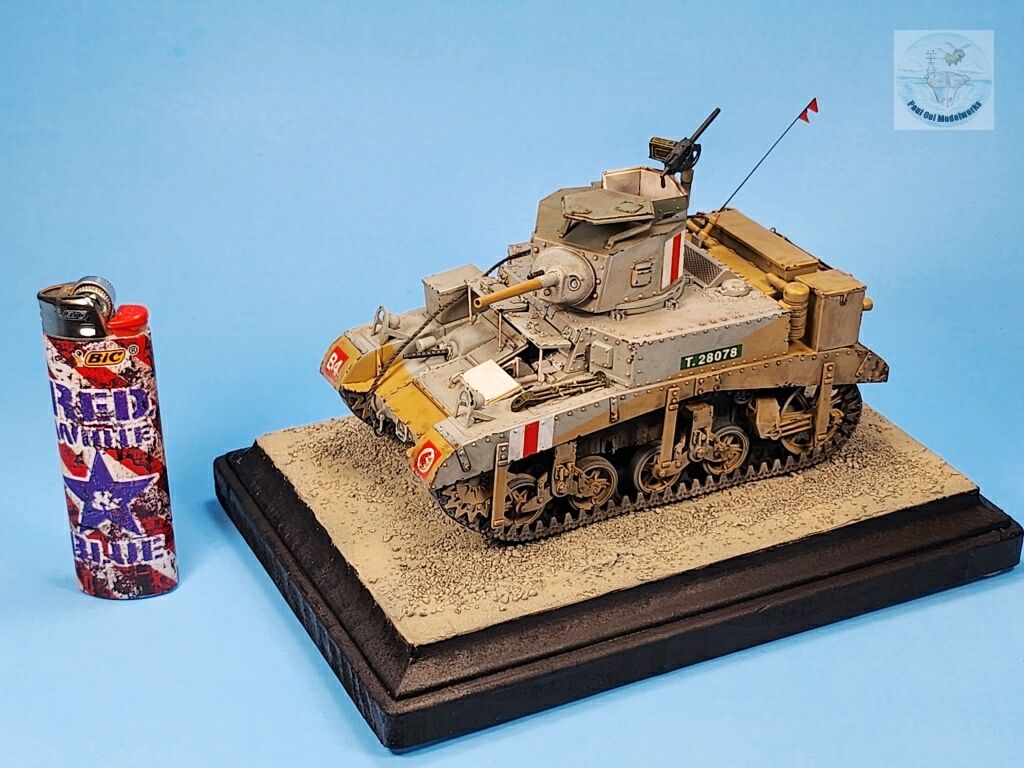
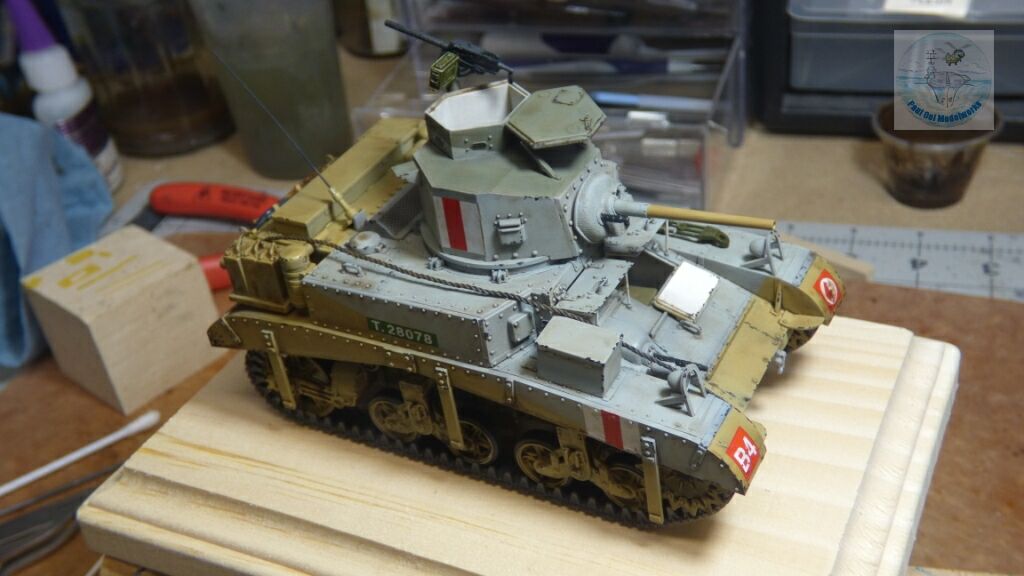
Not all the mightiest tanks of WW2 were hulking behemoths. Some of the best and effective tanks were light and small, moving at lightning speed to strike and harry the enemy, carry out reconnaissance, and to move through terrain that may impede heavier and larger tanks. I start this series with the M3 Stuart light tank in the service of the famed British Eighth Army (Desert Rats) in North Africa. Originally part of the “Lend Lease” program from the USA, the M3 Stuart was affectionately called the “Honey” tank because of it speed, good suspensions, and ease of maintenance. The 37mm main gun was adequate in 1941 but rapidly became obsolete by 1942. However, the Stuart soldiered on through the war, eventually being replaced by the M5 version. The M3 has the distinction of being used by all the major combatants of WW2. The US shipped some to the Soviet Union, and the Germans and Japanese used captured tanks for rear garrison duty as well.
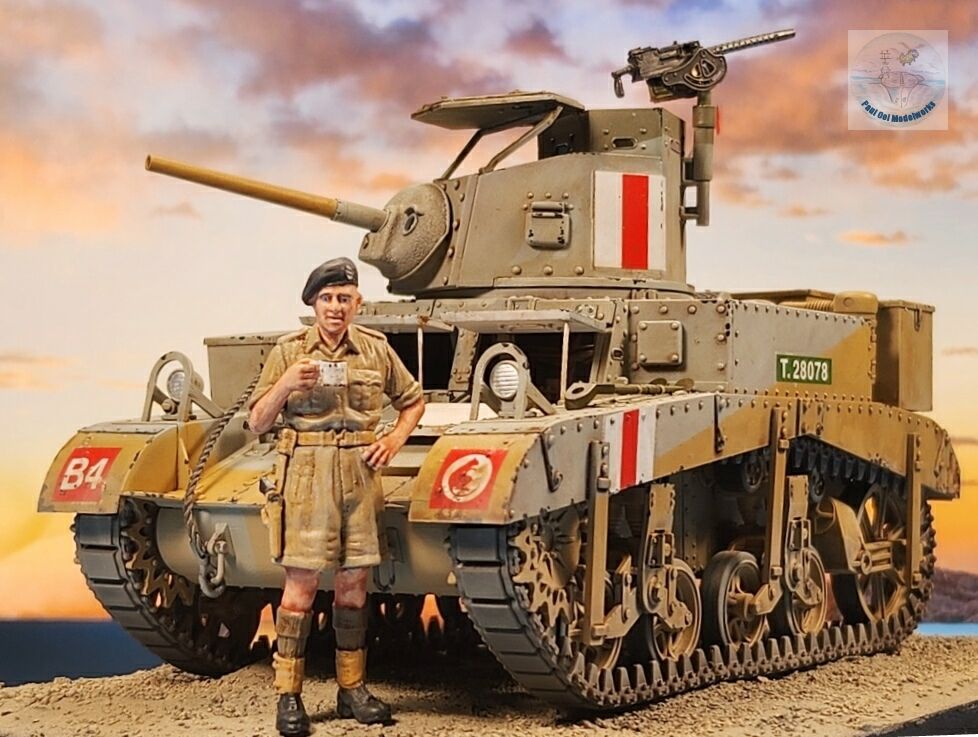
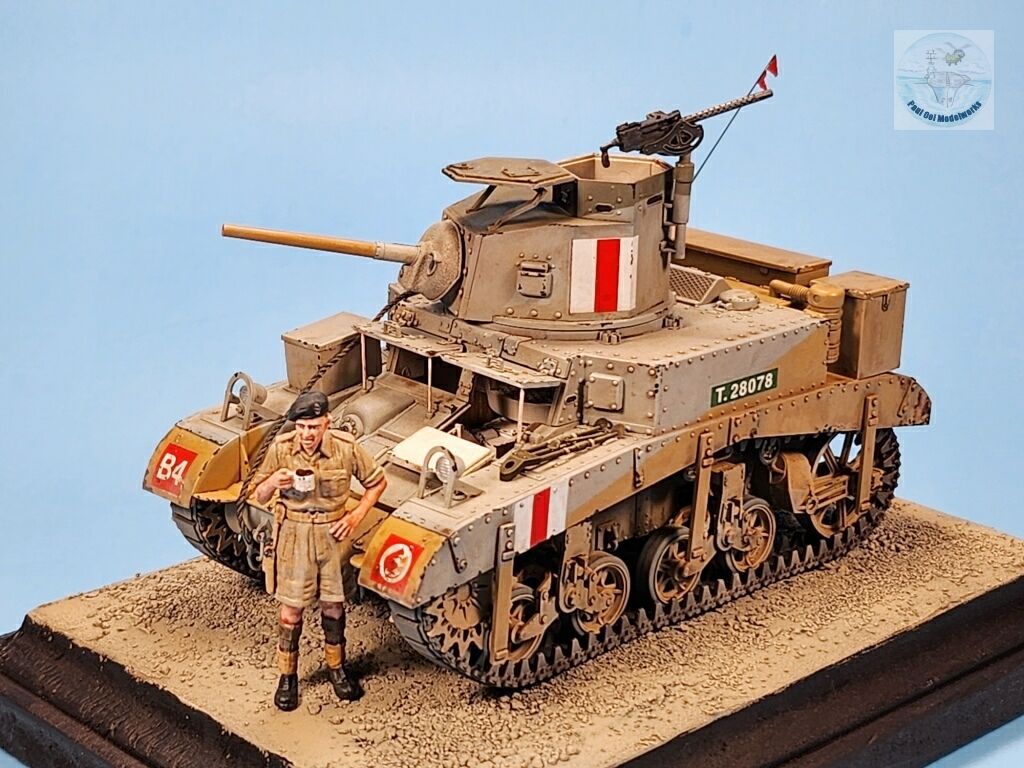
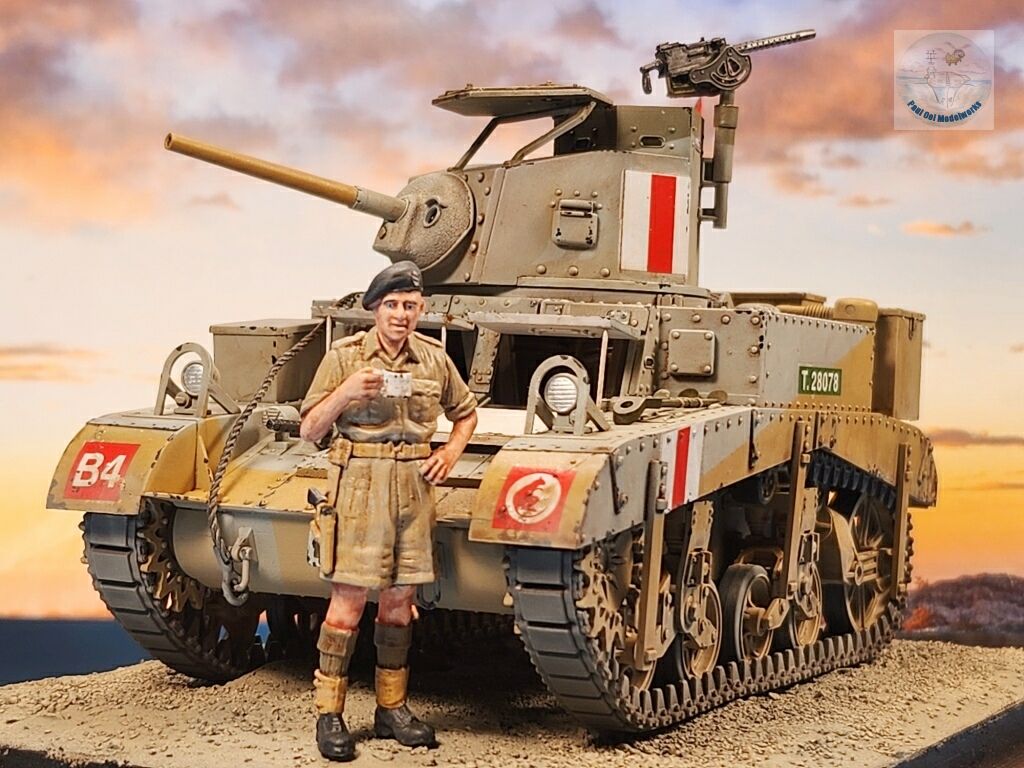
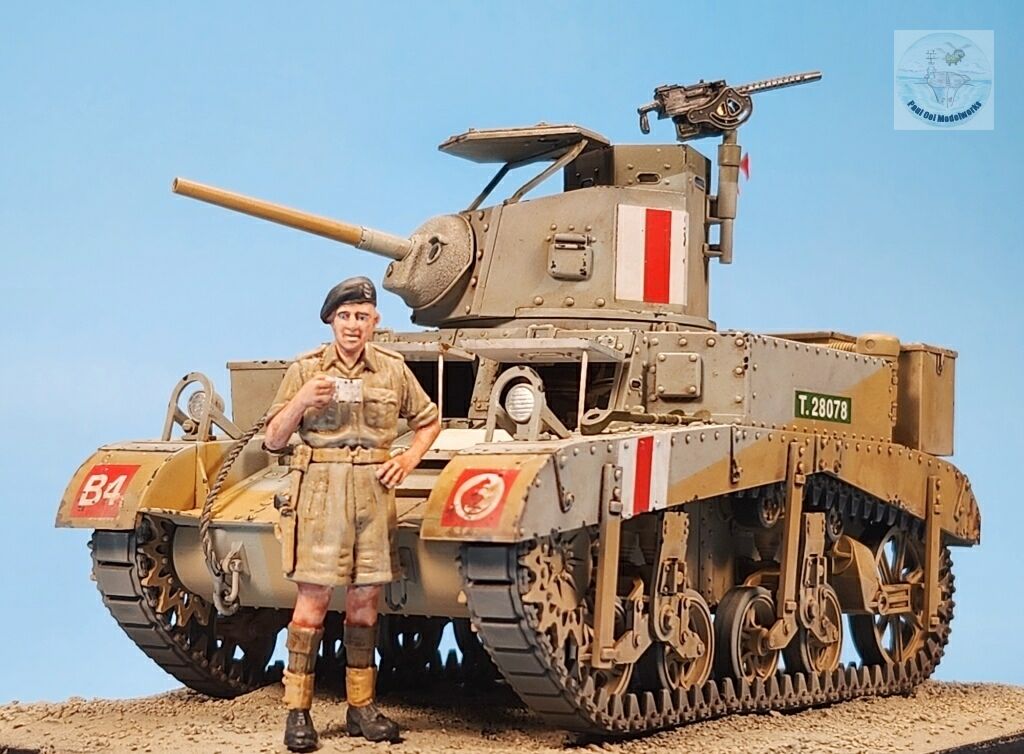
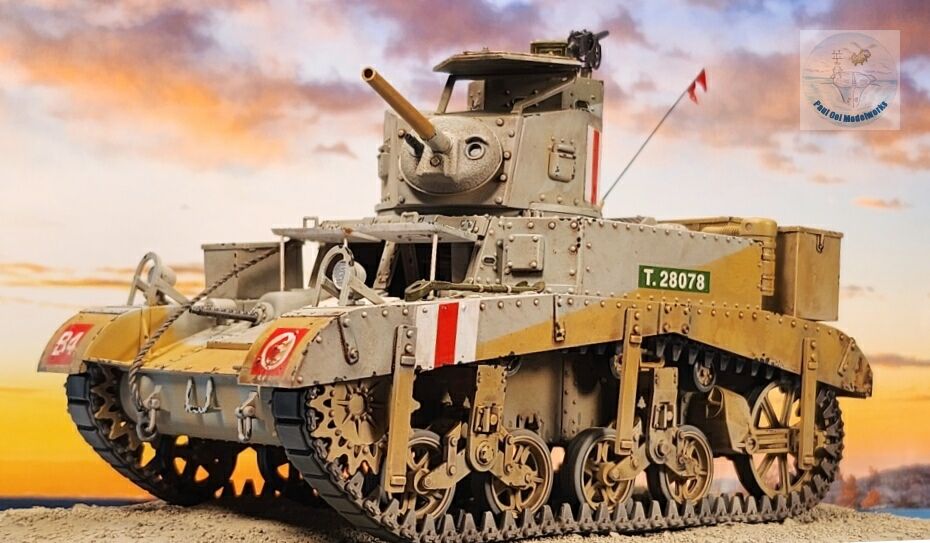
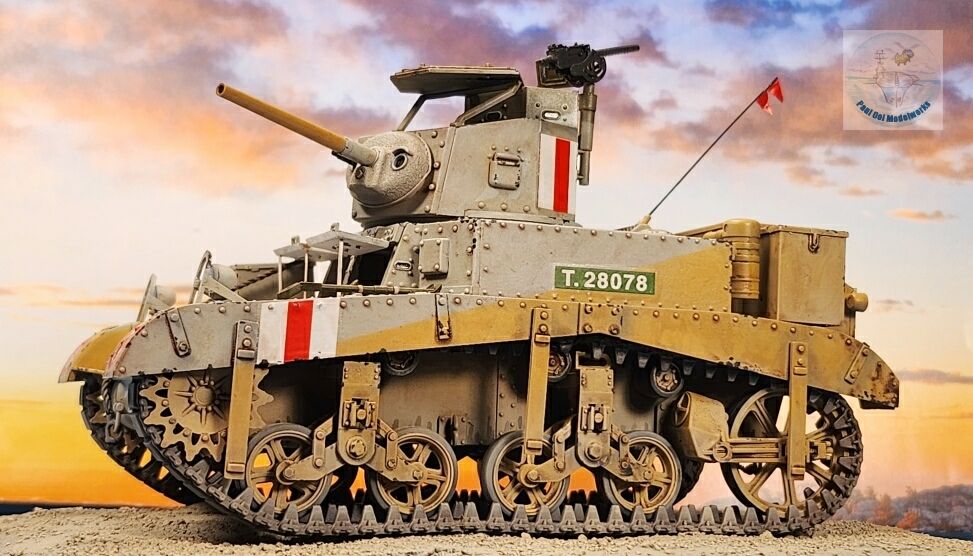
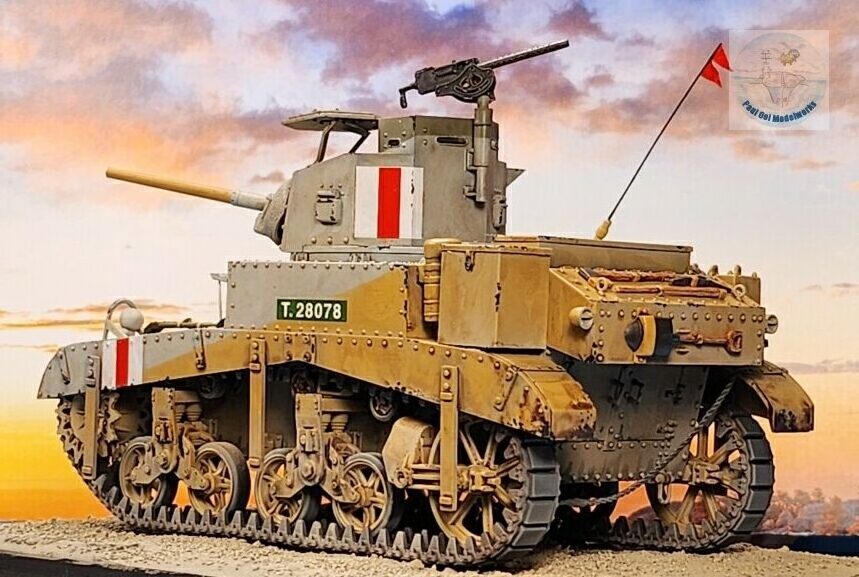
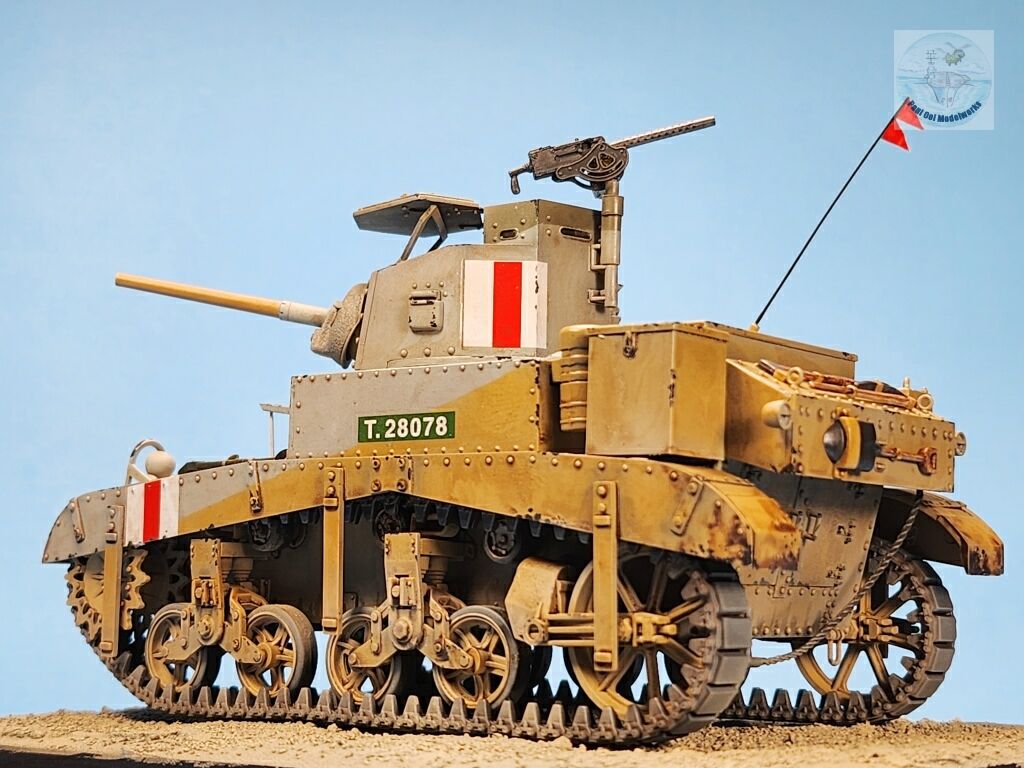
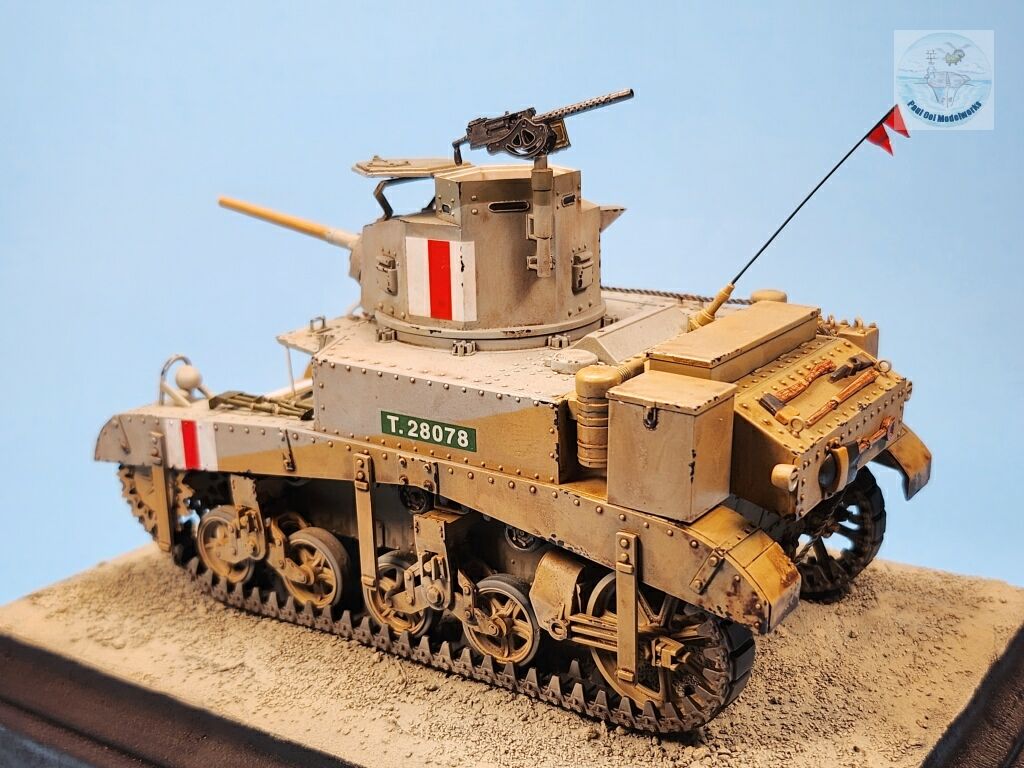
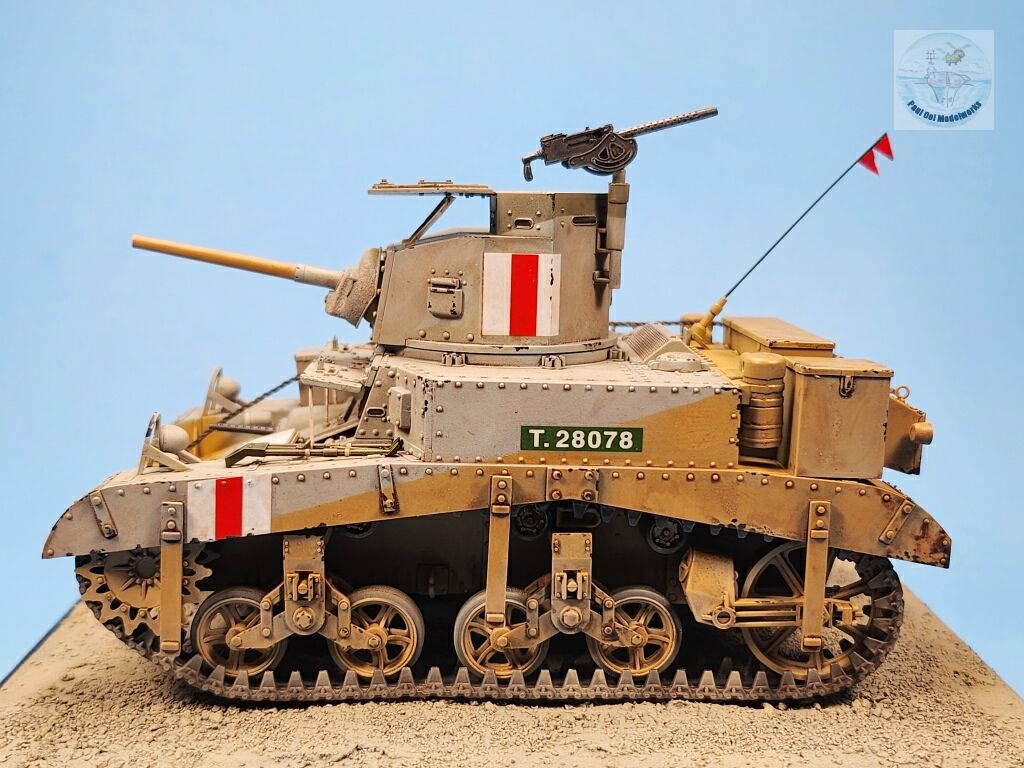
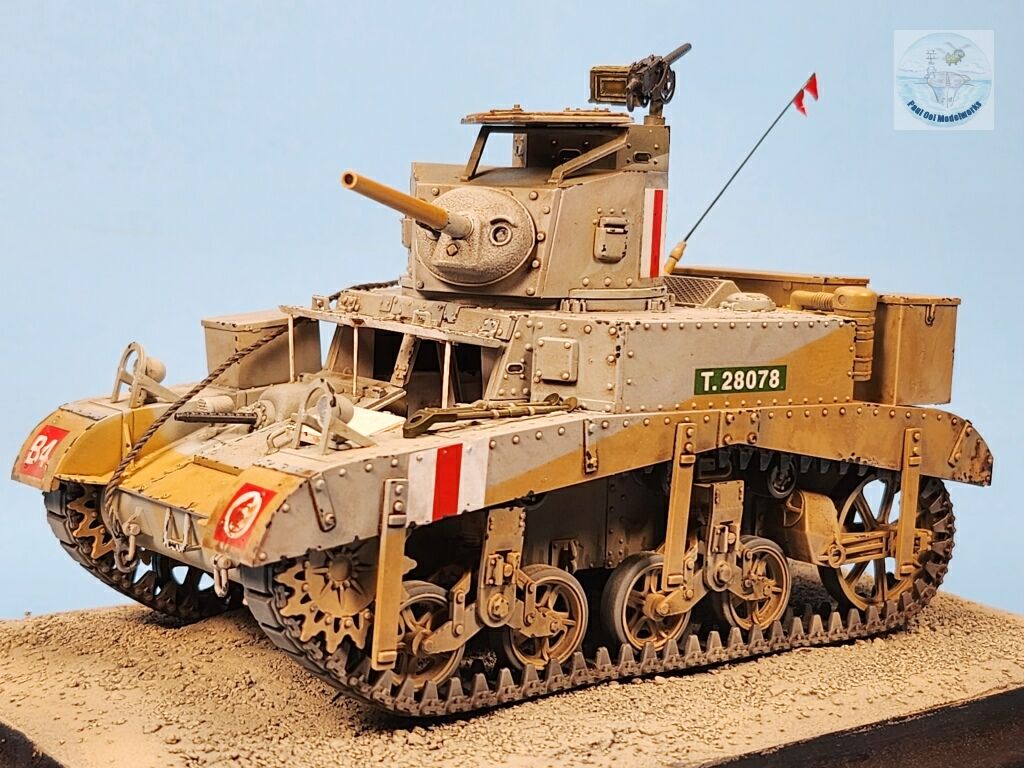
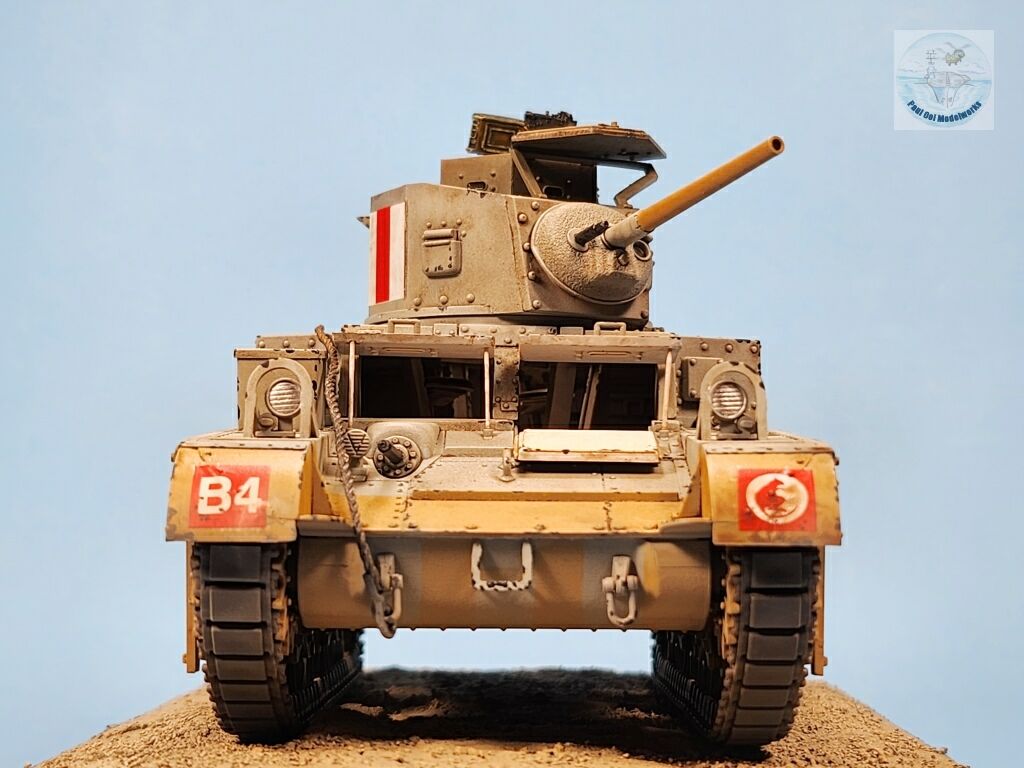
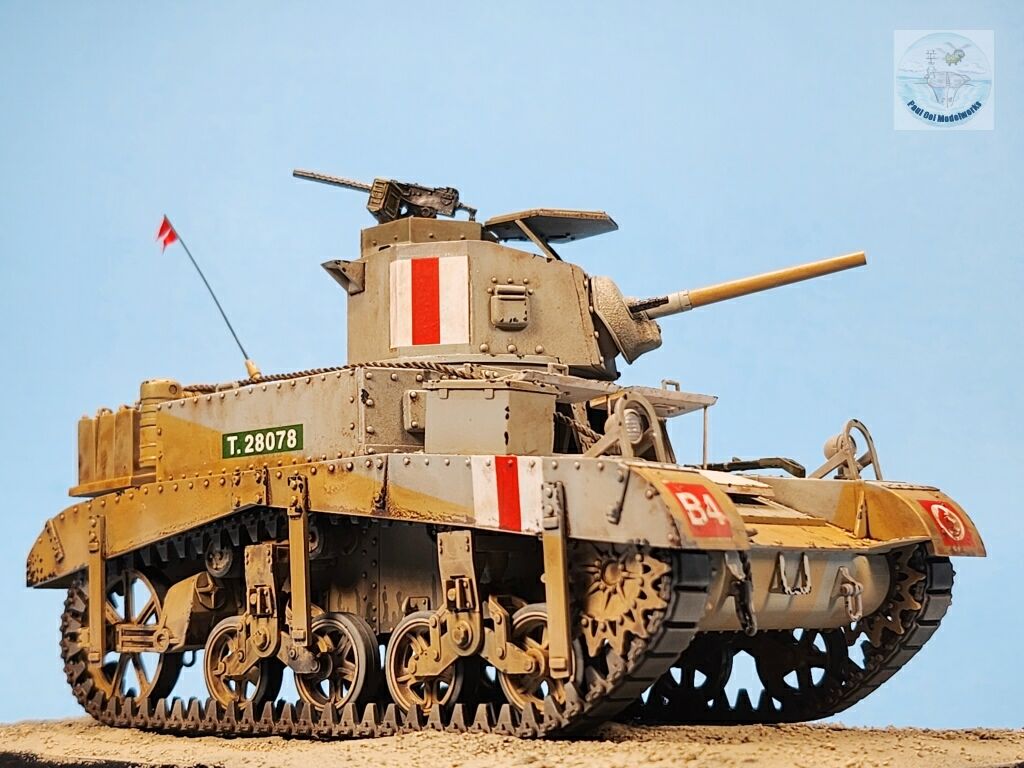
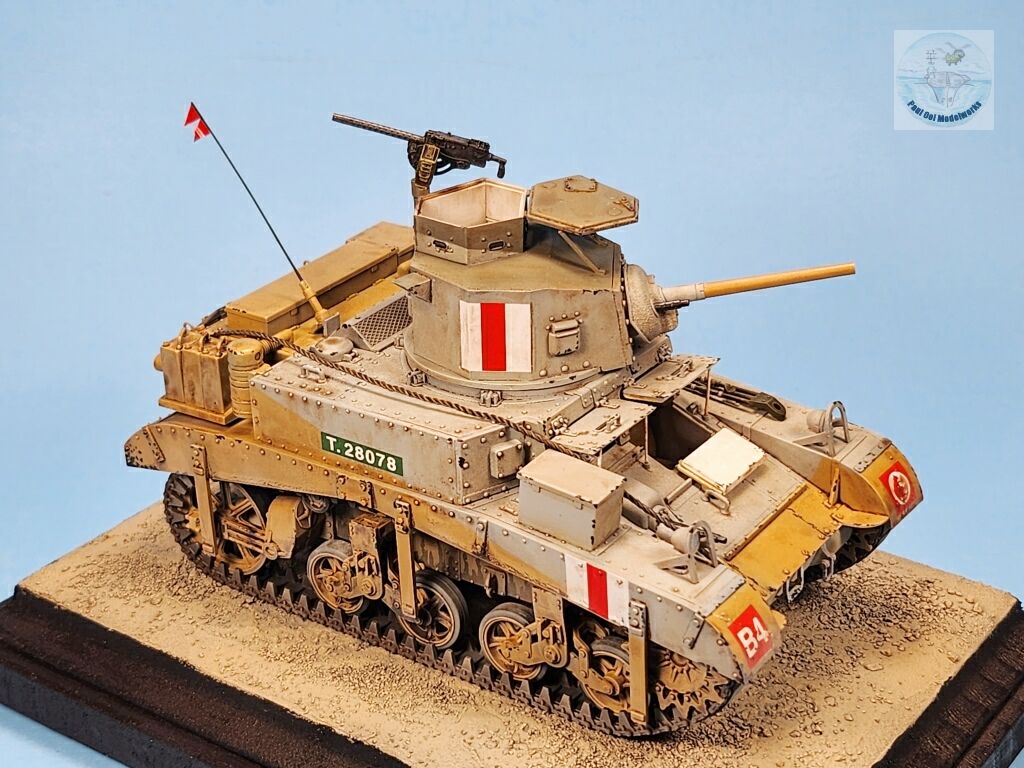
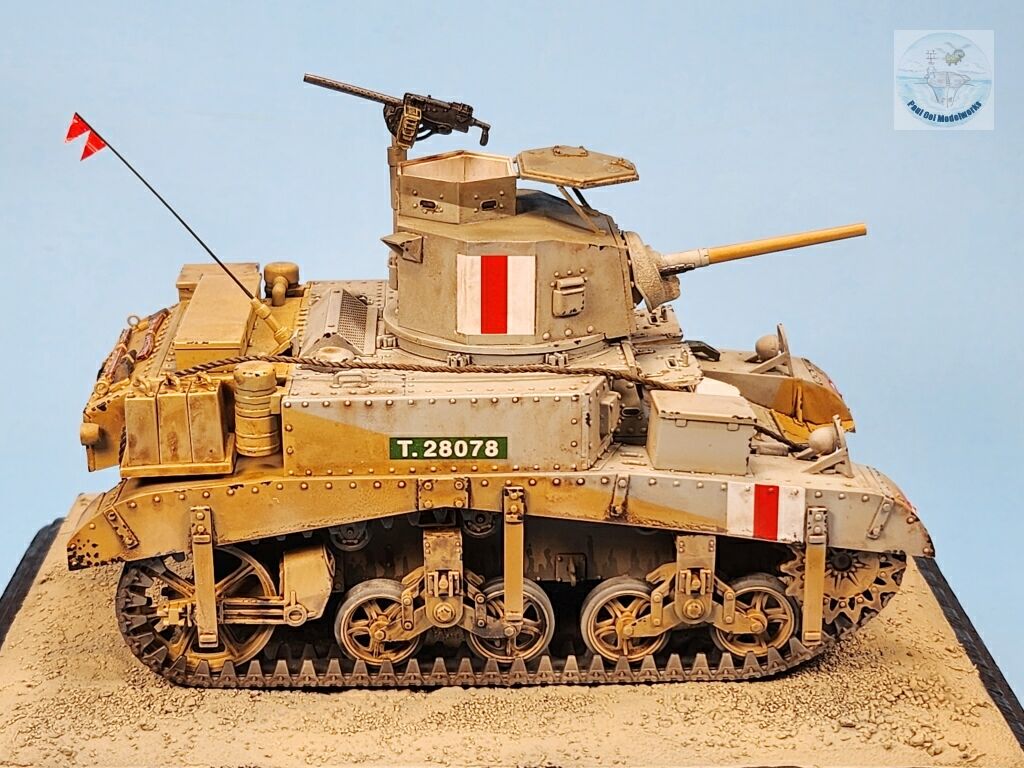
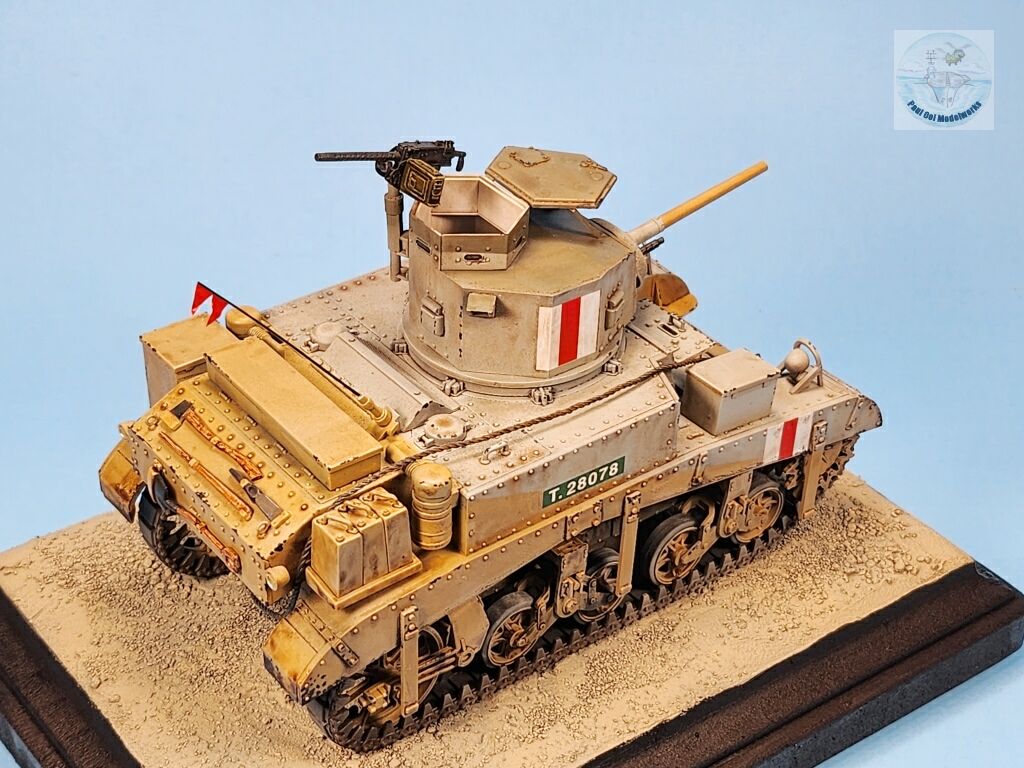
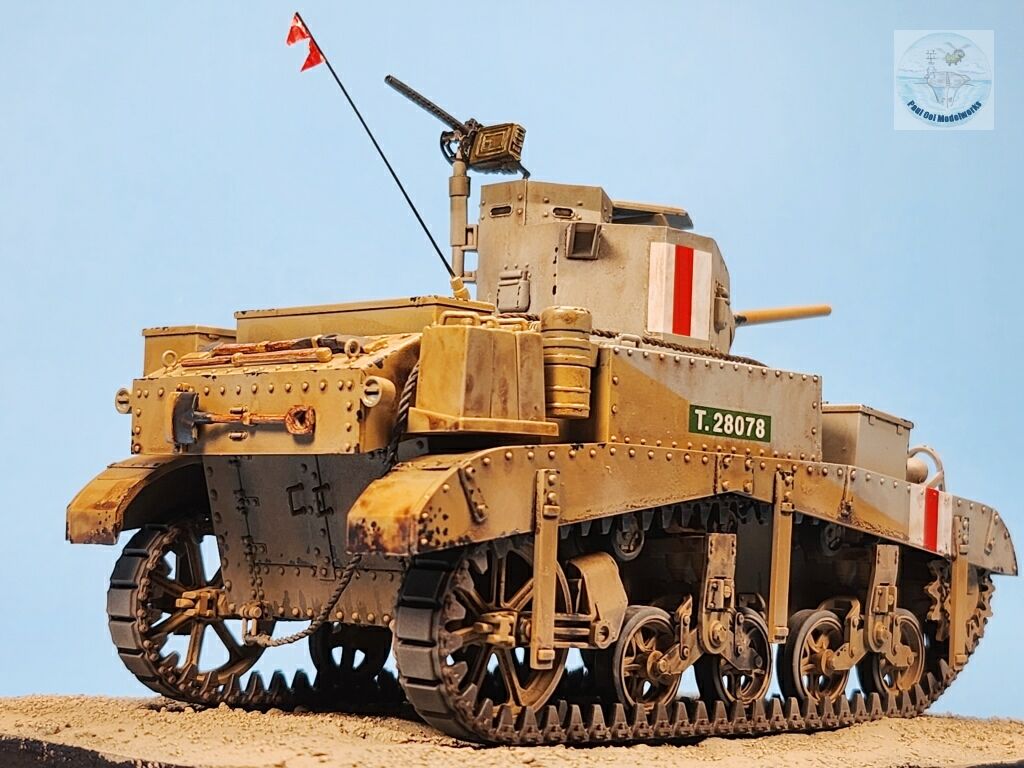
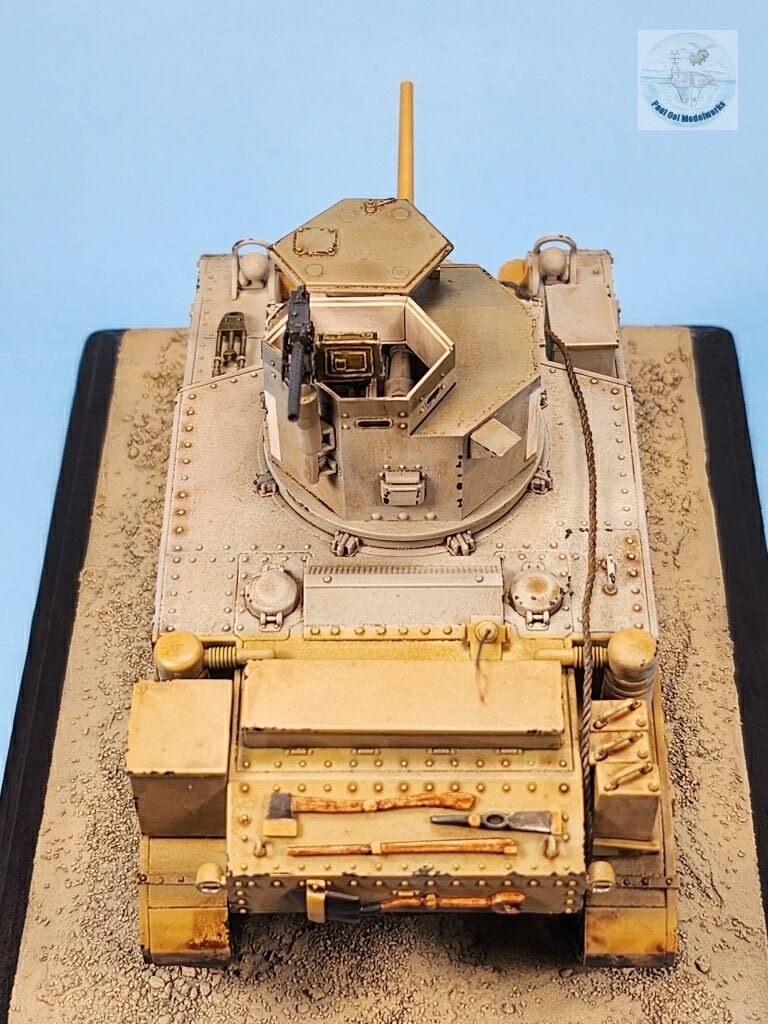
I had previously built the US Marines Pacific version of the M3A1 in 1/72 scale. I would describe the M3 as a “perfect little tank” that is fun to build, and very satisfying. This build is more detailed, and spotting the early war “Caunter Dazzle Scheme” that the British tanks were using in the desert campaigns of 1941. I decided to build the version used by the 8th King’s Royal Irish Hussars, 7th Armoured Division engaged in “Operation Crusader” in November of 1941. Also, I presented this model without much “cargo” like bags, extra supplies, and spare parts piled high to show the lines of the hull. As finished, I did not have a suitable British tankman from that era, and so I added one later from Gecko Models.
Gallery


Construction Notes
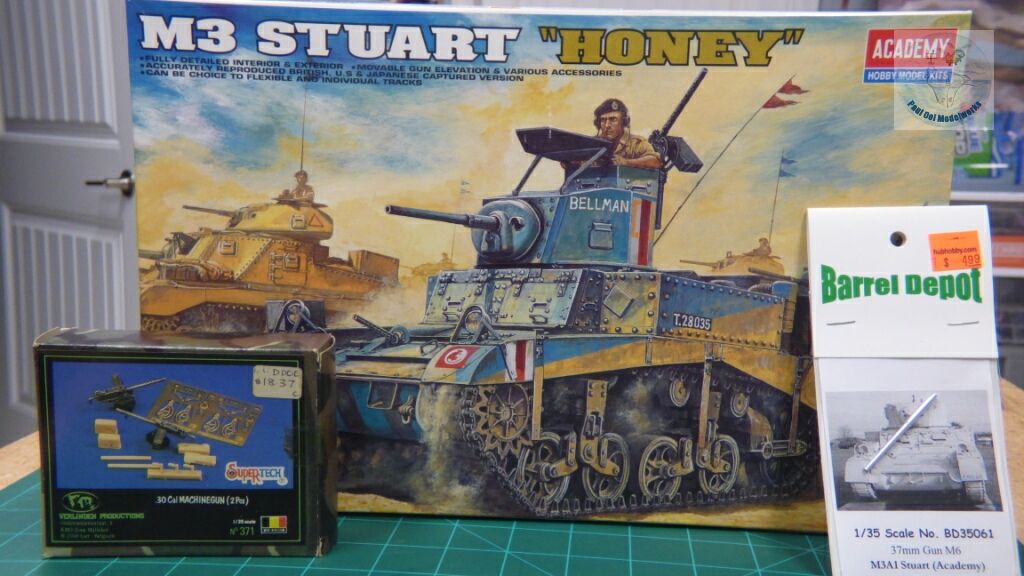
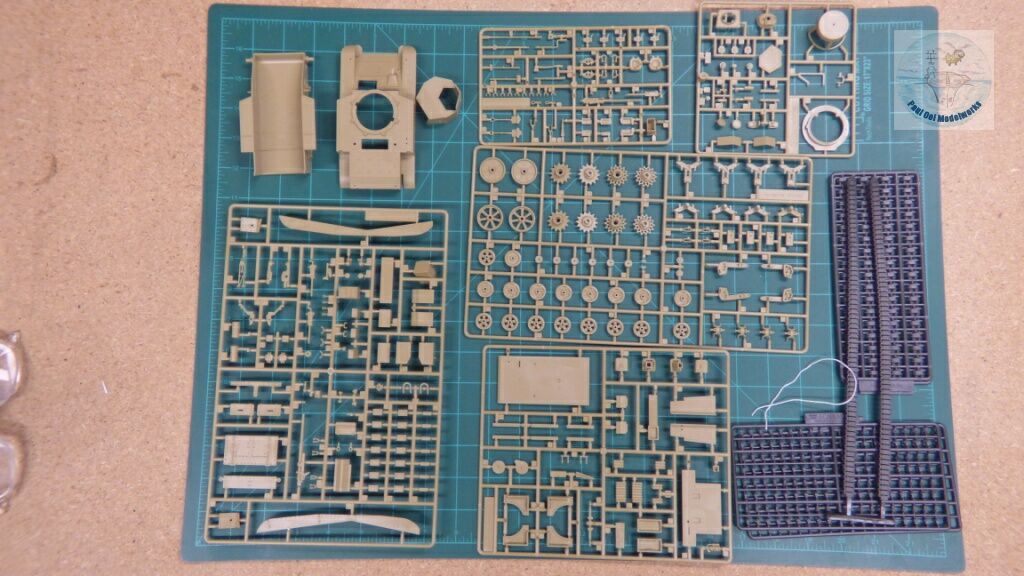
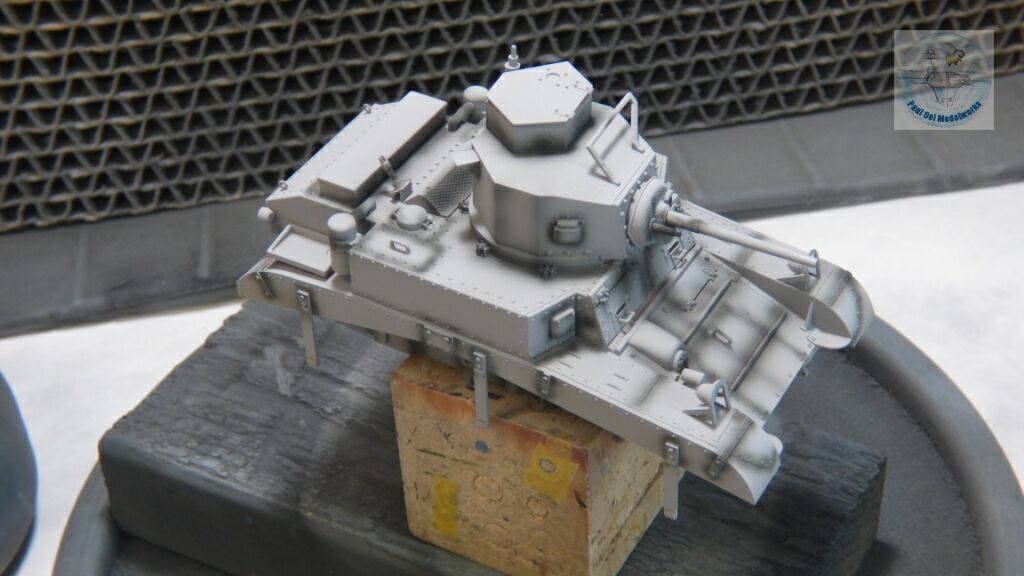
I bought this 1/35 scale Academy kit when it first came out in 2002, so I have had this kit for 23 years before building it! I had accumulated an aluminum barrel from Barrel Depot, and a Verlinden browning machine gun to improve the details of the kit. The parts are crisp and the fit was very good. The tracks provided were a choice between the flexible one piece-track and individual links. Since the one piece was very well-molded, I chose to just use it as I did not have to worry about showing a realistic sag like one might encounter with other tanks. This kit is now also issued under Airfix with different decals. This is a good starter kit for anyone wanting to explore AFVs in 1/35 scale as you can get very good results without having to get after-market parts.
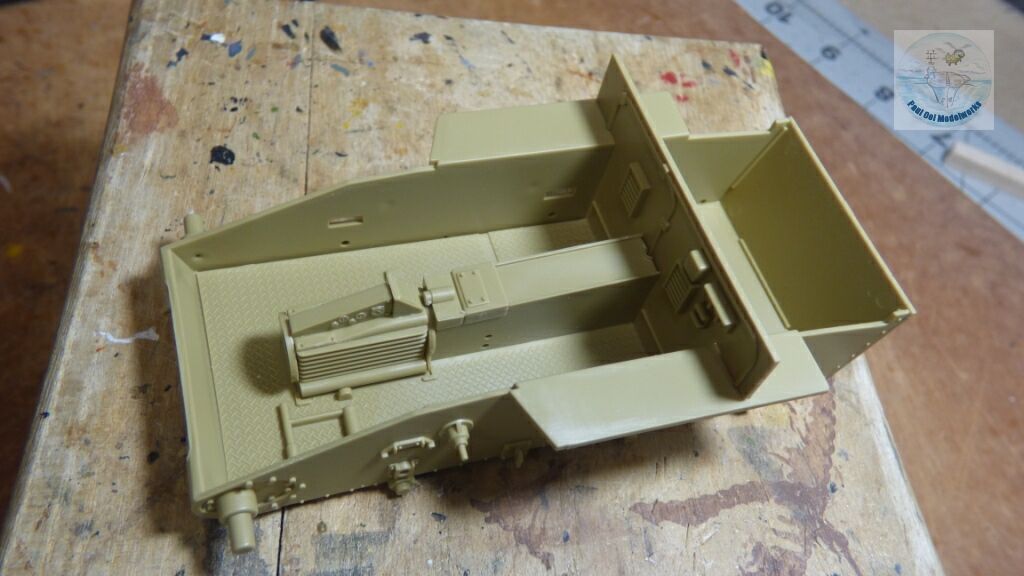
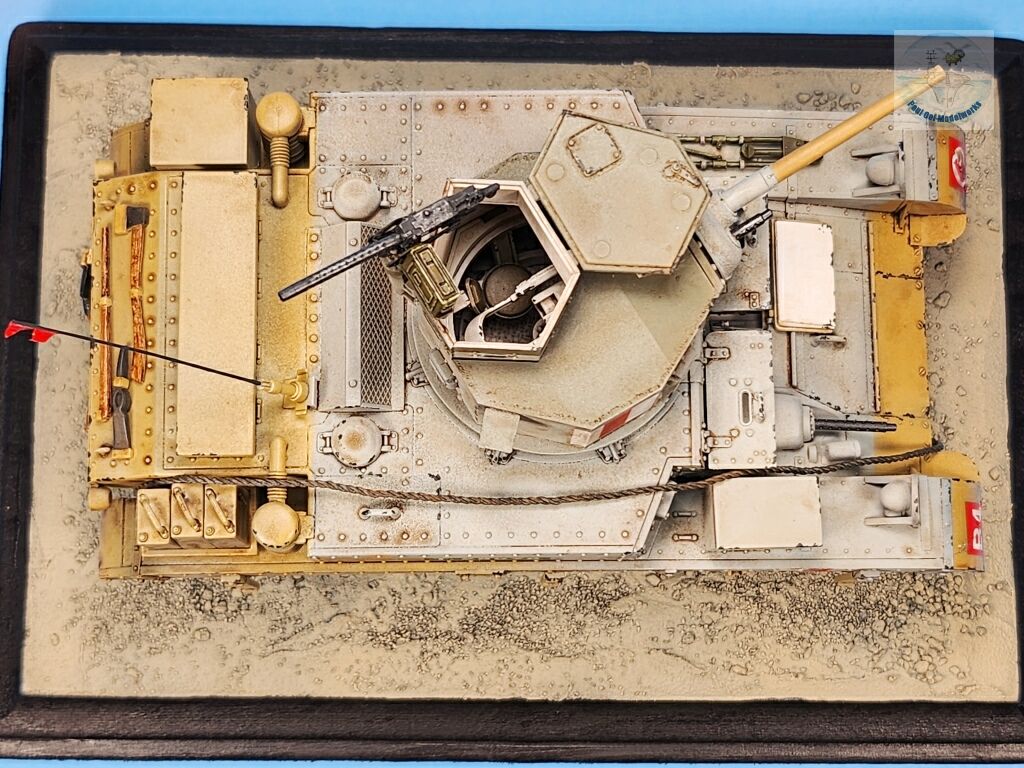
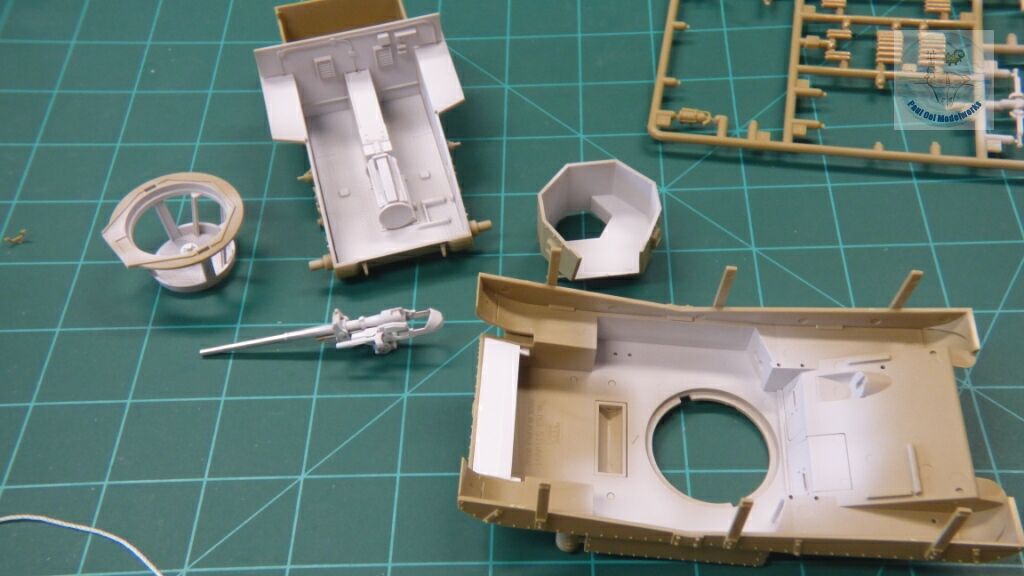
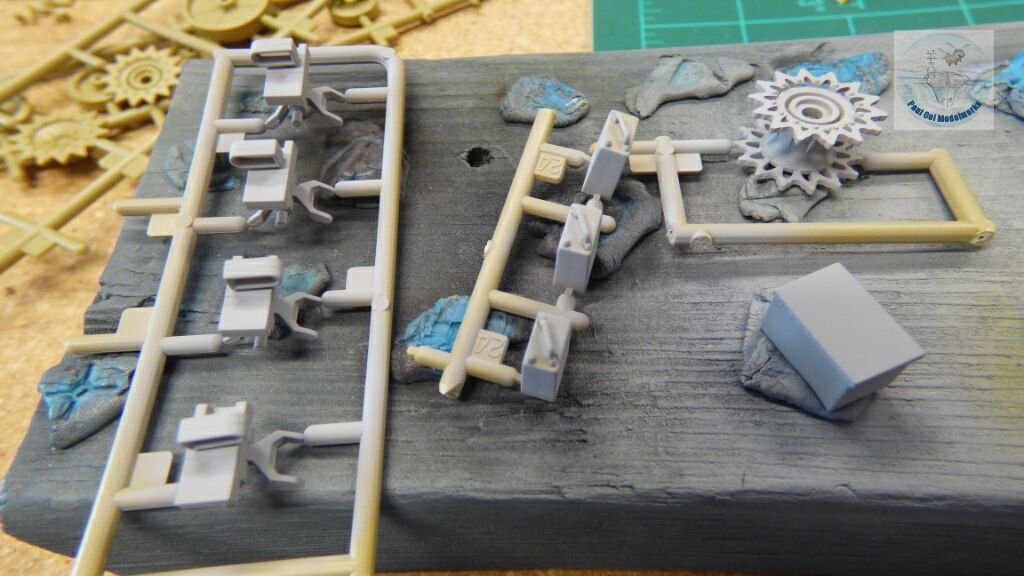
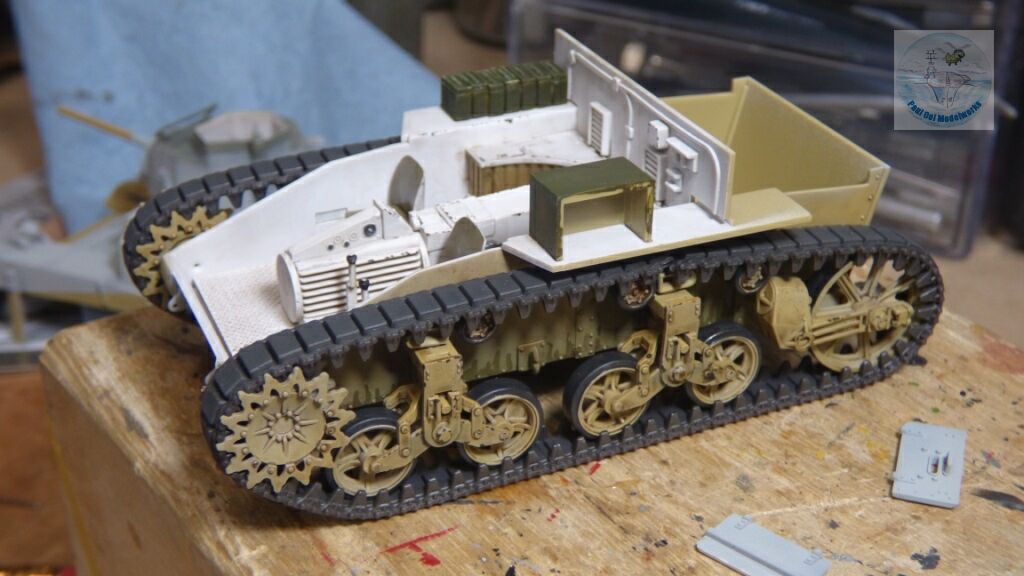
The build starts with the interior of the fighting compartment. This kit comes with a fully detailed interior (not the engine compartment), and we start with the floor insert and the gearbox straddling the center of the compartment.
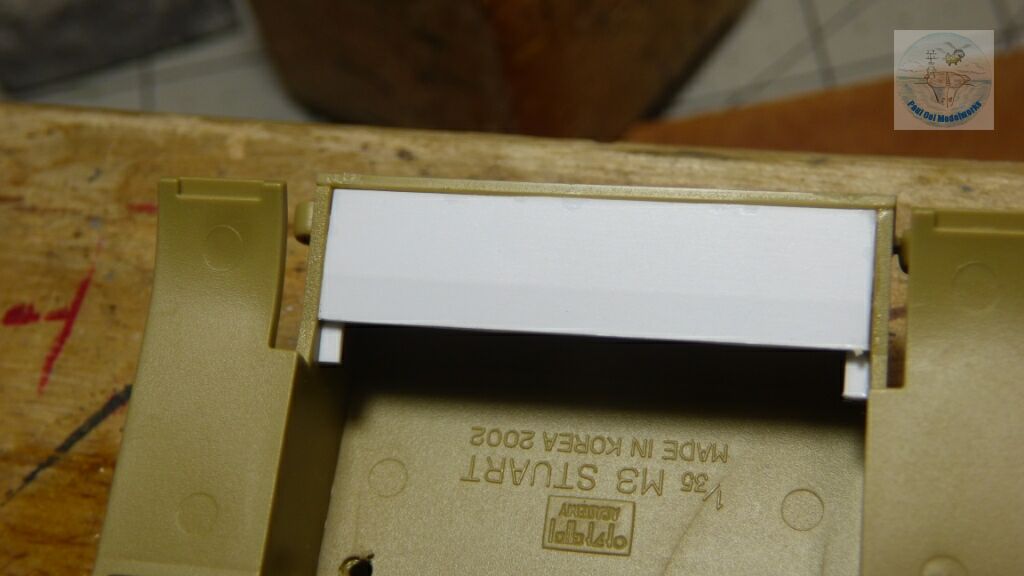

One of the things I needed to fix was the open space where the rear overhang of the top hull over the bottom hull (not really visible when displayed but it would bug me). I measured the space and cut a piece of Evergreen plastic card to fit, and then support the sides with plastic scrap.
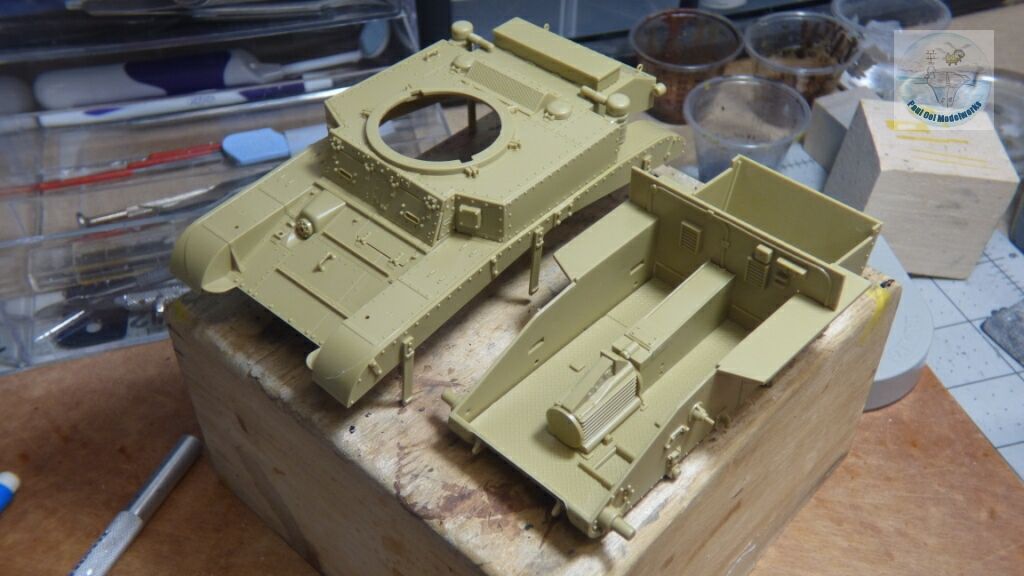
I proceed to build the top half of the hull. The fit of the two hull pieces is very good and precise.
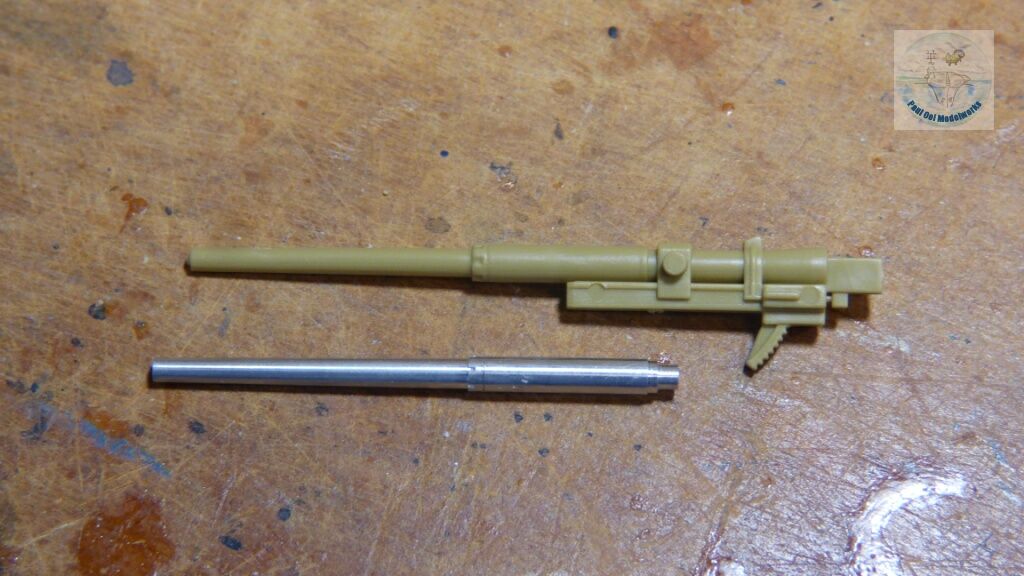
This is a comparison of the aluminum barrel to replace the kit part. You can see that the kit part is a one-piece that extends all the way to the breach. Some precise surgical grafting work is required here. As I have mentioned before, the kit part will build a good barrel for the beginner and intermediate modeler.
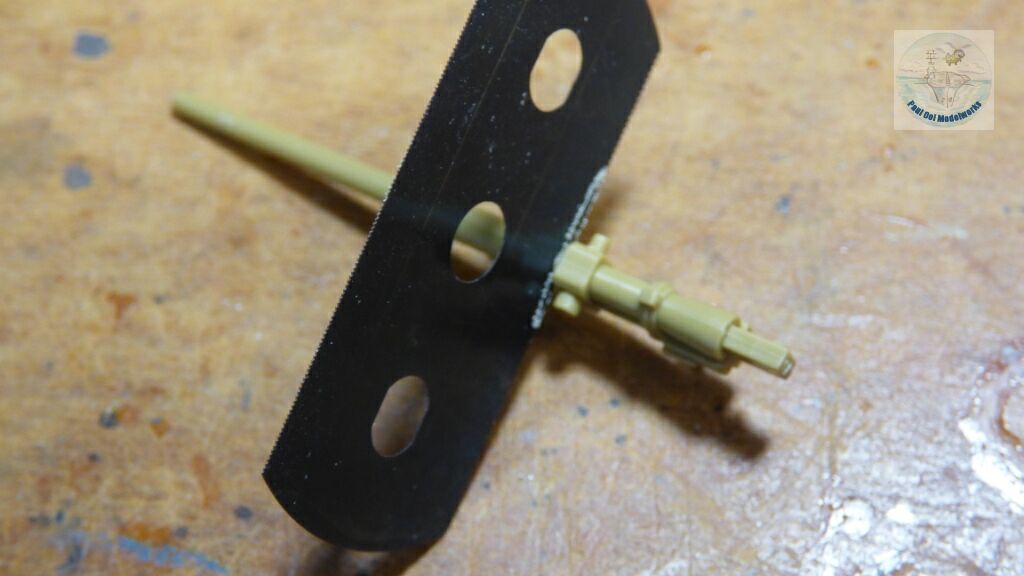
Using a precision saw, the plastic barrel is removed in two cuts, first the length right at the pivot point, and then the separation cut below the recoil housing.

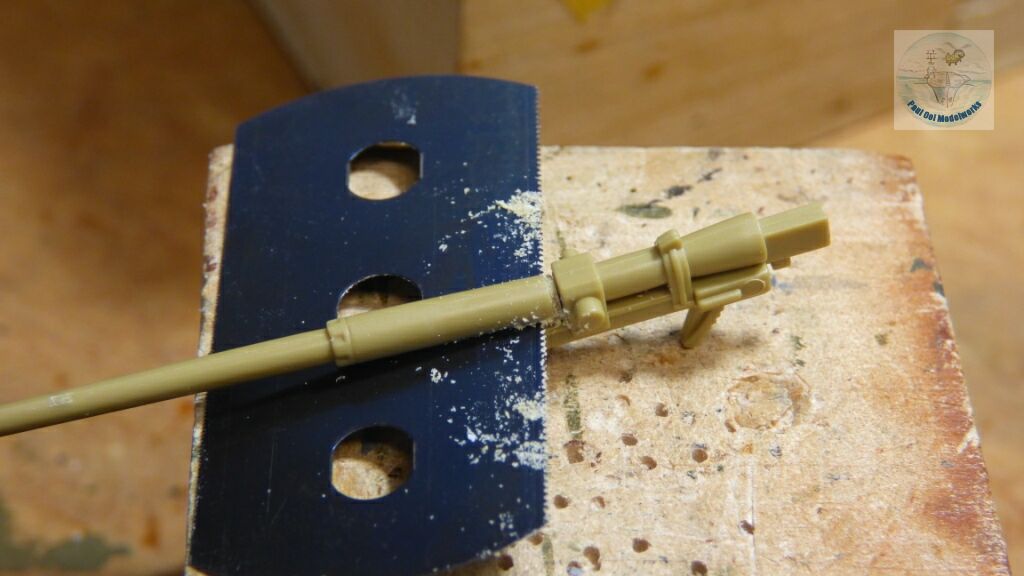
Carefully marking the center of the barrel axis, I drill out the remaining breach section to a depth of 2mm or 1/10 inch to allow the aluminum barrel to fit in and recess into the plastic part.
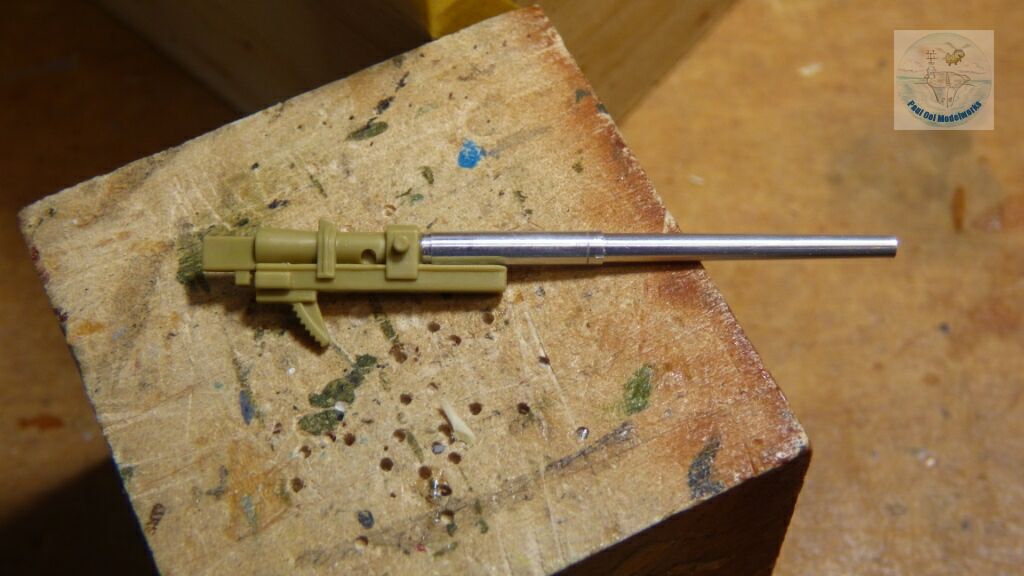
The aluminum barrel is fitted onto the kit part, and joined with cynoacrylate glue.
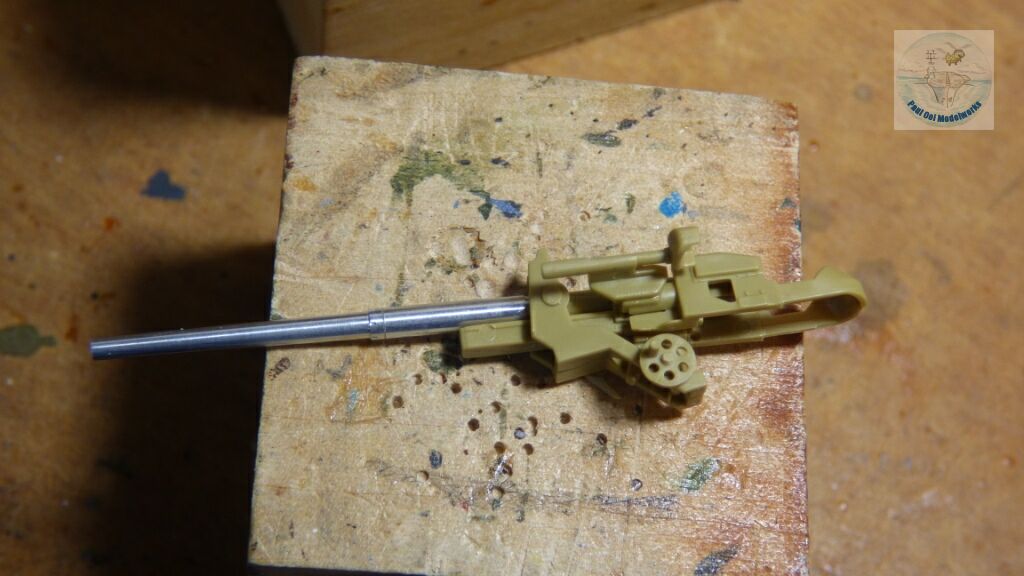
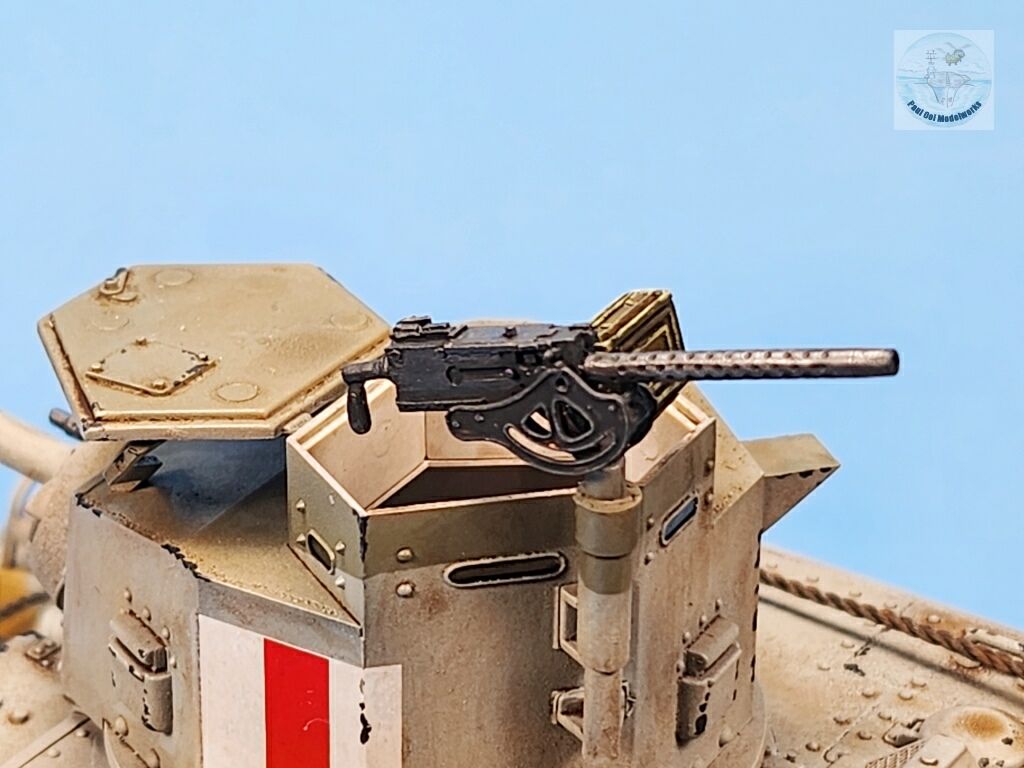
The rest of the gun parts like the elevation wheel, gun sights, and breach guard are added on.
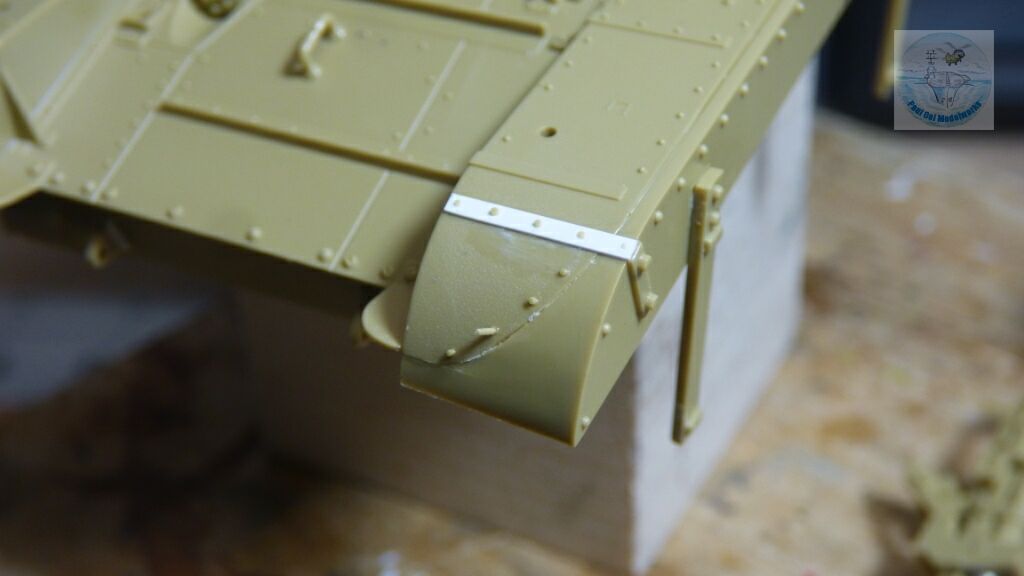
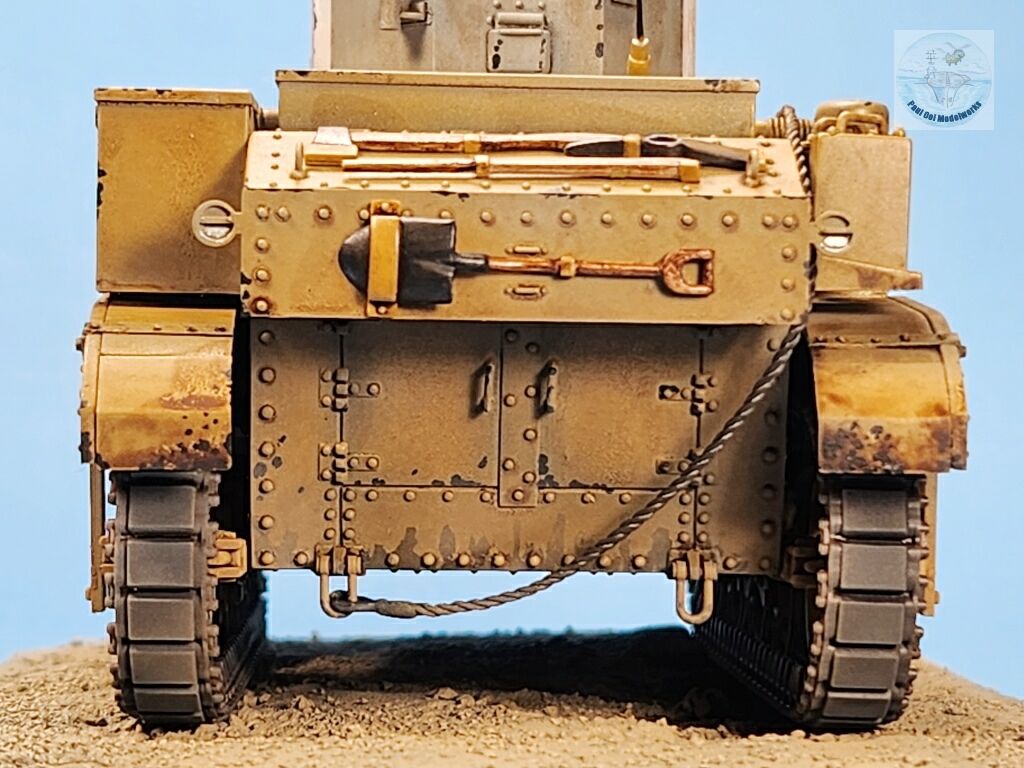
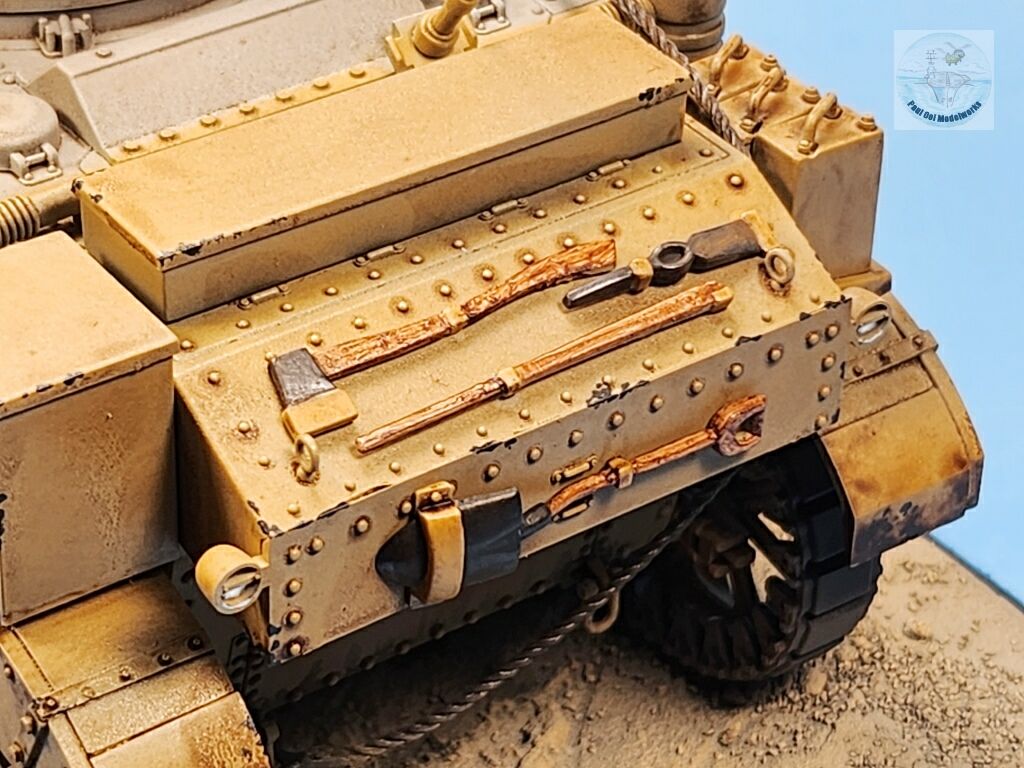
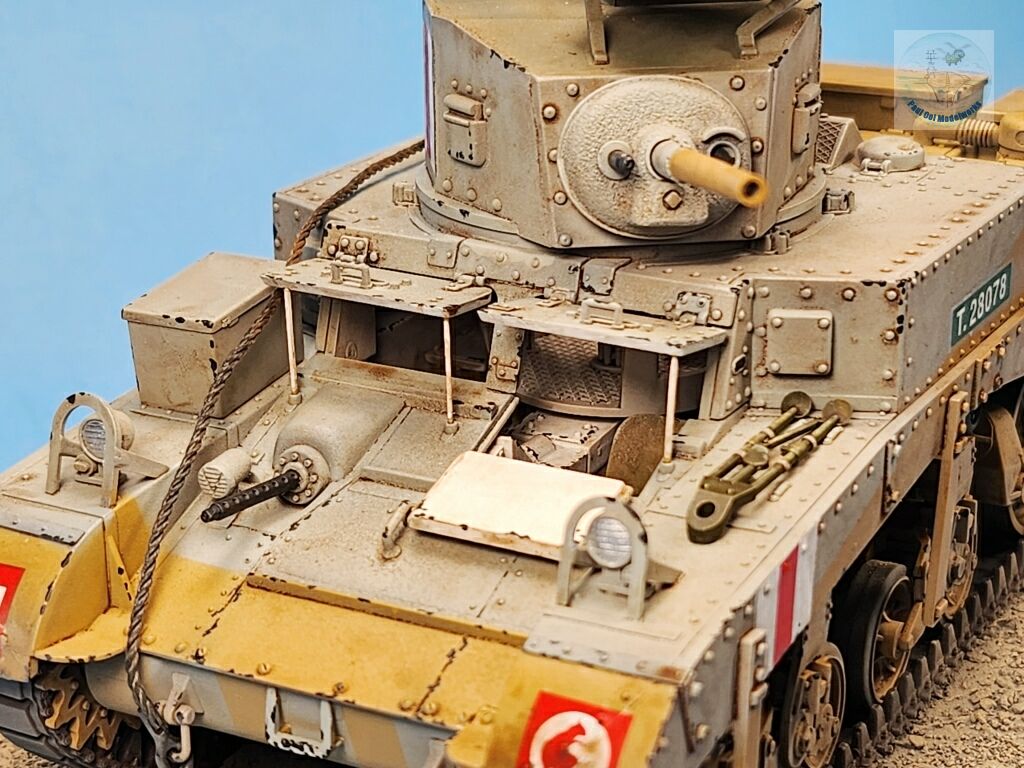
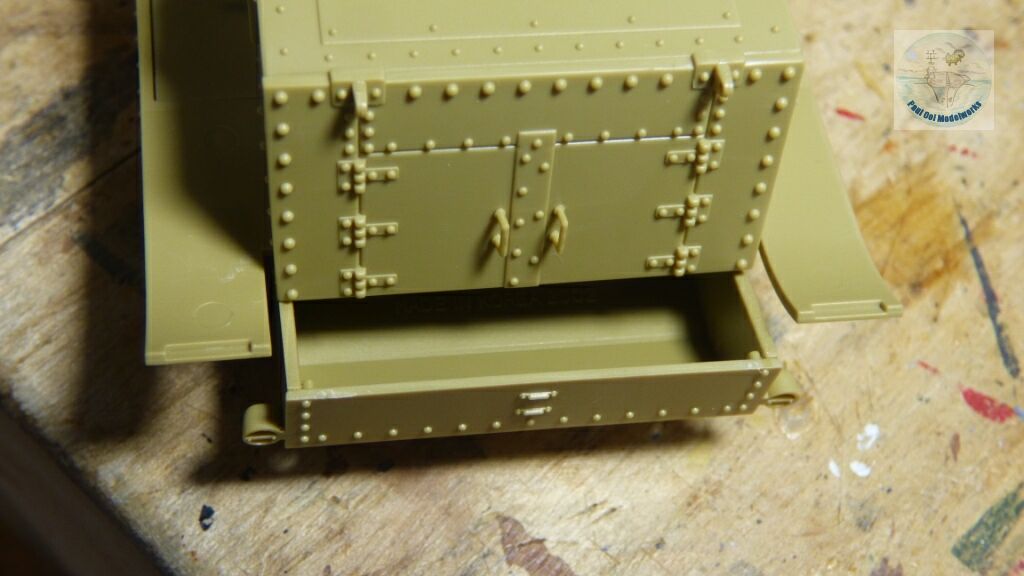
The other detail that needed enhancement was the lack of the reinforcement joint plates across all four mudguards front and rear, and also the rivet detail where the side skirt meet the hull in a curve. The plates are Evergreen plastic strips and the rivet details are stretched sprue rods glued on and then trimmed to the correct height.
All the interior surfaces are pre-painted with Tamiya XF-2 Flat White.
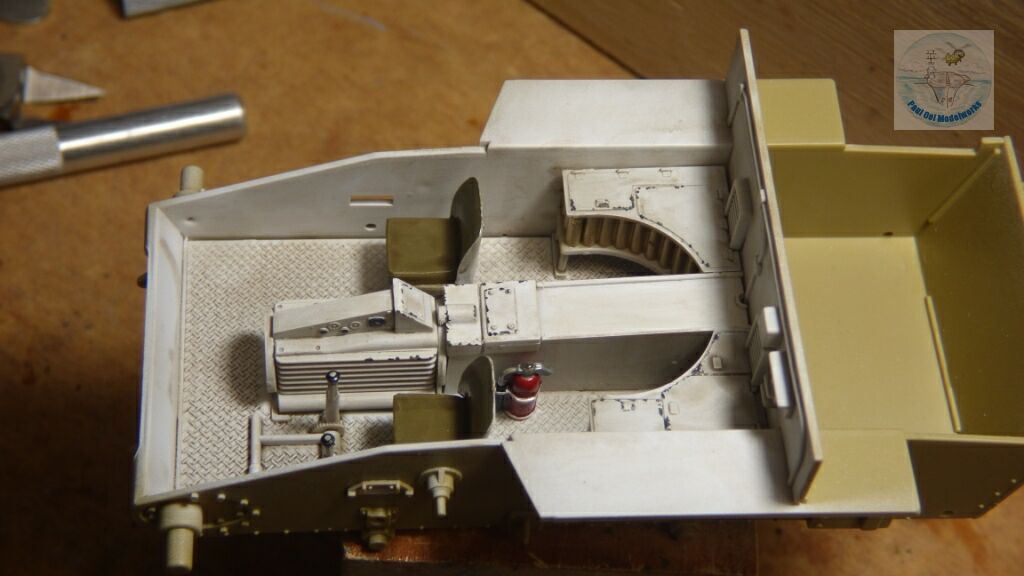
The full interior space is fully completed, complete with driver and machine-gunner/loader positions, shell storage racks, and fire extinguisher. Weathering is completed as well with Tamiya XF-69 NATO Black and an oil wash of Burn Umber + Lamp Black.
The tow hull halves are fitted together but not glued. We are now ready to spray paint the tank.
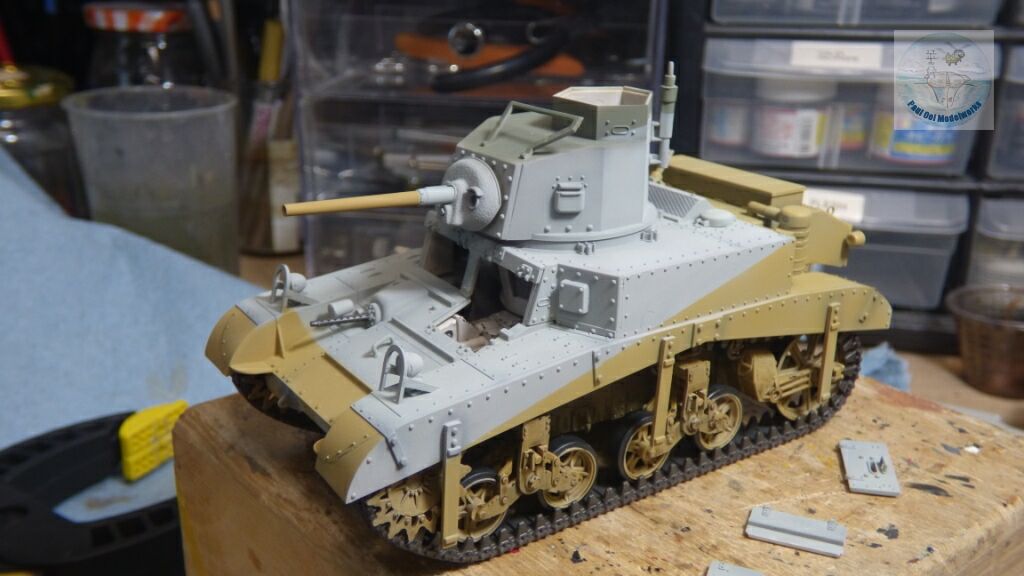
First, I prime the entire tank and the remaining loose parts like the chassis truck and wheel parts in Tamiya XF19 Sky Grey. The dark undershade is then applied using NATO Black.
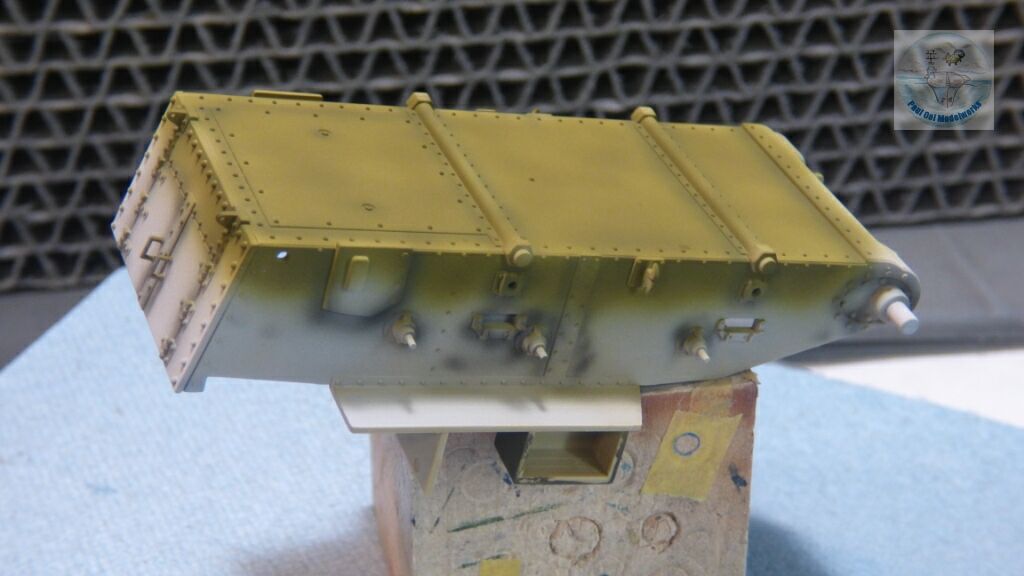
Since the original tanks arrived in the US Army color of Olive Drab, and then the British Caunter Dazzle pattern was applied at the field, the underside of the tank was still in that original color. I used Tamiya XF62 Olive Drab.
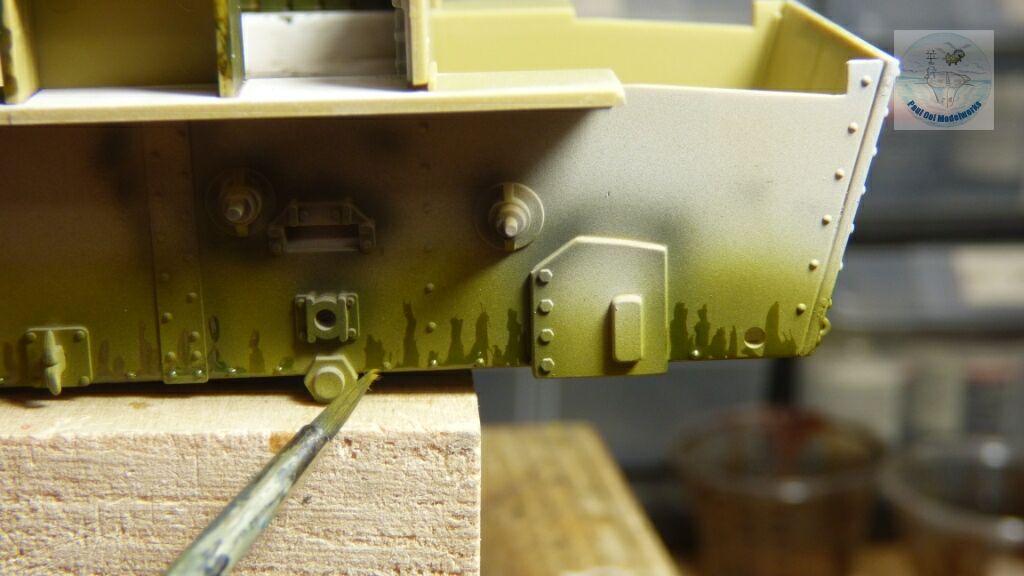
The pictures show that in a very short time, the wear and tear of desert driving wore away the upper camouflage to reveal the original Olive Drab. I create that wear pattern using a masking agent applied with a brush around the underside edges.
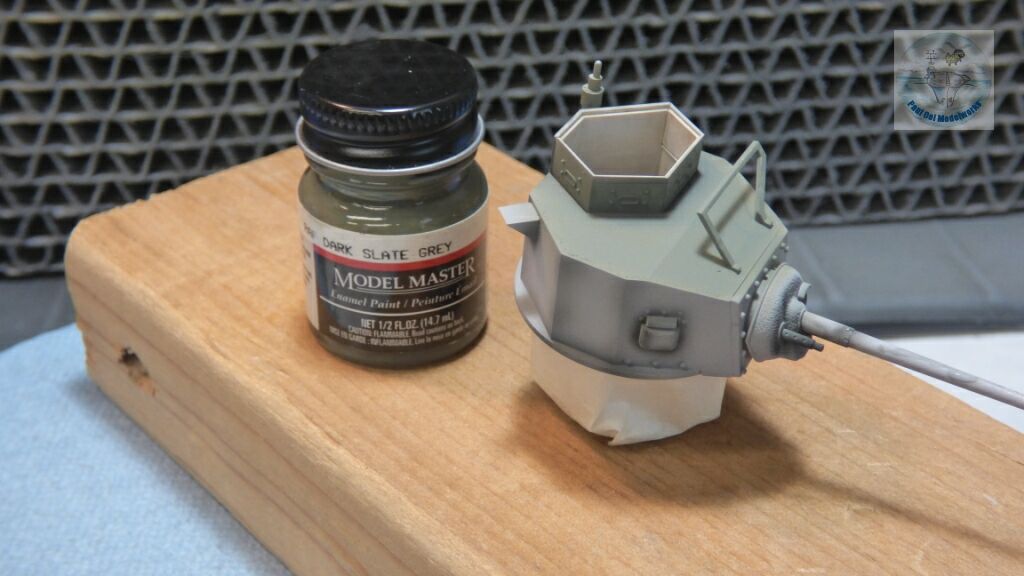
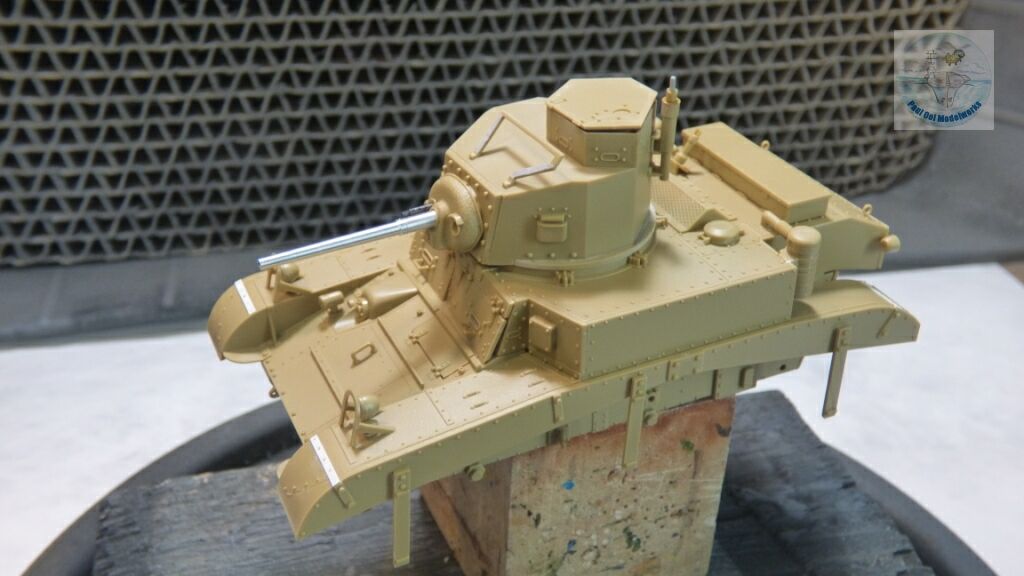
The top of the turret and hatch is painted with Model Master RAF Slate Grey which is closer to a darker shade of German Field Grey. Some modelers paint this surface with a darker shade of Engine Grey which is OK when freshly applied but the actual color looks a bit greener and more faded in the desert sun.
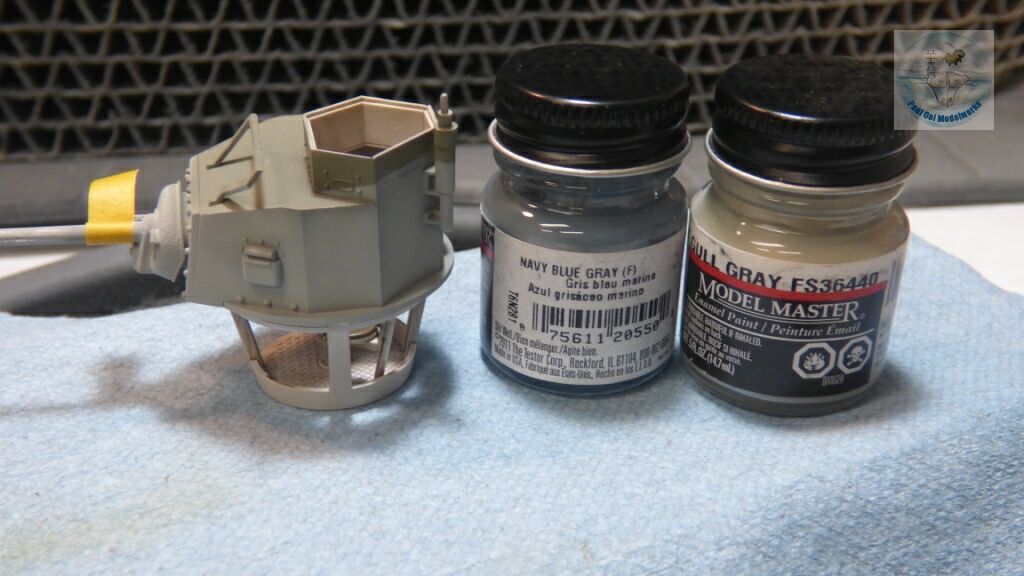
Next, I applied the British Silver Grey pattern over the turret and the front portion of the hull. This is mistakenly shown in the kit art and box as a strong blue color closer to Intermediate Blue. This is incorrect as British Silver Grey is much lighter with a hint of blue. I mixed Model Master Light Gull Grey FS36440 80%with Model Master Navy Blue Grey (or you can use any Intermediate Blue) 20%.
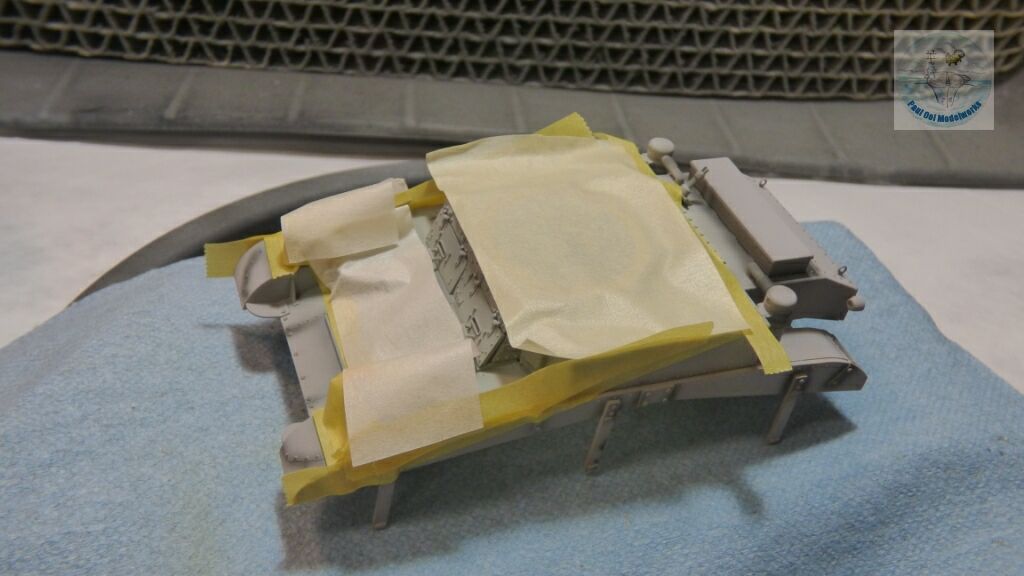
I masked most of the area of the Silver Grey in preparation for the application of Desert Yellow.

Tamiya XF59 Desert Yellow is applied to the rear and lower surfaces of the hull, and on the chassis trucks and road wheels. Once the masks are removed, you can see the straight lines of the dazzle pattern.
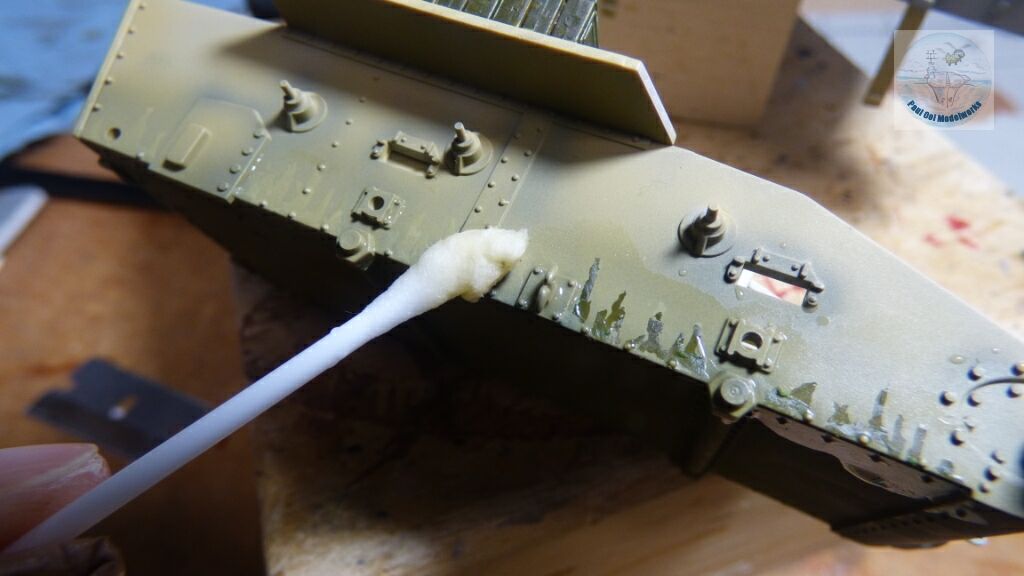
The masking agent is removed with a wet cotton swab to reveal the Olive Drab wear pattern.

The road wheels, chassis trucks, and rear idlers are flued on. The front drive sprocket is just fitted on but not glued to facilitate the installation of the tracks.
The tracks already come molded in gun metal (great), and I only had to spray paint the middle rubberized pads with NATO Black. Fitting of these tracks are similar to the tracking technique I described in the Pacific M3A1. The fit of these tracks are excellent without being overly tight or loose. I also do the weathering of the lower hull at this time with the similar chipping and oil wash as the interior.
Once the last items are fitted inside the fighting compartment (machine gun, radio, ammo boxes), the two hull halves are permanently glued together.
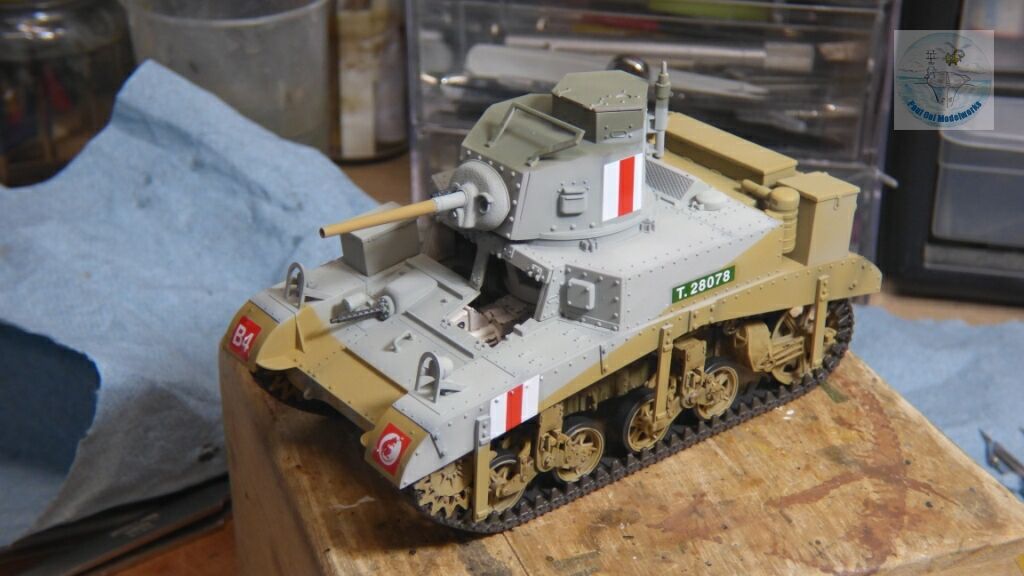
The decals are applied for the markings of a tank of the 8th Royal Irish Hussars from the1941 Operation Crusader in Libya. The decals are very good quality and apply easily and soften well to fit the riveted surface.

The entire tank is given the chipping treatment with NATO Black, and then oversprayed with a matt varnish. After that, the entire upper hull and turret is weathered with an oil wash of Burnt Umber 70% + Lamp Black 30%.
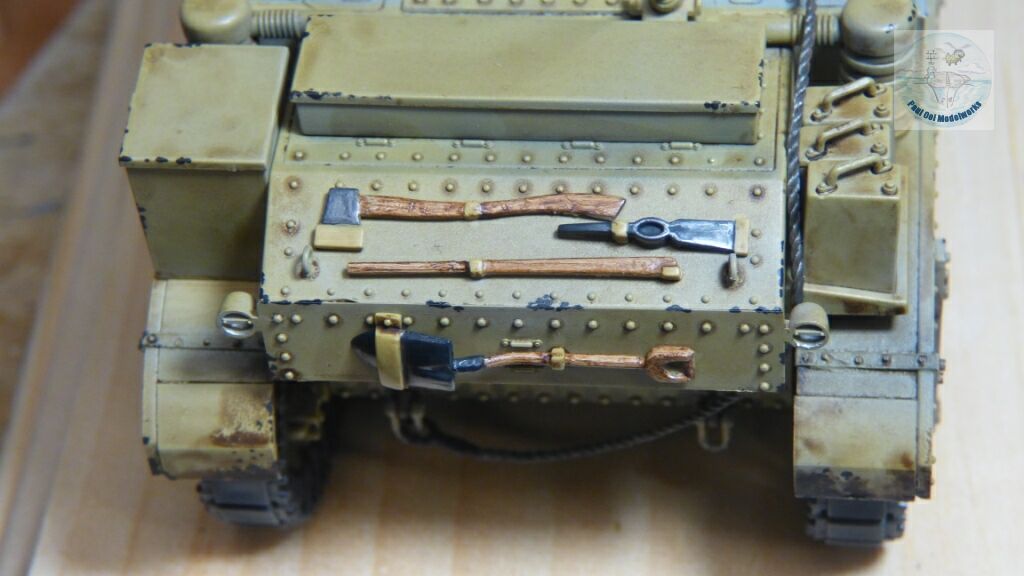
The tools are applied last.
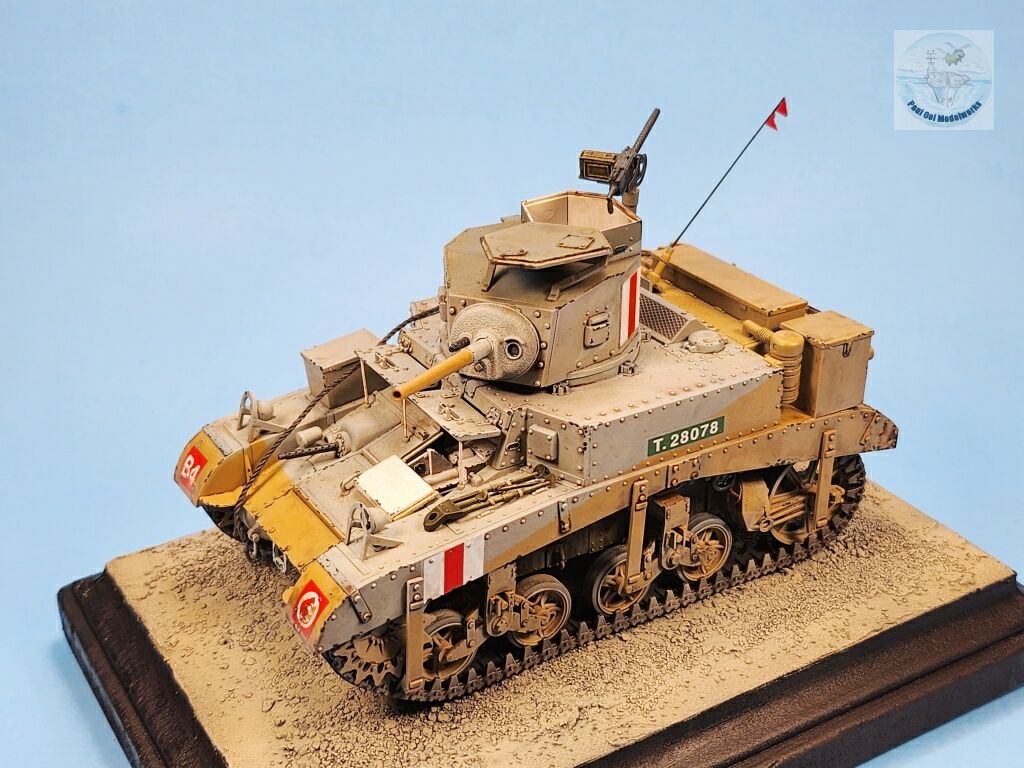
Last bits of details like the exterior Browning machine gun on the turret, whip antenna, top hatch and tow cable added.
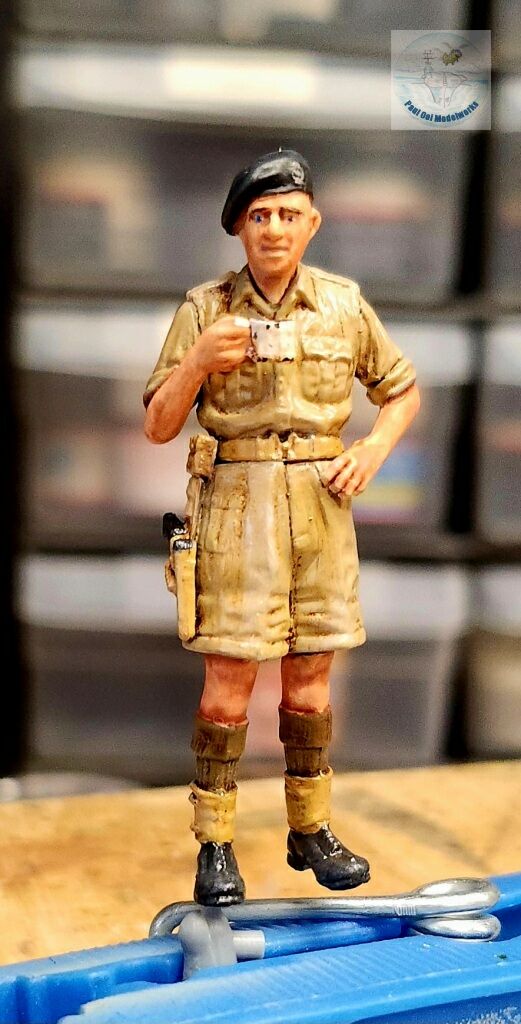
This really nice 1/35 scale early war British tankman from Gecko models was added later. The colors used are similar to the Eighth Army figures from the Crusader Tank project.
[…] 1941. I built the kit out-of-box without any after-market parts. And like the previous model of the M3 Stuart, I left the hull without “luggage” piled onto it. The only significant thing that I […]