When Nazi Germany annexed Czechoslovakia in 1938, they acquired the industrial capabilities of that small republic. Among these were the Skoda and Českomoravská Kolben-Daněk (ČKD) who were jointly producing the LT-35 tank (later, the Panzer 35(t)).The Germans quickly recognized the potential of ČKD’s type 38 tank design, and quickly co-opted that design into the Wehrmacht as the Panzer 38(t). This nimble little tank became a favorite among the Germans as it combined mobility, reliability, and good protection with a hard-hitting 37mm cannon. The 38(t)s were deployed first in the Battle of France, and then into more units during the invasion of Russia in the summer of 1941. Clad in standard Panzer Grey, these light tanks were all over the place, cutting off Soviet defenders and taking out defensive positions and transports in the rear, while the main German battle tanks attacked the front. In short, the 38(t) was a perfect light tank in 1941. As a measure of its success, 38(t)s continued to support the Germans, Finns, Hungarians, Romanians, and captured specimens were used by the Soviets until 1945. The Panzer 38(t) even featured in a South American war between Peru and Ecuador, and the last tank served until 1988!
In 1942, the 37mm gun was no longer effective in the battle field, and the small turret could not house the larger 75mm gun. However, the chassis of the 38(t) was very useable and the Czech factories could crank out lots of them. The Marder III tank-hunters were developed by building an SP gun compartment over the basic 38(t) chassis with a high velocity 75mm gun, providing the Germans with a quick solution in 1942 and 1943 when facing the Soviet T-34. Later on, the chassis became a basis for the late-war German tank-hunter called the Hetzer 38(t) that served until the end of the war. That’s a lot of use for a light tank design that started in the mid-30s.
Gallery

Construction Notes
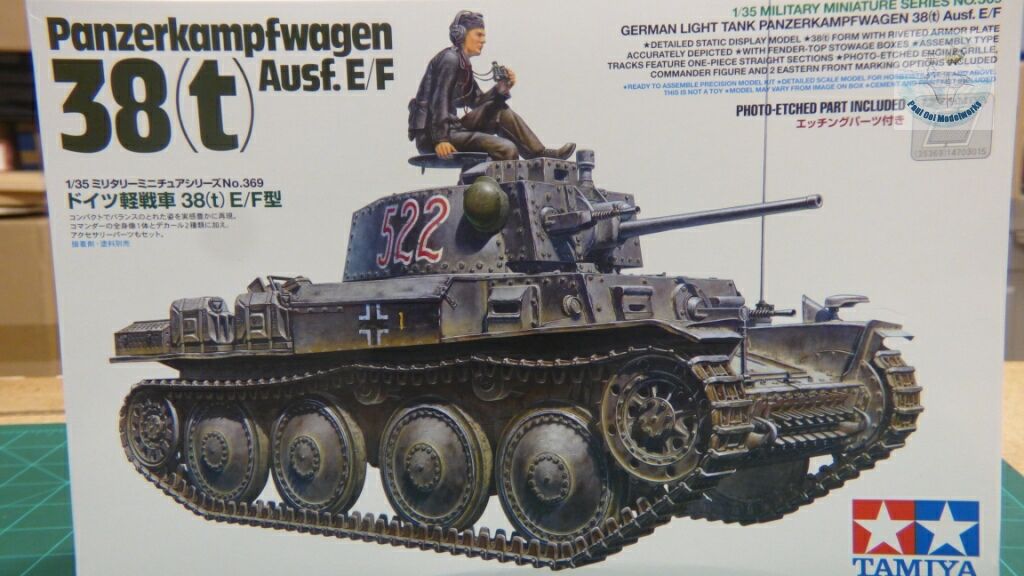
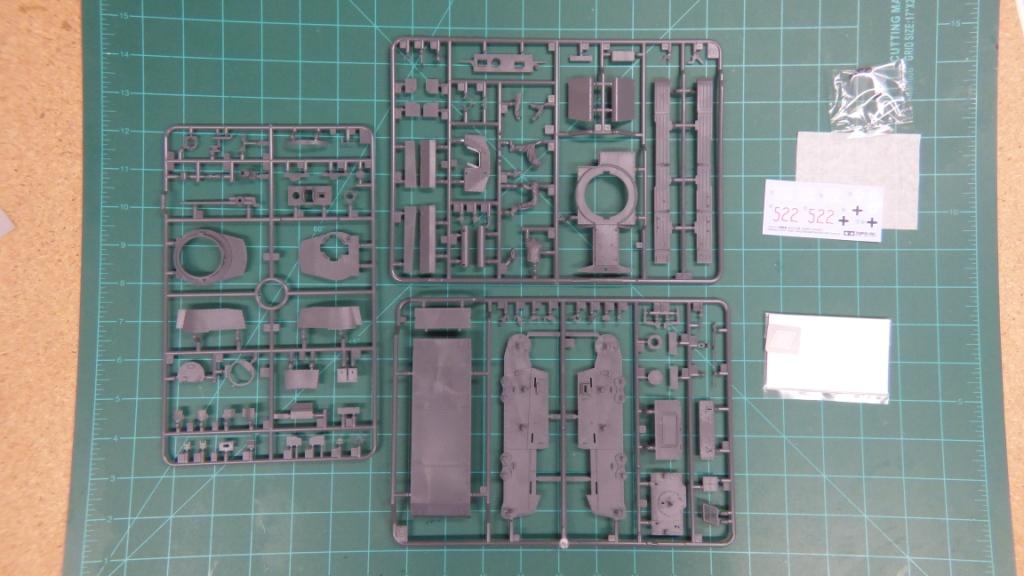
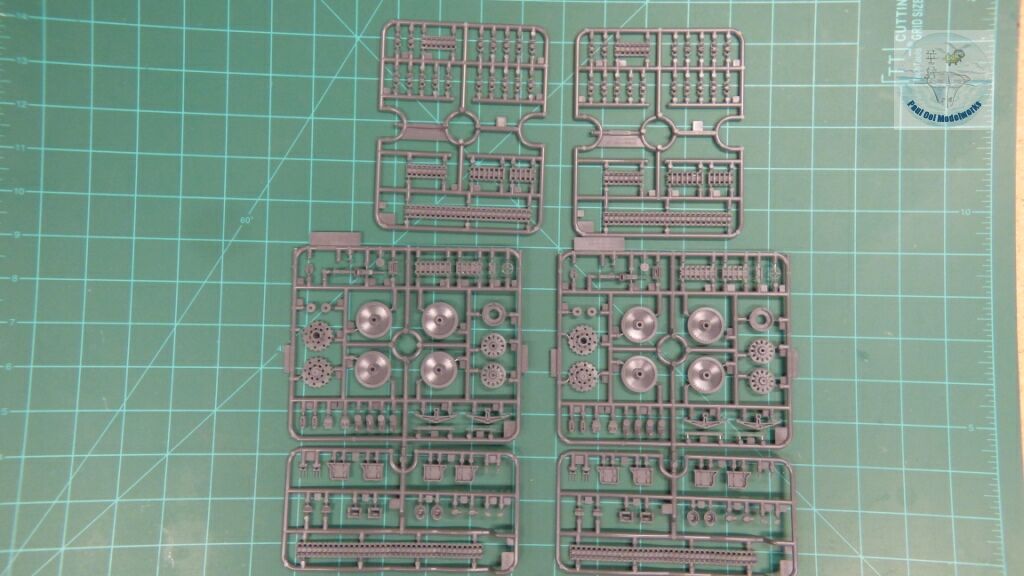
As Tamiya kits go, this 1/35 scale Panzer 38(t) reflects the state-of-the-art. Immaculately molded and detailed, perfect fit, and strategically placed ejector pins that are virtually out-of-sight once constructed. It comes with a single lozenge-shaped grill for the air intake. As mall sheet of decals and some poly caps for the road wheels completes the kit parts. The tracks are the multi-piece type, with the top section molded to a nice draping effect over the return rollers. The fit of the tracks are perfect, taking the guess-work out of the sections. This is certainly a recommended kit for beginners, but it provides enough satisfaction for more experienced modelers, especially if one were to get the internal details inserts for the crew and engine compartments.
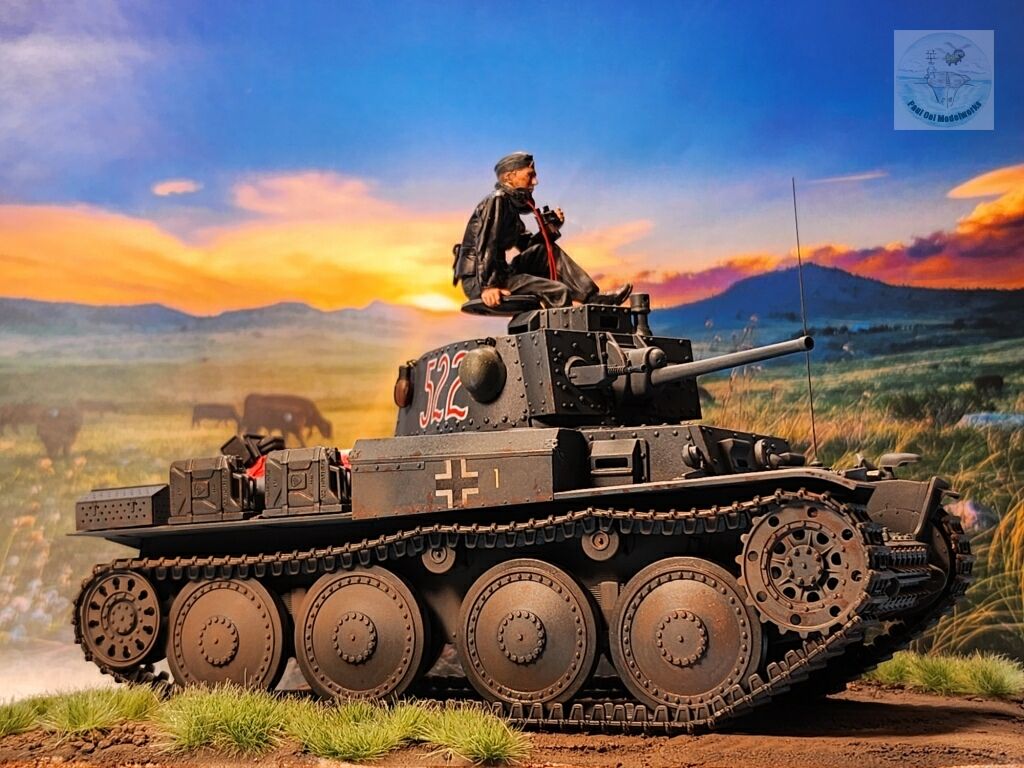
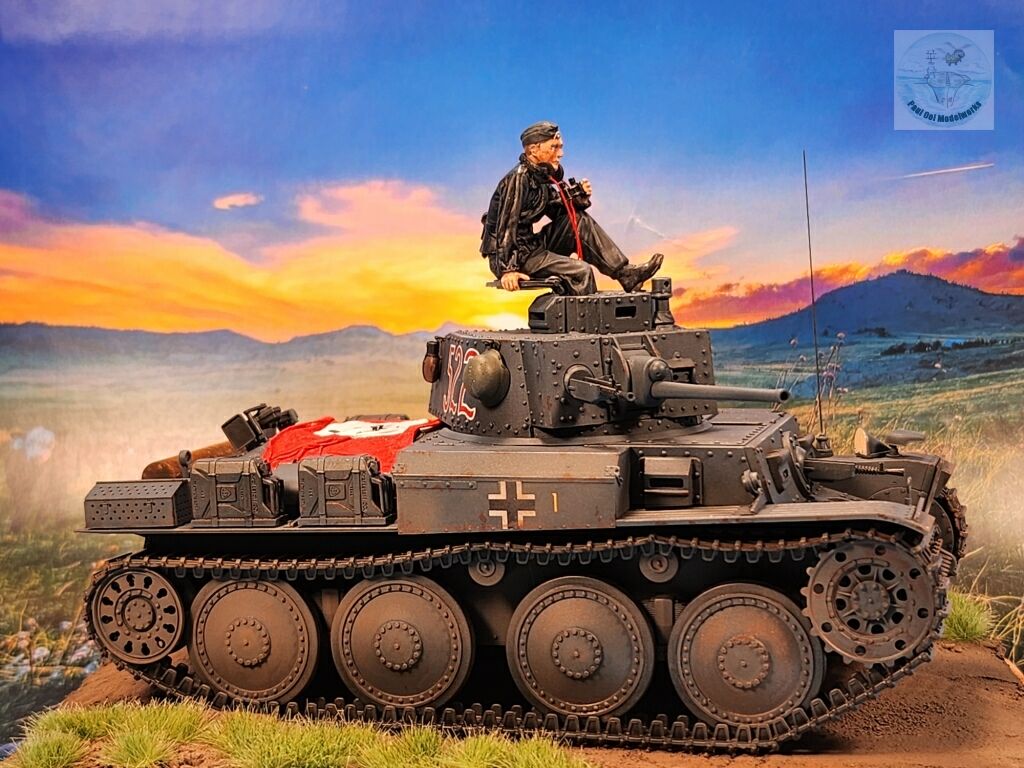
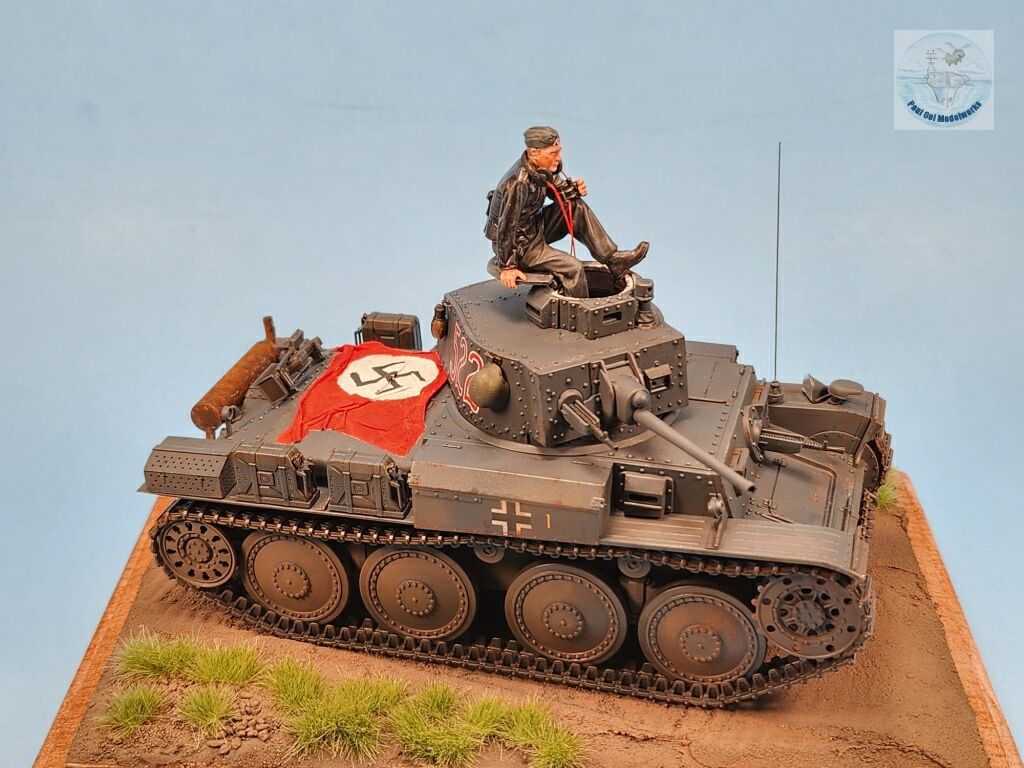
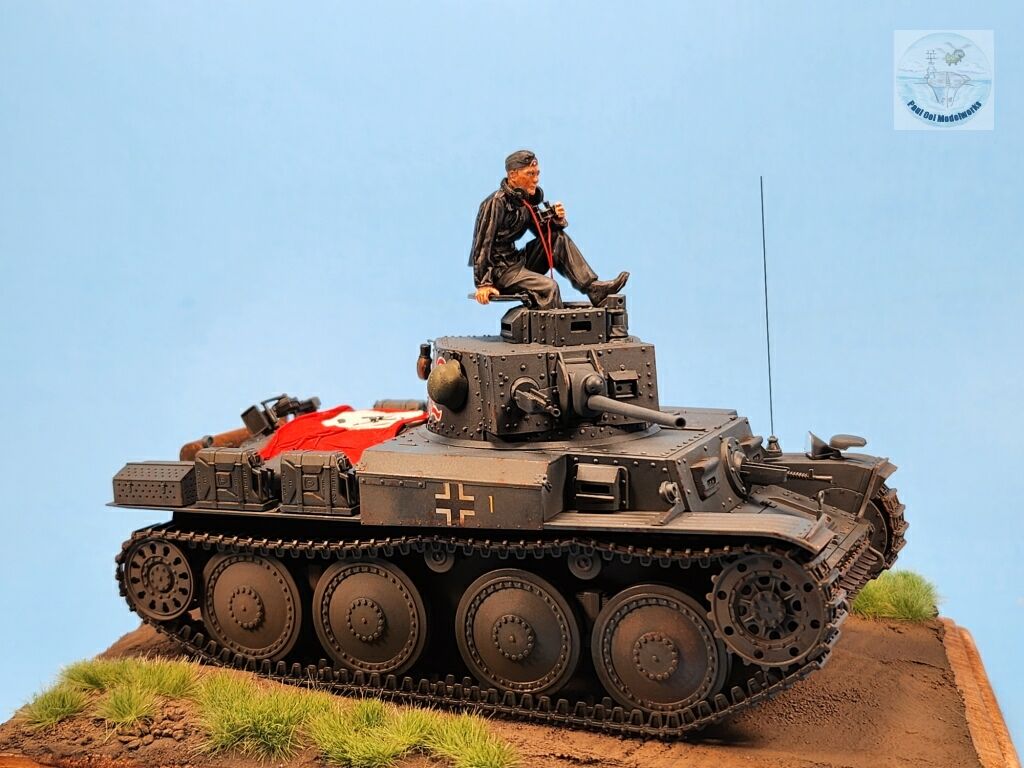
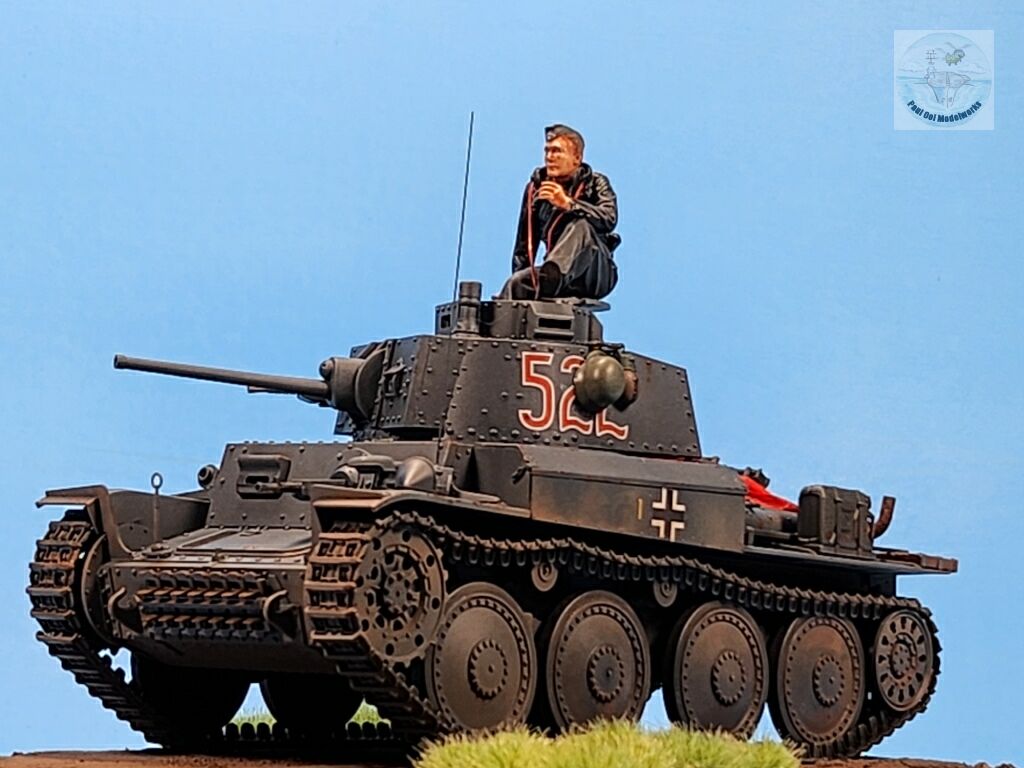
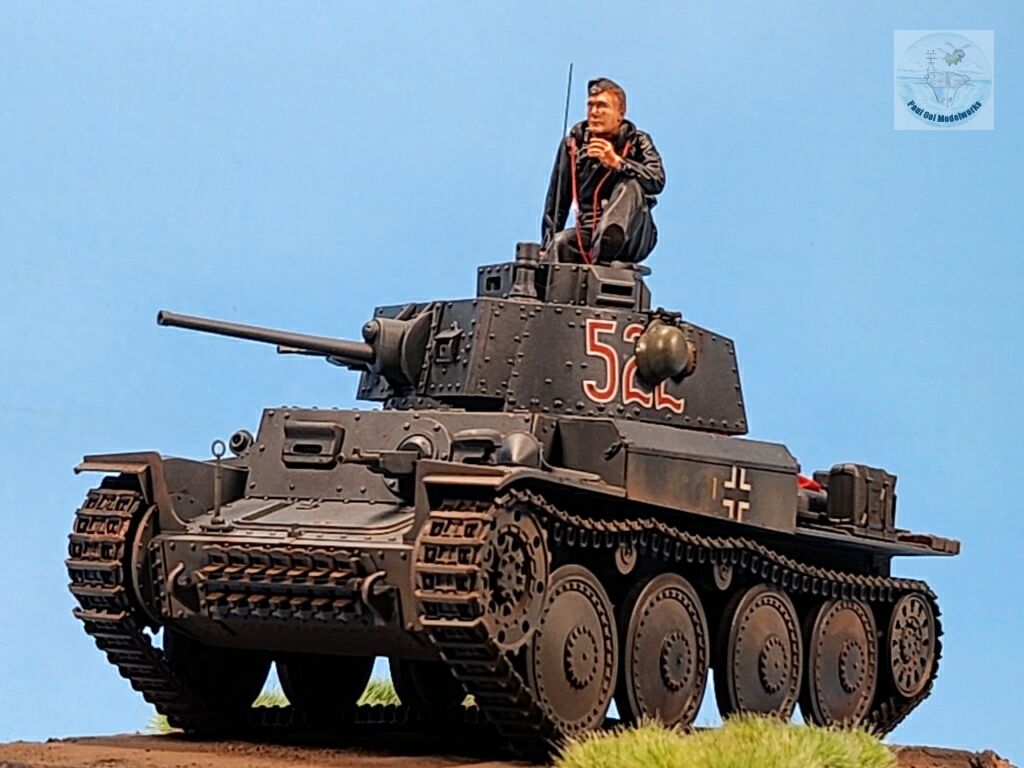
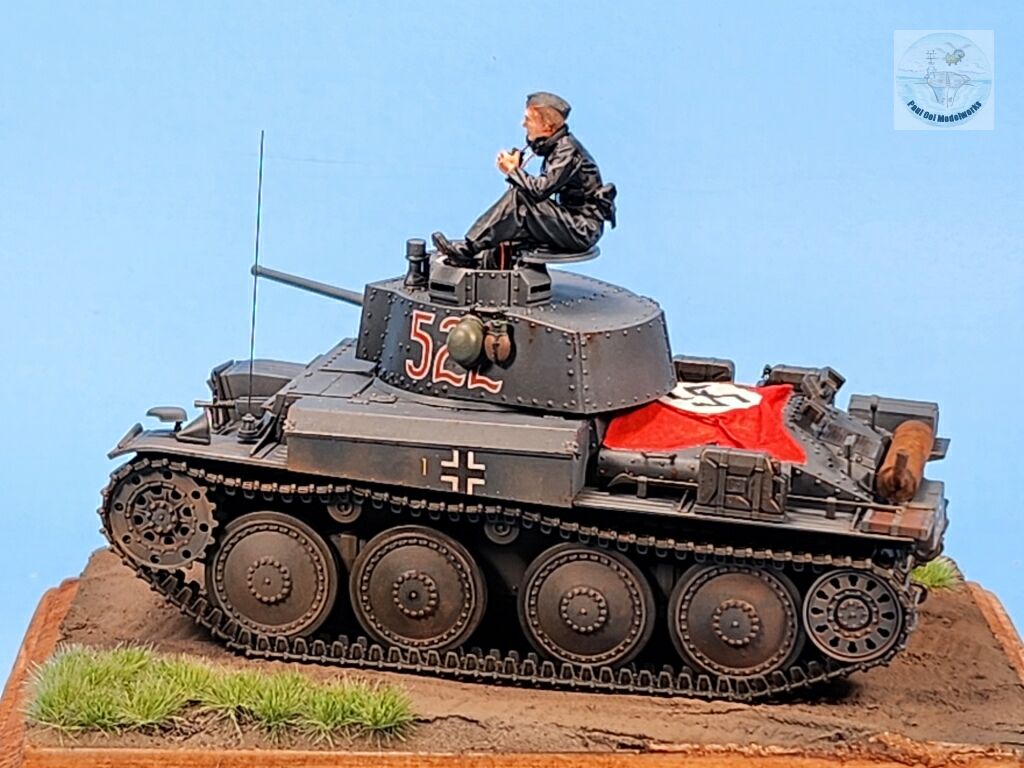
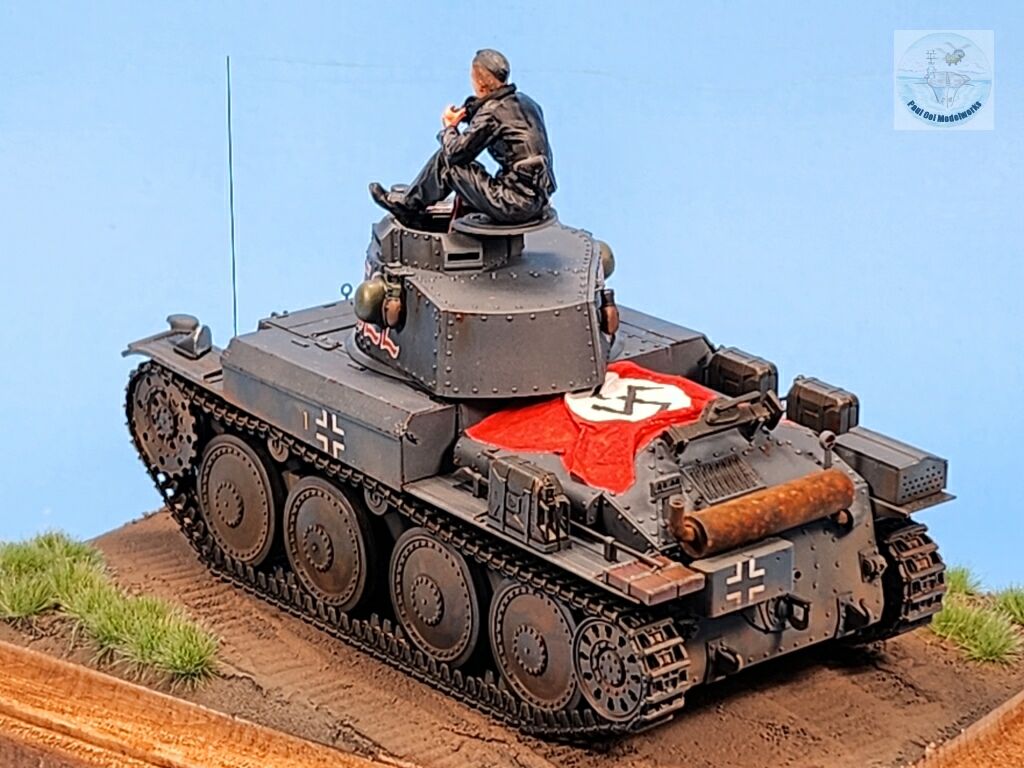
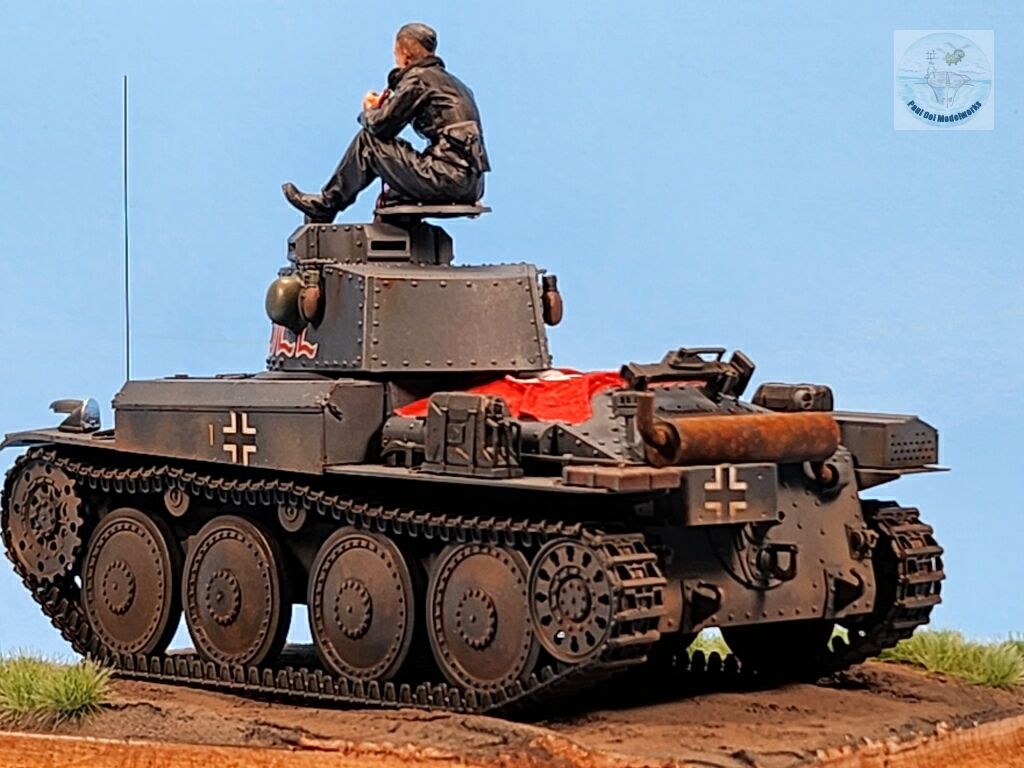
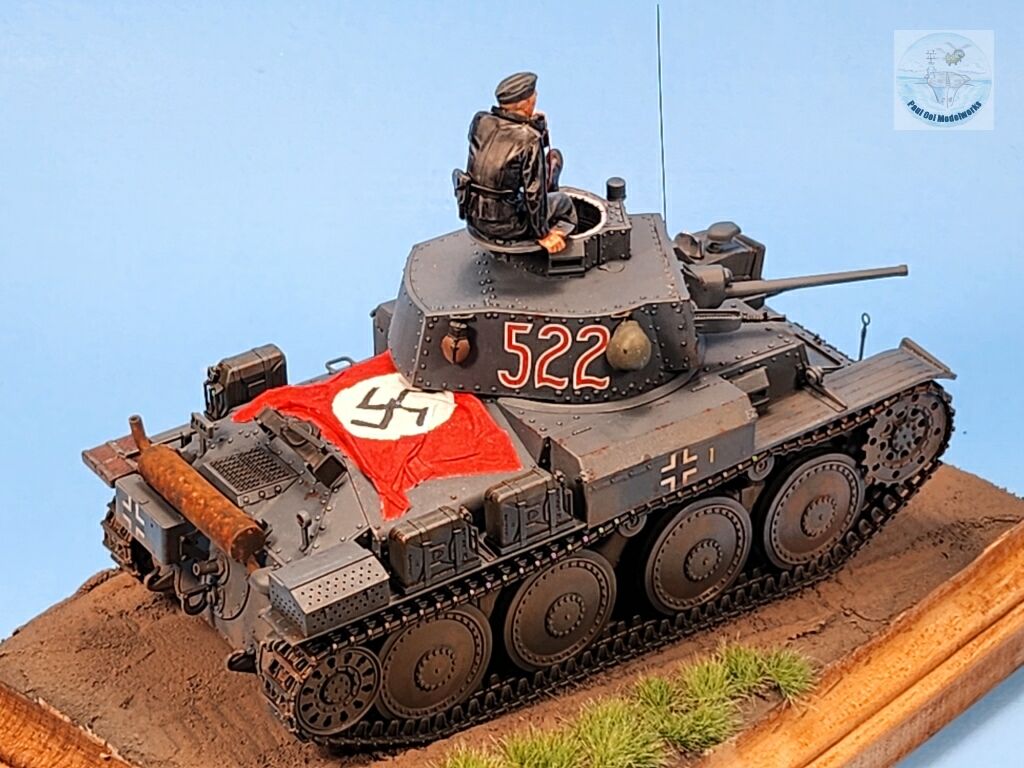
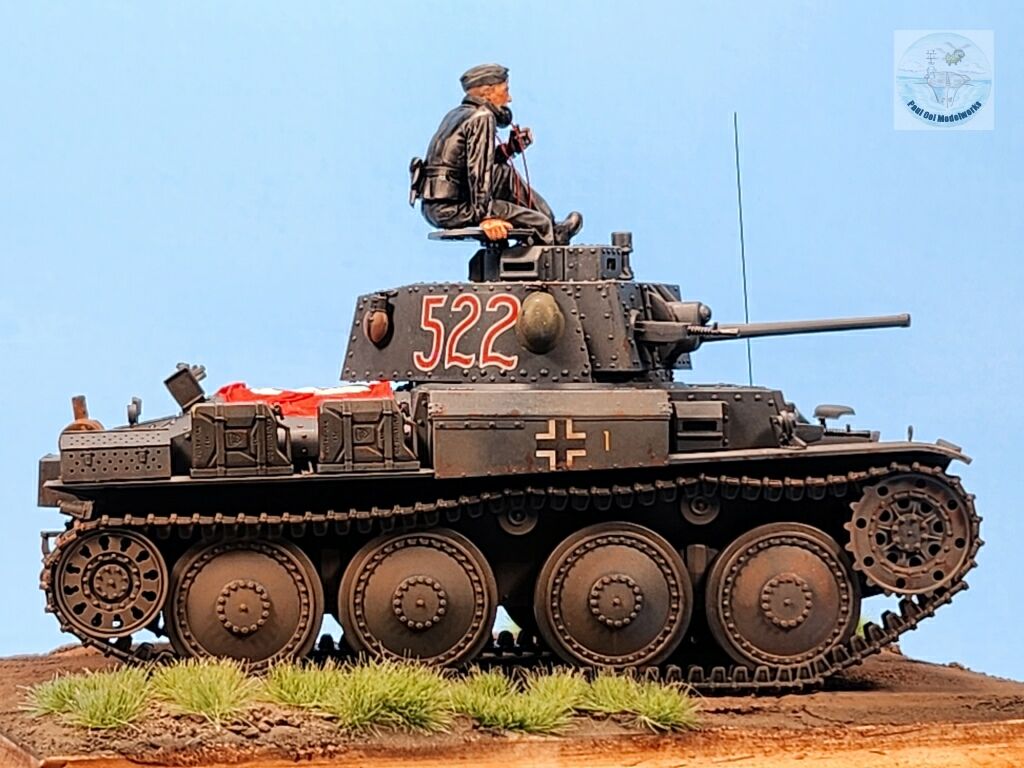
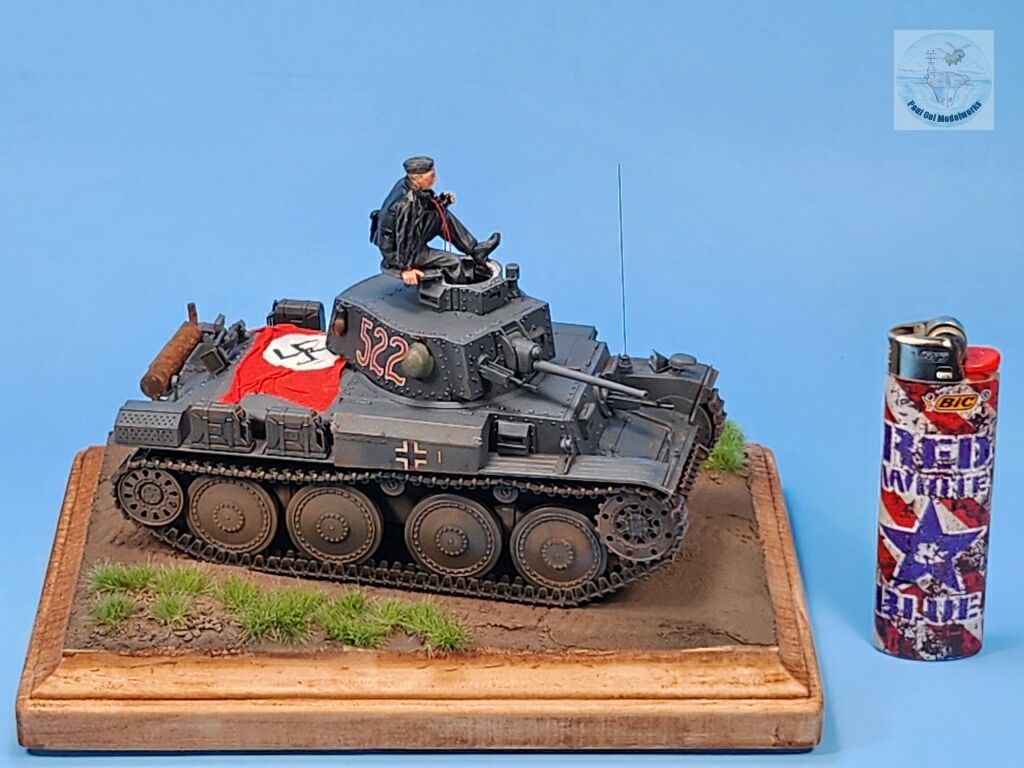
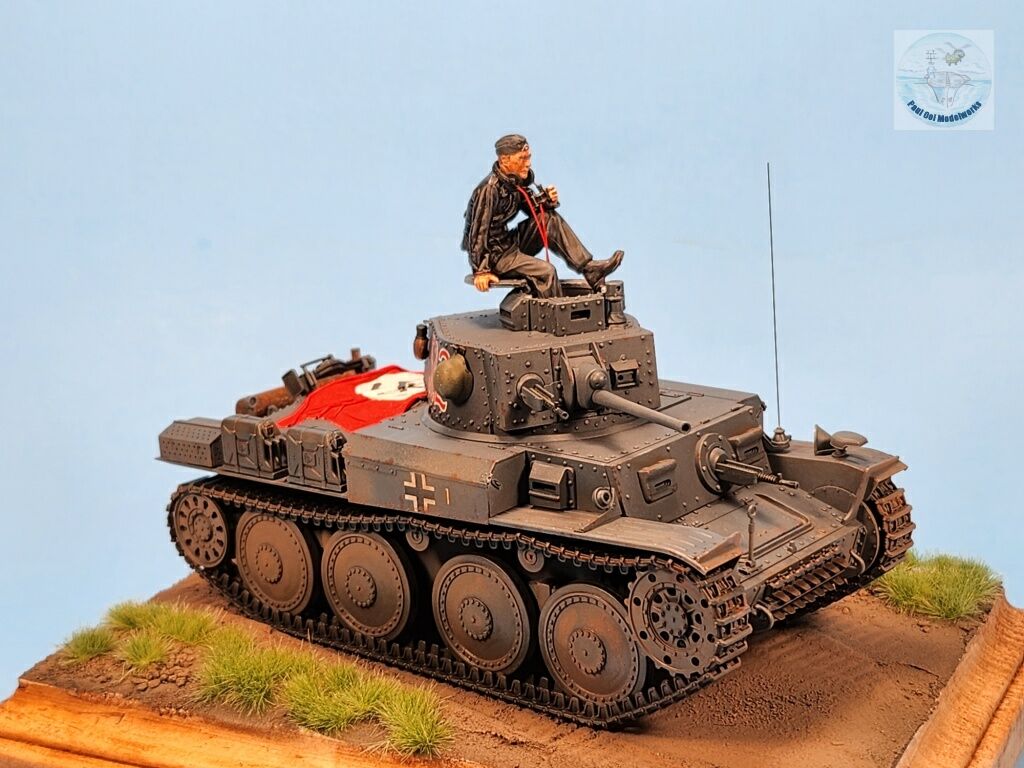
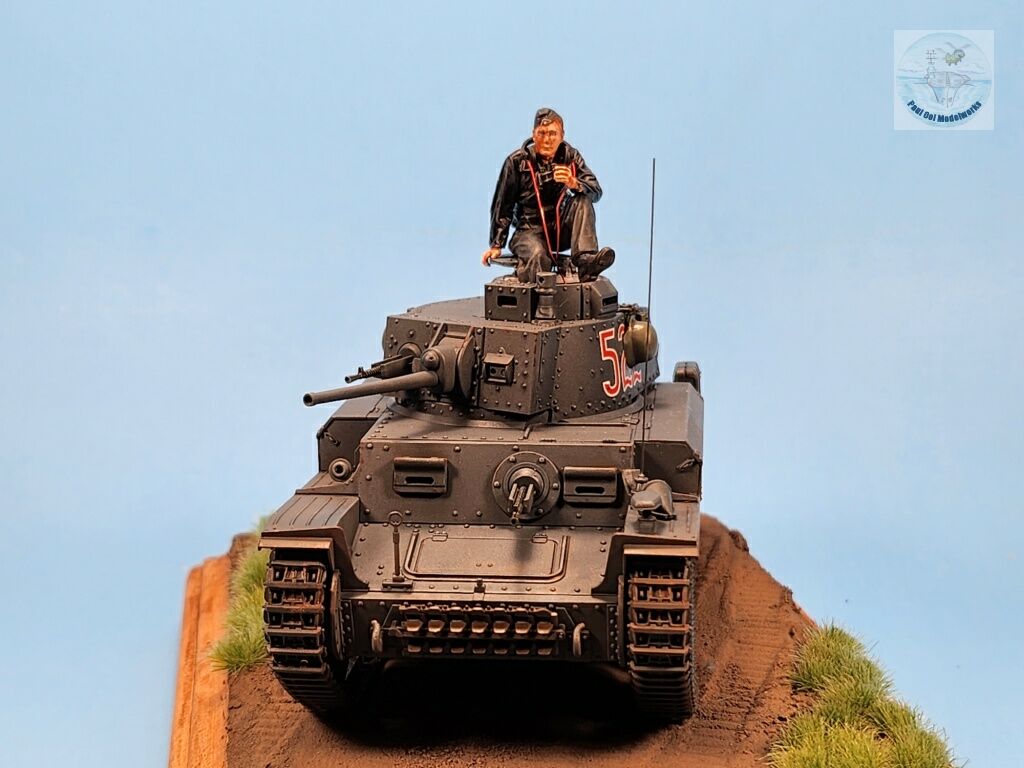
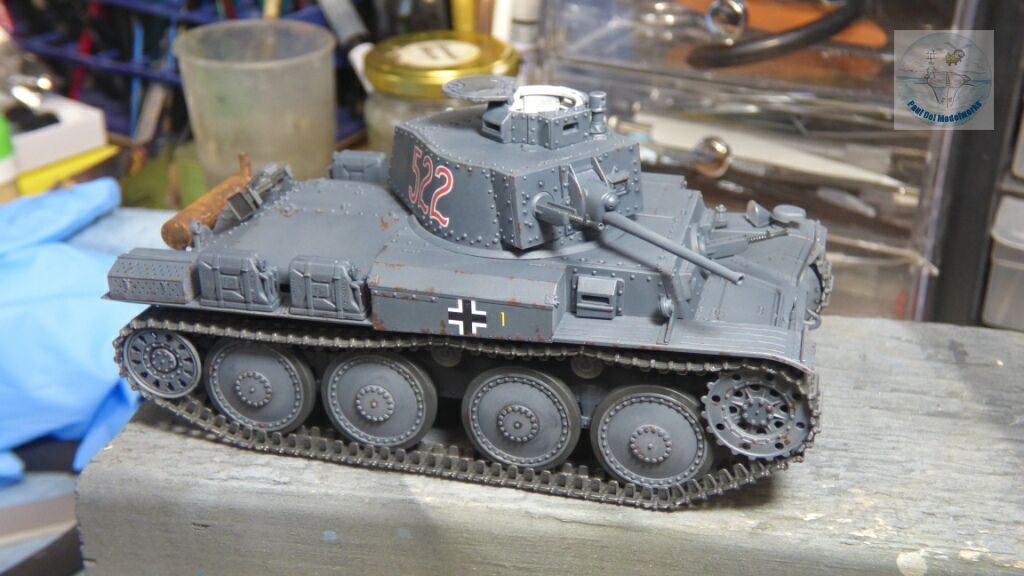
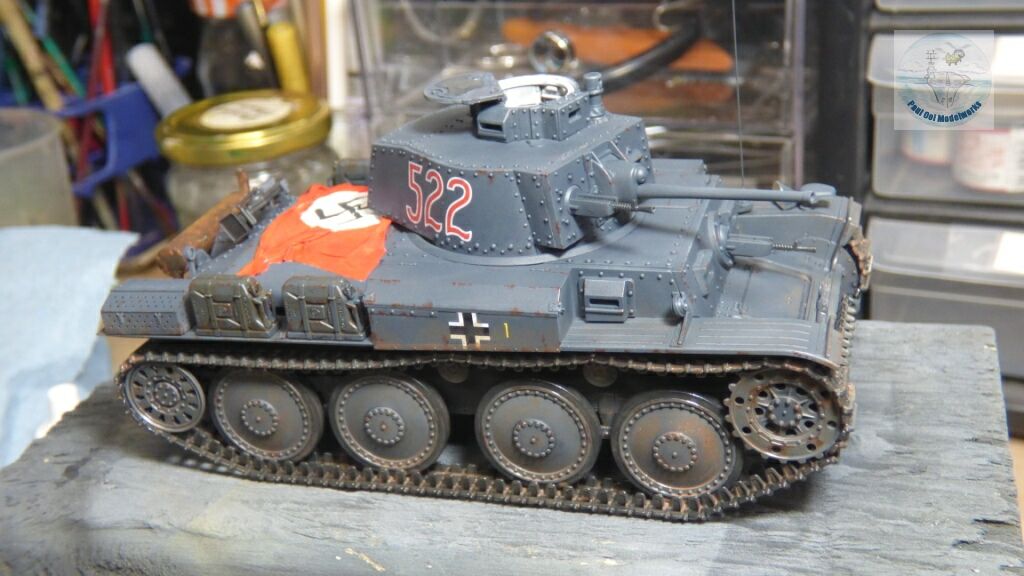
I decided to build the 38(t) of the 19th Panzer Division that participated in Operation Barbarossa as one of the panzer spearheads heading for the Belorussian capital of Minsk in July 1941. I built the kit out-of-box without any after-market parts. And like the previous model of the M3 Stuart, I left the hull without “luggage” piled onto it. The only significant thing that I added to the build was that Nazi German flag draped onto the engine deck that was used by most German tanks in Barbarossa to avoid friendly fire from the Luftwaffe was they were racing so far ahead that the pilots could mistake moving tanks far to the east as the enemy.
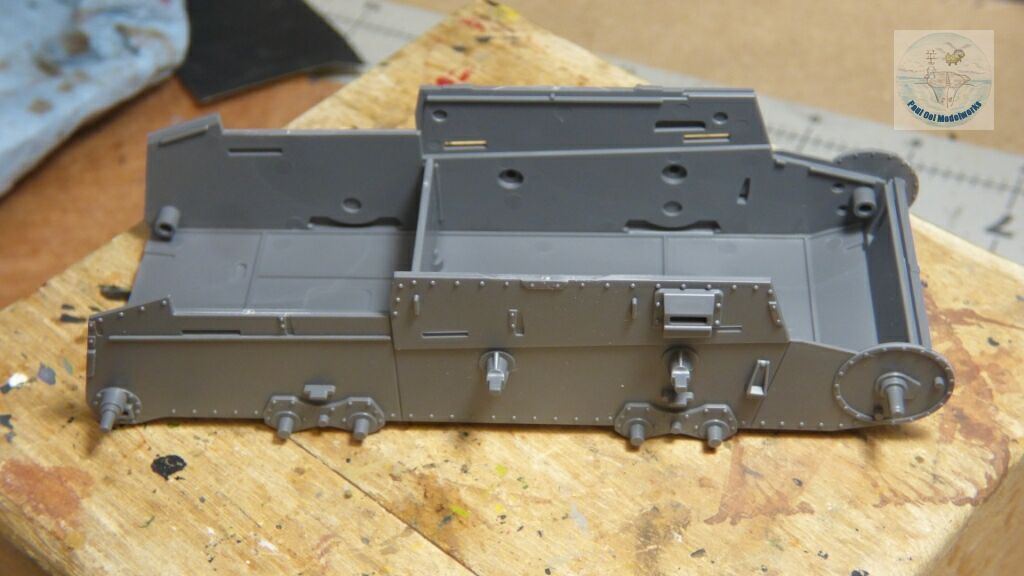
The lower hull tub came together easily and the pieces interlocked so well.
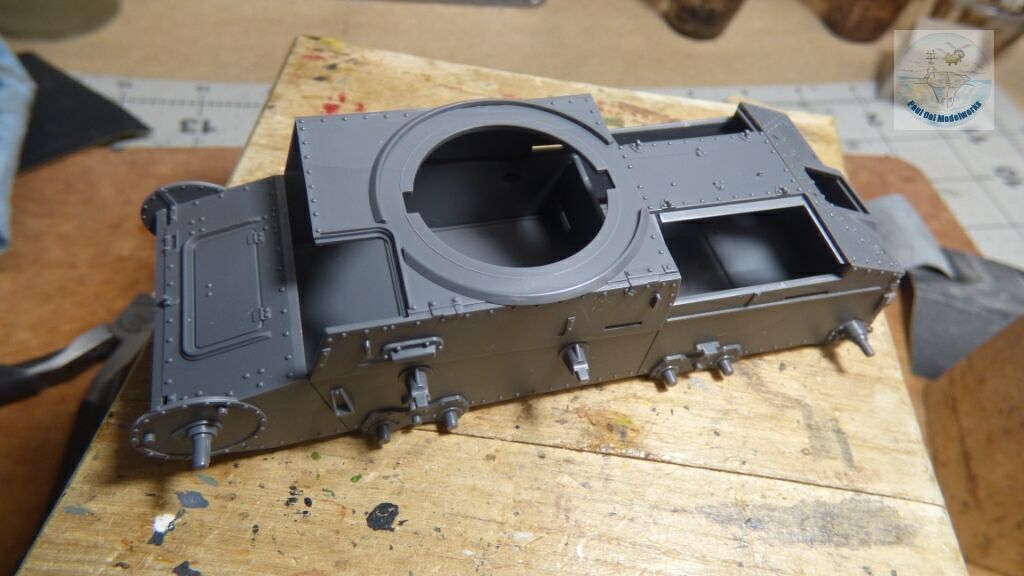
The top part of the hull also came together quickly. At this point, I am just dry-fitting the top to the bottom as I intend to keep them apart until the interior has been painted. Building a Tamiya kit can make fitting seem so effortless, that any beginner who starts with Tamiya may be in for a rude awakening when encountering other brands later. However, one has to pay attention to some of the order of construction that Tamiya provides in their instructions, or you may find that you cannot go back later to get the part in.

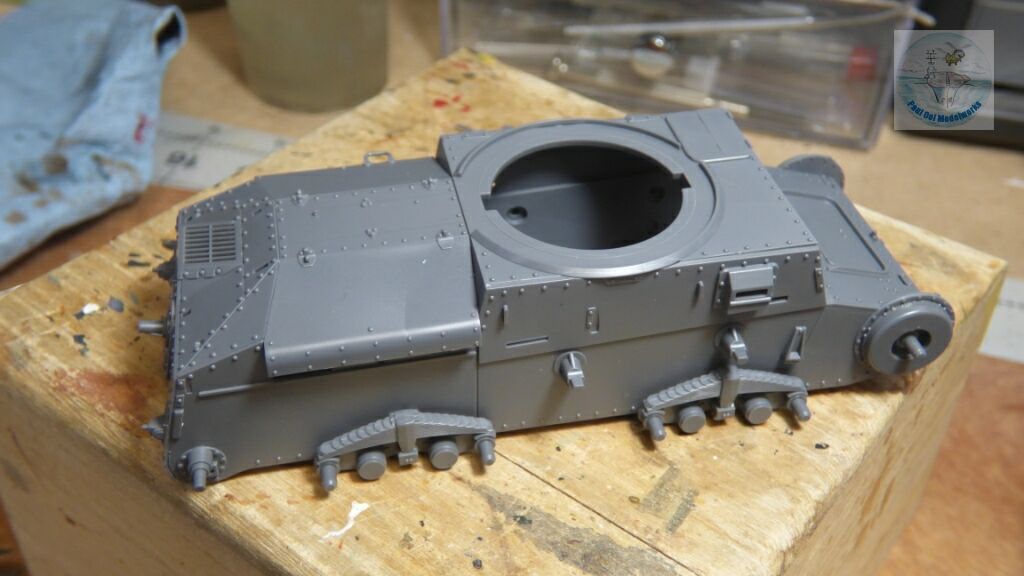
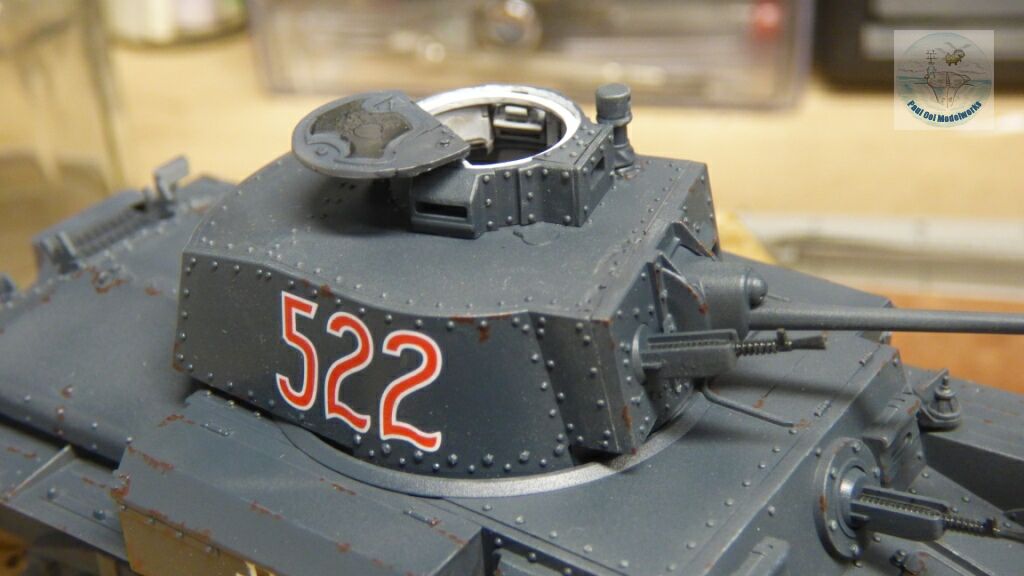
The turret comes together easily too (do pay attention to the order of fitting). I had skipped forward past the tracks and hull detailing to build the turret first because I want to spray paint the interior parts ahead of everything else. Given the angular shape of this tank and the multitude of rivets, it has a real Steam Punk charm to it.
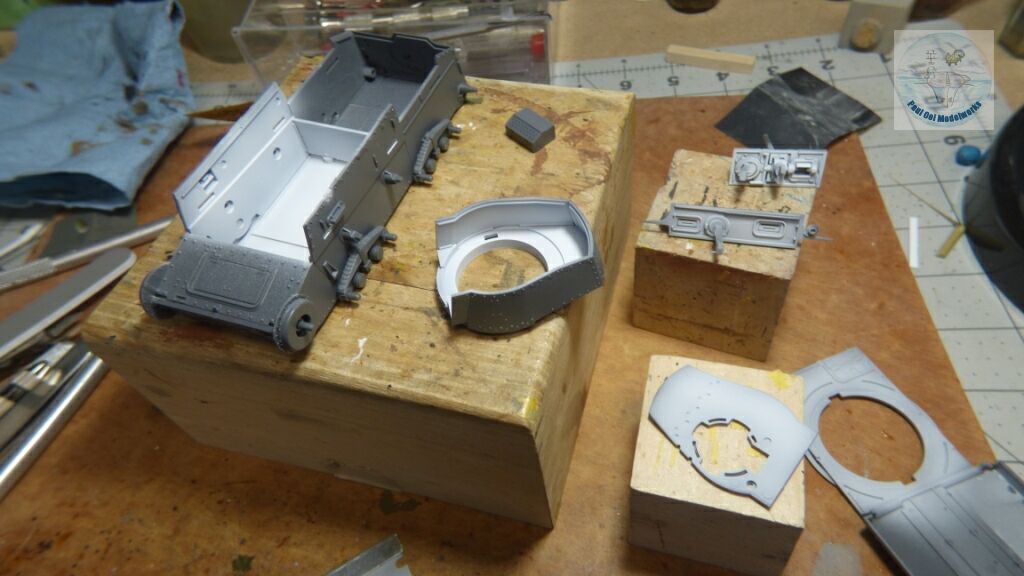
The interior is spray-painted Tamiya XF-2 Flat White. This includes the gun breech section.
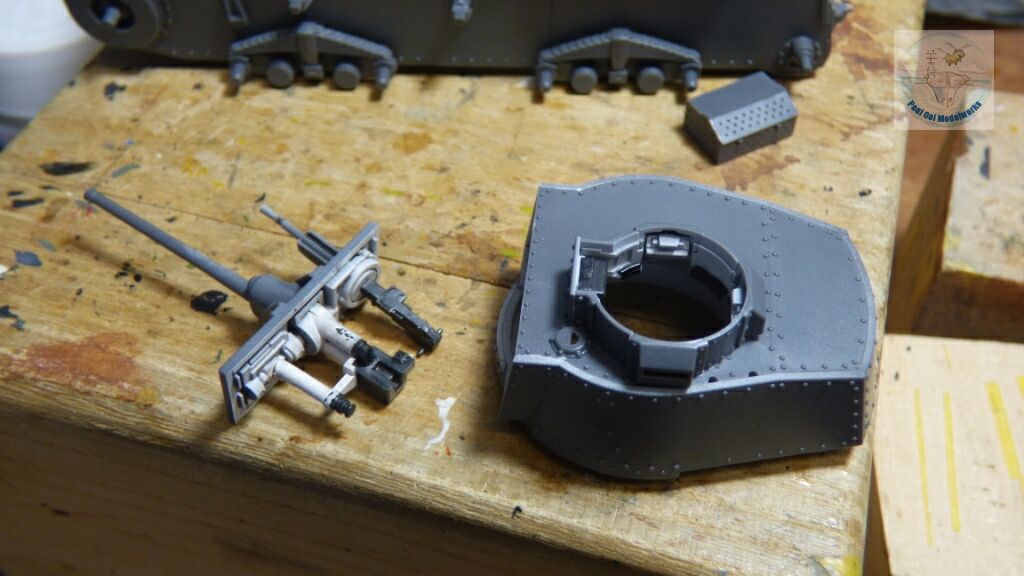
I can now build the rest of the gun sights and breech block, and also the accompanying side machine gun.

With the completion of the the turret, I can seal the hull up and get ready for the prep work to paint the exterior of the tank.
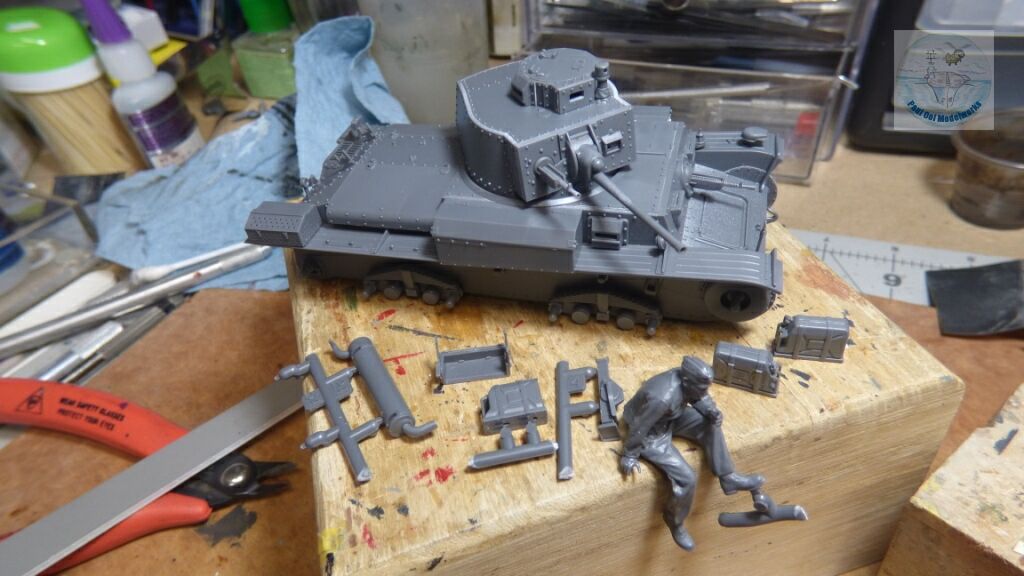
I build all the parts that will need painting including the exhaust muffler, jerrycans, and even built the commander figure. Notice how I build the parts with a sprue still attached to help handling for painting.
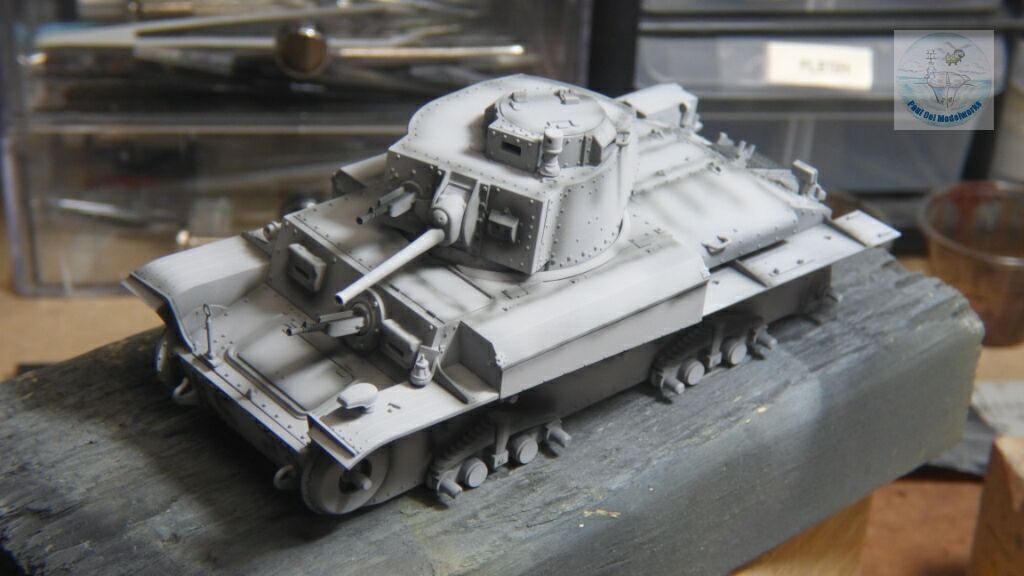
Apart from my usual priming (Tamiya Sky Grey XF-19) and undershading (Tamiya NATO Black XF69), the main grey used is a ixture of Tamiya XF-63 German Grey 70% + Medium Blue XF-18 30%. I felt that the German Grey is too close to NATO Black when actual German color swatches of that period has a bit more bluish hue to it.
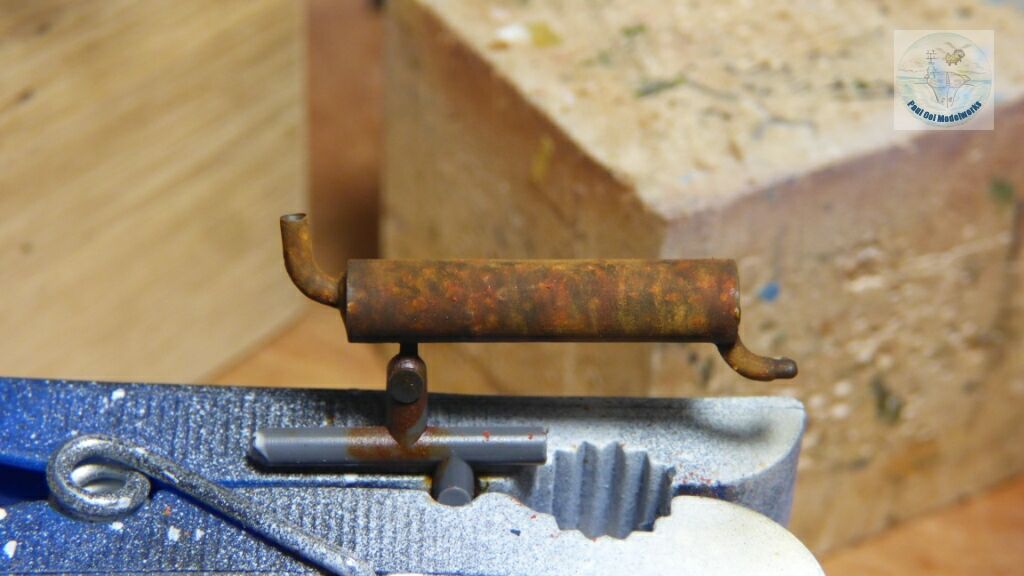
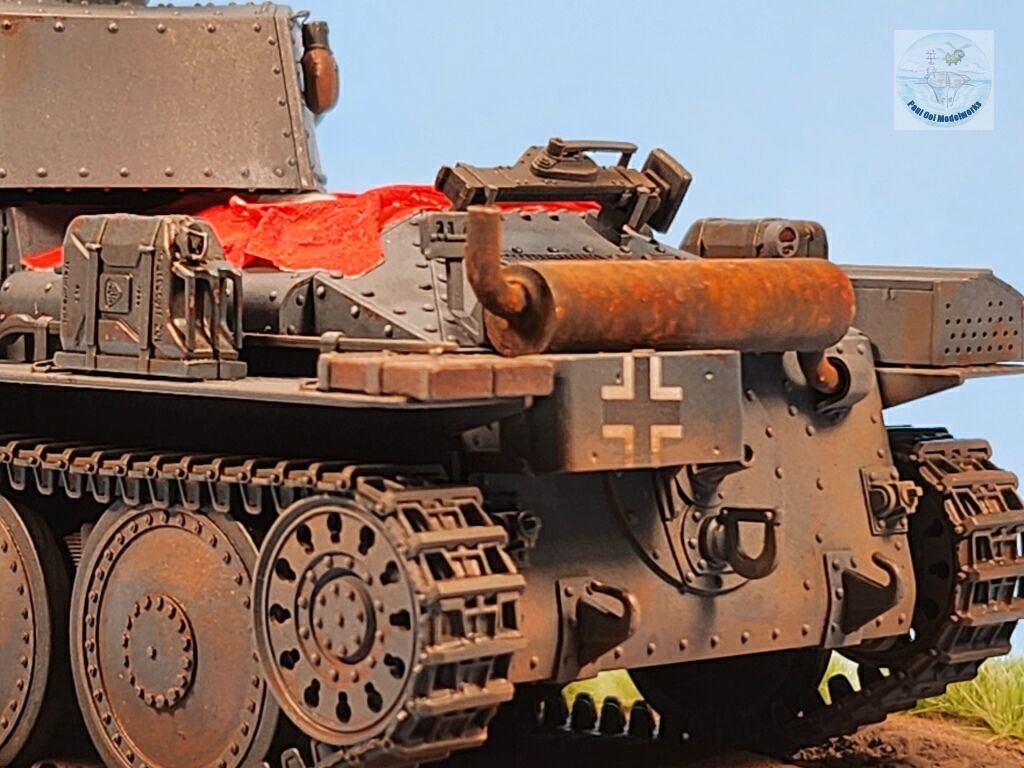
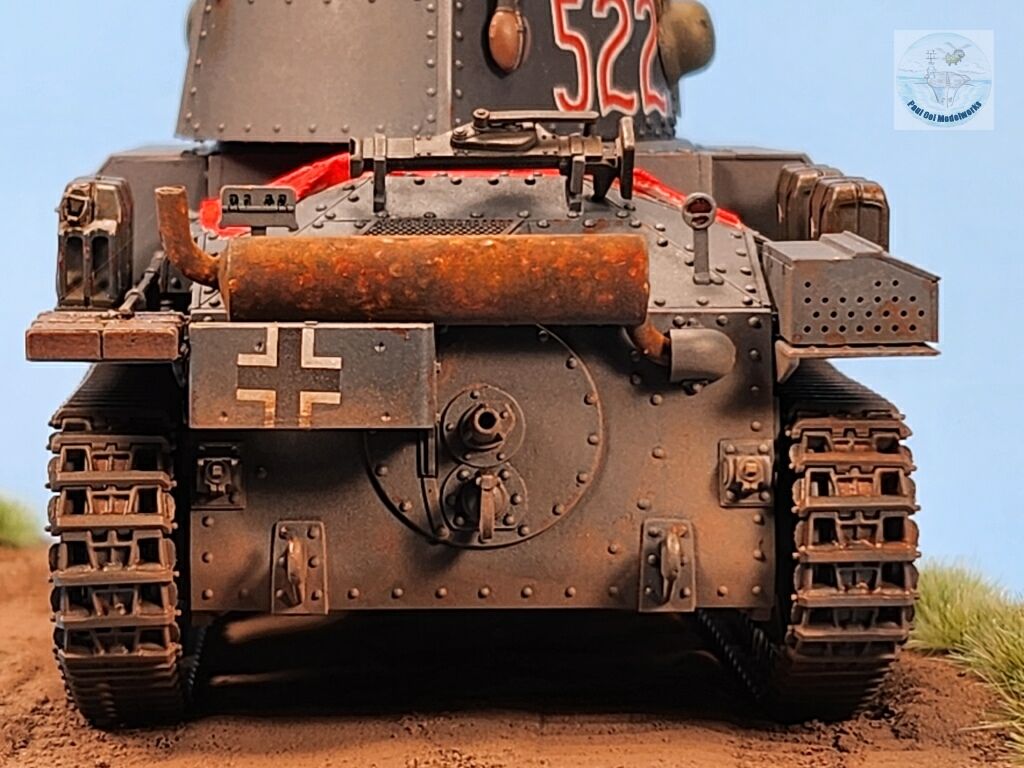
While waiting for the hull and turret to dry, I work on painting the rear muffler to look like a real rust bucket. This paining technique is described in Tutorial 14.
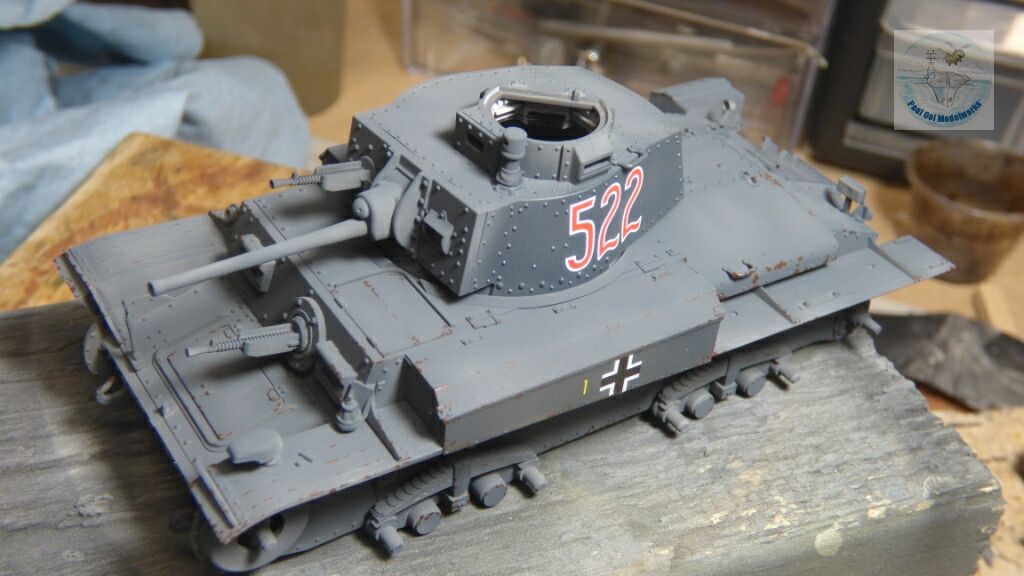
I sprayed gloss varnish on the side panels where the large decals are applied as prep, followed by the decals. After which, I applied little bits of Tamiya XF9 Flat Brown for the rust chipping of the hull.
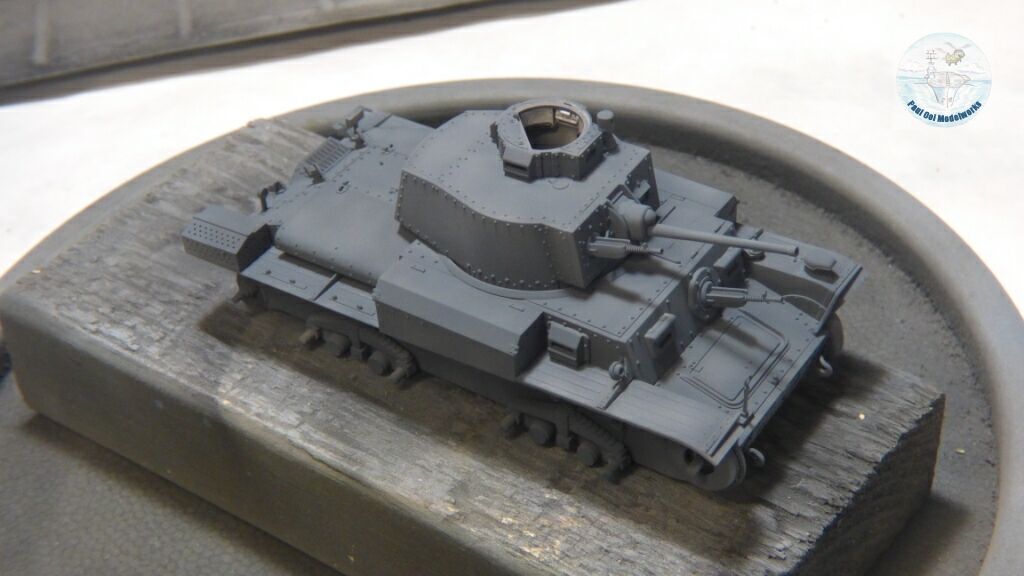
To highlight the rivets, I dry-brushed them with enamel paint light grey, in this case, some Model Master IJA Light Grey.
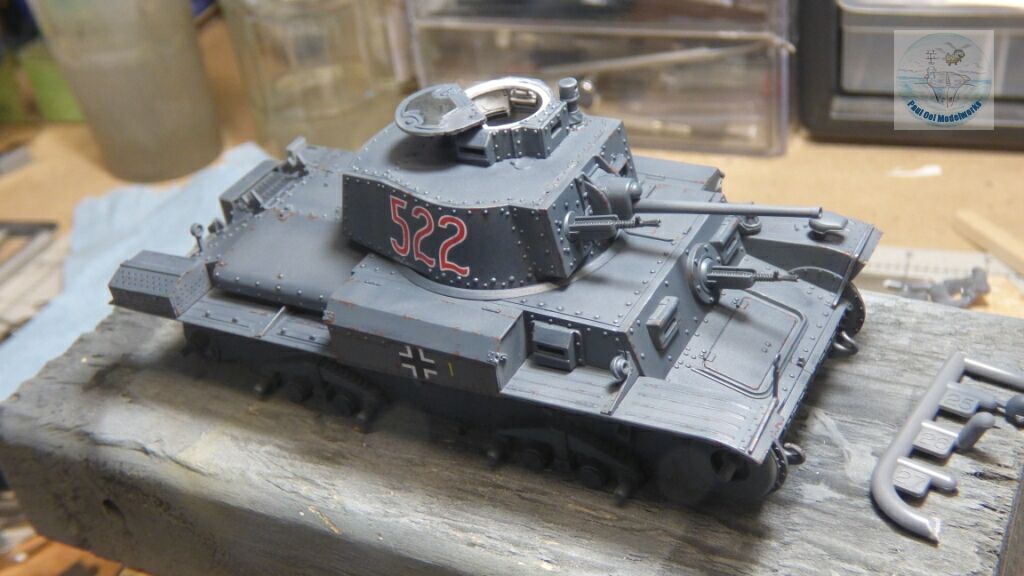
The whole assembly is given an oil wash of Payne’s Grey which has a slight blue hue to it to complement the German Grey+ Medium Blue mix.
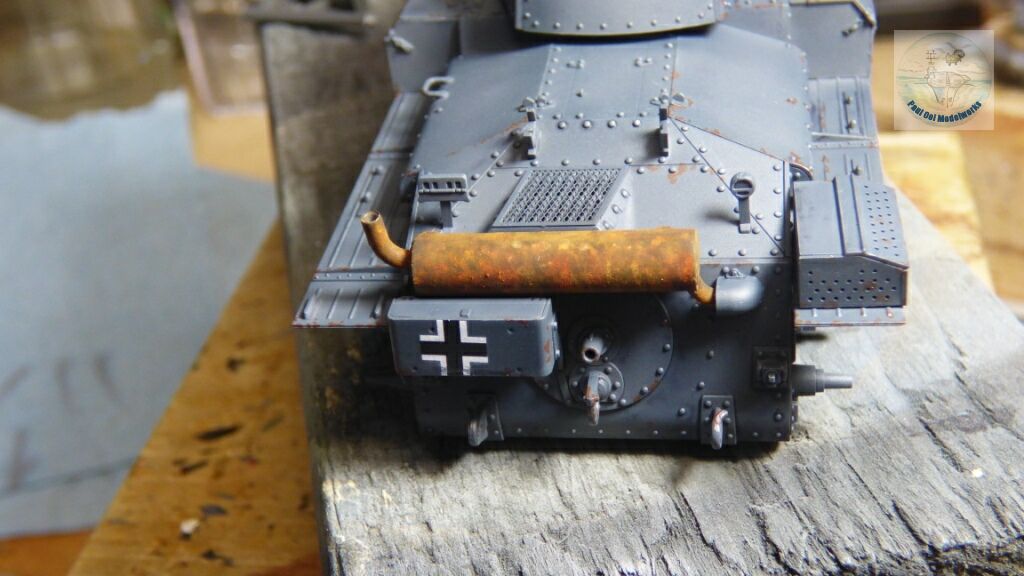
Rear assembly of the muffler and exhaust, which really adds to the Steam Punk persona.
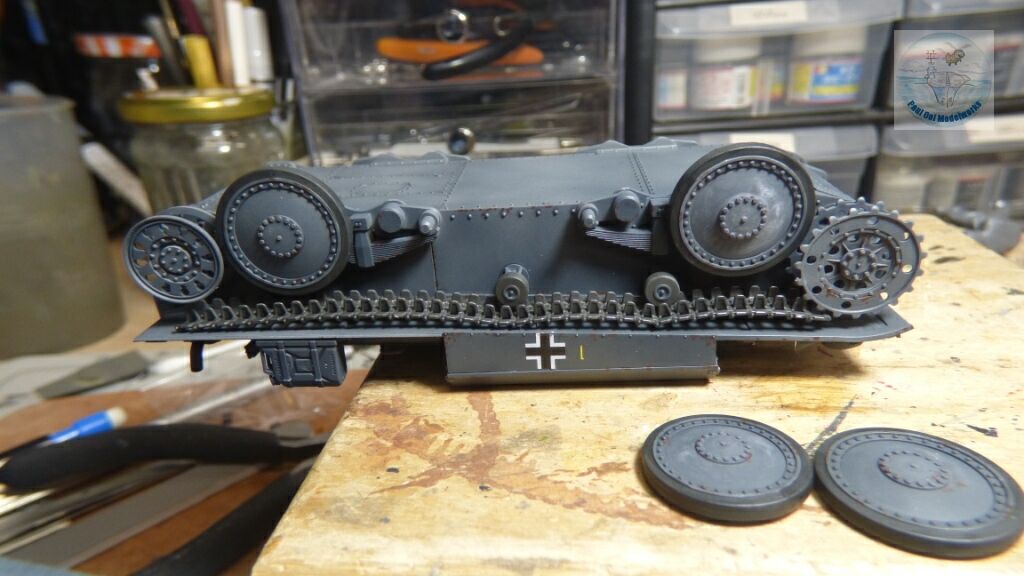
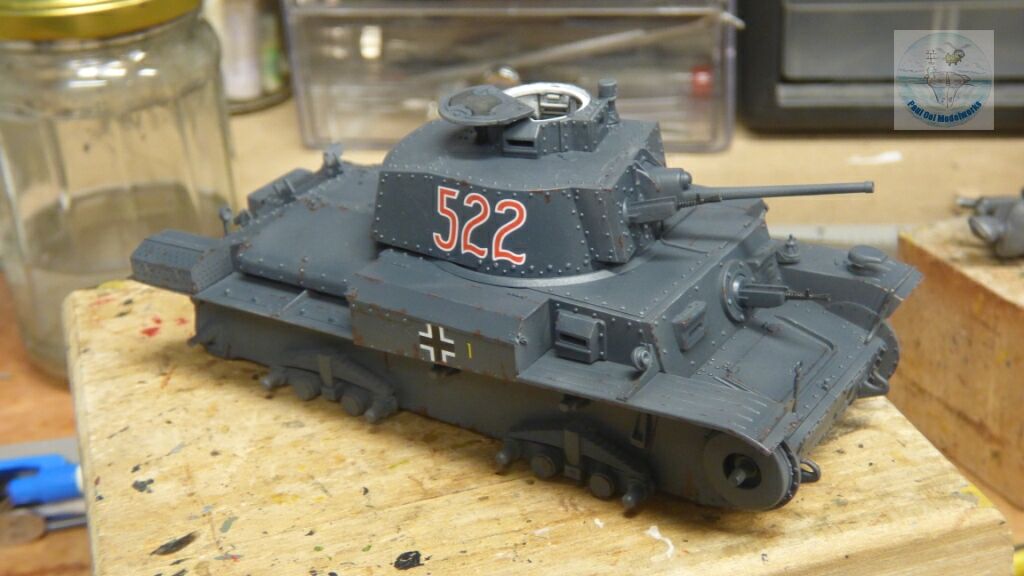
Road wheels, drive sprocket, and rear idler are fitted onto the hull. The first piece of track is fitted to the top of the road wheel ensemble. Not how the tracks drape onto the top (in this picture “bottom”) of the return idlers.
The track sections are all properly fitted. This is where the absolute precision fit of the kit makes a huge difference to the modeler. Notice how the front sprocket’s teeth totally imbeds into the track’s cavities.
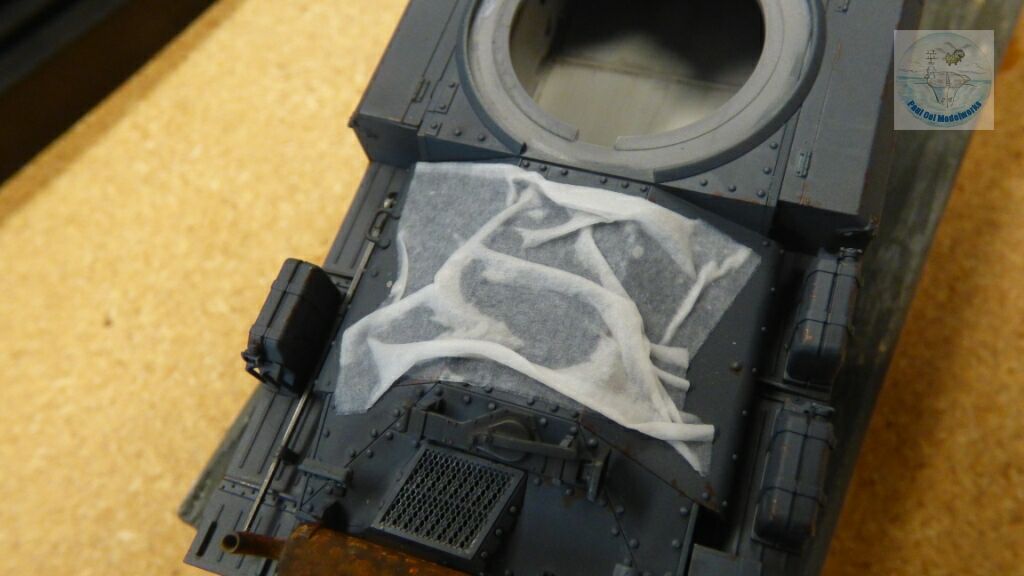
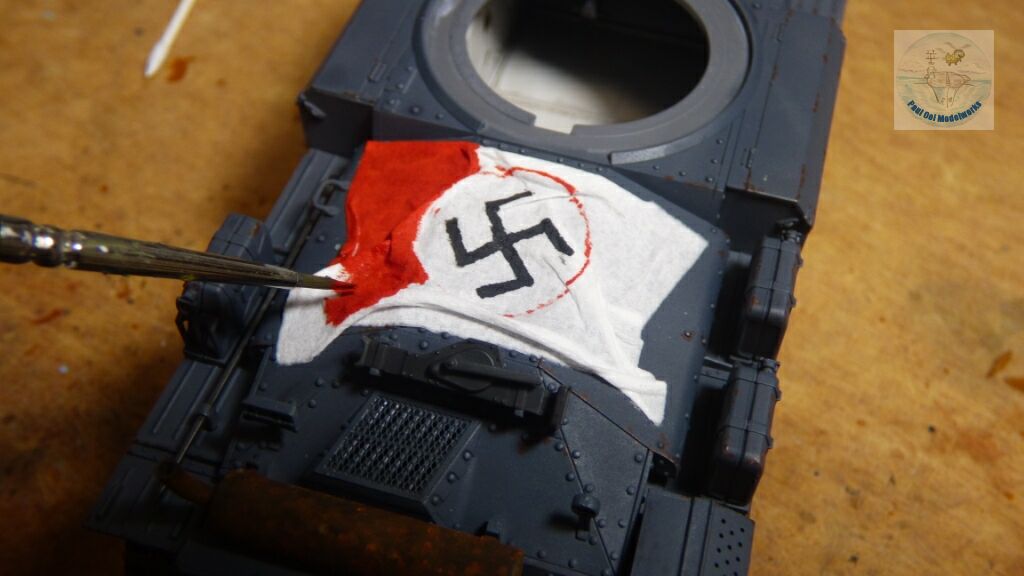
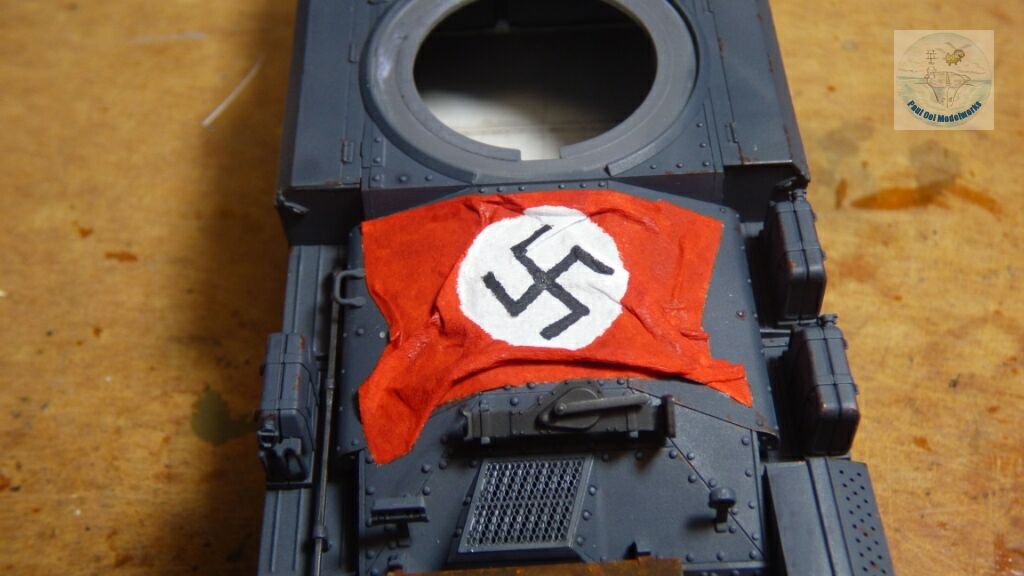
The flag identifier used by the Germans (in the same way US, Canadian and British units used the white star on their AFVs in the Western Front) was prominent during Barbarossa when the Germans swept the Soviets off the skies and dominated the space. After 1942, when the Soviets returned to the skies, this practice was stopped. To make the flag, I immersed a precut piece of fine facial tissue paper into a solution of white glue + water. Then I arrange it with toothpicks (to make sure it does not tear) on the target surface. Then I set it to dry under the lamp. Once dried, I use acrylic paint, starting from the middle of the flag outward.
Another oil wash of Burnt Umber 60% + Zinc White 40% applied to road wheels, hull lower surfaces for mud and rust effect.
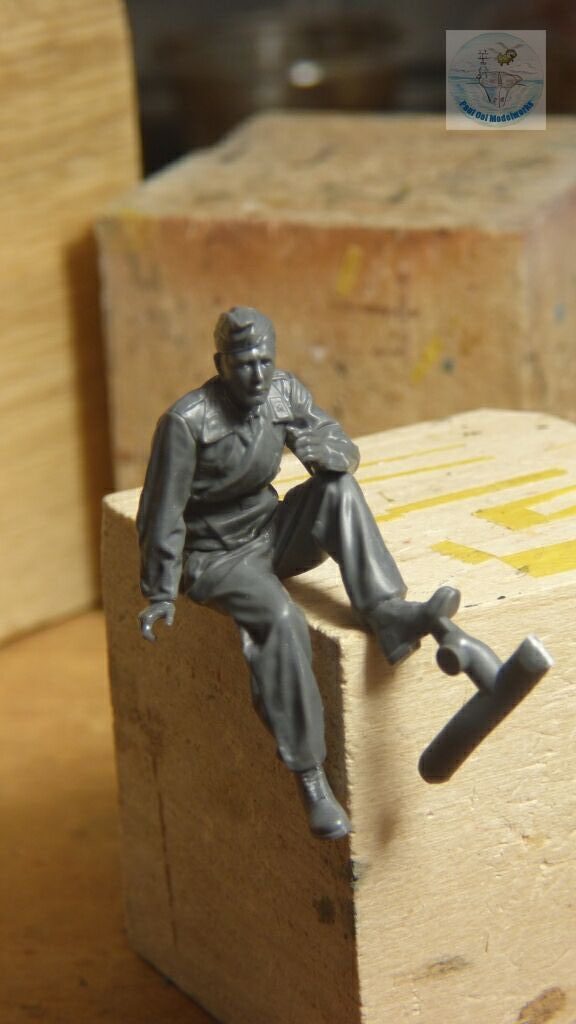
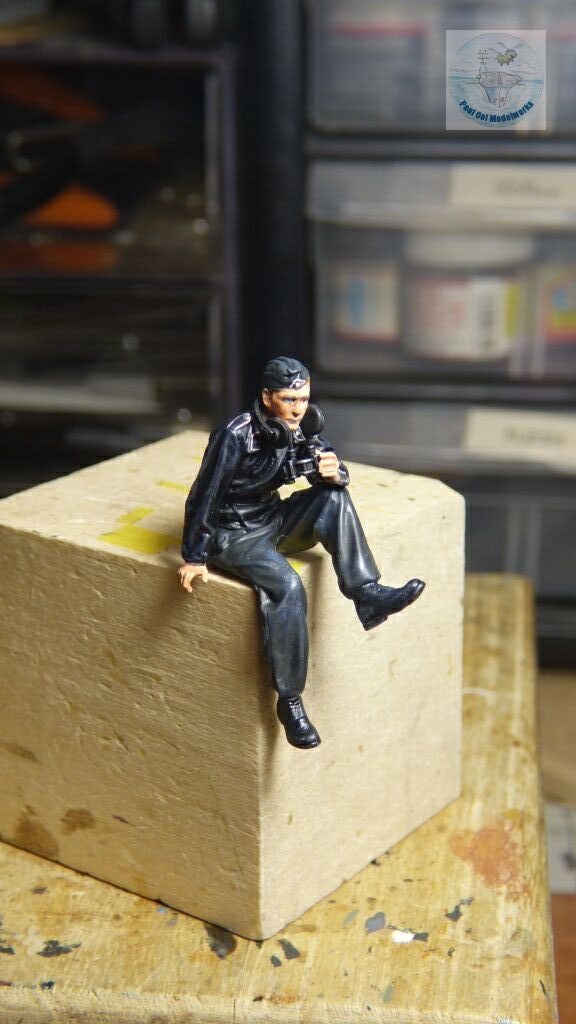
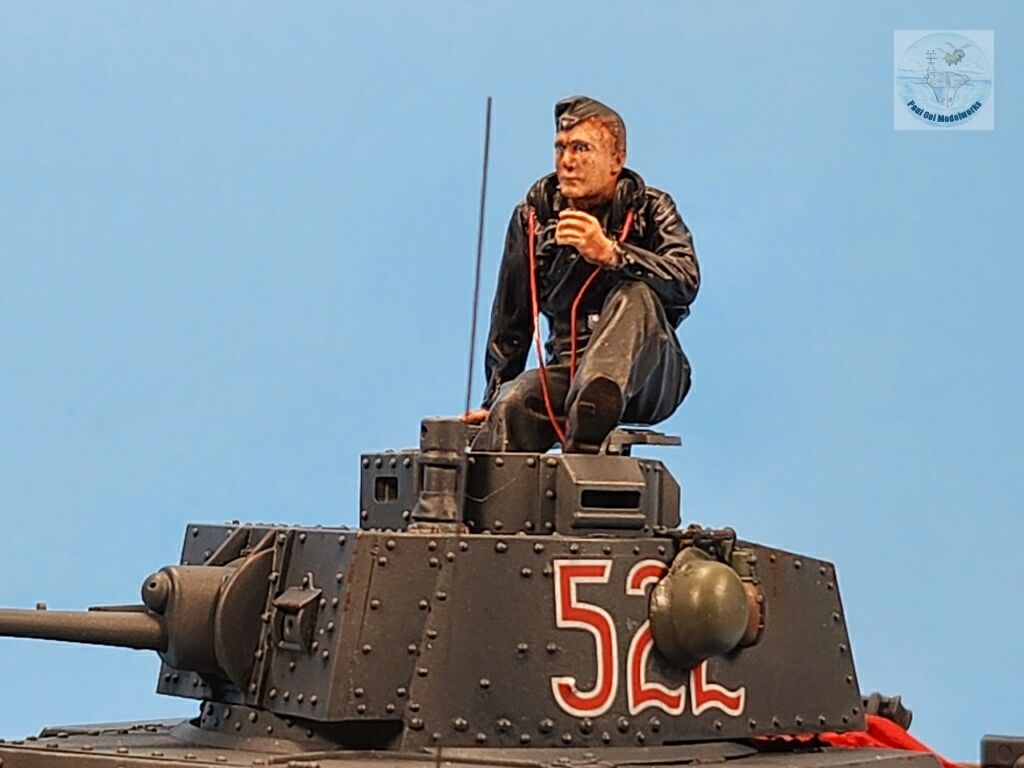
The commander’s figure gets painted. While the uniform is entirely black, one will notice that there is black, and there is black, with slight gradation of “blackness”, and texture. The battle blouse is painted with Tamiya Flat Black XF1, whereas the pants and forage cap is in NATO Black XF-69 which has a slightly greenish hue.
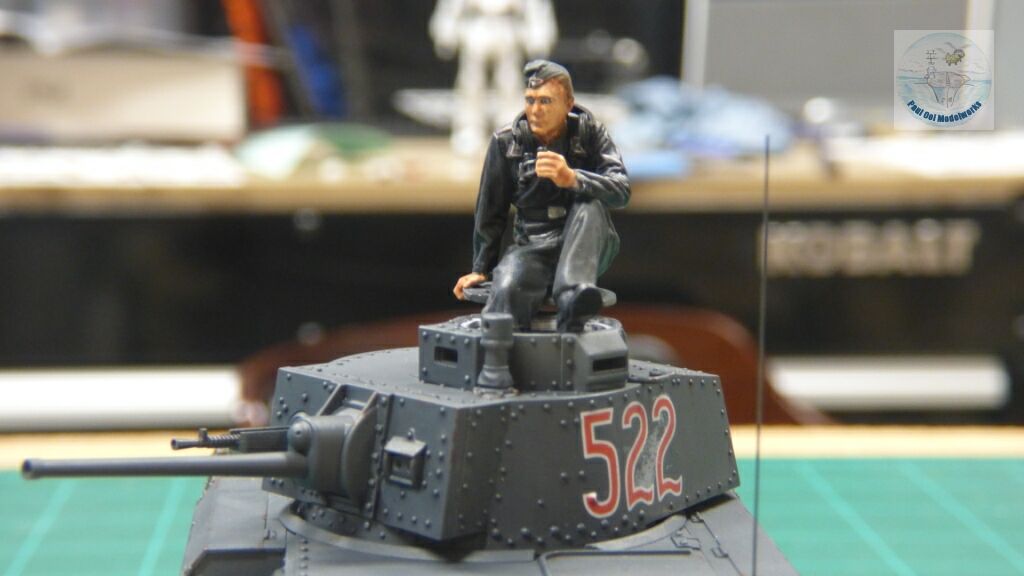
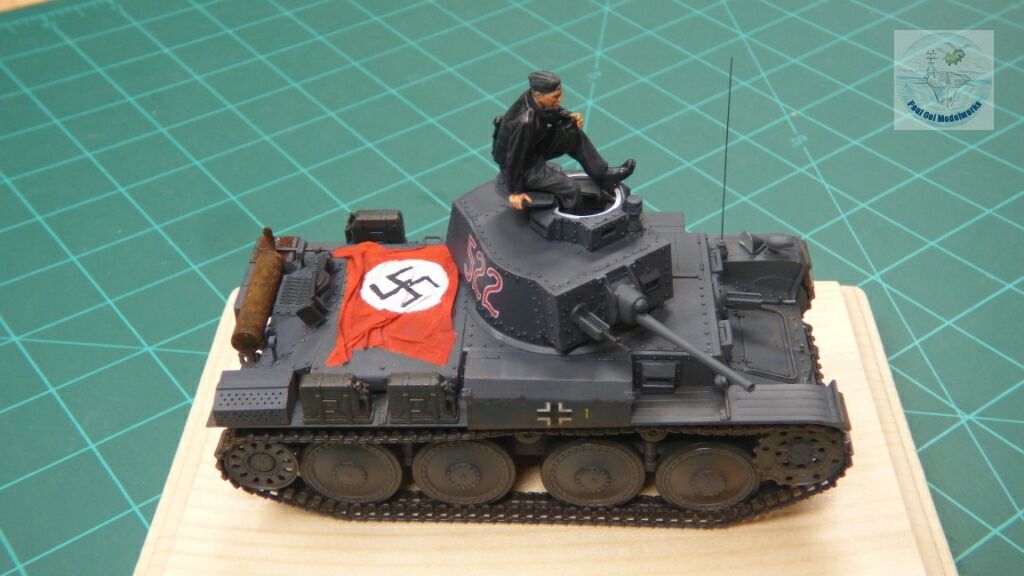
Once the figure is properly perched on top of the turret cupola (brave guy, not afraid of snipers), the tank is ready to be mounted on its base. I misted the lower portion of the tank with Tamiya Flat Earth XF52 to match the soil color of the base.
[…] fielded in the last year of the war. Built on the reliable and tested Skoda 38t chassis (see my post of the Panzer 38t), the low slung but heavily armed Hetzer did very well in ambush kills. While the interior was […]