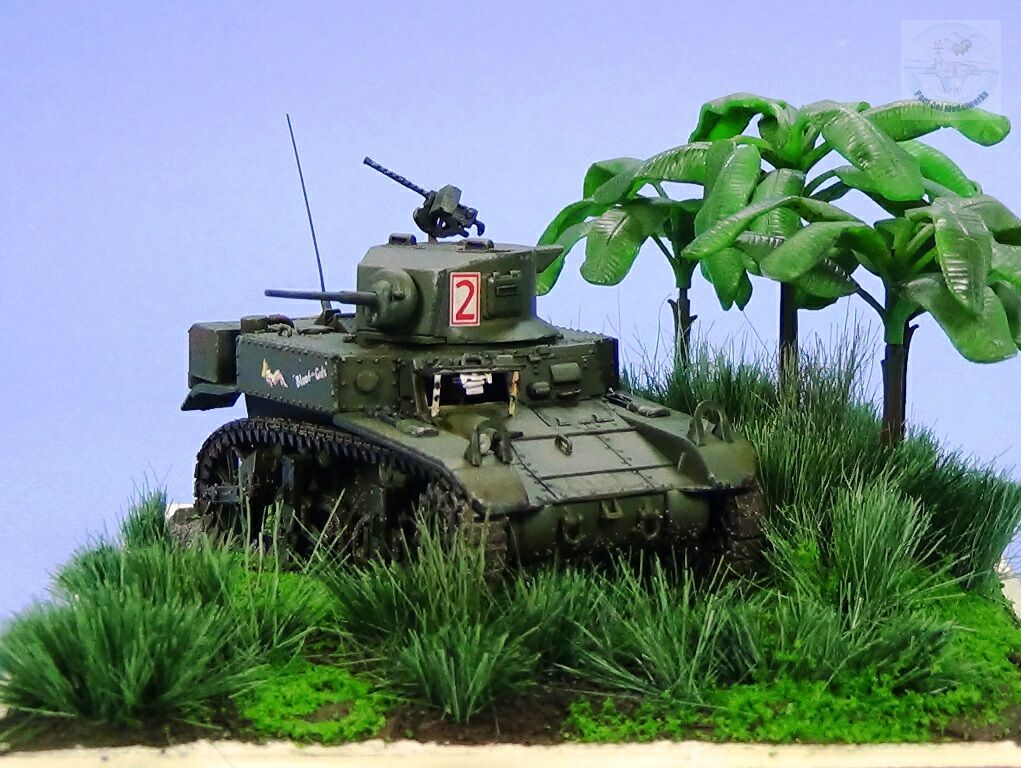
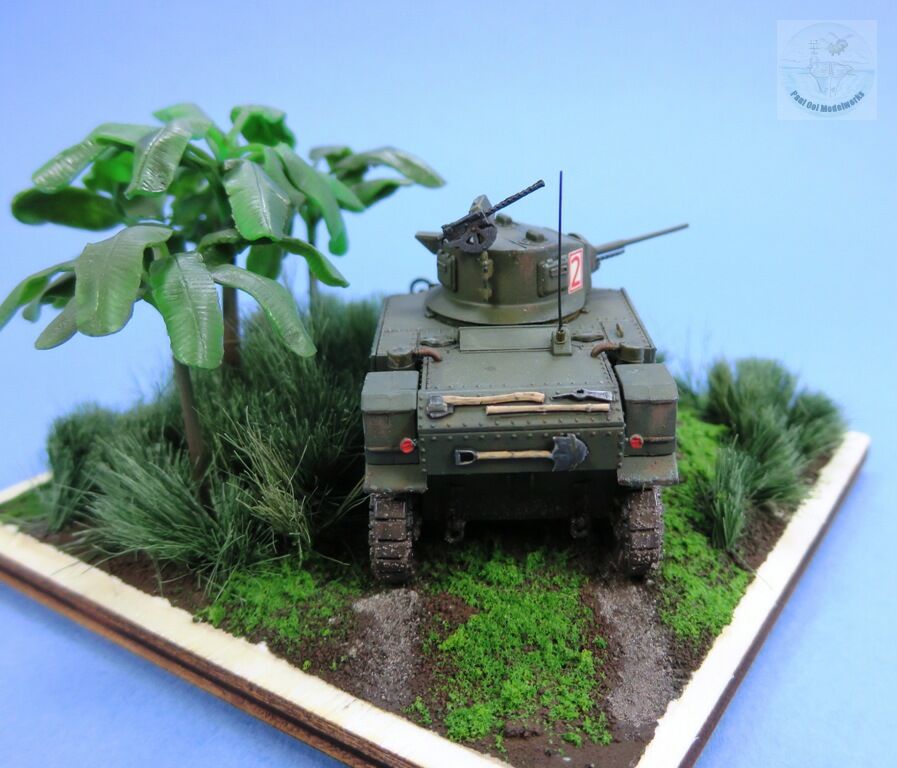
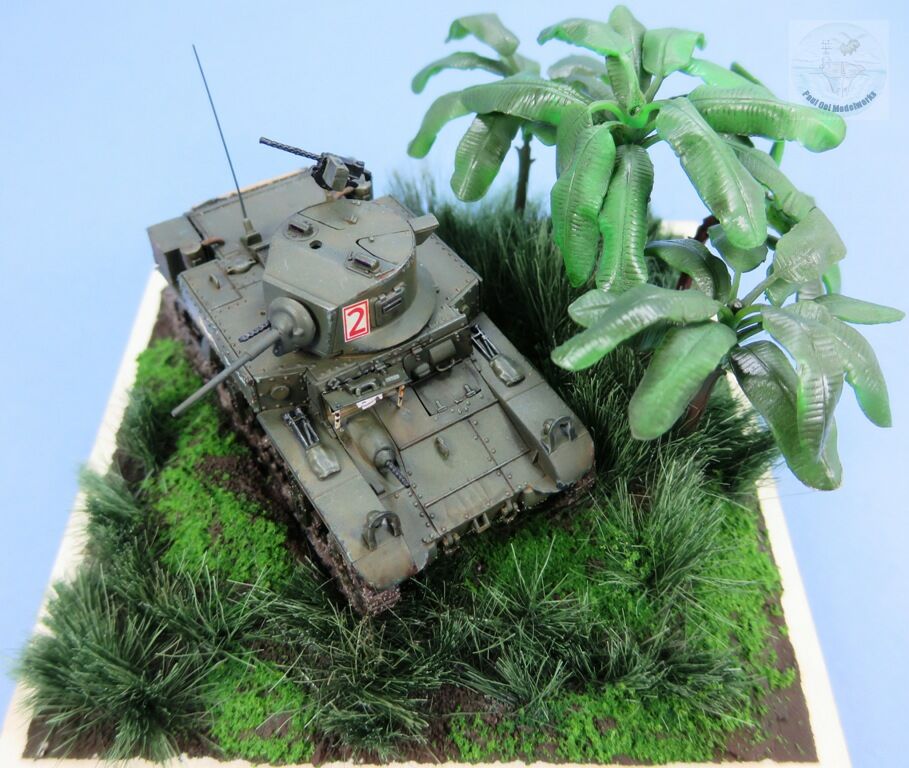
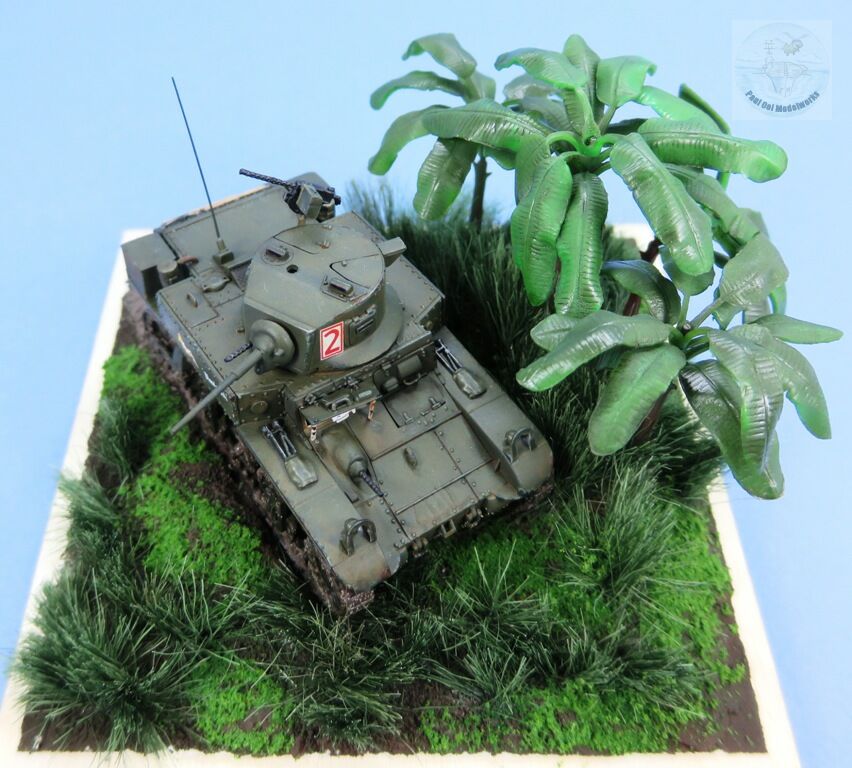
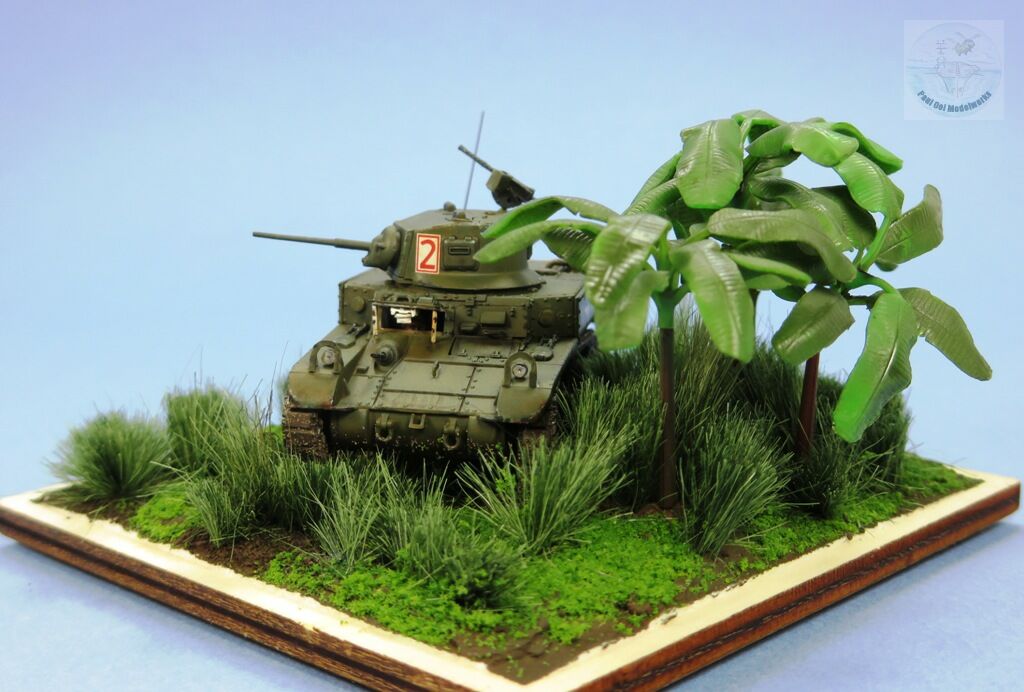
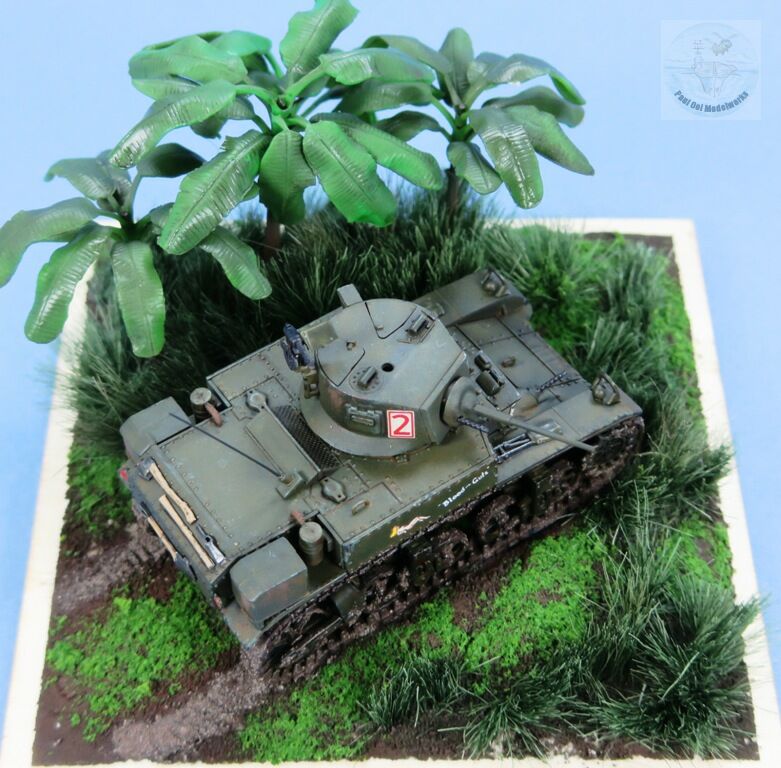
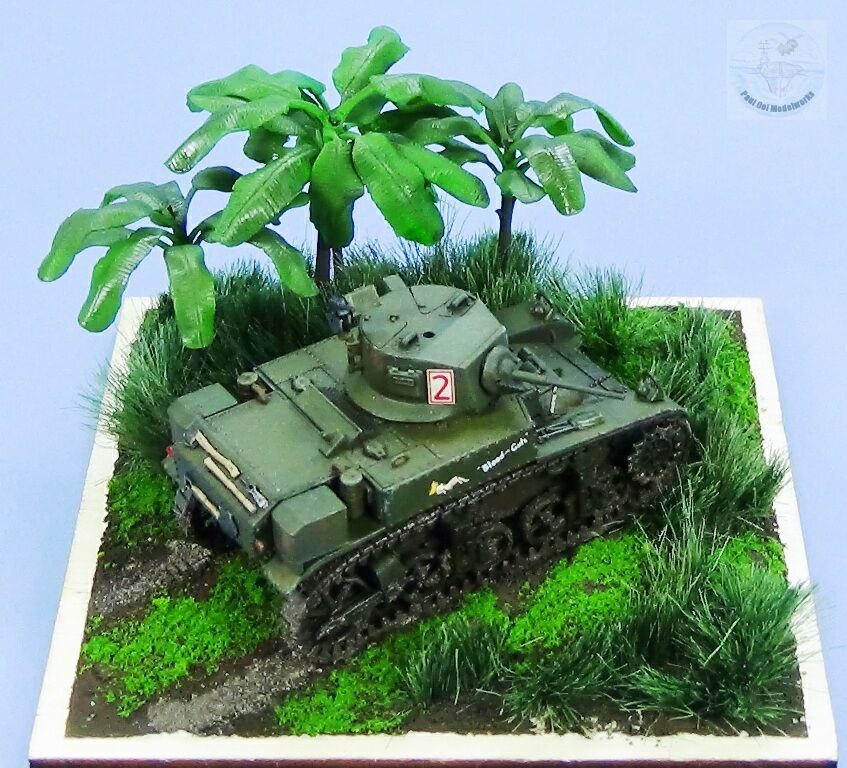
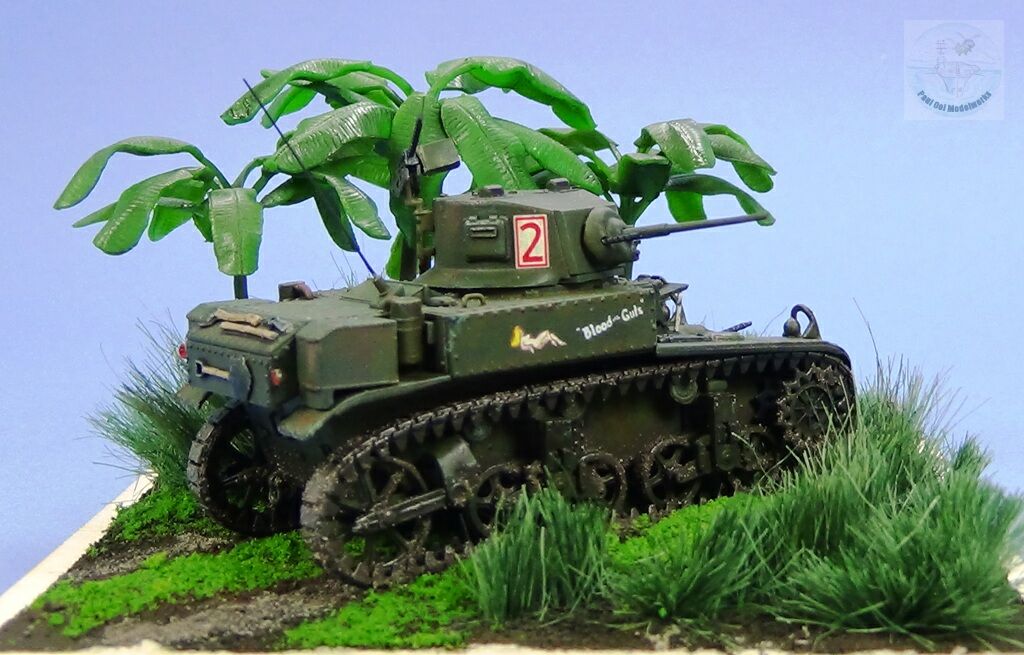
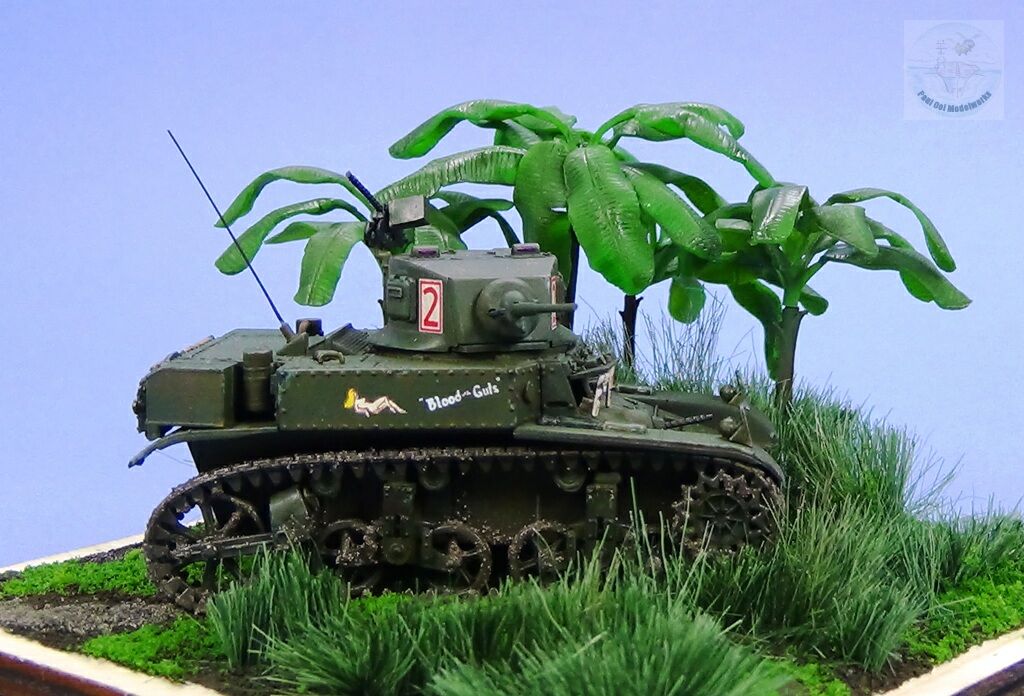
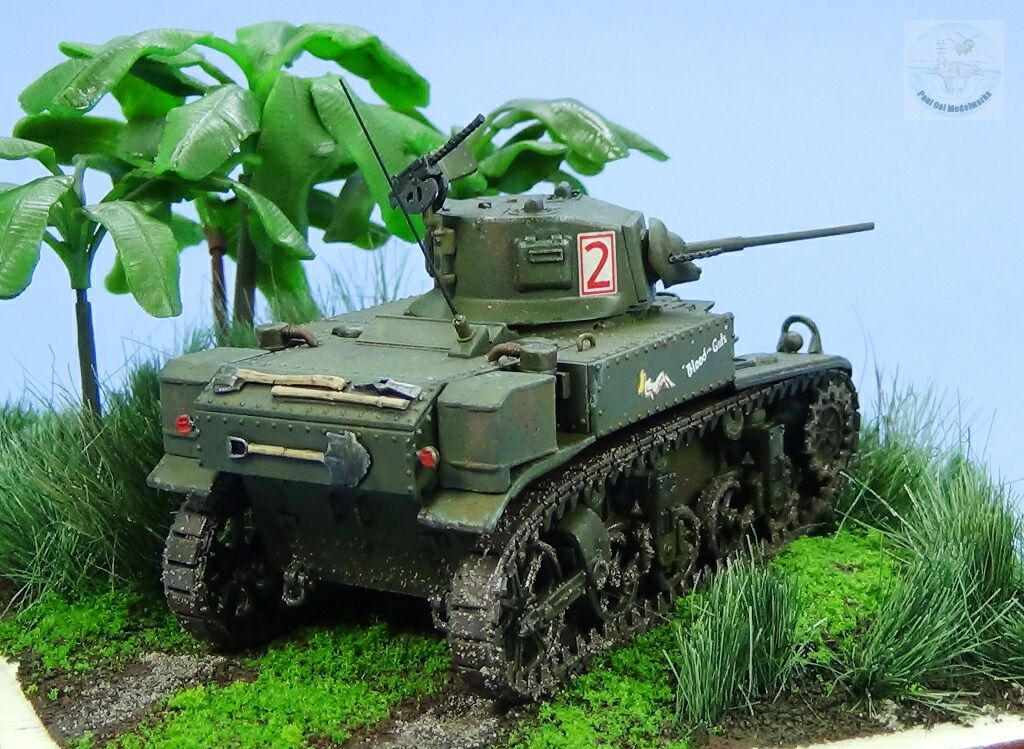
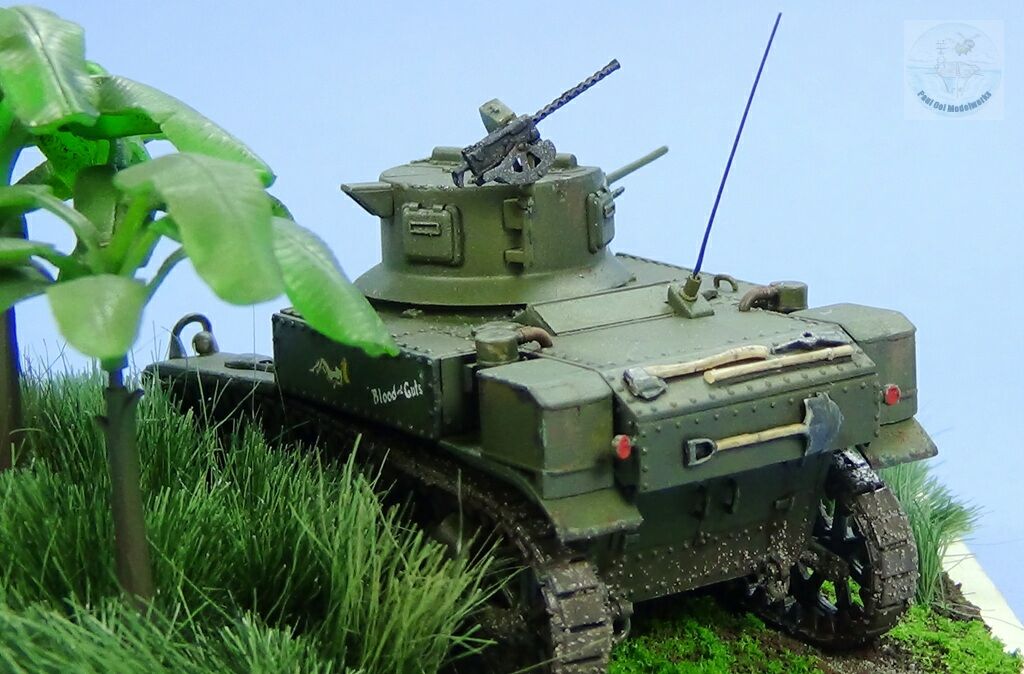
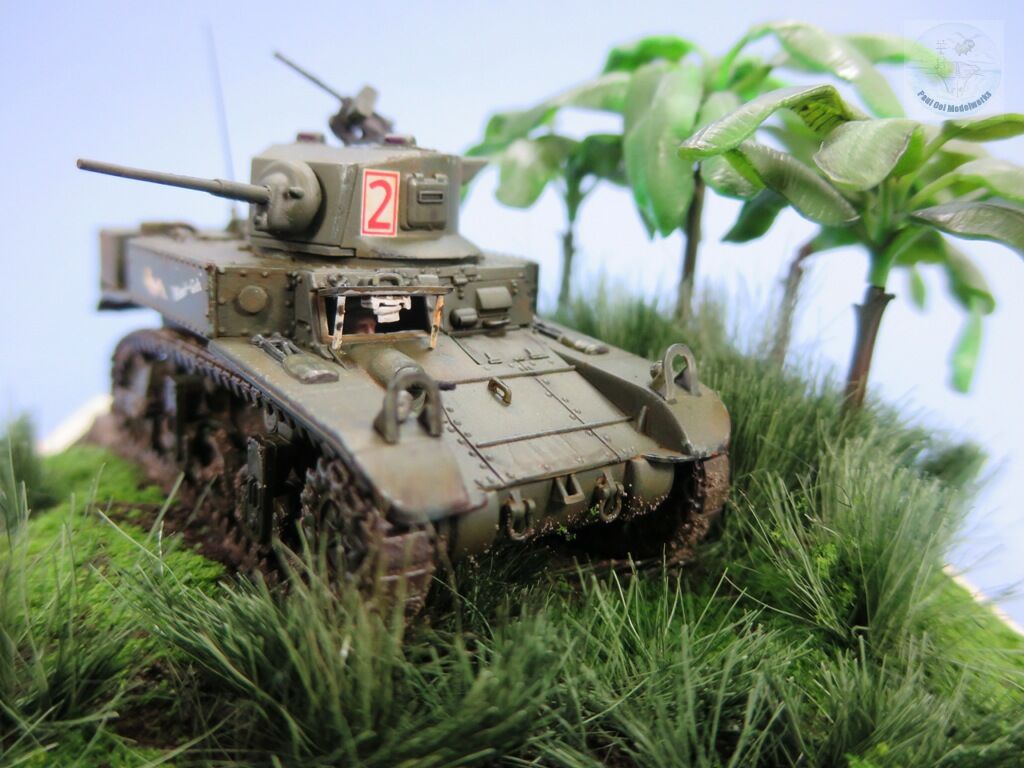
The WW2 Pacific Theater was not known for tank battles but many tanks were deployed in the island hoping campaign by both sides as defensive and offensive weapons. The need for shipborne transport, moving across closed in narrow terrain, favored smaller light and medium tanks that were employed in close infantry support and taking out pillboxes and machine gun positions. The M3A1 Light Tank was already moving toward obsolescence in Europe but proved ideal in these island battles. This tank was employed by the US Marines as a mobile gun platform, using the 37mm cannon to fire the deadly M2 anti-personnel canister shot. The latter contained 200 balls of shot that would literally shred vegetation and men in a large swath of destruction. This super shotgun role could break up massed charges and ambush positions with equal ferocity.
Gallery
Construction Notes
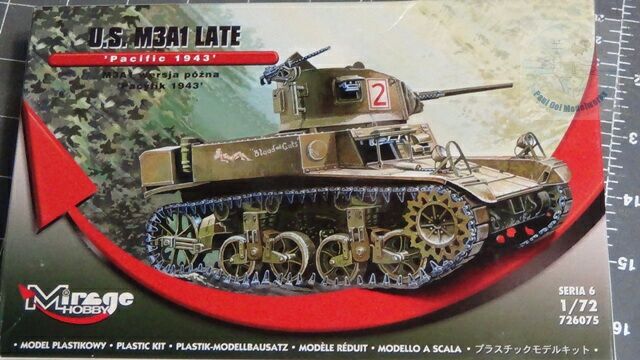
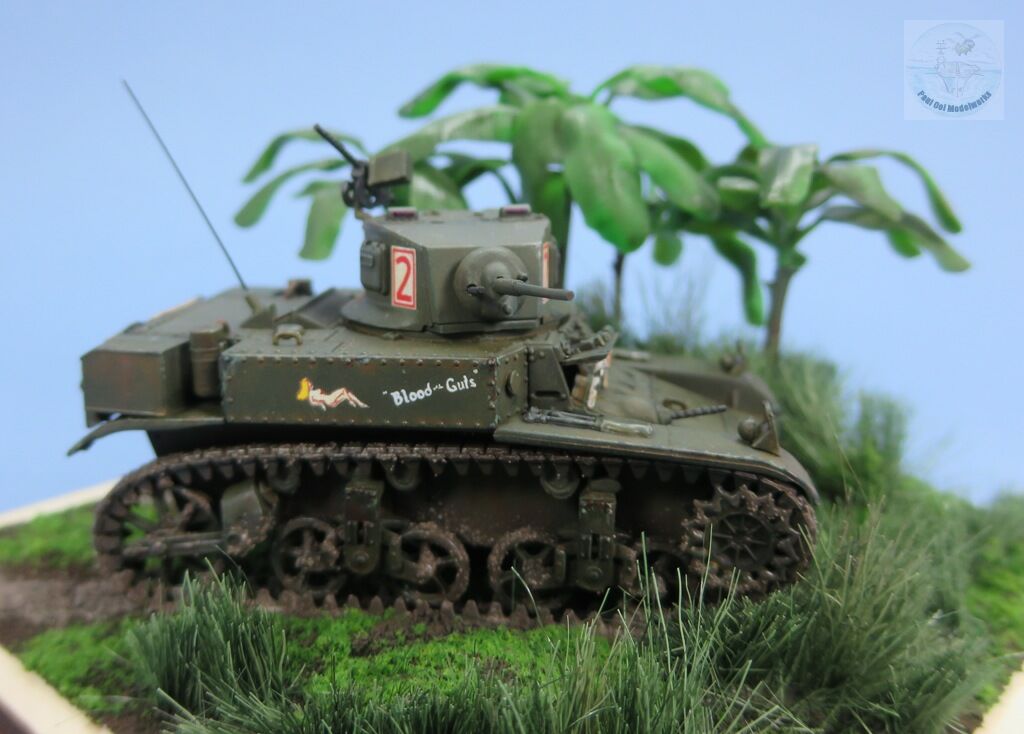
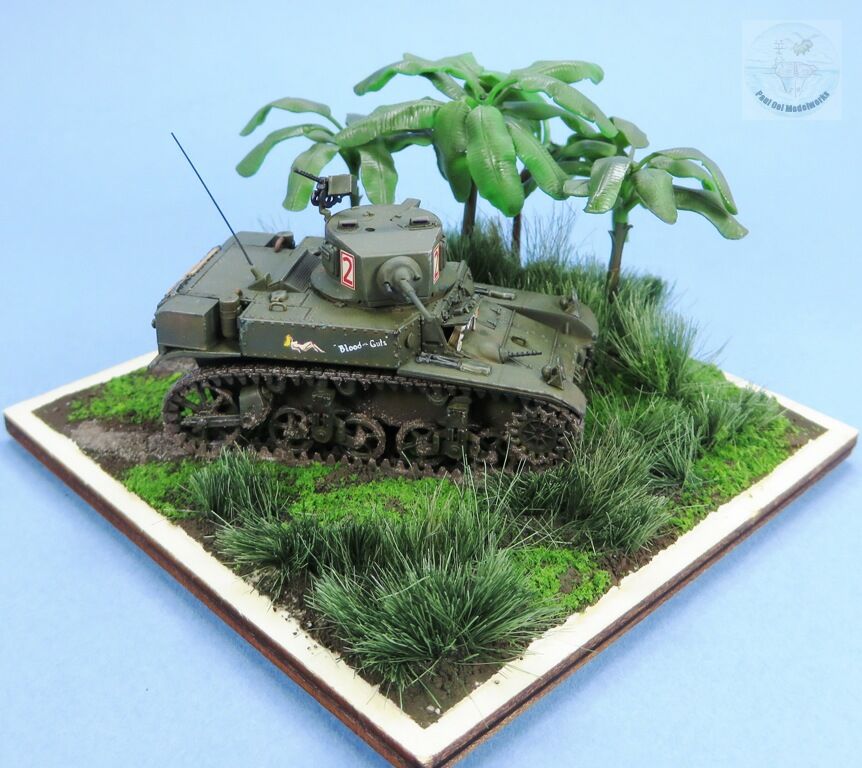
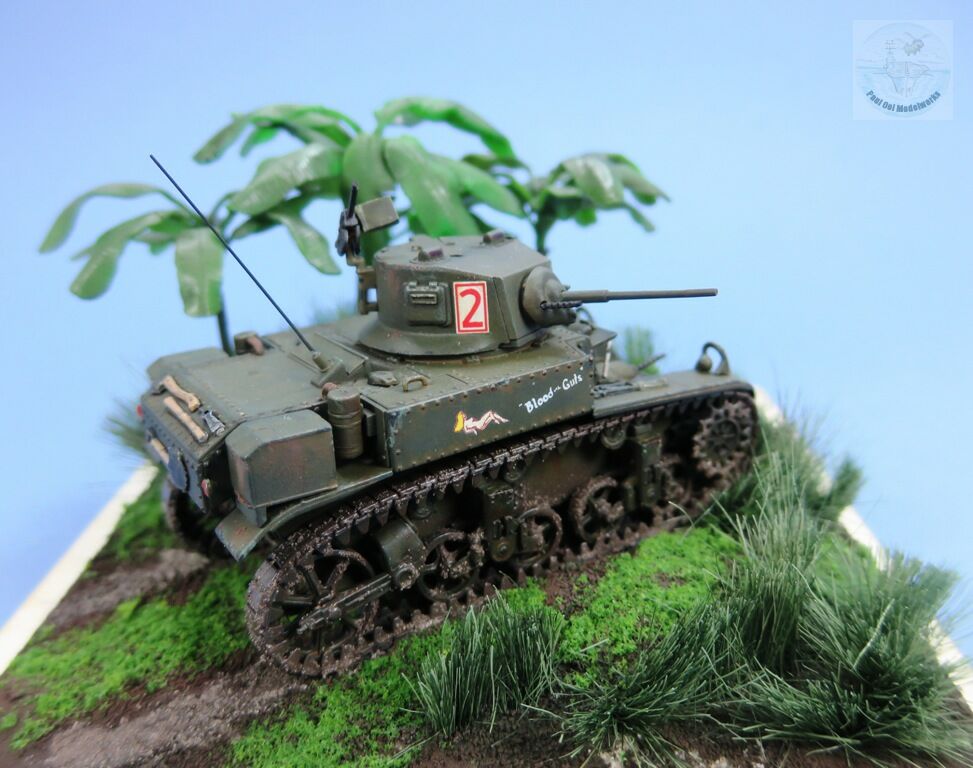
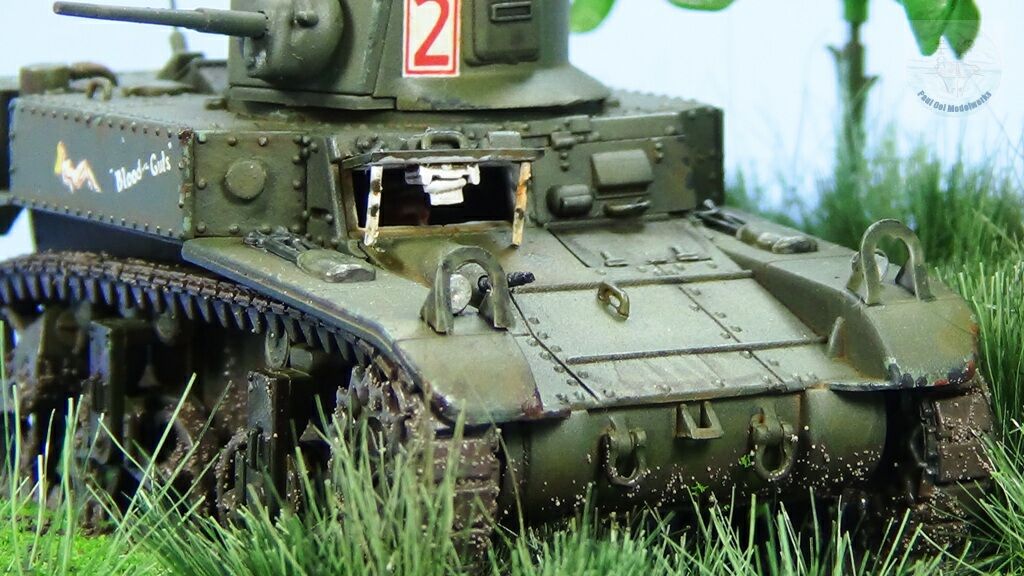
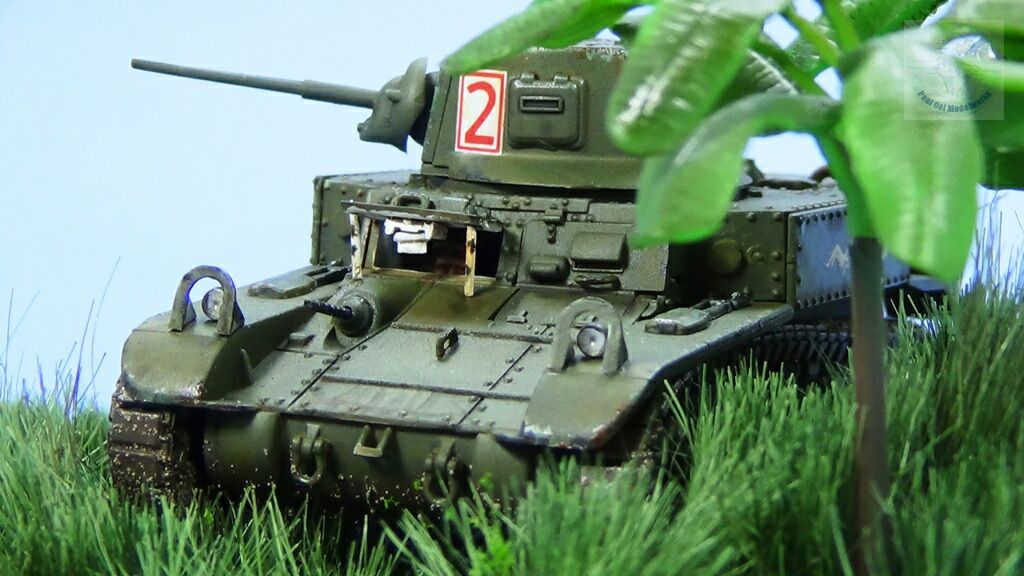
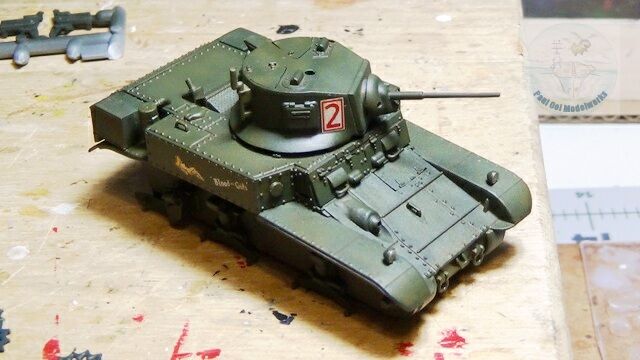
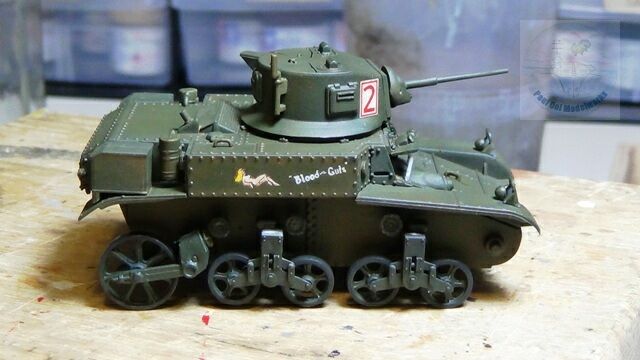
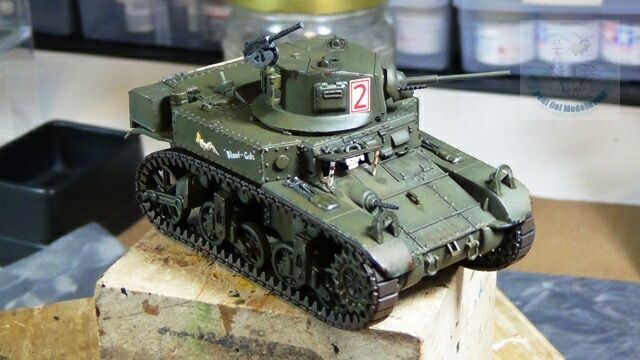
Mirage Hobby of Poland makes this detailed 1/72 scale model of the Pacific version of the M3A1 Light Tank. The markings provided are for three individual tanks belonging to the 3rd Marine Tank Battalion of the 3rd Marine Division on Bougainville Island in November 1943. The molding is crisp and the fit is very good. I wanted to portray the tank moving through a tall grass area fringed with banana tree groves, a dangerous place for the Marines advancing towards the trees. The assistant driver’s view hatch is open, possibly for heat relief and also to give him better view to fire the machine gun in the thick vegetation. It also makes him an inviting target for a Japanese sniper.

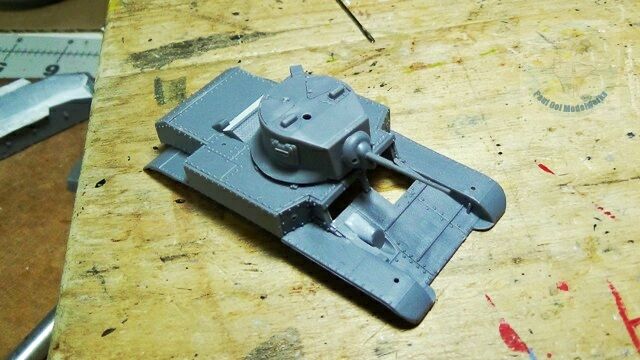
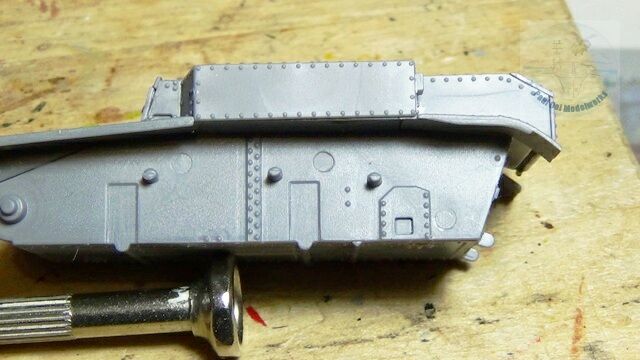
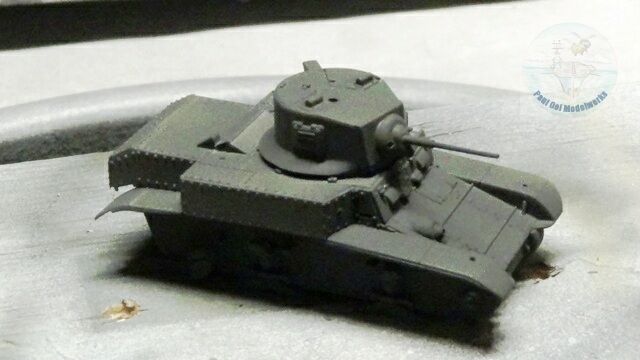
The construction begins with the main hull tub. The parts fit very well together and provides the foundation for the rest of the model.
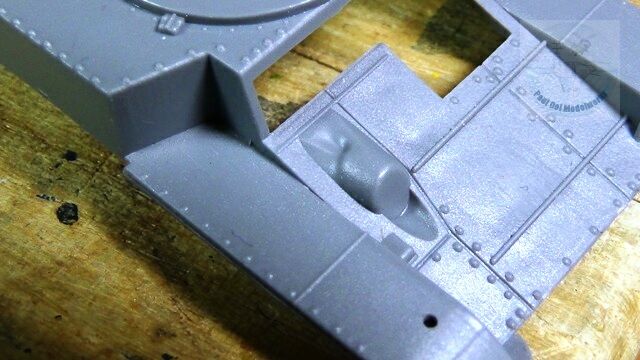
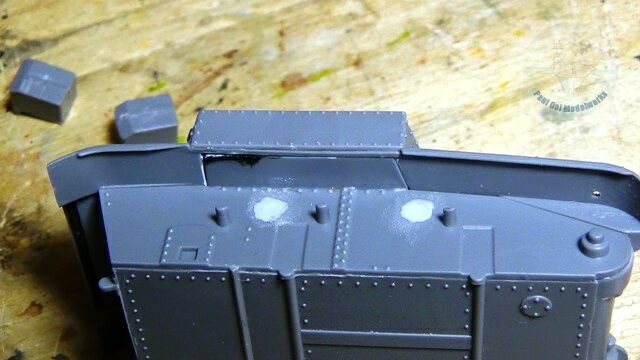
There are two major areas of sink holes on the upper hull sections, one immediately behind the engine compartment grill, and the other over the front hull-mounted machine gun housing. For the first one, I cut thin plastic card stockto fit the size of the panel and glued it over the sink hole site. For the second location, I applied putty, and smoothed over with Mr. Primer Surfacer 1000.
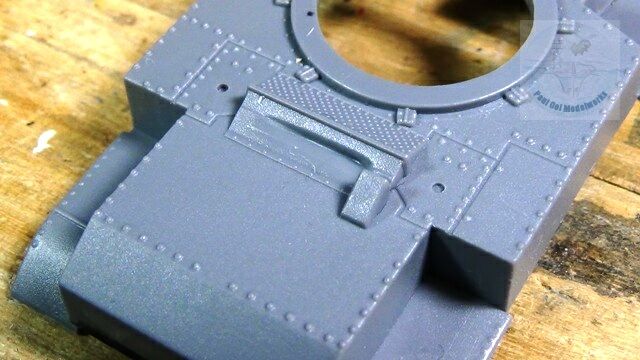
The rest of the hull and turret parts come together easily. Note the two locations mentioned earlier that needed cosmetic improvement.
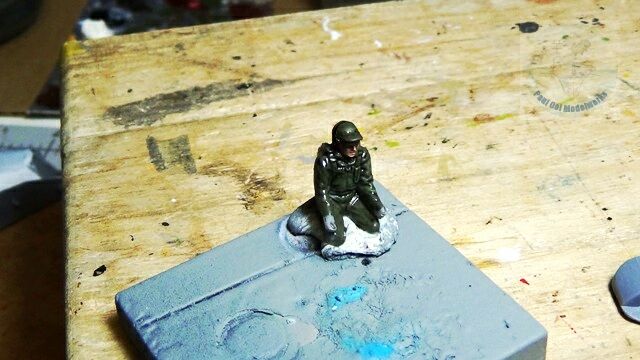
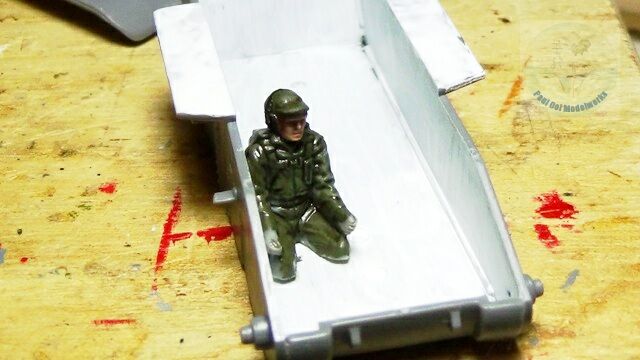
Before permanently gluing on the top and bottom sections of the hull, I painted a driver figure (recycled crew man figure from a 1/72 Revell kit) and after some dry-fitting I glued it at the correct position where the hatch will be at. By the time we finish, only the top of his face will be visible to the viewer.
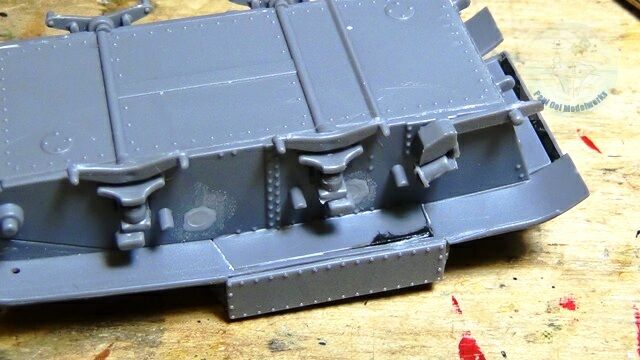
Unfortunately there were also prominent ejection marks along the walls of the lower hull that needed to be puttied and filed down.
Then the inner layer supports for the main bogies were installed at the chassis.
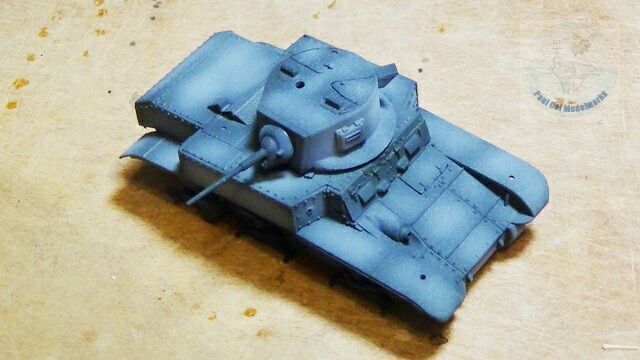
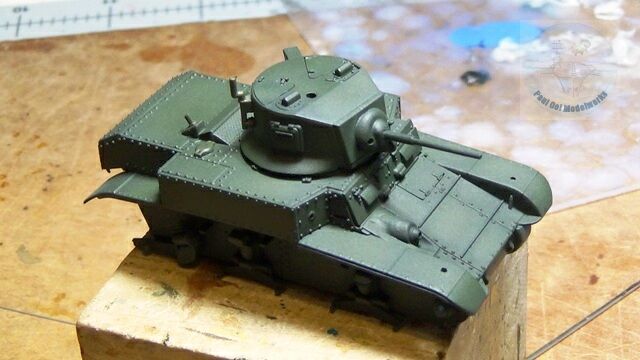
Painting starts with my Tamiya NATO Black undercoat, highlights with Tamiya Sky Grey, and then Model Master Acrylic Marine Corp Green.

After applying a prep coat of Microscale Gloss (applied locally with a soft brush at decal positions), decals are applied.
Once the decals have dried, I applied an overall coat of satin varnish to give the vehicle a uniform finish. Once the varnish has dried, I applied an oil paint wash of 50% Burnt Umber + 50% Yellow Ochre on the entire surface.
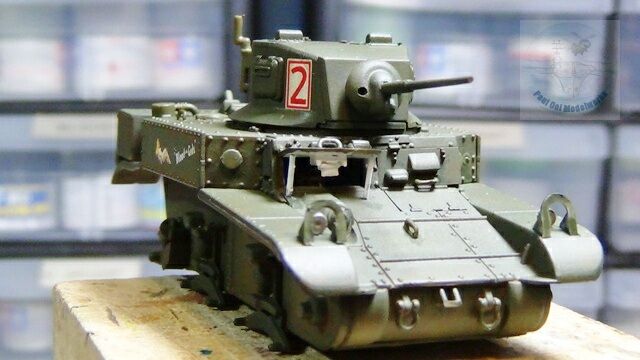
The left assistant driver’s hatch is opened (previously attached to the hull with white glue), and interior details of the vision slit built. The interior is painted Insignia White.
The road wheels and following sprocket are attached to the main hull.
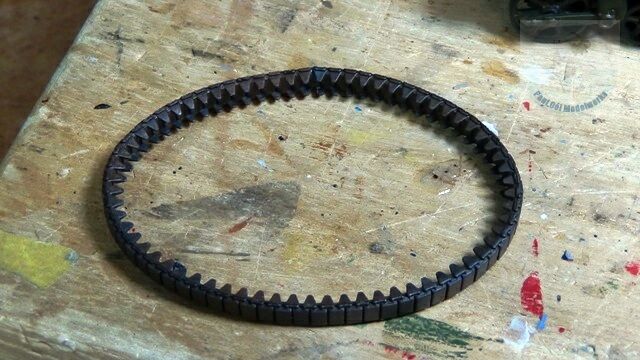
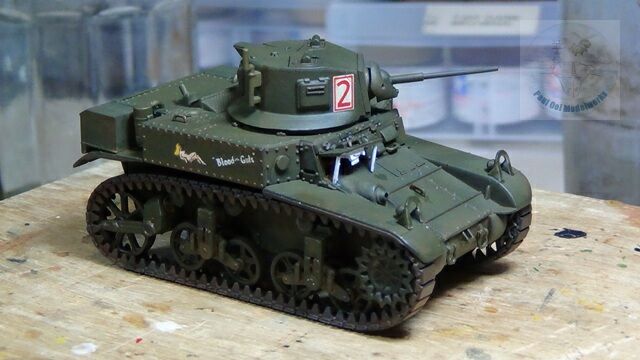
Now for the trickiest part of all. I had prepainted the one piece tracks with Tamiya NATO Black, and then airbrushed Tamiya Red Brown over it in uneven patches. The flexible tracks were then glued together with super glue after I cut off 2mm off each track after dry-fitting. Once the tracks are properly dried, I fit them over the track assembly.
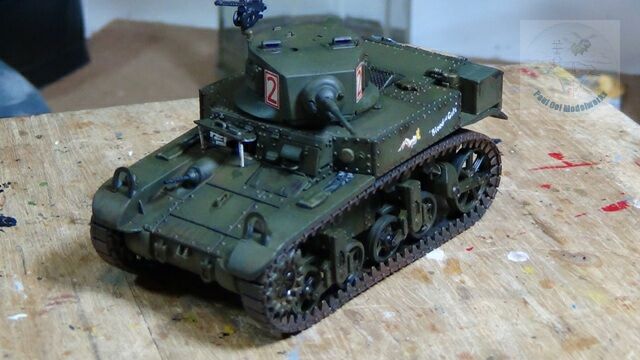
Panel lines and mechanical details are given a pin wash of 50% Burnt Umber + 50% Lamp Black.
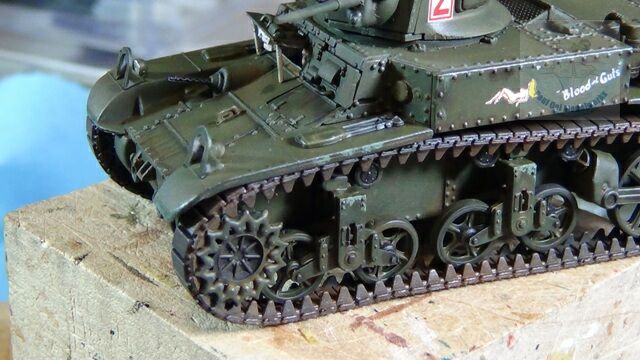
Raised details are give a light dry-brush using Model Masters enamel SAC Bomber Green FS34159, and also areas of heavy wear.
Heavy wear areas are then further detailed with a brush using NATO Black scuff marks, and finally rust stains using Burnt Umber and Burnt Sienna oil paints.
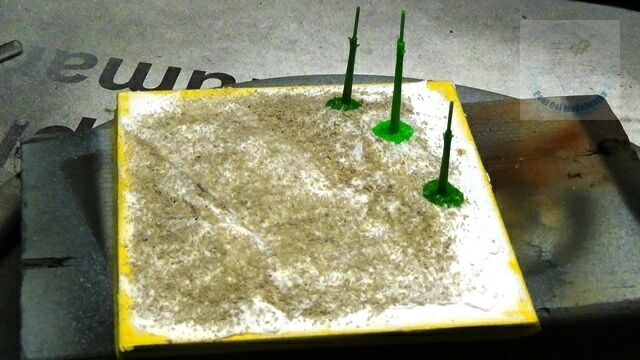
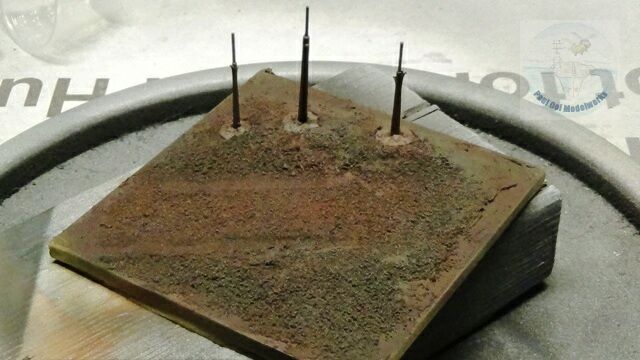
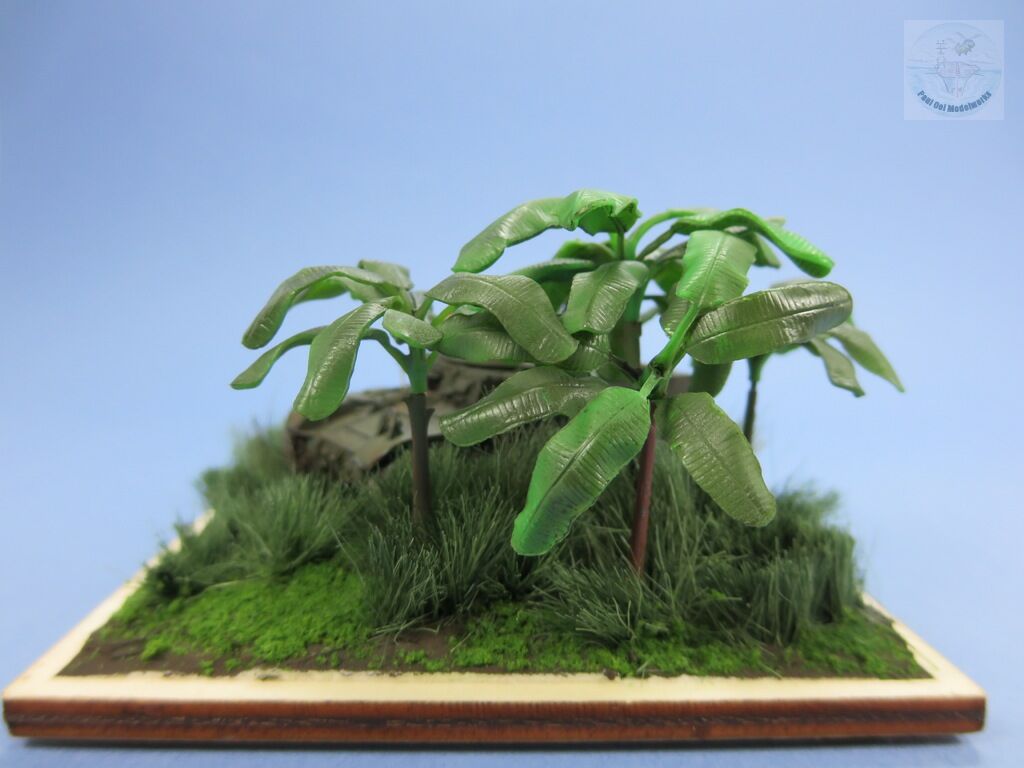
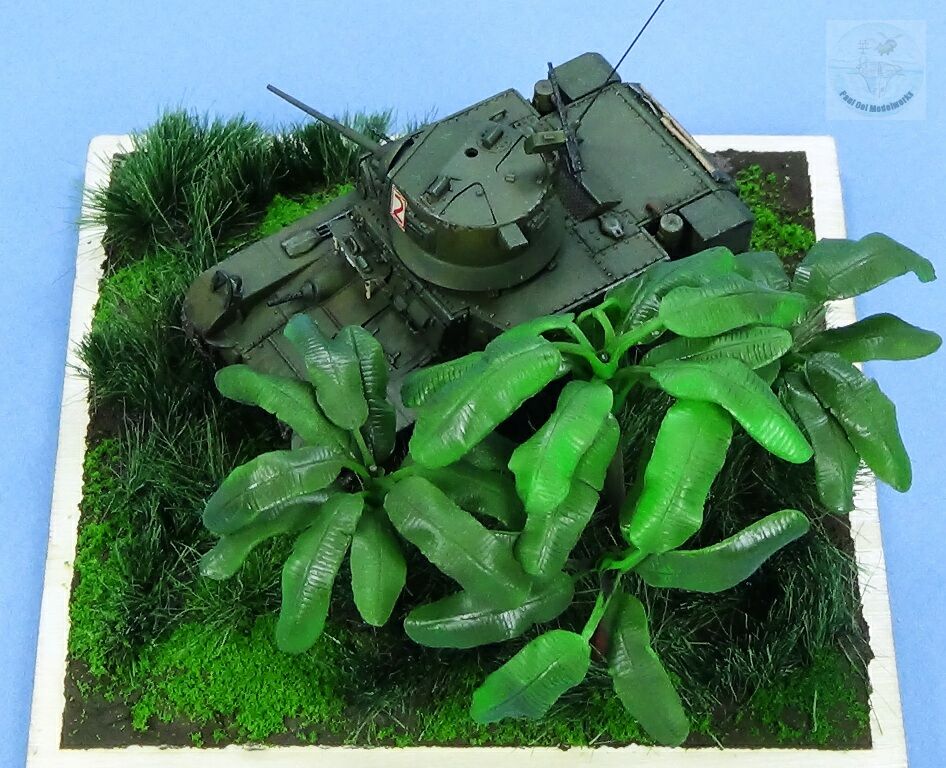
The base preparation is similar to previous posts on ground bases. I planted three banana tree trunks (Pegasus hobbies banana tree set) into the wet plaster. The base is given an undercoat of NATO Black, followed by overspray of Red Brown and NATO Green.
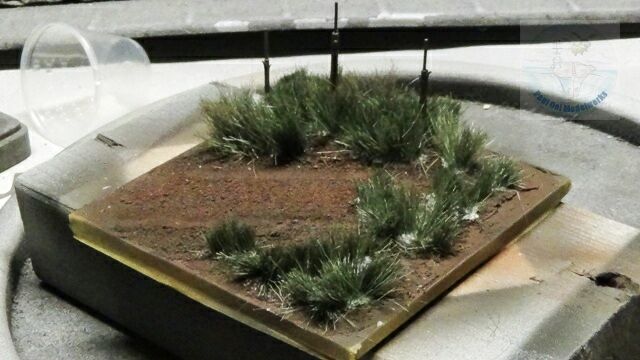
Then tall dark green “grass” is planted. See previous post on UH-1 Helicopter on tall grass technique.
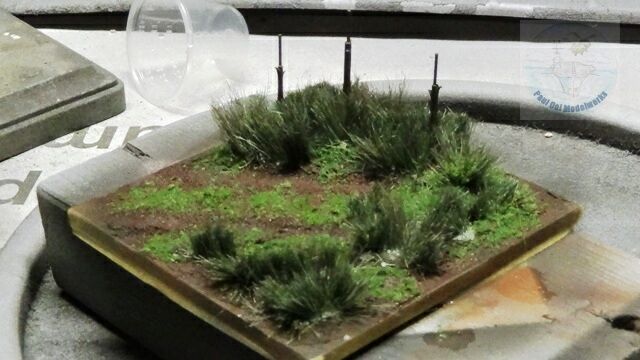
Lower ground hugging vegetation is simulated with green grass powder sprinkled close to the base of tall grass, secured with eye drops of diluted white glue solution.
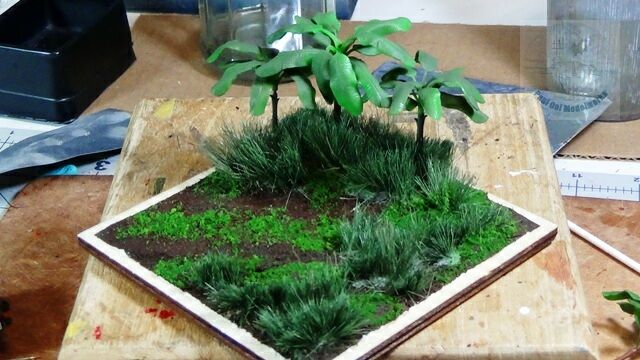
Banana leaf fronds are painted NATO Green, given a glossy Dark Brown wash and attached last to the diorama base.
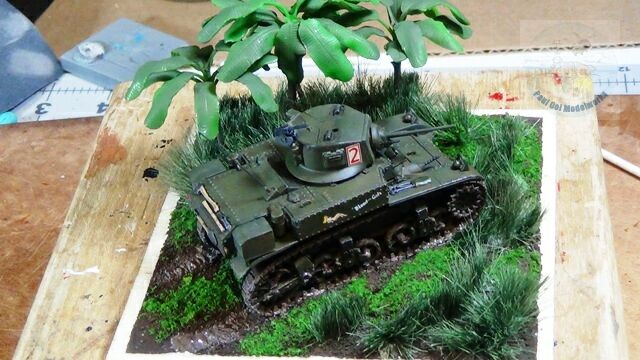
Once the tank is glued to the base, I applied a mud solution of Vallejo Sandy Paste mixed with NATO Black + Nato Brown for muddy deposits on the wheels and tracks, blending them into the base. The M3A1 is now ready to rumble!
[…] tropical vignette is done with the same methods as shown in the Pacific M3A1. For the wet mud and foliage look, I applied Vallejo Wet […]