

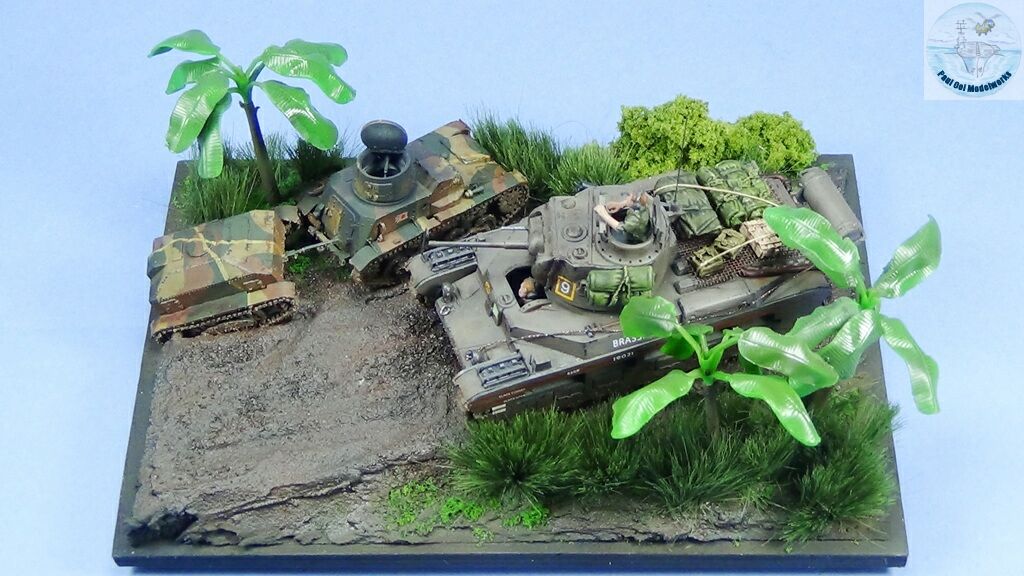
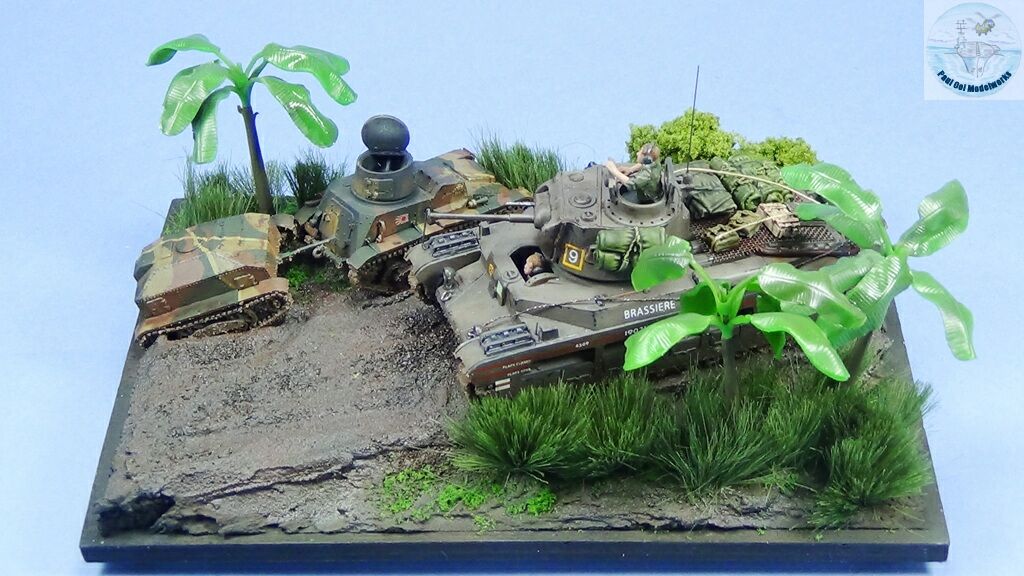
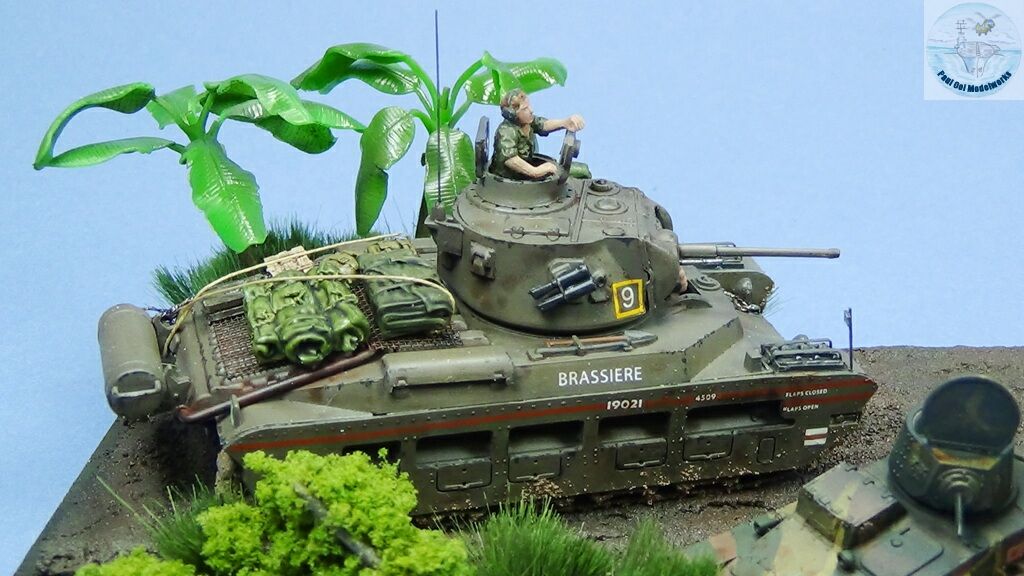
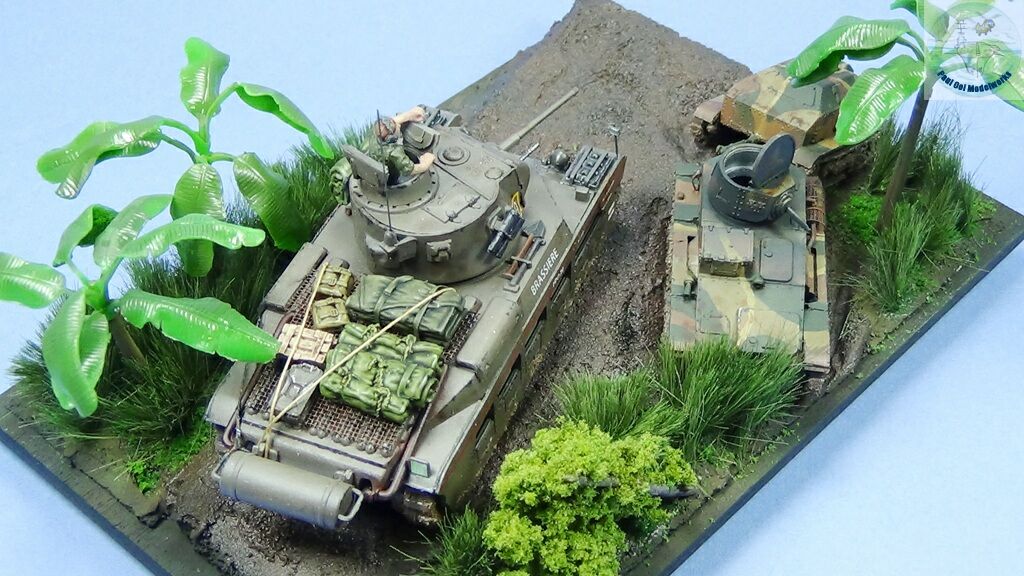
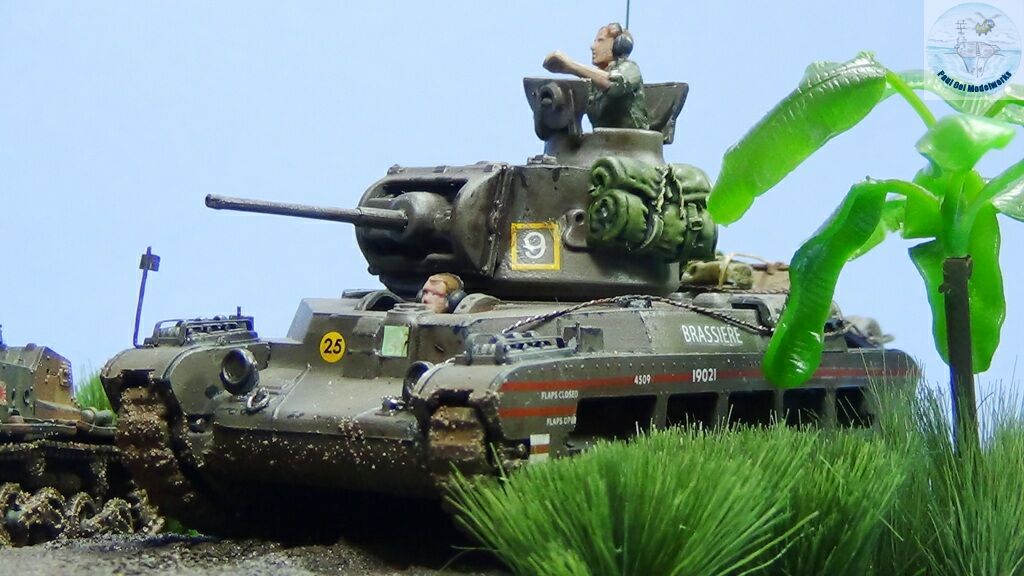
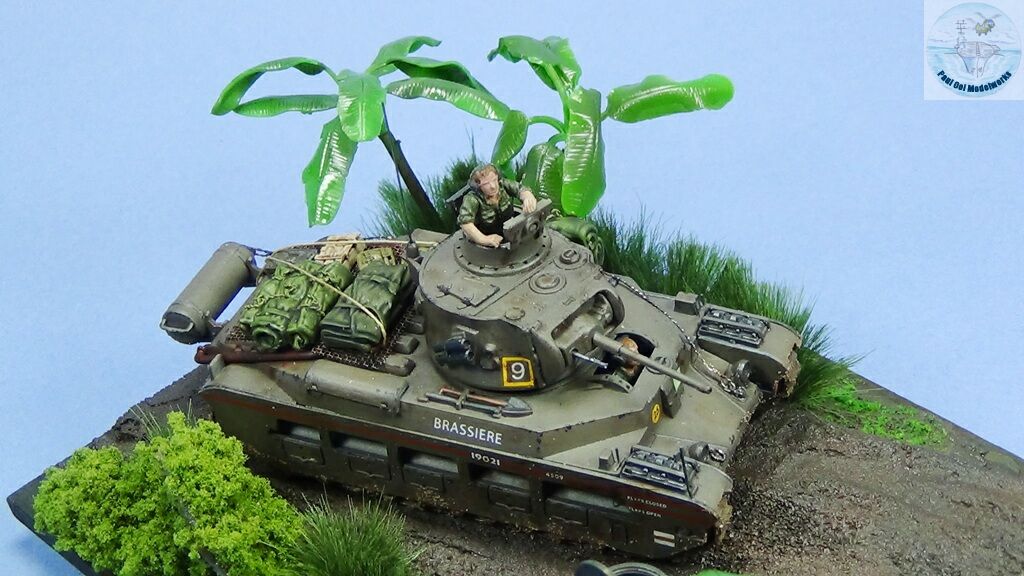
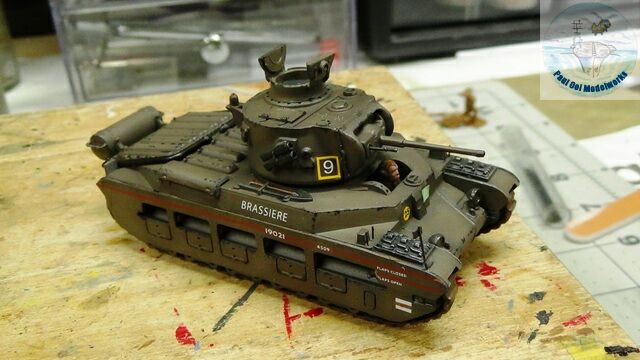
After Guadalcanal and the Allied campaign in the Solomons, the Americans continued westward in their island-hopping effort to bring the war ever closer to the Japanese homeland. This approach bypassed many sizeable Japanese troop concentrations around the Pacific. The Australians concentrated on clearing out the islands immediately north of Australia, namely New Guinea and the islands in the Southwest Pacific. These long, grinding fights were a continuation of the type of fighting seen at Guadalcanal in torrential rain forests. The Australians found the venerable Matilda Mk.II with its 2-pounder gun and thick 100mm armor to be very useful in the jungle fight and it was more than a match for the Japanese Chi-Ha. Its slow speed that was becoming an issue in the European theater was not a problem as the type of fight in New Guinea was more infantry support to clear out bunkers and entrenched enemy positions. In the end, the Matilda Mk. II, and its Australian variant the Mk. IV was the only British tank to have served at the front line from 1939 until 1945.
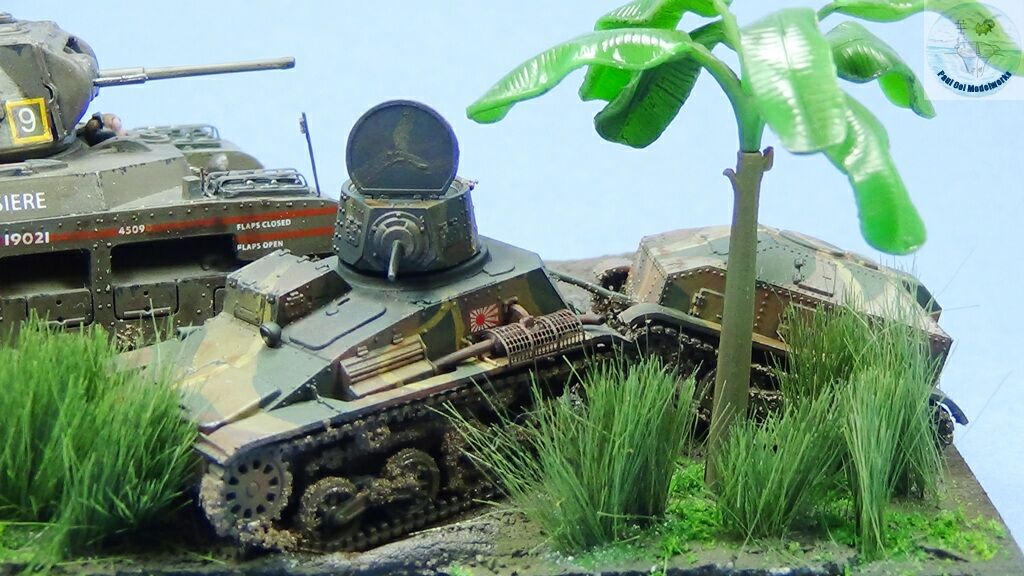
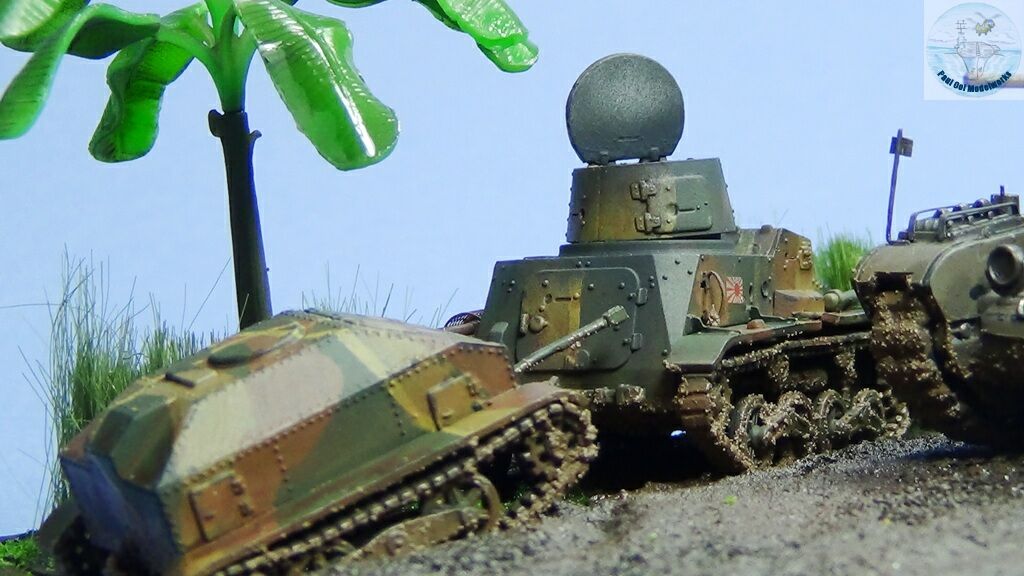
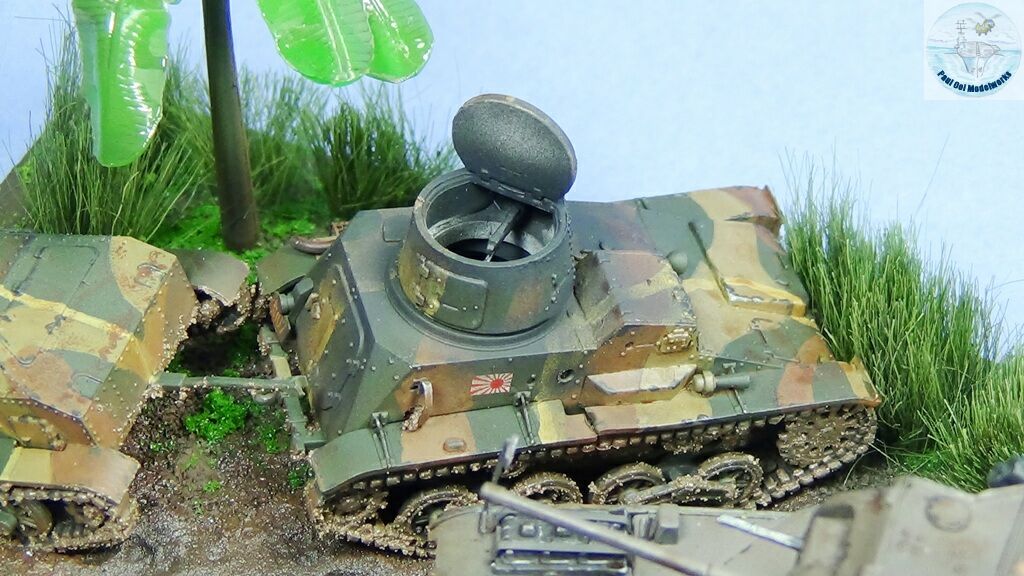
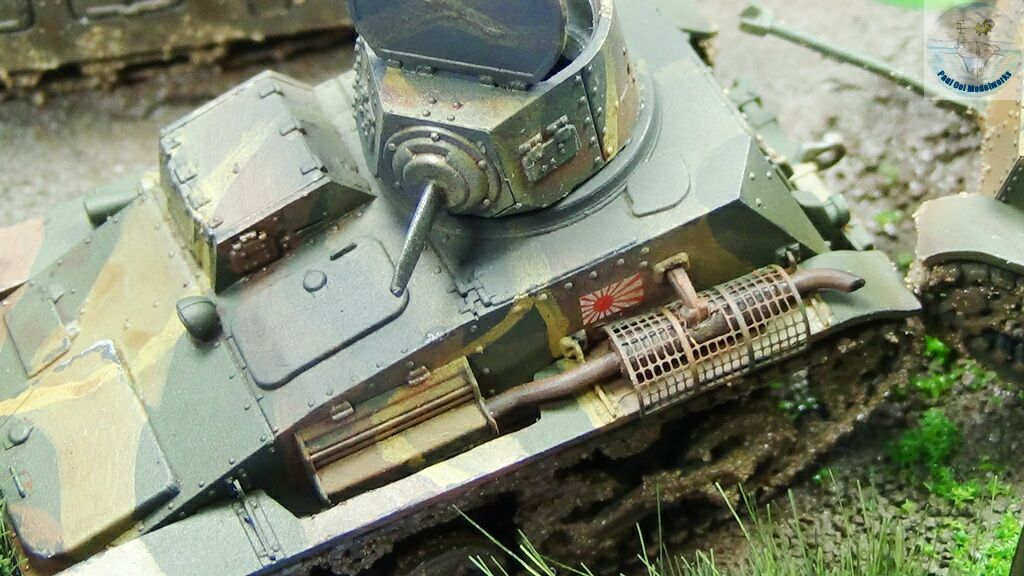
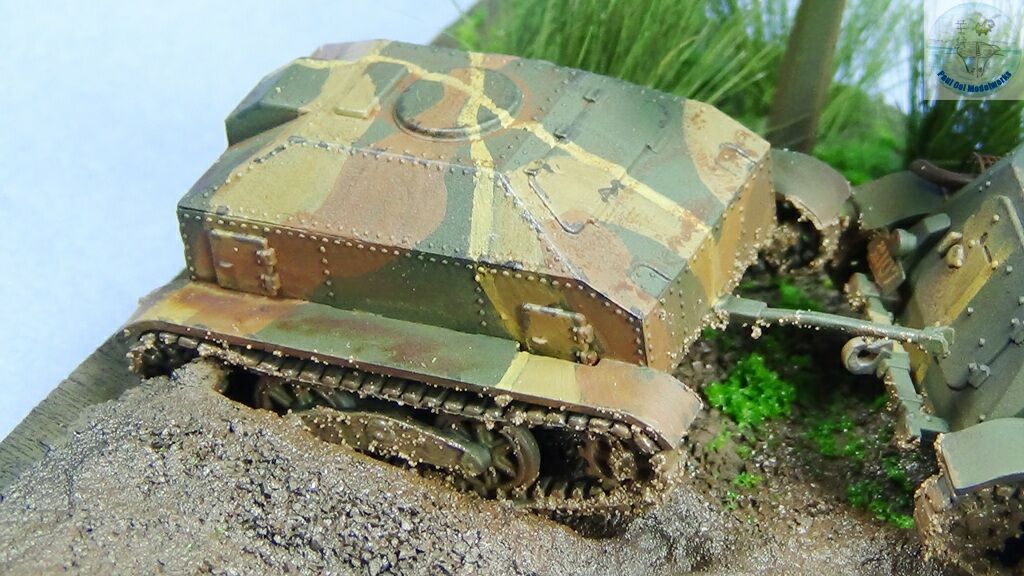
The Japanese Type 94 tankette is a dimunitive AFV with a 2-man crew. First used in China in the 1930’s, it was already obsolete at the start of the Pacific War. It had its moments of glory in the conquest of Java and the Dutch East Indies where the opposition did not have any tanks to face it. Later on, the tankette was too under-armed (only a single machine gun) and thinly armored to face the M3A1 Stuart and M3 Grant deployed by the Allies. However, it was still used as an infantry support tank and mostly used as a field tractor to tow a trailer to transport ammunition and supplies. It was distributed among the army and naval units in the Pacific.
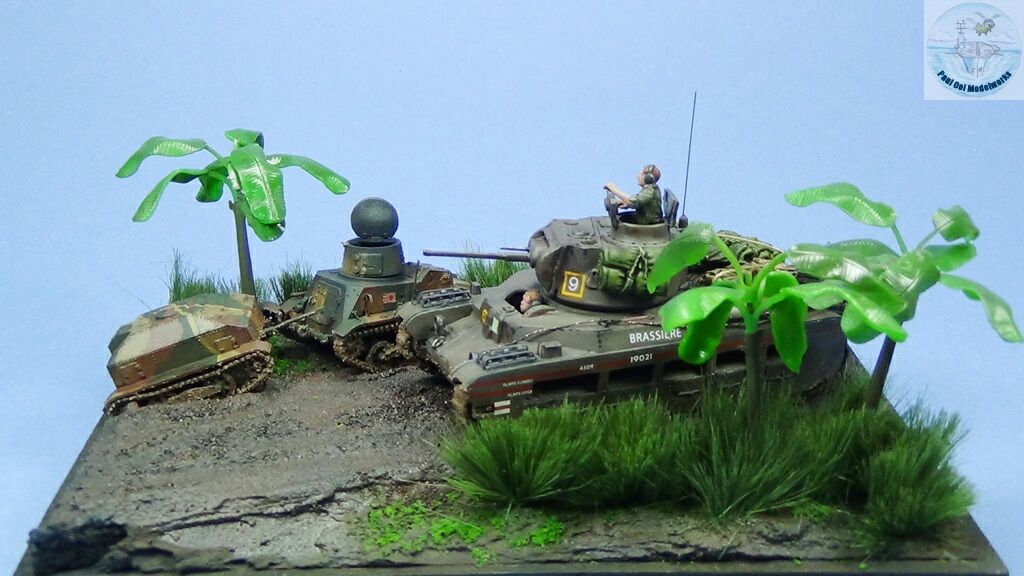
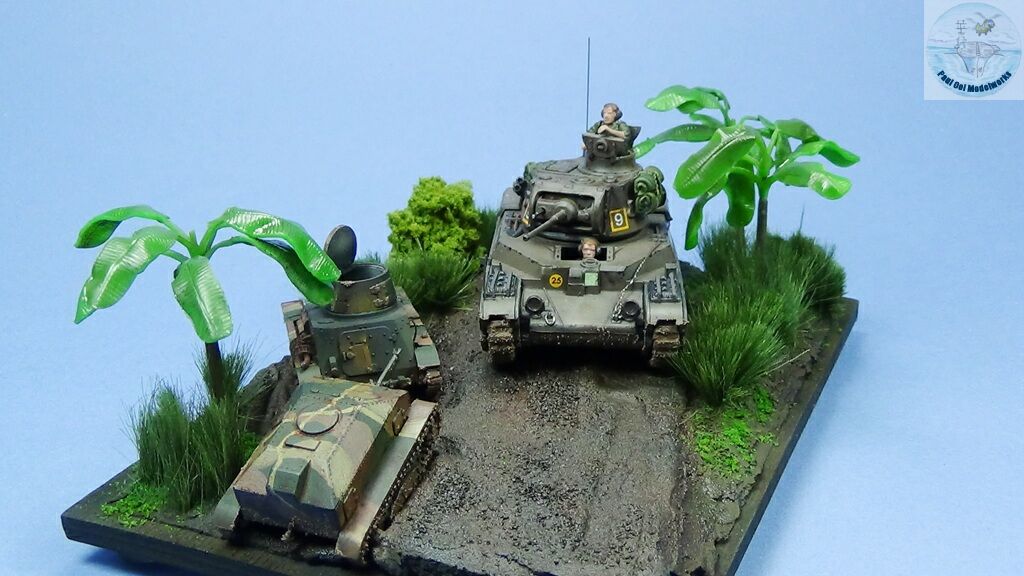
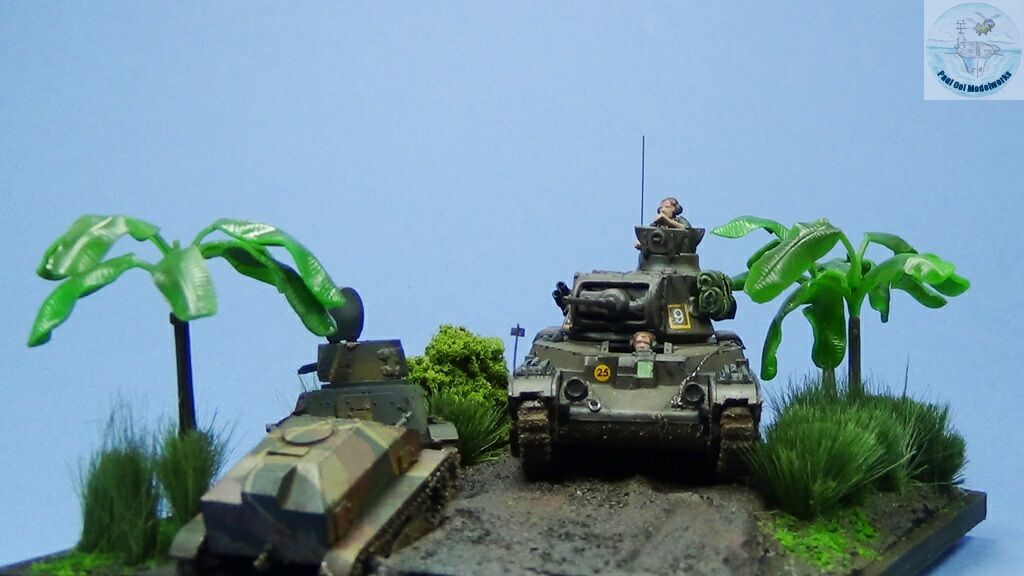
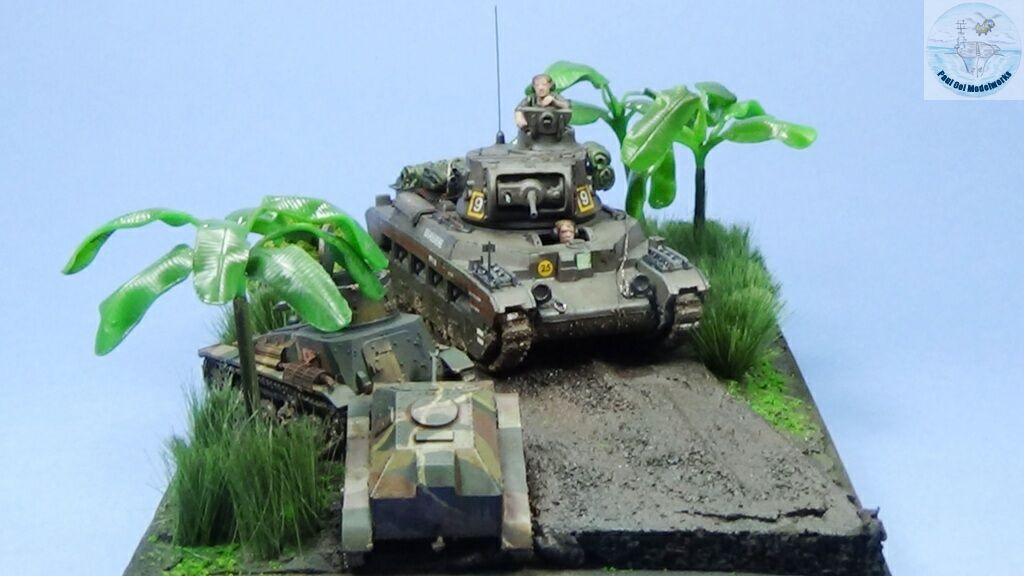
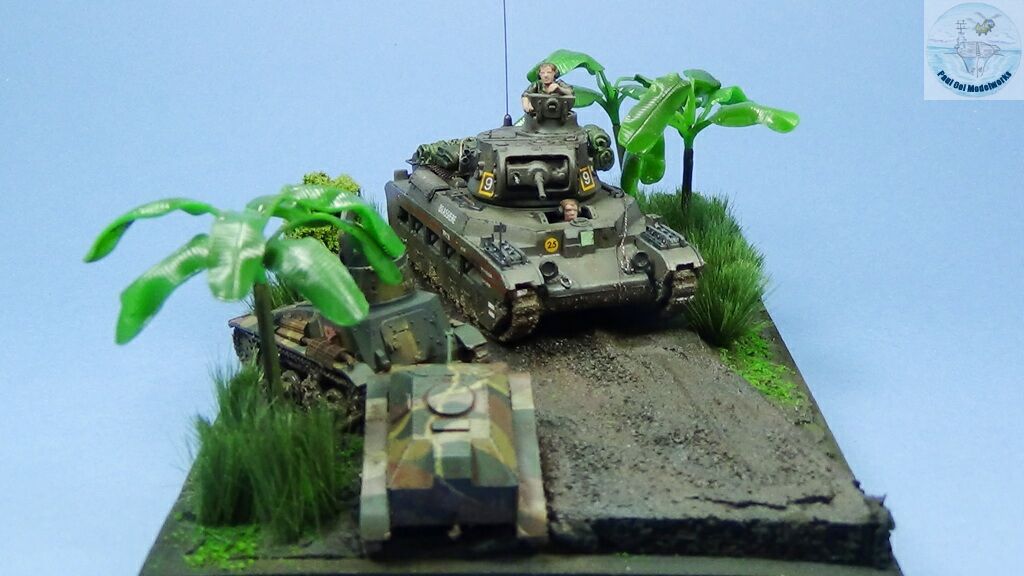
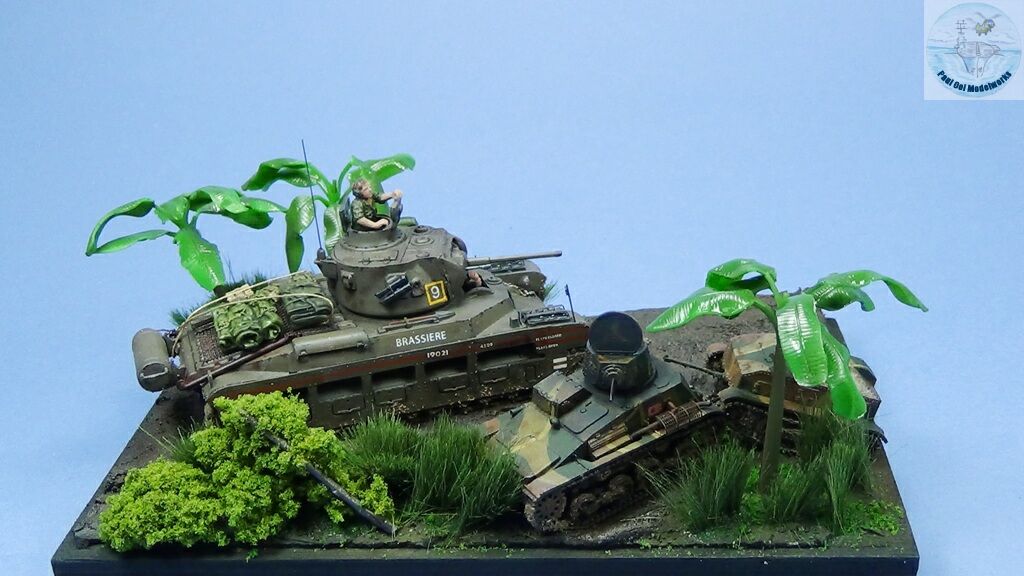
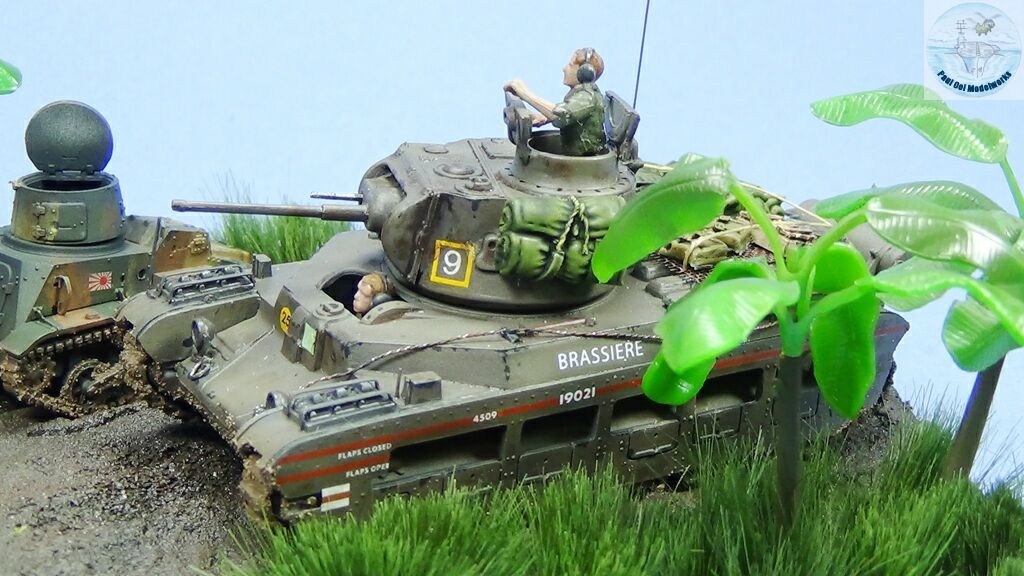
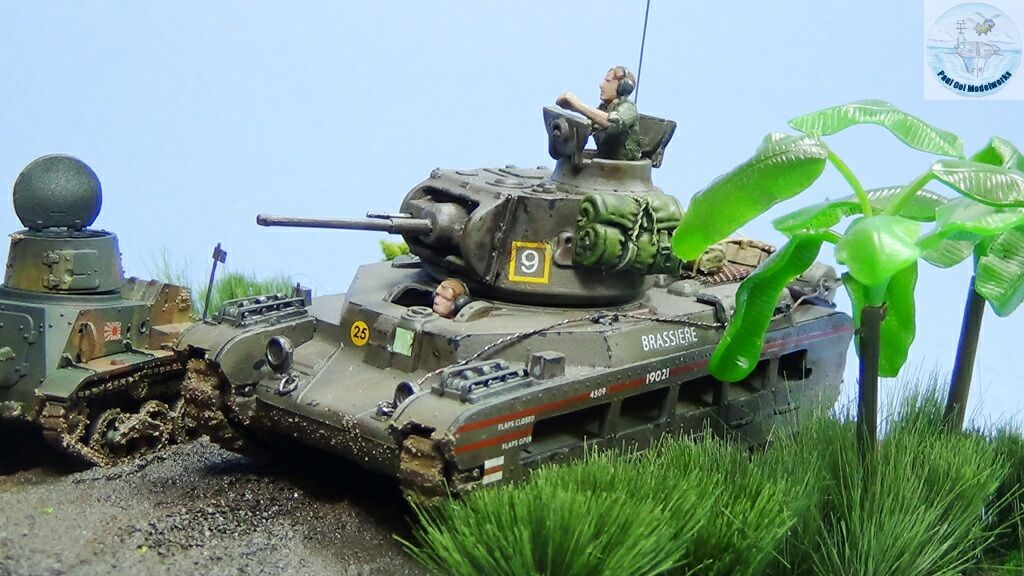
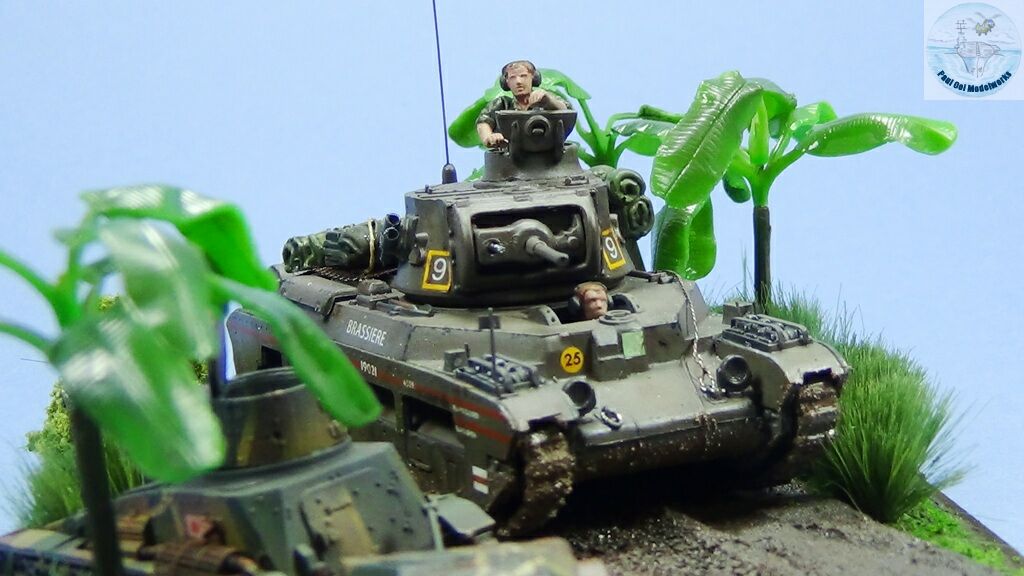
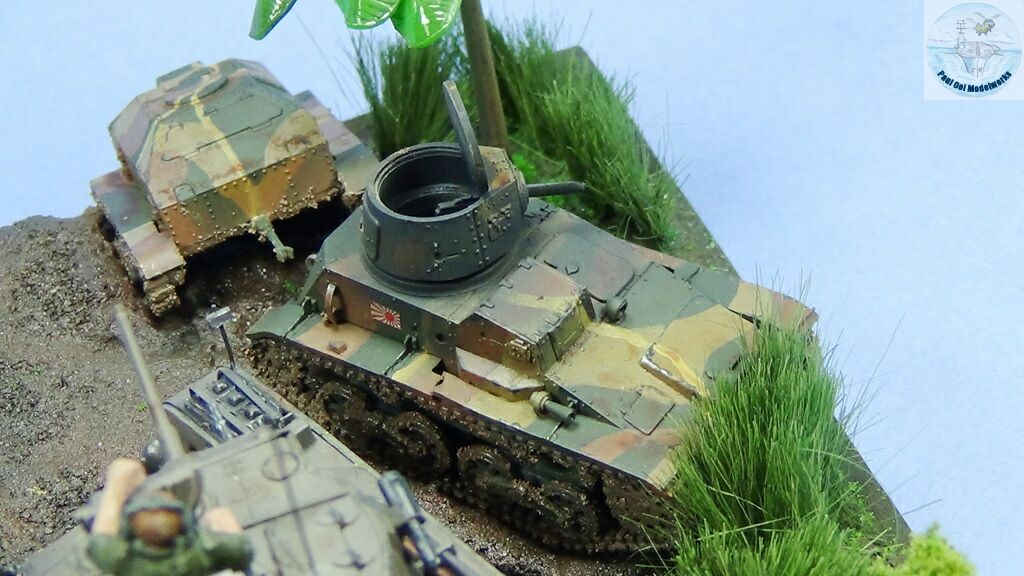
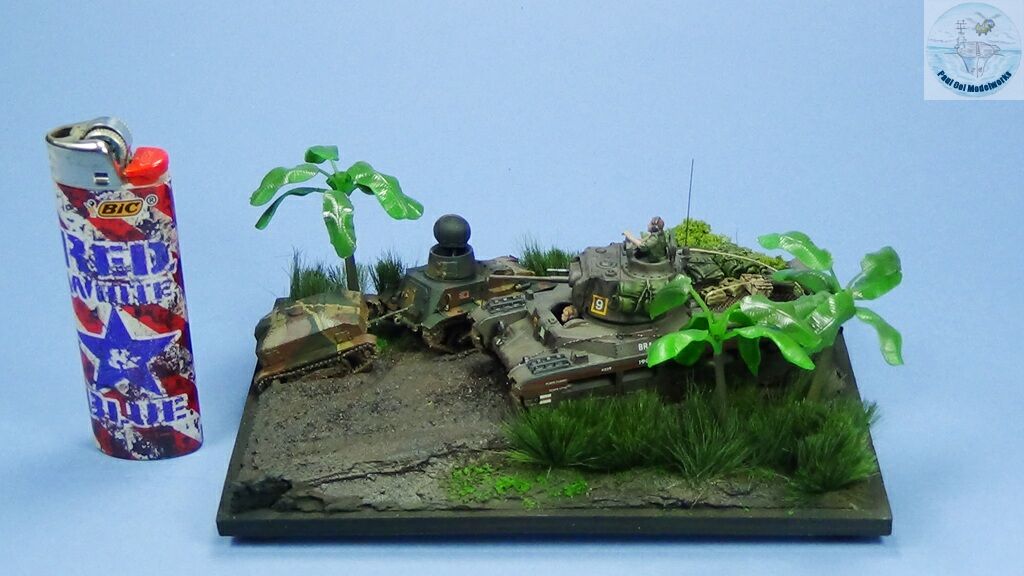
This vignette shows the action by the 2/4th Australian Armoured Regiment moving along the Buin Road on Bougainville island to cut off the supply route to the last Japanese garrison in Buin. The fighting along the road was vicious as Japanese units attempted to encircle the Australian advance. The Matildas were used to clear roadside fortifications and bunkers. The little Japanese Type 94 was probably used as a field tractor to pull supplies for the Japanese naval infantry and got knocked out with a single shot that went right through the vehicle instead of exploding inside it due to the very thin armor.
Gallery


Construction Notes
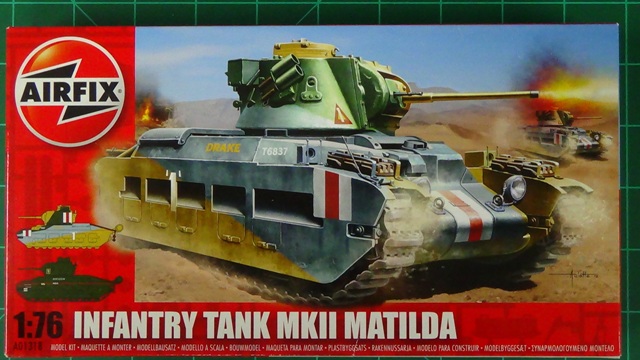
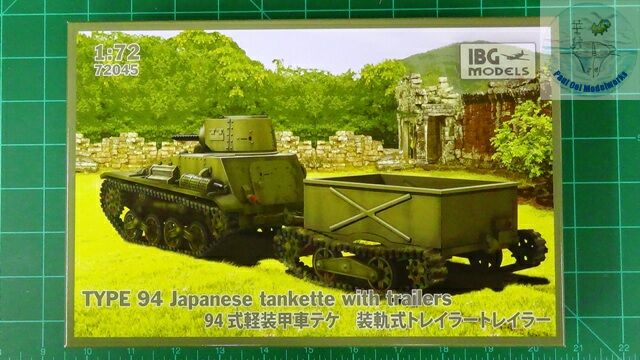
The Matilda II kit was a venerable Airfix mold from the 1973 release but the details are pretty decent and the fit is good. I remember when it was first released and how we all wanted to build the “Queen of the Desert”. The Type 94 tankette is a recent IBG Models kit with two trailers provided and a small photoetch fret for the muffler guard and fender details. It had excellent fit and both kits were fun to build.
Building the Matilda
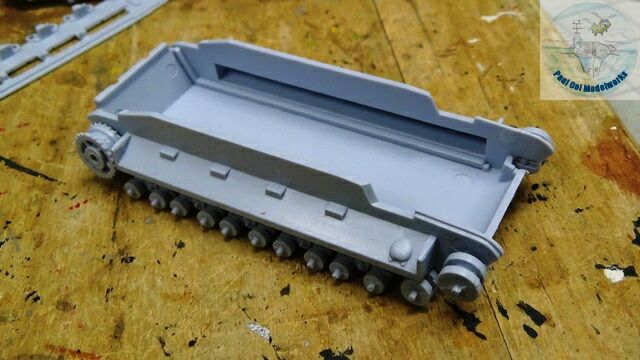
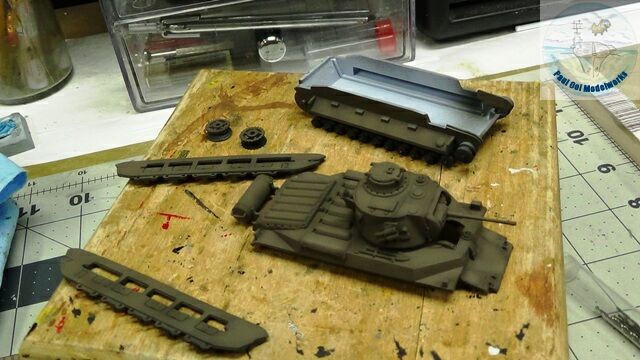
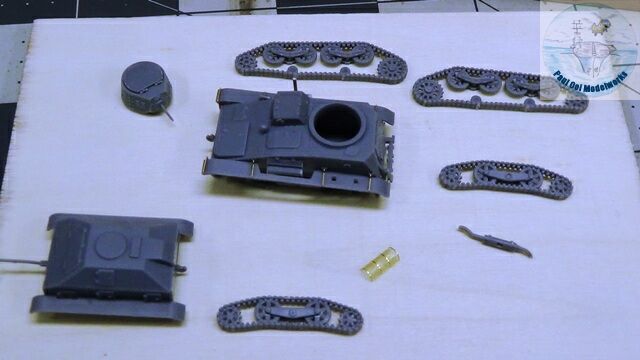
The first assembly steps for the Matilda are the two sets of road wheel panels that will get boxed in by the outer shields later. Together with the hull base, they form the lower hull tub. Unlike the instructions, I kept the upper hull shell off until very late in the construction in order for me to be able to attach the driver’s half-body figure later.
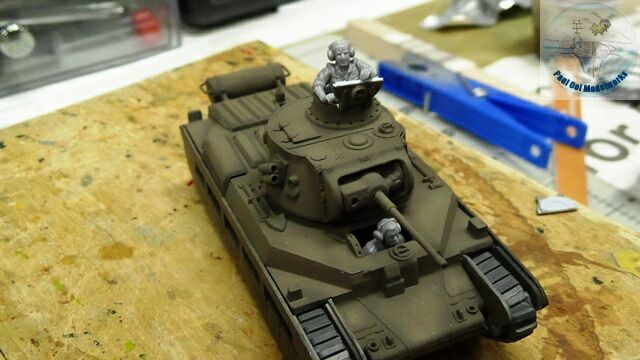
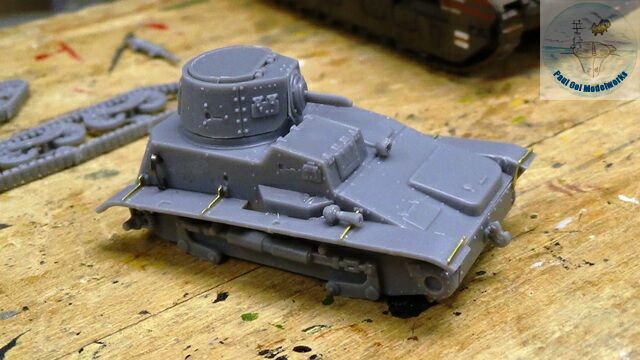
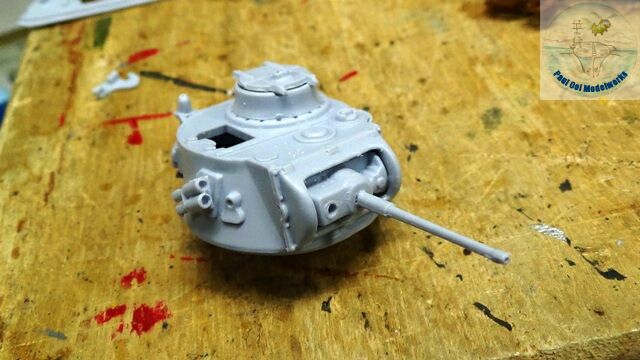 I proceed to build the turret unit . The commander’s hatch is temporarily attached with Blutack as I plan to build it in the open position.
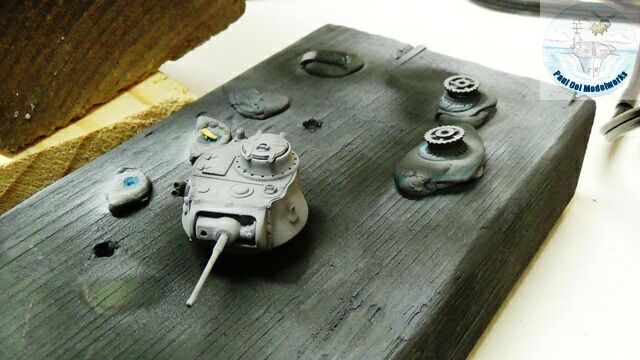
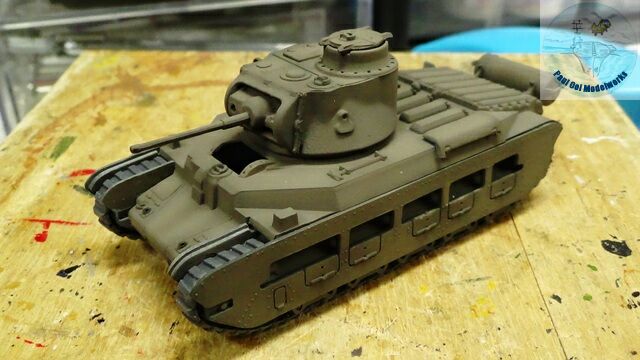
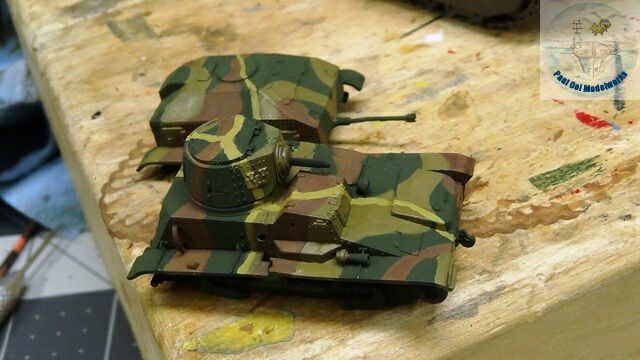
 As usual, I prime the parts in Tamiya NATO Black XF69, highlights in Tamiya Sky Grey XF19. Then I apply the overall camouflage Khaki Drab XF51. By lightening the Khaki Drab with 30% Buff XF57, I get a lighter shade that I airbrush over the highlights to provide some shadow and panel contrast.
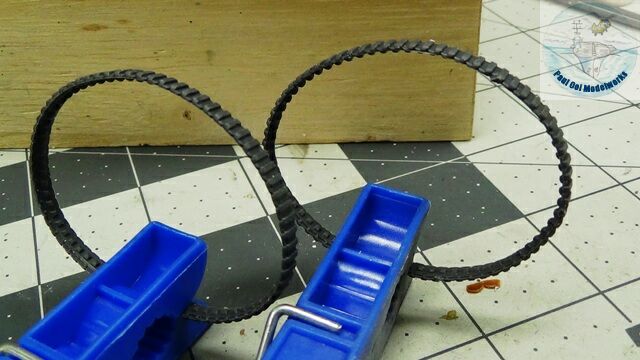
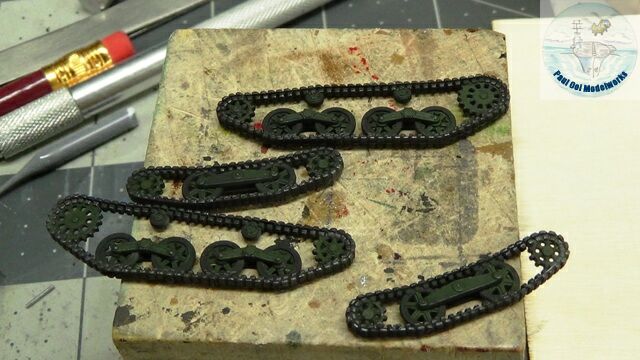
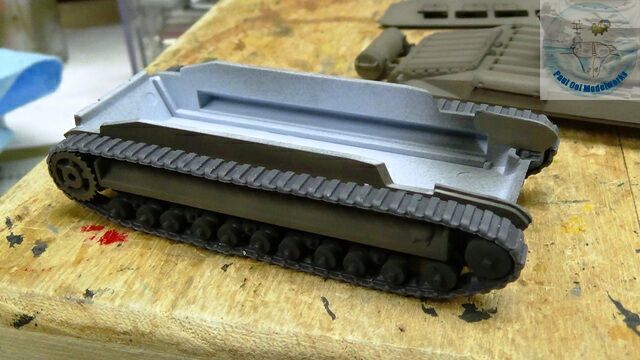 Since the tracks were already molded in gun metal, I just applied them directly onto the track panels. For the technique used in applying flexible poly tracks, please refer to my M5 Tractor project. The fit was perfect with no slack or over-tightness. Not bad at all for a nearly 50-year old kit design.
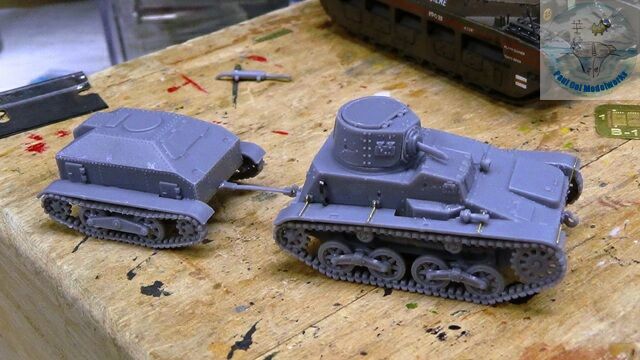
 I did a dry-fit of the upper hull shell and turret onto the lower hull first. Then I did a trial fit of the crew figures for positioning. I got the two figures from Hasegawa’s US Pilot/Ground Crew Set (X72-7), adapting a couple of ground crew figures to tank duty!
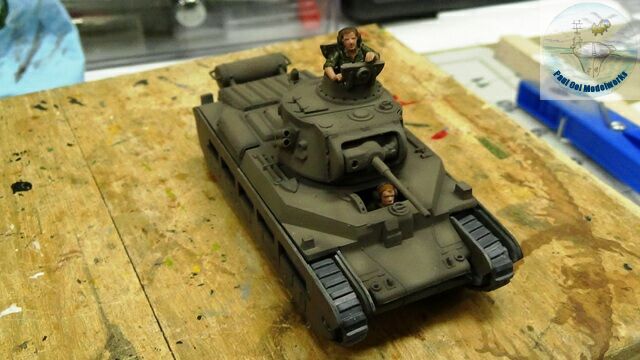 The crew figures get painted with Jungle Green uniforms (Vallejo 70.893).
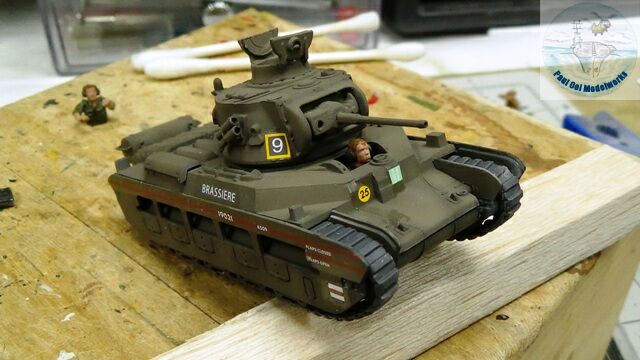
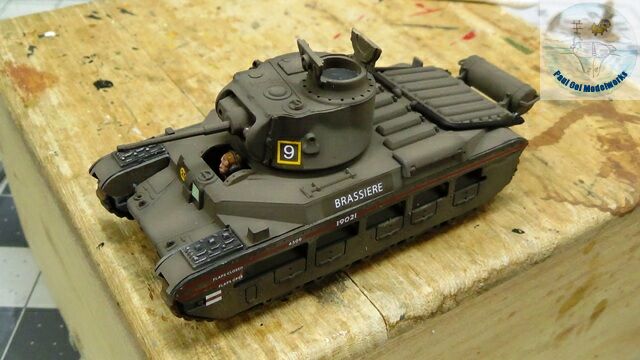 Decals settled nicely with Micro Gloss base, and MicroSol setting solution. Then the paintwork is sealed with satin varnish.
 Finer details are added, and then given a heavy rust wash of Burnt Umber. The tracks are painted with thinned NATO Brown XF68 for rust effect.
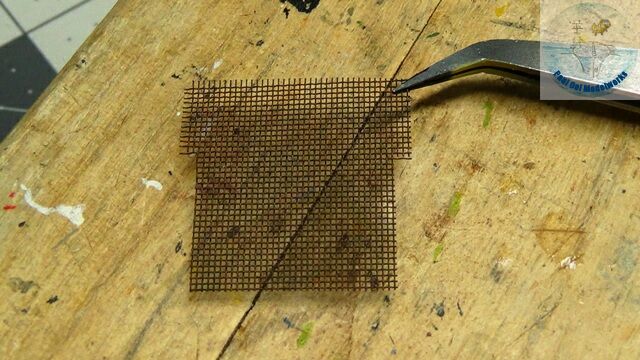
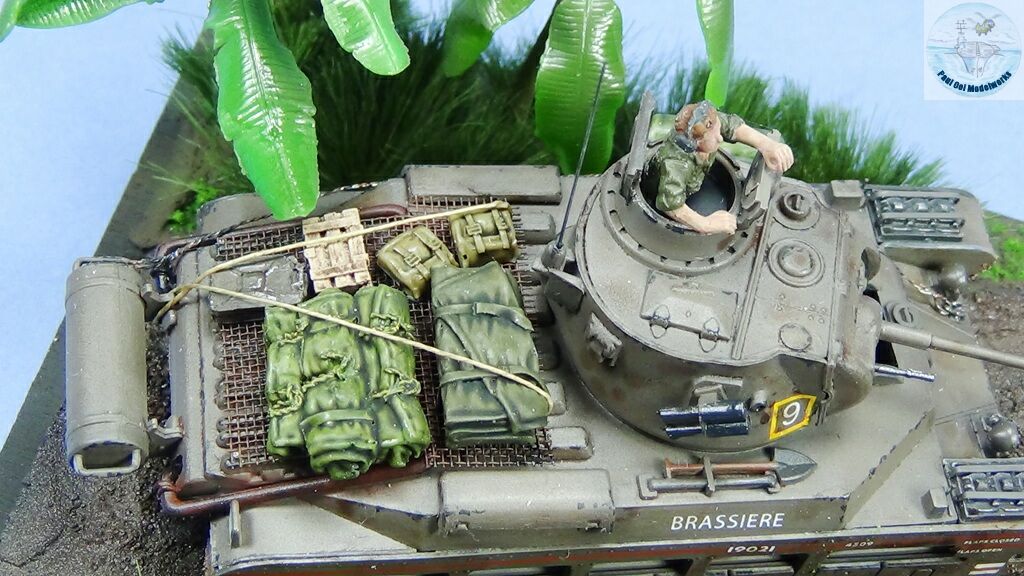
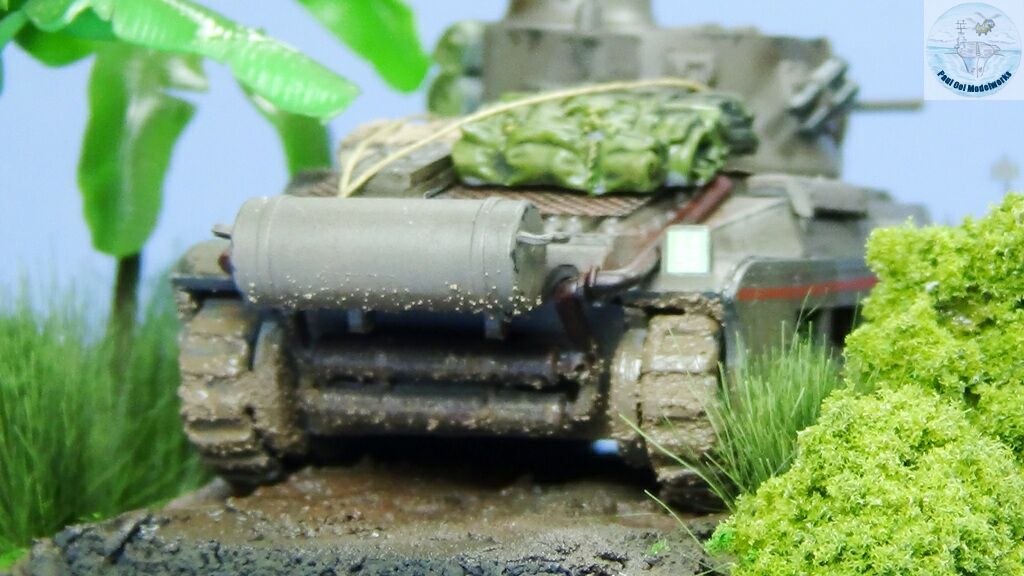
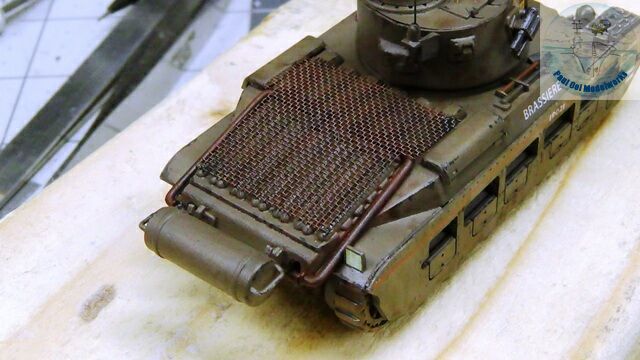 The transition of Aussie Matildas from Mk. II to Mk.IV fittings was not a single transition. Tanks in the field could be seen with some but not all ‘Mk. IV” fittings. One that was seen a lot in 1945 was the metal mesh grating over the engine compartment. I used a fine plastic mesh cloth that I painted with thinned Tamiya NATO Brown XF68. I attached it with superglue to the rear compartment.
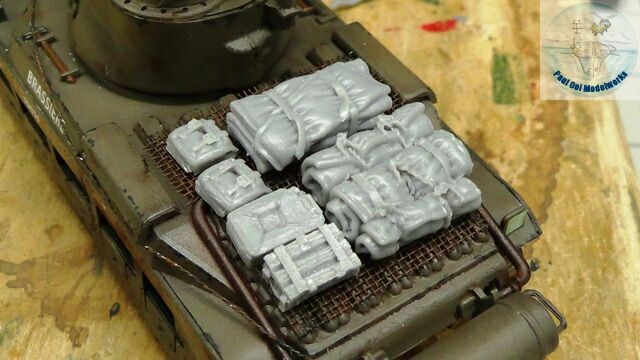
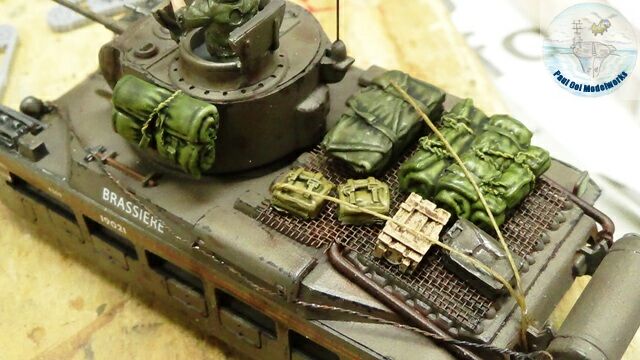 I added resin British equipment parts from Black Dog T72091 and strapped them down with very fine rigging twine.
Building the Type 94 Tankette
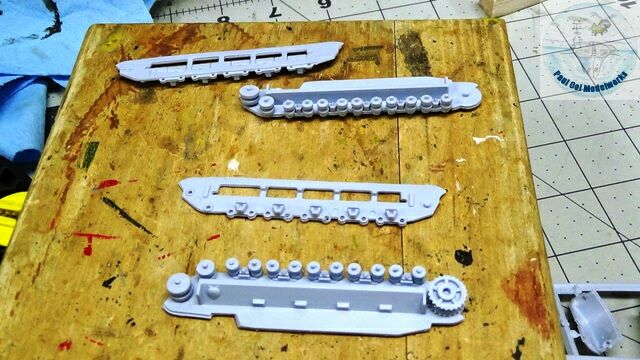
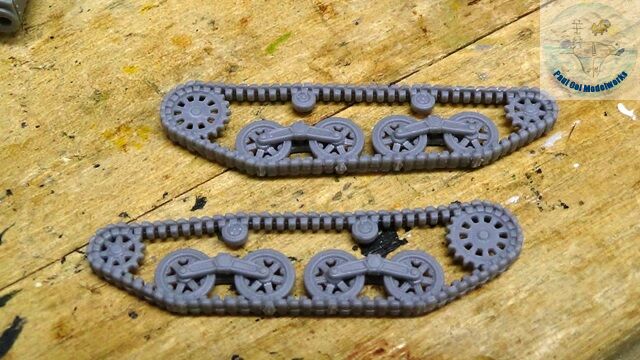 The tracks for the tankette are molded together with the road wheels and sprockets. Given the tiny size of the vehicle, this works perfectly.
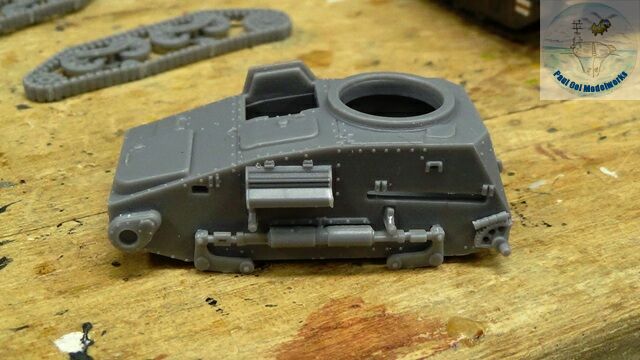
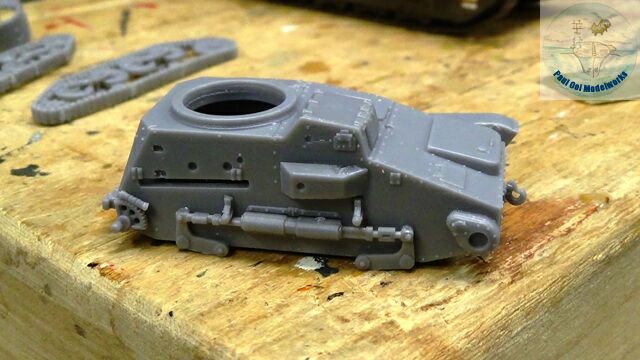 Parts of the suspension, and sprocket attachment details go directly onto the main hull shell.
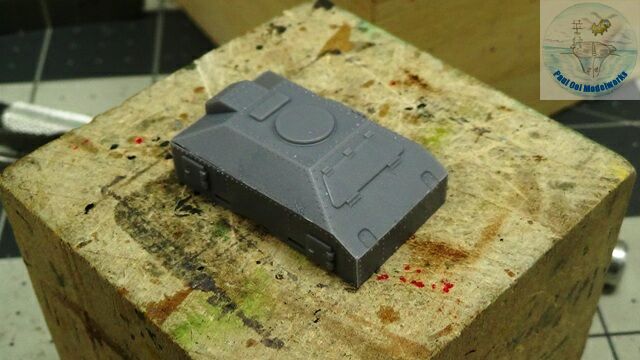
 The turret (the size of a thimble!) is trial fitted and the fenders added on. I left the tracks off for ease of painting. I also filled in all the holes for the tools attachment. By the end of the war, most of these tools have gone missing based on the pictures of knocked out Japanese tanks.
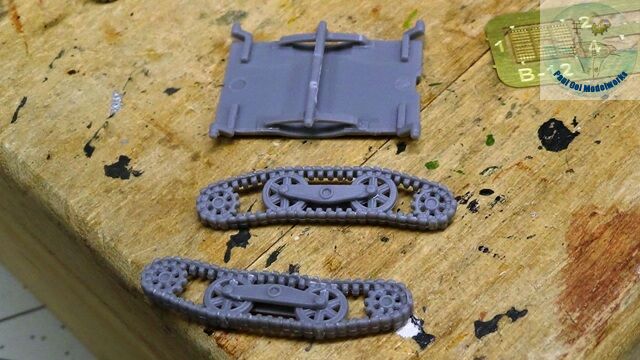
 The ammo trailer has similar molded tracks and a simple boxed body.
 Dry-fitting of the tankette and its trailer unit. To simulate the through hole damage, a shell entry hole was drilled into the side prior to painting.
 The parts are ready for painting.
 The tracks are given a gun metal finish using pencil lead highlighting over Tamiya NATO Black primer. The road wheels are brush-painted with Tamiya Japanese Army Green XF13. The tankette and trailer are primed with NATO Black, and then spray painted with JA Green XF13 overall. After that, the 4-tone camo pattern was painted in this order: Khaki XF49, Red Brown XF64, Dark Yellow XF60.
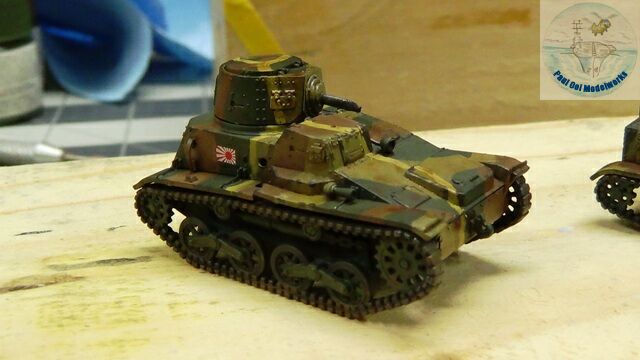 Decals are applied, sealed in with varnish, and then a heavy rust wash of Burnt Umber.
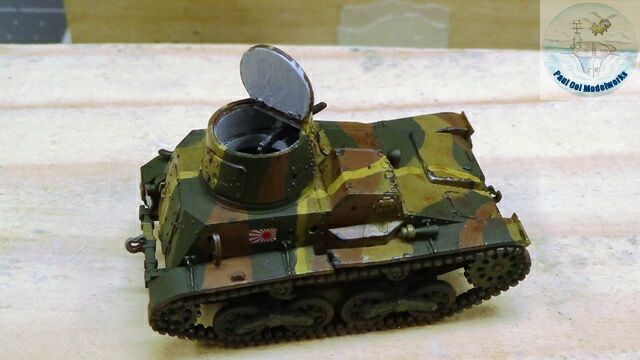
 The turret hatch is left open with off white interior. The turret is glued on slightly dislodged from the ring to show the impact of the armor piercing round passing entirely through the hull and out again. Airbrushing of burn marks (NATO Black) around the entry hole, and interior of turret and hatch. Just to compare the size of this tankette, I have shown this picture with a British infantry man.
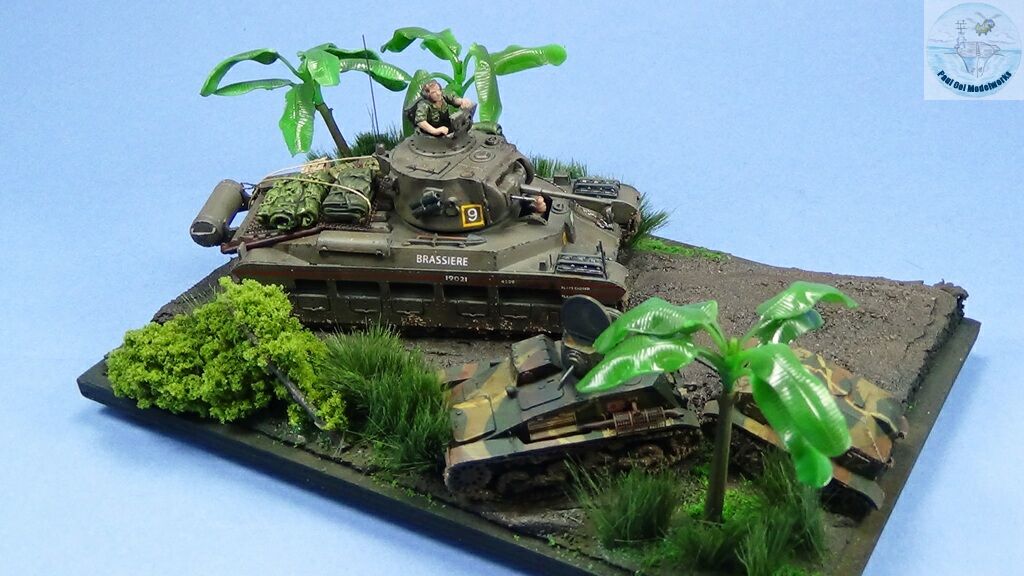
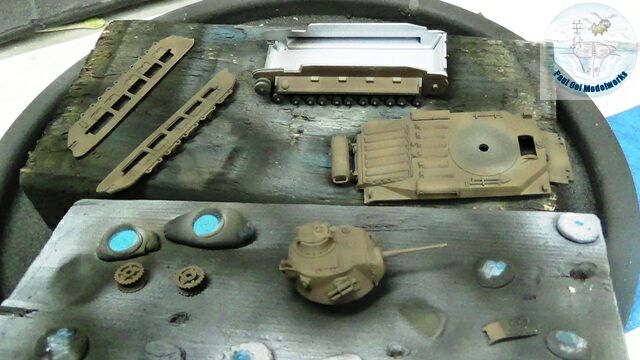
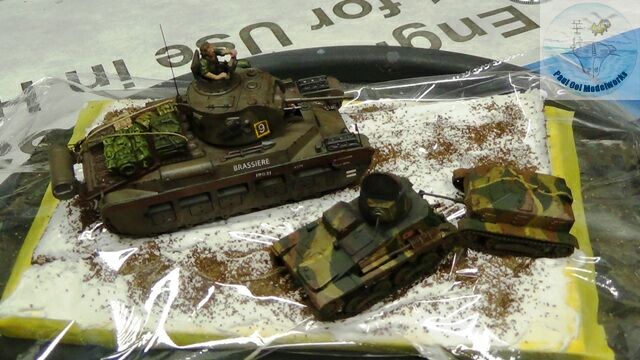 Checking the relative positions of the vehicles on the diorama base.
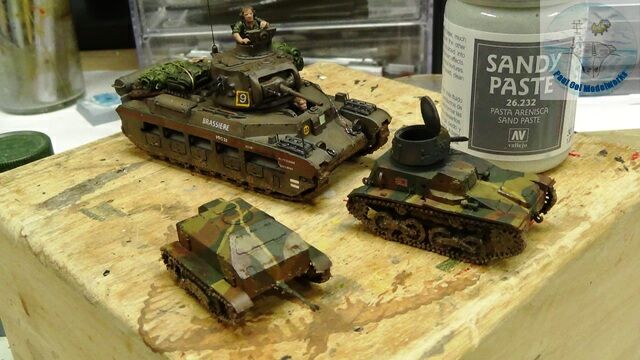 A final mud application of Vallejo sand paste mixed with 50:50 NATO Black and NATO Brown on the wheels, tracks and undersides.
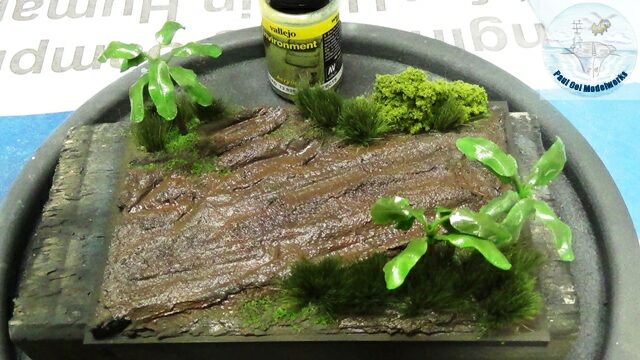 The tropical vignette is done with the same methods as shown in the Pacific M3A1. For the wet mud and foliage look, I applied Vallejo Wet Effects.
Leave a Reply