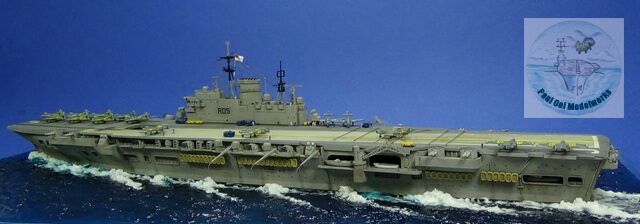

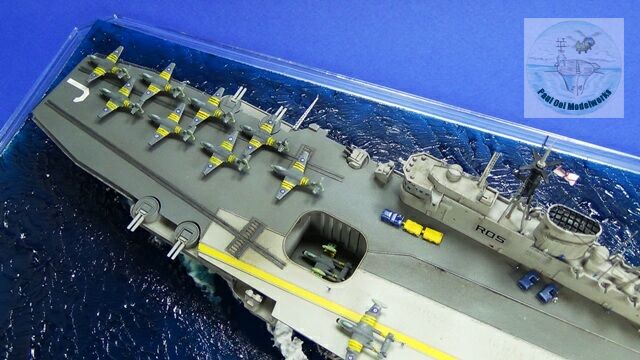
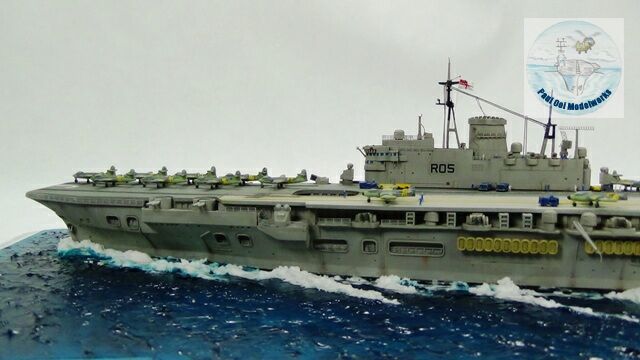
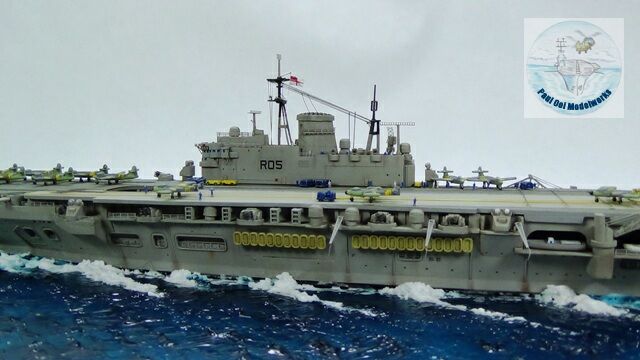
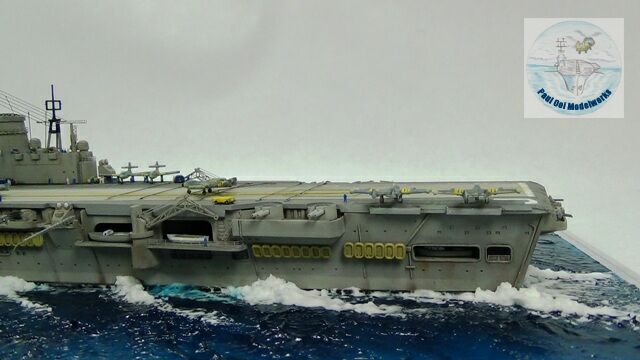
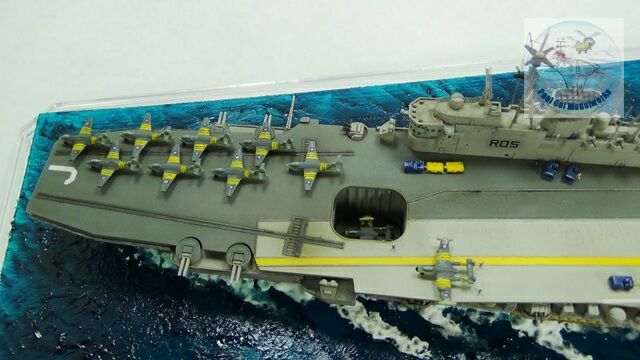
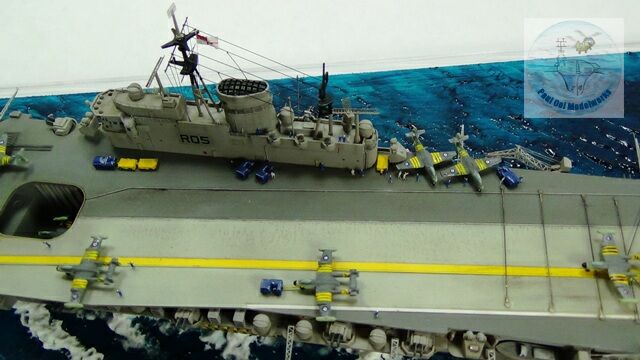
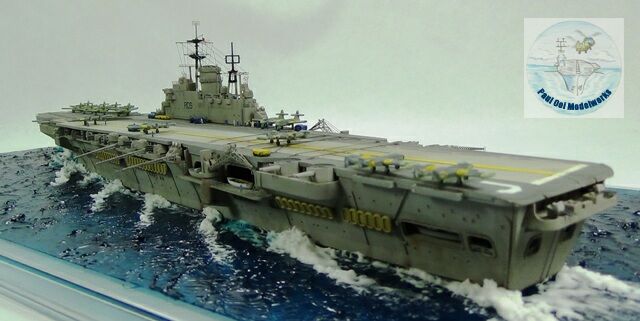
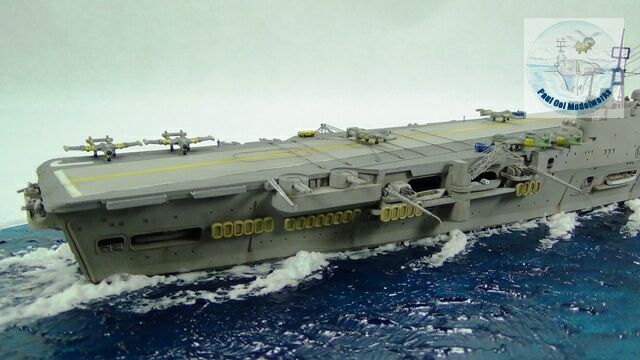
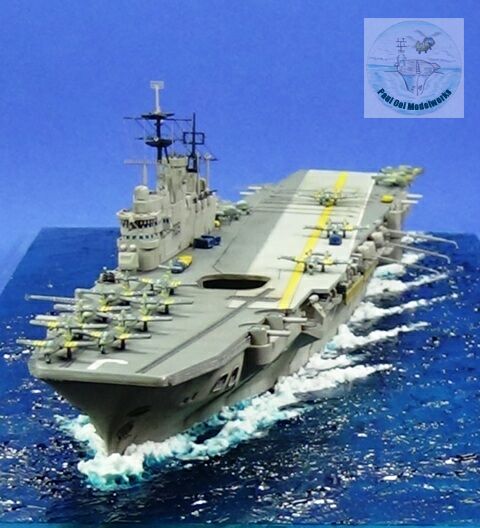
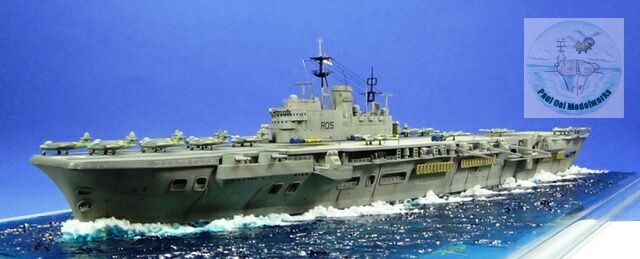
HMS Eagle R05 was the 18th ship in the Royal Navy and the second aircraft carrier to bear that name. Launched in 1946 with a typical WW2-style straight flight deck, the Eagle went on to have 2 major refits, the first in 1954 to add a transitional 5.5 degree angled-deck (a new British innovation), and then again in 1964 with a more pronounced 8 degree angled deck to accommodate the heavier jets like the Buccaneers and Phantoms. The Eagle and her sister ship HMS Ark Royal were the two largest aircraft carriers ever built by Great Britain until recently with the new HMS Queen Elizabeth carrier projected to be larger still.
I wanted to build an 1950’s aircraft carrier in transition between the WW2 era and the modern super carriers exemplified by the USS Enterprise and Nimitz classes. This version of the Eagle features gun turrets with 4.5 inch guns, that transitional 5.5 degree angled decks and the first generation of naval jets to serve in the Fleet Air Arm. During the Suez Crisis of November 1956, the Eagle had a large contingent of straight-winged Hawker Sea Hawks and also De Havilland Sea Venoms with their distinctive twin-boom design. Other aircraft on board at that time were Wyverns and Douglas Skyraiders.
The Suez Crisis was a joint Anglo-French-Israeli attempt to prevent Gamal Abdel Nasser’s nationalization of the Suez Canal in 1956. The Royal Navy sent several carriers to the action including HMS Eagle that sent out Sea Venoms and Skyraiders for ground attacks while Sea Hawks provided air cover. Although the air campaign was successful, political pressure put an end to British and French actions.
Gallery
Construction Notes
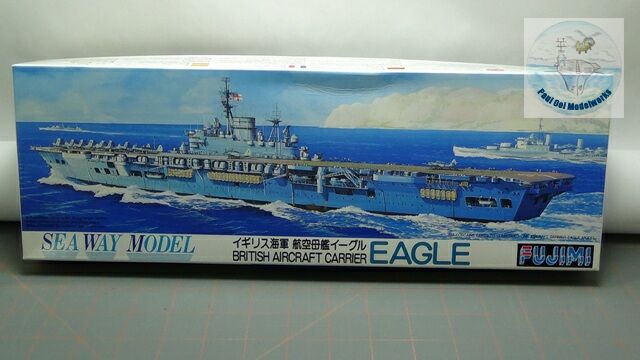
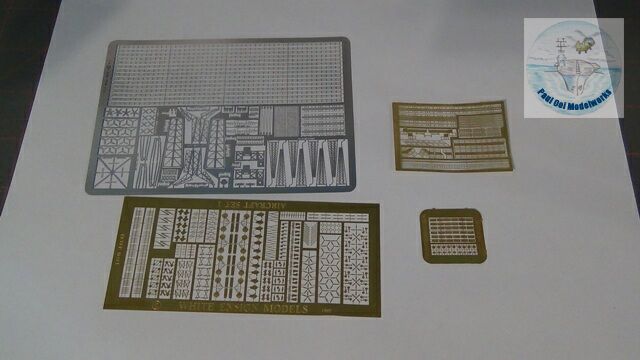
This 1/700 scale Fujimi kit is a pretty old mold (1970’s?)with scant details and a collection of aircraft that could not be displayed together (more about that later). However, it did portray the mid-50’s HMS Eagle correctly and that is a good starting point. The paint guide (all in Japanese) were pretty vague as well so a lot of cross referencing was needed with photographs from that period (another source of agitation, mostly black-and-white pictures!). To augment the details, I added photo-etch frets from Gold Medal UK Carriers, White Ensign RN doors, walkways, railings and Fleet Air Arm aircraft details.
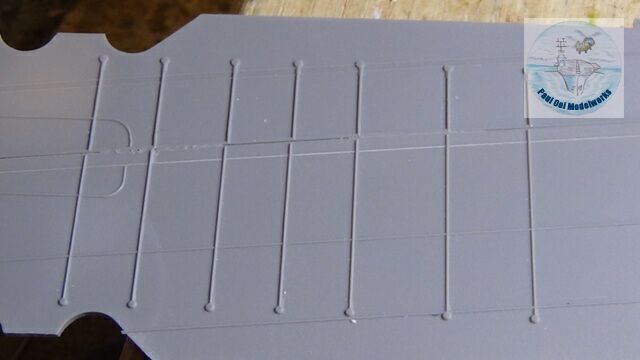
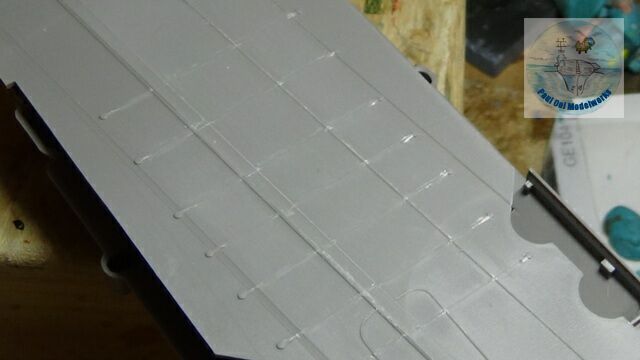
Firstly, I had to remove the molded arresting wires, not because they weren’t fine but when the two sections of the flight deck came together, the entire row of wires was misaligned. I carved away the raised features and left it bare for adding fine bronze wire later in the build.
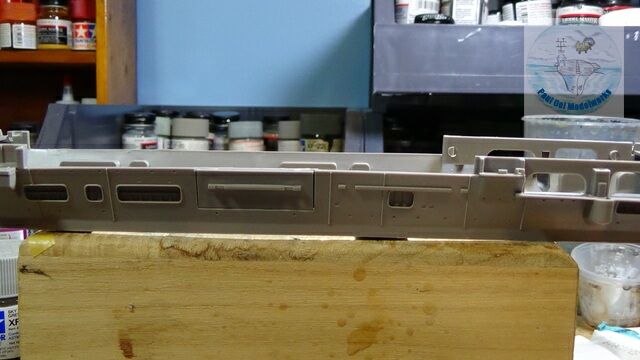
Next, I started working on the main hull. The hull molding did not sit flat on the waterline, but had a curved camber that had to be resolved or the flight deck would have gaps when pressed to the main hull.
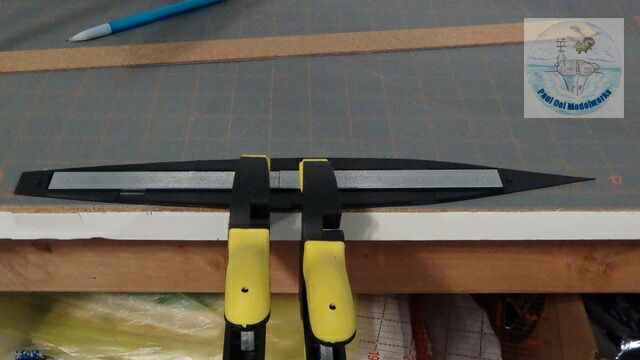
To solve that problem, some heavy clamping work was needed. First I used the weight plates that came with the kit (older Japanese waterline models had these, a throw back to a time when waterline models were displayed as free-standing structures on a flat table like paperweights) as stiffeners for the waterline base. These are glued to the plastci base and clamped to provide a flat base for the main hull.
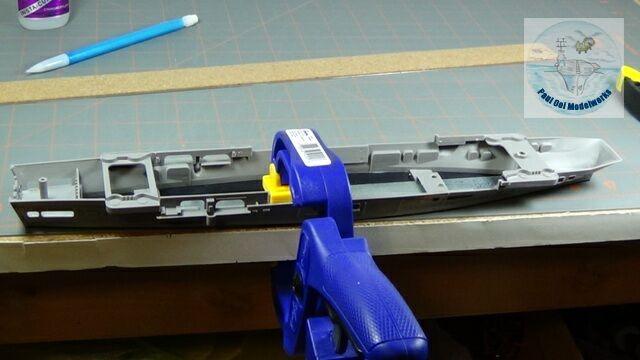
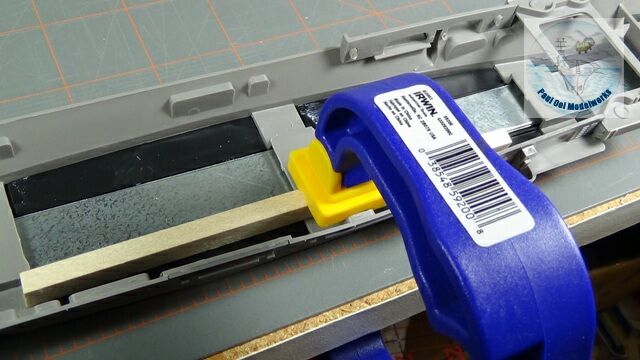
Next, the main hull is joined to the waterline plate, with heavy clamping to a flat work surface while the liquid glue dries. Several clamping arrangement were made to balance out the seam lines. I took special care not to apply pressure to the upper edge/rim of the hull so that I do not end up with a cracked hull, instead concentrating the pressure at the plastic bridges across the bottom of the main hull.
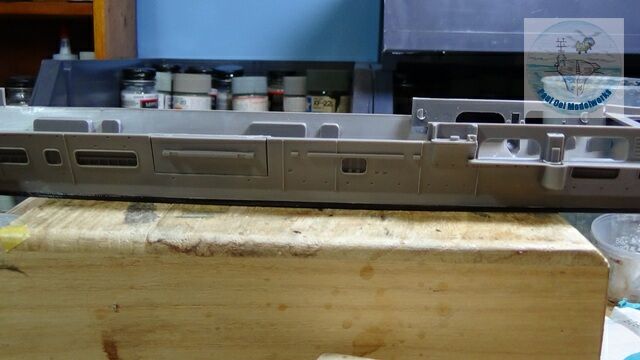
You can see the successful restoration of the hull lines. The model is ready for some work at the flight deck.
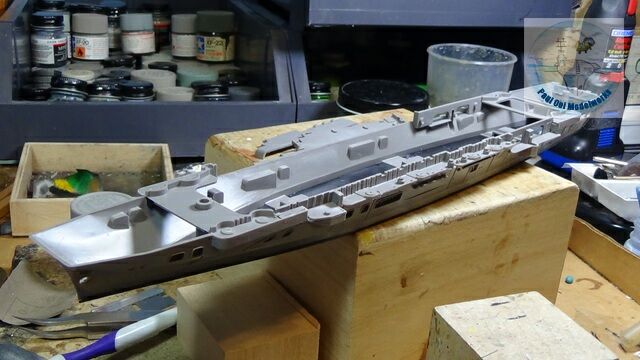
I start adding the platform decks that line the main hull just below the flight deck. Some careful aligning and filling work hasd to be done. The most important aspect of this assembly phase is to make sure that the flight deck will fit nicely over these platforms without any major gaps.
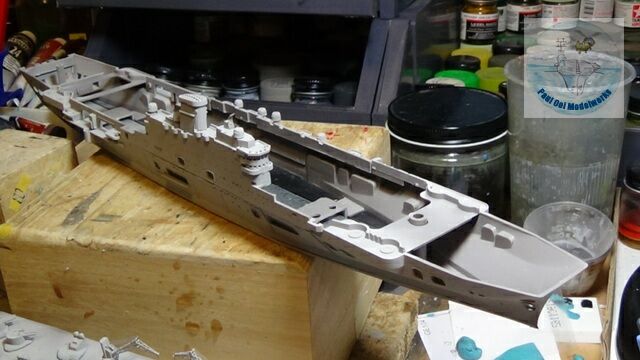
The next dry fit is to check the alignment of the island structure to the main deck. After this, I spray-painted the entire hull and island sub-assemblies with Tamiya Sky Grey XF-19.
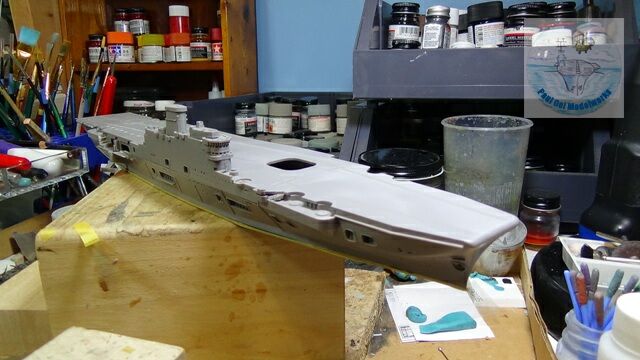
The last major dry fit is to fit the flight deck to the main hull and snapped under the island.
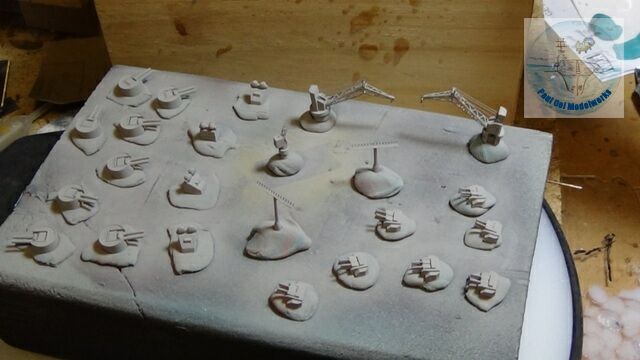
I also worked on the small platform and deck fittings, gun turrets and gun directors. All these are painted Sky Grey as well.
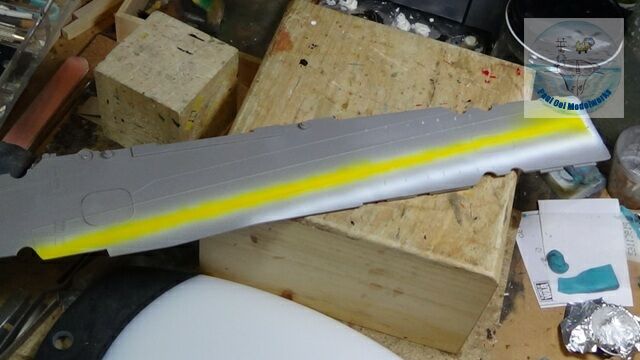
Painting of the flight deck starts with Flat White, which are then masked off for the light deck demarcation lines, followed by Flat Yellow for the central landing strip (circa 1956).
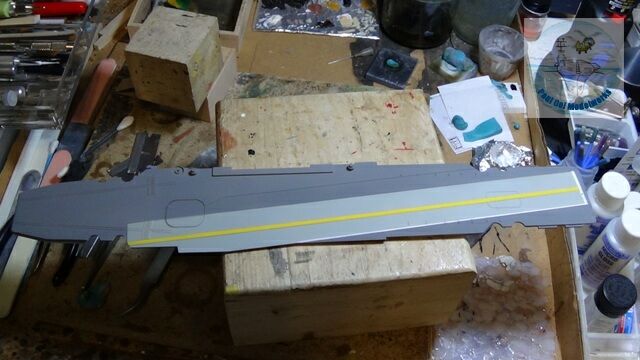
The landing strip is then painted in Flat Gull Grey, then masked off.
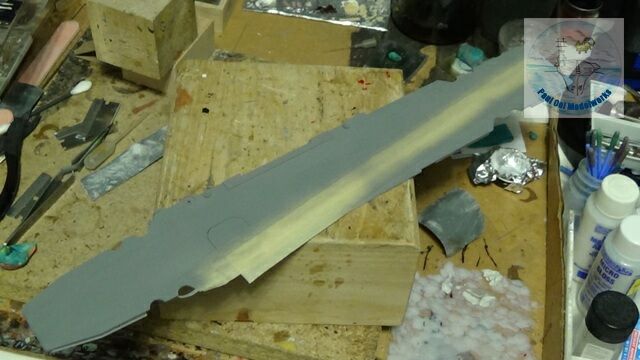
The rest of the flight desk is painted in Dark Sea Grey XF54. Once dried, the masks came off and the deck lines are ready for air traffic. Well maybe not quite.
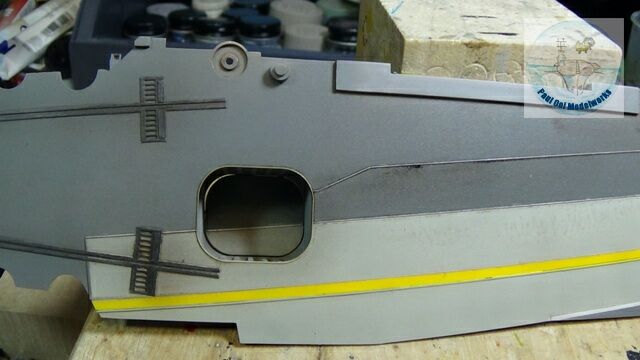
Catapult details were hand-painted with gun metal. Did I mention that the modern carrier steam catapult was also a Royal Navy invention?
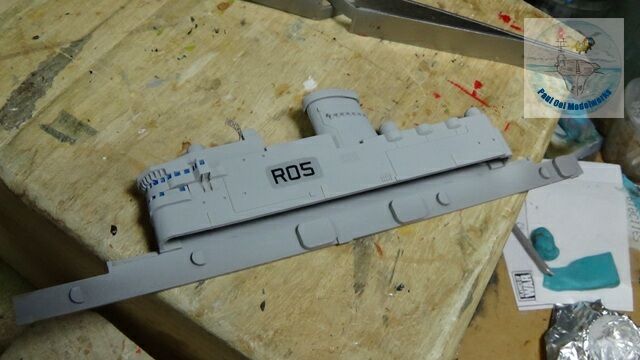
Decals are added to both the island and the flight deck. “R05” in black were stenciled on the starboard side of the island, while white “J’s” were painted on the forward section of the flight deck and also near the fantail. The kit did not come with these decals, so they were scavenged from my stash of spare decals.
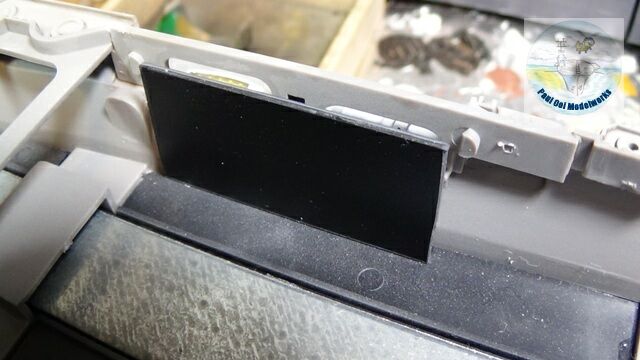
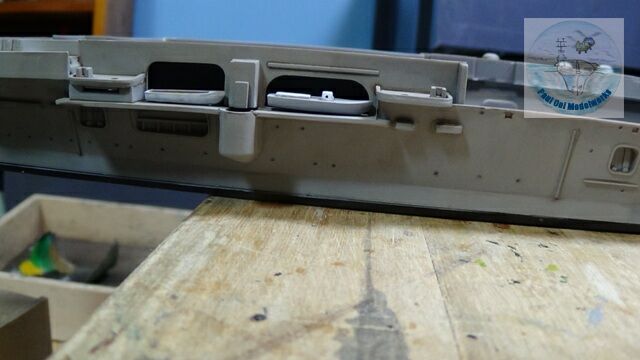
More interior detailing of the main hull before it is enclosed under the flight deck. I added black plastic card as a backdrop behind the boat deck since there was no interior feature to show.
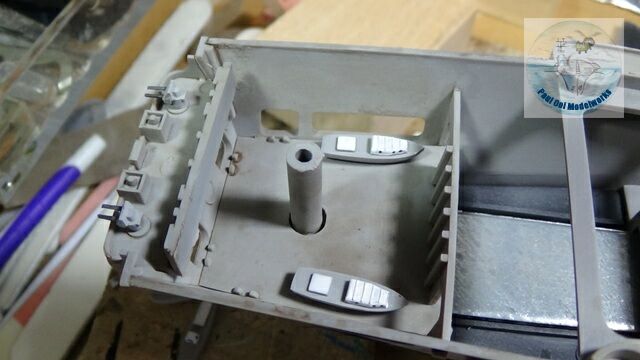
More boats in the hangar deck in the stern section of the ship.
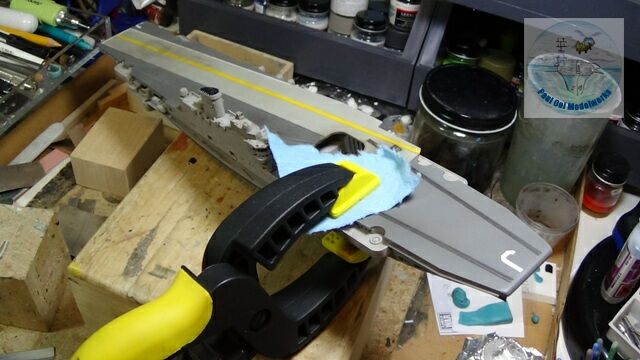
After all the hull details have been added, the flight deck is attached and clamped onto the hull. Note that to protect the paint work on the flight deck, a piece of paper towel was used as padding for the clamp.
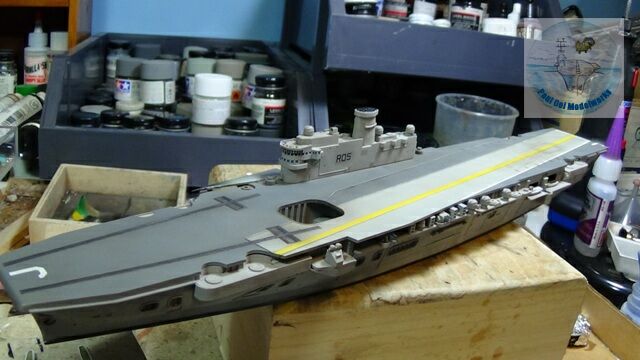
Shortly after, the island section was added to the assembly.
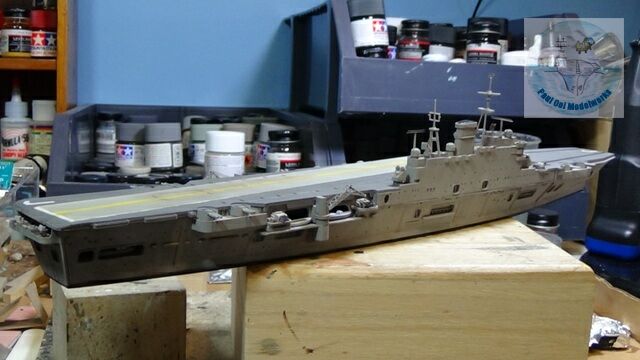
The small platform and flight deck details were added to the assembly. The photo-etched ship crane can be seen and gun emplacements can be seen from here.
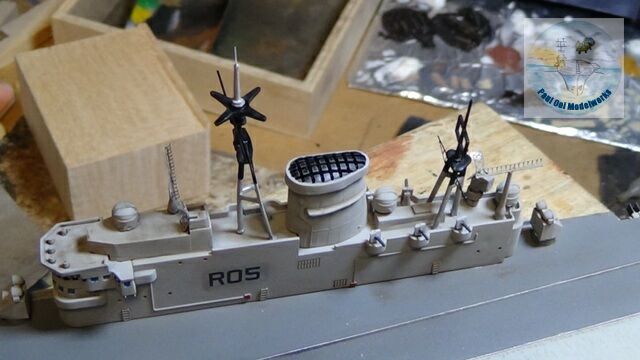
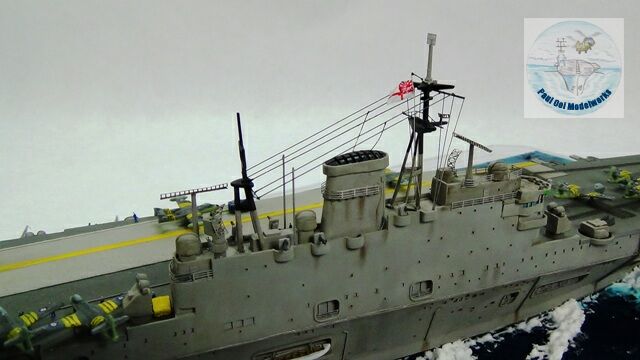
Island details, mainly radar arrays and gun directors were added at this point.
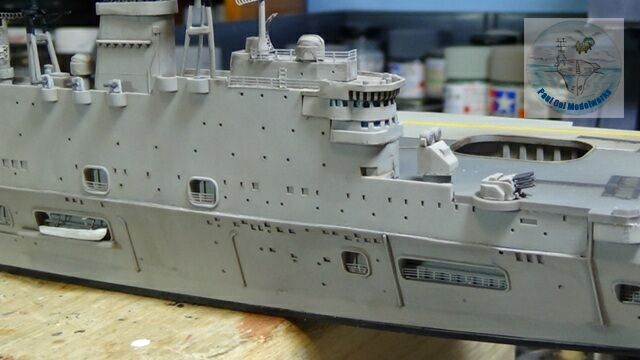
Photoetched lifelines were added along island and main hull decks.
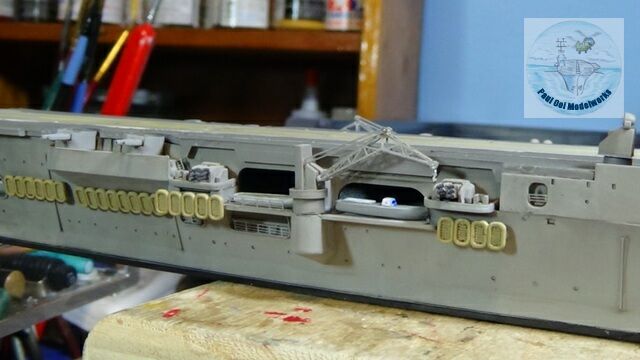
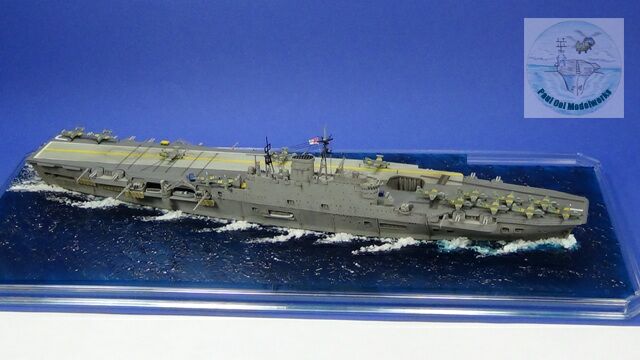
The other characteristic of Royal Navy carriers of that period were the long rows of dinghies lining the freeboard section of the hull. Notice also that the lifelines have been added to the main hull.
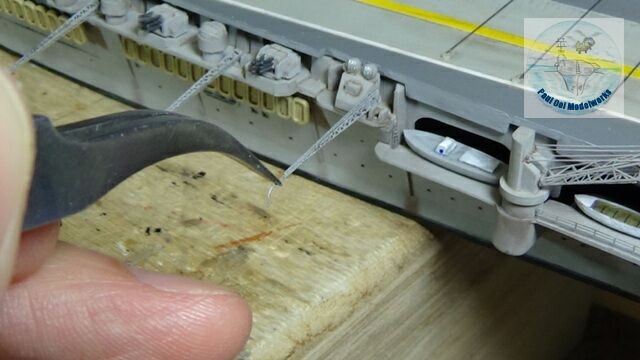
The photo-etched radio towers (seen here in lowered position for flight operations) were attached to the platform decks.
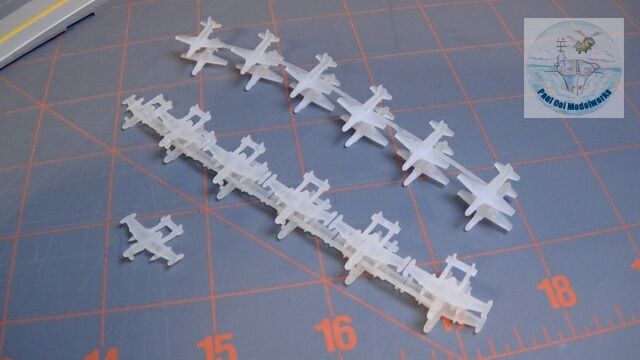
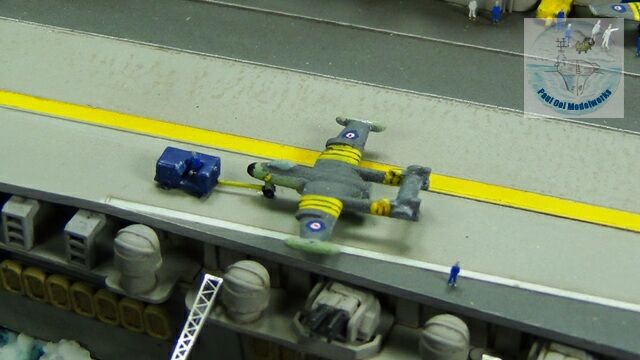
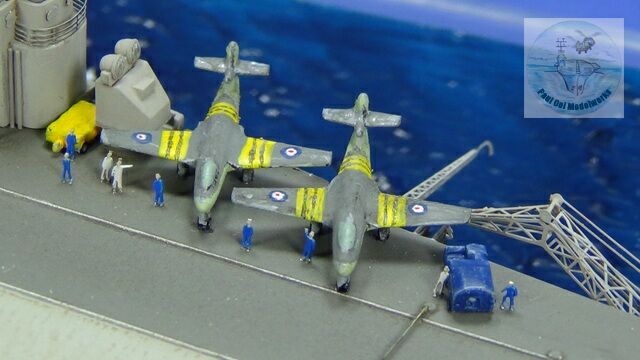
The aircraft provided in the kit were totally unsuitable for the period of the mid-50’s. They provided Seafires and Hawker Sea Furies from the late 40’s, and then several Gannets and Westland Wessex’s from the mid 60’s, so these do not belong on the same carrier deck and none of them were around for the Suez Crisis of 1956. I looked around and found Shapeways.com who provide new 3D printing of 1/700 frosted plastic aircraft. I was able to get Sea Venoms and Hawker Sea Hawks, that were perfect for the Suez Crisis. I also bought carrier deck vehicles from Shapeways.
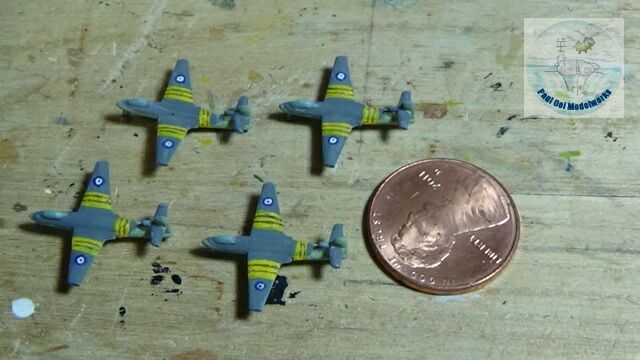
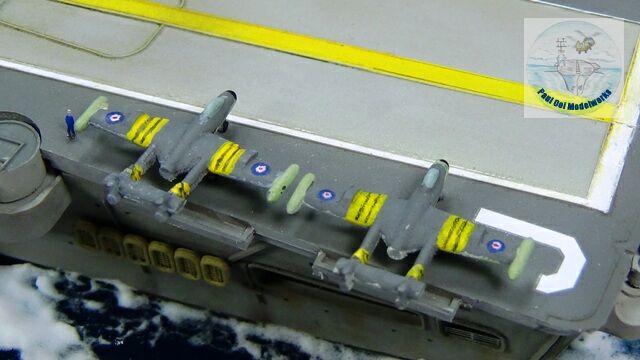
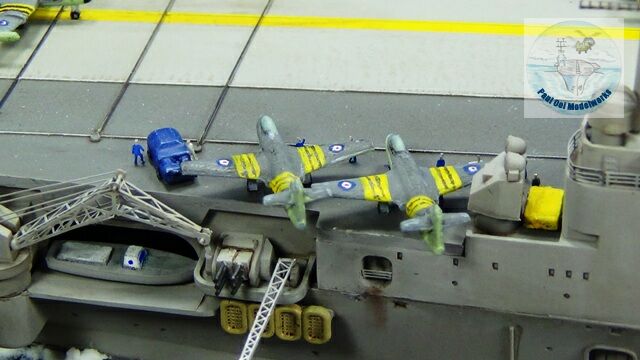
These are the Sea Hawks painted with the yellow-and-black stripes of the Suez campaign. I also hand-painted the national roundels on the aircraft. You can compare them to the size of a US one cent coin!
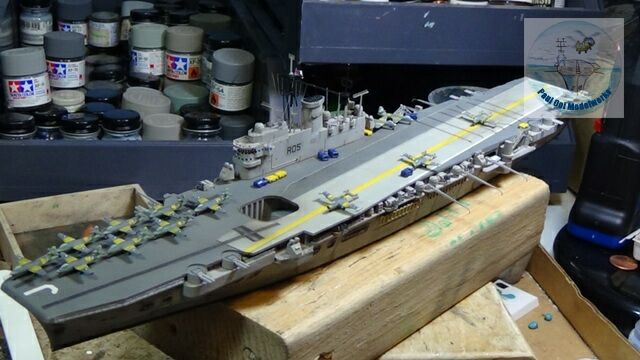
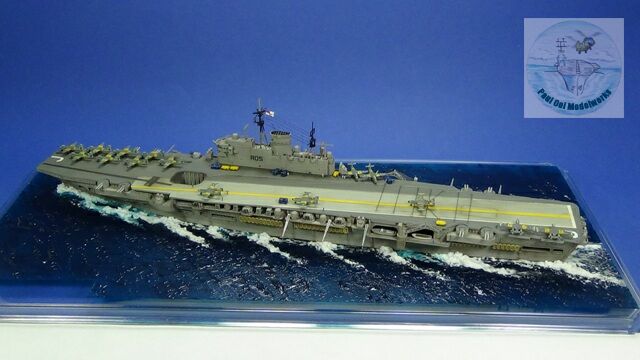
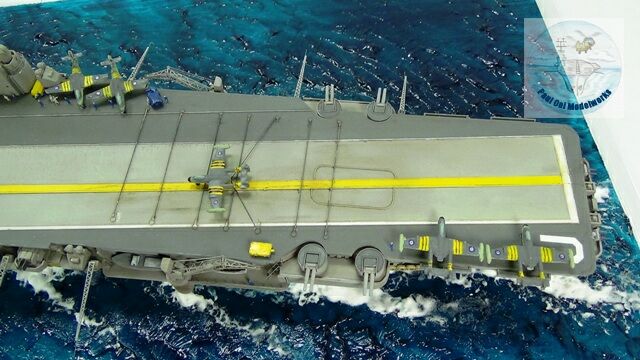
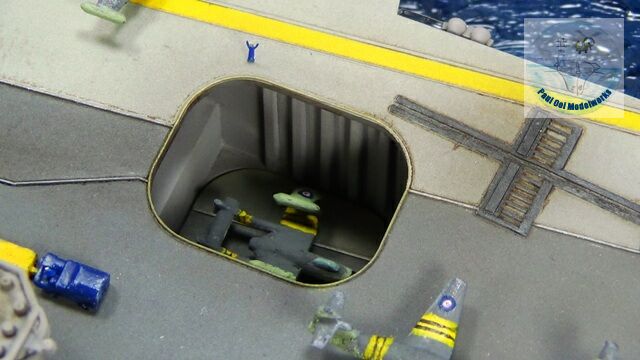
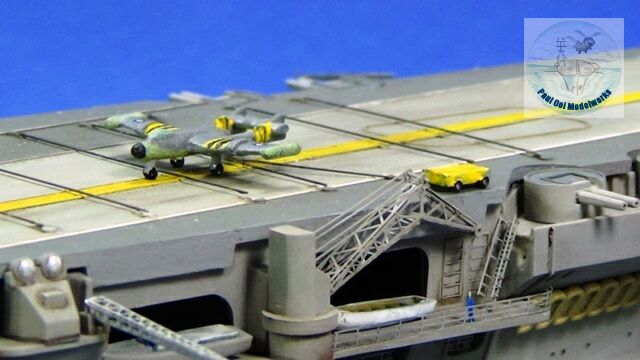
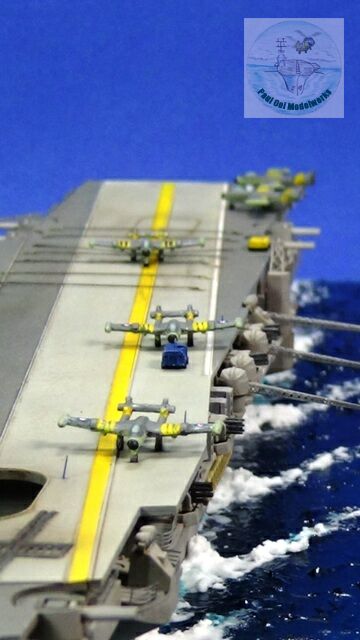
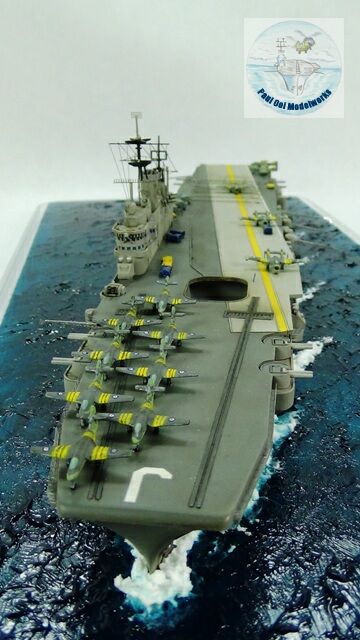
At long last, I have managed to paint all the tiny aircraft and deck vehicles. The fun part is in arranging these to tell a story. What is being shown here is a squadron of Sea Venoms returning from their ground attack sortie with one catching the wire, one being towed forward to the marshaling point, and one in the elevator being sent to the hangar deck. On the forward end of the carrier, Sea Hawks are readied for take-off.


I enjoyed looking at the big E model, but the identification strips on the aircraft were not yellow and black as you have shown, they were white and black, I stayed up all night painting these strips on my Wyvern aircraft of 830 Squadron at the time of the Suez affair.
Dear Mr. Brown,
Thanks for visiting my site and I certainly respect your experience of being actually there at the time of the action.
Unfortunately, for those of us who weren’t there at that time, we have to go by what official records and references tell us. The overwhelming evidence was that Operation Musketeer, as the Anglo-French action in the Suez Crisis was called used yellow-and-black stripes for all British and French aircraft (a parallel to the famous D-Day black-and-white stripes). The only time in the 1950’s that the Fleet Air Arm used the black-and-white stripe scheme was during the Korean War where Seafires 47’s were painted in that scheme. Also, I did not portray any Wyverns on the deck at of HMS Eagle, only showing the Sea Hawks and the Sea Venoms.
Please see the following representations links of 830 Sqn Wyverns and their colour schemes during Operation Musketeer. The same stripes were also applied to the the Sea Hawks and Sea Venoms on HMS Eagle.
Thank you.
http://www.arcair.com/Rev1/801-900/Rev825-CED48275/00.shtm
http://www.marklittlejohn.com/galleries/paintingDetails.asp?id=8
http://nofineline.com/blog/westland-wyvern-frog-172/
Your sincerely,
Paul Ooi
The recognition stripes were yellow and black, not white and black. I have numerous photographs in color of aircraft on the deck of Eagle during operation Musketeer in November of 56’. These photos were from a private collection of pictures taken from crew members that served on HMS Eagle during that time.
My sad served on hms eagle in the early / mid fifties hes 90 years young this coming new years say 01/01/24
I’ve been searching for a model of the eagle without much success
Where did this kit come from and how much would it be .
He’d absolutely love it he’s got altzeimers these says but he still recalls his navy days with great pride
Any help would be greatly appreciated
Many thanks
Rob burton Leicester
Hello Rob,
This kit has become rare these days, but if you are quick, you can snag this one that I found online –> https://www.mustang-hobbies.com/product_p/fuj-wla124.htm
Good luck finding the kit.
Paul
Not sure about the positioning of the aircraft – a “bolter” would take out both the two you have in front of the one currently picking up the wire – that was the whole idea of the angled deck, and the others should be to starboard of the landing line off the paler strip. When I saw Eagle (when she had had her second major refit) the power boats all had royal blue hulls and white upper works (except the Captain’s Barge which was red & white) but that was a good decade later
Ian, Thanks for the “insider” remark. Very few of us have that sort of info and references on operational details are hard to come by. Hopefully future modellers attempting this build will benefit from your remark. If I try to change mine, it will break more things than fix. Paul
Hello I am really stunned to see the model as well as the completion of your aircraft carrier along with its navy aircraft fleet. i really appreciate it. But can you guide me please that how and from where i can purchase the tiny models of aircraft in 1-700 scale for this aircraft carrier. I really love navy aircrafts, specially in this mini scale. I like much sea venom, sea hawk, phantom and other navy planes. I shall be awaited for your kind response.
Kind regards,
Adnan Mandrees
Hello Adnan,
You can find these 1/700 scale aircraft from http://www.Shapeways.com. They will 3D print the aircraft in their catalog once you place your order.
Paul