
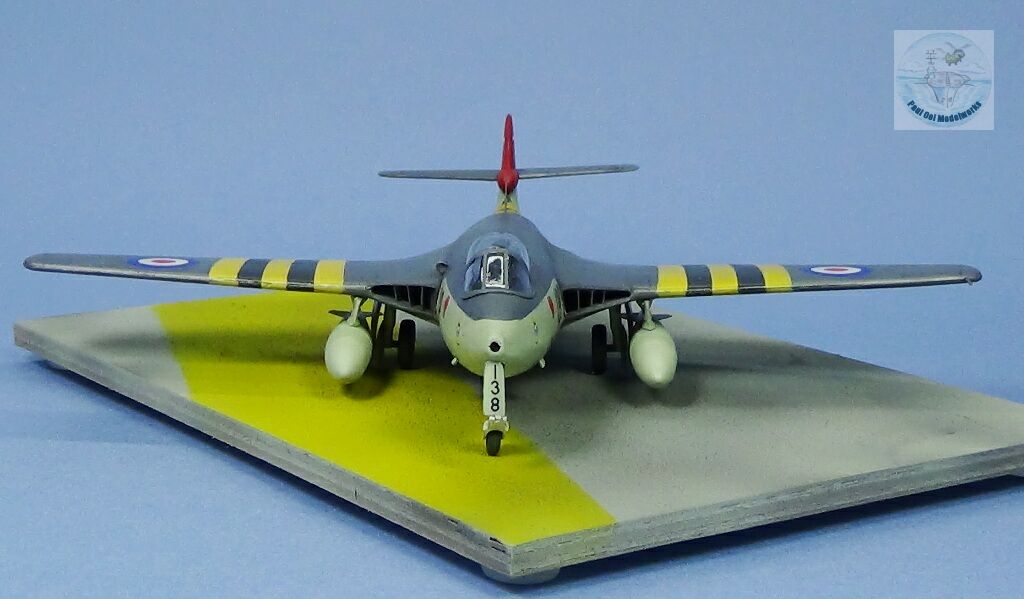
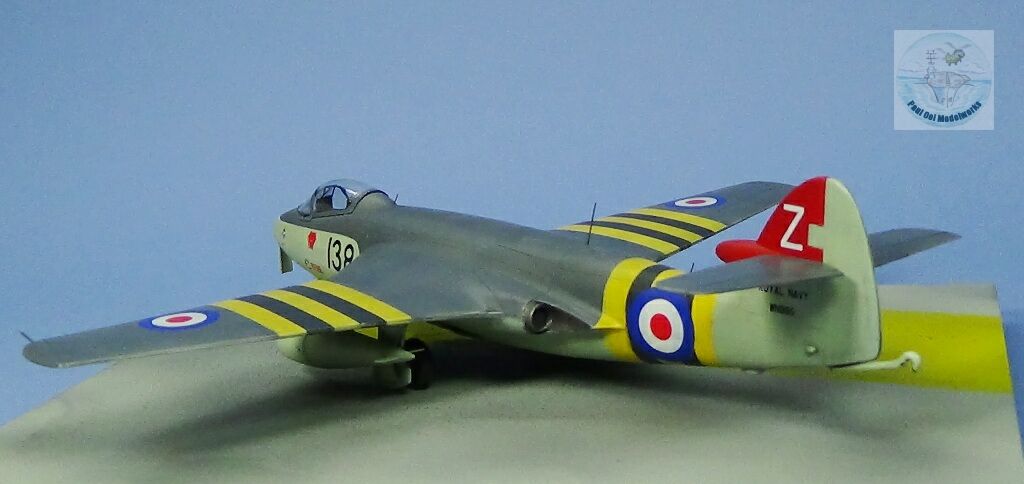
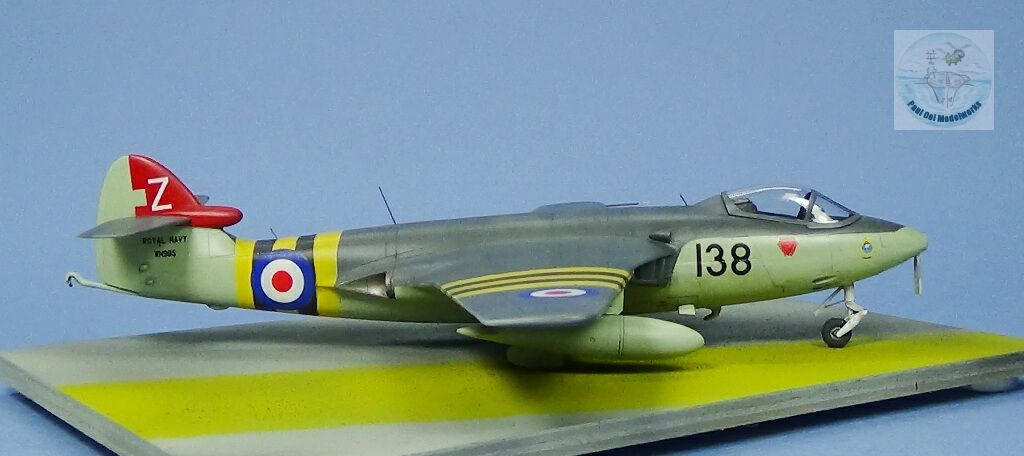
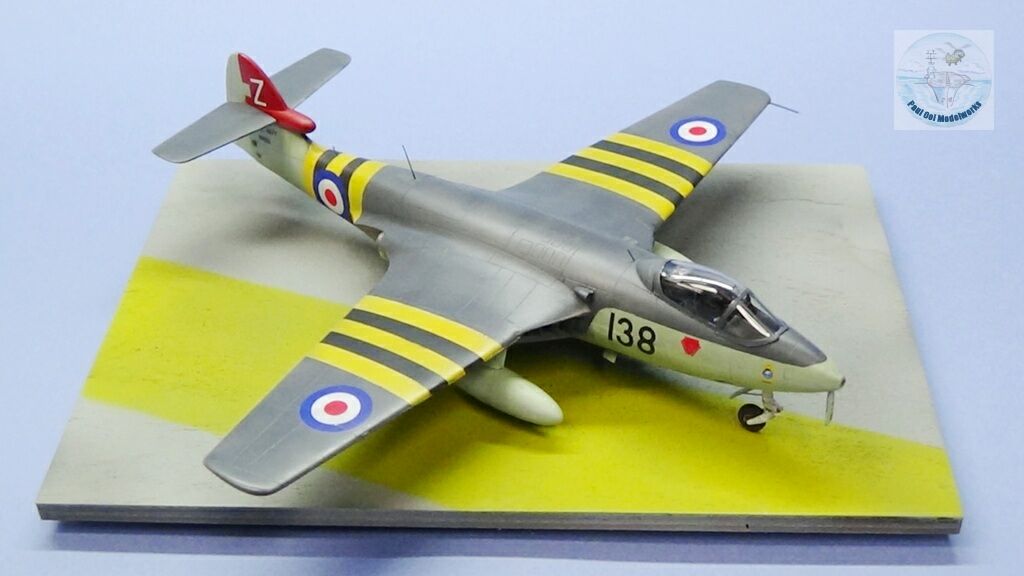
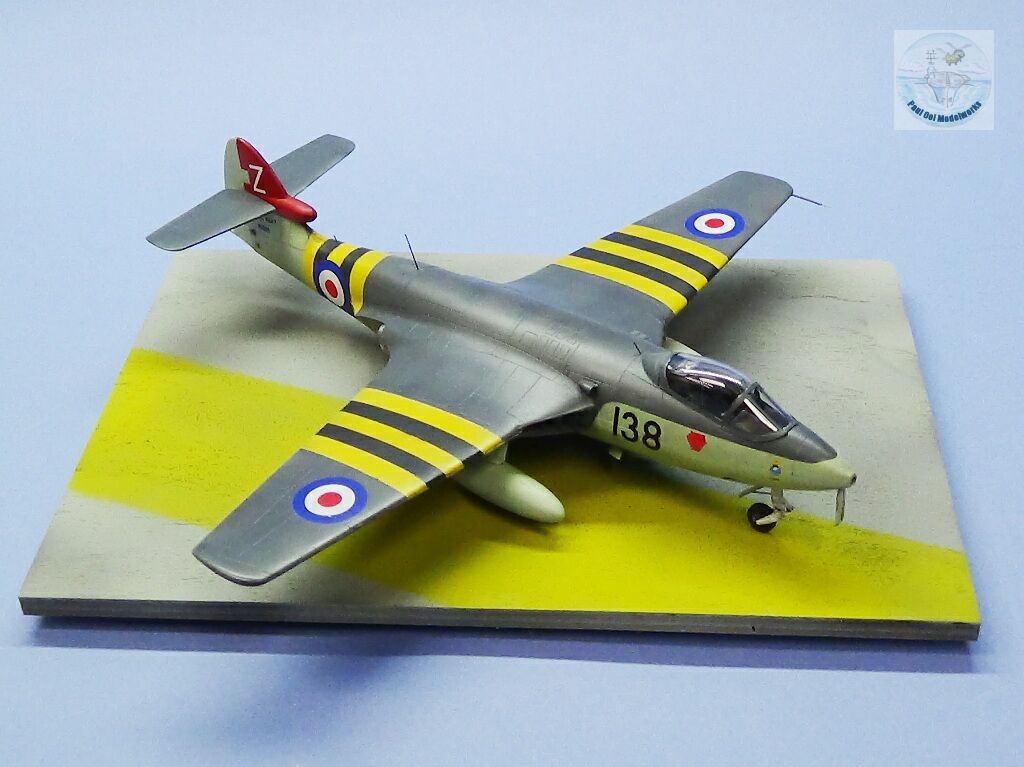
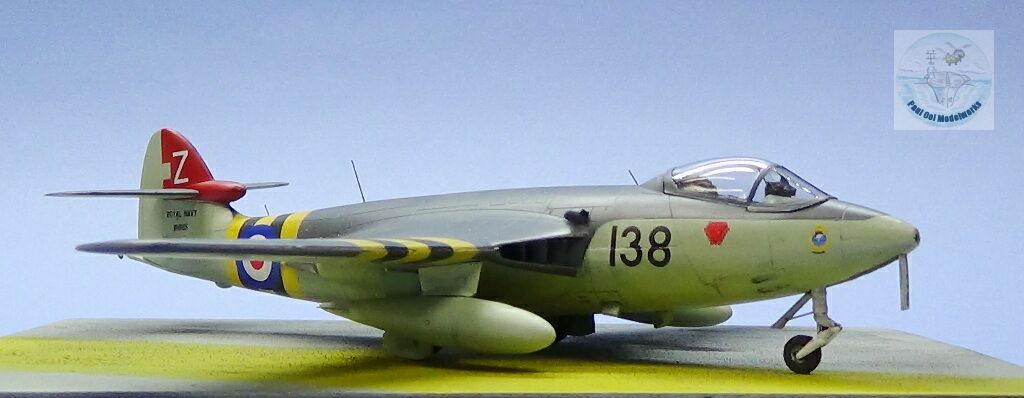
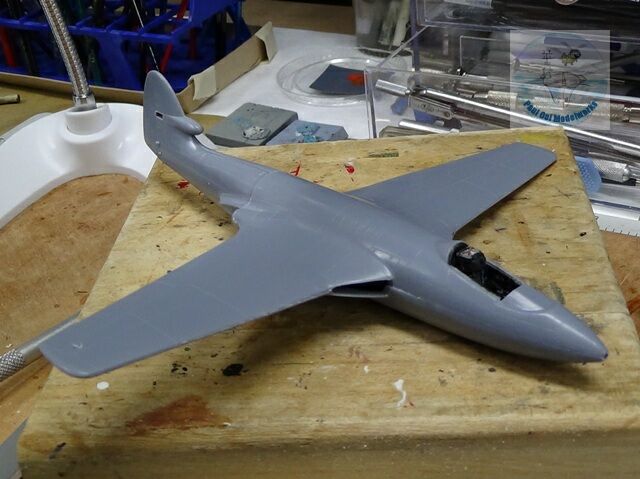
The Hawker Sea Hawk FB3 was the first successful jet fighter bomber deployed by Great Britain’s Fleet Air Arm and served from the mid-1950’s until the end of the 1960’s. It was an effective carrier plane with excellent flight characteristics and provided very good visibility for the pilot because of its bubble canopy situated far forward on the fuselage. Hawker started its development during WW2, first using a piston rotary engine (Sea Fury), making refinements to fit a more powerful Rolls Royce jet engine in the late 40’s. The result was a transitional jet aircraft design with streamlined air intakes built into the wing root, with twin exhausts in the rear, and straight wings resembling propeller-driven aircraft. Its elegant lines were in stark contrast to its contemporaries, the Soviet MiG-15 or the US Saber F-86.
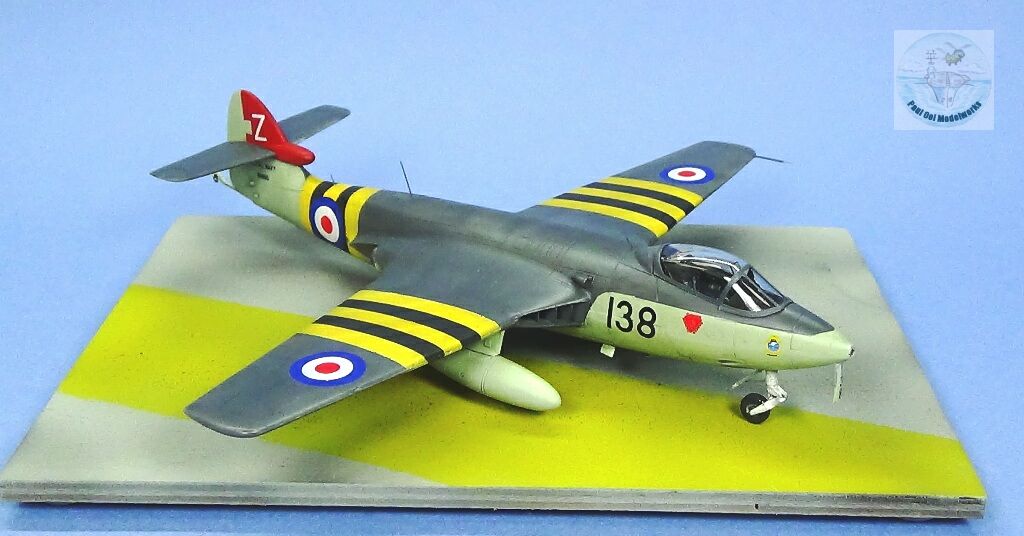
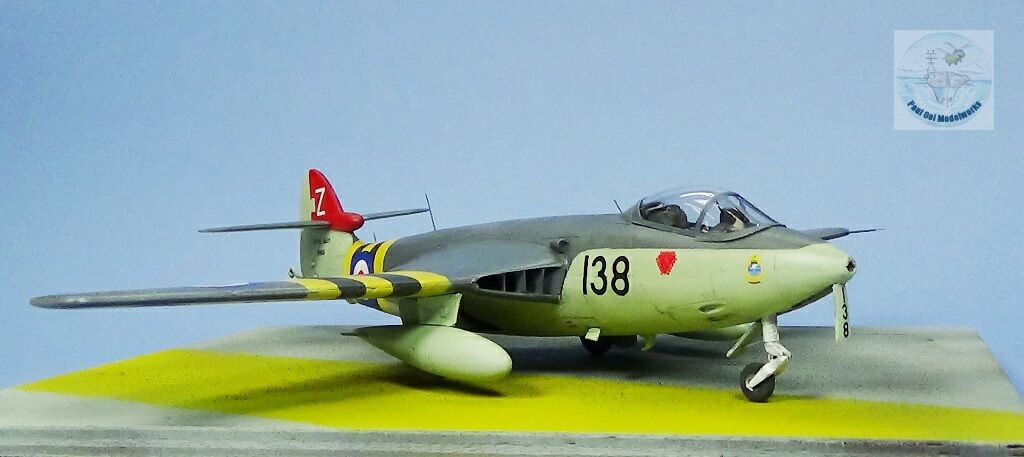
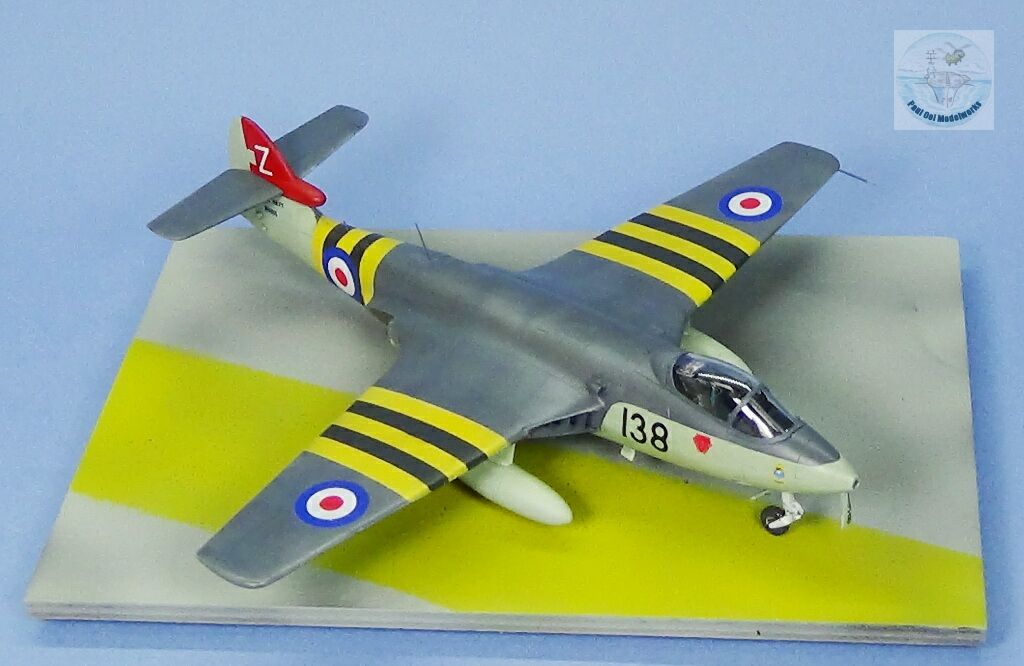
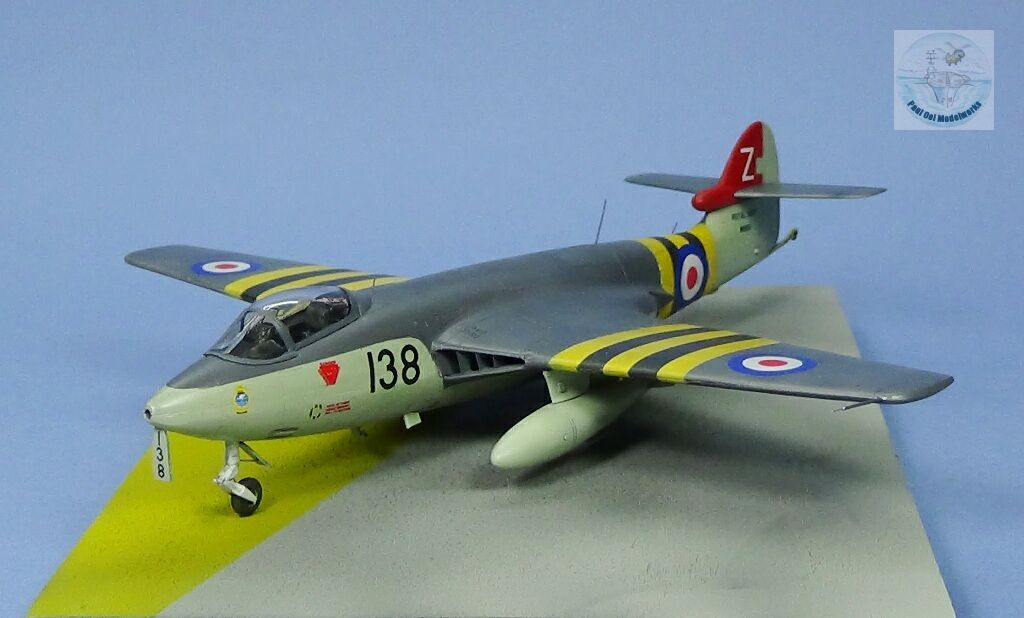
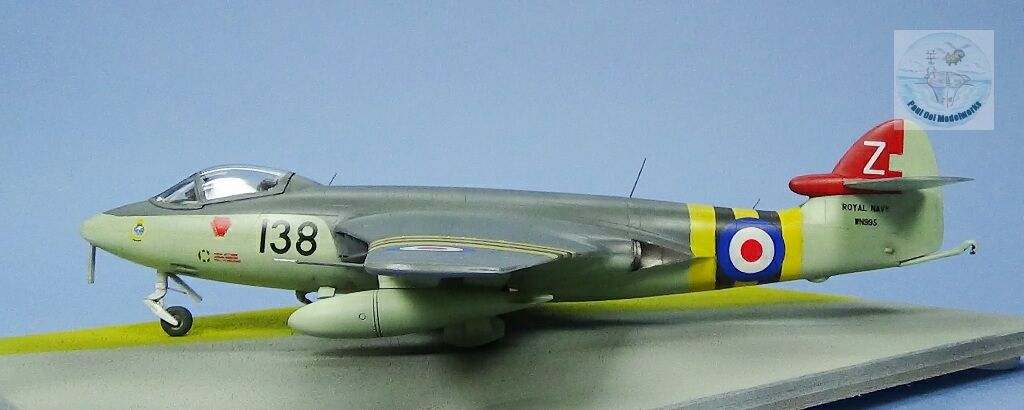
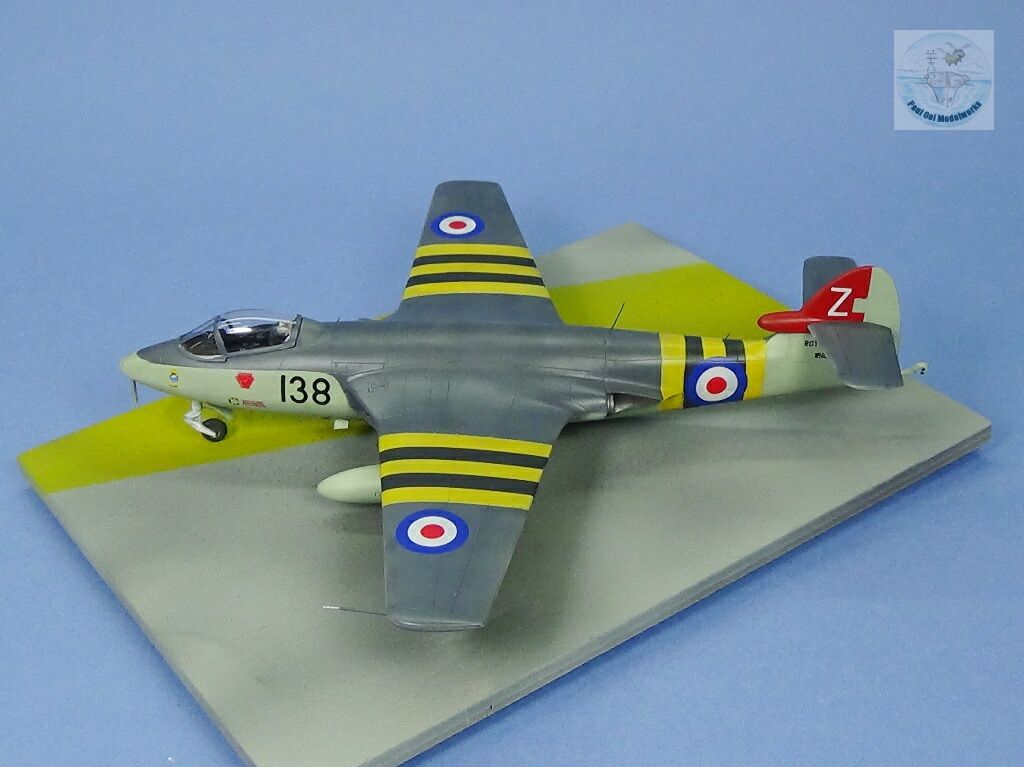
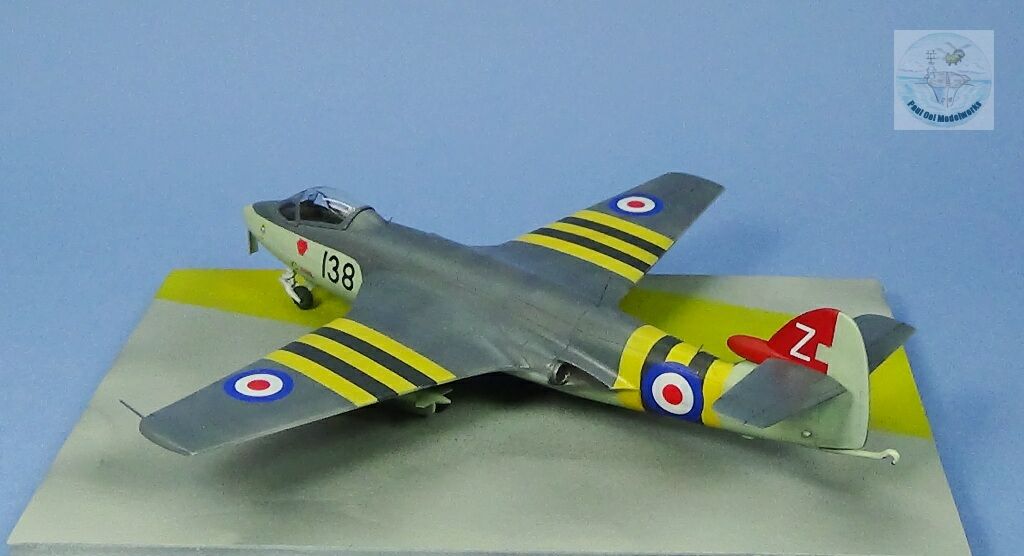
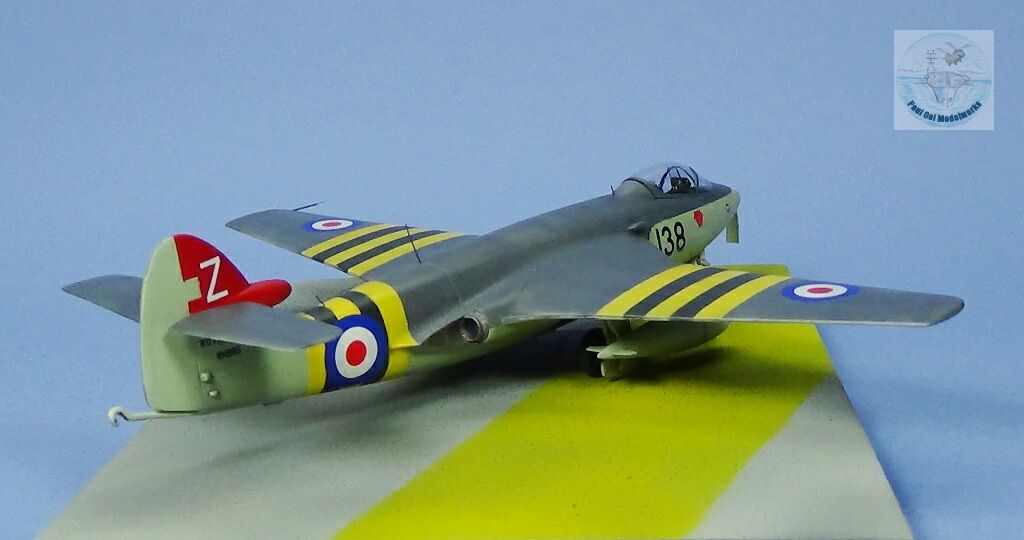
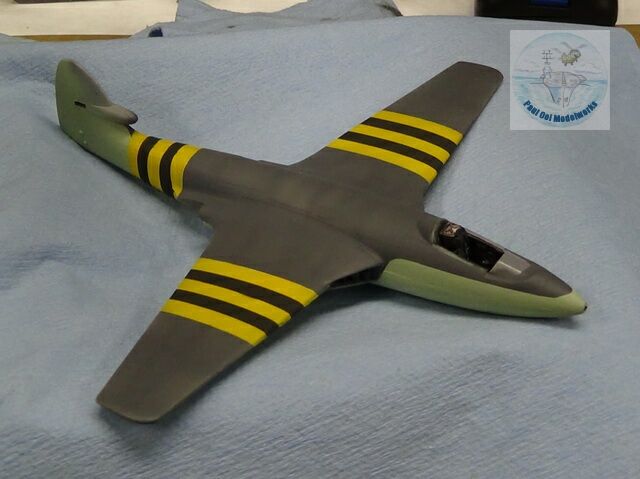
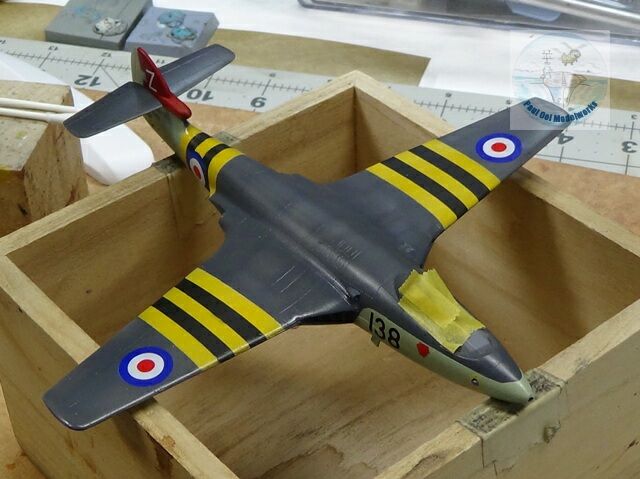
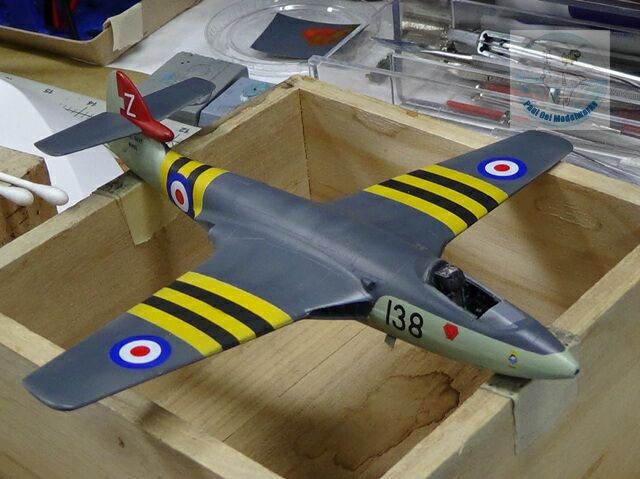
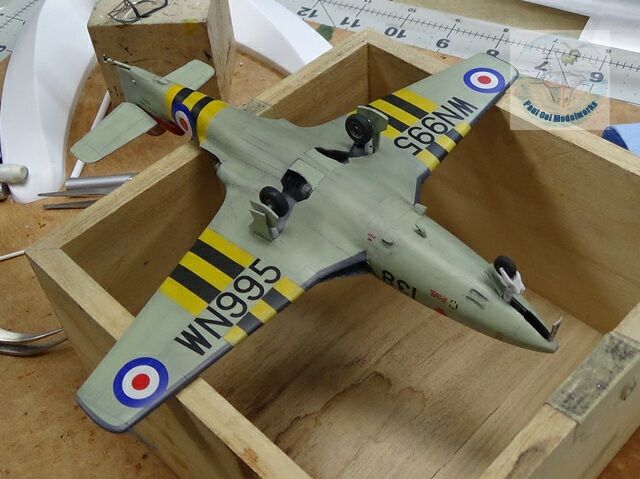
The Sea Hawk was the main ground support aircraft for British forces during the 1956 Suez Crisis. Six squadrons from three carriers HMS Eagle, HMS Albion, and HMS Bulwark struck at Egyptian airfields, troop positions, and logistic centers, sometimes under heavy anti-aircraft fire. The versatile little jet could carry bombs and rockets apart from its main armament of four 20mm cannon, and had good survivability because of its ability to glide even when power is lost. During the crisis, two jets were lost to ground fire. The Sea Hawk also served in the marine wings of the German, Dutch, and Indian air forces. This 1/72 model is a specimen from 802 NAS, HMS Albion with the stripes from Operation Musketeer.
Gallery
Construction Notes
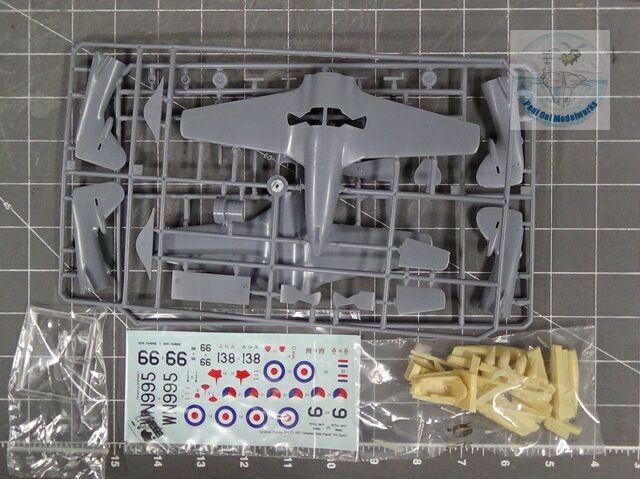
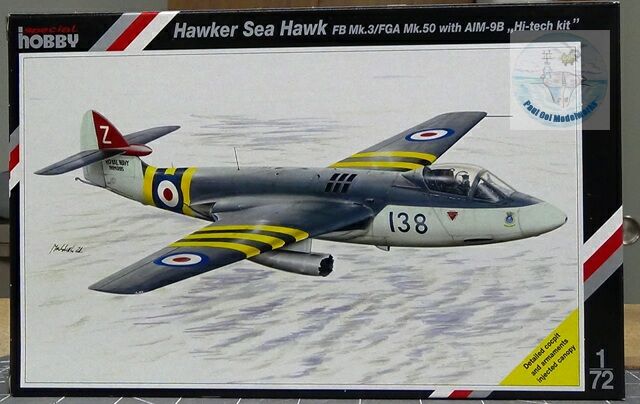
I had always wanted to build one of these transitional carrier jets from the early 1950’s and was debating between the US jets or this UK example. I had added 1/700 scale Sea Hawks onto my previous build of HMS Eagle during the Suez Crisis. I chanced upon this kit with resin and photoetch parts when I was shopping for something else, and decided to order it as well. Special Hobby makes interesting subjects , and this one is no exception. One word of warning though, these limited run kits are not for the novice and require a lot of fitting and cutting to get it right. In order for the resin parts to fit, some thinning of the plastic fuselage wall is required, and the clam shell fit of the front fuselage is horrible. However, with some patience and careful detailing, you can get a pretty nice little gem out of this kit.

From the get go, I could see that the cockpit tub and the clamshell fit of the fuselage was going to be a problem. Note also that the rear fuselage is a butt fit to the front fuselage, which makes for a tricky fit.
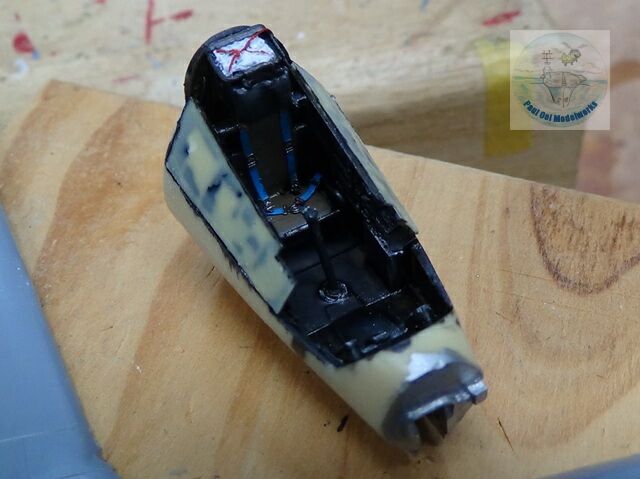

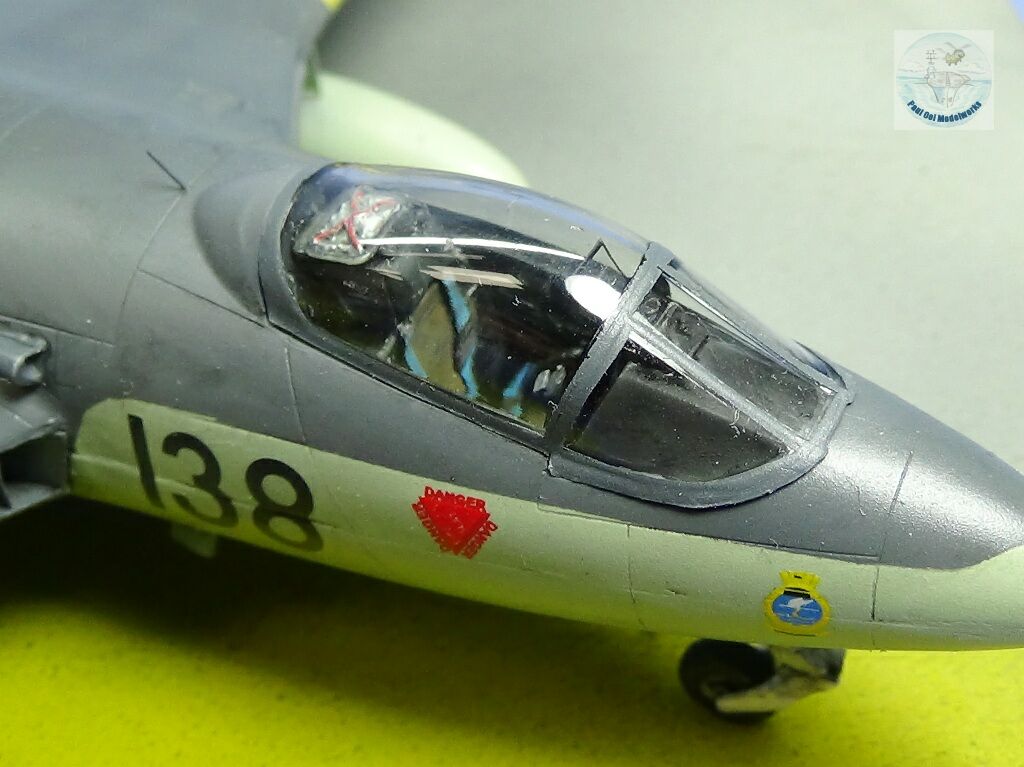
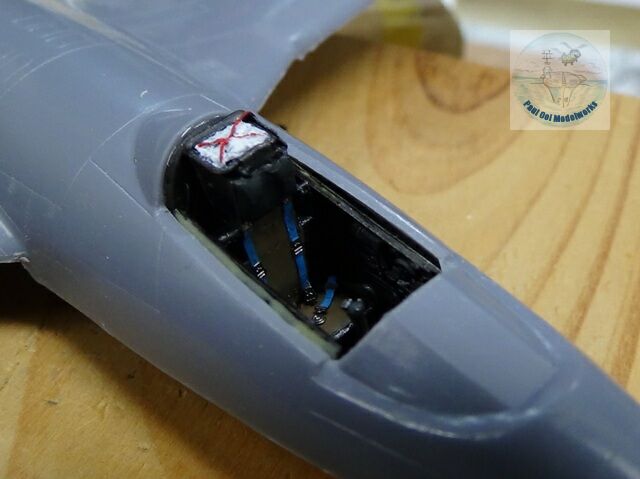
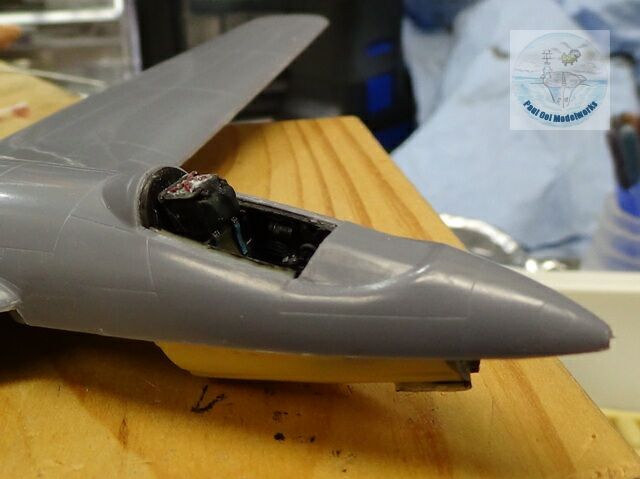
Assembly and painting for the cockpit tub is fairly straight forward. I did shave off some exterior of the tube to reduce it’s cross section fit into the forward fuselage. The interior is painted Model Master Interior Black, with sliver and white highlights for the instrument panel.
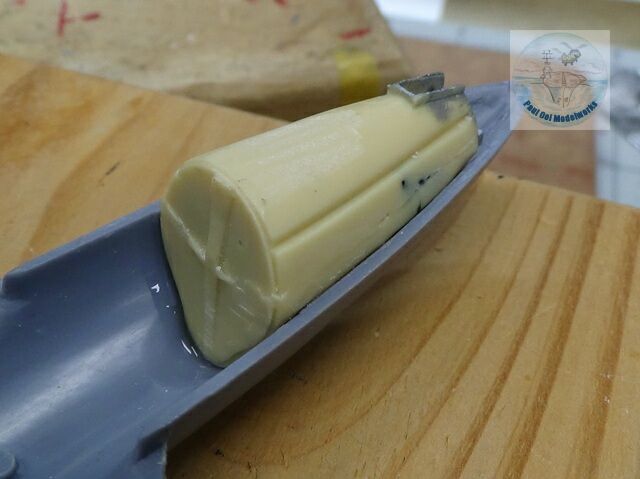
Fitting the resin cockpit tub required multiple dry fitting with both clamshell halves of the fuselage. This is critical as the top part of the tube is the cockpit, while the bottom part of the tub forms the nose wheel well.
Next I installed the wheel well platform for the two belly wheels that also included part of the engine detail. This platform needs to be clamped in place to sit properly while it dries.
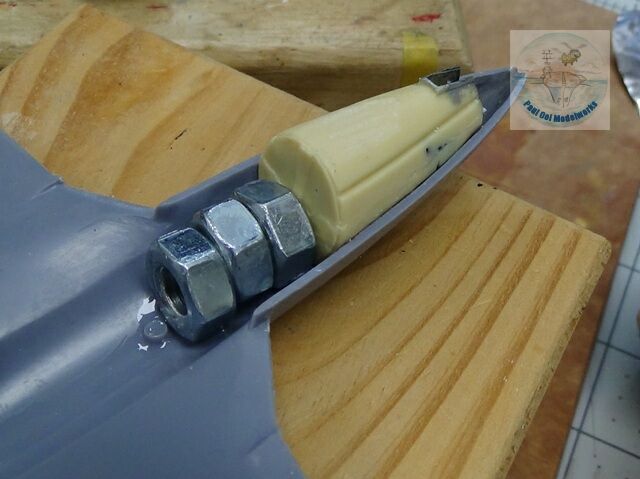
Nose weights are added on using some steel bolts glued down with cyno-acrylate adhesive. I was careful to make sure that the bolts do not interfere with the fit of the bottom clamsheel half of the fuselage.
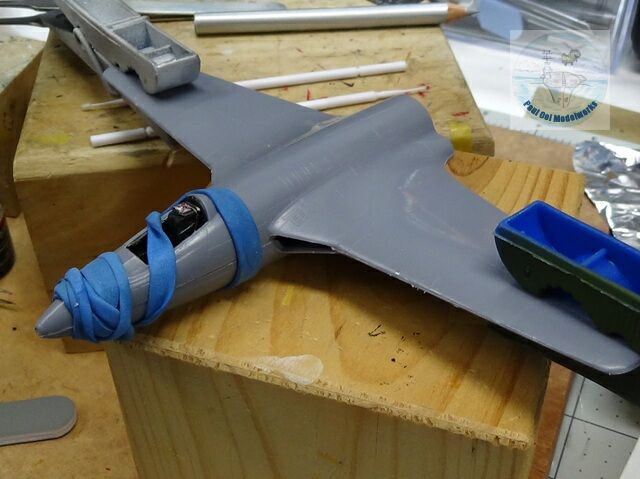
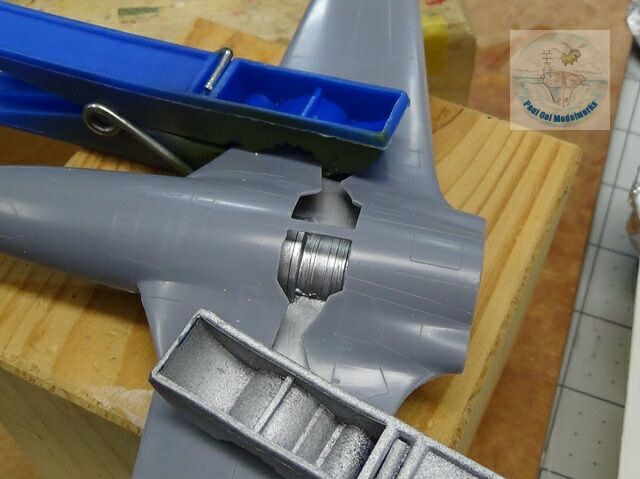
The two fuselage halves are then glued together and clamped to get the best possible fit.There are no guiding tabs or locators, so checking both fuselage and wing alignments are a must.
Next, the rear fuelage section has to be pressed onto the main forward fuselage section. As I had mentioned earlier this fit is also tricky. To get the best clamping force for the butt joint, I manually pressed both fuselage sections together while chatting with a family member for almost 20 minutes!
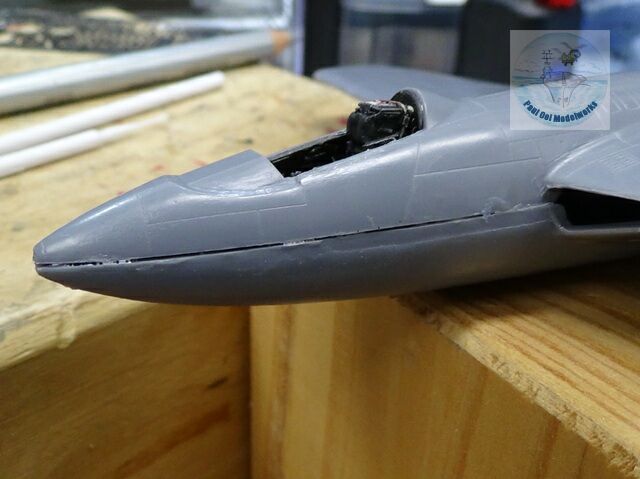
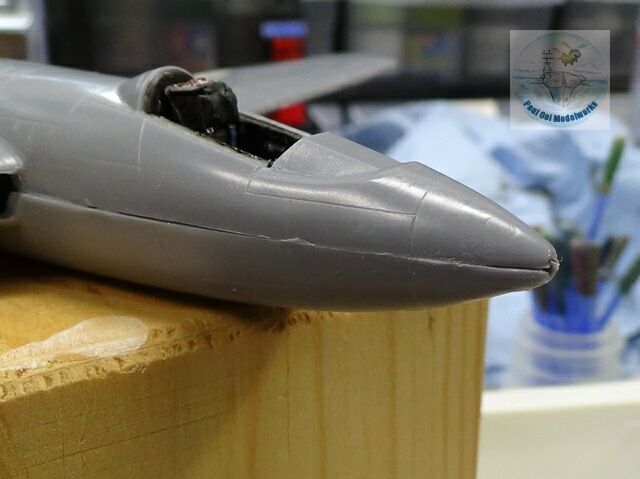
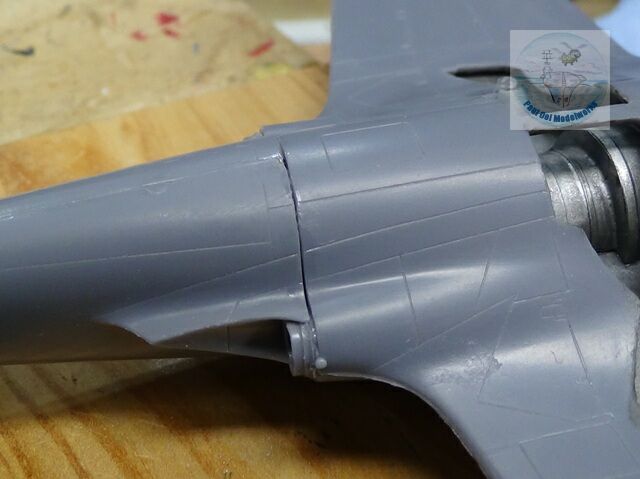
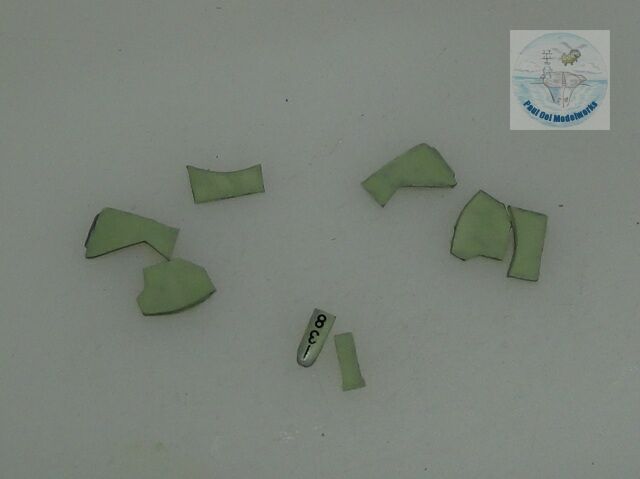
Notice how large the gaps are at the fuselage clamshell joints, as well as between the rear and forward fuselage sections.
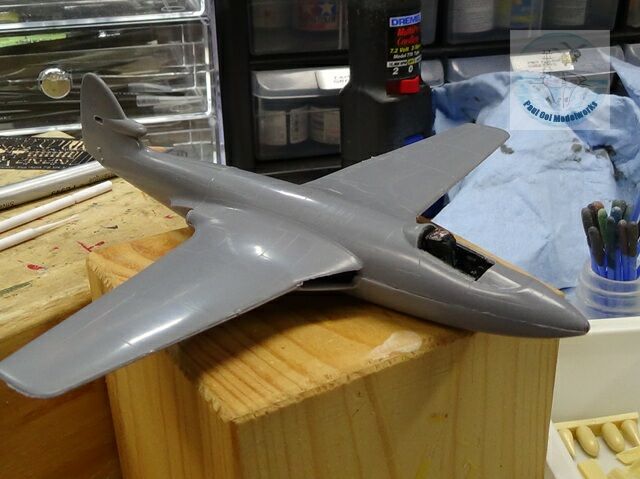
Using techniques from Tutorial 3, I filled in and filed the joints to smooth out the seams. The panel lines that disappeared were then re-scribed using a scribing stylus.
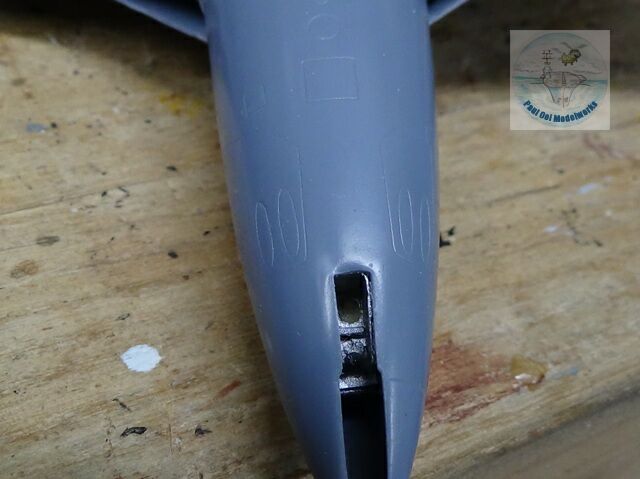
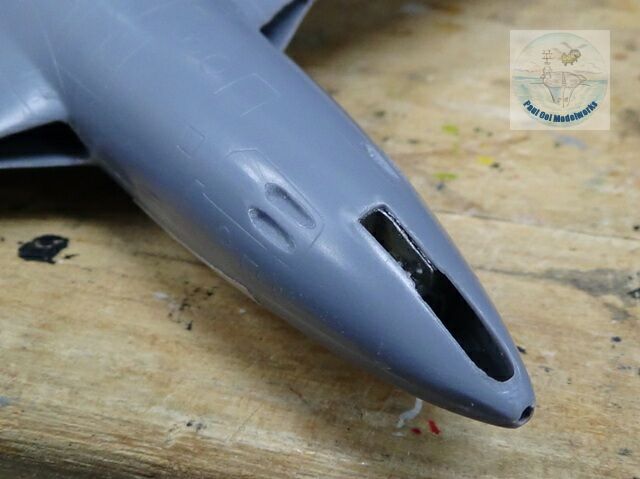
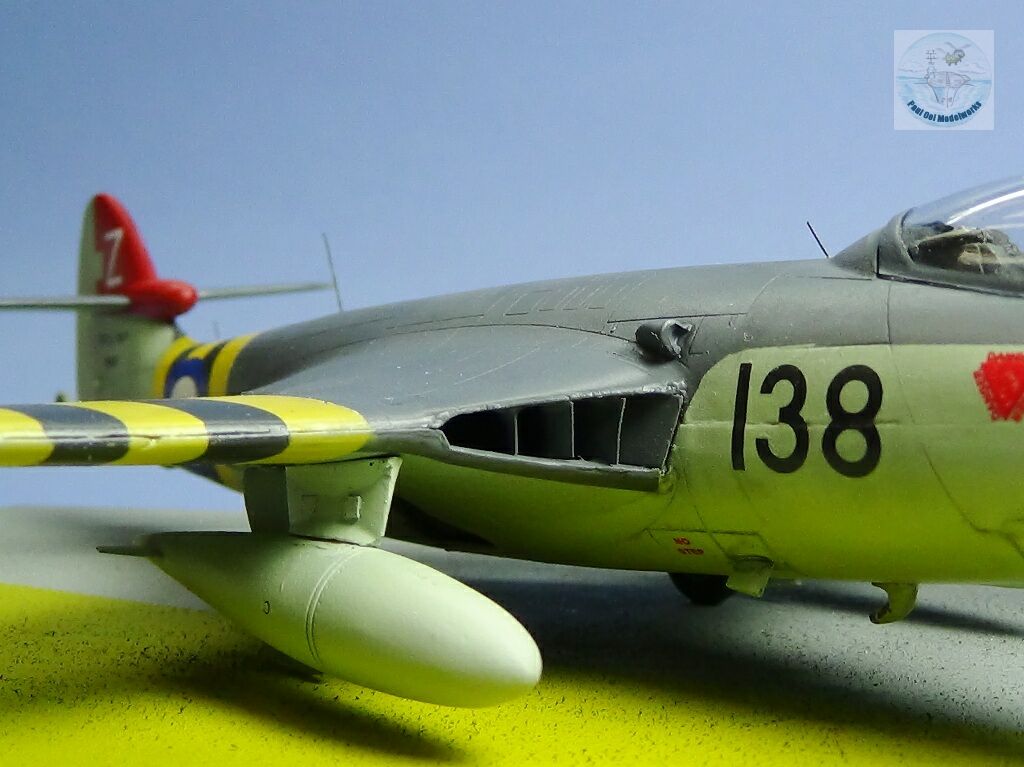
The aircraft nose area also lacked the proper indents formed by the four Hispano Suiza 20mm cannon. I sculpted these using my fine inscribing bit on the Dremel tool.
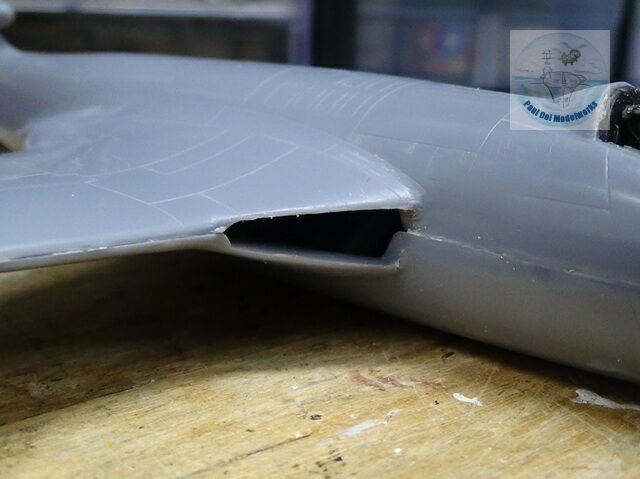
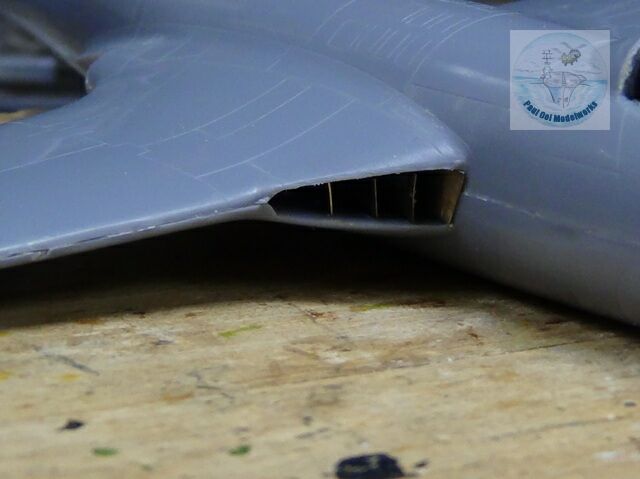
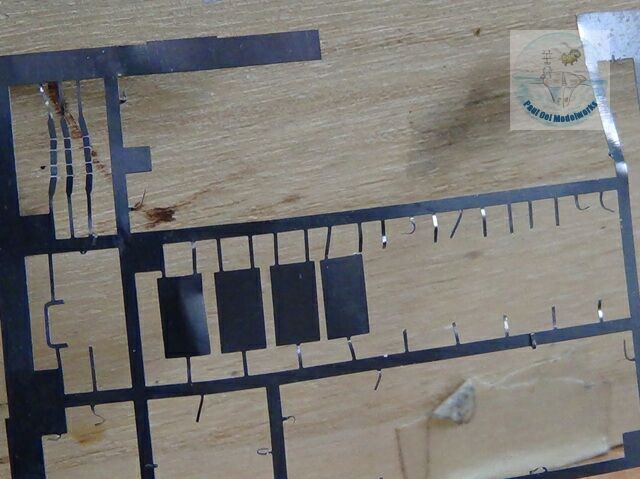
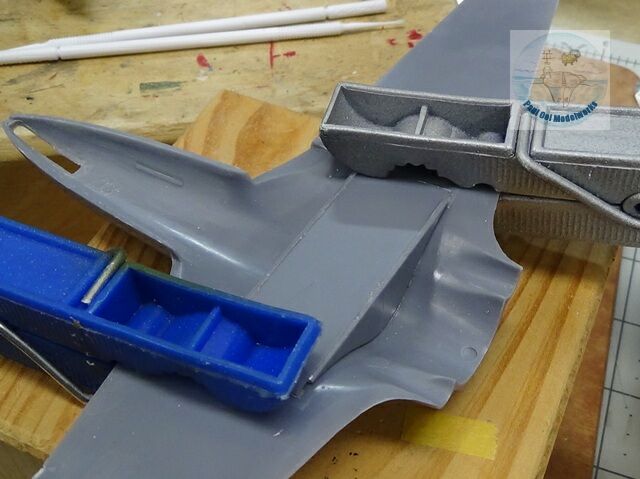
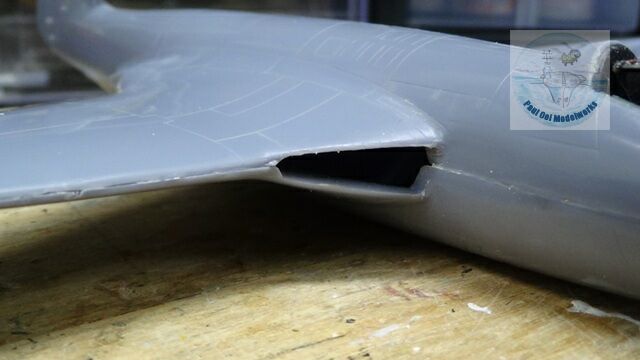
Another set of features that are missing in this kit are the air intake slats directing air inward towards the engine cavity. You can see the triangular hole region before and after I added photoetch pieces of the slats made from scrap photoetch frets.
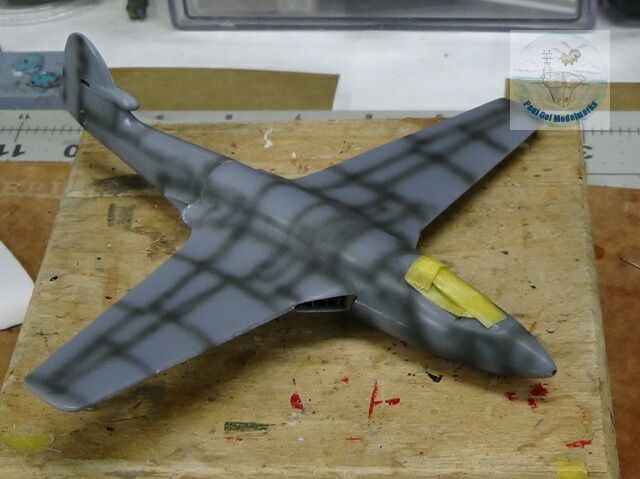

The painting of the aircraft started with under-shading of panel lines using Tamiya NATO Black. This is followed by two coats of Model Master Sky. Masking off the Sky, I then painted Model Master Engine Grey which is almost identical to British Extra Dark Sea Grey onto the top surface.
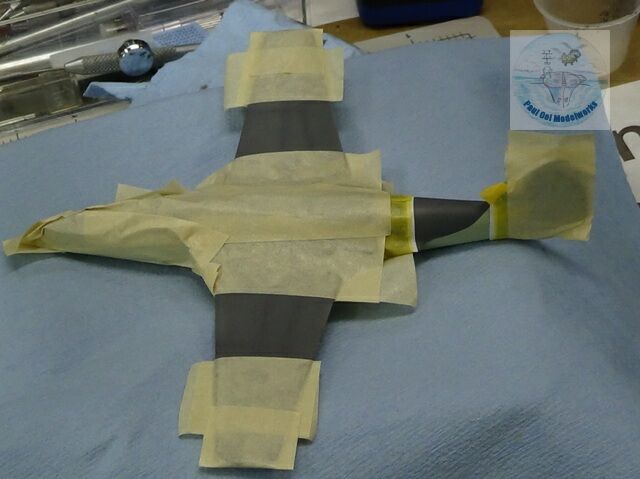
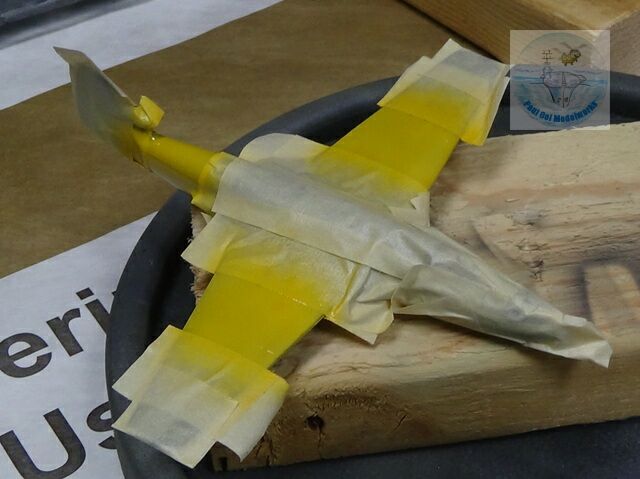
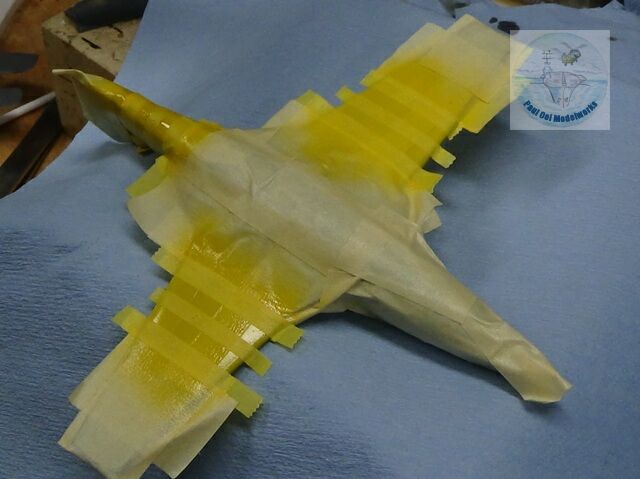
After the main camouflage, we have to apply the operation stripes used by the British and the French in Egypt. I started with the lighter color first, protecting the entire aircraft with masking except for the areas with the yellow stripes (21.5mm, 5/6 in). I undercoated with Model Master Flat White, and then used Model Master British Trainer Yellow. Next, masking tape measuring approximately 4.3mm wide (1/6 inch) are used to mask off the yellow sections. Tamiya NATO Black paint is sprayed on the exposed section. Once the masking tape is removed, we have the zebra-crossing operation stripes.
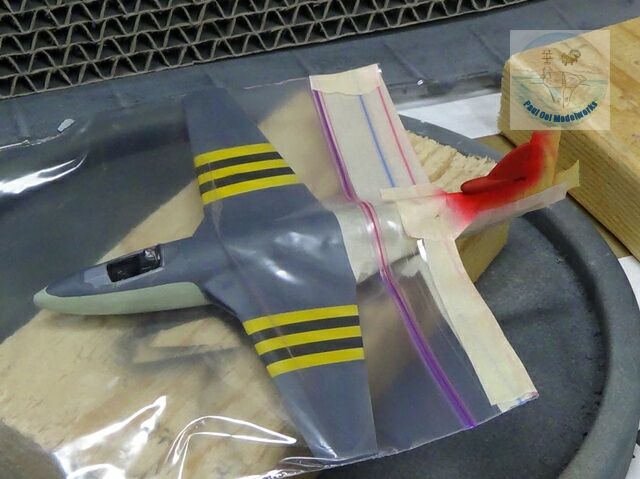
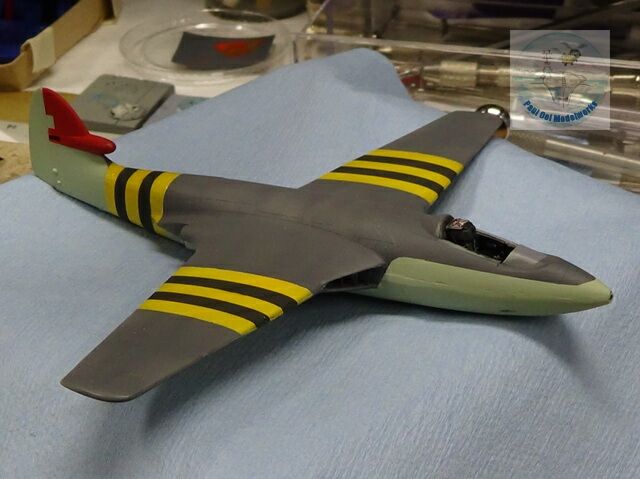
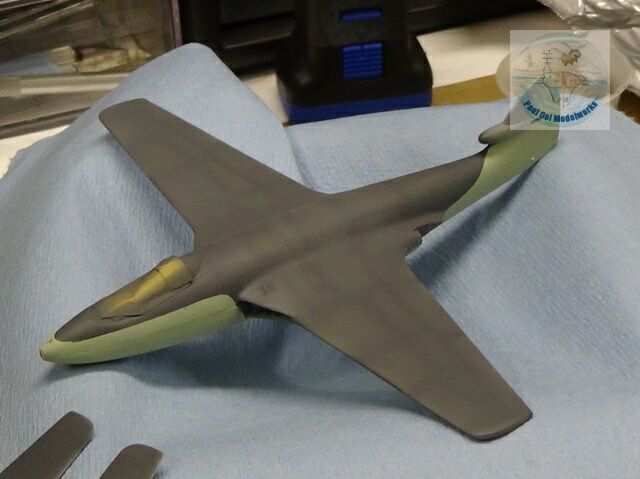
The final color to be sprayed on is the Insignia Red section on the tail. Be careful to totally protect the rest of the paintwork as red over sprays can really ruin the paint job.
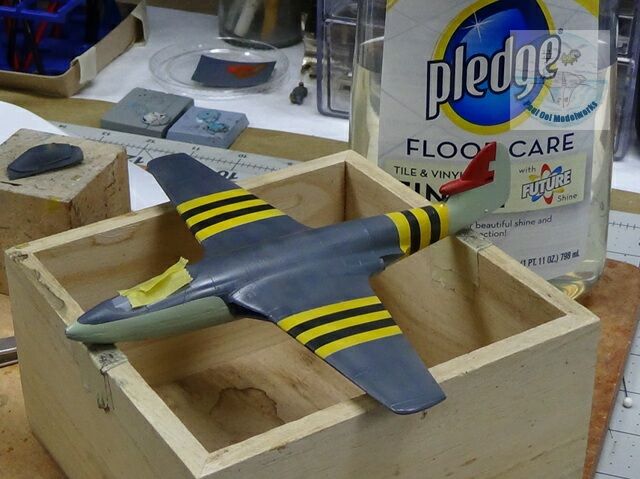

To prepare the surface for decals, I sprayed Pledge Future floor polish in two coats onto the model, allowing 24 hrs of drying and cure. Notice the gloss sheen in contrast with the earlier pictures.
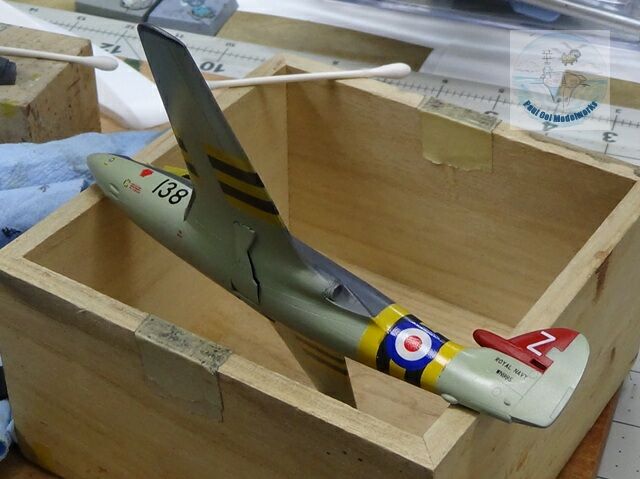
Decal application came next. For all the other problems with fit and lack of details, the kit made up for it with excellent decals. The decals slid onto the surface easily and with a bit of Micro Sol setting, adhered very well to the panel lines.
The decals are then sealed under another layer of satin varnish to blend into the overall paintwork and give the aircraft a uniform finish.
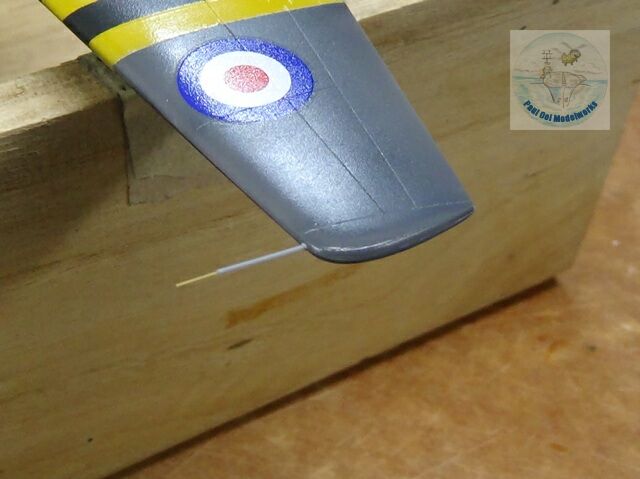
The kit also lacked another detail, the port wing pitot tube. I made this one with two different thicknesses of stretched sprue.
The aircraft is then given an oil-paint wash of 50:50 Burnt Umber:Payne’s Grey with turpenoid. The excess is carefully removed with a paper towel to reveal the panel lines. The overall model is given another layer of satin varnish to seal the wash in.
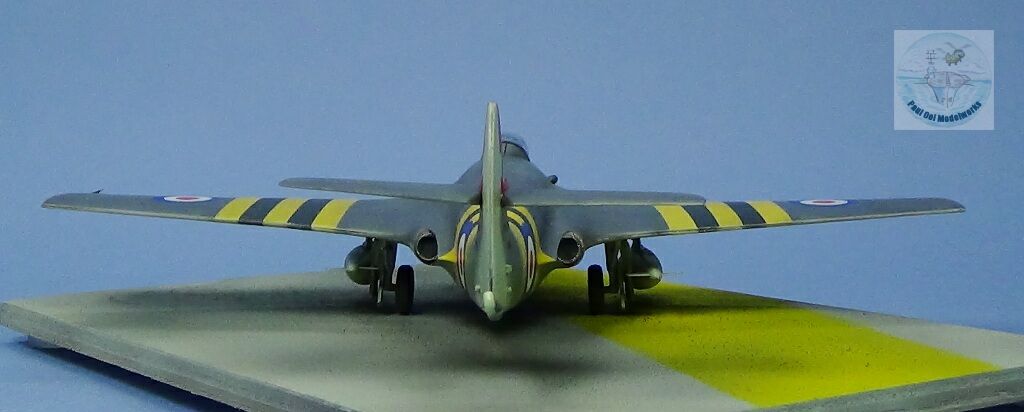
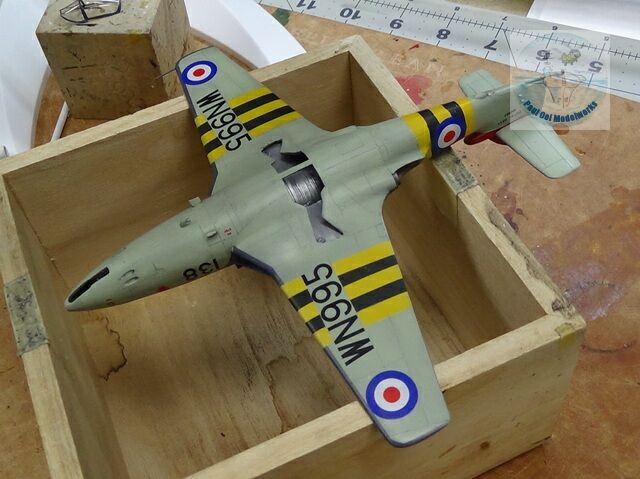
The undercarriage doors are painted in Sky. The tricycle undercarriage parts are finally mounted. The Sea Hawk fuselage sits very low to the ground and the wheel doors are just above where the tires meet the ground. Wheel struts are painted white with a black pin wash.
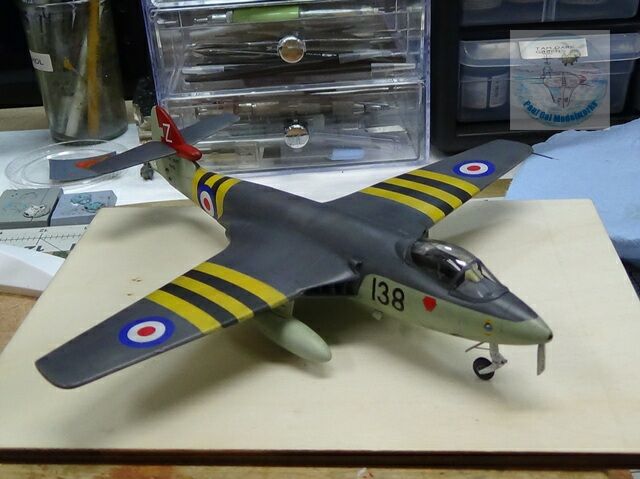
The Sea Hawk has found its legs at last! I mounted the two external fuel tanks just inboard of where the folding wing joints are. The canopy has not been glued on, just dry-fitted.
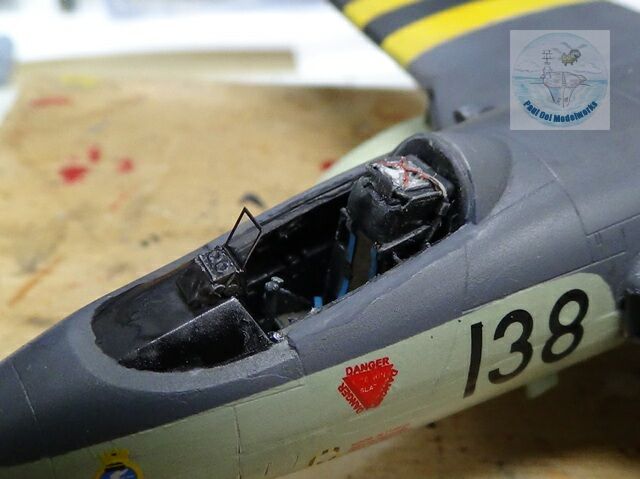
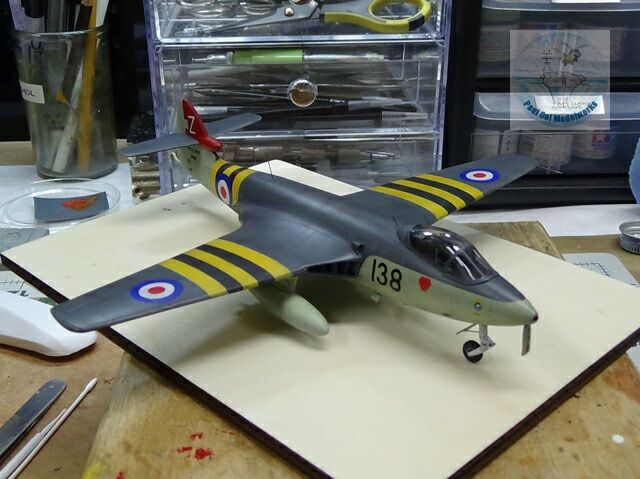
Before closing the canopy, I mounted the gunsights onto the instrument panel. The canopy is glued with Elmer’s Glue-All which does not cause fogging and dries clear. As a note, the base is painted with Light Gull Grey and Insignia Yellow to simulate the landing deck area of HMS Albion.
She was beautiful.
Whilst I appreciate those aircraft that placed pure ugly function over any other quality (see Su-9, 11), there are or were some aircraft that were handsome, just gorgeous to watch especially in flight.
Your Armstrong Witworth SeaHawk shines. Best wishes.