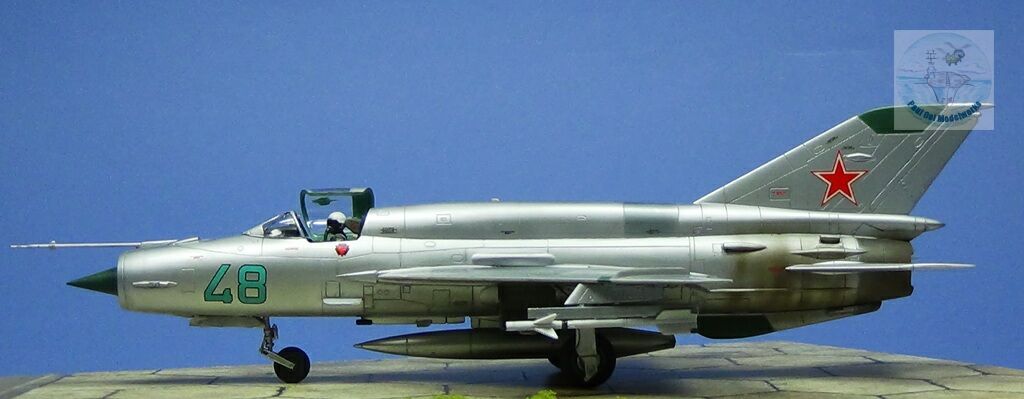
One of the most iconic fighters to emerge from the Soviet Union during the Cold War was the MiG-21, NATO code name “Fishbed”. Emerging in the early 60’s, this versatile aircraft eventually served with 60 nations and a career of 6 decades. Unlike its predecessors the MiG-15 and MiG-17 which were derived from captured German designs, the MiG-21 was very much a product of the Mikoyan design team and capitalized on the tailed delta wing design. The MiG-21 gained notoriety in the West during the Vietnam War when the North Vietnamese used them to great effect against USAF Thunderchief bombers over Hanoi and Haiphong.
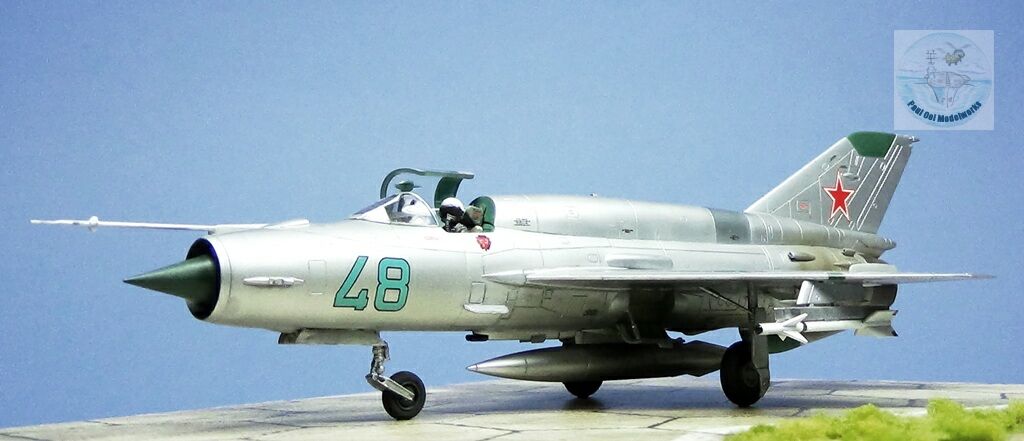
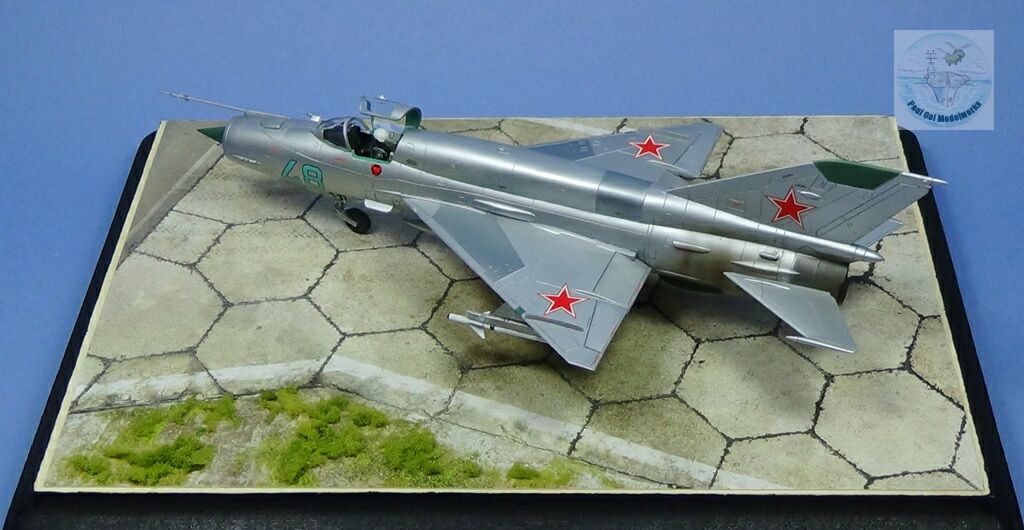
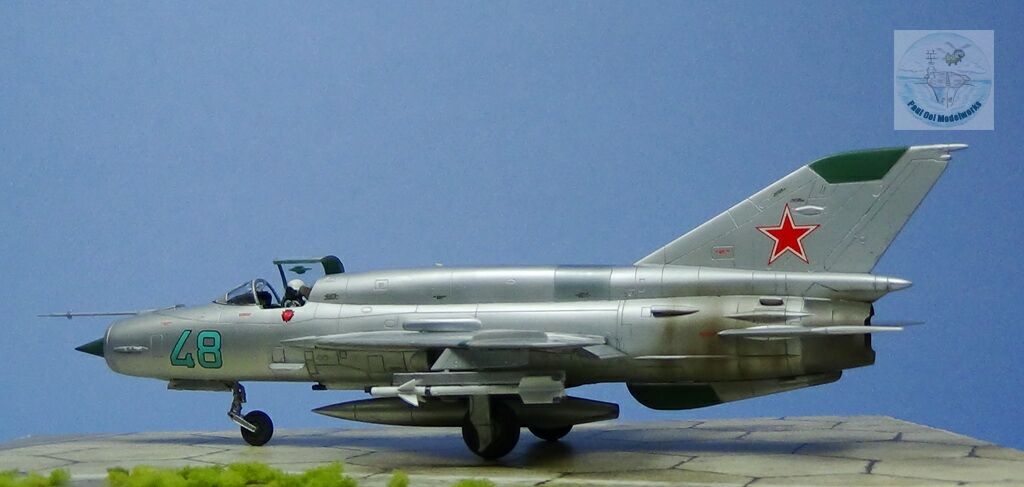
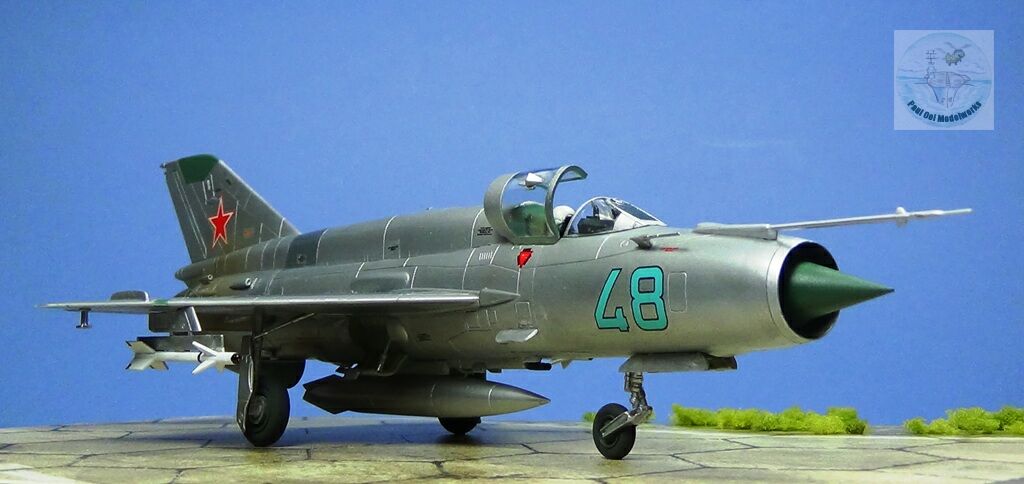
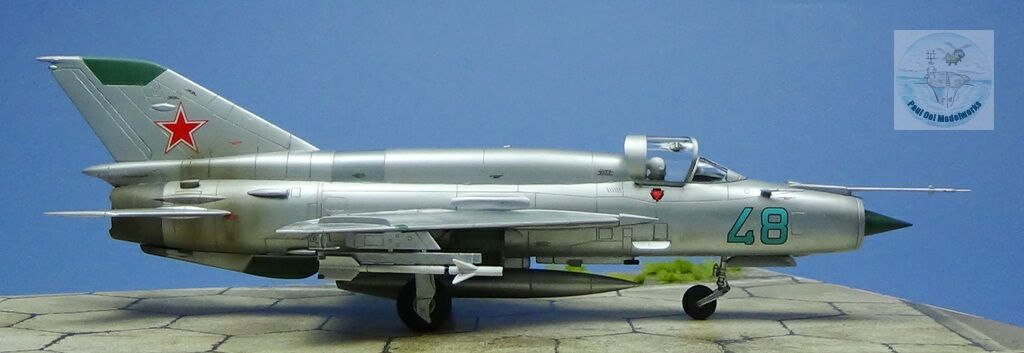
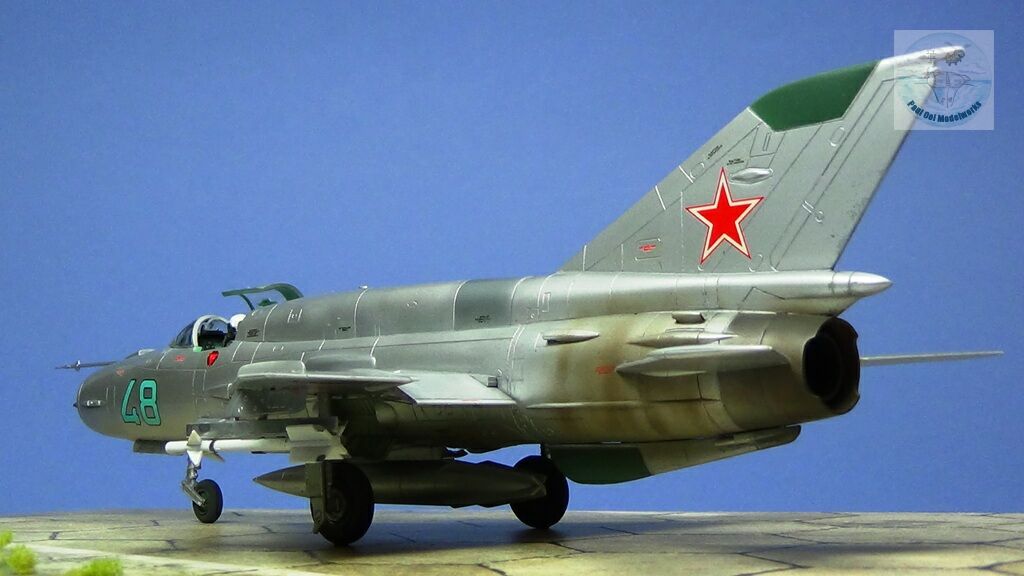
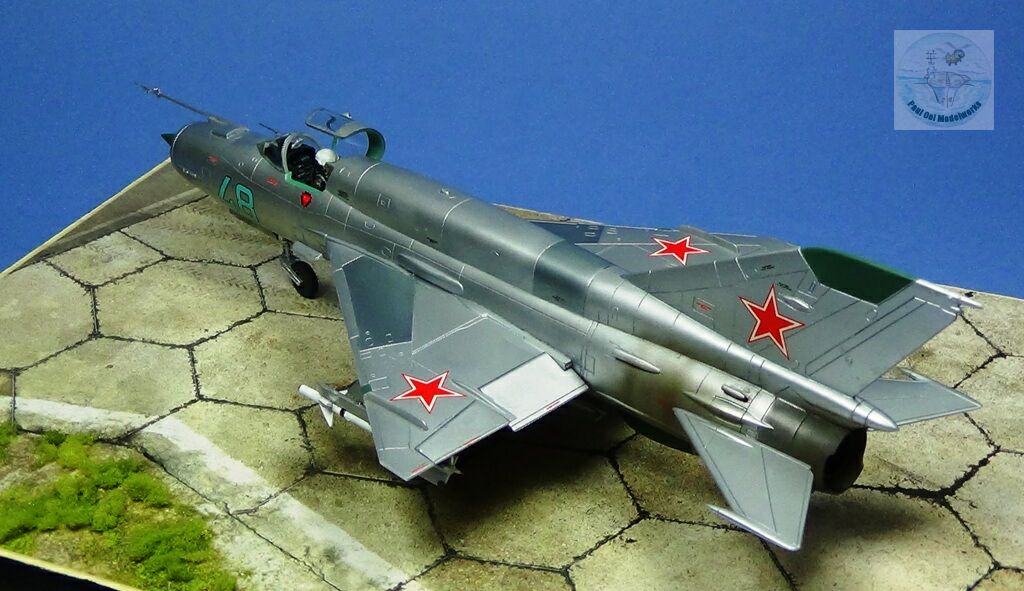
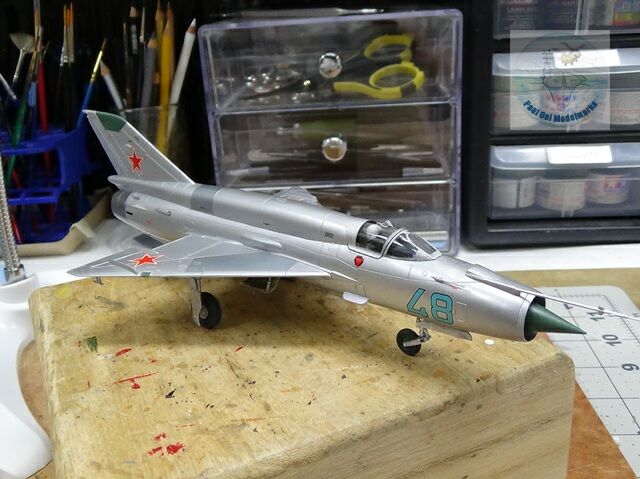
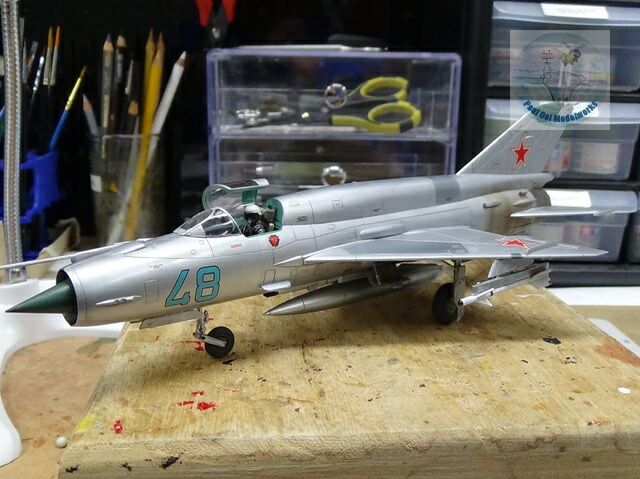
This version portrayed here is a mid-1970’s aircraft based on an interceptor in the Soviet Union. The SMT variant (Sapfir Modernzirovanniyy Toplivo) has an upgraded Sapfir-21 radar system and a characteristic hump on its spine for added fuel capacity. This version rectified one of the original short-comings of the MiG-21 which was its short range limitation because of small fuel tank capacity.
Gallery


Construction Notes
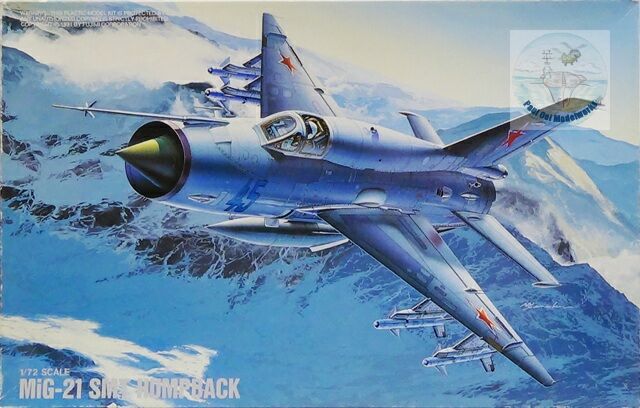
This 1/72 scale Fujimi kit has been around since the mid 90’s but it builds a very nice model of the MiG, with engraved panel lines, good fit, and compensates for a basic cockpit with a nicely sculpted pilot figure. I built this one straight out of the box without any post-market components. My main purpose was to paint this aircraft entirely in different shades of Testor metallizer paint (I had previously finished the MiG-17 in Alclad II).

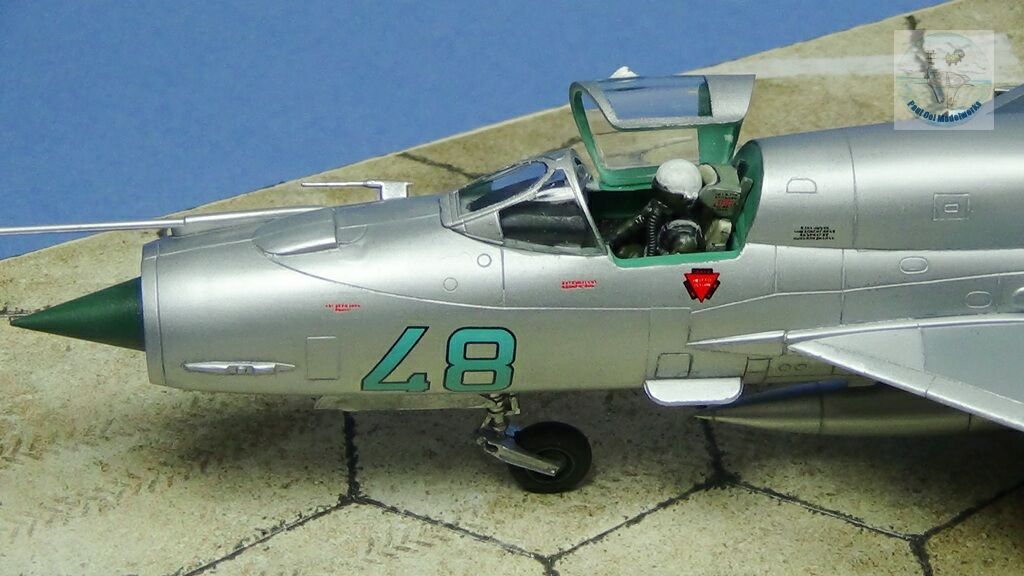
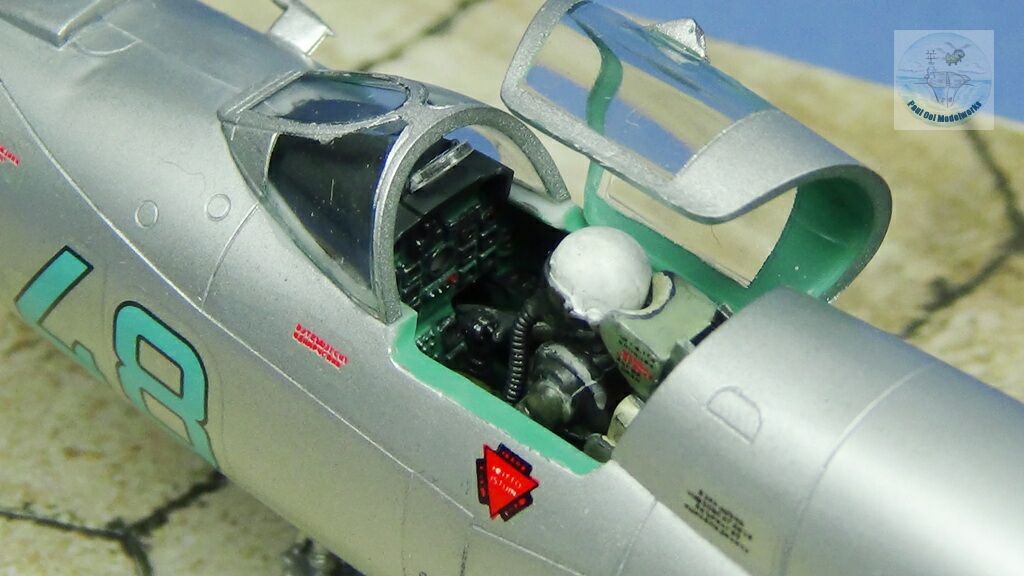
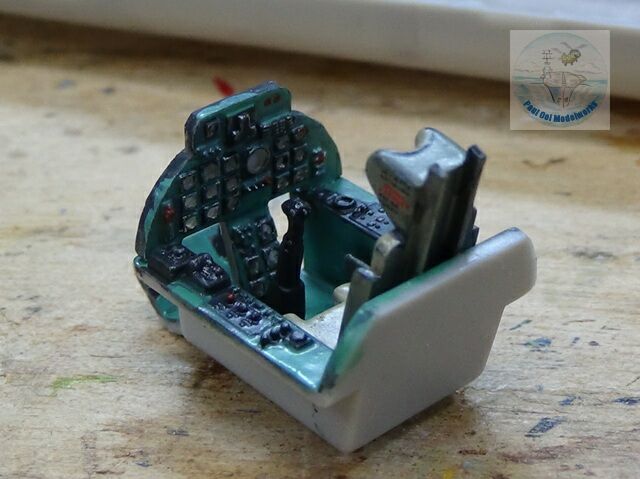
The cockpit tube was finished in Model Master Interior Blue/Green 2135 and Interior Black FS37031. I chose not to use the instrument panel decal as I felt that the molded details are much better painted directly. The pilot’s uniform was olive drab with dark grey and black webbing.
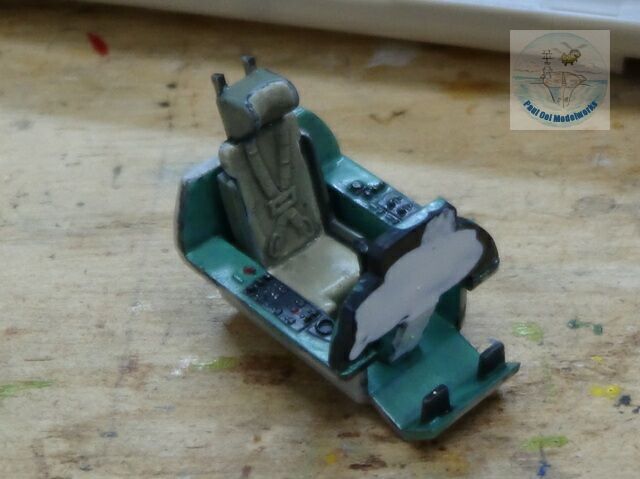
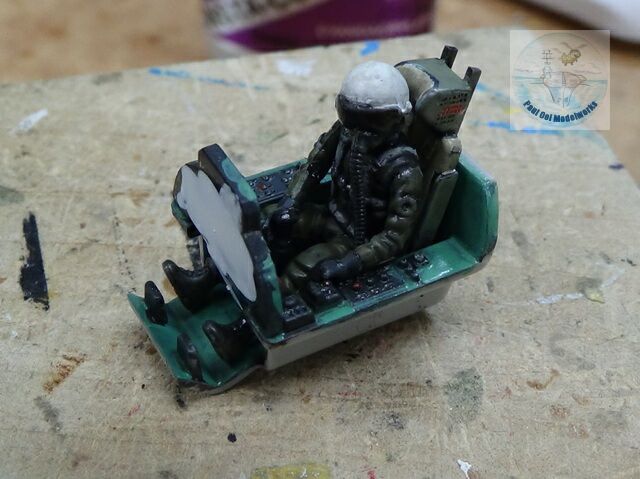
The cockpit tub parts go together easily, followed by the insertion of the pilot figure whose arms are carefully positions to grip the controls.
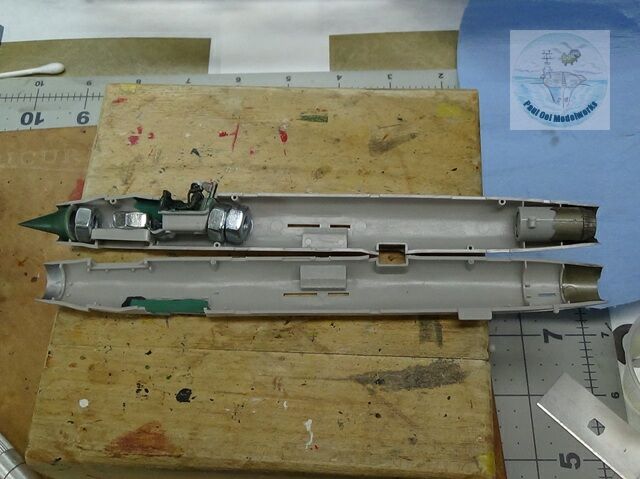
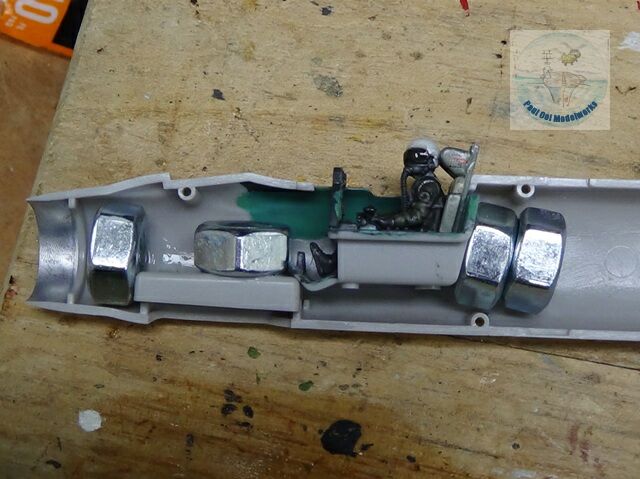
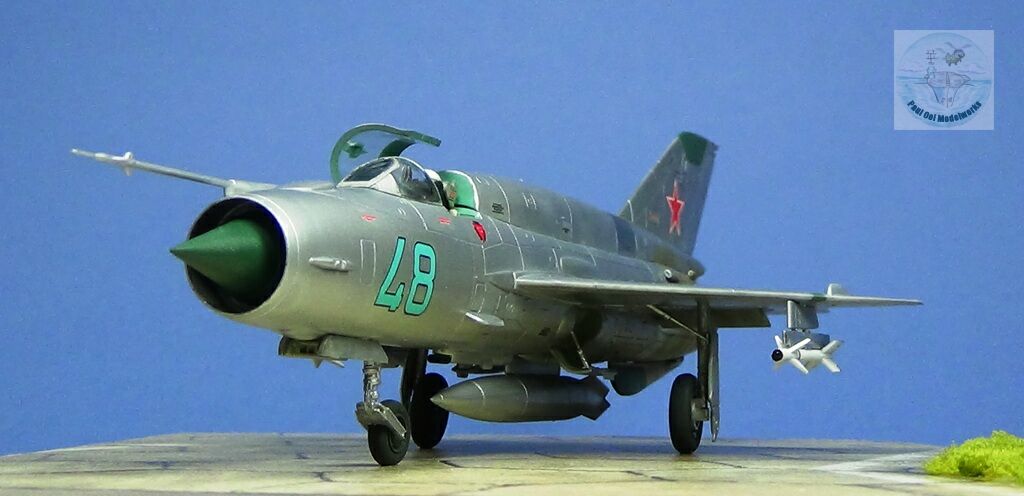
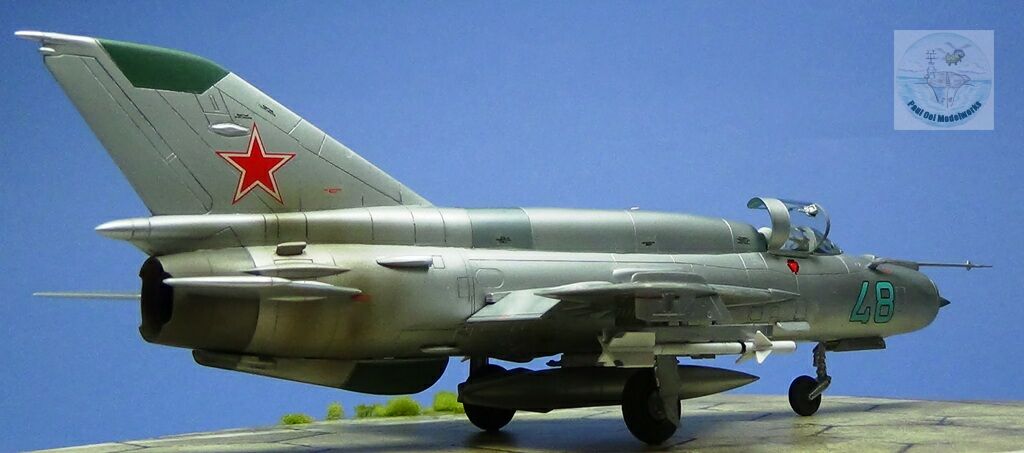
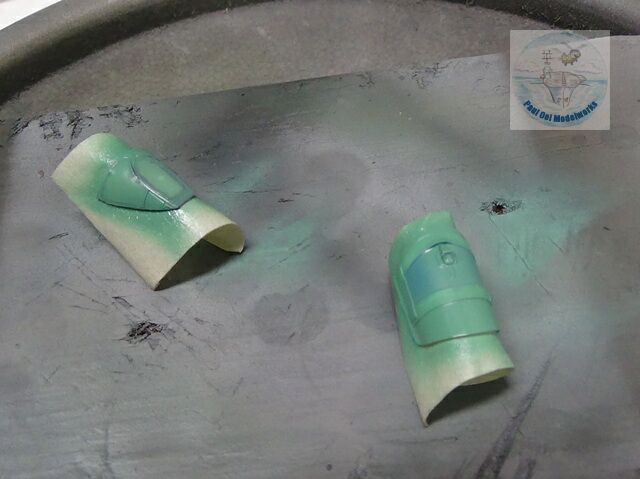
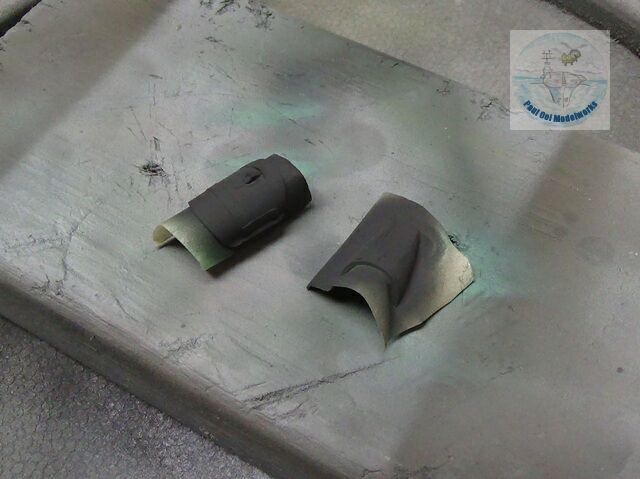
In putting together the main fuselage, the interior of the cockpit is painted the same blue/green 2135, The front intake is steel, and the rear exhaust painted Model Master Jet Exhaust. Note the steel nuts bonded to serve as nose weights. The radome cone is painted a mix of Euro Dark Green (75%) and Neutral Grey (25%). I also painted the other green dielectric panels on the tail and wing edges.

The halves are then carefully fitted together. The fit is good and does not require any filling.
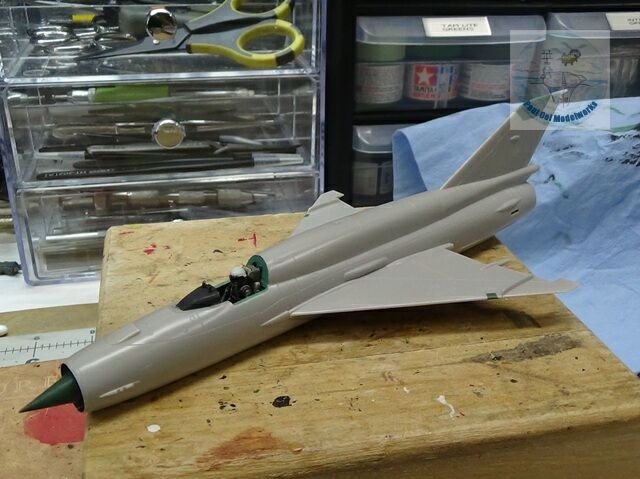
In fairly quick succession, the spinal hump, tail section, and delta wings are fitted to the fuselage. Again, the fit is very good and did not need filling.
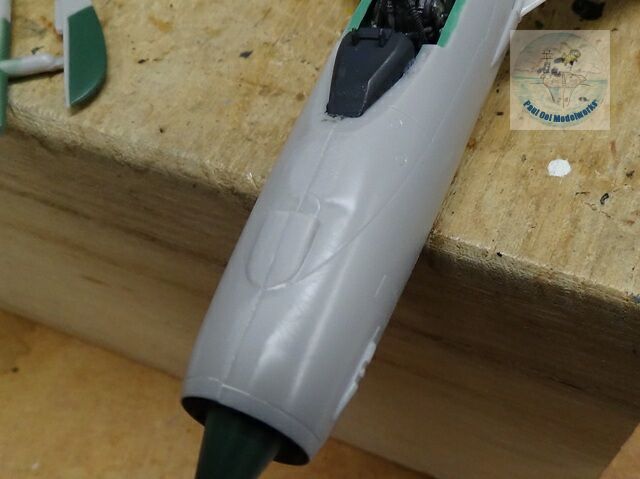
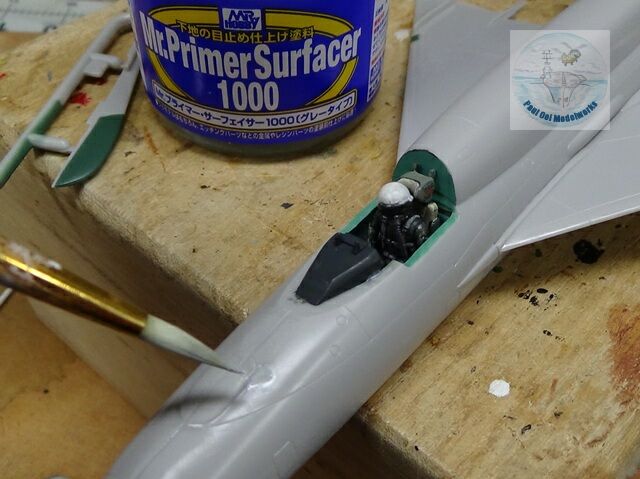
There was one area on the fuselage that needed fixing. There was a prominent sink mark on the top side of the cowling that I filled with layers of Mr. Primer Surfacer 1000.
I prepared the clear parts by first masking, and then applying the same interior blue/green first so that it will show up under the clear canopy. Next I applied a barrier coat of Tamiya NATO Black to prevent light from filtering through the interior blue/green paint. Also by using an acrylic paint (Tamiya), the two color layers will not interact and mess up the appearance when viewed from the clear canopy material.
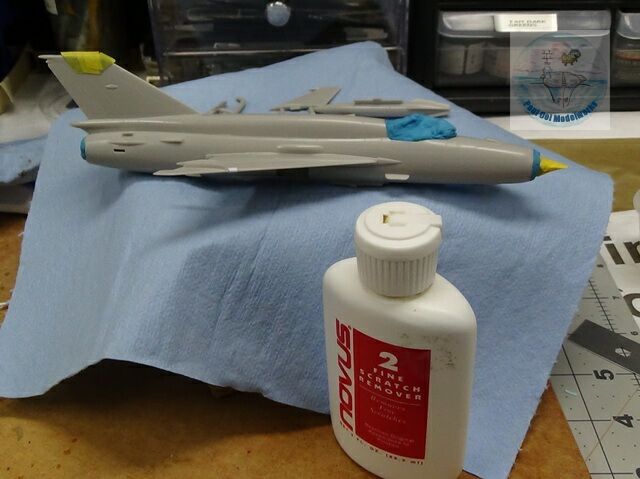
To prepare the surface, I used Novus 2 plastic polish. While it did do the job of polishing the plastic, it created a problem for me later on when I applied the first coat of Metallizer polished aluminum plate when the latter refused to adhere to the surface of the model. So, lesson learnt: unlike Alclad II black primer, the metallizer paints do not like to mix with this plastic polish. Note that I had masked off the green dielectric and radome areas after I had protected that paint finish with some Pledge Floor Polish.
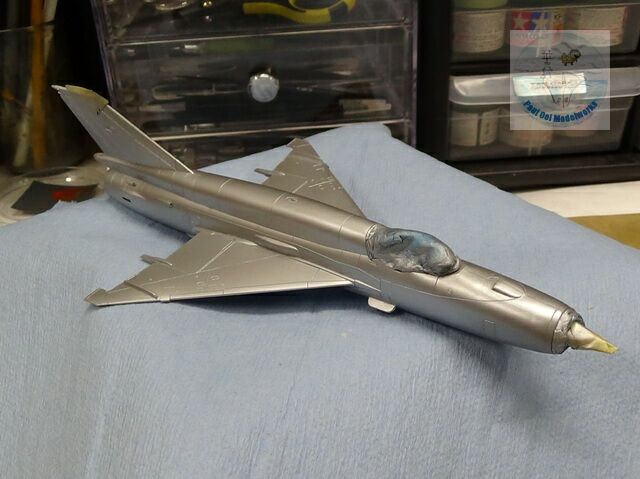
I applied several coats of Testors Metallizer Aluminum. This was then protected with two coats of Pledge Floor Polish, allowing each layer to dry at least 24 hours to protect the metallizer layer from the masking tape.
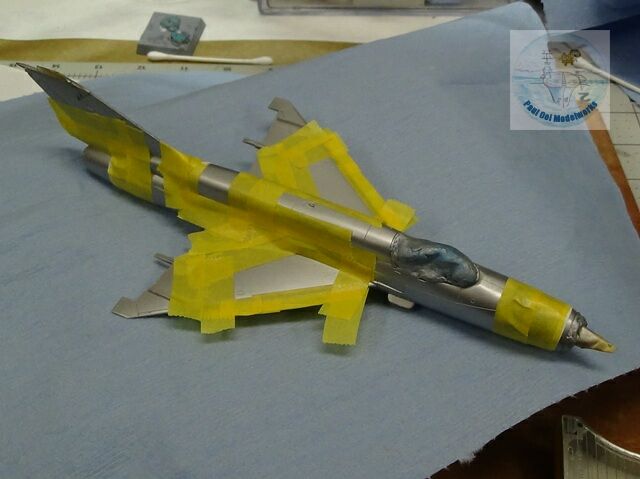
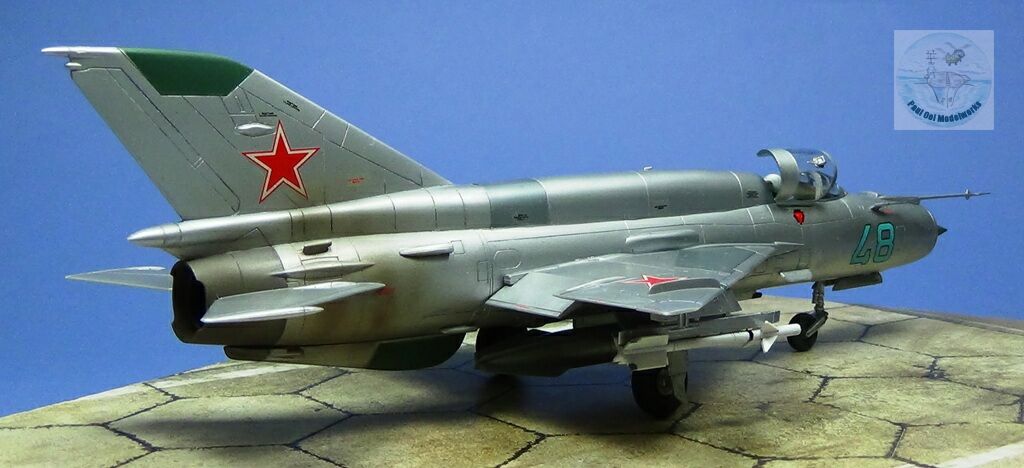
Masking is applied for spraying of dark anodic gray, steel, and at the rear exhaust, burnt metal metallizer paints. This helps to create the look of dissimilar metal panels that shows up in contrasting patterns on actual all-metal finish jets.
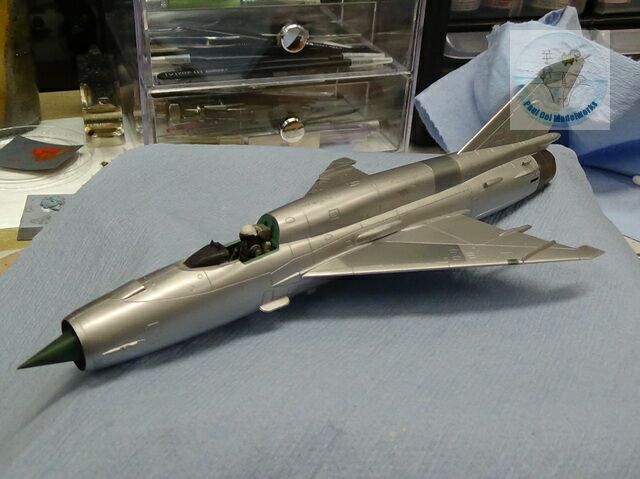
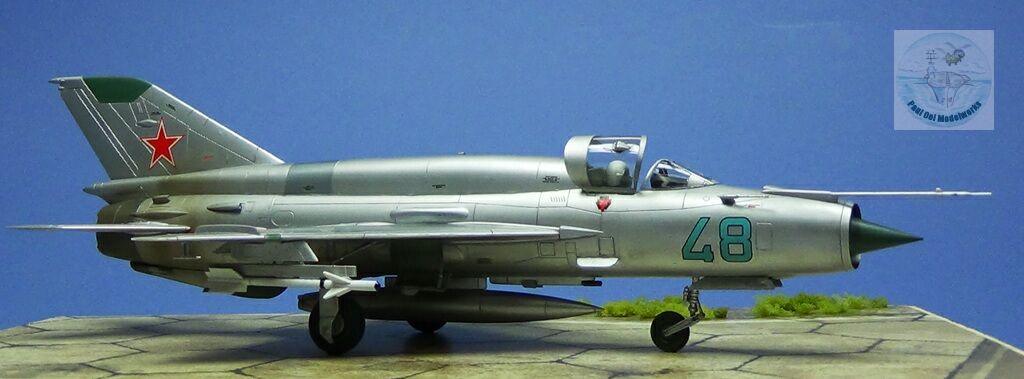
Once the masking tape have been (carefully) removed, the multi-metallic panels show out (see the different shades). Some touch up with airbrushed aluminum had to be done as the tape still removed some areas of Metallizer (Alclad II is much more resilient in this respect). After this, several layers of Pledge Floor Polish were applied to protect the metal finish for decaling.
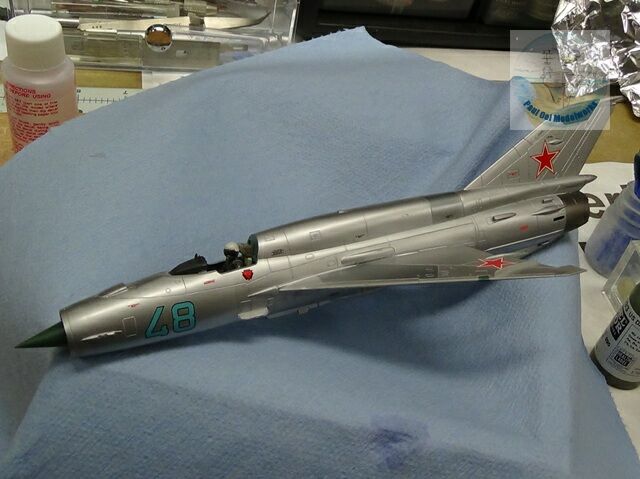
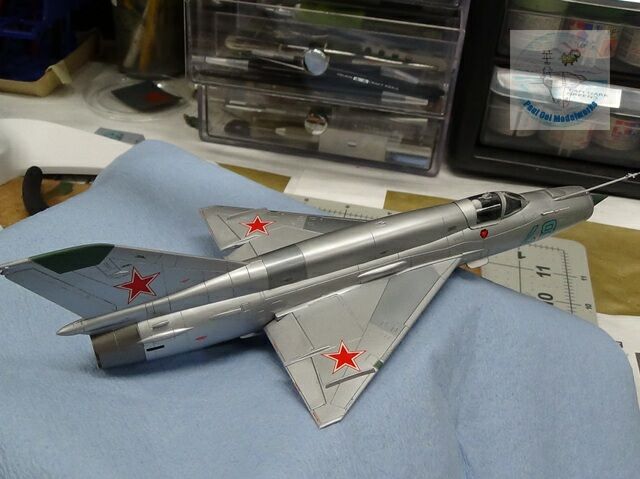
Once the decals are applied, the whole plane comes alive with those classic Soviet era markings. To protect the decals after application, I applied a coat of Pledge Floor Polish.

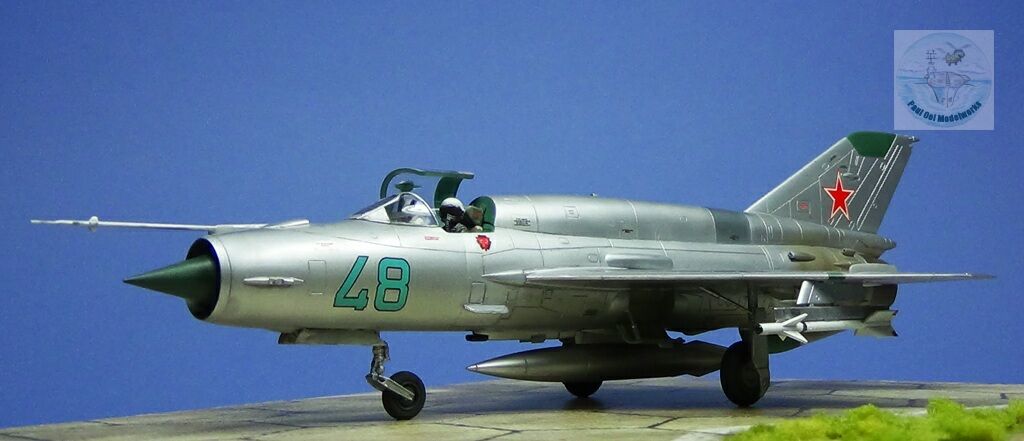
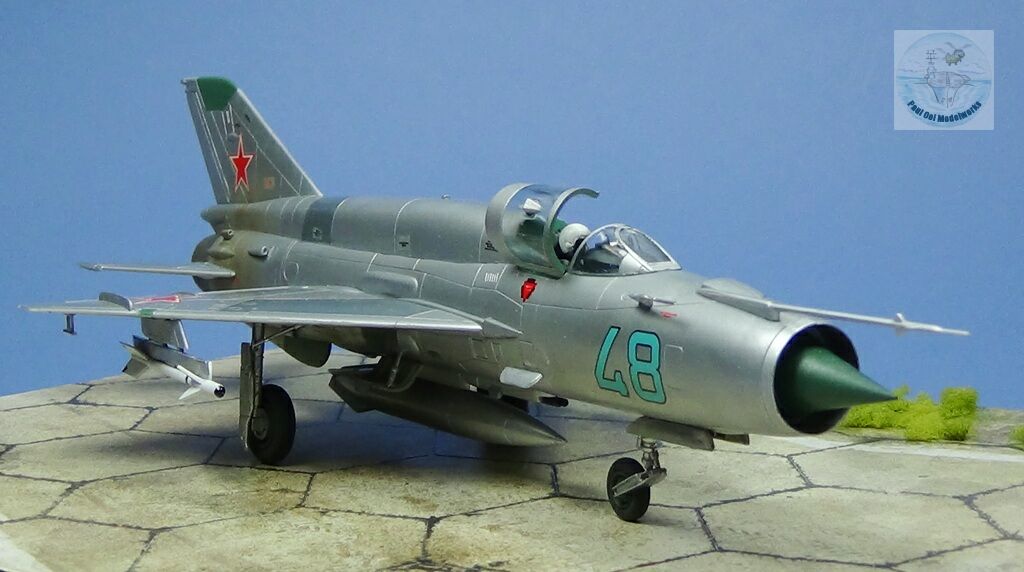
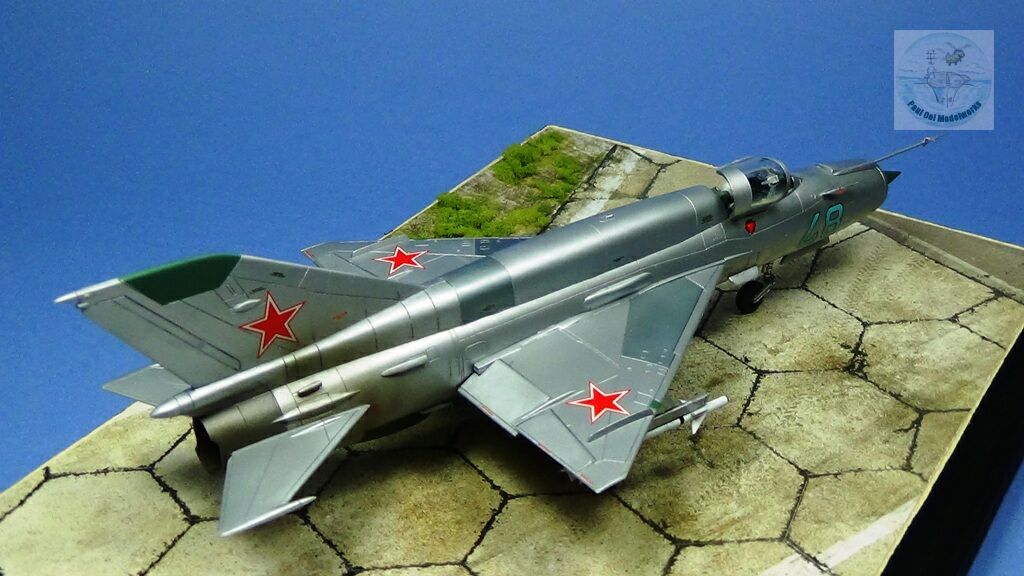
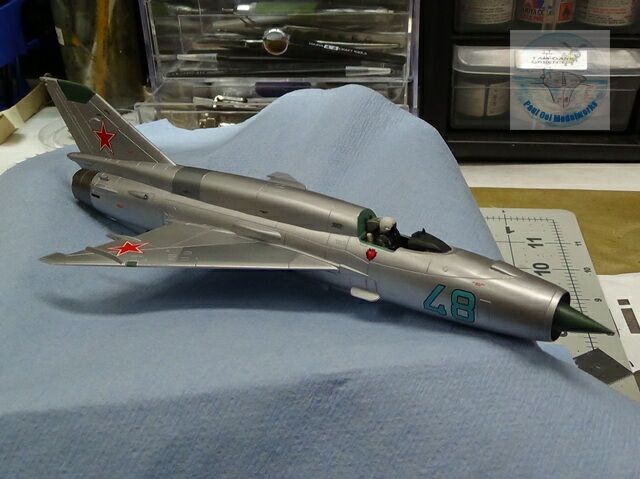
The ailerons and flaps are then attached. Note that the flaps have been placed at an angle in preparation for taxiing and take-off.
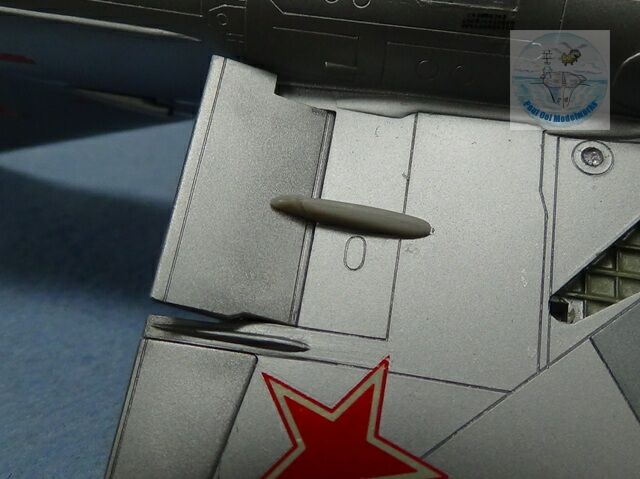
Note also on the underside that the flaps have these large hinges that needed some cutting-adjustment in order for the flaps to drop as shown.
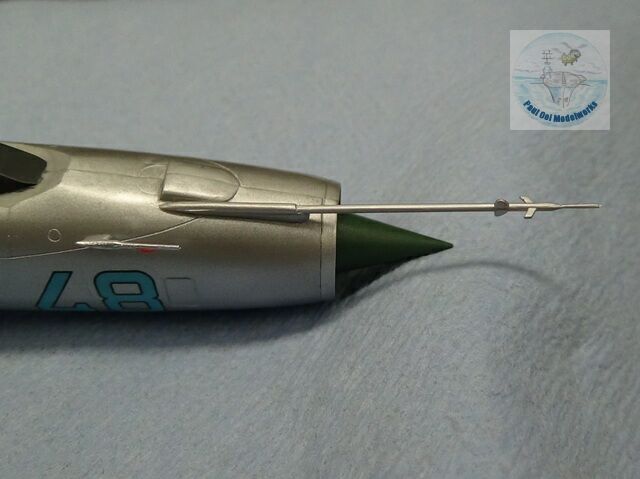
The mid-air refueling tip was also added at this time. Be careful as this section is very sensitive to breakage.
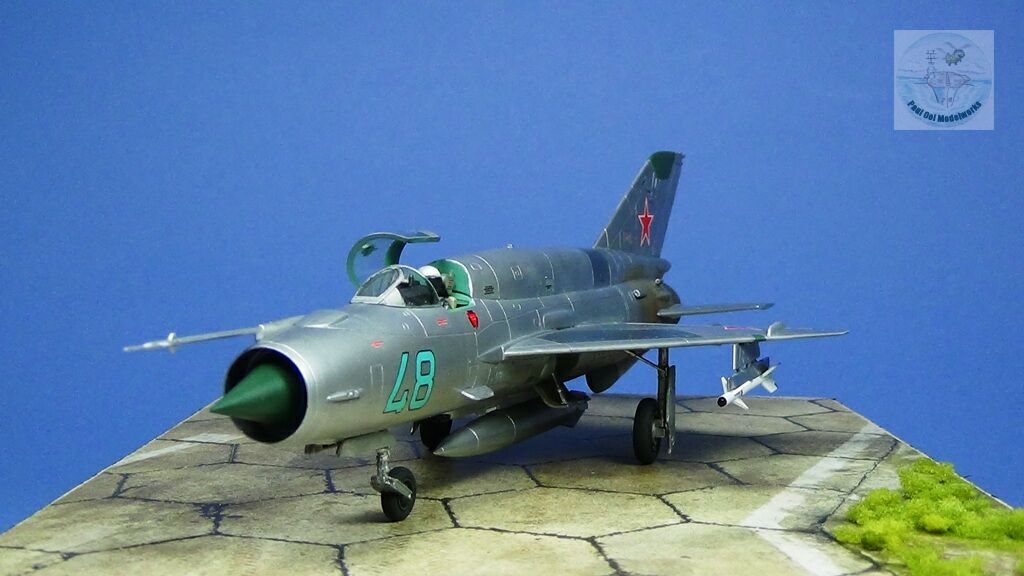
The fuselage is now ready for weathering. Notice that I have left off the rear stabilizers as I intended to discolor the engine panels first with heat rings, and the former would get into the way. A turpenoid wash of dark grey was applied to bring out the panel lines. Access was removed using an absorbent towel. The rear engine panel was stained slightly brownish (heat discoloration) using another turpenoid wash of burnt umber.
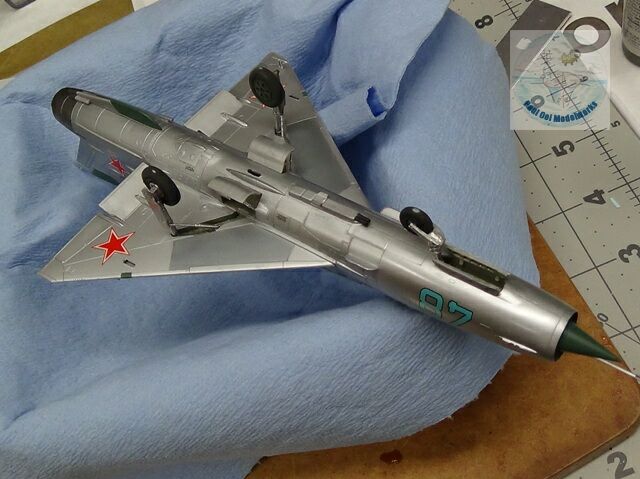
Next, the tricycle under carriage was installed together with the wheel well doors. All interior wheel well surfaces are painted with German RLM02 Grey. Struts are painted silver.
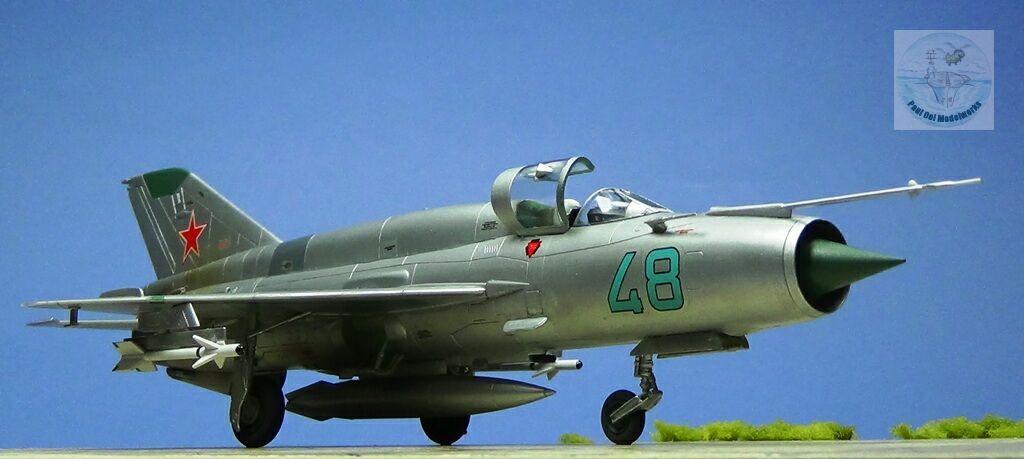
 The aircraft can finally sit on its own set of wheels!
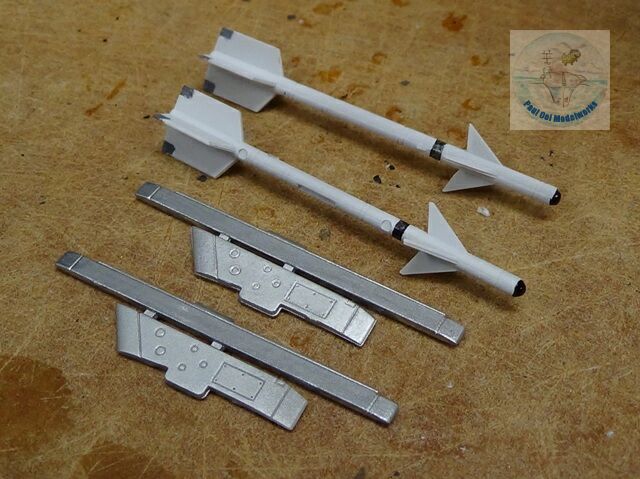
The pair of Atoll AA2 (K13) air-to-air missiles are painted white with semi-gloss black tips.
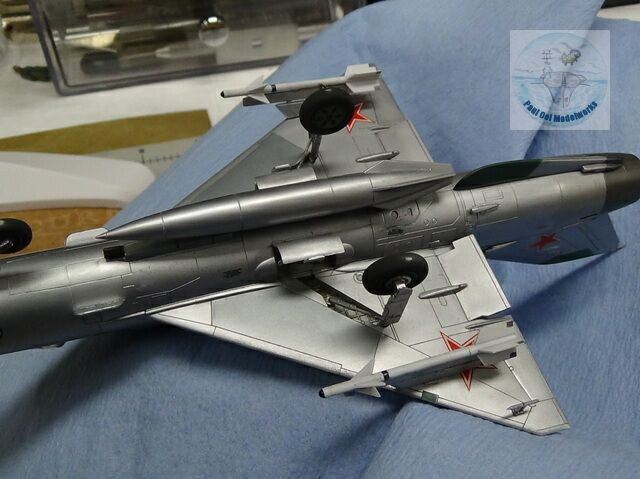
The drop tank and the missiles are attached to the underside.
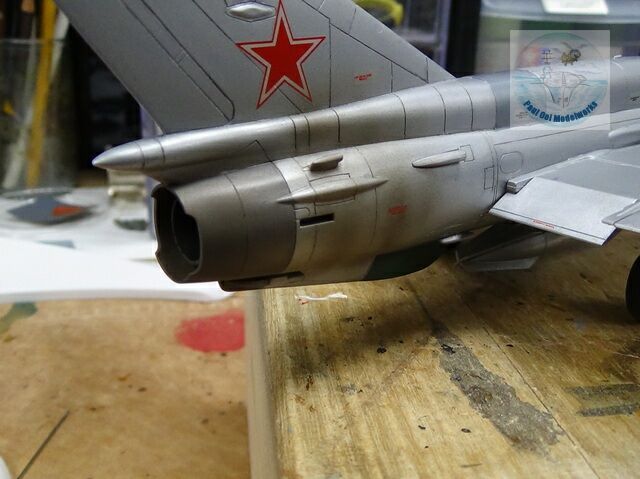
Heat discoloration rings are sprayed lightly onto the rear engine region using a thinned down mix of Tamiya Red Brown (50%) + NATO black (50%).
The opened canopy is finally attached and the aircraft is all ready.
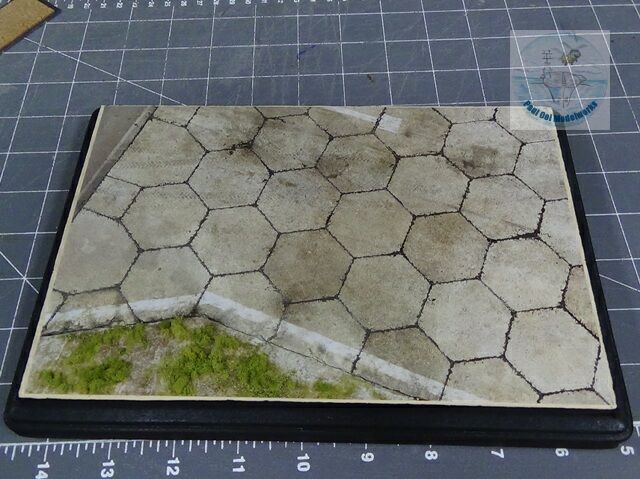
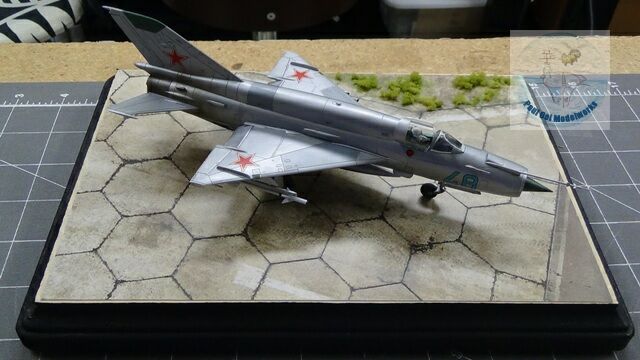
The display base uses a Soviet Hex MIA-7207 tarmac card from Miliscale glued onto a wooden base, and Woodland Scenics rough foliage added. Blue 48 is ready to taxi down the runway!
Awesome work, again. Congrats on this beautiful build, Paul.
Suddenly and for no readon changing directions from WW1 era aircraft to 1st and 2nd Gen. jets, this fine build can only inspire!
Well done.
Thank you! Paul