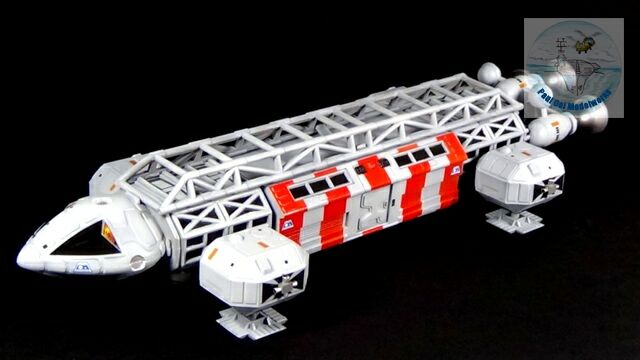
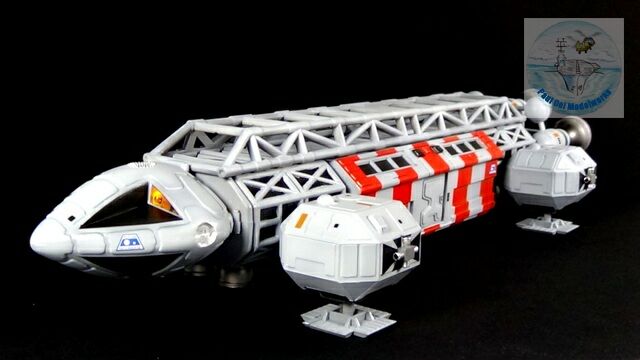
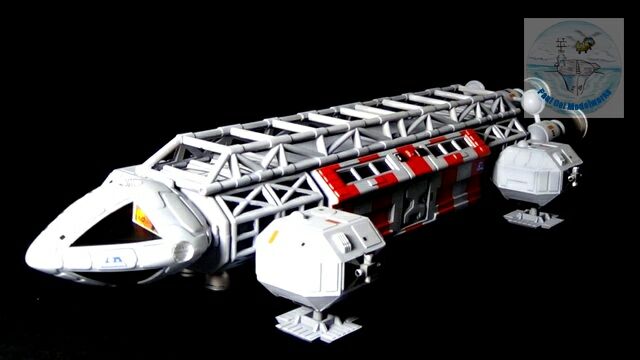
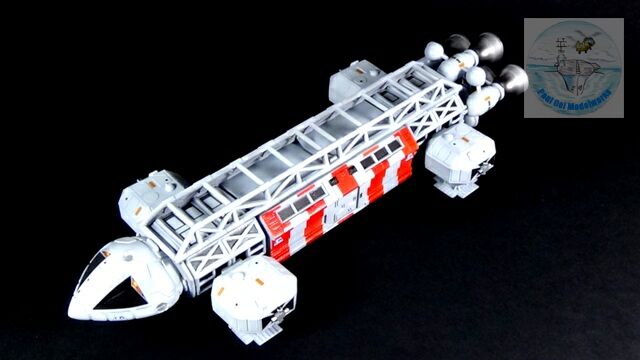
Back in the 1970’s, one of the sci-fi TV series from the UK that got me and my buddies all fired up was Space:1999. This was a time before Star Wars where most aliens in shows where still flying around in flying saucers (why those?) and Earth responded with rocket star ships that look like they only go one-way and blow up at the end of the journey. Gerry Anderson’s Eagle 1 Transporter was a marked departure from the cliched genre and gave a fresh industrial look to space craft. It also had the interesting concept of being able to drop off the mid cargo section, thus it could change roles from passenger carrier to bulk cargo or even weapons just by taking on a different load.
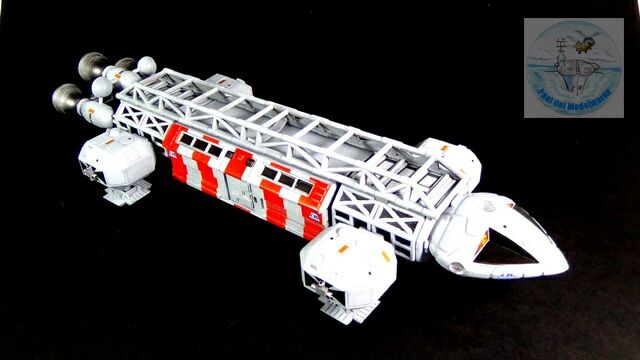
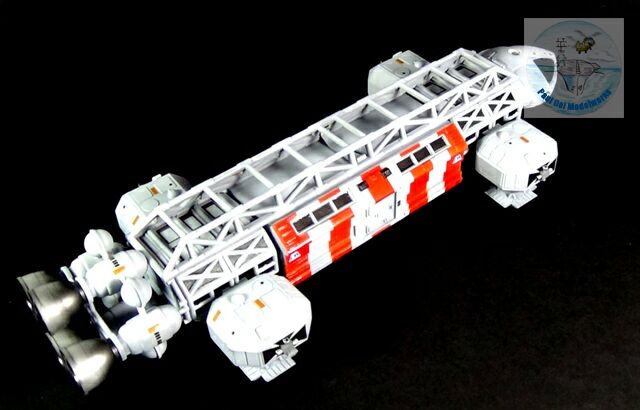
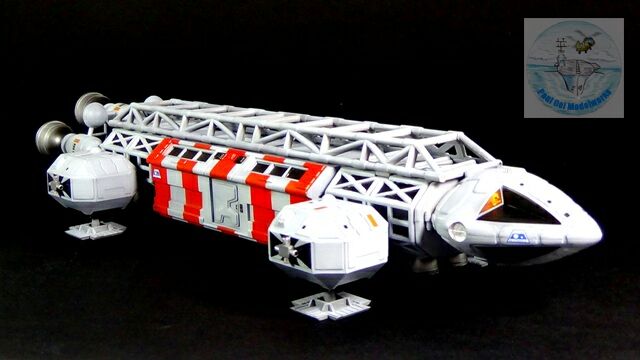
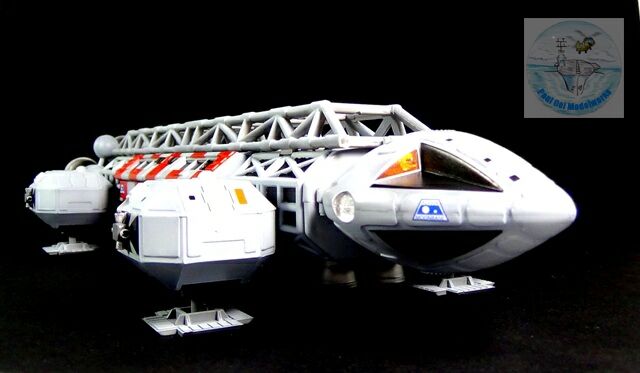
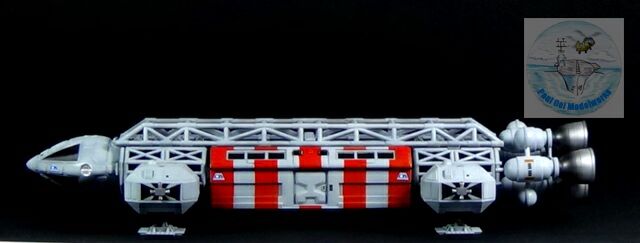
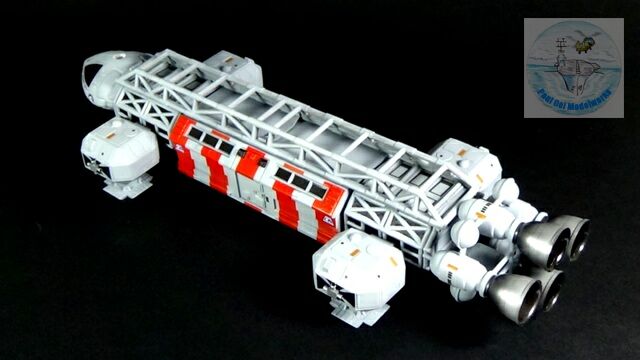
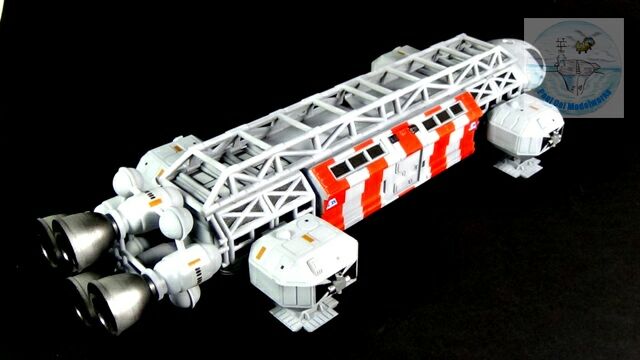
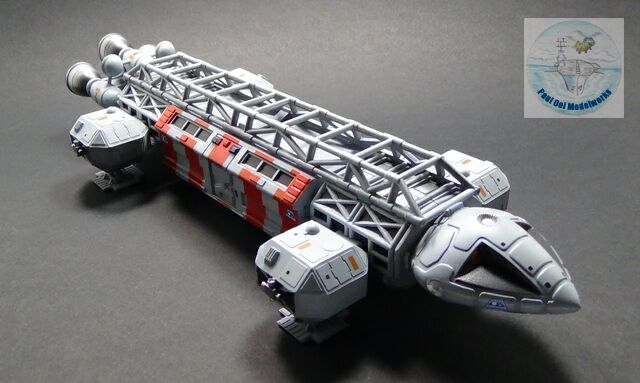
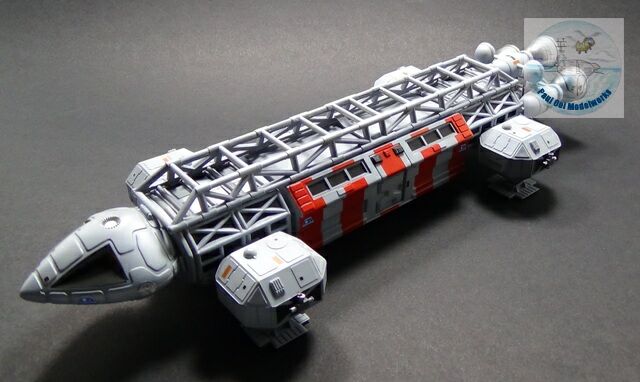
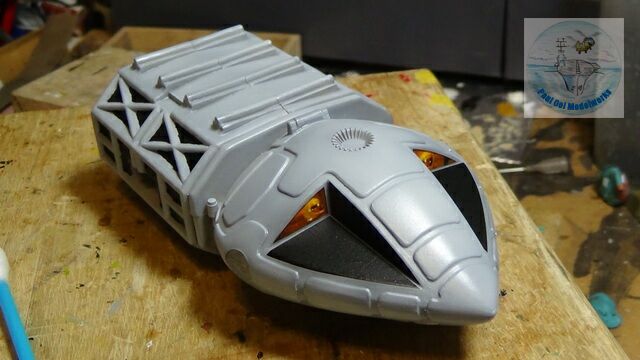
The Eagle Transporter’s unique appearance was characterized by the open truss framework that make up its “fuselage” and the command and engine sections at both ends of that structure. The command section has that distinct cockpit that, depending on who you ask, looked like a tortoise’s head or a walnut. Until the Rebel X-Wing came along, this used to be one of the coolest looking space craft on screen. In reality, the Eagle’s fuselage design would have a terrible vibration problem since there is a long and relatively slender frame with a vibrating engine mass at one end. Also, any angular forces from on the engine section would translate into a huge twisting moment that would turn the craft into a flying pretzel. But then, since when did we allow physics get into the way of a cool-looking space ship?
Gallery


Construction Notes
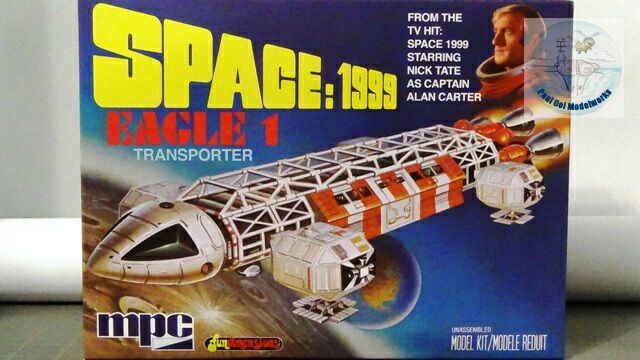
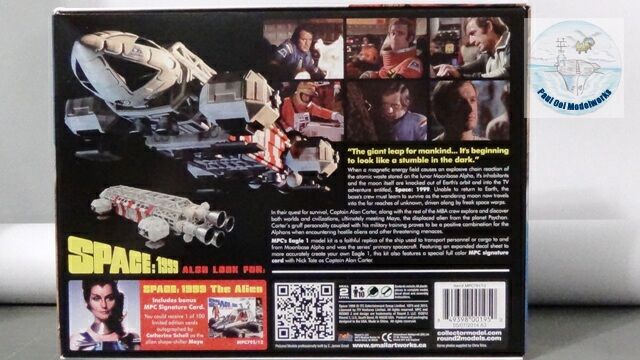
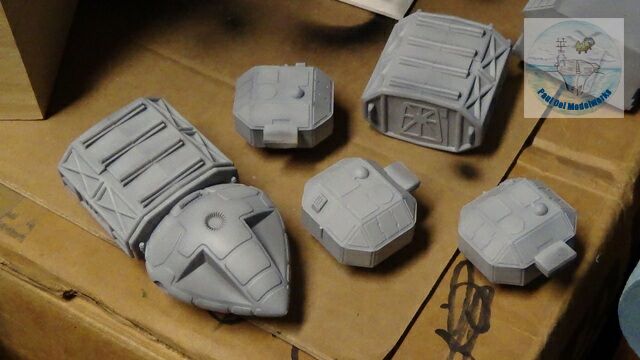
This project is a commission from our local hobby store and was a good break from the real world models that I have lined up for the rest of the year. The last time I saw an Eagle kit was the old Airfix release back in 1976, and this MPC kit looks very similar in the parts (hmmm?). Judging from the relative size of the doors, this could be approximately a 1/72 scale model. The decal sheet is pretty extensive with surface details for the command, engine and cargo sections. Although the parts are in pretty good shape, there were plenty of mold seams that needed cleaning up. The fit of the parts are only so-so and needed some putty and filing.
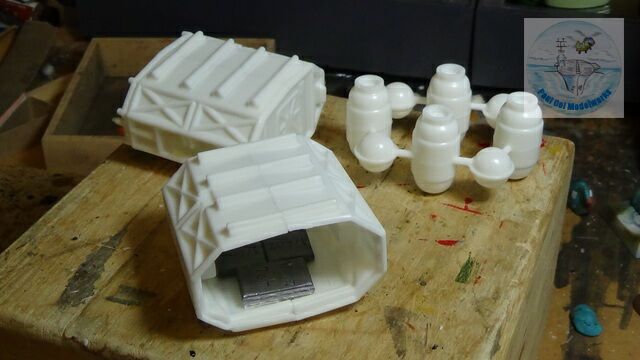
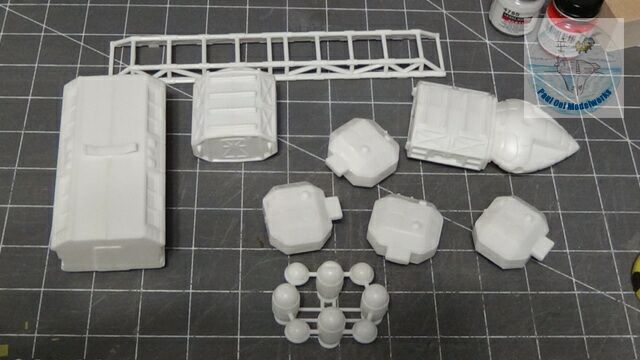
There weren’t many parts for the kit, mostly comprised of halves to make the fuselage sections. The command and engine modules are almost identical but their end sections are different because one side joins to the cockpit while the other, to the engines. To provide the finished model with some heft, I placed 3 grams of ballast into each section. The seams for these sections are pretty large and pronounced, and these had to be filed down in order for the surface detail decals to settle down properly.
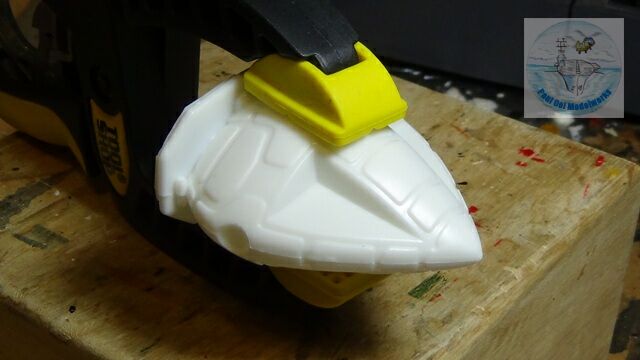
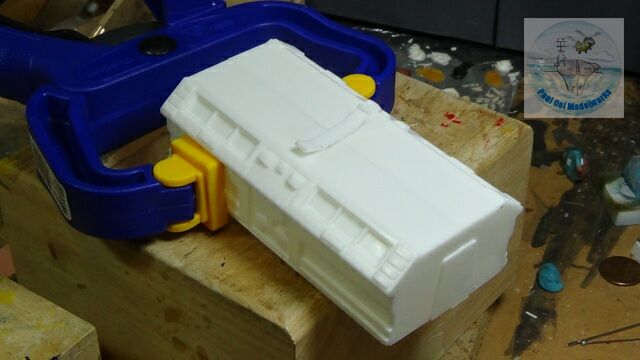
The cockpit halves were slightly warped and had a large open seam. In order to overcome this, I clamped the cockpit shell for half-a-day. Similarly there was a slight mismatch in the way the halves met for the cargo section. Again, clamping was the order of the day. Although I managed to get the halves to meet, the seams were pronounced and needed filing and re-surfacing with Mr. Liquid Putty from Gunze Sangyo.
After a week or so, all the main sections have been assembled and their seams cleaned up.
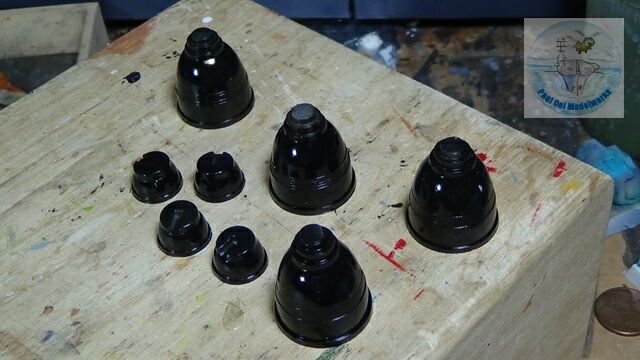
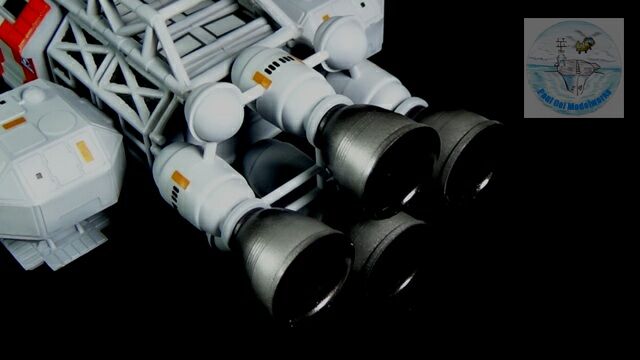
I separated all the rocket exhaust cones and first primed them in Alclad II glossy black primer. Then I applied the first layer of Alclad II Steel lacquer. While it did provide a nice uniformed dark steel look, I need it to be somewhat brighter. The second layer of paint was Testor’s Metalizer Steel paint.
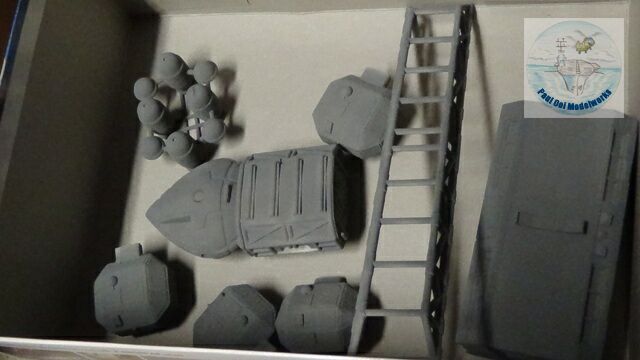
I primed the rest of the fuselage parts with Tamiya Dark Sea Grey. This helps to remove the translucent effect of the white plastic kit parts.This color also provides the darker base shade for the lighter grey that came after this. I used Testor Acrylic’s Light Grey 4765 which is like an off-white instead of the recommended white paint. I think this shade looks more appropriate for the subject matter.
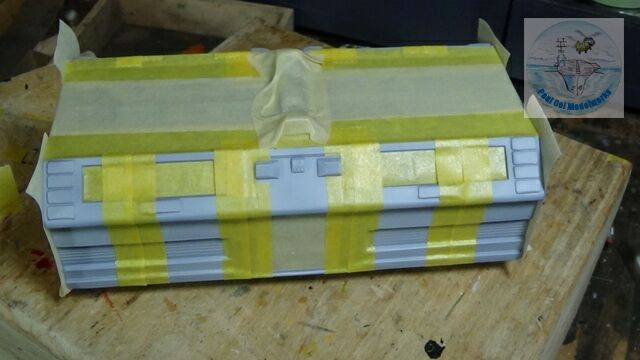

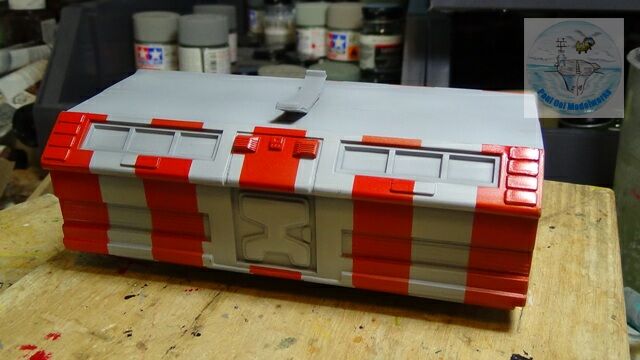
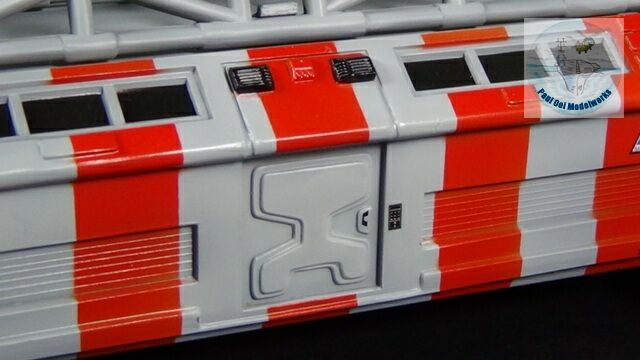
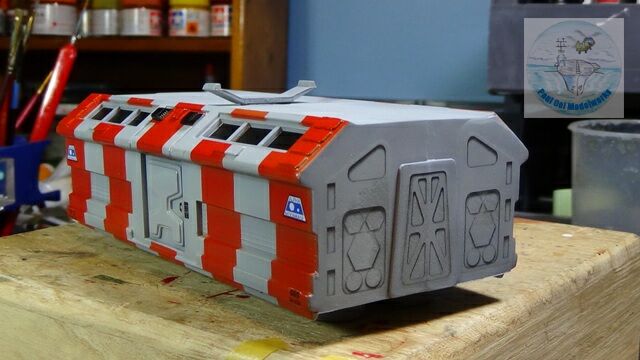
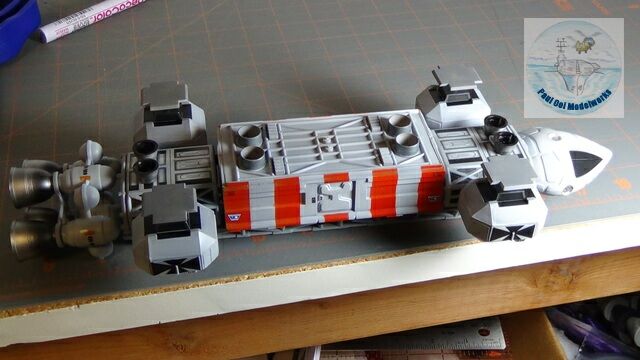
I decided to paint the midship cargo section using the emergency rescue color screen with bright orange red stripes. I felt that this color scheme lent interest to the finished model as compared to the drab light grey ordinary scheme. However, it does involve more work. First I masked off the sections that will remain light grey, using carefully measured masking tape. This is followed by a generous coat of Testor Acrylic Italian Red 4631. Once dried, the masks were removed to reveal the striped pattern.
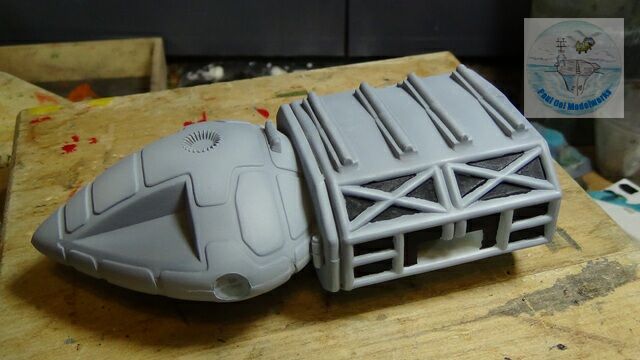
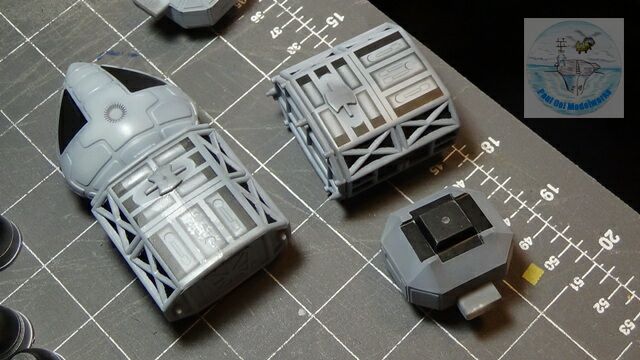
The command and engine module sections have raised relief details to suggest more open truss framework. In order to highlight these, I decided to paint in the black spaces to suggest the frames. This is pain-staking work and each panel had to be carefully painted in with Matt Black.
Once the paintwork for all the sections are completed, all the fuselage sections were coated with Future Polish and left to dry for 2 full days. After the glossy varnish has dried, it was time to apply the decals. There were many pieces of decals in this version of the Eagle 1 and they certainly made a huge impact to the visuals of the model.
For the cockpit windows, they gave a choice between plain black ones versus a pair with the crew pictured at their stations. I am always partial to crew representations (it helps to provide scale to the kit) so I opted for the latter. The decals also provided surface details like the door and other hatches seen at this end of the cargo section.
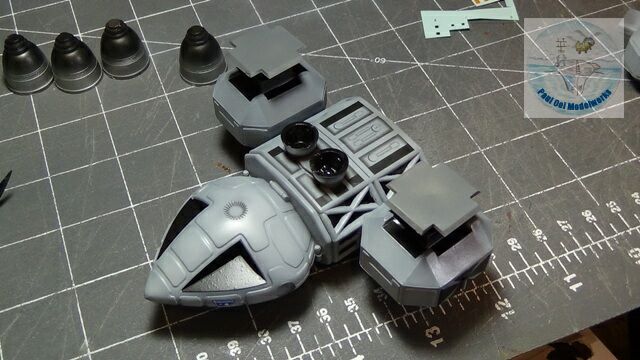
More decals, this time for the underside of the command, engine sections and the four landing pads. these decals must be applied before installing the leg pads and the retro-rockets. Otherwise, I would have been stuck with some pretty interesting decals and a pretty bare Eagle.
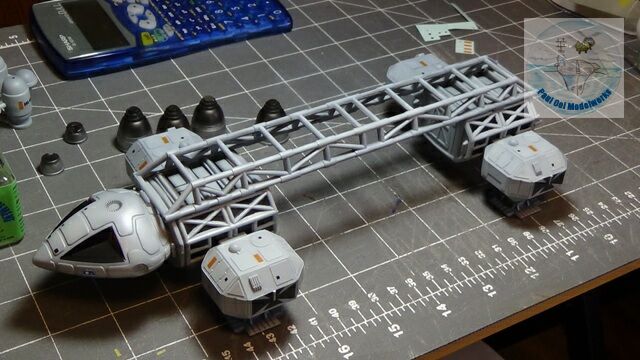
I tried attaching the main lateral frame to join the cockpit/command section to the rear engine section. The attachment points are pretty tenuous and did not provide a good bond among the fuselage sections.
At that point, I decide that it was better to flip the model (carefully) onto its back and bond the parts onto the main lateral framework.This helps to get the contact points pressed onto the edges of the framework. All gluing was done at this time to attach the various sections to the framework and ample time to dry properly.
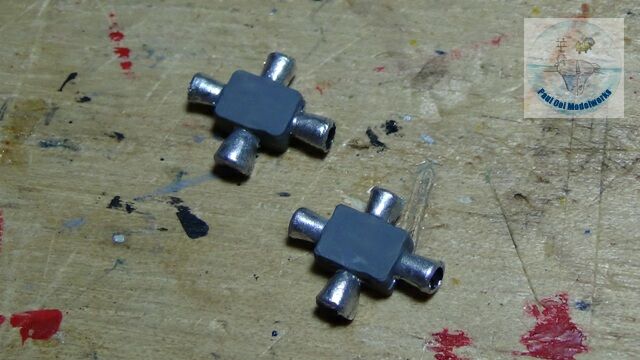
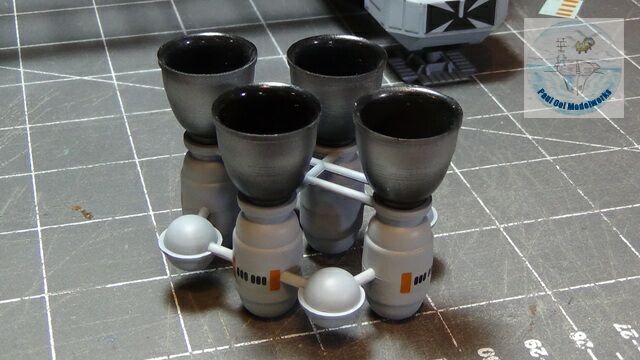
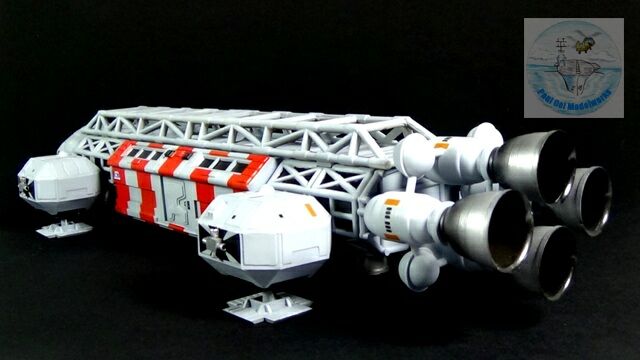
The main engines and the side thrusters were detailed last and attached to the main assembly.
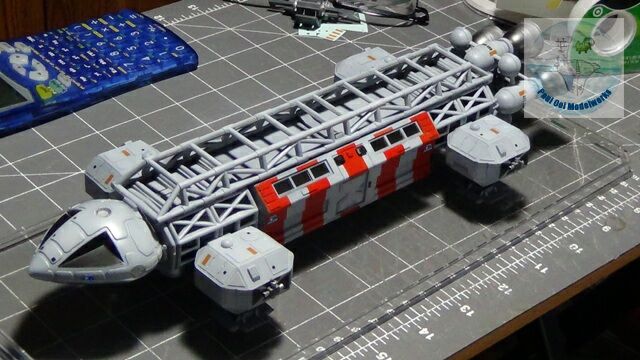
Finally, the Eagle 1 is ready for its mission to Moon Base Alpha!
Nice job. U said u used furniture polish. Can u explain this, what does it do? Ty
Hello Shane, I wrote’Future Polish”, which is a floor polish known among modelers as the best gloss varnish to prepare the surface for decal application. “Future” is a brand name of SC Johnson, and in some markets it is also called “Pledge”. It is water soluble, but once fully cured (48 hours) it will protect the underlying paint work and allow decals, washes, weathering, etc. It dries extremely glossy, but it can be toned down with alcohol and flat varnish.Thanks for your question. Paul
Hi. I love the eagle model. I was wondering if you do builds for private collectors. I would love to have an Eagle with the level of detail you provide. Thank you
Hello John,
Yes I do build for private collectors. I will contact you directly soon.
Paul
Hi Paul , I’m currently building this model , and i got the pledge spray , but when i sprayed the model it went all foamy , is this supposed to happen.
Cheers
Karl
Sorry I took so long to reply. No it should not be foamy. It should be the Pledge liquid, not the spray form which has got something else mixed into it. To use Pledge, mix it with some rubbing alcohol or Denatured Alcohol in a 4:1 ratio. It should not be foamy at all.
Amazing build. I’m very impressed. I have the larger Eagles but still like the 12 inch kit. I have build a few over the years and recently cut out and detailed the cages, which does add something to the kit. But your build looks great. Nice detail and paint work.
Hello Jim,
Glad that you liked the build. Painting can do wonders even to an old kit like this.
Paul
Awesome!