Although the SPAD (Societe Pour L’Avition et les Derives) XIII only emerged in April 1917, it was one of the most successful fighter aircraft designs of World War 1. It became iconic of the Great War which was declared almost exact 100 years ago, hence my title of the “Guns of August”. The SPAD XIII was a fast and powerful dogfighter, equipped with the 220 hp Hispano Suiza engine, a marked improvement over the earlier SPAD VII’s 150 hp. It also struck hard with the twin Vickers machine guns each having 400 rounds.
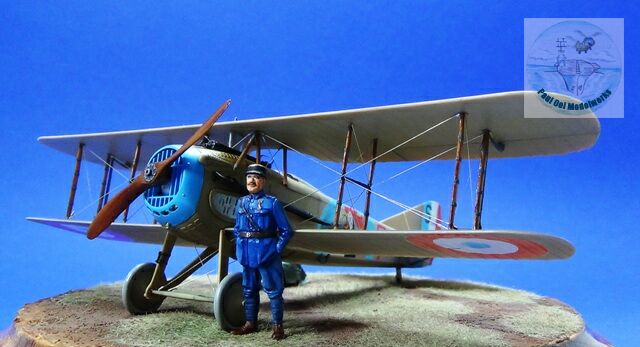
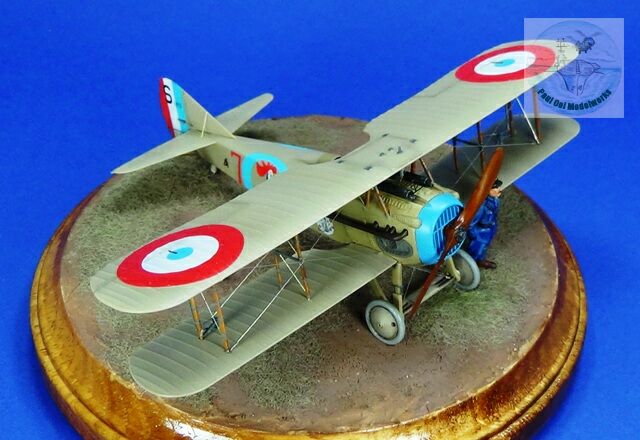
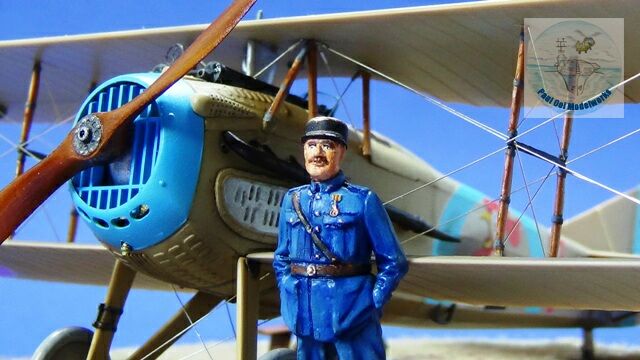
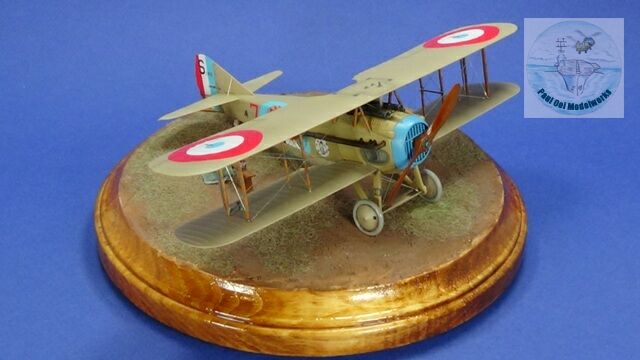
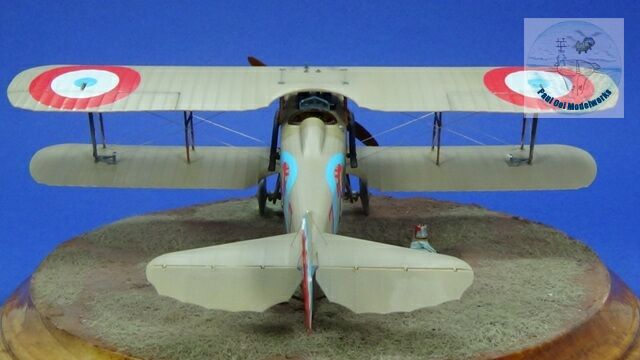
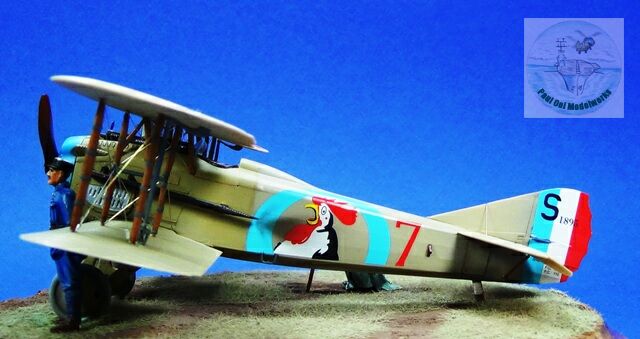
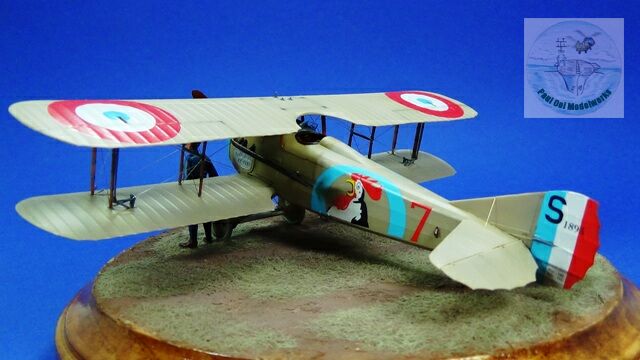
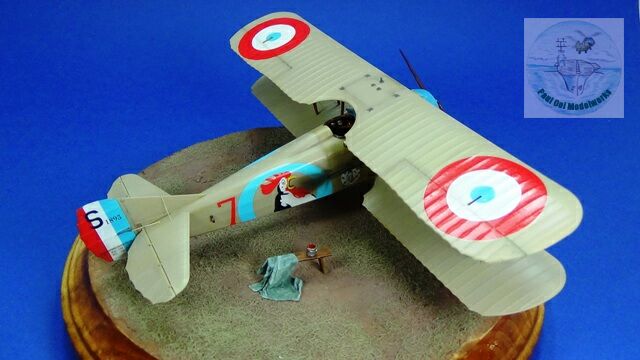
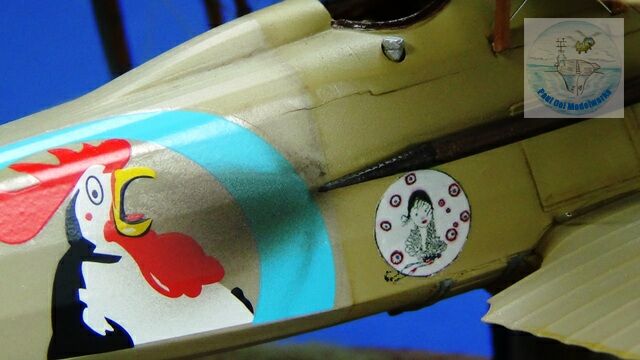
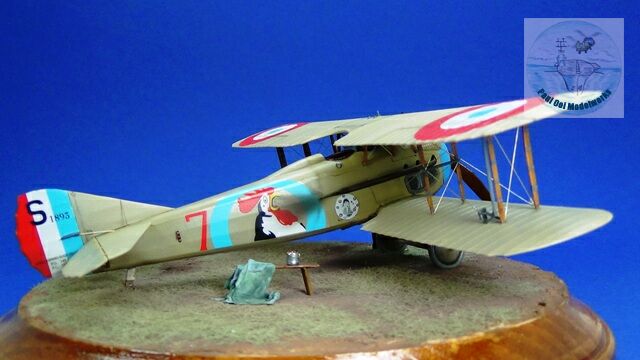
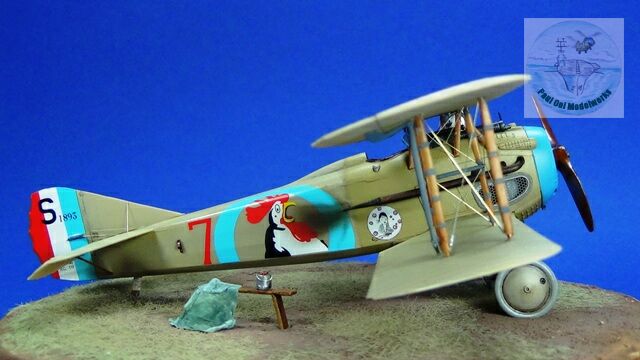
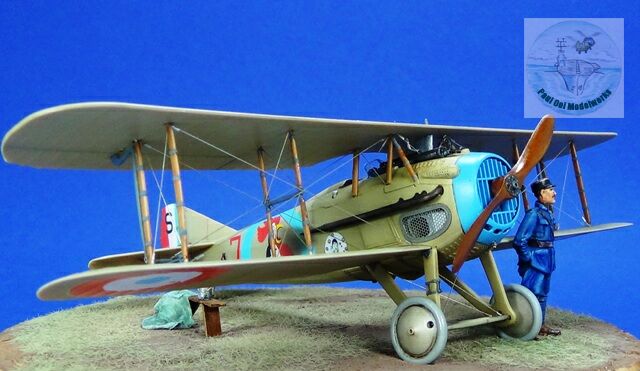
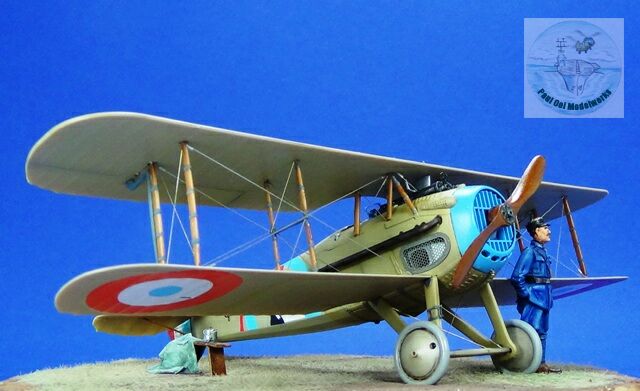
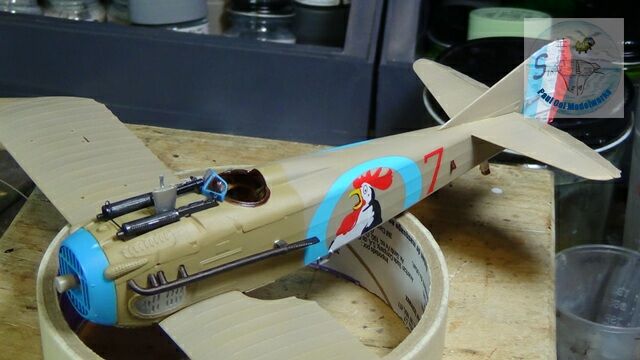
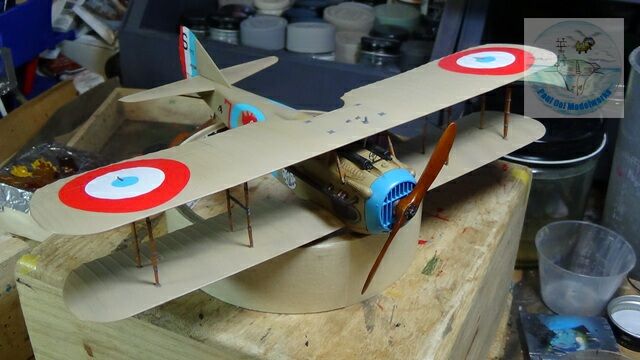
The model portrayed here is the early production version of the SPAD XIII with the markings of the aircraft used by Adjudant Jacques Raphael Roques from Escadrille No. 48 in the spring of 1918. The early production version had rounded wing tips, and in this case, the color scheme was a plain sail-colored doped linen. I was attracted by the muted colors of this early version, combined with the light blue of the cowling and the cockerel insignia of the squadron.
Gallery

Construction Notes
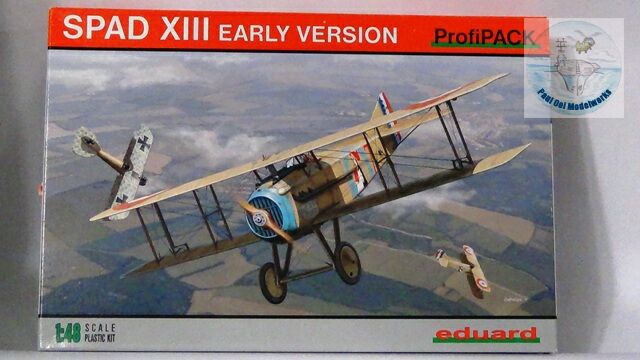
The model kit that I chose for this commemorative project was Eduard’s 1/48 scale Early production SPAD XIII that came with the decal sheet for Jacques Roques, but did not have the personal badge that was applied somewhere between the fall of 1917 and the spring of 1918. The kit was wonderfully detailed, complete with a colored photoetch fret. Other choices (all very good) of markings were for French ace Georges Guynemer and Italian ace Francesco Baracca.
Instead of my usual narrative on the build process of the aircraft, I would like to point out some key and interesting features of this build for those interested to build this kit or one of the other versions provided by Eduard.
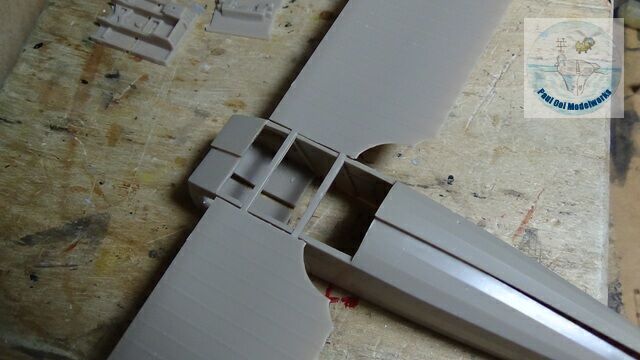
The under wing attachment to the fuselage is very fragile, where the large sections of the port and starboard wings are only bridged by two parallel struts meant to dovetail into the floor of the cockpit. In my kit, one of these struts already broke while still attached to the sprue frame. I carefully repaired the break with super glue. This section is key to the wing alignment to the fuselage and its attachment to the cockpit floor, so be very, very careful with this part.
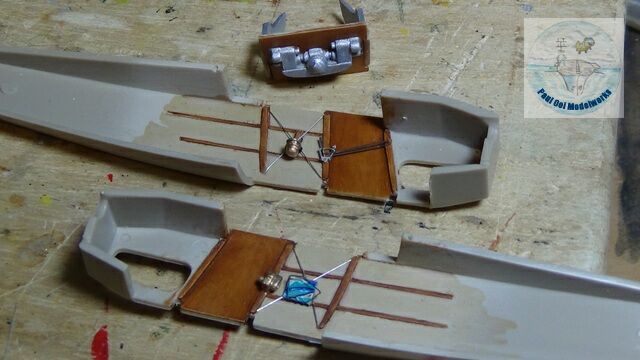
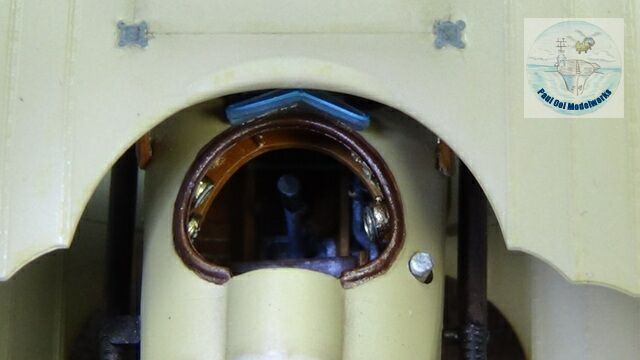
The interior walls of the cockpit have important and visible details that need careful painting, in this case to simulate wooden panels and frames over the doped fabric. I used the wooden panel painting technique described in my other post on the Austro-Hungarian OEFFAG Albatros. There are wire braces in the interior of the aircraft that will also be visible once the cockpit is fitted together, so I added these when detailing the walls.
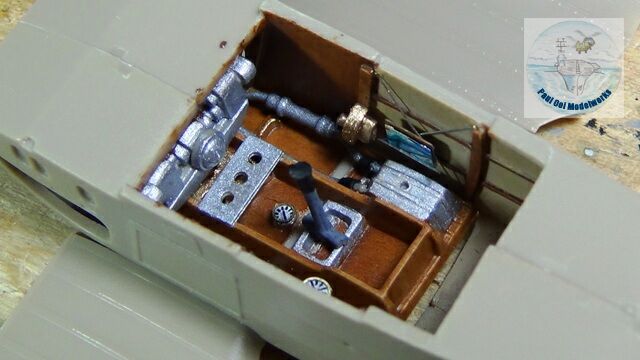
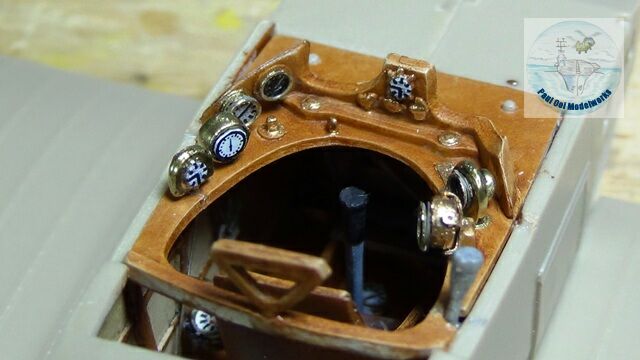
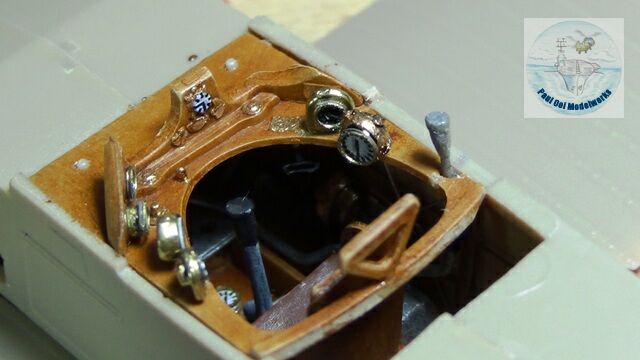

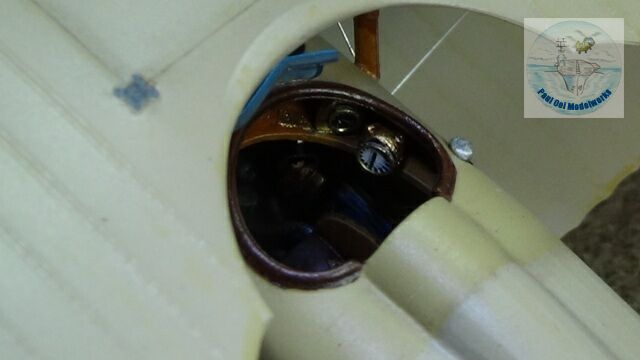
The cockpit details of the SPAD XIII certainly demand a lot of attention from the builder, as it comes in three separate vertical layers. First, there are details of the cockpit flooring, replete with the aluminum and bronze tubing that seen to intertwine. The pilot’s seat is wedged into the cramp space between the two walls and the dials that protrude out of the cockpit walls were vulnerable to the alignment of whole assembly. I had to dry fit several times to make it work. The instruments (they look like multiple alarm clocks arranged on a wooden table!) are beautiful but very fiddly, so I had to take my time to insert each detail in one at a time and make slow progress.Finally, the seat belt assembly was carefully inserted onto the cockpit seat and gingerly attached.
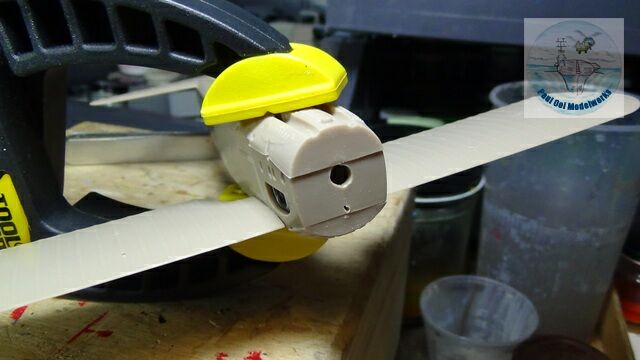
Like the interior cockpit details, the fuselage itself is made from three separate strata, and these do not line up very well as can be seen from this picture of the assembly when clamped together. The top stratum overhangs the middle stratum by about 1 mm on each side as the later is slightly narrower. After the clamping was completed, I had to spend a bit of time filing down the overhang, and re-scribe some of the panel details.
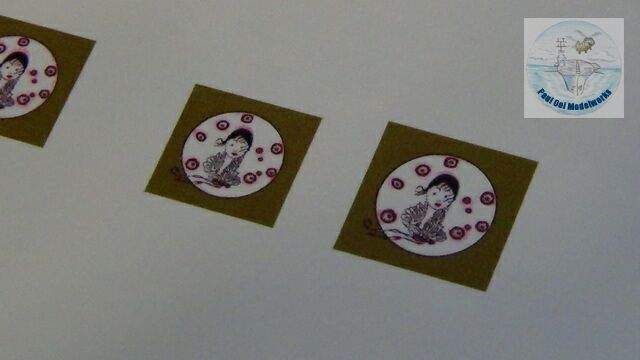
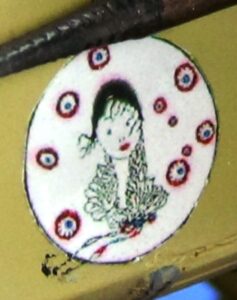
Earlier on, I had mentioned that the beautiful personal badge (Jolie Demoiselle) of Roques did not come with the kit decal sheet. I created 1/48 scale decals of this Art Deco motif for the starboard side fuselage. The decal worked well and I was very pleased with the results.
For the the overall paint scheme of the aircraft, here was what I used:
Overall wing surface, fuselage, rear stabilizers: Undercoat of Tamiya Buff XF57 and Flat White XF10 (1:1); Oil wash of Yellow Ochre, Burnt Umber and Deep Cadmium Yellow in 2:2:1 ratio; thinned down 70% with Turpenoid
Front fuselage around cockpit and engine compartment: Undercoat of Tamiya Dark Yellow XF60 and Buff XF57 (1:1); Oil wash of Burnt Umber and Ivory Black 2:1, thinned down 70% with Turpenoid.
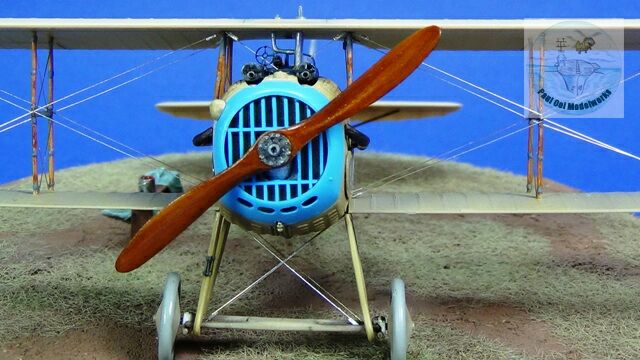
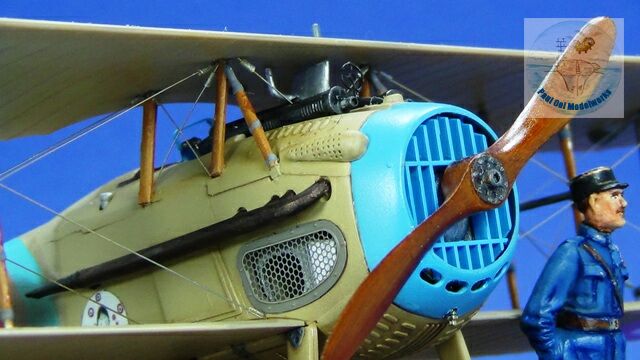
Cowling: Undercoat of Tamiya Sky Blue X14 and Flat White XF10 (3:1); Oil wash of Burnt Umber and Ivory Black 2:1, thinned down 70% with Turpenoid.
Exhaust: Testors Bunt Iron metalizer

One last detail. The upper wing attachment: I started with the in-board struts first, making sure that they were firmly attached to the fuselage and lower wing, and also checking their tips for proper spacing and height alignment. Once I managed to attach the upper wing on to the central struts (check for alignment repeatedly as the glue dries, then I slowly wedge the outboard struts, one at a time into each set of holes until all have been completed in place. There is no magic or shortcut to this critical step in biplane assembly, just meticulous alignment checks and careful assembly.
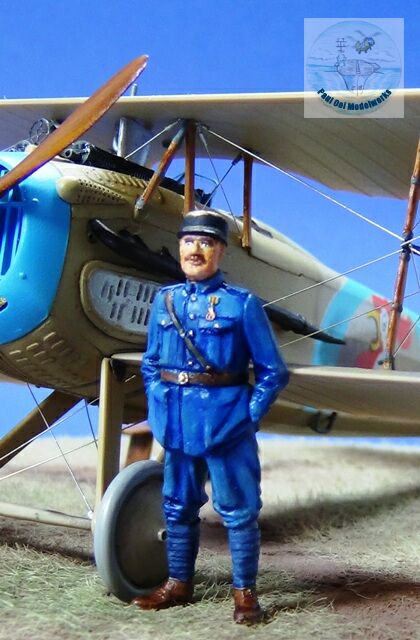
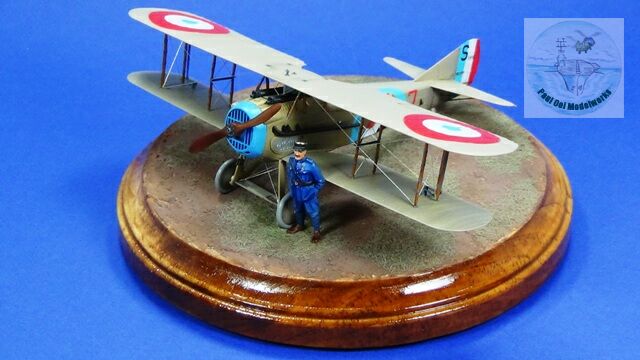
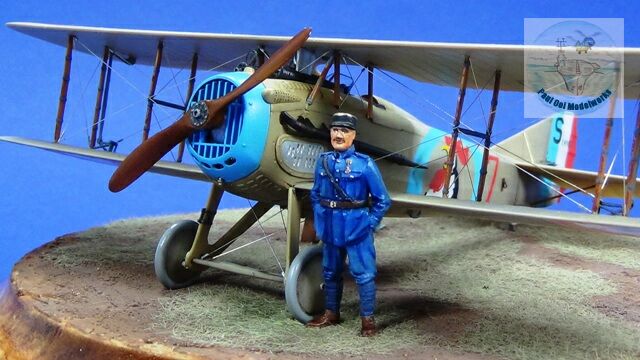
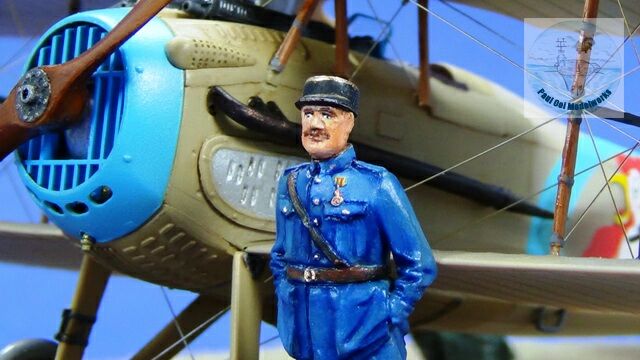
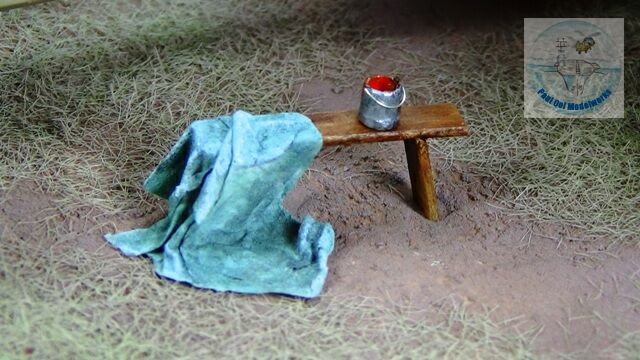
And voila – this French beauty reproduced in 1/48th scale. I portray a French flight officer painted in acrylic and oil paints complete with a Belgian War Cross (awarded in 1917). The figure is from Eduard’s Aeronautique Militaire figure kit. In life, Adj. Roques was quite a bit lankier than this figure but since 1/48 WW1 airfield figures are rare, I made do with this one. I also added a scratch-built wooden bench, a can of red paint and tarpaulin sheet for the paint job for accent. The vignette portrays the aircraft sometime in March 1918, near Villeneuve les-Vertus.
Fantastic resource Paul, just starting to build WWI aircraft although in 1/72 scale. Your photos help no end when it comes to knowing how the cockpit should look when all the PE parts are added.
Glad it is useful for you and good luck on the build. 1/72 WW1 is really tight space!
Paul
Magnifique. Perhaps the roundel blue is a touch too vivid and the French liked to varnish their props a dark mahogany red (not always) but otherwise a fine model of an almost forgotten war nowadays.
Thanks for your remarks. Next time I will remember mahogany for the props.
Paul