* This post is a commemoration of the 13th Anniversary of 911, and to honor all our servicemen and women who have battled terrorism all over the world *

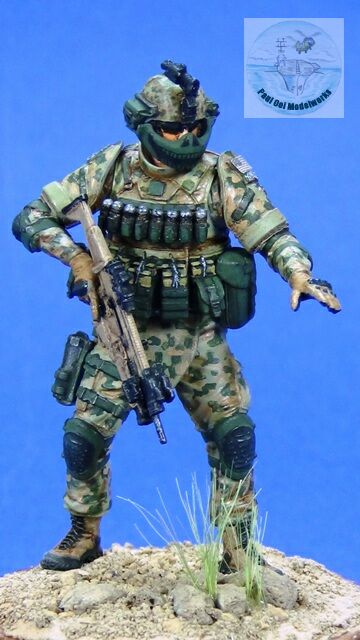
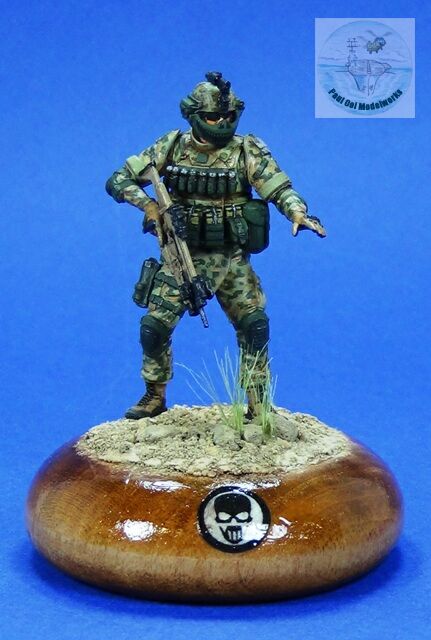
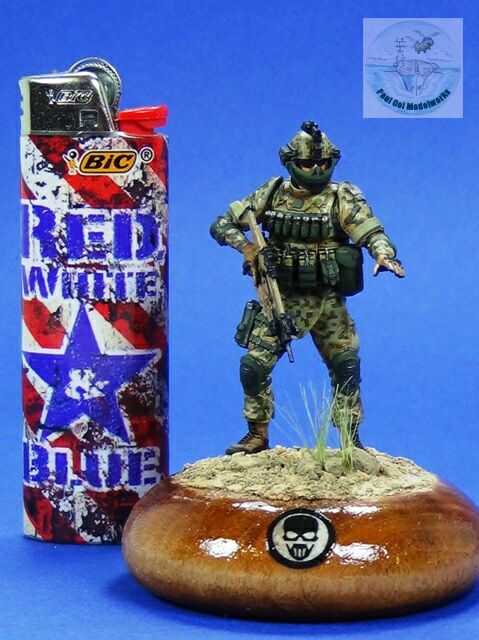
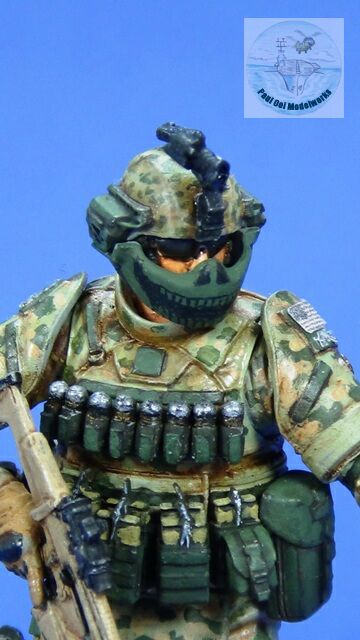
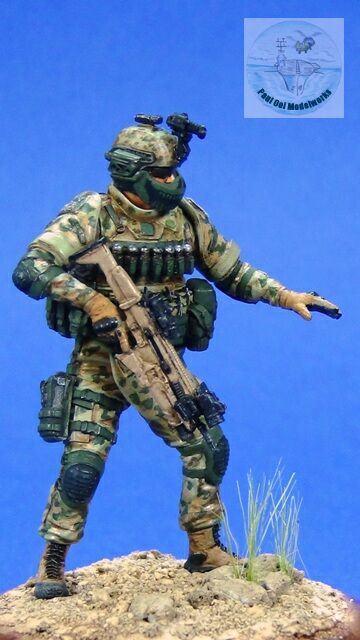
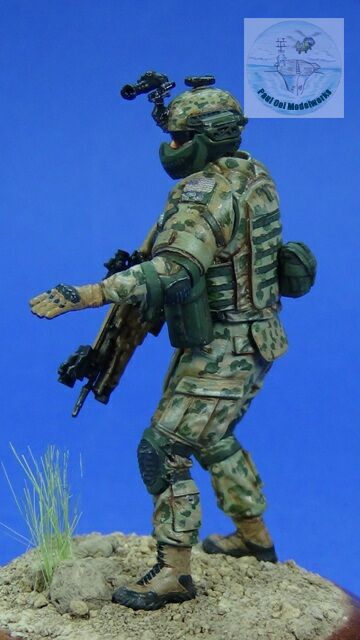
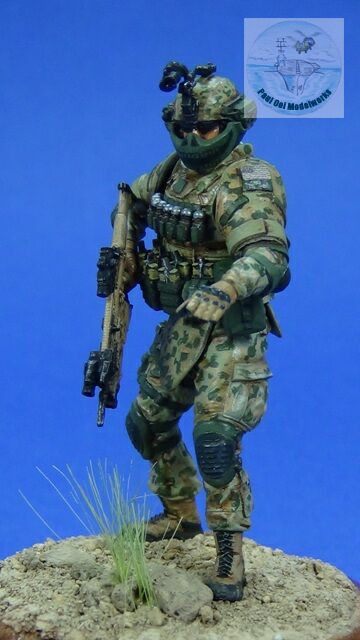
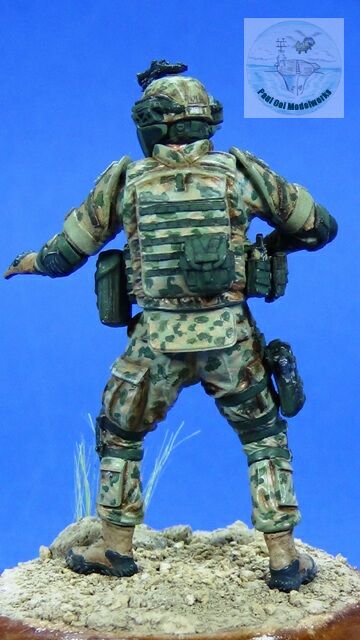
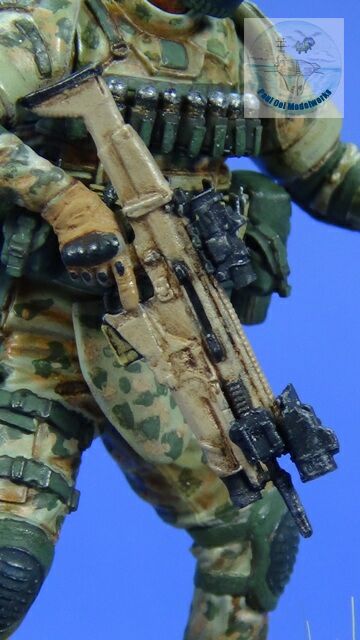
The modern US Army Ranger wears and carries equipment quite different even when compared to a couple of decades ago. In response to the danger and complexity of the modern battlefield, body armor has made a huge comeback. Helmets are now wired with night vision goggles, helmet lights, communication headsets, and now even facial armor that seem to hark back to ancient samurai armor. The venerable ALICE webbing system that was the mainstay during the first Gulf War gave way to the RLCS system , and now the uniform carries the Multi-Cam camouflage pattern. With all that body armor around, the modern soldier actually bears a lot of resemblance to his armored forbears with the shoulder plates, raised collar ring, and side skirts to protect the crotch. However, his infantry weapons have killing power unimaginable even to the Vietnam War era soldier, since the FN SCAR rifle has deadly accuracy combined with the fire power of the grenade launcher.
Gallery
Construction notes
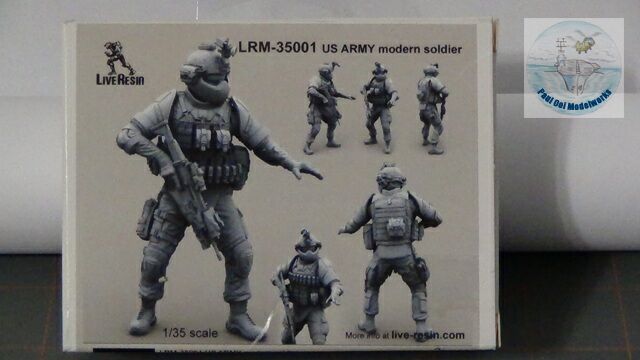

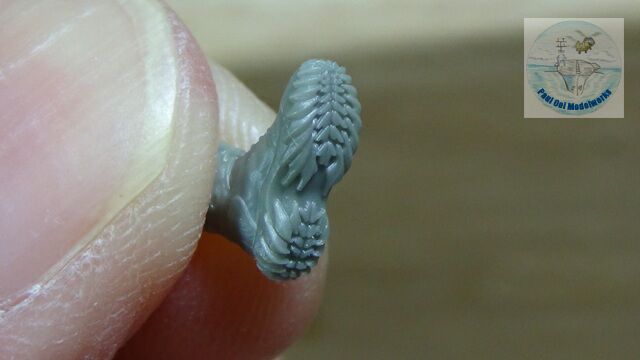
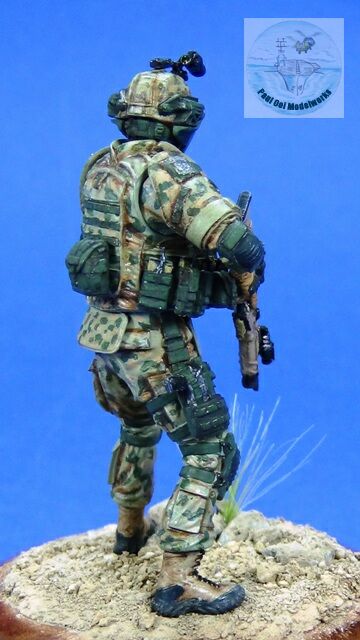
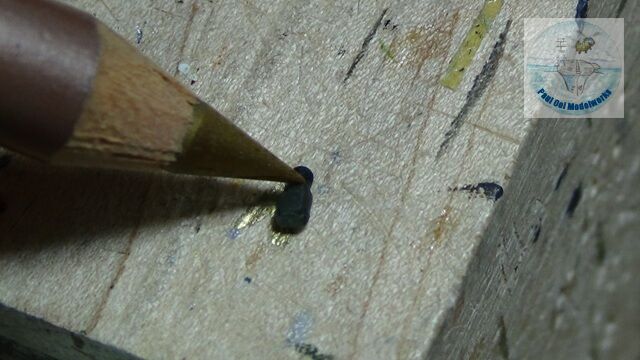
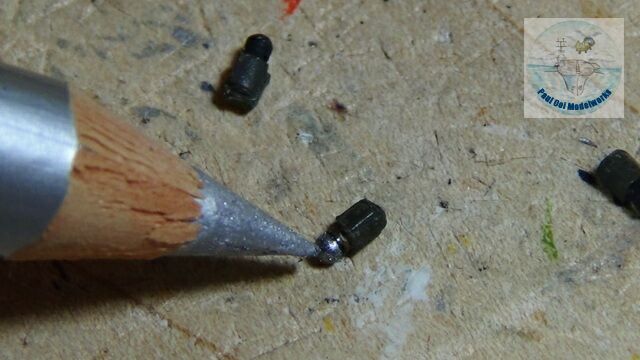
This resin kit from Live Resin is incredibly detailed with many parts to build a single 1/35 scale figure. Most of the parts are for the gear carried in the webbing. The finished figure stands at about 54 mm or 2 inches, so that’s a lot of detail crammed into a very small space. All in all it took me about 10 days to finish this little gem. One thing to be careful about, the small resin parts are delicate and can break off easily when handled. In the last panel, one can see the incredible molded detail, in this case the soles of the combat boot.
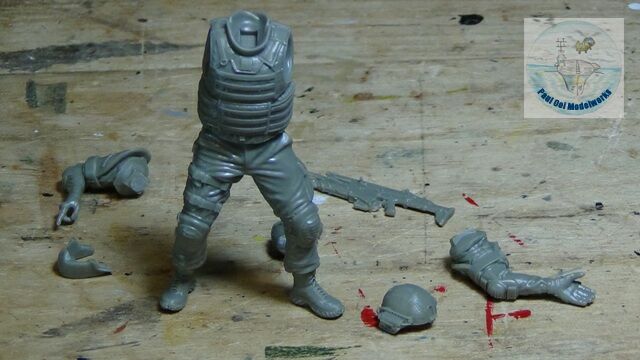
After cleaning the resin parts with soap and water (an important step for resin parts, to remove the extraction compound residue that could affect paint work), I put the torso together. While the fit of the kit is very good, I still used small amount of Gunze Sangyo’s Mr. Dissolved Putty to fill the small seams. After that, I sprayed Armory Grey Primer made by Alliance Game Distributors. This primer is excellent for figures, does not smother any of the fine detail, and dries quickly without a powdery texture.
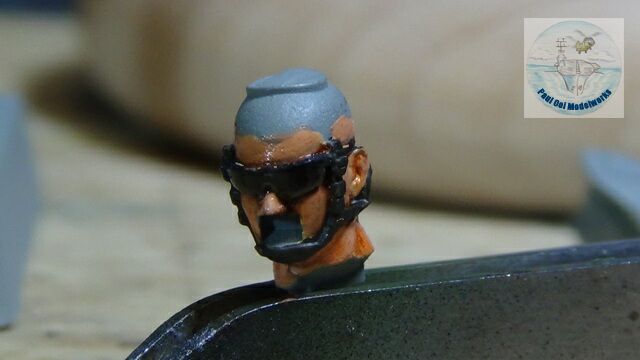
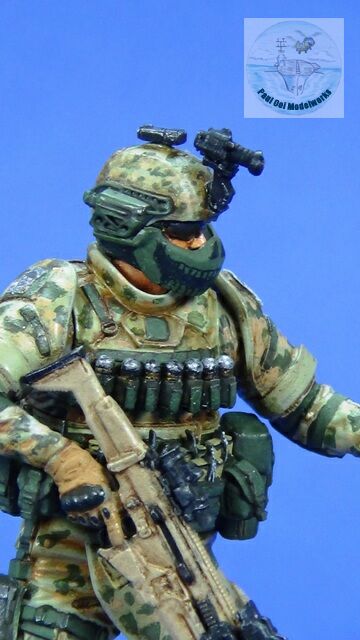
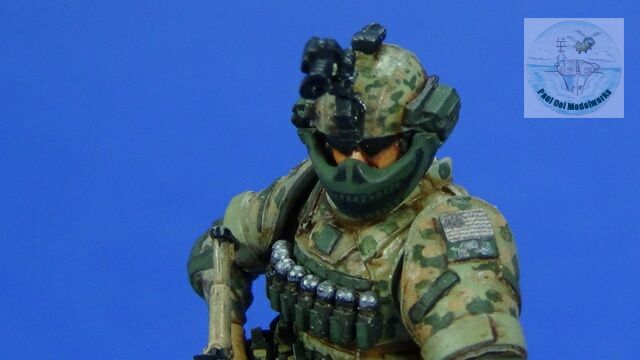
In this sequence, I start by painting the bare head first. The flesh portion is undercoated with Tamiya Flesh XF15. Then I shade the edges with Burnt Umber oil paint, and then apply Daler Rowney’s excellent Flesh Tint oil paint, after which I blend the two together for a soft interface from light area to dark shade. I also add a little Titanium White to the highlights, like the nose bridge, and blend that into the Flesh Tint. A little Burnt Sienna is used for the ears. For the goggle, I used Tamiya Smoke X19, building it up over several layers to give a uniform gloss effect.
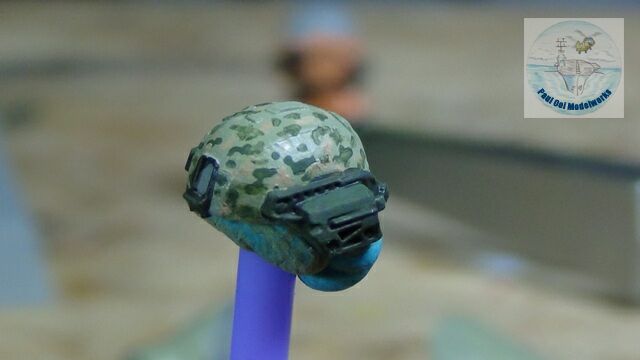
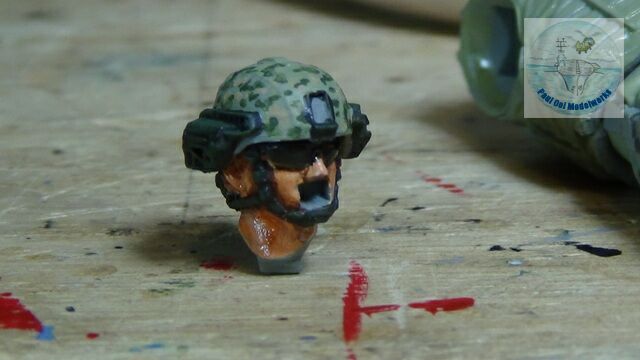
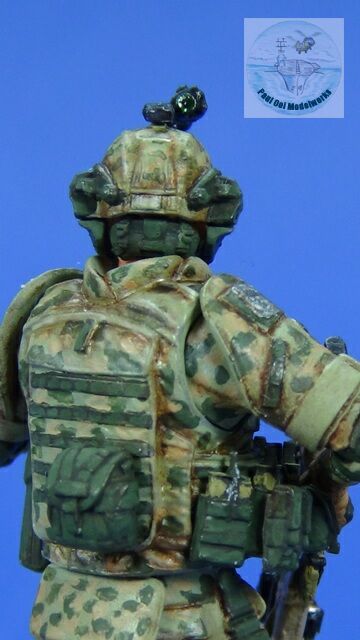
The helmet (and subsequently the torso) is covered in Multi-Cam camouflage pattern. I start with a uniform coat of Tamiya IJN Grey Green XF76, then patches of NATO Green XF67, followed by Wooden Deck Tan XF78. The side helmet lights are undercoated first with Tamiya Dark Green XF-61 then, highlighted with NATO Green.
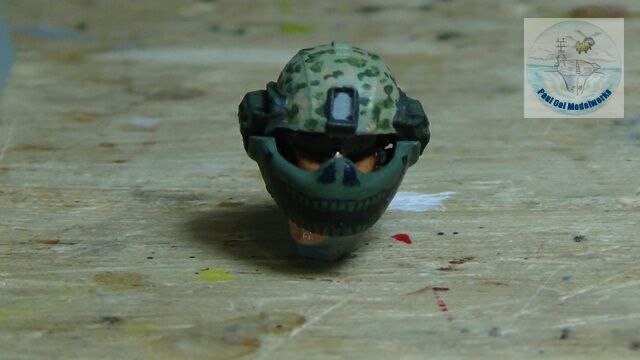
The face armor is painted in NATO green, and then the skull pattern was drawn free-hand (based on an actual photograph) using a black Prismacolor pencil PC935.
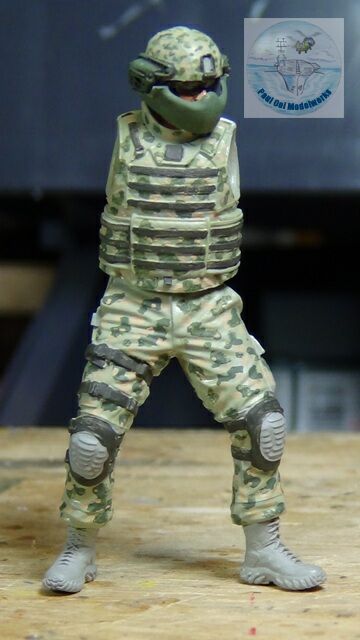
Once the basic camouflage is painted over the whole torso, I attach the head to the body. I leave the arms off so that I can have good access to the details around the front and sides. I also undercoat all attachment straps in the webbing with Dark Green XF61.

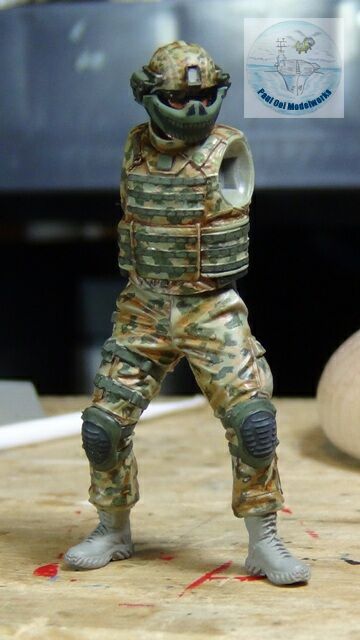
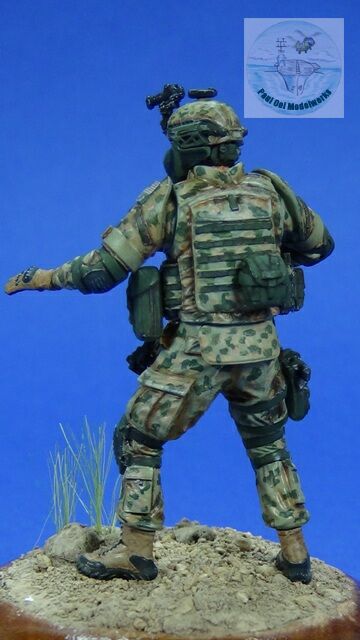
After applying the basic camouflage pattern, I add the final shading using Burnt Umber oil paint, applying to the deep recesses , and then blending over the main surface, I remove the excess with a fine tipped cotton bud. The burn umber tint gives the uniform the final shade of the Multi-Cam pattern. I also paint the webbing straps with NATO green highlights.If I were to do this again, I would use a finer brush with Vallejo colors for the basic camouflage instead for a finer finish.
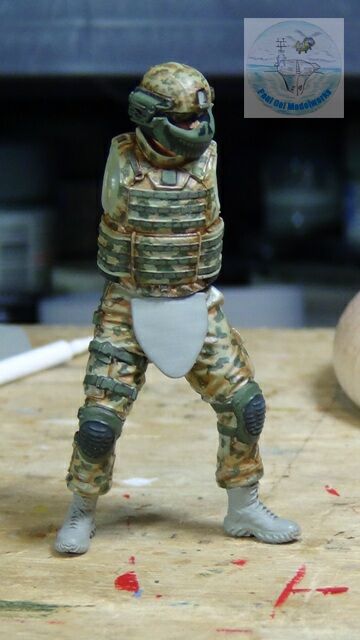
After finishing the basic torso, I attach the side skirt armor. This one looks like a diaper when unpainted :).
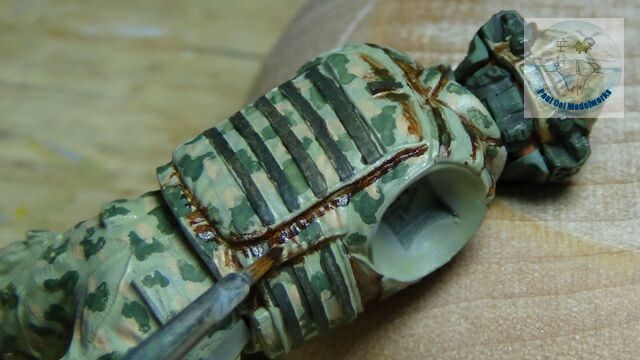
When painting the gear to be attached around the torso, They were generally undercoated with Dark Green XF61, followed by NATO Green highlights. One special exception was the grenade round, which I lined first at the base with Gold Prismacolor pencil PC950, followed by the rest of the round using Silver Prismacolor PC949.
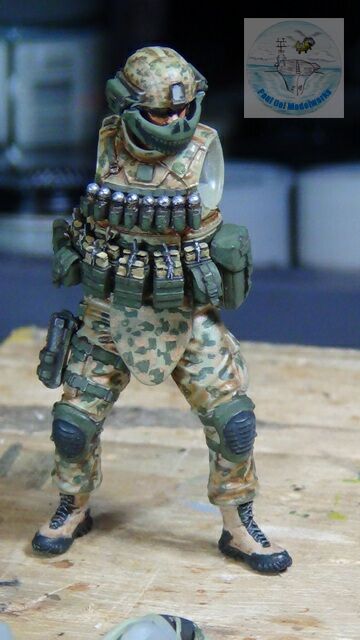
The magazine pouches, sidearm (Beretta M9) in holster, grenade rounds, and other gear are finally attached to the torso.
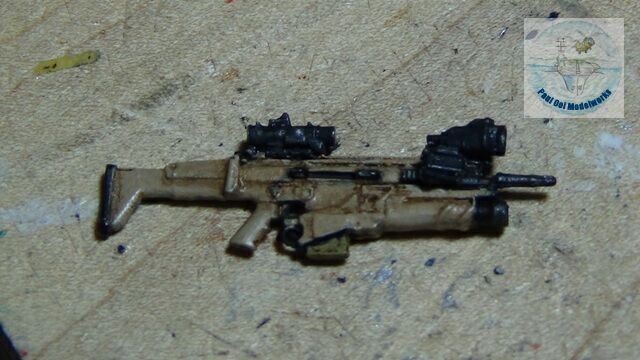
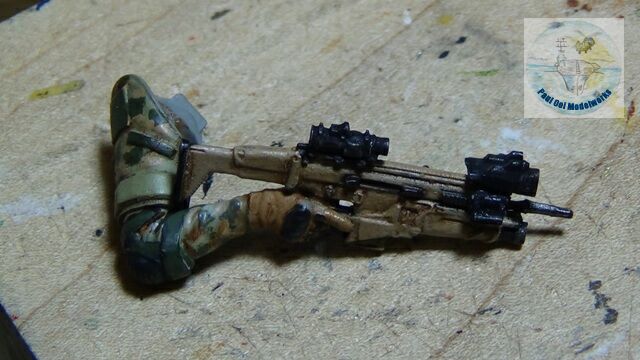
The SCAR rifle was first undercoated in Tamiya XF1 Flat Black. This give the color for the black details and also gives the correct darker tone for the final finish after it has been over-painted in Buff XF57. Without the black undercoat, the rifle will be too stark and bright against the uniform. Then I painted gun metal on the barrel, a few attachment racks and the gun sights. Scopes are painted in Flat Black, and then highlighted with Prismacolor silver. I apply an oil pin wash of 1:1 Black & Burn Umber, removing the excess with a fine-tipped cotton bud. Once dry, the rifle is squeezed into the right arm assembly.
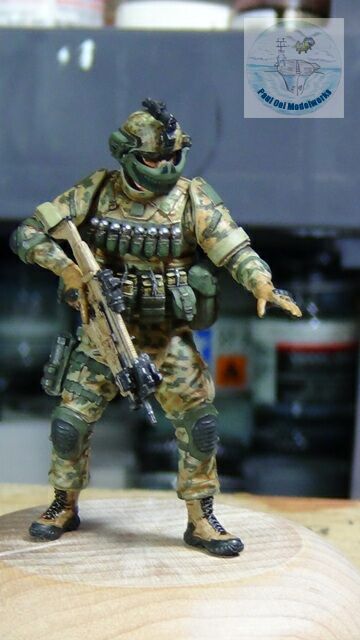
Finally, this US Ranger is “armed” in more ways than one.
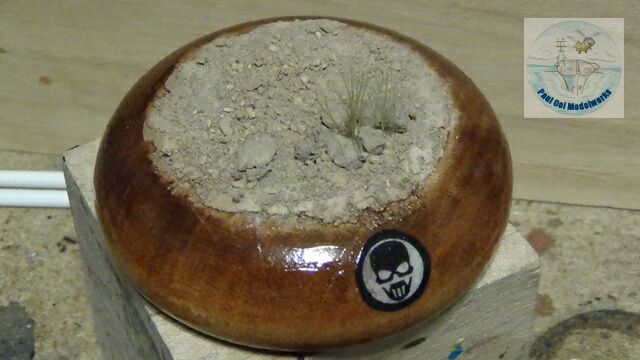
A base with a rocky desert landscape and some dry grass completed the project. The logo applique used here is for the Recon Ghosts.
Leave a Reply