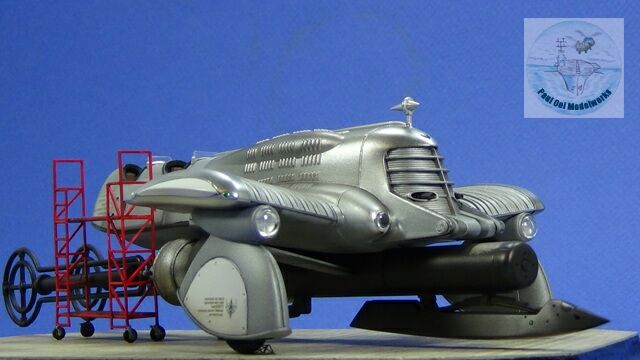
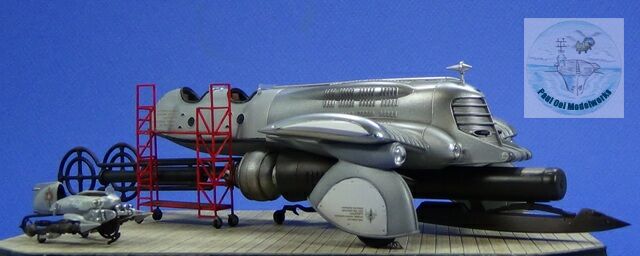
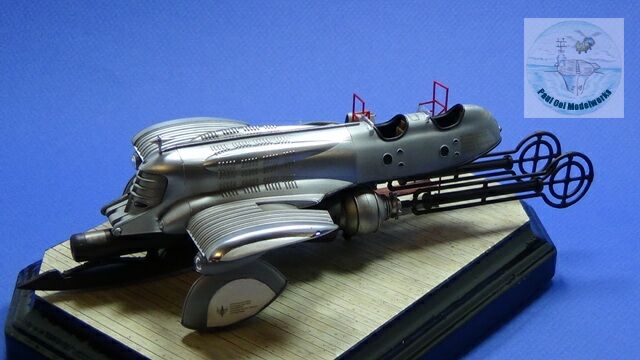
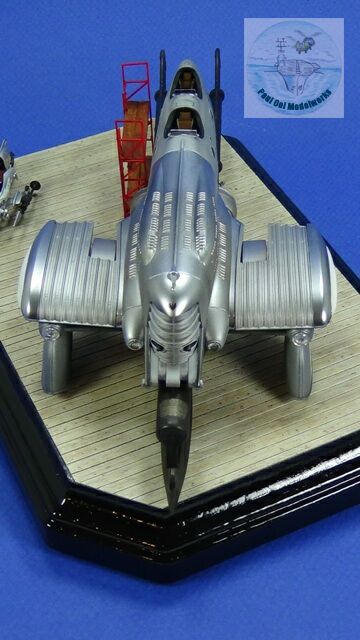
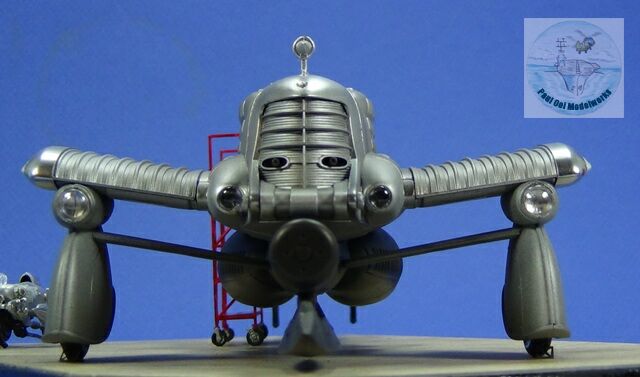
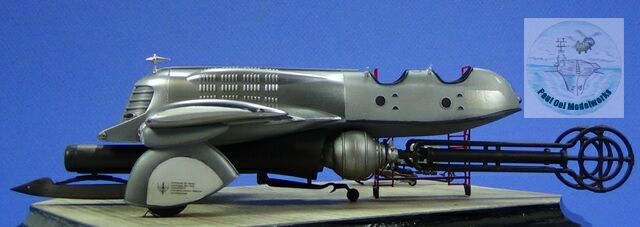
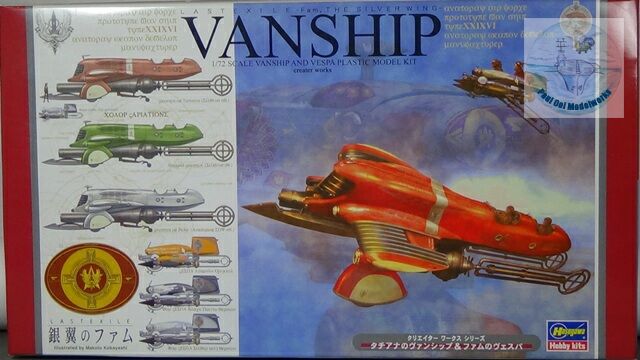
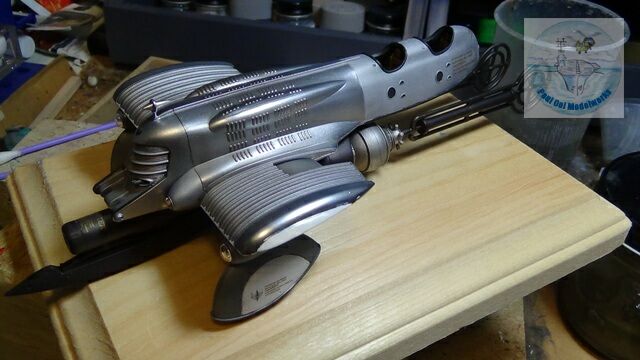
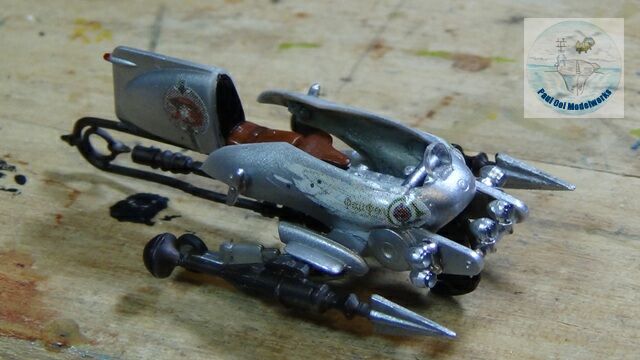
The Japanese Anime series “Last Exile” featured many flying craft with whimsical combinations of 1930’s automobile and industrial shapes. Some engine parts even look a little bit like steam era tubings and boilers. I was hoping that someone would make at least a few into model kits and finally Hasegawa obliged with this 1/72 scale rendition of the military Vanship, a two-seater fighter used by many of the main characters.
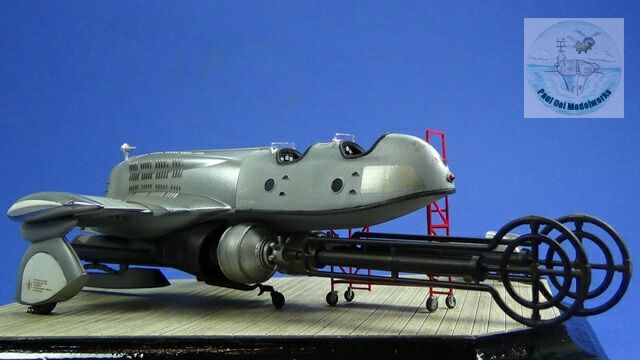
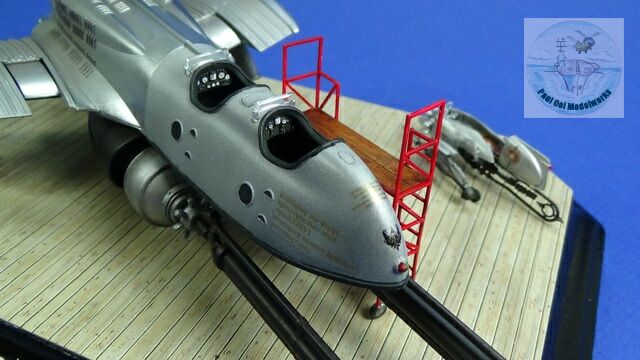
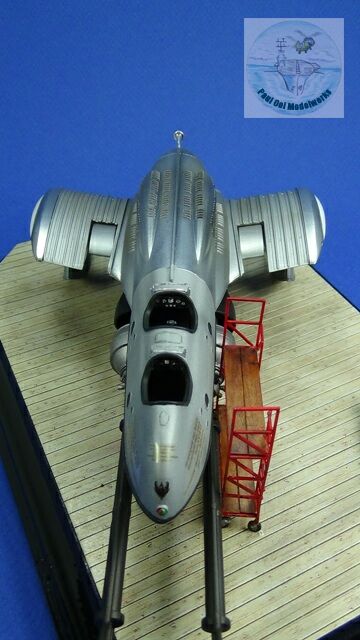
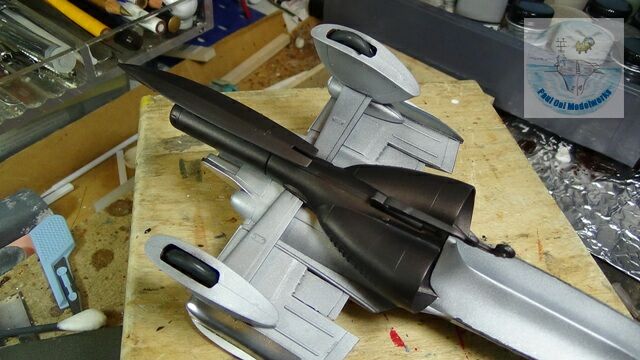
Since all of this is fantasy, I decided to portray this Vanship used by the Anatoray Air Force in various shades of aluminum finish. Apart from the wooden interior and dark grey instrument panel, the entire craft (and its companion little Vespa) is finished in all sorts of metallic paints. This is truly one project that I would call “Heavy Metal”!
Gallery


Construction Notes
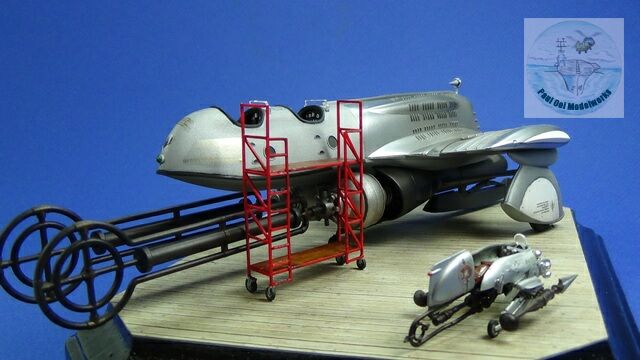
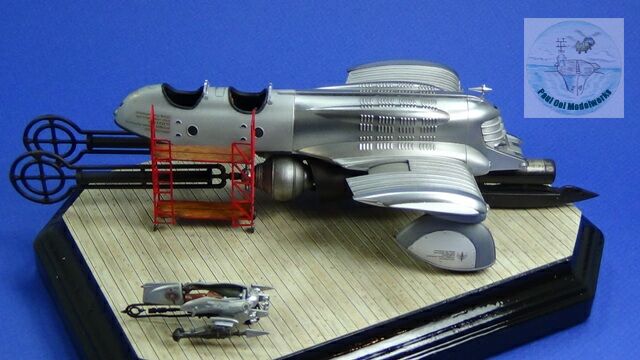
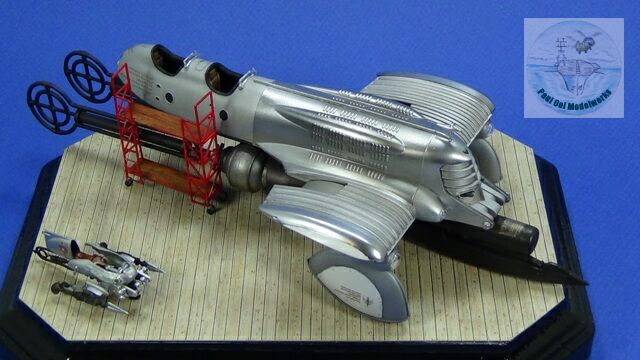
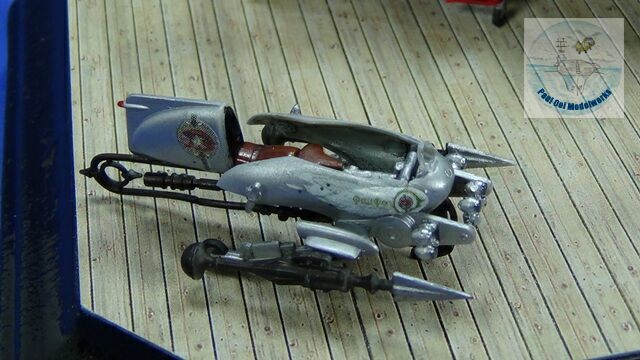
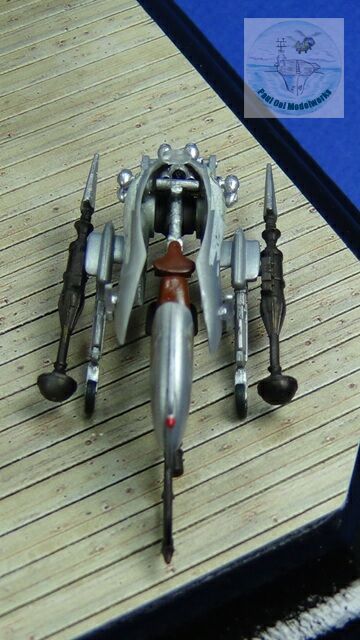
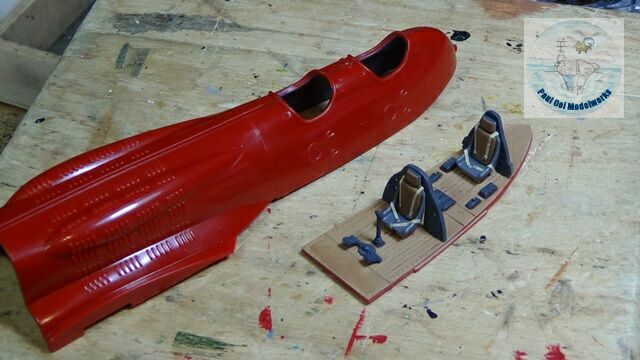
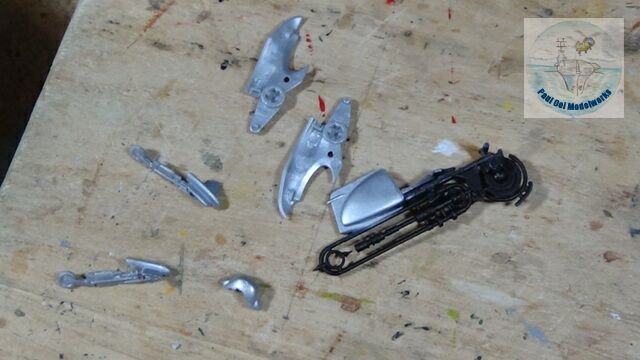
As I had mentioned earlier, this Vanship Last Exile kit was issued by Hasegawa and it is still available at my Paul Ooi Model Shoppe. The vanship is accompanied by the little scooter-like vehicle called Fam’s Vespa. The kit provides pilot figures for both crafts but I decided to omit them, choosing to portray them sitting in some maintenance bay instead.
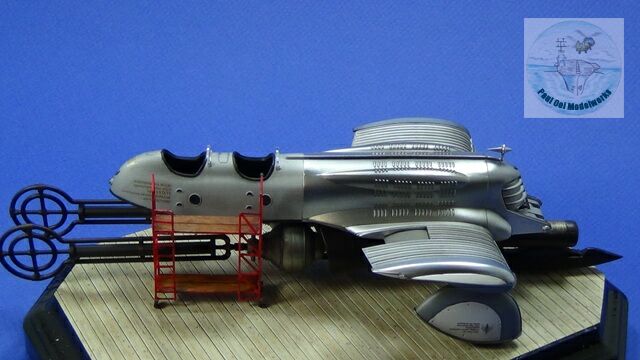
I also chose to cover the entire craft in metallic paint instead of the red used for Tatiana’s vanship. The main fuselage came molded in bright red, most of the engine parts in dark grey and the Vespa parts were in light grey. The kit also provided large clear display stands to show the crafts airborne, but as I had mentioned, i was going to keep these ships firmly on the ground, or at least in a hangar in the the sky (as the story goes).
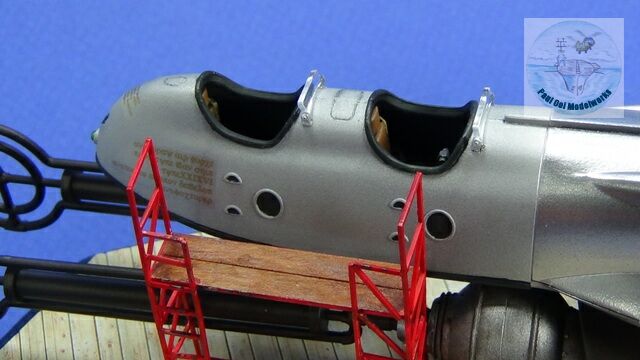
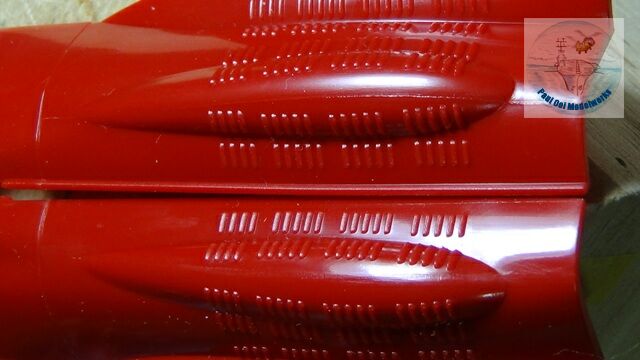
For a start I had to do some mold lines cleaning, which was a bit surprising for a Hasegawa kit. In general, the kit was very well molded but there were some seam lines that were “out-of-place, in my humble opinion. The most prominent is show below, where the two nasal bulges in the fuselage had prominent mold lines running the length of those features. I have left the upper one in the picture with the seam line still there, while the bottom one has been cleaned. These had to be carefully scraped off, and then polished to a smooth surface because of the metal paint to follow.
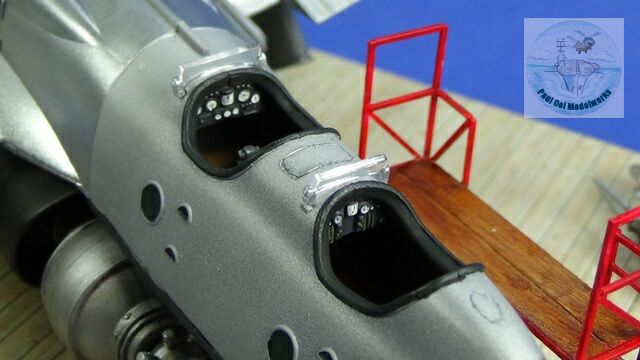
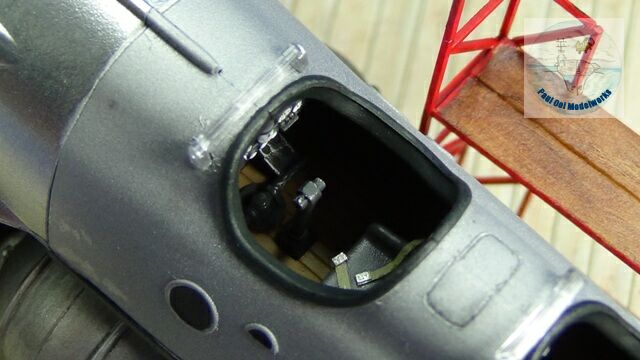
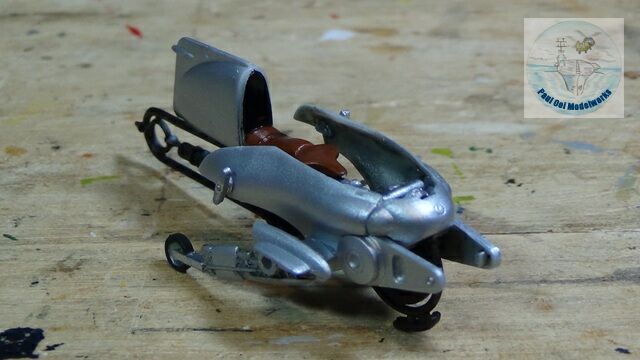
The interior of the fuselage shell was painted Schwarzgrau RLM66, while the cockpit’s flight deck was painted Tamiya Wooden Deck Tan XF 78. Since i was not putting in the pilots, I added masking tape seat belts.
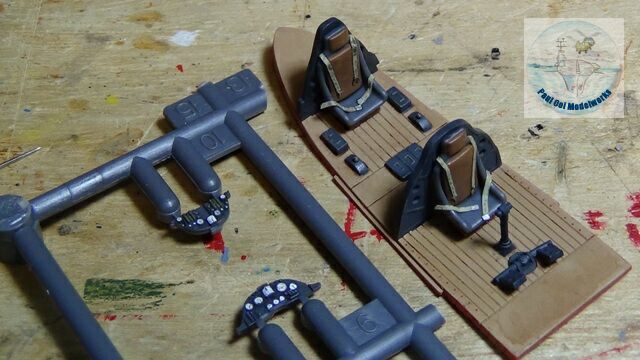
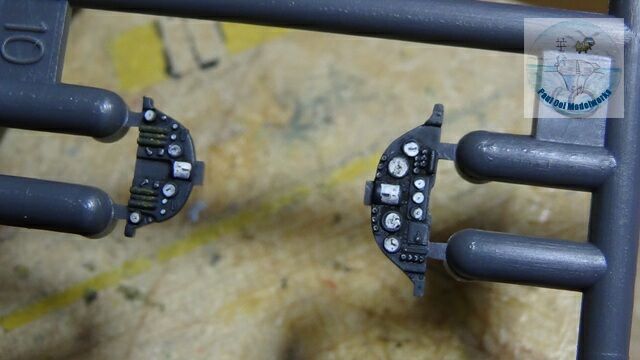
The instrument panels came with decals, but I chose to paint these on, using white dials, black markings on a background panel color of RLM66. Some panel details were highlighted with Prismacolor Silver pencil.
Finally, I out the fuselage together, first inserting the flight deck into the fuselage shell, followed by the bottom plate. The “wing” sections have these corrugated steel panels that need to be properly aligned so as not to leave open seams at the wing root. These are squeezed together with a masking tape “compressor”. Now is a good time to also add those weights into the fuselage to prevent tail sitting.
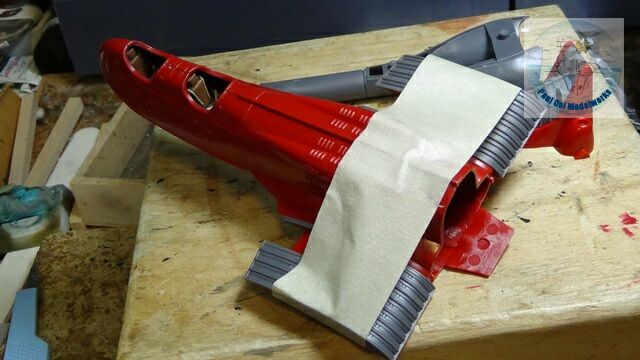
Dry-fitting is crucial in this assembly, as the two landing gear spat assemblies attach to the engine section below as well as to the wings. It also helps in getting the spars attached to the spat assemblies to be fixed at the correct angle. I did not glue these assemblies to together as yet because the engine section is painted a different metal color from the fuselage and the spat assemblies.

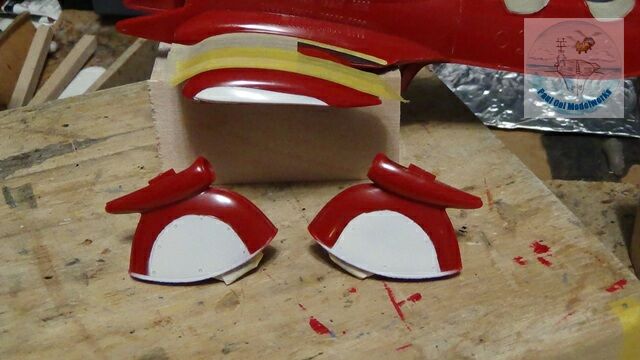
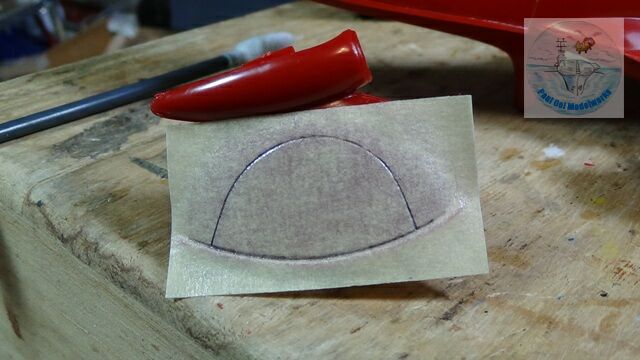
Next, the fuselage is prepped for the first layer of paint, in this case, the Insignia White flashes at the wing tips and the outer panels of the spat assemblies. I used masking tape templates to obtain the half-moon shapes of the spat assembly panels.
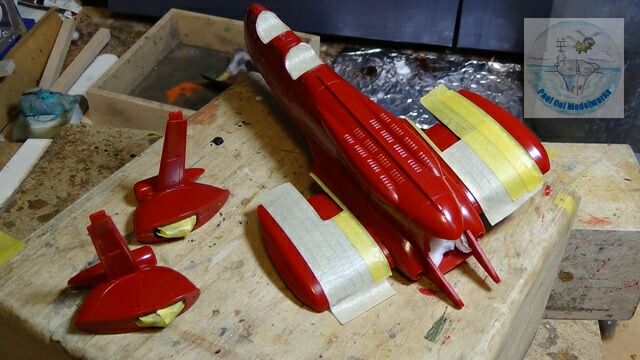
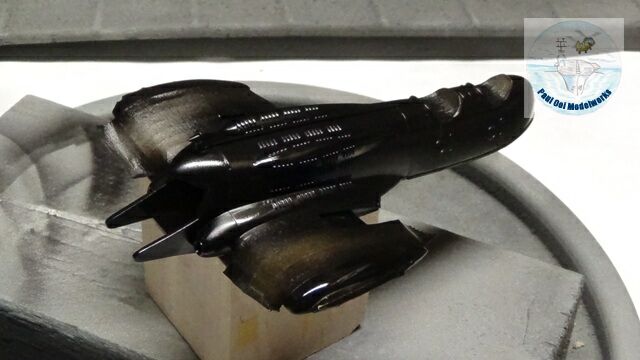
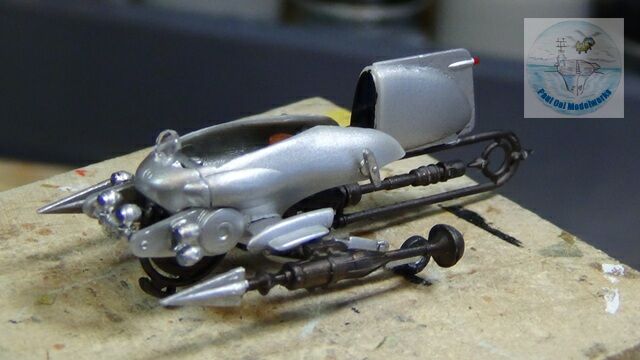
After masking off the White sections, the main fuselage and spat assemblies were primed using Alclad II Gloss black Base.
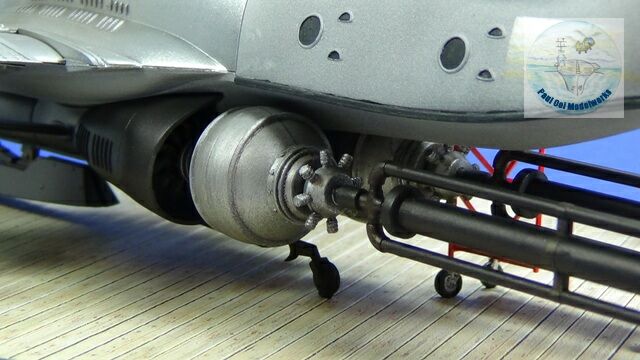
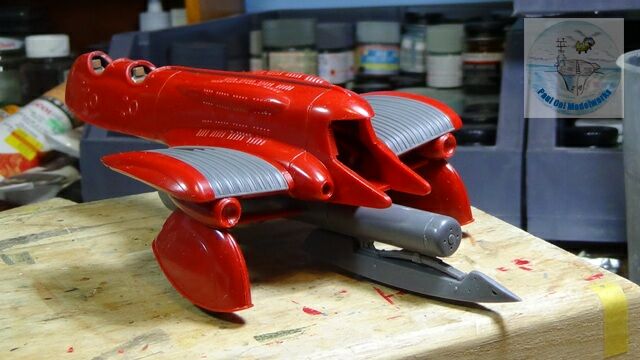
Next, Alclad II Polished Aluminum was applied to the front panels of the fuselage. This was then followed by Alclad II Dull Aluminum for the crew compartment, fuselage underside, and the spat assemblies. Finally, Metalizer Steel was applied to the corrugated metal part of the wings.
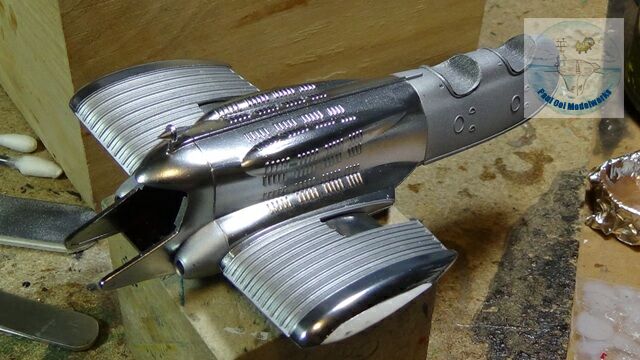
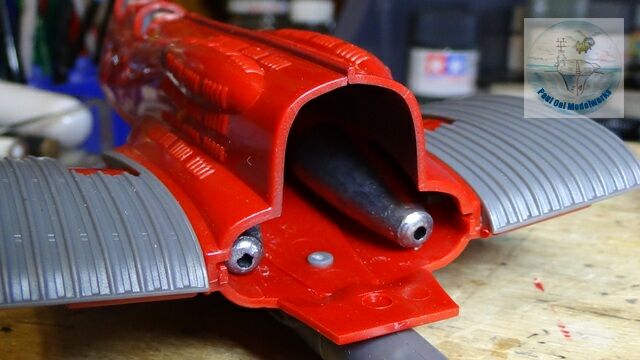
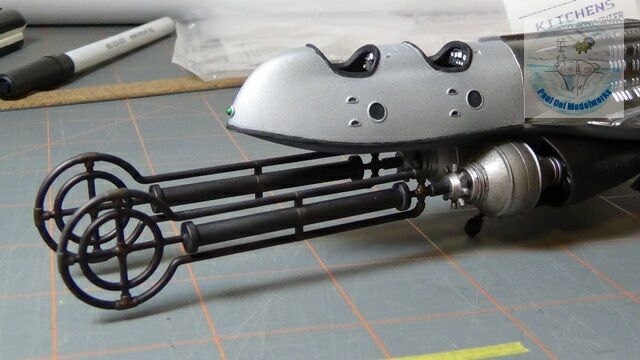
The engine assembly sections were painted separately with Metalizer Burnt Iron. These were then attached to the main fuselage.
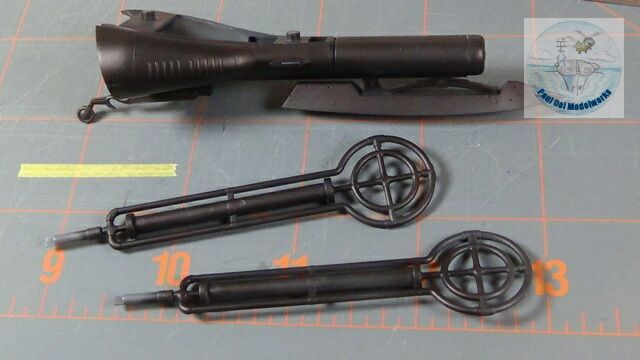
Finally, a pair of large “carpet-beater” assemblies were attached to the engines.
Decals are then applied to the vanship. I was disappointed that these were a bit on the thick side and took a lot of coaxing and copious amounts of setting solution to soften and get into position.
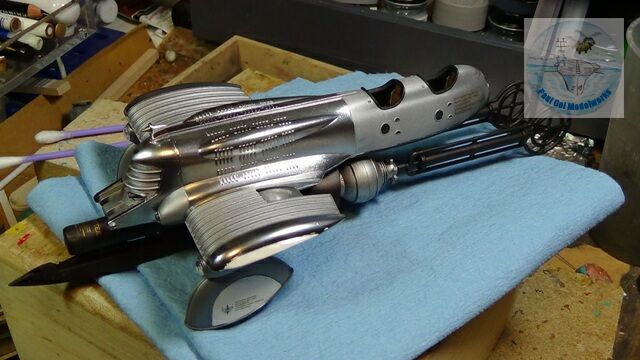
In order to lightly weather the fuselage with some exhaust fumes, and also to tone down the polished aluminum just a tad bit to blend in with the rest of the ship, I used satin varnish first, then a light overspray of heavily diluted NATO Black/Red Brown mix (50:50).
The little Vespa also had similar steps in its assembly.
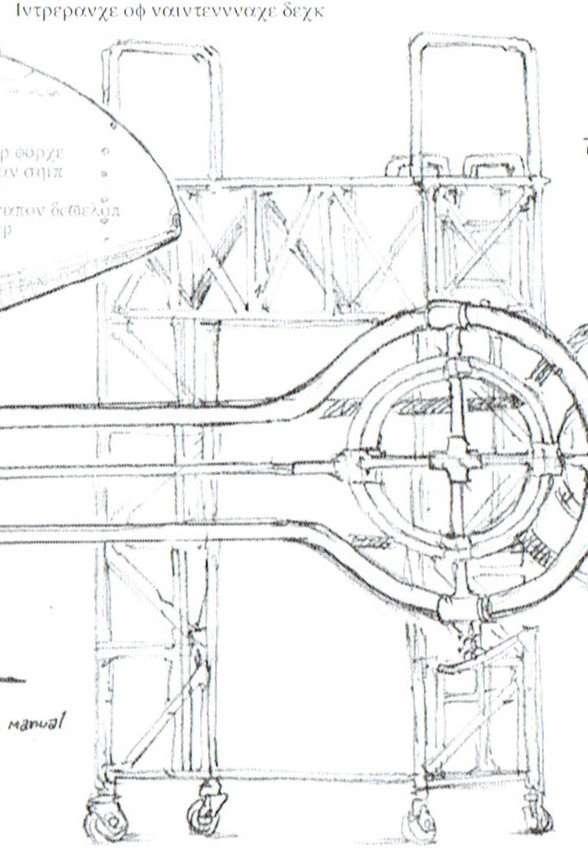
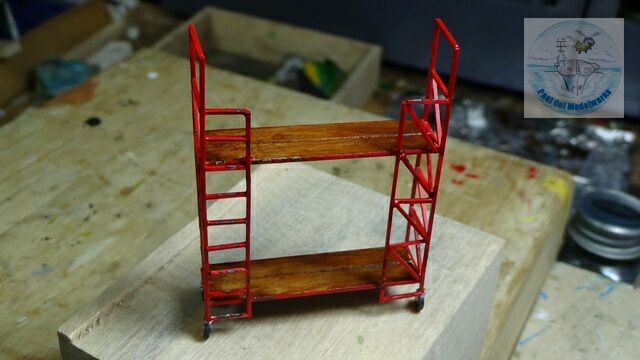
Lastly, I wanted to add something to give a contrast to all that shiny metal, so I scratch-built a maintenance/boarding ladder platform. I found an illustration in the kit literature that really helped me to get this idea together.
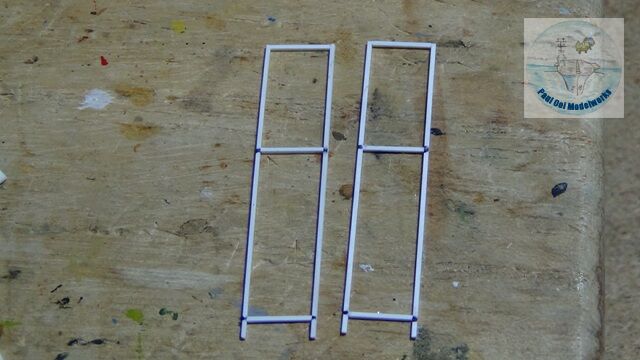
I built the main structure using Evergreen plastic 0.5mm x 0.5mm square sections and Plastruct 0.8mm x 4.0mm styrene strips. I started by building the two end sections before bridging them with strips of styrene strips (these were painted to look like wooden planks using Tamiya Wooden Deck Tan, covered with Burnt Umber oil paint). I added caster wheels from my spare parts box. The whole structure was painted Insignia Red.
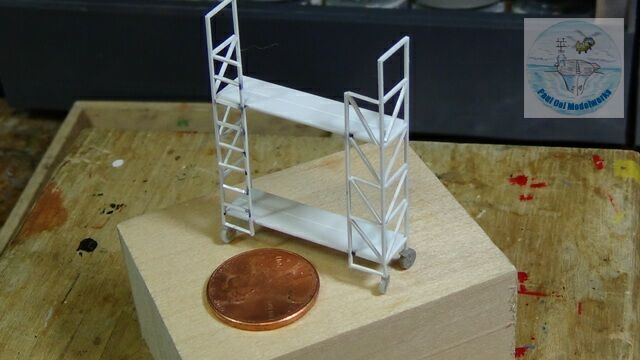
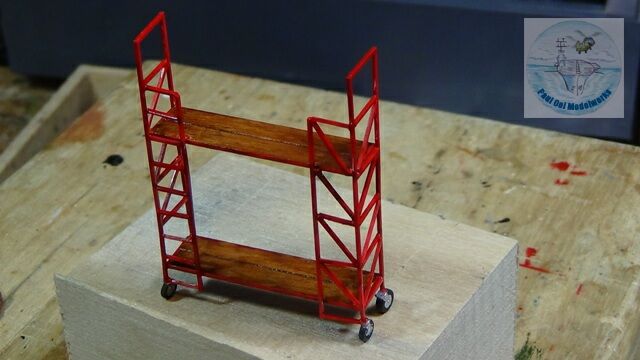
As a finishing touch, the structure had paint chips and worn sections (especially ladder rungs) using NATO Black and highlighted with Prisma Color Silver pencil.
Stunning build, I hope I can build one half as good.
Hello Brian,
it is a good kit with very good fit for most part. That will help anyone attempting this kit.
Paul
Hi Paul
That good to know, I now just need to decide on Alclad Aluminium or AK true metal for the finish. I have not used either before but Im curious about the AK true metal. Do you think that there is enough room inside to install SMD LED`s into the front lights?
Hi Brian,
There is enough room to install LED’s. That would be awesome. Share pictures when you get that done.
AK is wax based. Best applied with a brush, some people say that you can dilute with thinner and then airbrushed but I have no experience with the latter. Very nice for small area and details. If you need to mask over..not so good.
Alclad is liquid paint and very good with airbrush and large surfaces (see my other projects like the Hustler and Peacemaker). You HAVE to undercoat with a protective primer with a very high gloss finish like Alclad’s own Gloss black Primer or Tamiya Gloss Black. If you fail to do so, the results are disastrous, with the paint solvent immediately attacking exposed styrene. Once properly cured, Alclad is very resilient to masking, so it is ideal when doing panel masking and shading.Not easy to use for small parts (like AFV’s) since it needs that undercoating step.
Have fun!
Paul
Hi paul. I eventually got around to building my Vanship. Not to your standard but Im very happy with it and even managed to fit some lights.
http://i1145.photobucket.com/albums/o513/brian07900/Mobile%20Uploads/20160316_134118_zpsdohjwcrm.jpg
Hi Brian,
Thanks for sharing your picture. You are way too modest. The model is awesome with the lights. Also, love the floorboards.
Paul