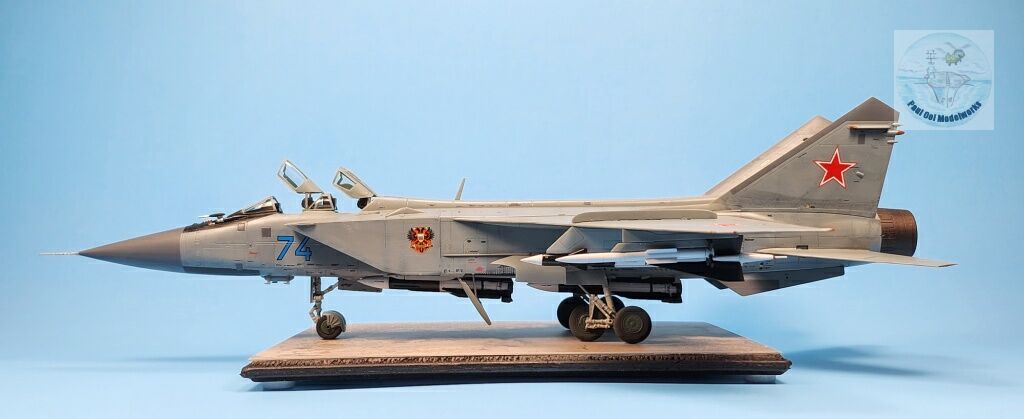
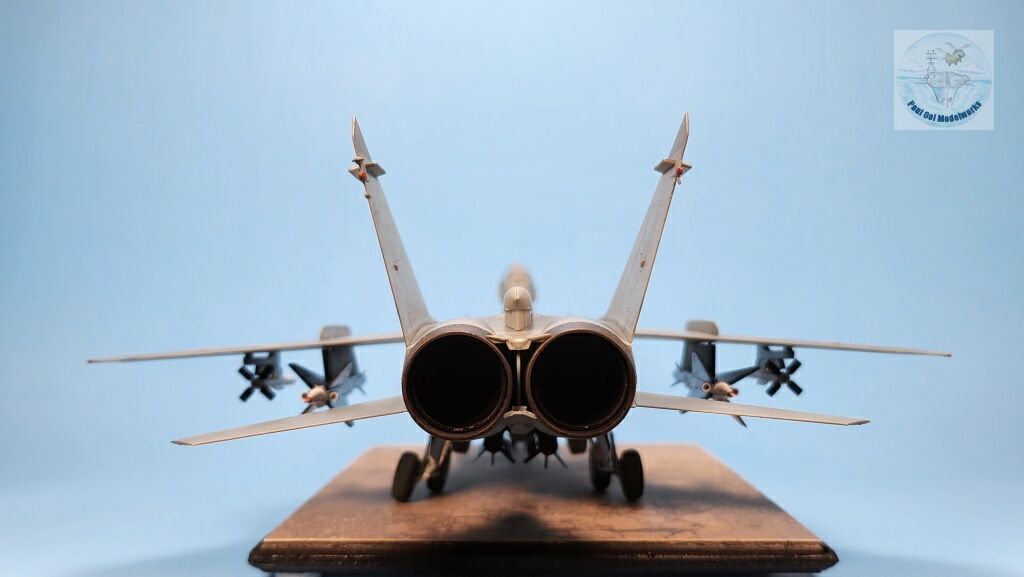
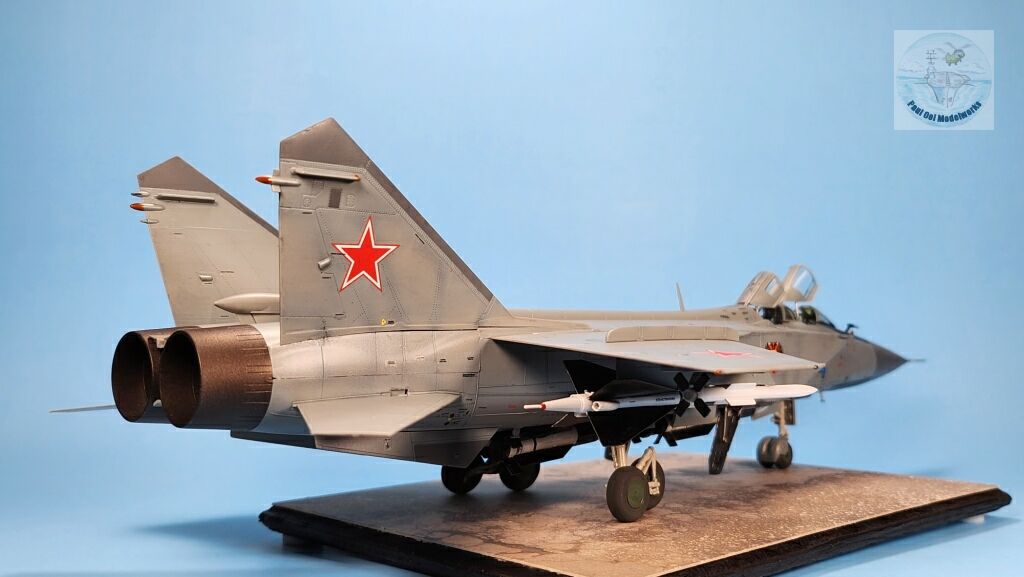
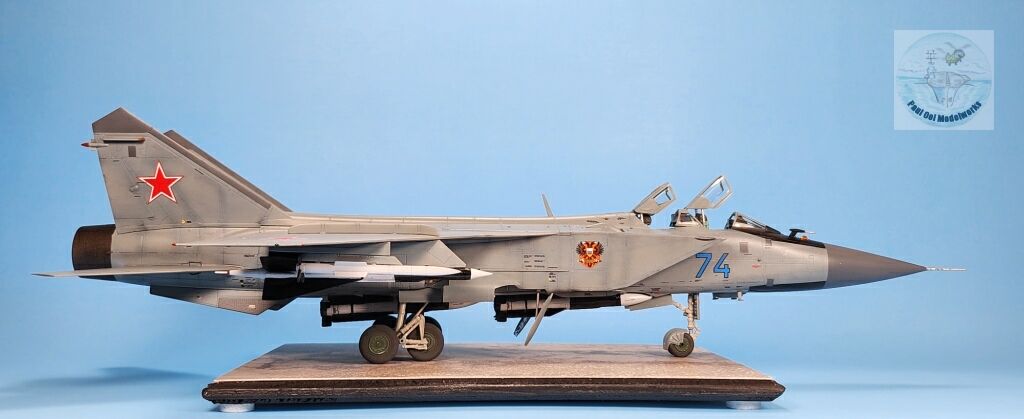
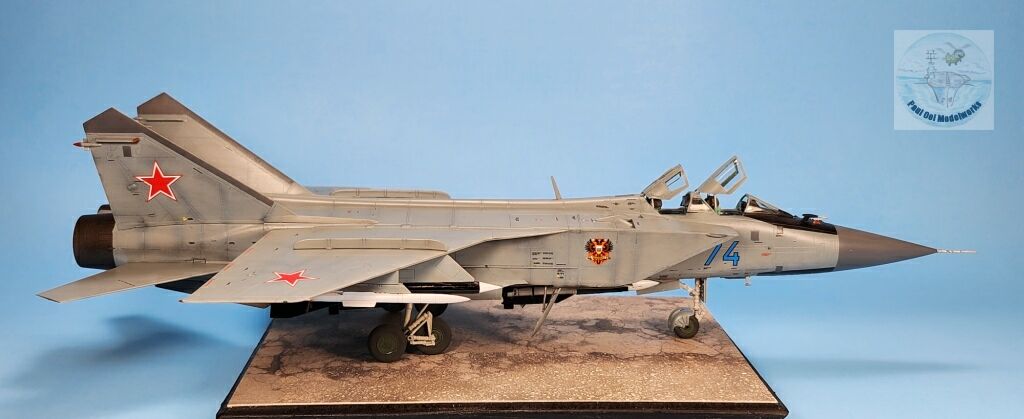
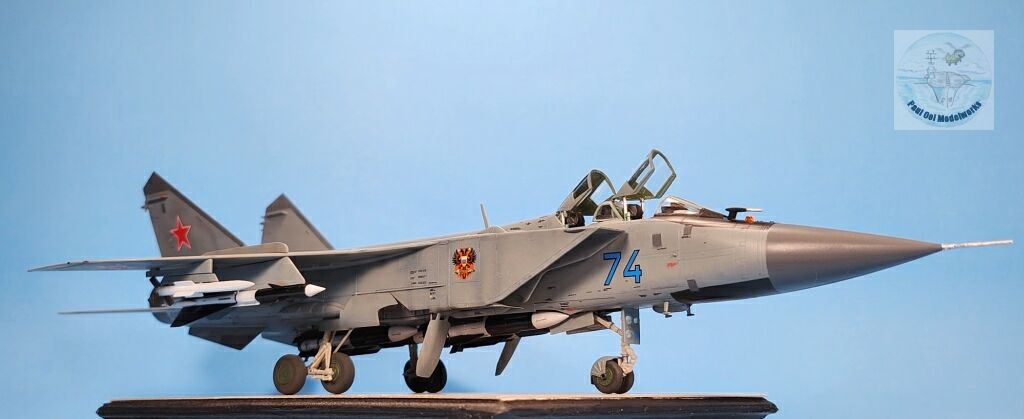
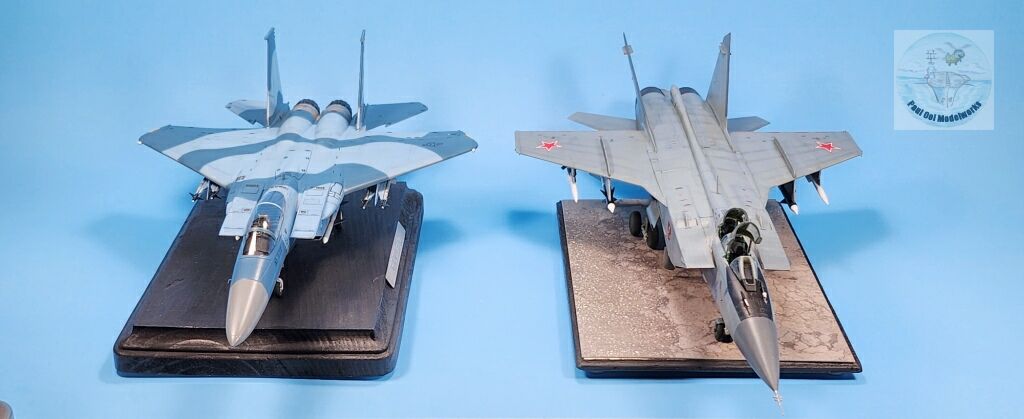
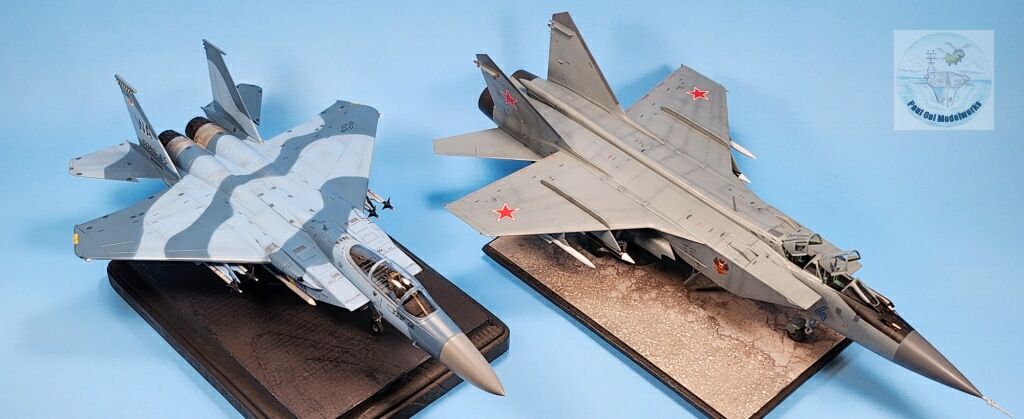
When Viktor Belenko defected with his MiG-25 Foxbat in 1976, he told his US debriefing team that the Soviets were developing a “Super Foxbat”. This turned out to be the Mig-31 that started production in 1979. The Foxhound, as it is codenamed by NATO, had a similar outline as its predecessor, the Foxbat but it was a twin-seater with totally different engines. The main armament of this huge interceptor were the long range R-33 missiles carried under the belly. The Foxhound is a very fast fighter with an estimated top speed of 3000km/h, a fast climb rate to catch high flying targets and designed to also take out low flying NATO cruise missiles. The B version was introduced at about the time of the transition of the USSR into the Russian Republic. The current BM version has been deployed in the war with Ukraine, and its long-range missile capability has proven deadly in taking down Ukrainian Su-27s. So far, none were lost in air combat but two were lost on the ground from drone strikes, and a third crashed off the runway. Despite its age, the MiG-31BM design is still a feared opponent by NATO.
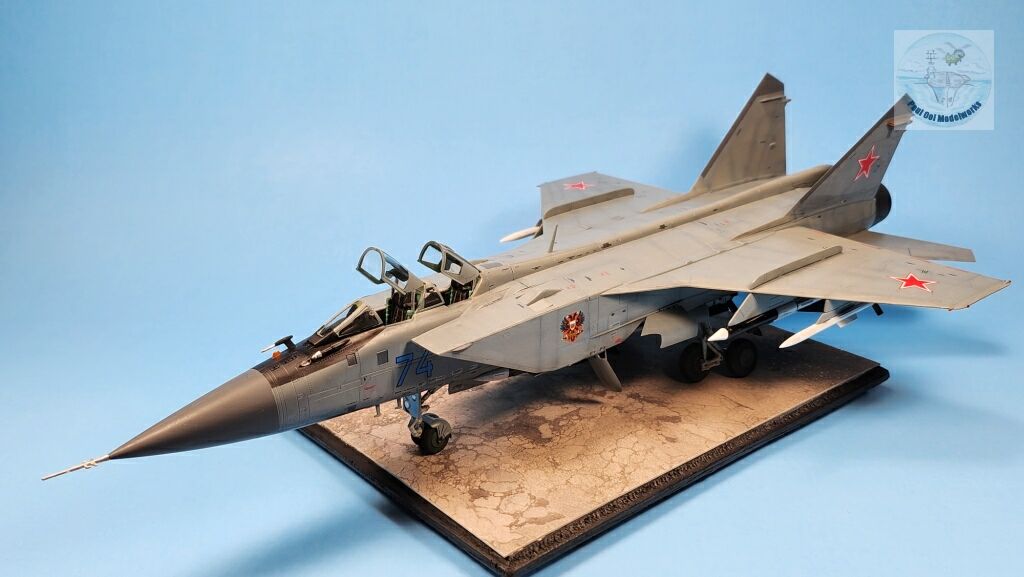
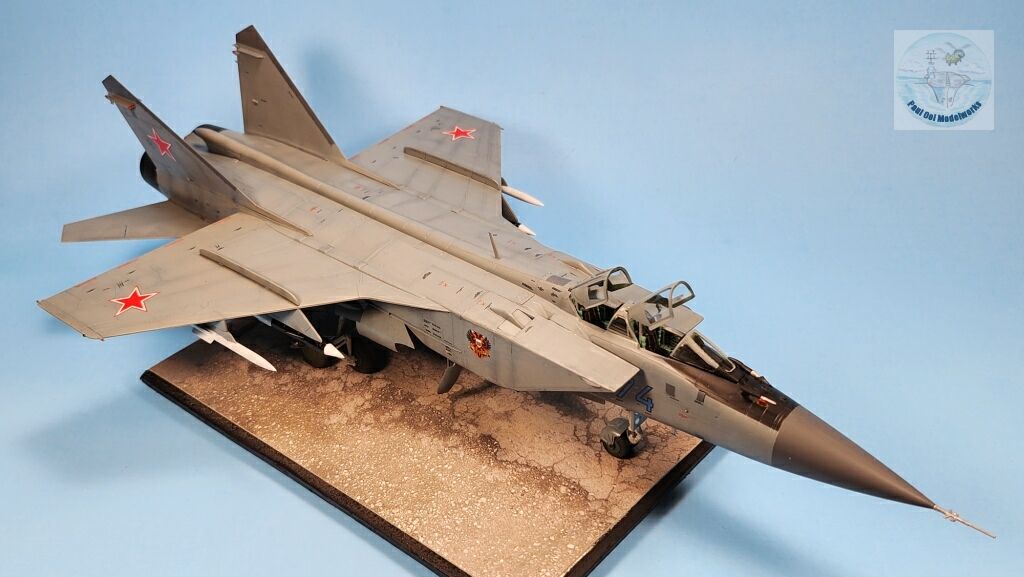
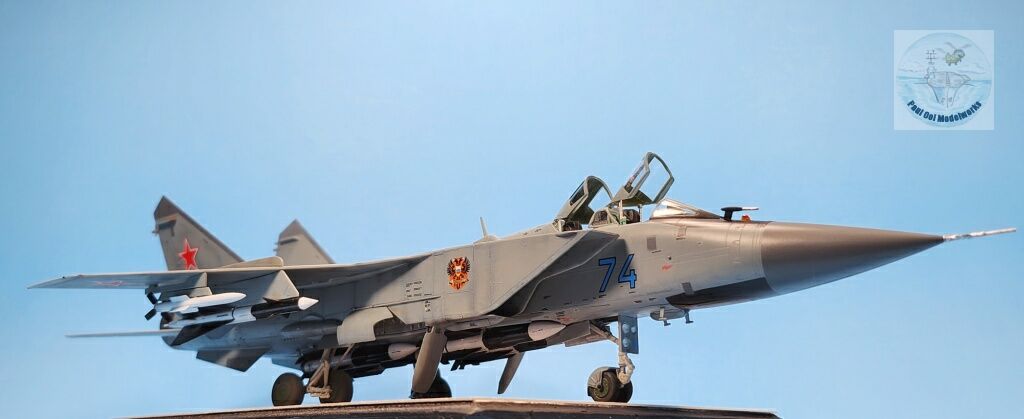
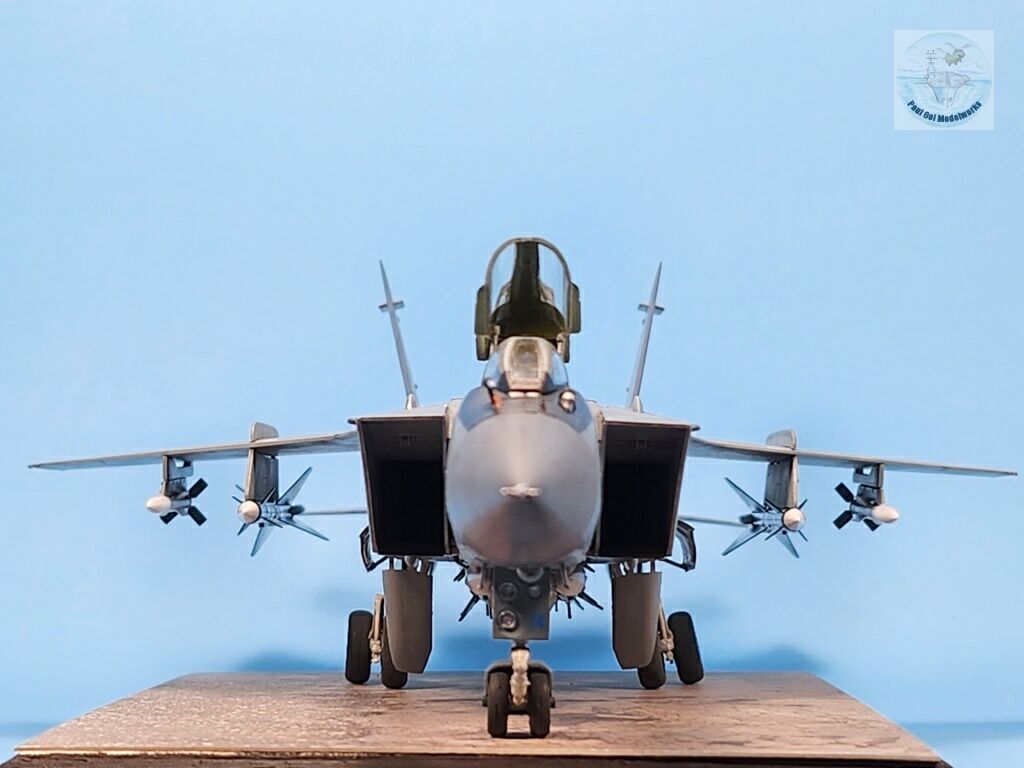
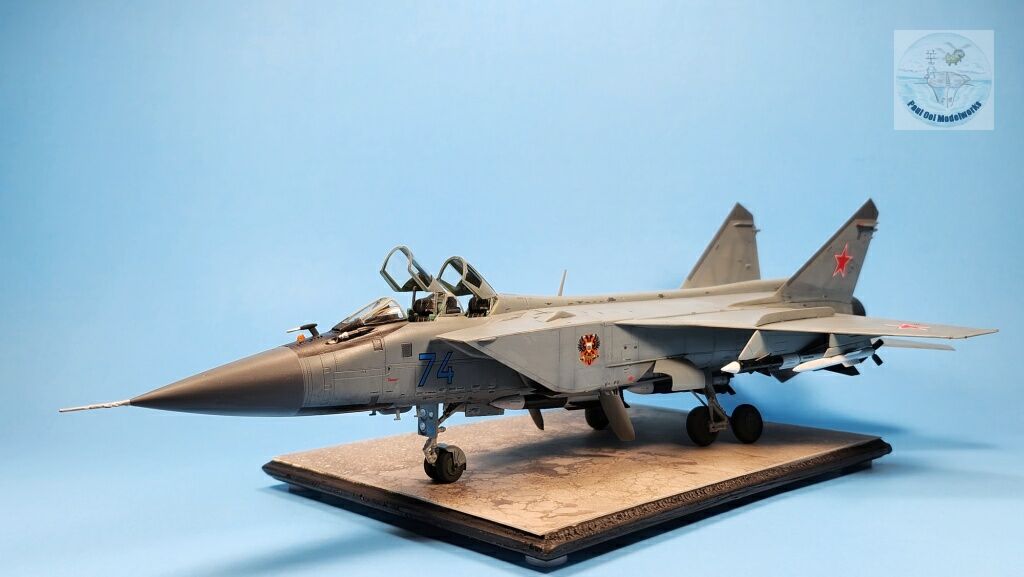
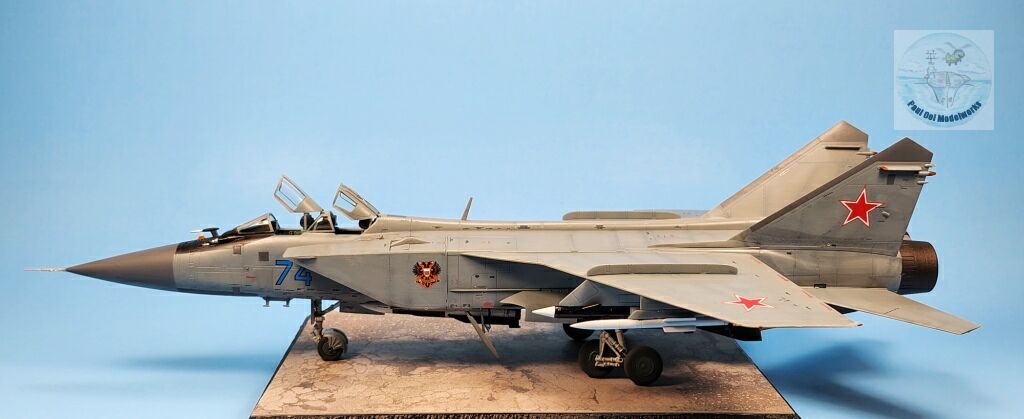
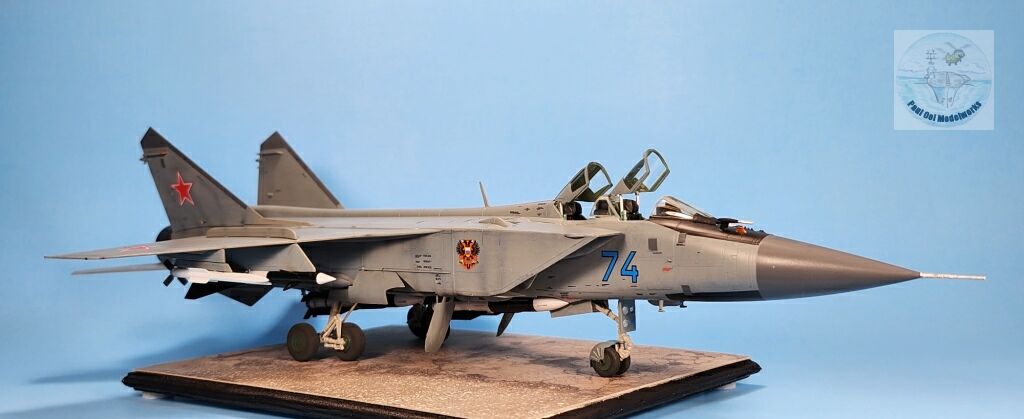
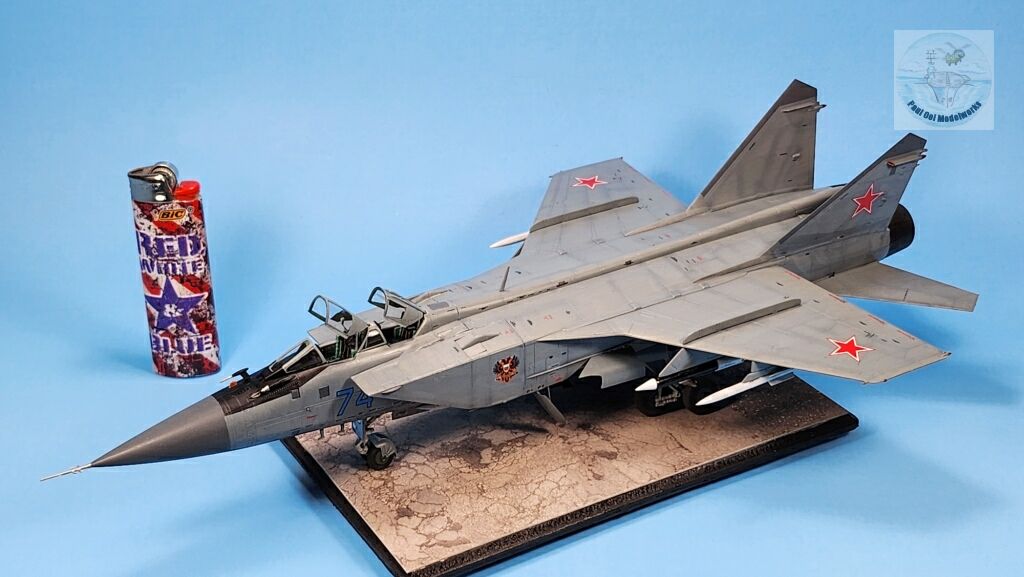
This version of MiG-31B that I built carried the markings of Blue 74 of the 786th VVS-IAP stationed in the Moscow military district. Other than the R-33 missiles, this model also carries two R-40 and two R-77 missiles.
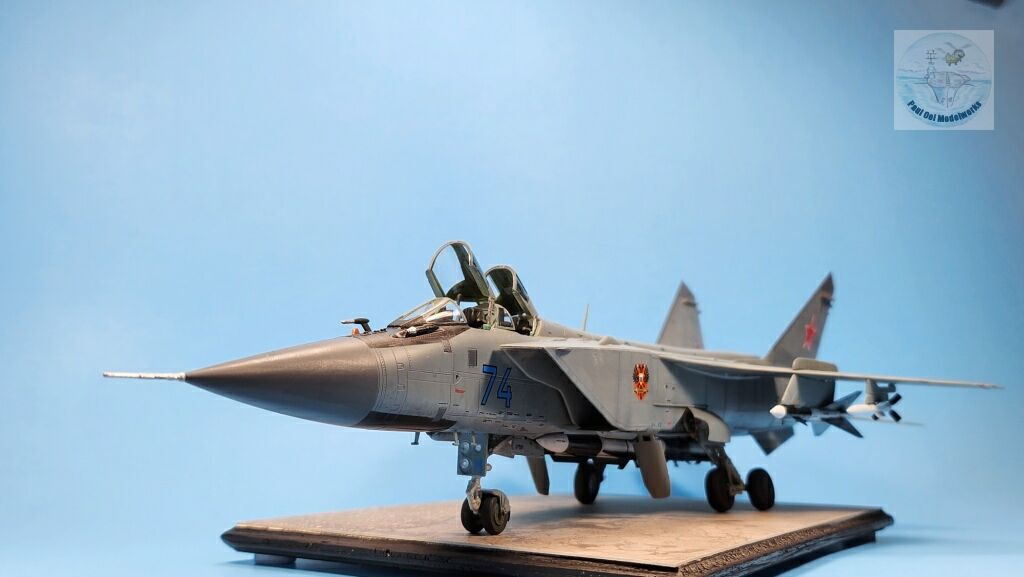
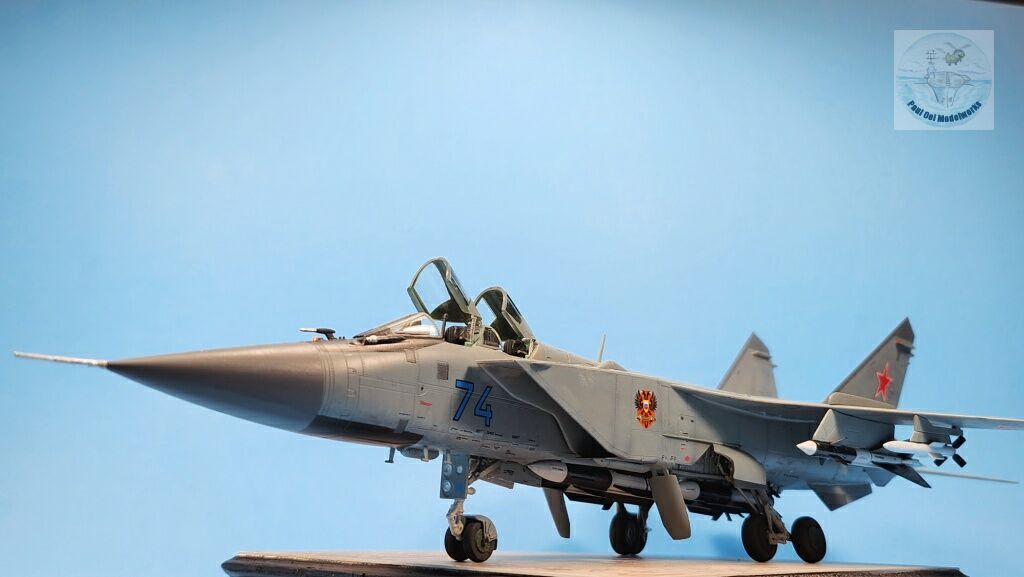
Gallery
Construction Notes
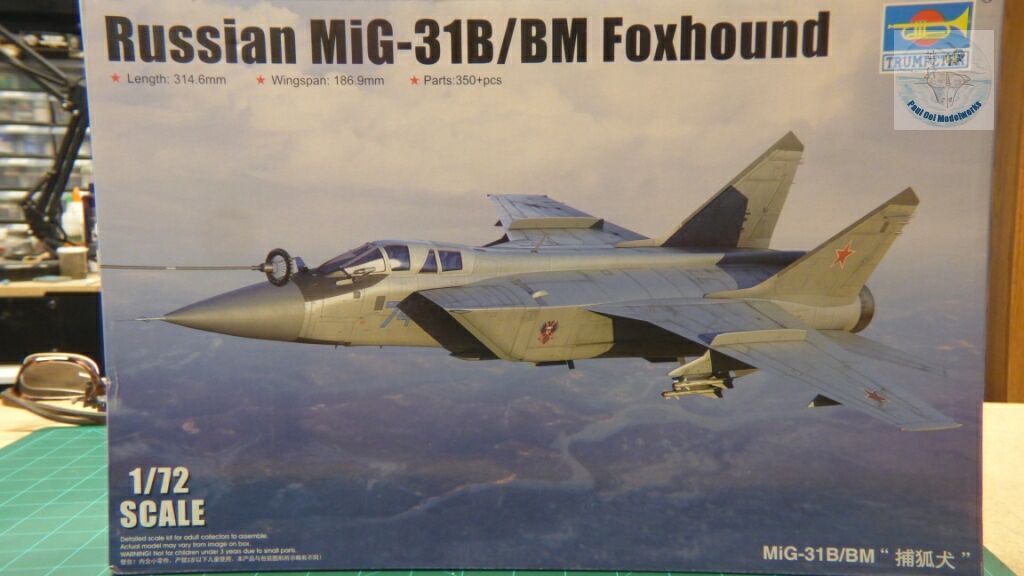
The Trumpeter 1/72 scale kit of the MiG-31B/BM is a huge box crammed full of sprue panels, and a large decal sheet with more than 300 decals. The parts are very nicely molded, and some of them are very delicate. I decided to build this kit out-of-box without any after-market parts since it is already very well detailed. This kit is moderately complex and I would recommend it only for intermediate builders upwards. The undercarriage assembly is very complex, hence my recommendation. While the overall fit is good, the areas around the air intakes leave gaping seams that need to be filled using the seam filling techniques used in Tutorial 3. The paint scheme is relatively simple, with the fuselage only needing 3 basic colors. One complaint: the dorsal antenna was missing from the kit parts. They left it out of the actual kit. I had to scratch build mine, which was a relatively simple matter from my spare parts box.
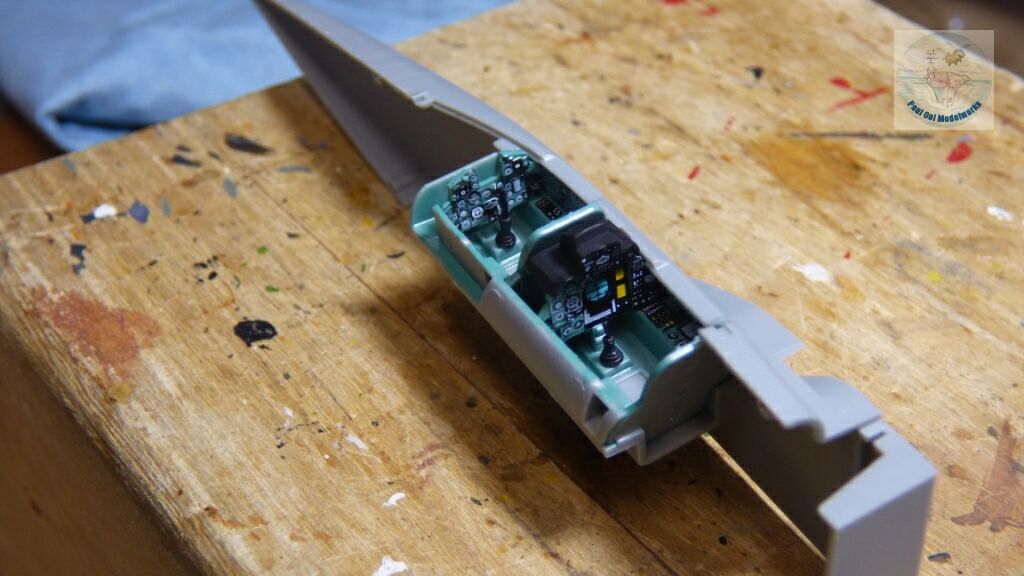
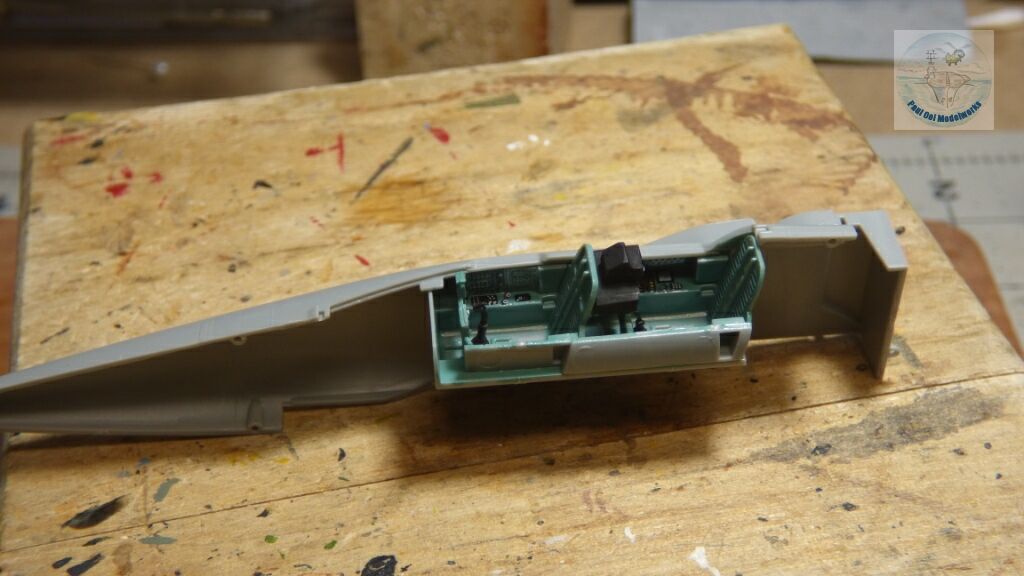
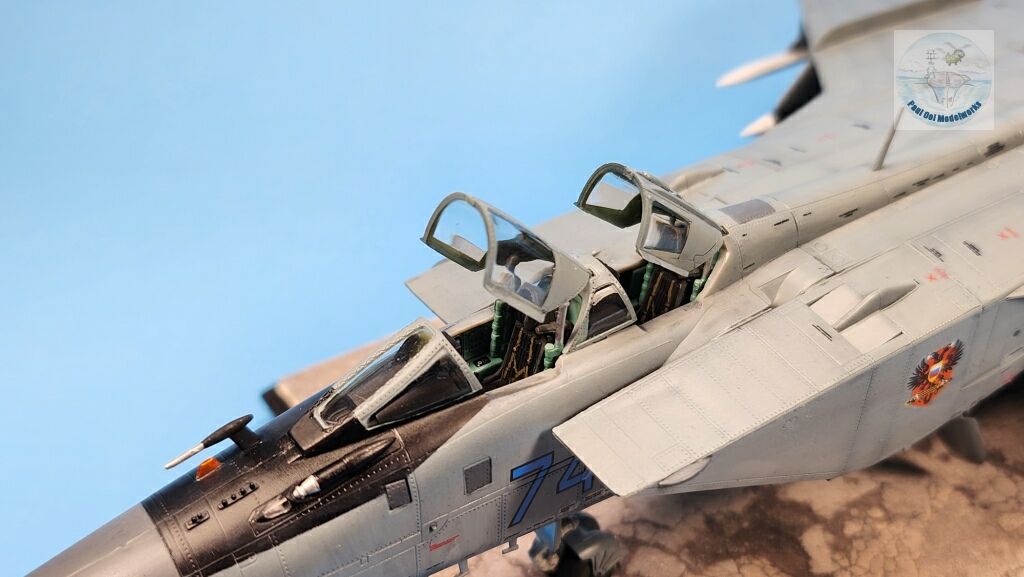
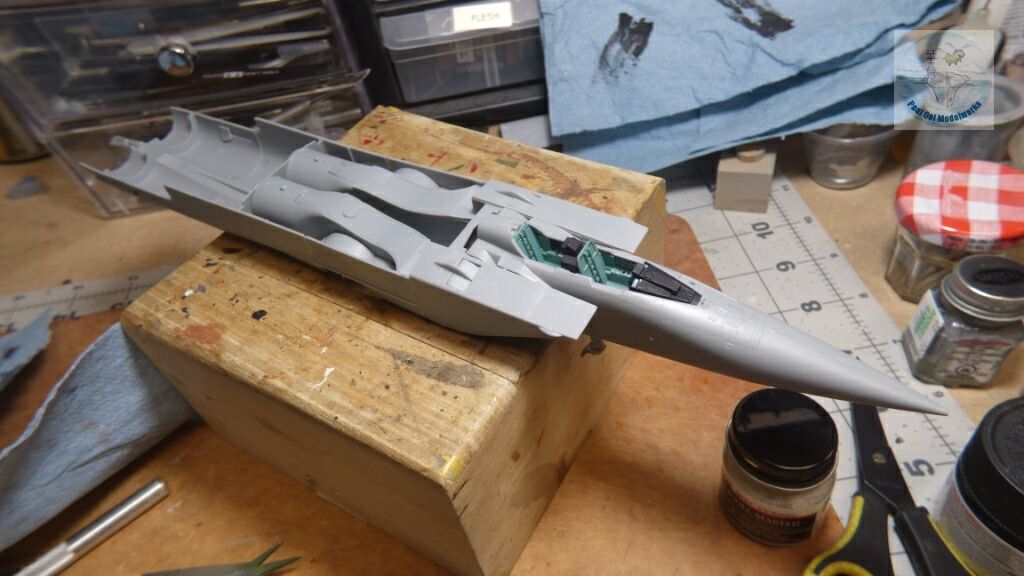
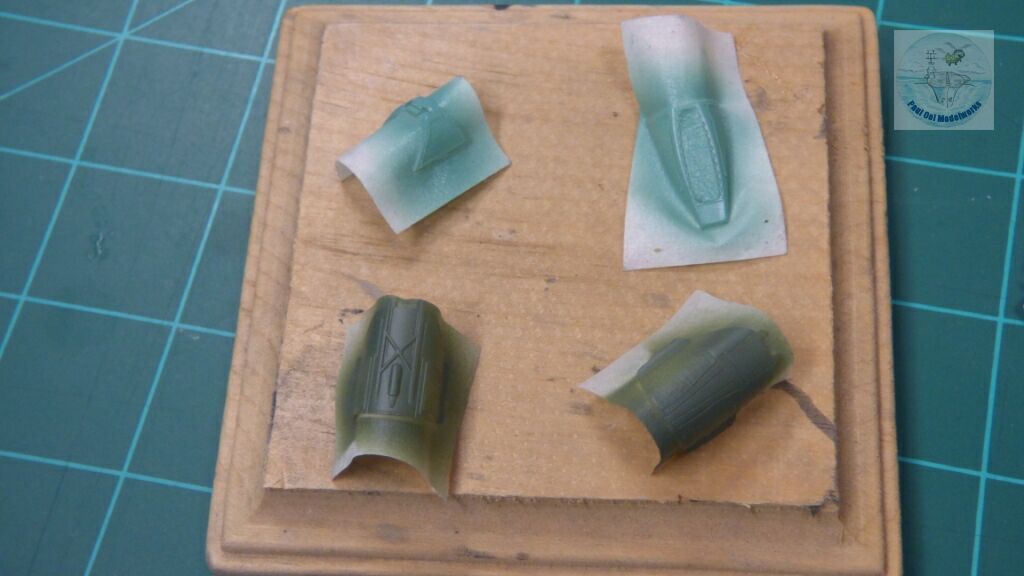
The pilot and weapons officer positions and panels are very specific, with corresponding parts for the B and BM versions having different decals. The cockpit walls are painted with Interior Blue Green. At this stage, I am leaving out the ejector seats.
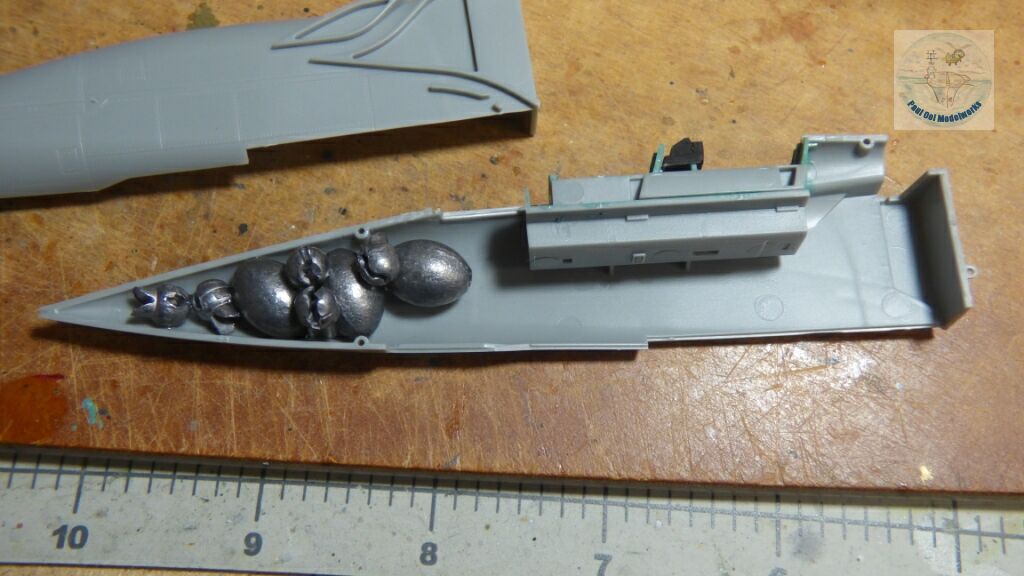
Fishing lead sinkers are added to the nose cone area (this aircraft has a very long fuselage, so quite a bit of counter weight will be needed), and then the front fuselage halves are clamped together.
There are extensive details for the air intake channels leading to the engines. Actually, most of it will not be visible once installed. The insides are painted Aluminum. Two wheel wells are also built at this time, also painted Aluminum.
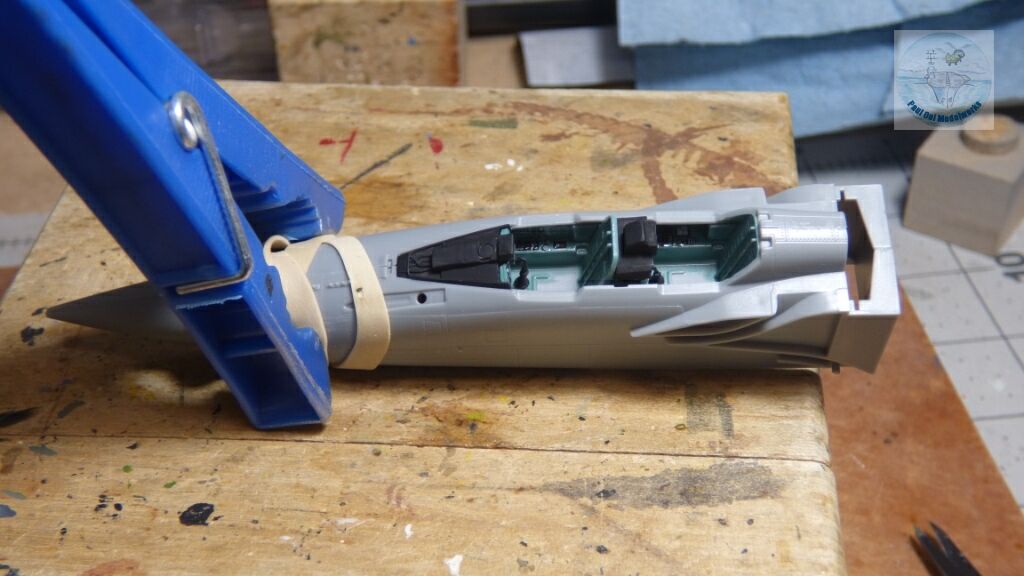
Here, you can see the left and right air intakes, and the front fuselage fitted in between them onto the main lower fuselage half.
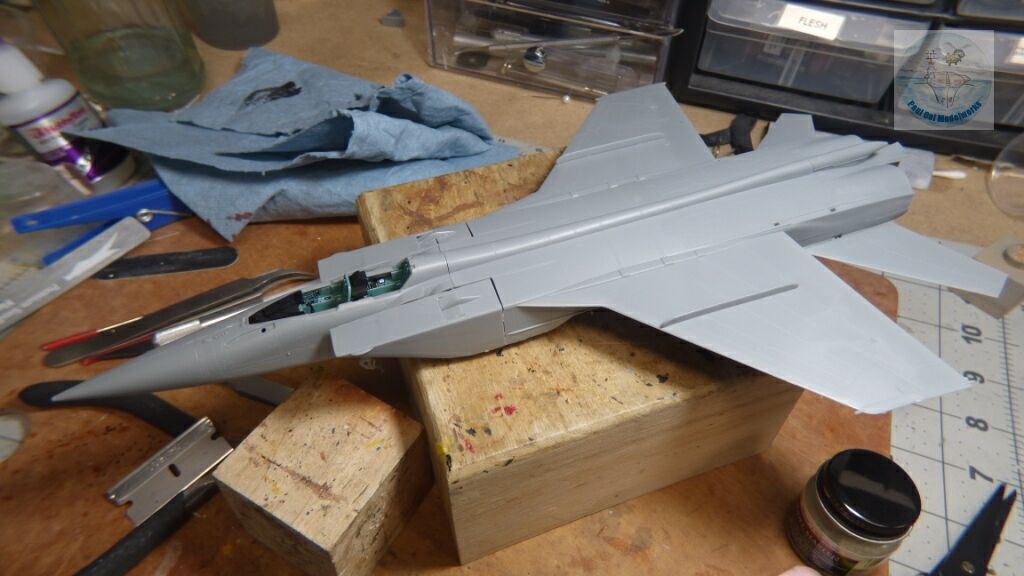
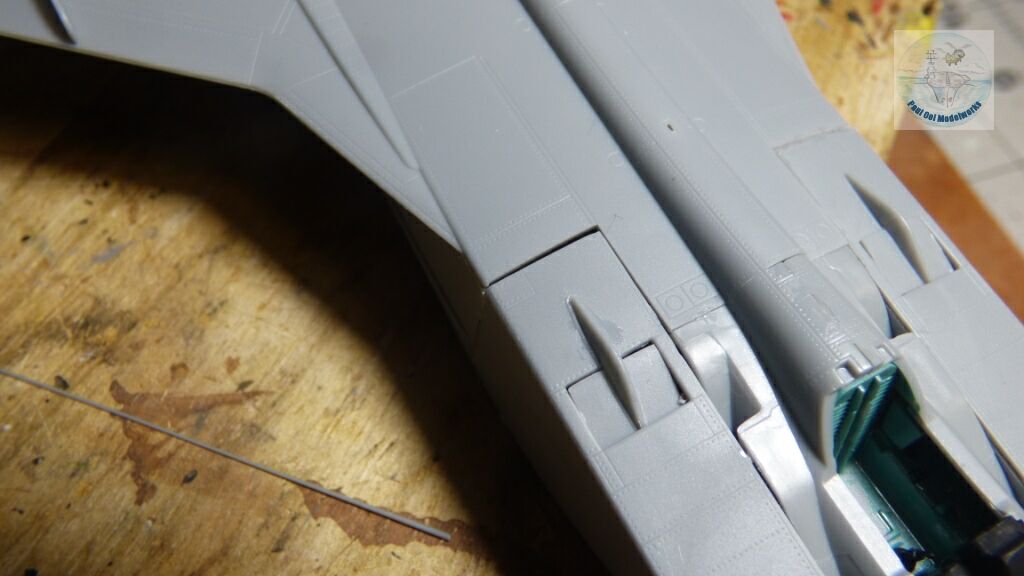
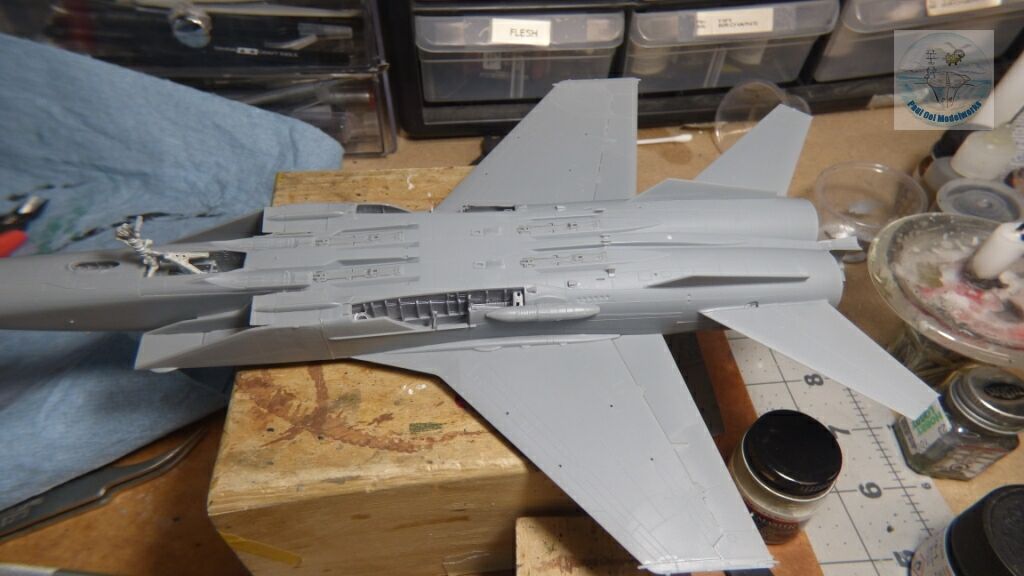
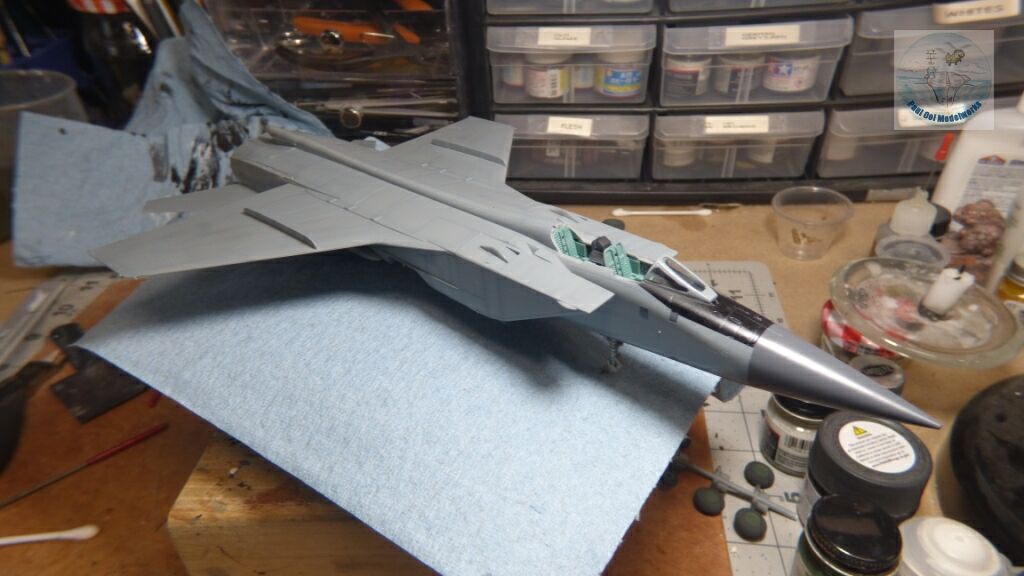
The top half of the main fuselage, together with the main wings and rear stabilizers are added. You can now clearly see the large open seams where the upper fuselage meets the air intake housing.
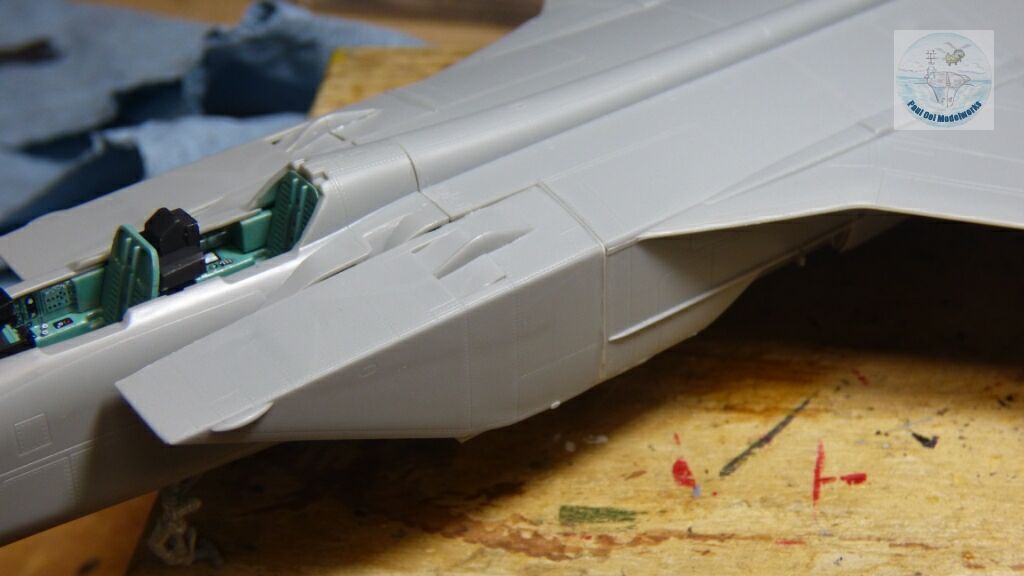
The large seams are filled with stretched sprue using the technique taught in Tutorial 3. Some careful sanding has to be done to fair over the joints.
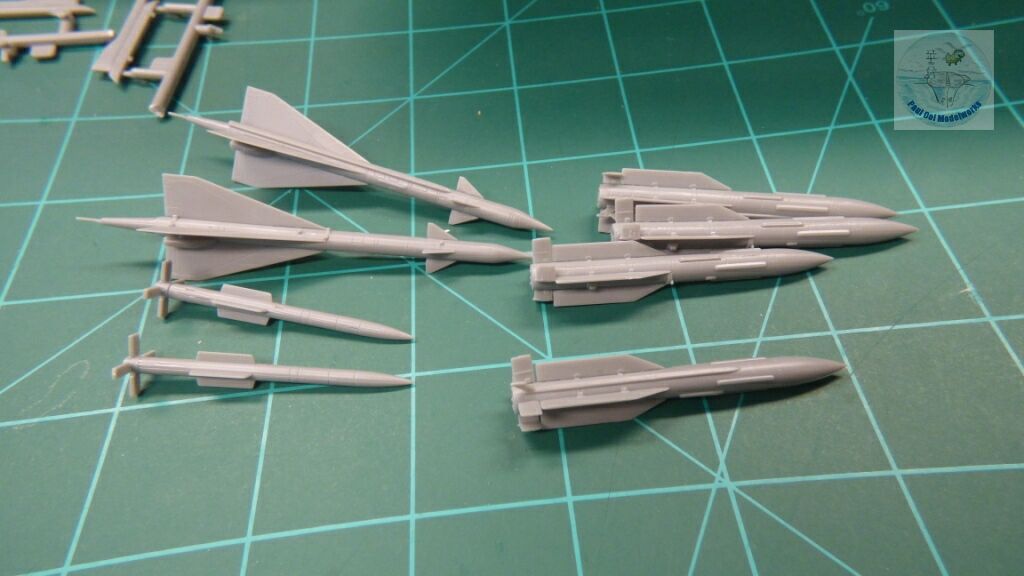
All the missiles to be mounted on this model are built while the fuselage joints are left to set.
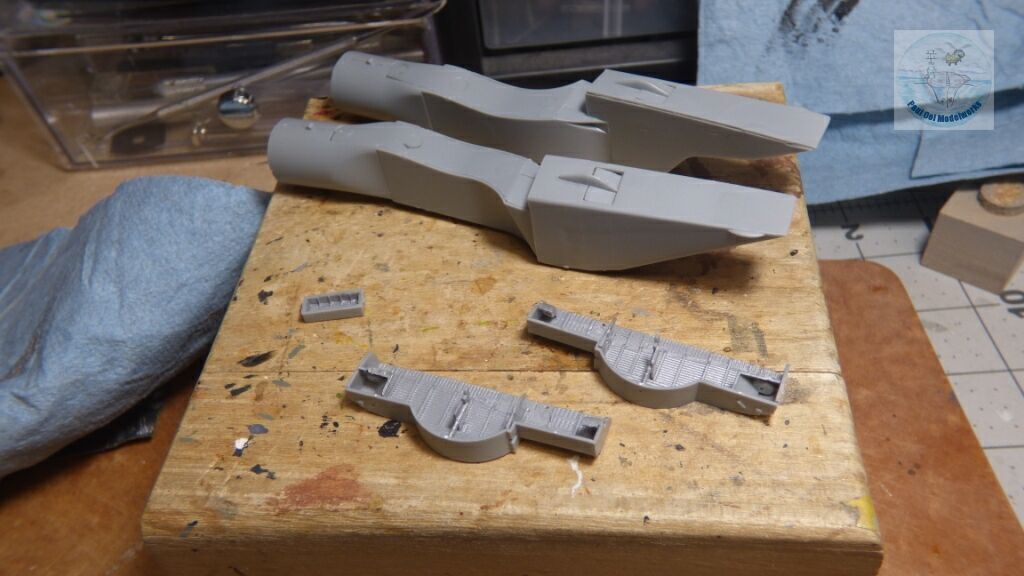
The underside stabilizers, gun capsule, and missile mounts are added.
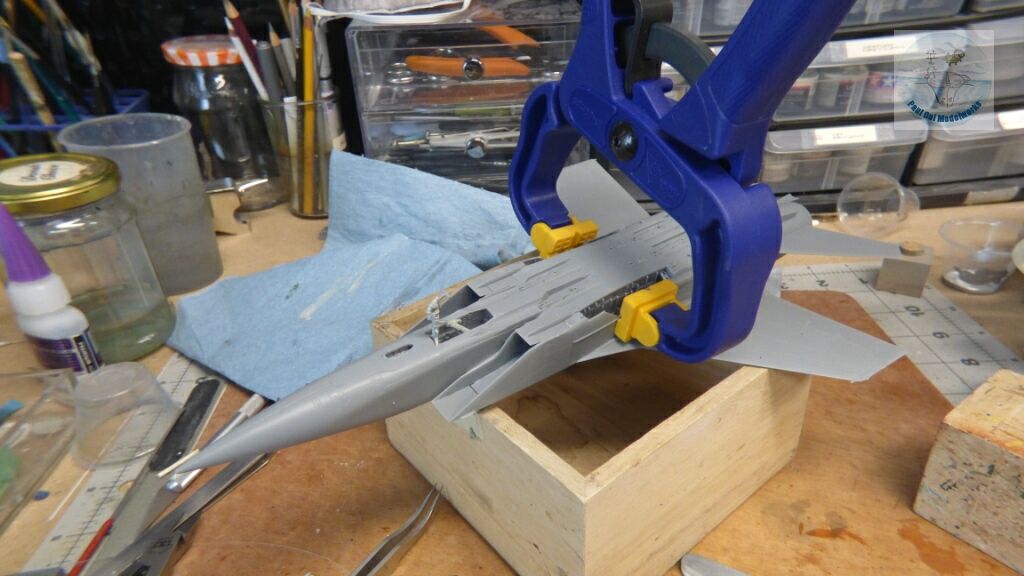
There is still some separation between the wheel well inserts and the outer skin of the fuselage. These have to be clamped together and allowed to set.
Meanwhile, the interior colors for the frames and canopies are sprayed onto the masked parts. Interior Blue Green for the fixed frames, and Russian Armor Green for the doors.

The engine tubes interior details and surfaces are painted with Metallizer Burnt Iron.
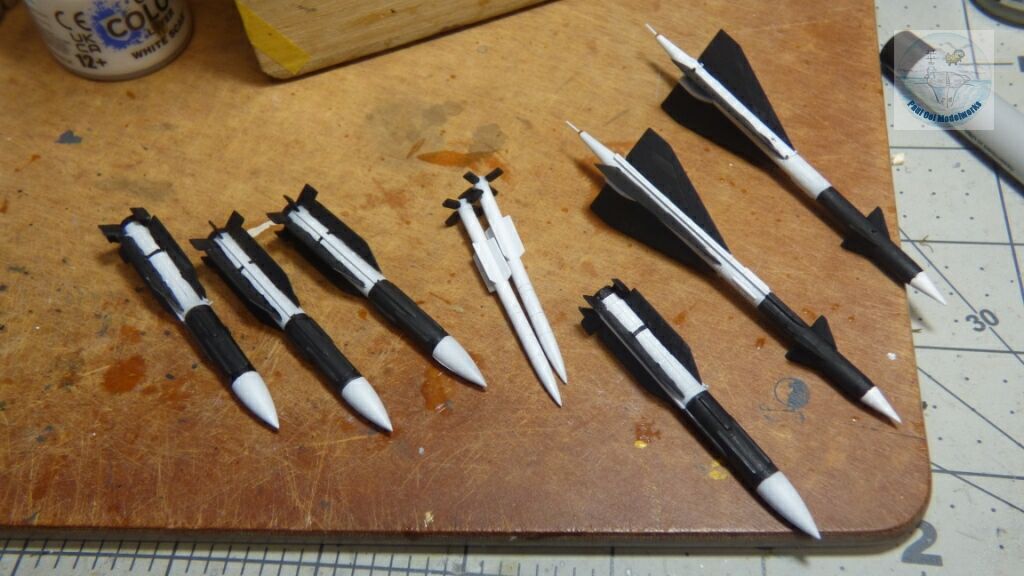
The missiles are first spray-painted with Flat White, and then I hand-painted the black portions with Flat Black.
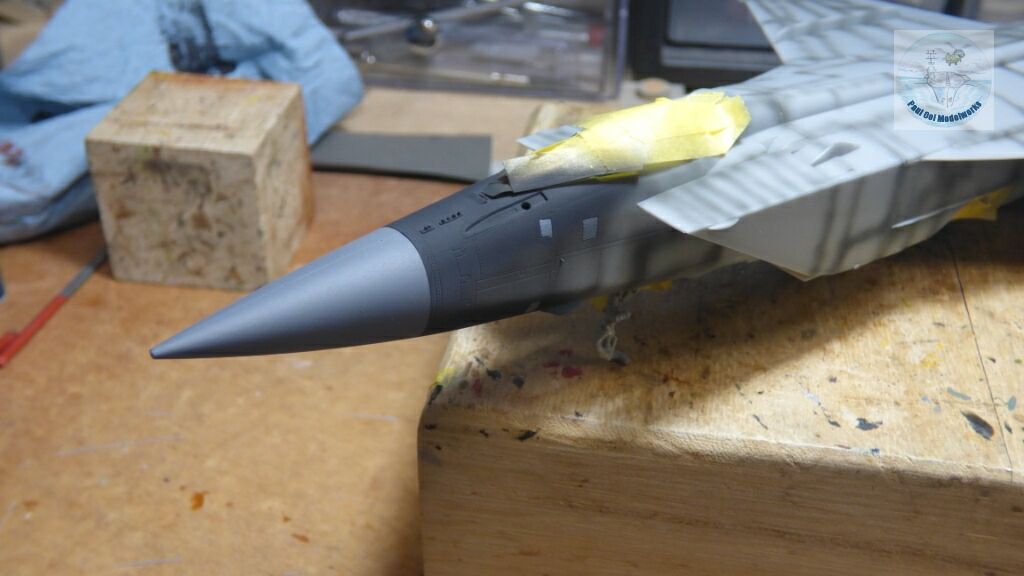
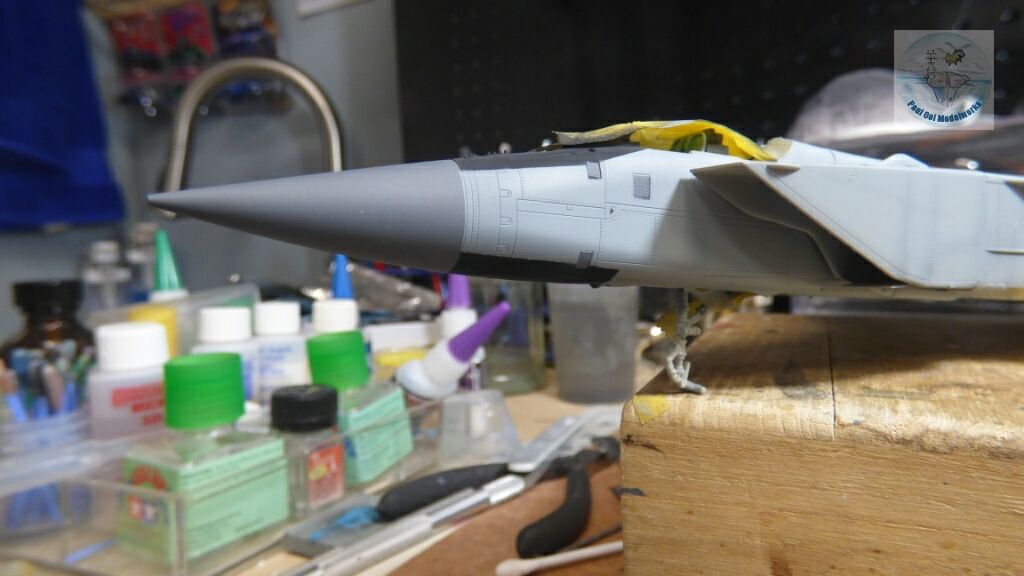
With all the masking done for the main fuselage, painting begins with the NATO Black undershading, and then Gunship Gray FS36118 for the radome, and edges of the two rear rudder tails. Then, we spray Flat Black on the front panel in front of the cockpit, and also correspondingly under the nose chin area. Once these areas are properly dry, I masked over them.
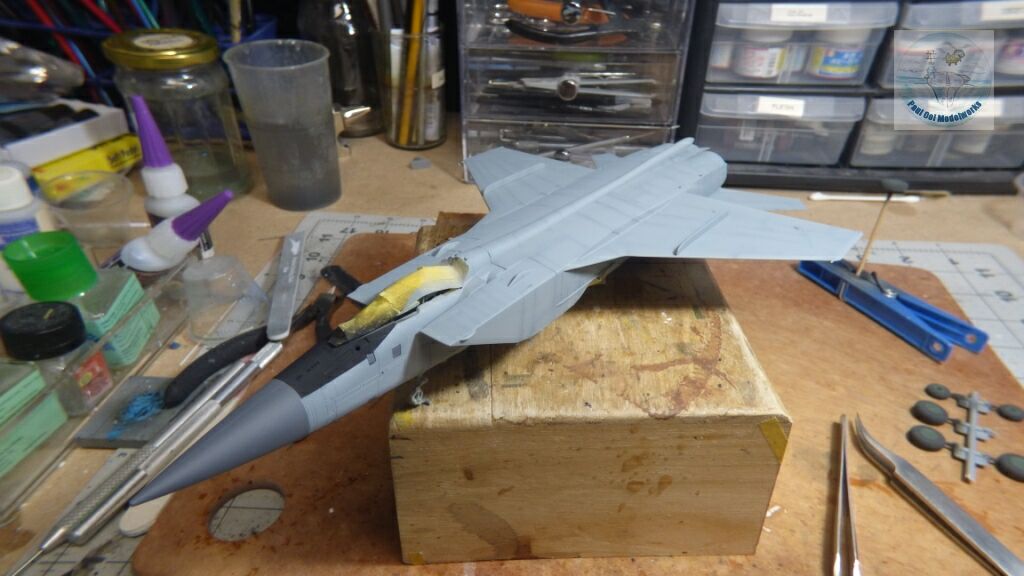
The overall color of the wings and fuselage is Vallejo 70.905 Blue Grey Pale.
The whole fuselage is given several coats of gloss clear varnish (Pledge Floor Polish).
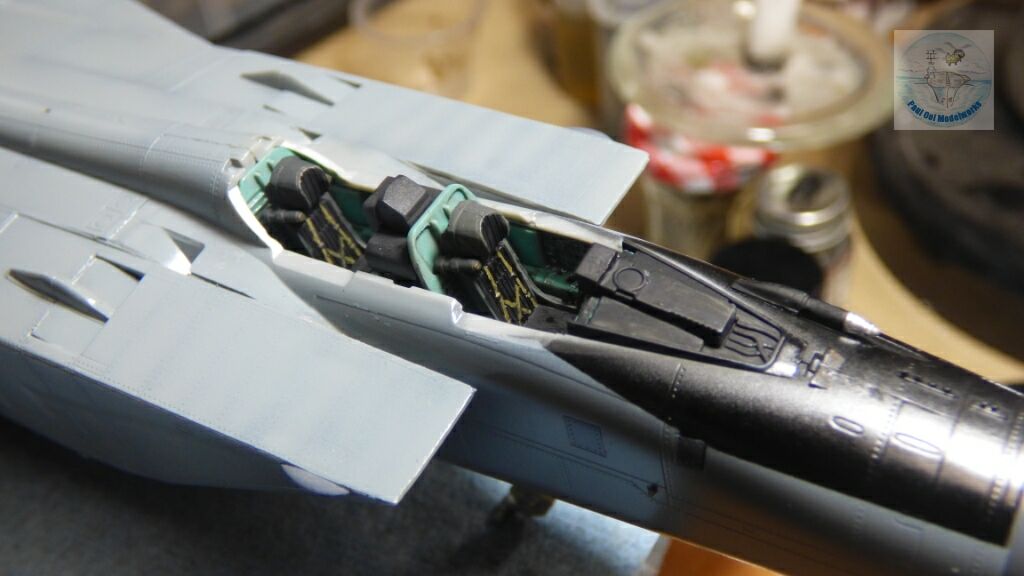
Finally I added the ejector seats. These seats are NATO Black for the seat body, Flat Black for the seat cushions and headrest, and then Khaki for the belts.
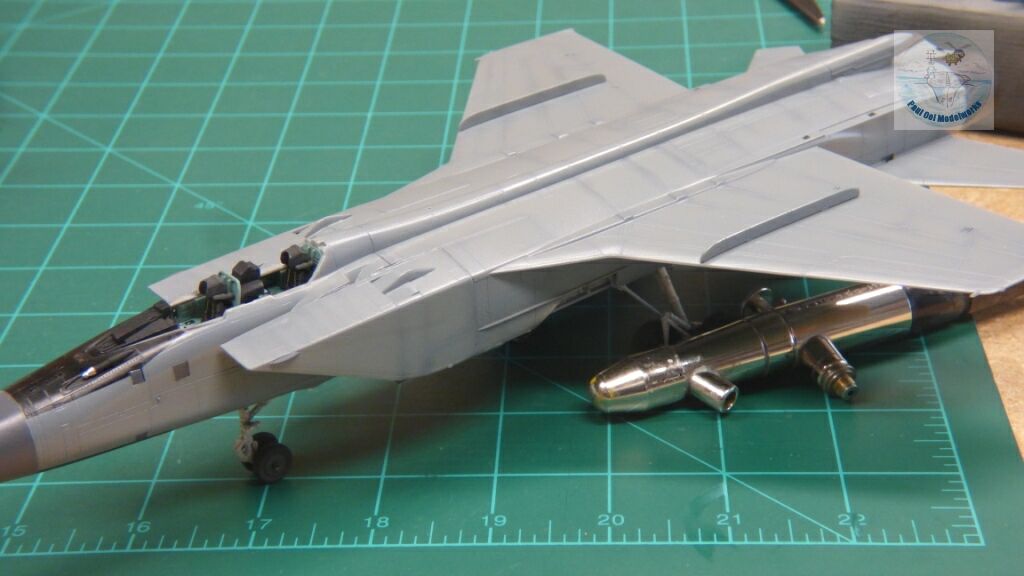
Finally, I fitted the undercarriage struts and wheels for the aircraft. The pair of main wheels at the back are extremely tricky and delicate. They sit with inbound tires that require a constraint (heavy airbrushes to keep them from splaying) until they are firm and dried overnight. I didn’t take any pictures during their actual assembly onto the aircraft wheel wells because it was extremely fiddly and one bad move would break the delicate joints. Not beginner stuff!
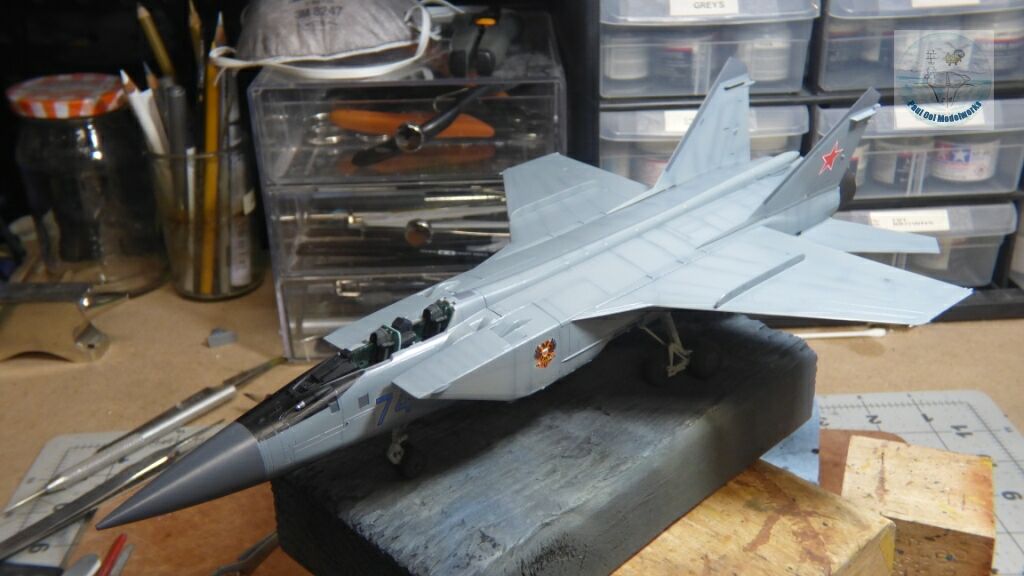
Decal work starts. While the decals are nicely printed, they are delicate. The tips of the big red stars are especially brittle, so it is better to get the positions right, then a decisive slide into place. It took three days to finish all the stencil decals.
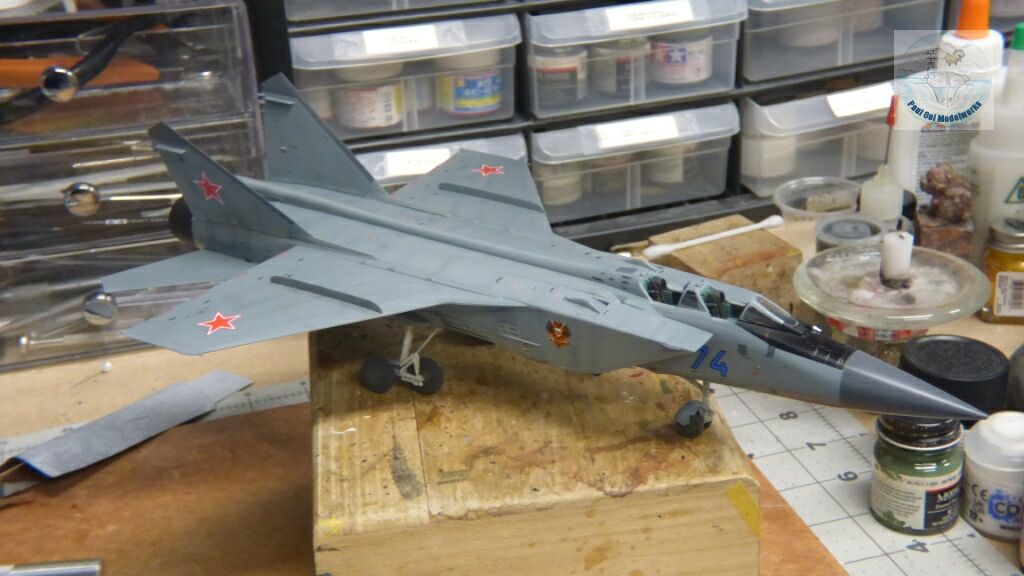
Decals completed at last!
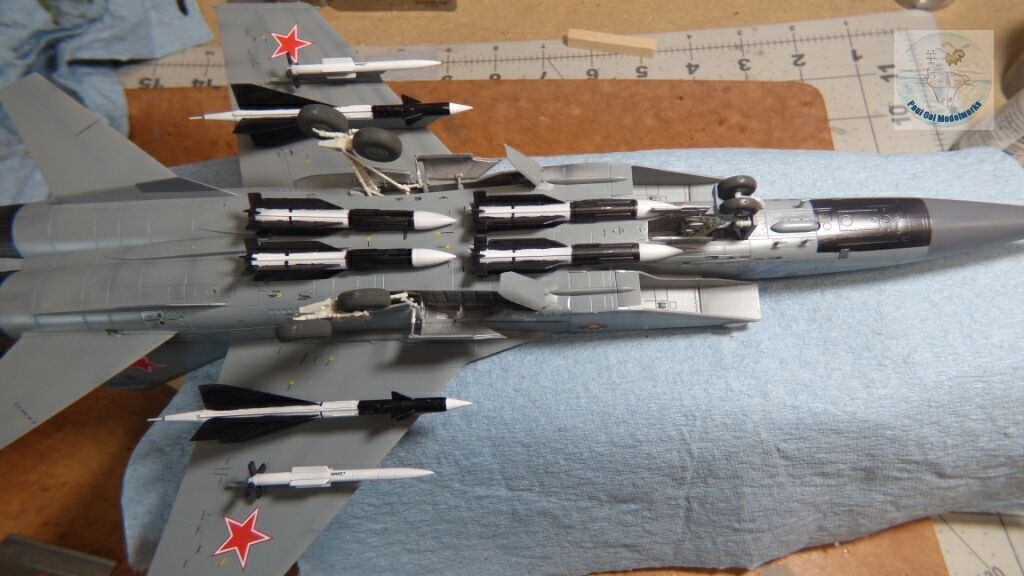
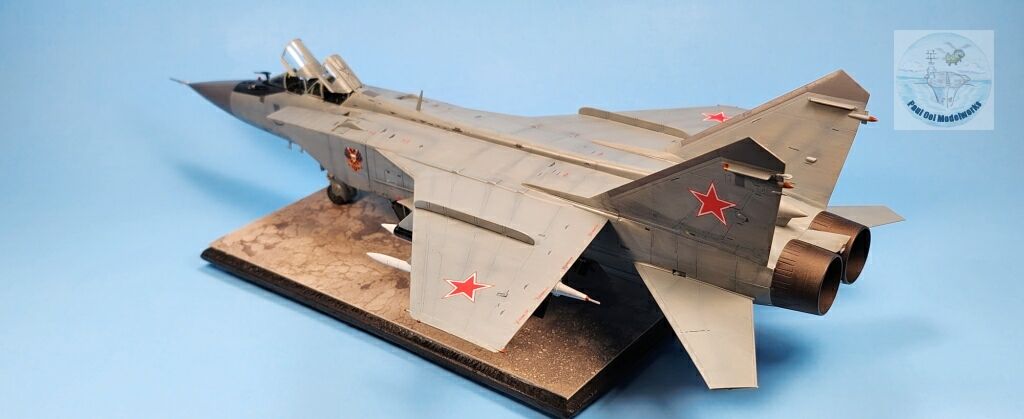
Missiles, air brake flaps, wheel well doors. Underside is all good to go. It looks simple but it is the source of some consternation. Patience required.
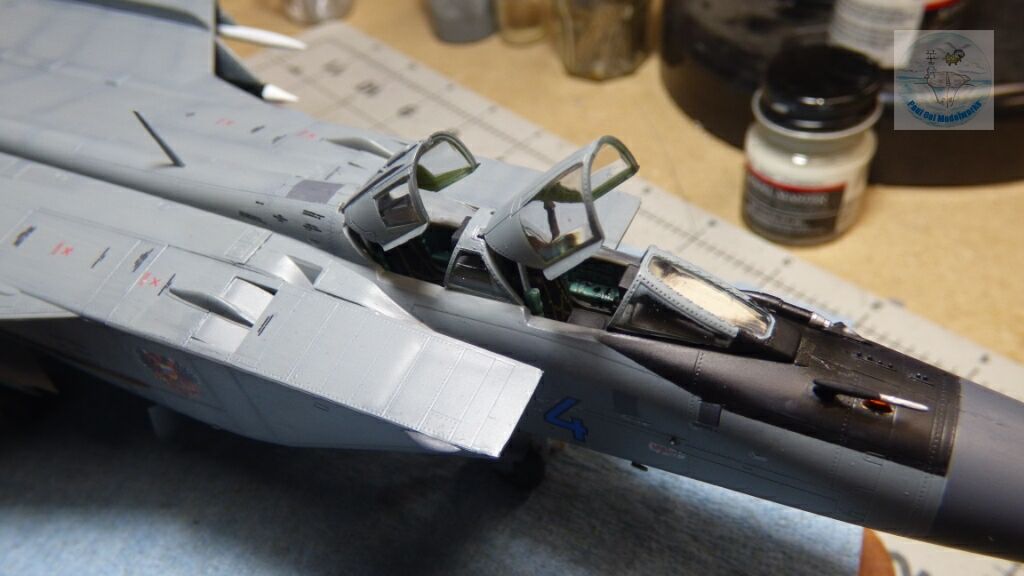
All the fiddly bits and the cockpit canopies installed.
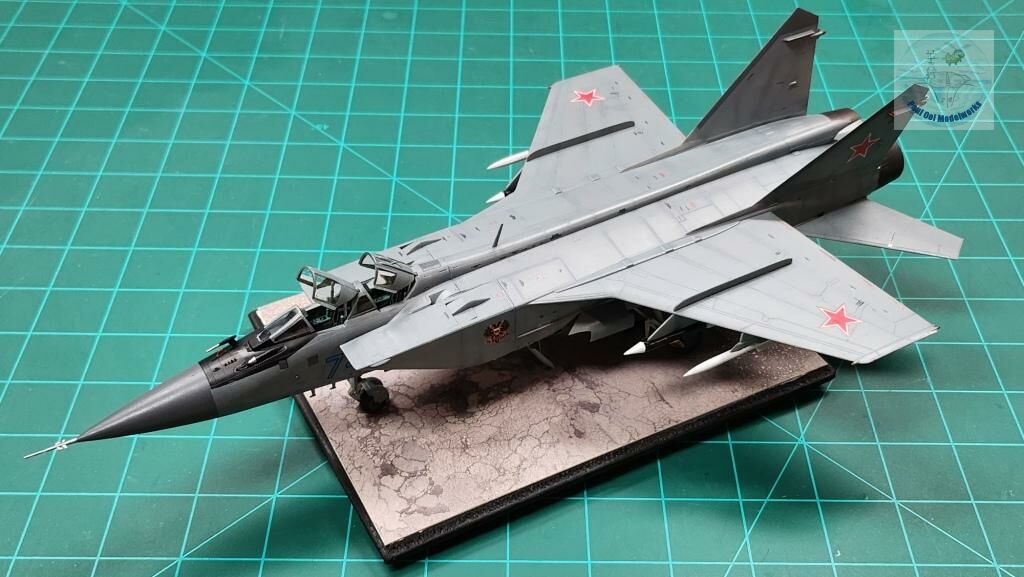
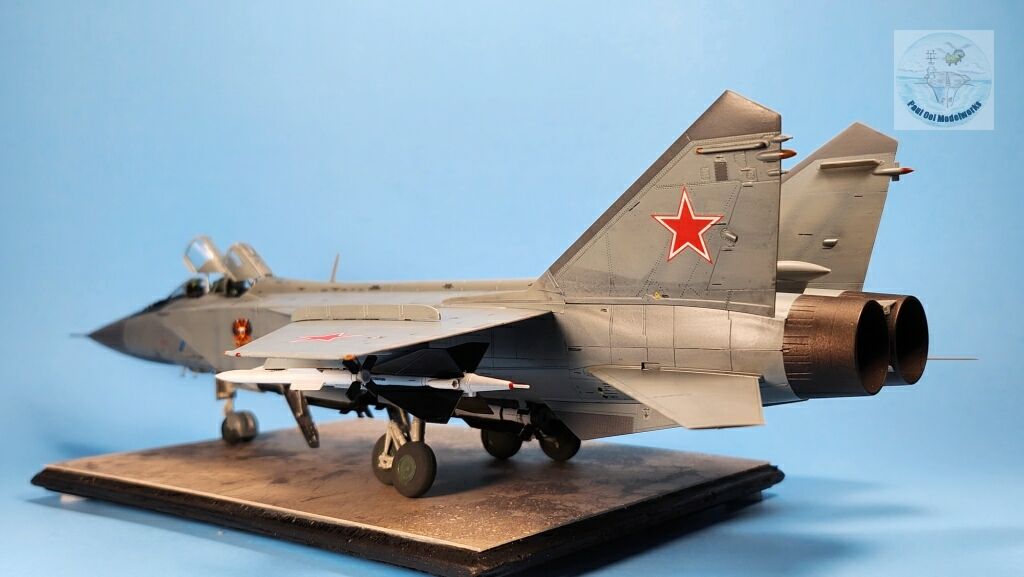
An oil wash of 70% Payne’s Grey+ 30% Zinc White diluted with Turpenol, and our Foxhound is sky bound.
Leave a Reply