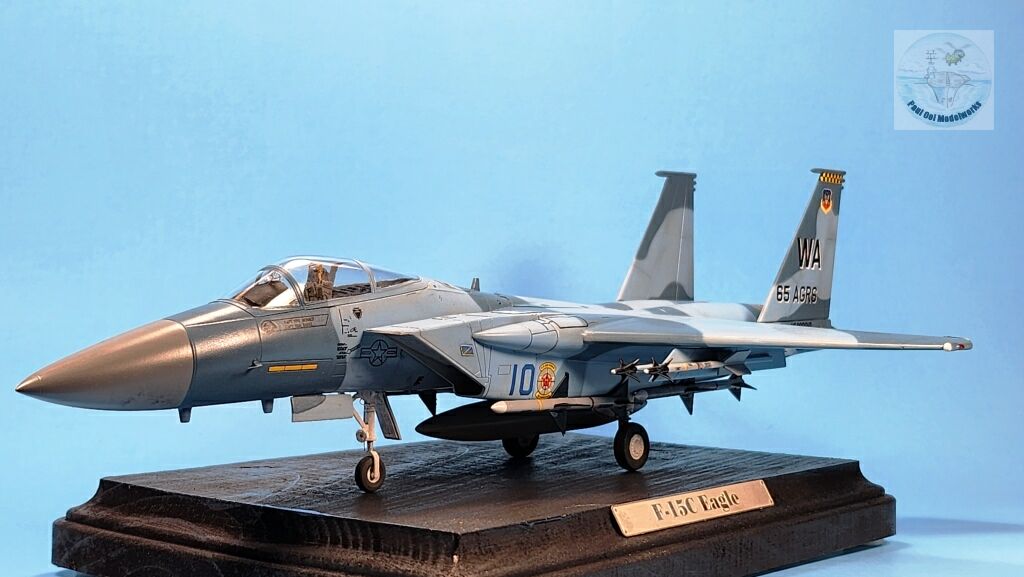
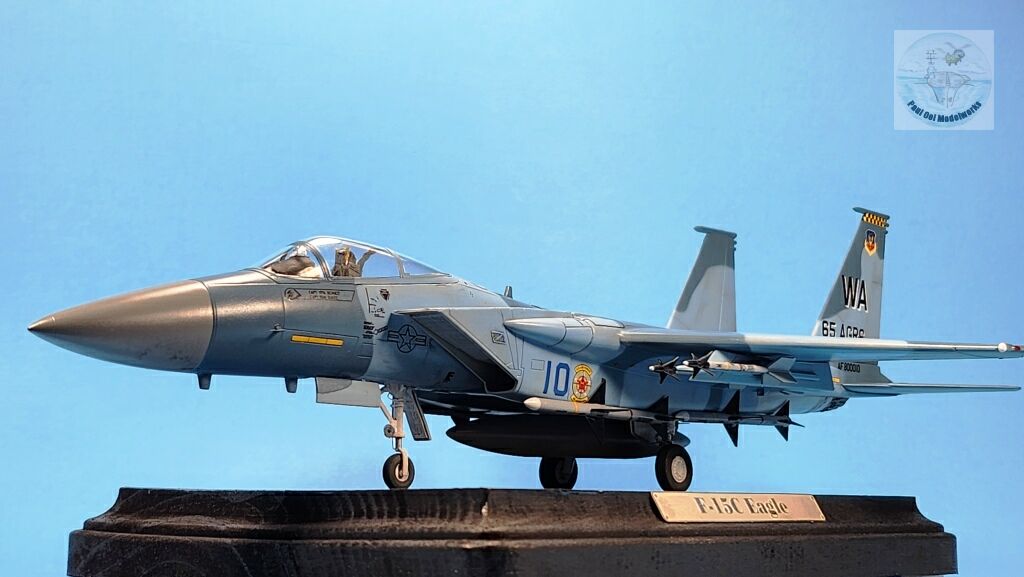
The F-15 series air superiority fighter has been the symbol of American air dominance in the world for the last quarter of the 20th century extending into the first decade of the 21st century. The fighting ability of this remarkable aircraft has been demonstrated by its air-to-air combat kill record of 104 to no losses in 37 years of operational history. Apart from its lethality, the F-15 is also admired for its design and elegance. Apart from the air superiority role in the F-15C and D variants, the F-15E Strike Eagle is a dedicated version for fighter bomber missions, with conformal fuel tanks and a greater payload to deliver heavier ordnances. Not bad at all for a design that was conceived in the 1960s and first produced in 1972.
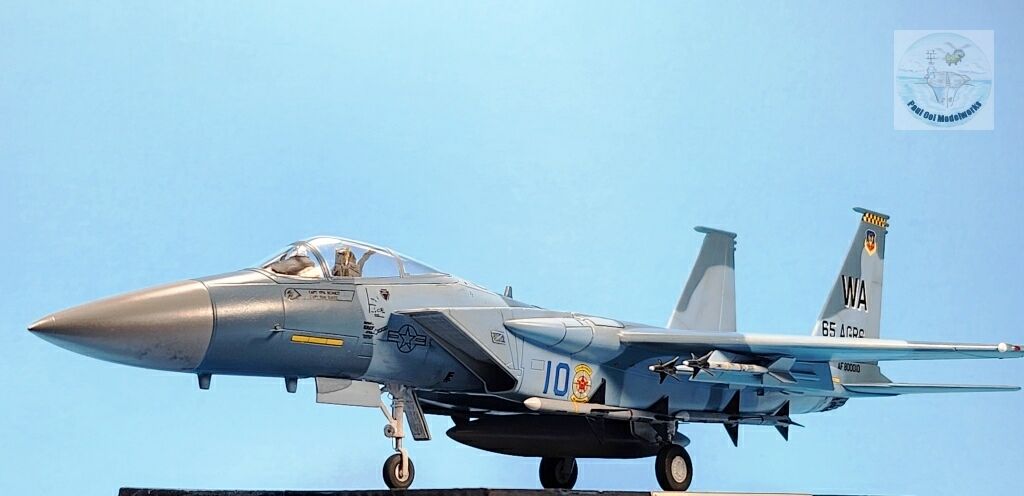
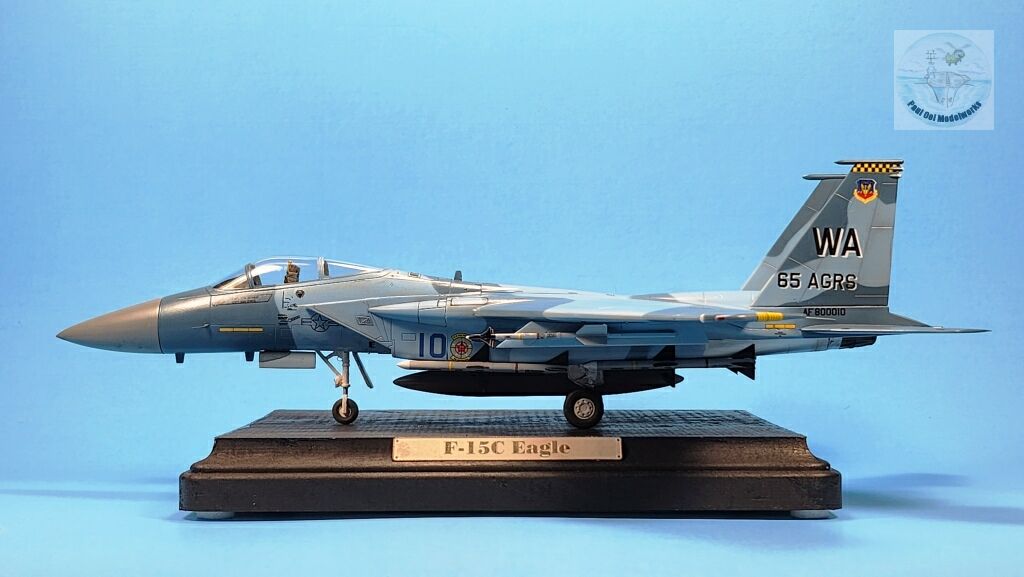
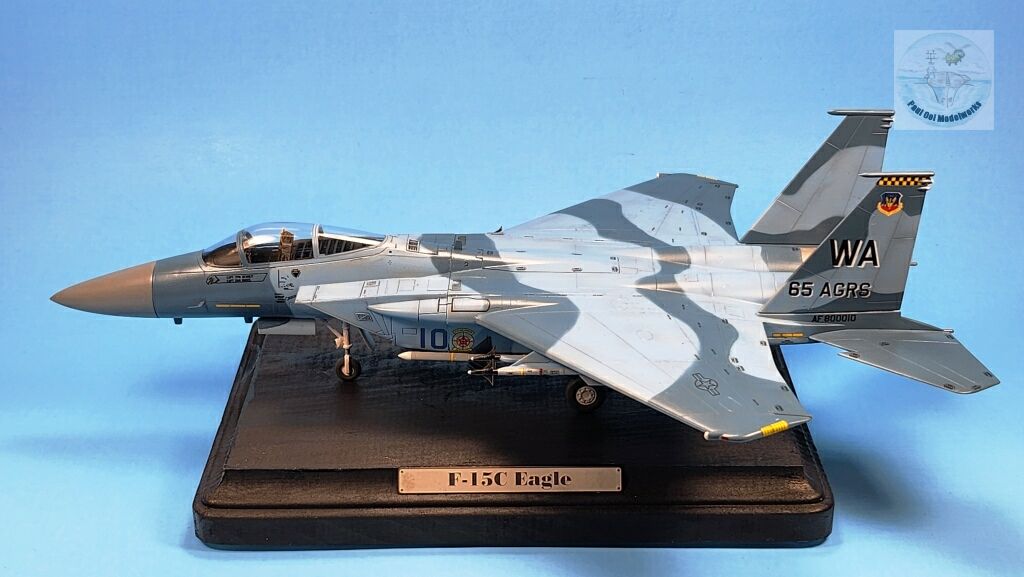
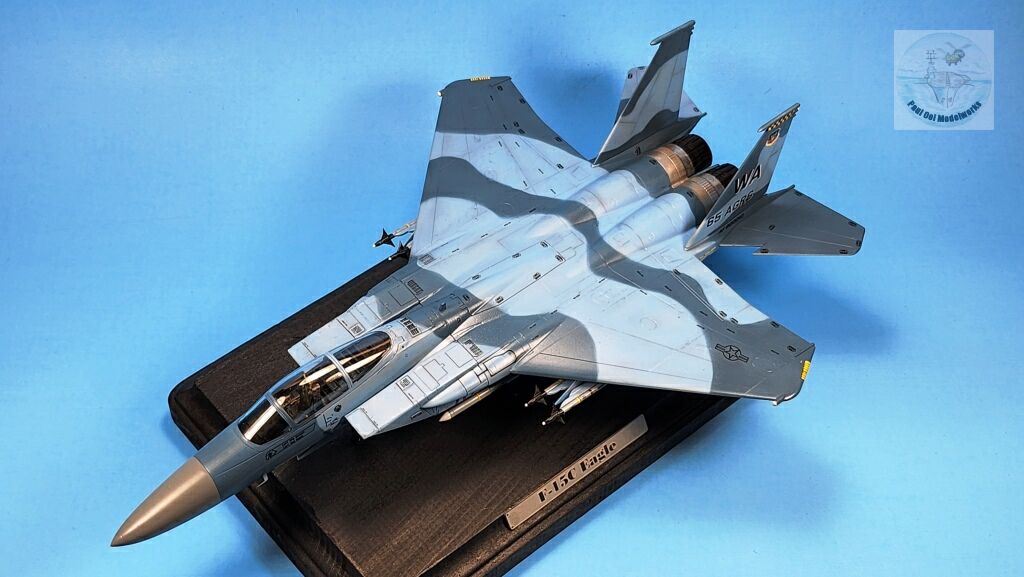
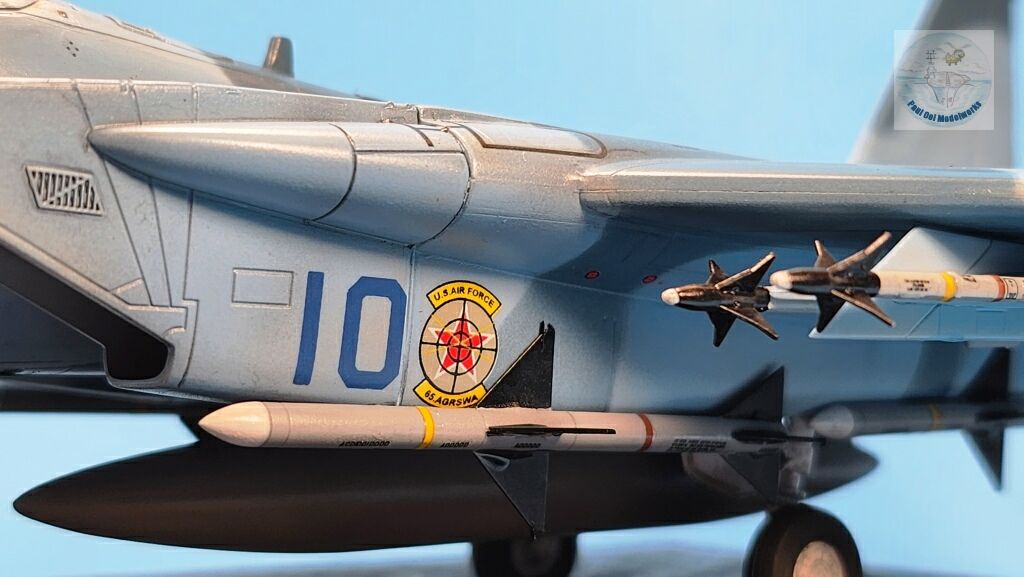
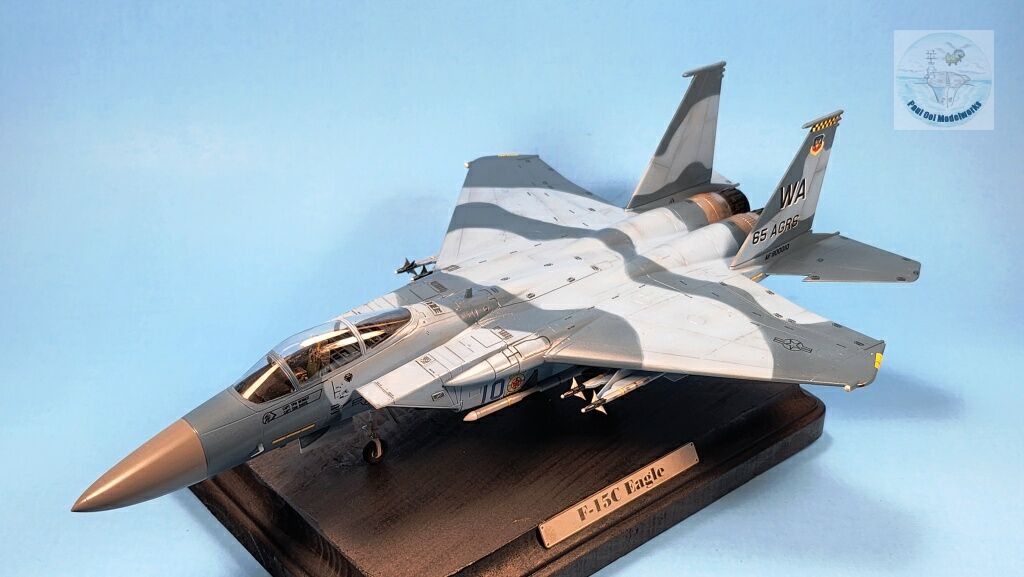
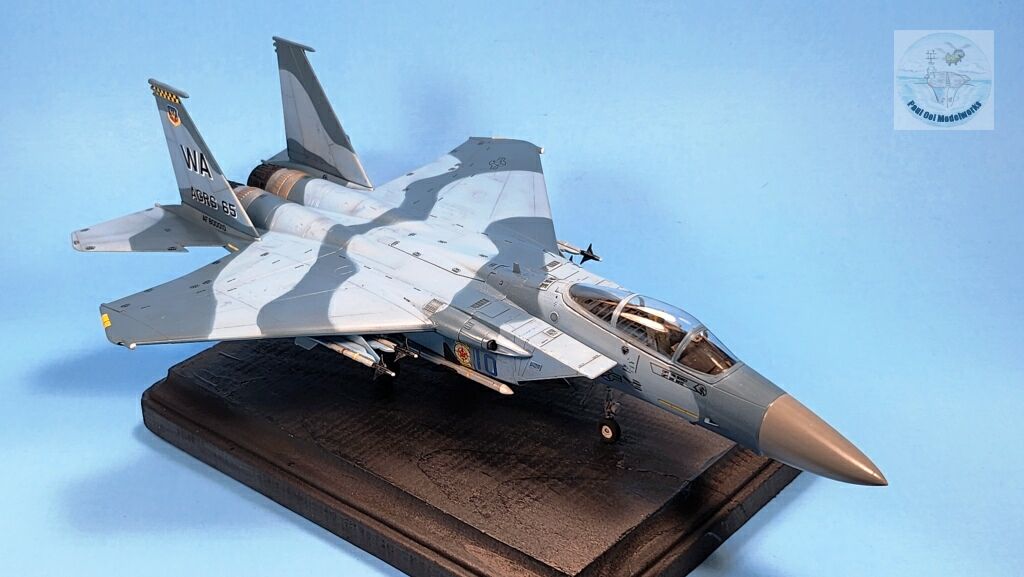
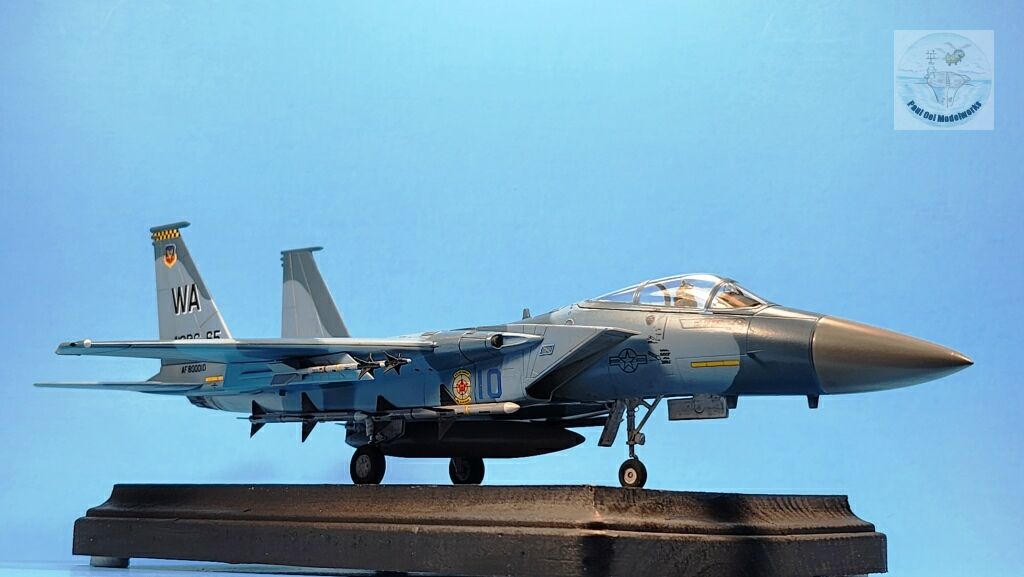
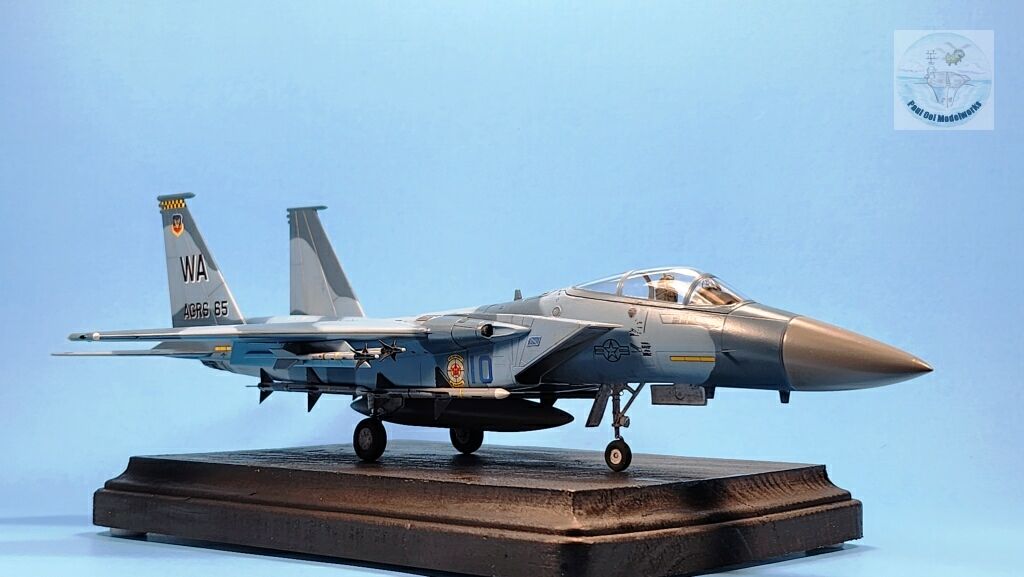
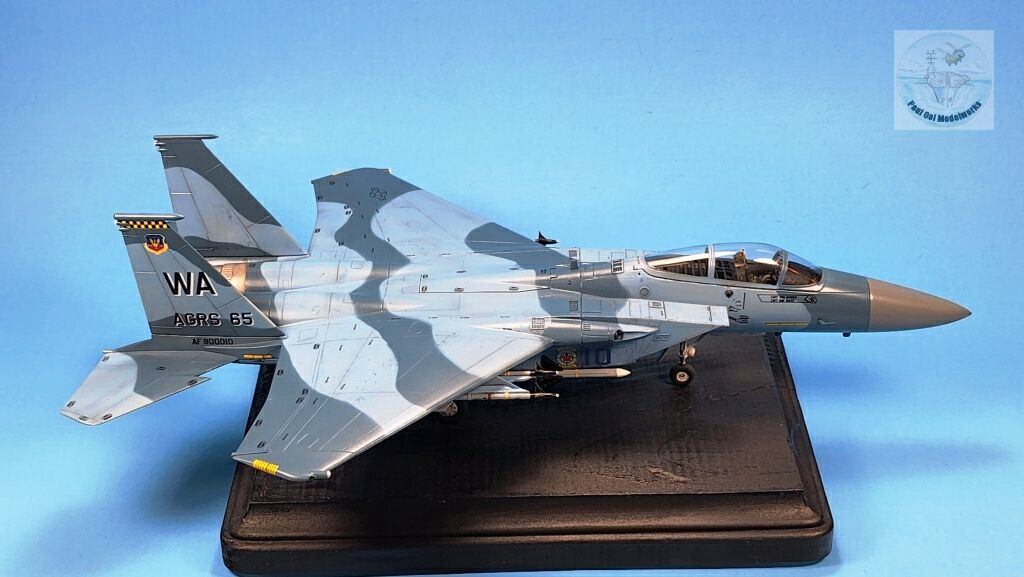
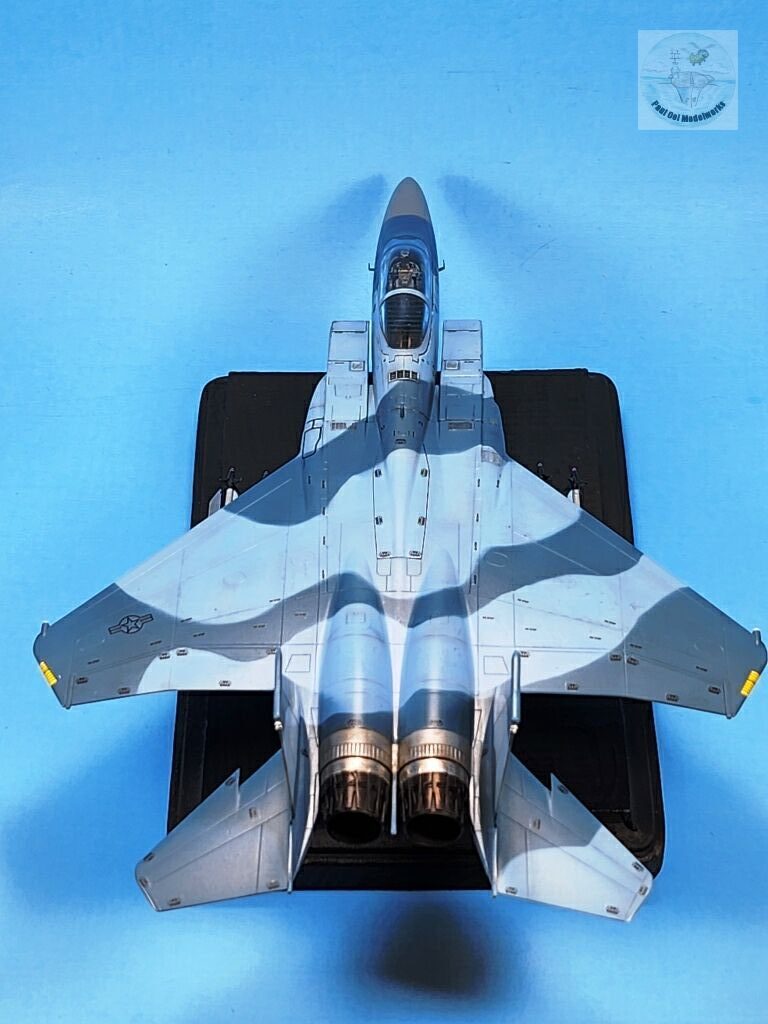
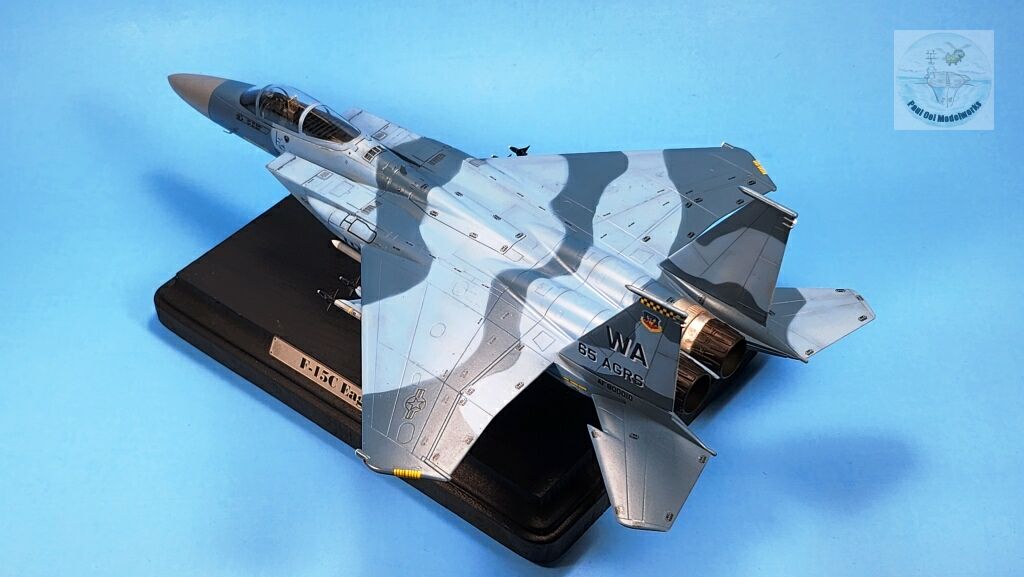
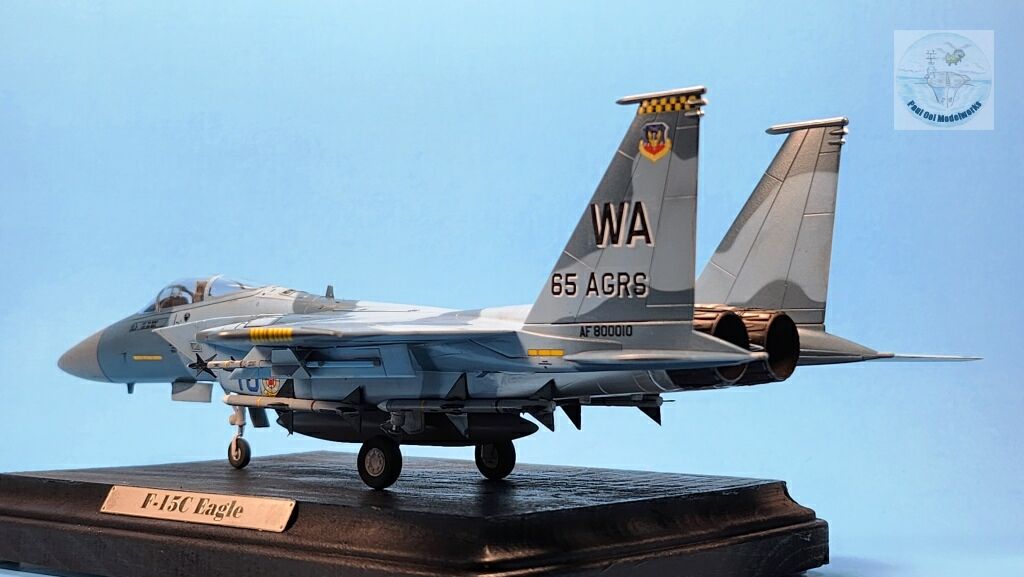
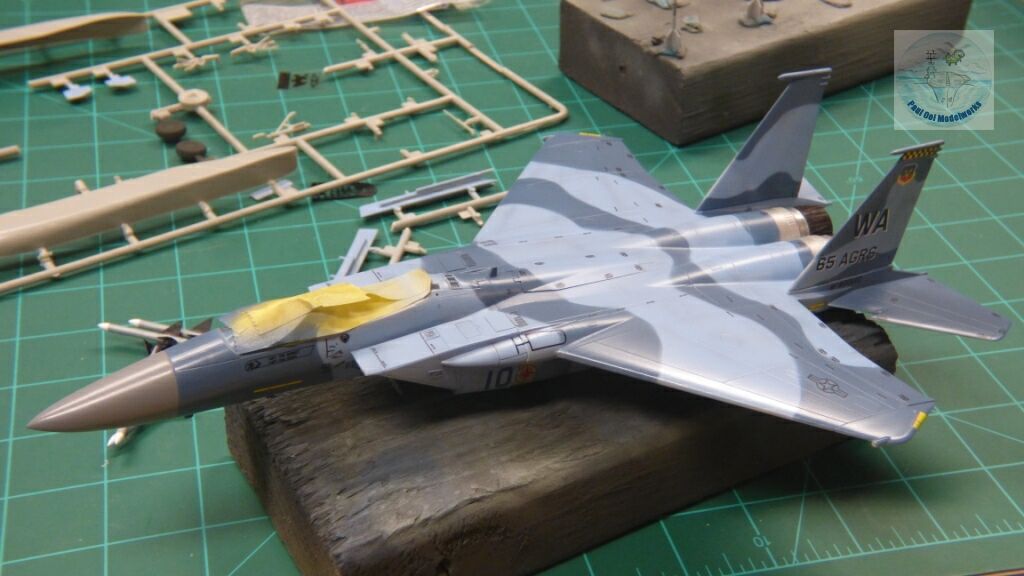
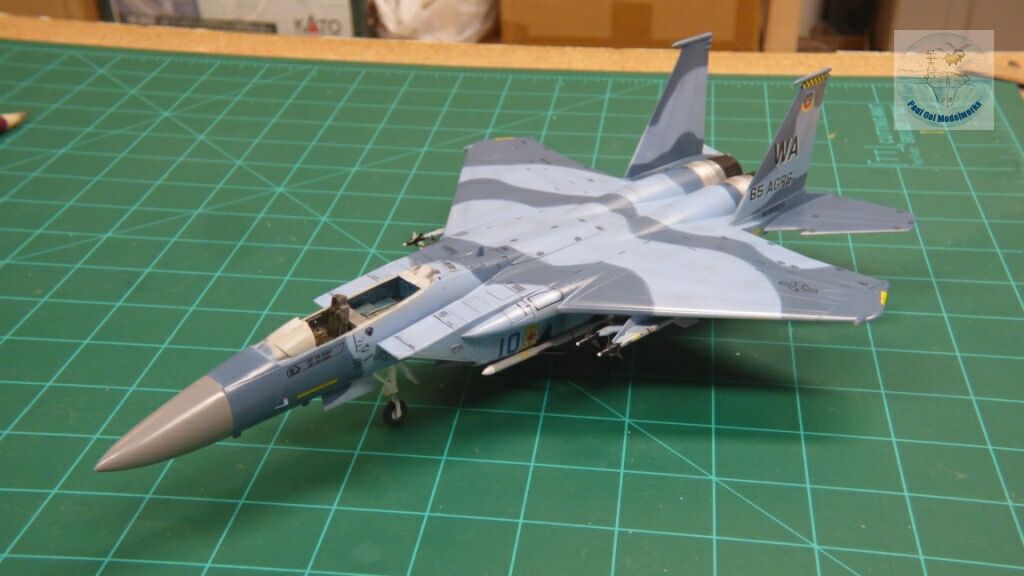
The Aggressor Squadron version of this F-15C has a light blue-dark blue color scheme meant to simulate that of the Su-25 Flanker. Aggressor pilots learn to fly their aircraft to simulate tactics and flight patterns used by opponent countries for other units to train against. These pilots tend to be highly skilled and experienced, being able to handle their aircraft very well, and maximizing the F-15C’s strengths and armament, thus presenting a very formidable challenge for other fighter pilots to engage in training combat.
Gallery


Construction Notes
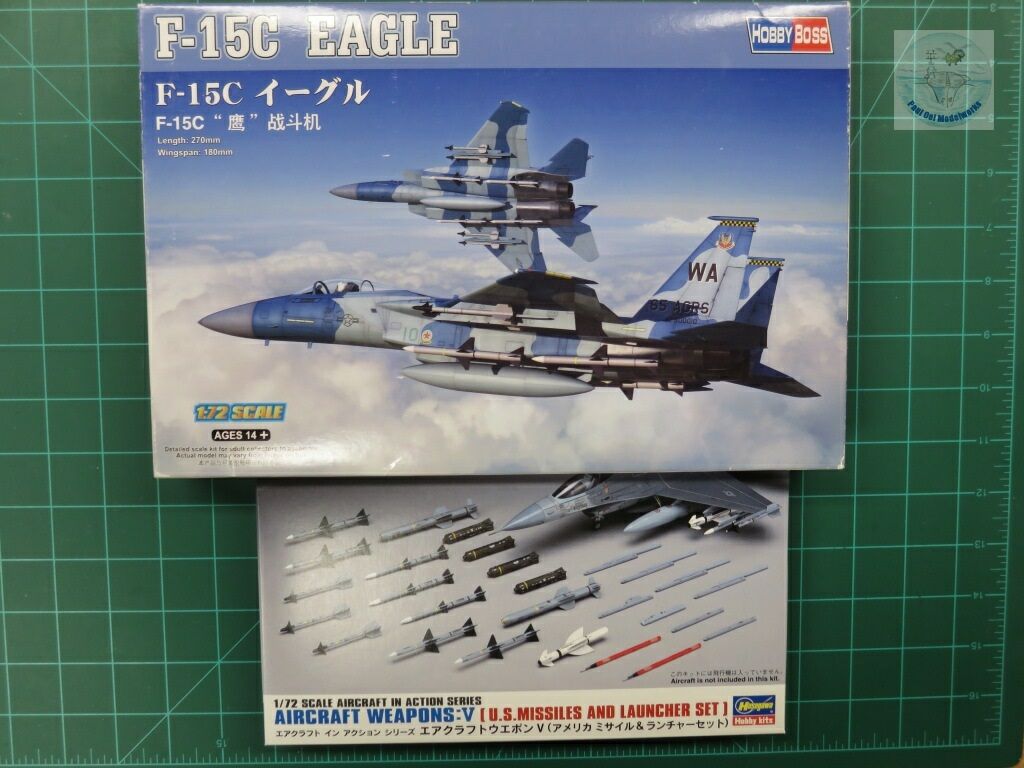

I bought this 1/72 scale HobbyBoss F-15C some years ago because I liked the Aggressor color scheme and the kit was relatively cheap. However, the simplicity of the parts were meant for a weekend kit with many details missing. For example, the cockpit was spartan and lacked the details of the avionics compartment behind the seat. The engine intakes had no details, just two gaping cavities. And there were no missiles in the kit parts despite the box art showing them prominently. To bring the kit up to par, I bought Hasegawa’s Aircraft Weapons V kit with the correct Sidewinder AIM 9L/M and Sparrow AIM 7M missiles, a resin ejection seat from Quick Boost, and Eduard F-15C Eagle interior and exterior detail kit for the Hasegawa kit ( I did not find one for HobbyBoss). The molding details for the HobbyBoss parts were adequate, but the fit of some critical parts were mediocre and needed seam filling using techniques from Tutorial 3: Filling Large Plastic Seams. The decal sheet is surprisingly good, and provides markings for at least 3 aircraft versions, and the generic stencils. The decals separate quickly once immersed, and they settle well using Micro Set or Micro Sol.
This kit is manageable for a beginner to produce an adequate representation of the F-15C with interesting markings. It does provide the basic frame for detailing work if you are one for that challenge, as I will show in the following construction notes.
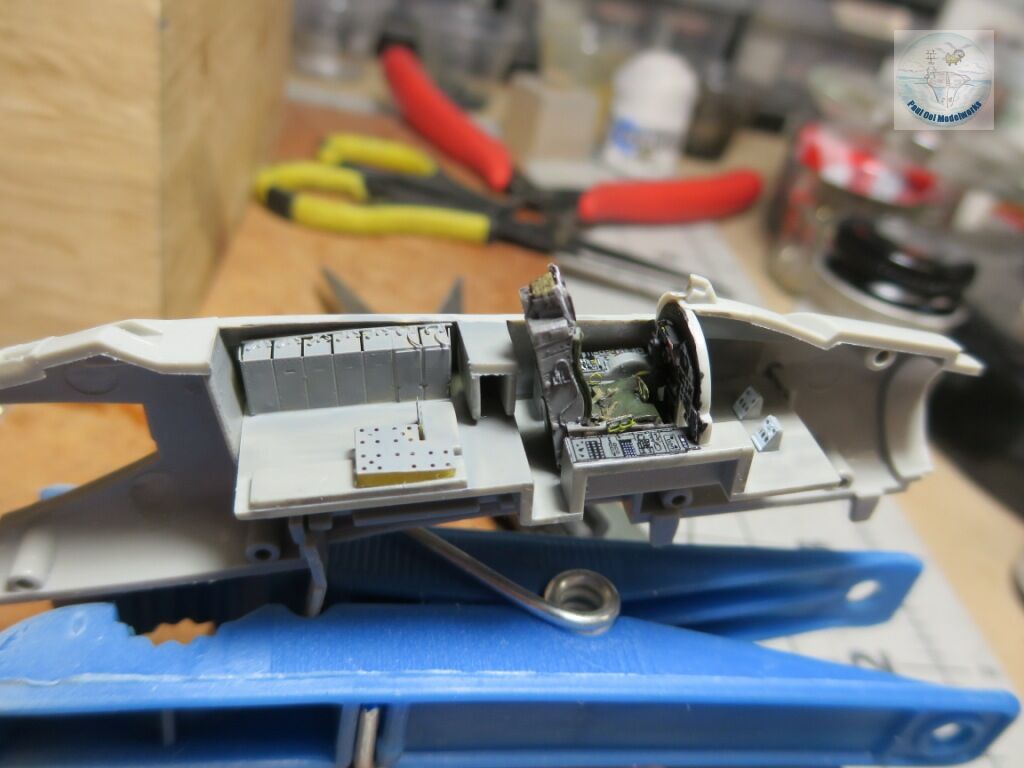
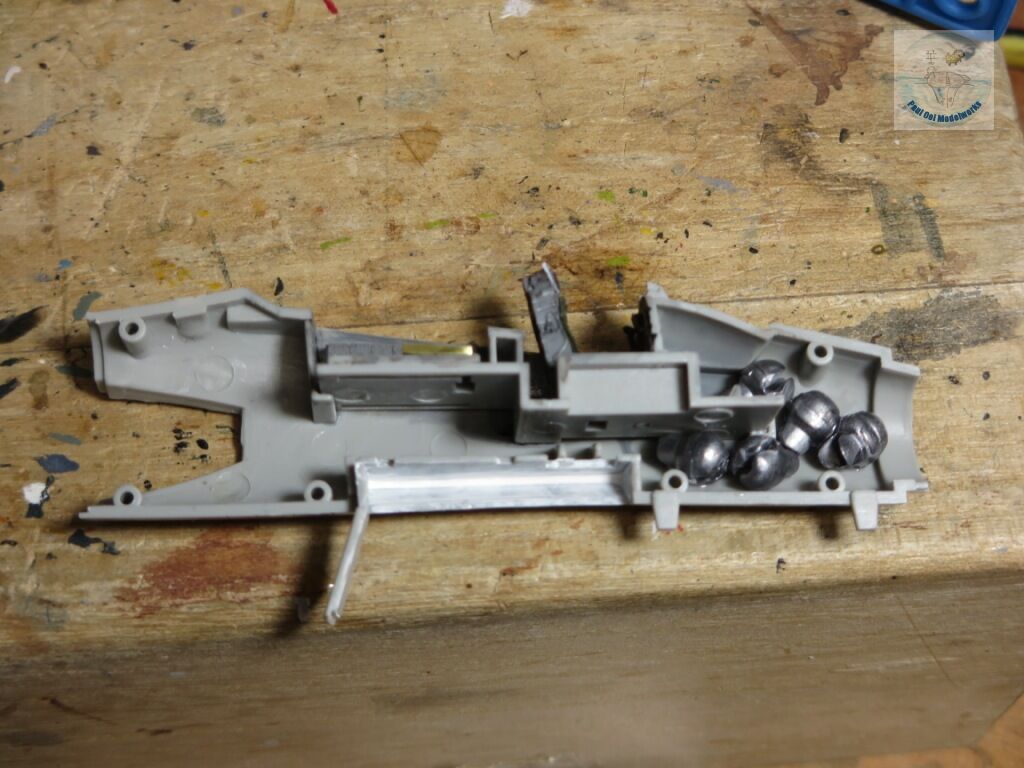
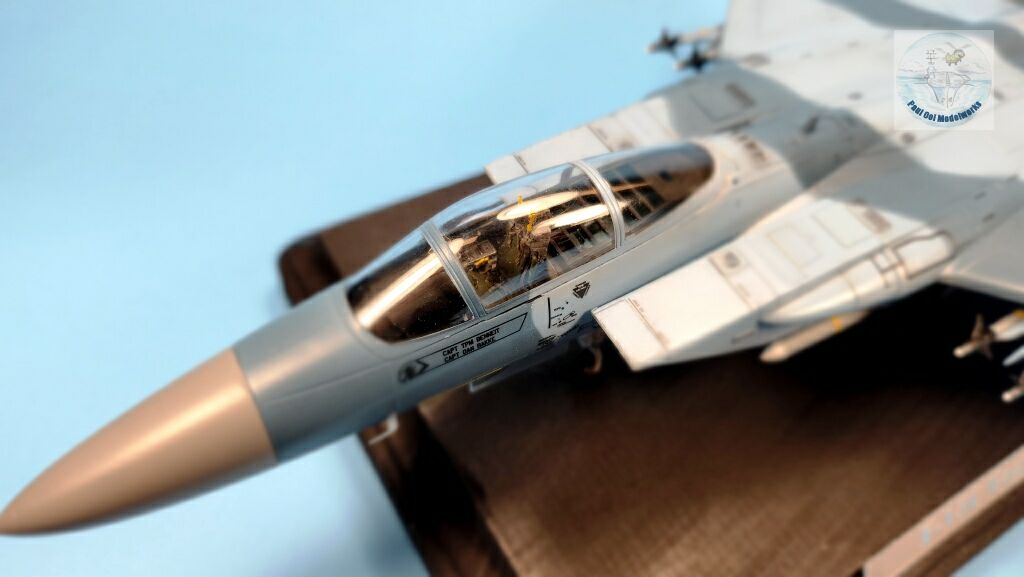
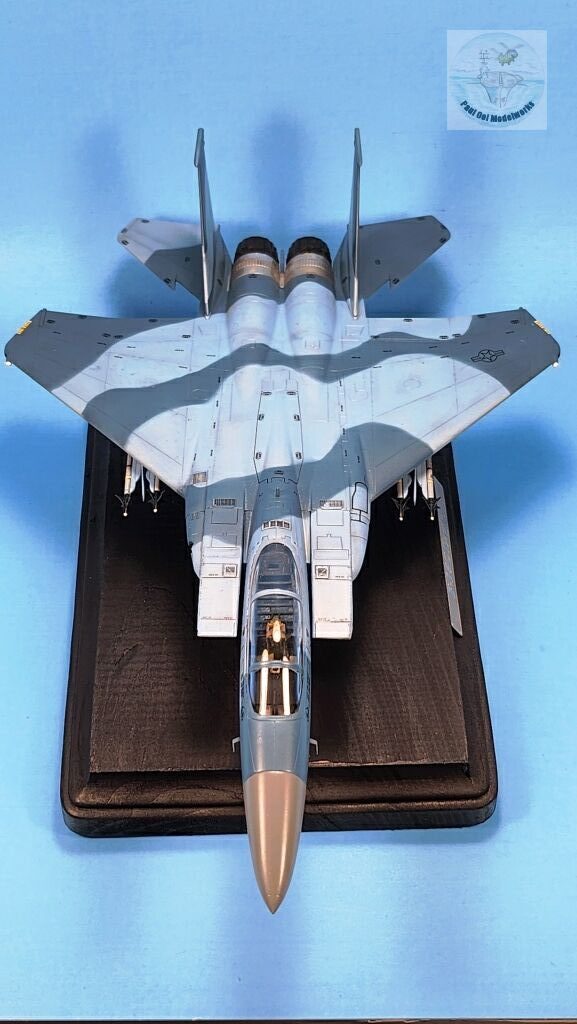
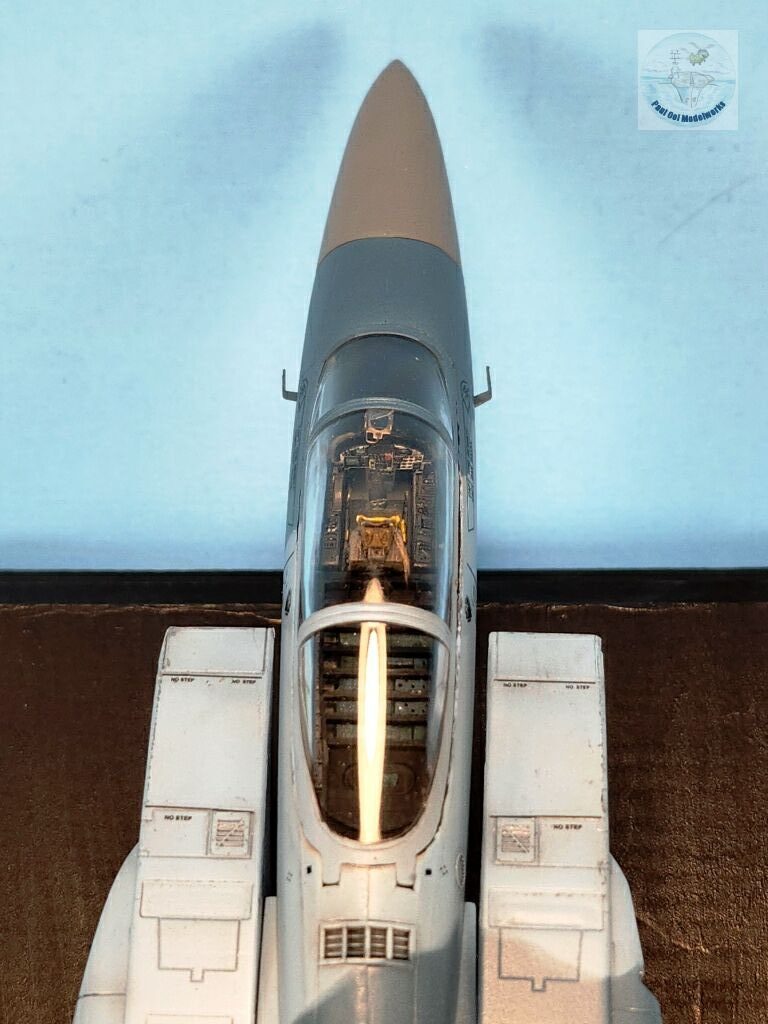
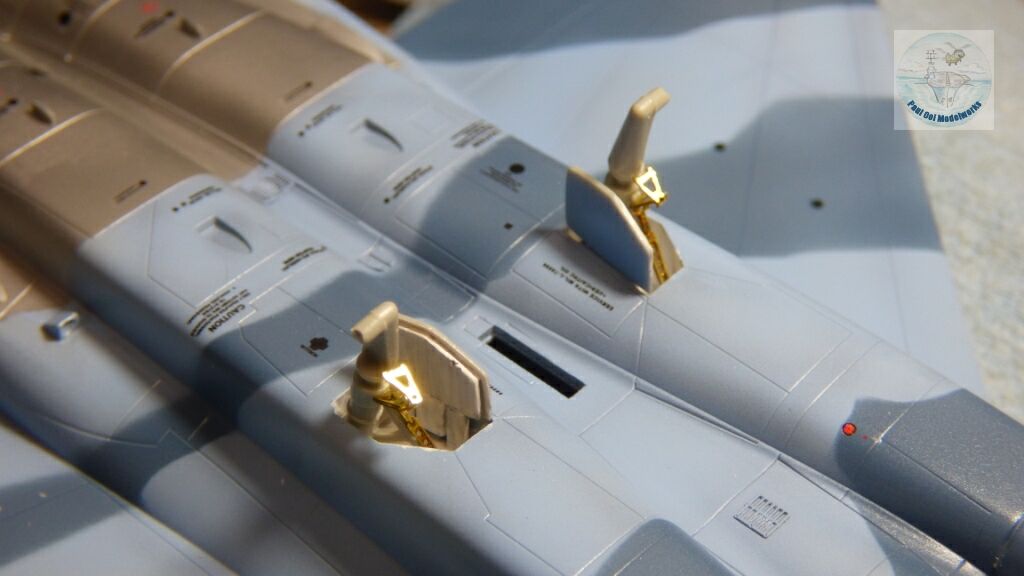
The cockpit details from the Eduard photoetch fret really brings out the cockpit space, and as can be seen here, the additional avionics boxes in the compartment behind the pilot’s seat. I always like to use resin ejection seats as they provide intricate detail without the headache of photoetched details that are quite a bit more fiddly and fragile to handle. As always, to prevent tail-sitting, remember to add fishing weights or similar to the front compartment. Do check to fit before cramming in too many weights, or the halves will not close properly. The interior walls and bulkheads are painted FS6231 Dark Gull Gray which is very close to Aircraft Gray.
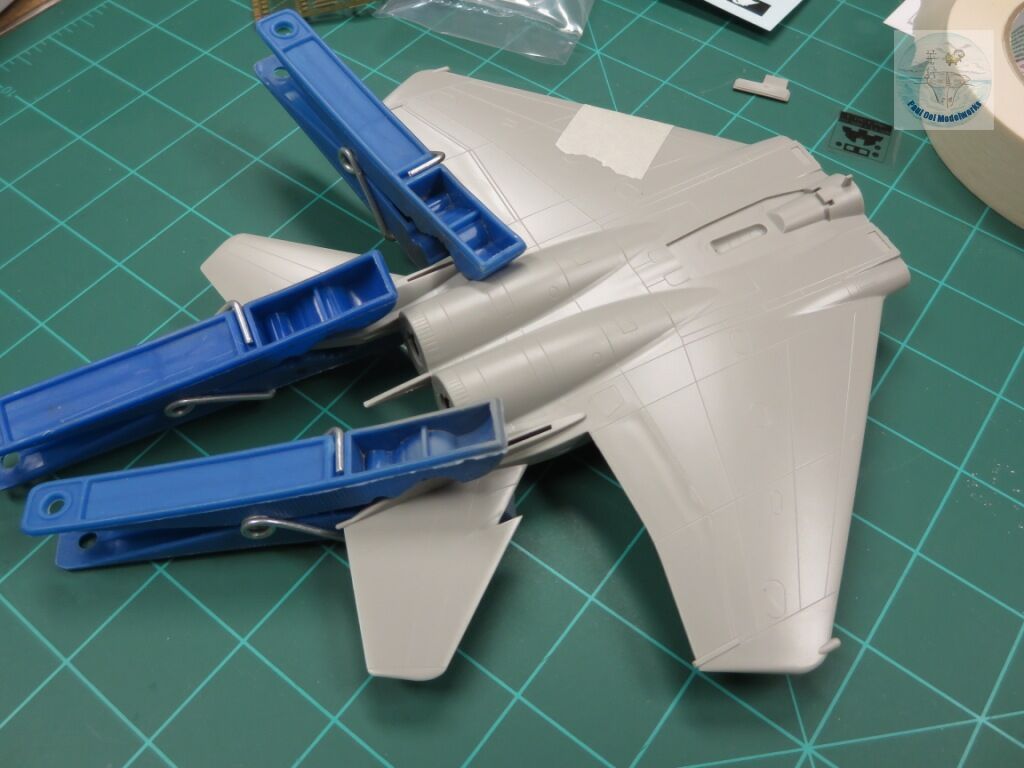
The largest sub-assembly are the two clam shell halves of the main fuselage. These do require some forced clamping to close the seams, as seen here.
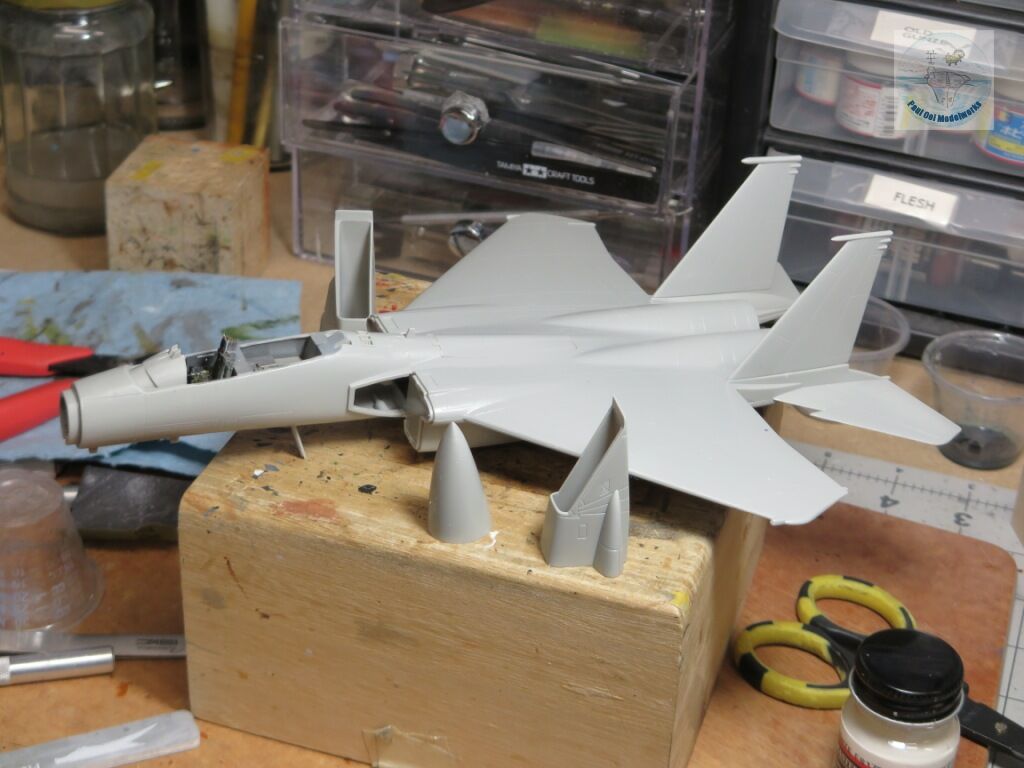
Once the cockpit tub section gets fitted onto the main fuselage, the aircraft’s main form takes shape. At this point, I clean and dry-fit the two rear stabilizers (despite the picure, they are not glued on, just test-fitted), and also the front radome and two air intakes.
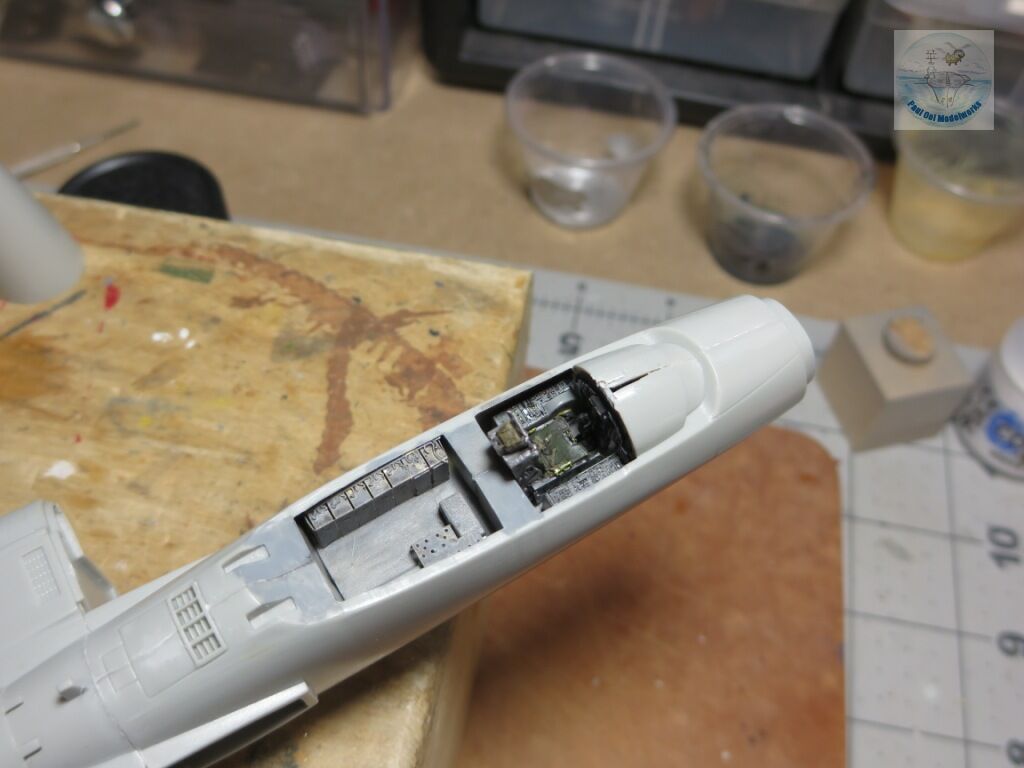
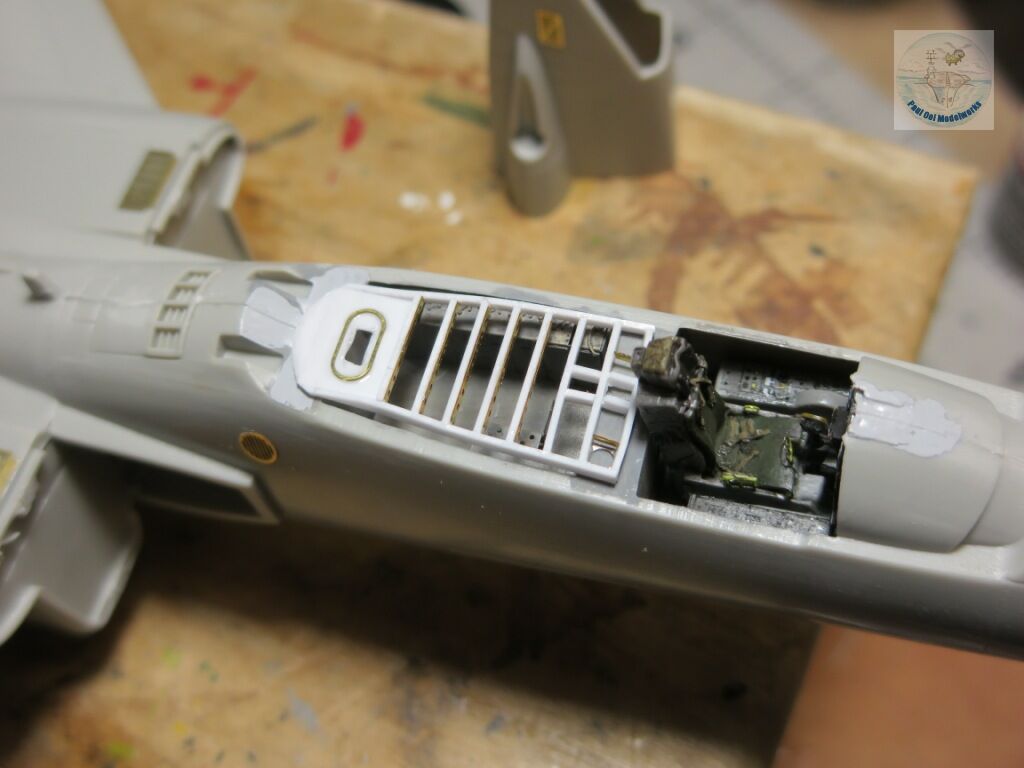
The kit did not provide the rear avionics compartment cover (in real life, it is a frame that attaches to the main plexiglass canopy), and so I scratch built one with Evegreen plastic rods and photo-etched parts from the Eduard fret.
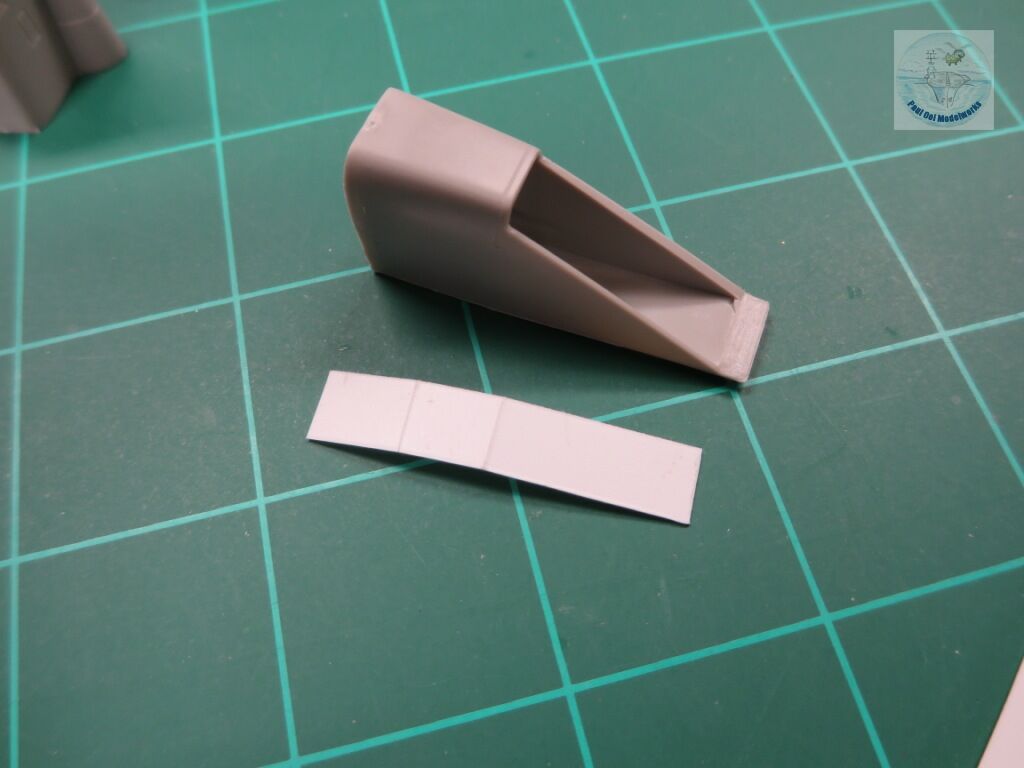
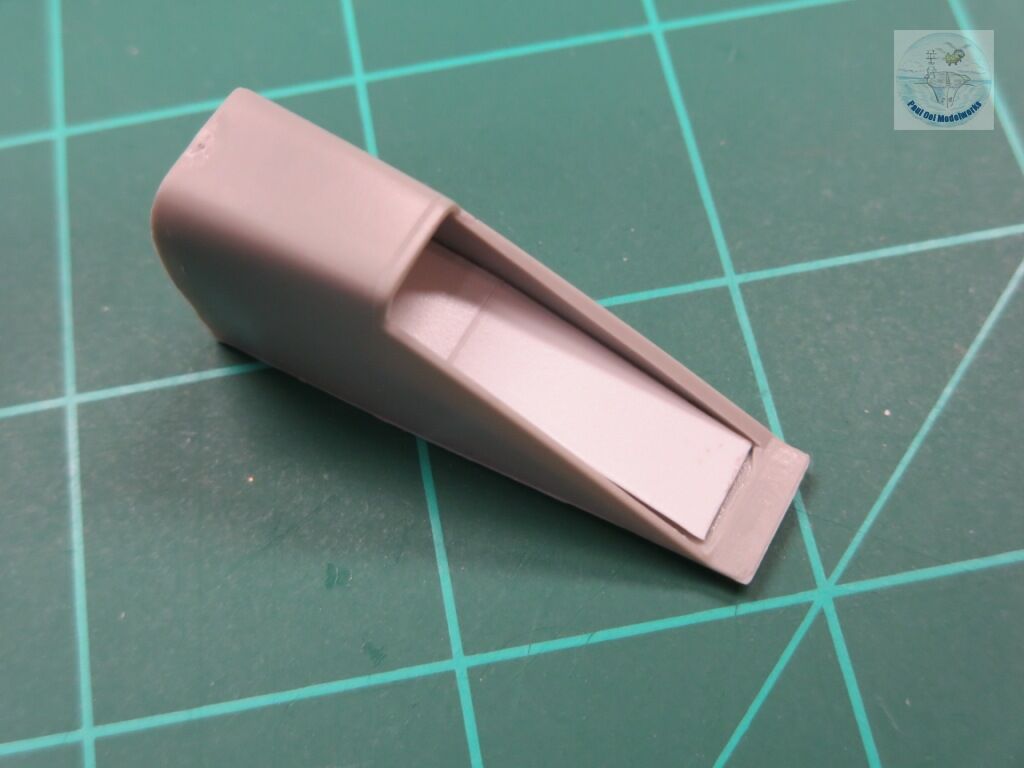
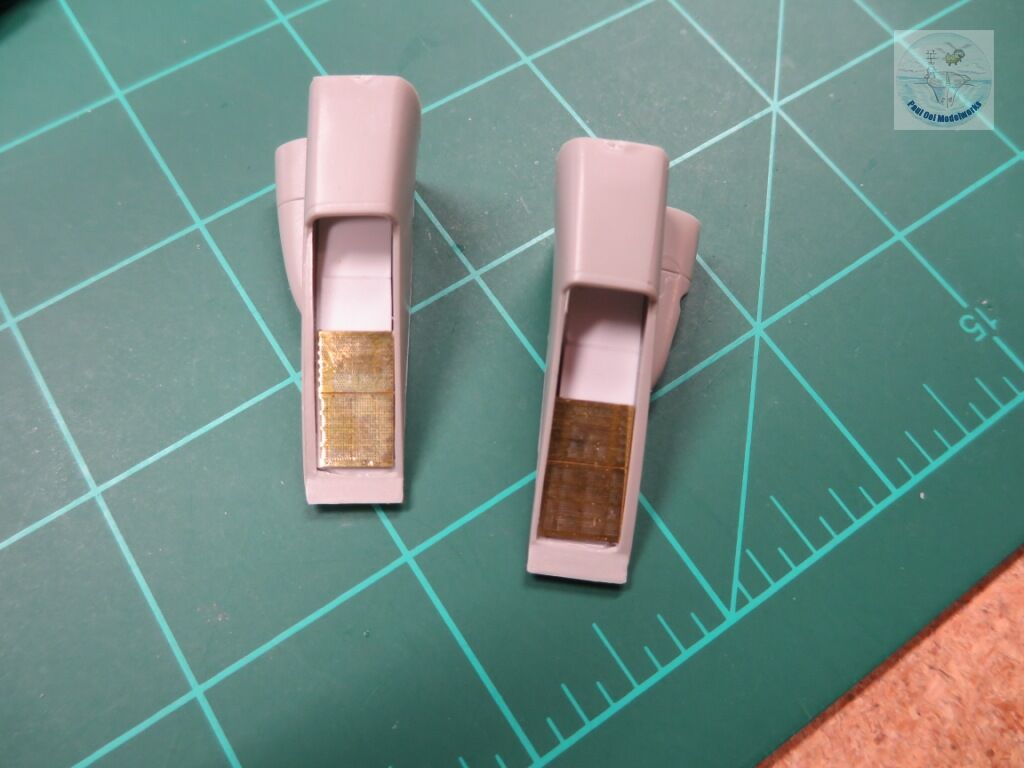
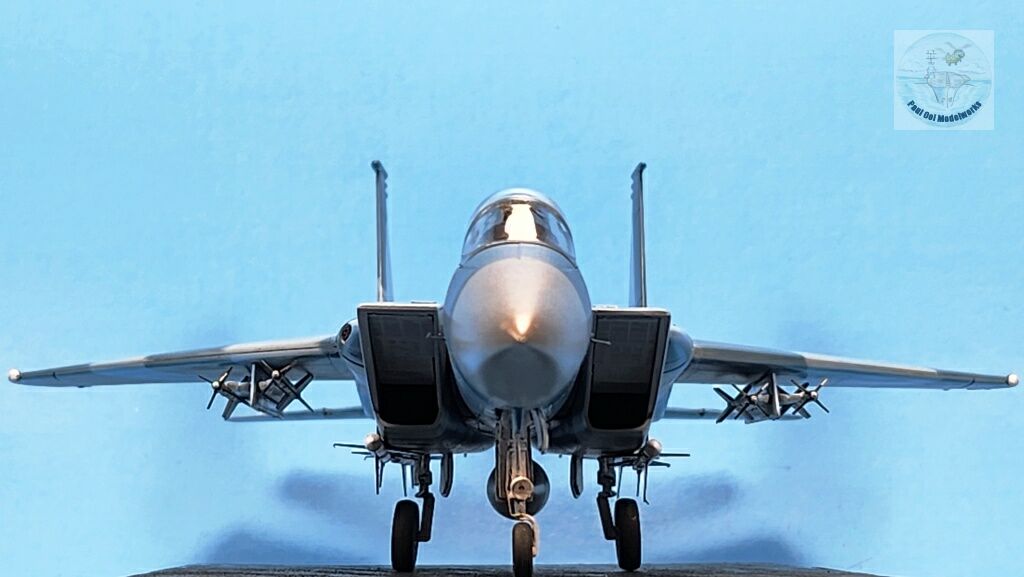
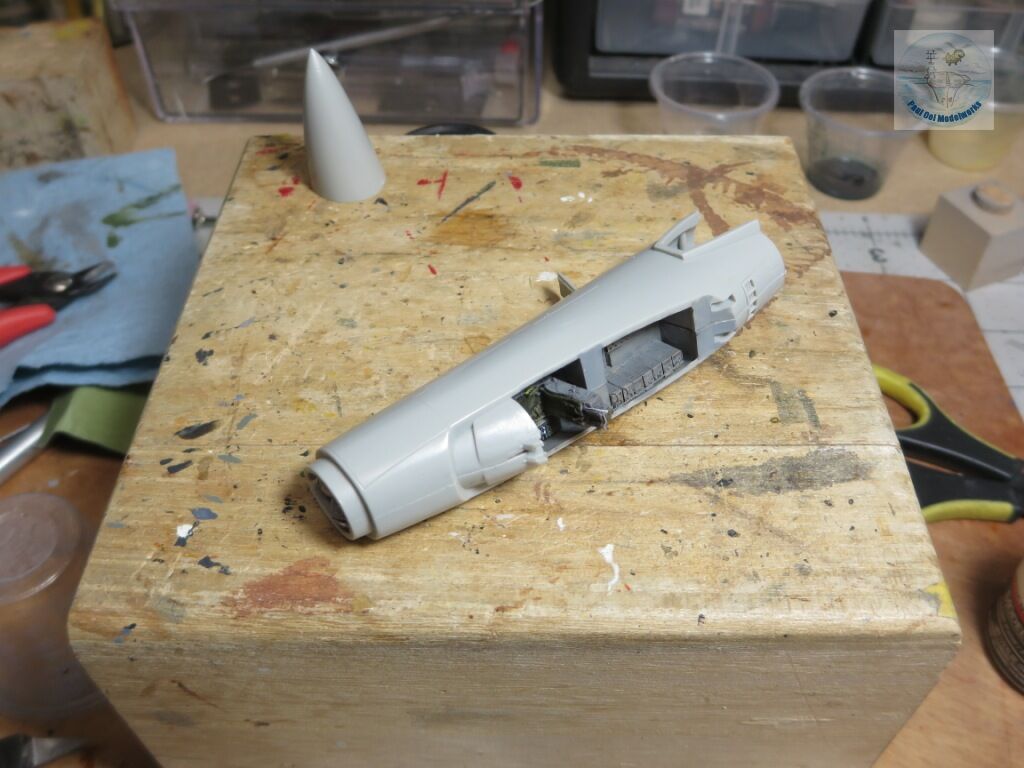
The next space to tackle and fill in are the two engine intakes. As mentioned, the kit just provides two gaping cavities without any components inside. In actuality, the intakes have these flaps that channel the flow. I kit bash these using Evergreen plastic sheets, and combine them with the photo-etched panels from Eduard.
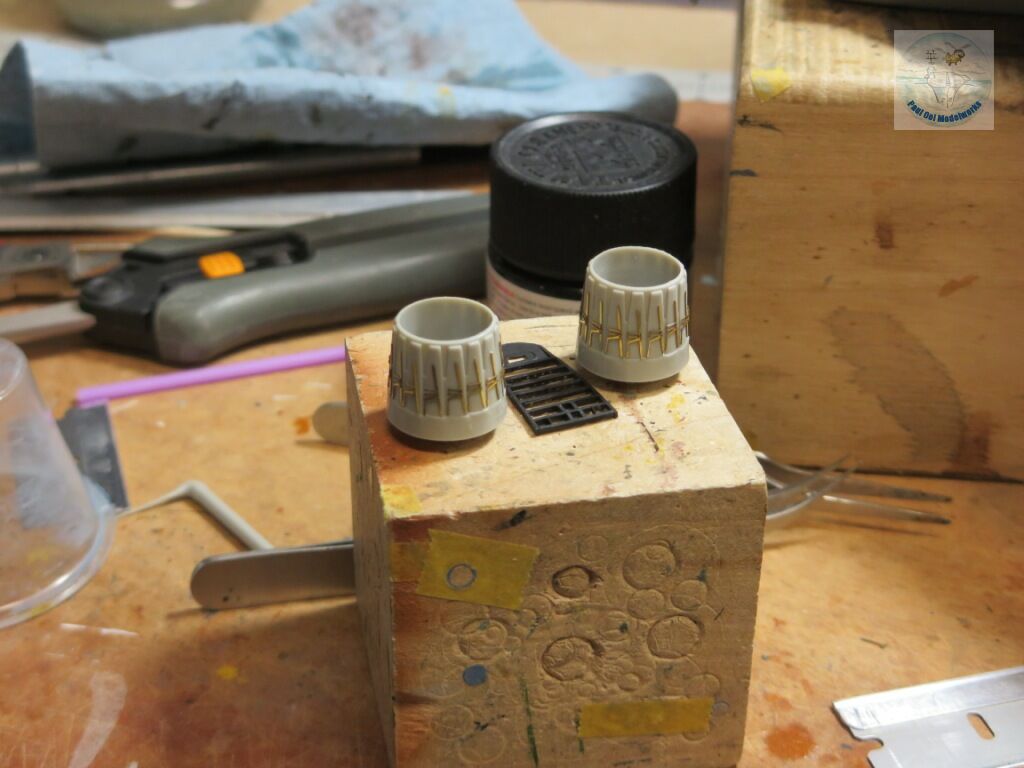
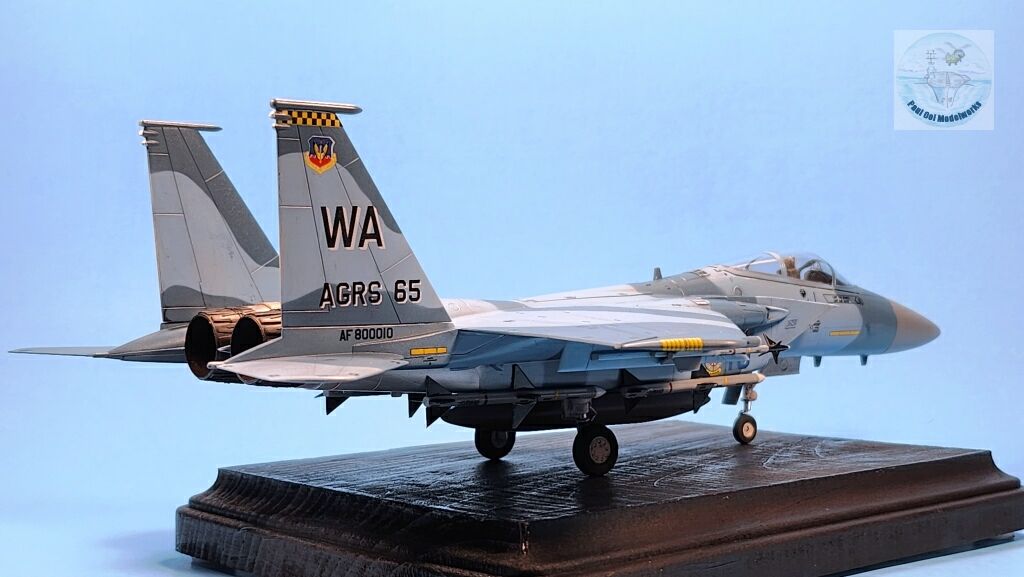
The engine exhaust cones were very simple. To add the actual flap control details, I got these parts from the Eduard photoetched frets and it really made a huge difference to the appearance of the exhaust cans.

The kit part for the starboard side air intake has a nacelle for the main Gatling gun but it was just a void where the gun barrels should be. I scratch-built the Gatling 6-barrelled boiler plate by getting a suitable diameter plastic rod, and thin it down to fit into the void. I drilled 6 micro-holes with pin drills to simulate the barrels, and then fitted the boiler plate into the nacelle.
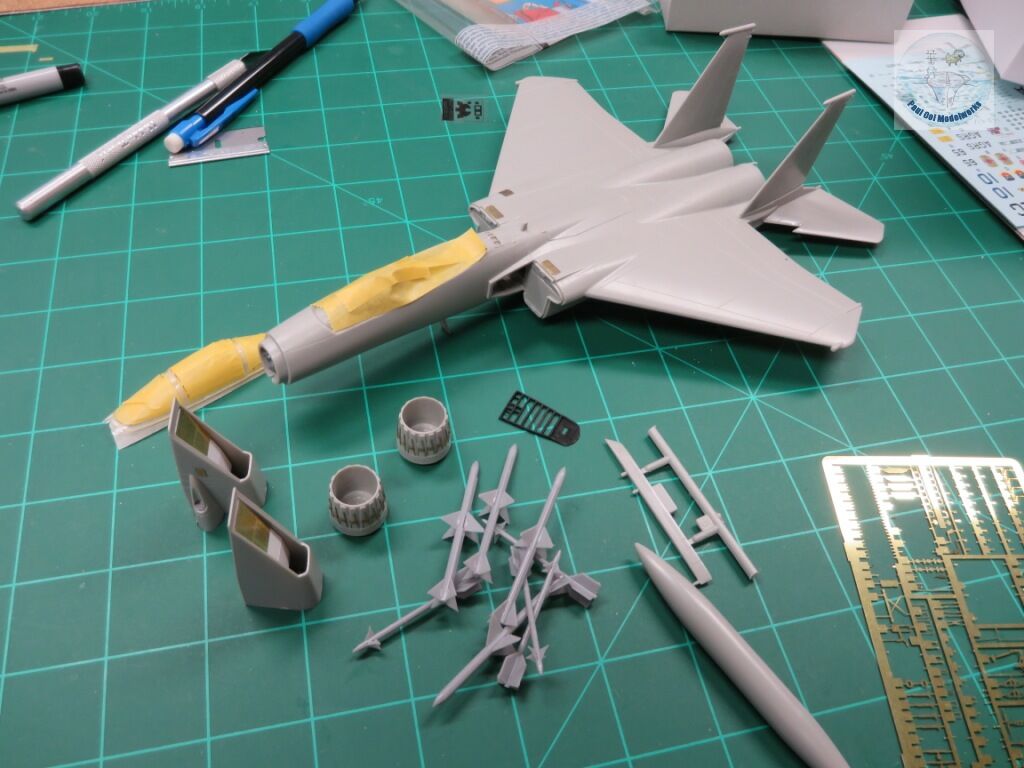
The usual prep work is required to mask off the cockpit, smooth down the seams and fill in the voids. I also mask off the bare plastic regions in the lower and rear fuselage that will be painted with metallized paints. Notice also that I have left the two air intakes off despite being told to add them in the instruction sheet. This is to allow me to paint the sides of the cockpit tub or forward fuselage region without the engine intakes blocking off the paint. This makes a huge difference to the final finish of the aircraft.
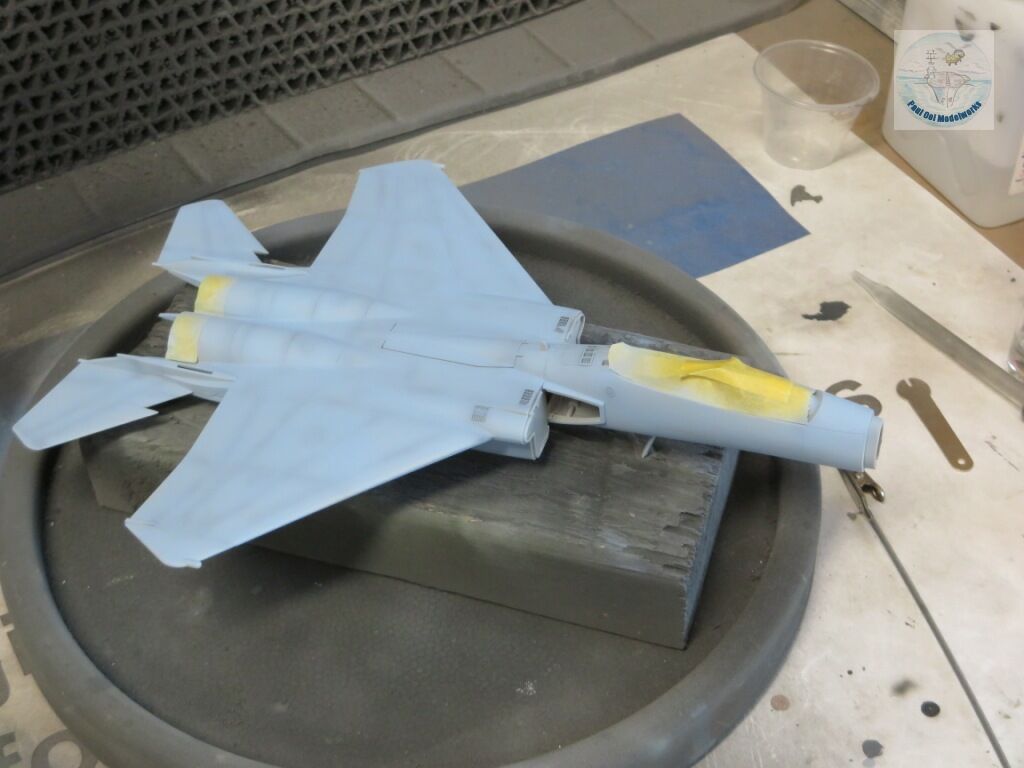
As usual, I start with undershading the panel lines with Tamiya NATO Black XF-69, and then I follow this with the main base color of Vallejo FS35450 Underside Faded Blue. I then protect this layer with a generous gloss varnish of Pledge Floor Polish (there is also another brand called Quick Shine Floor Polish).
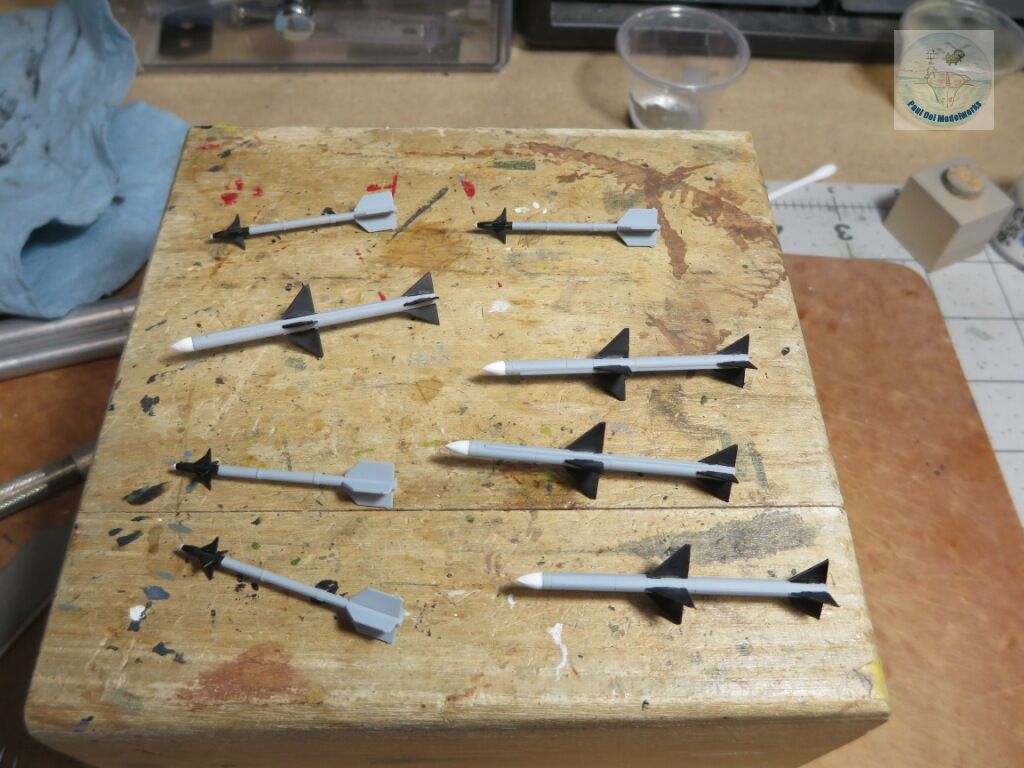
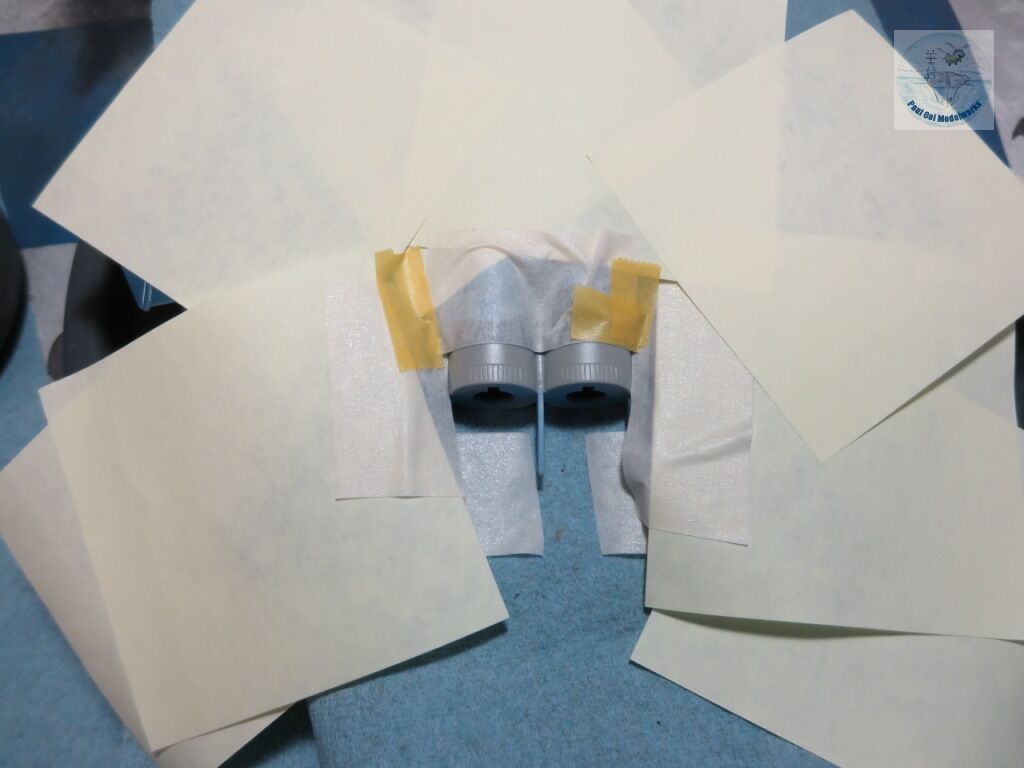
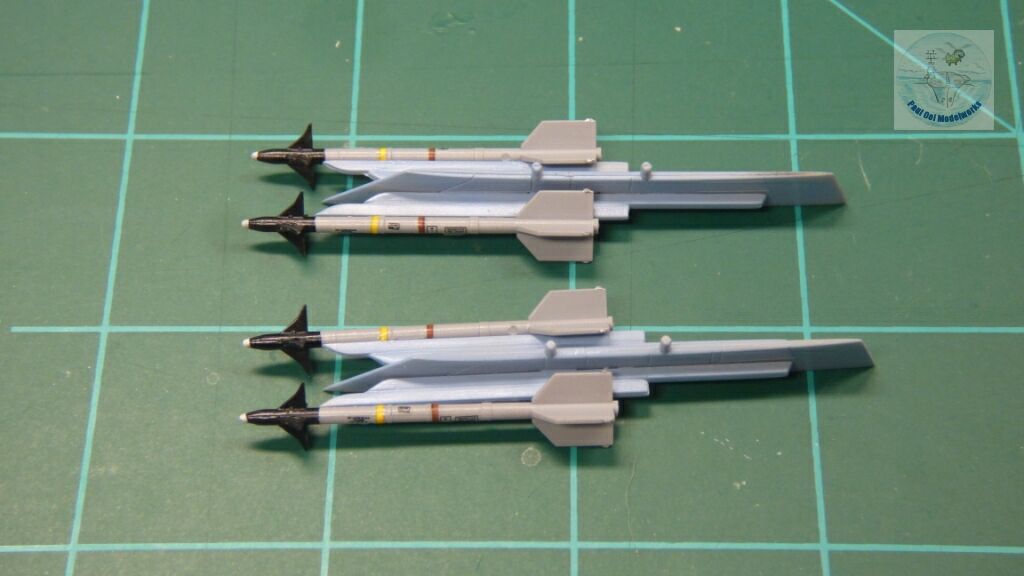
While waiting for the varnish to cure, I start painting the missiles using FS36375 Light Ghost Gray, with Flat Black fins, and Flat White tips.
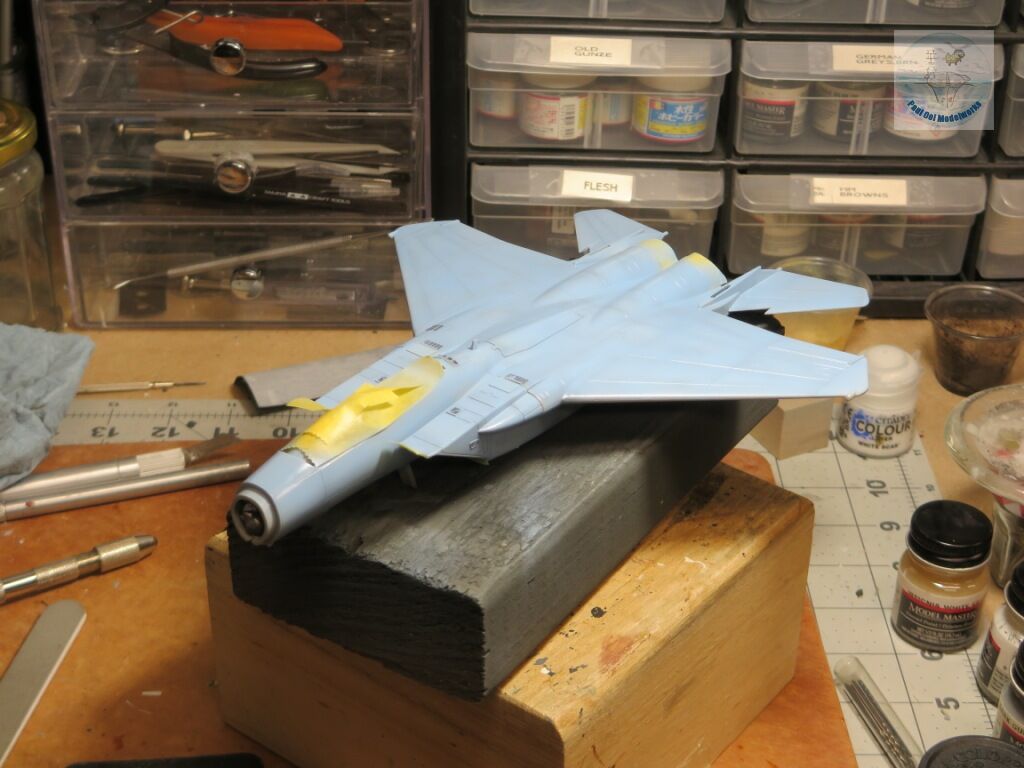
At this point, I attach the port and starboard engine intakes. There are large gaps along the seams of the intakes where they join to the fuselage. These should best be filled so as to make the transition appear smooth and continuous from the fuselage to the air intakes.
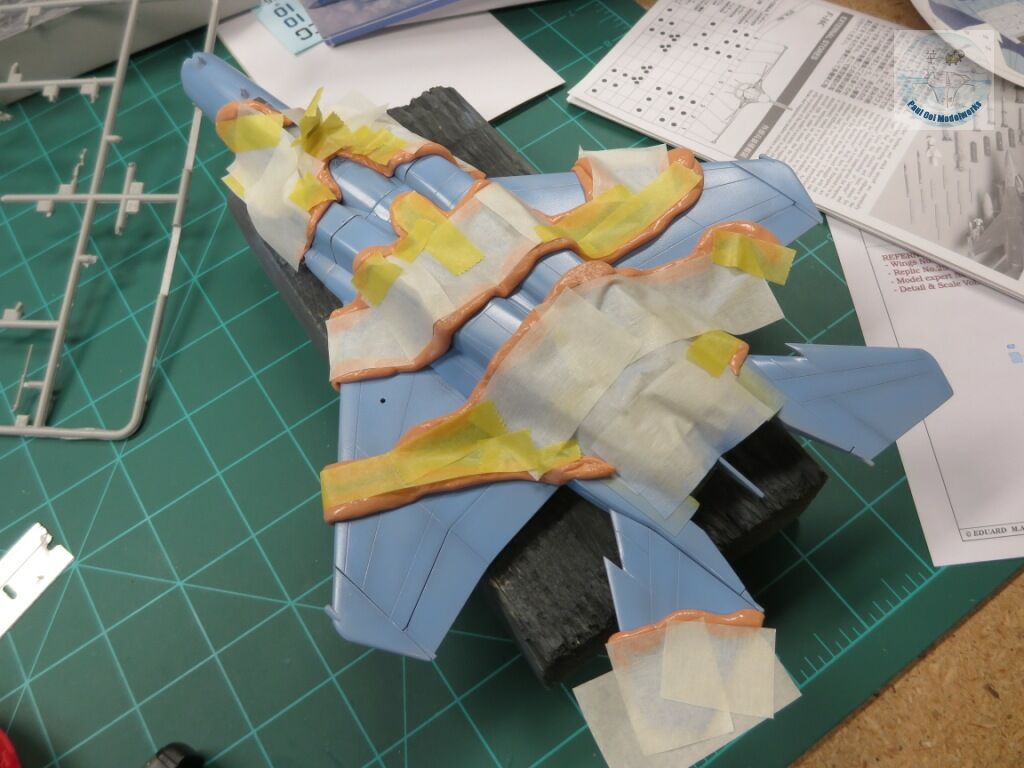
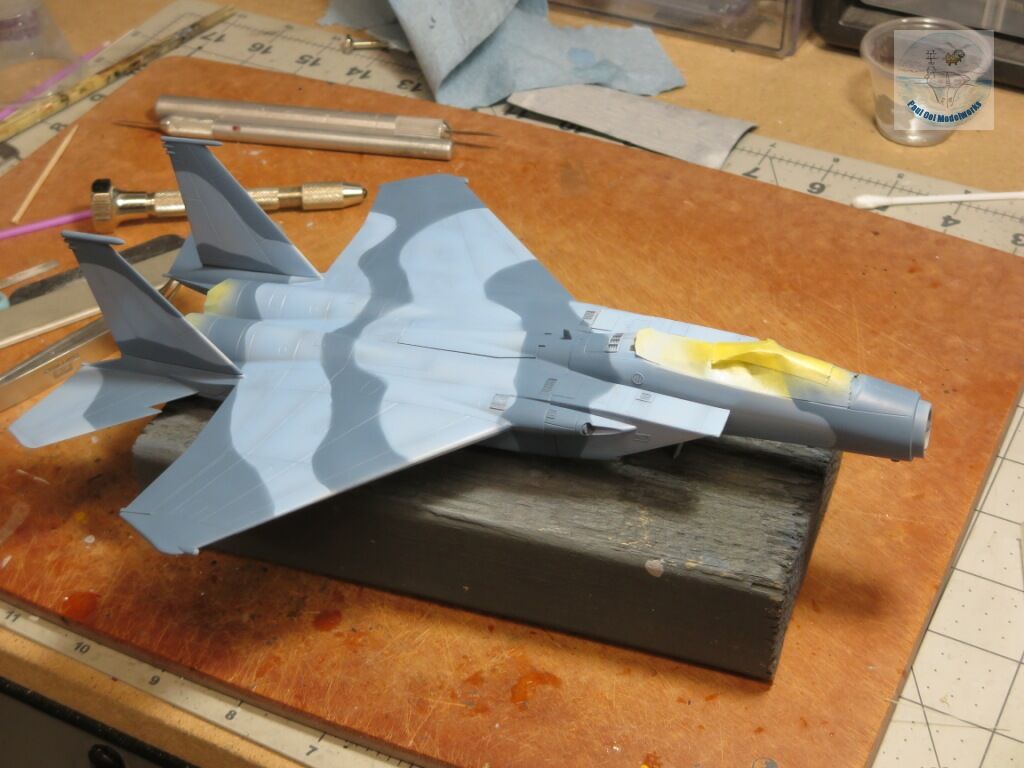
To achieve the solid but not overly hard camouflage lines, I use the well-tested technique of Silly Putty “worms” with masking tape to cover the base color. The reason why I laid down that protective coat of varnish is to protect the base coat of light blue from getting oil lines from the Silly Putty that may leach into the paint. I paint Vallejo FS35109 USAF Light Blue (which is not really “light”, more like the WW2 Spectral Medium Blue) and quickly remove the masks . Then I carefully touch up small areas of overspray with FS35450. Then the entire camouflage scheme is protected with another layer of Pledge Floor Polish gloss varnish and allowed to cure properly.
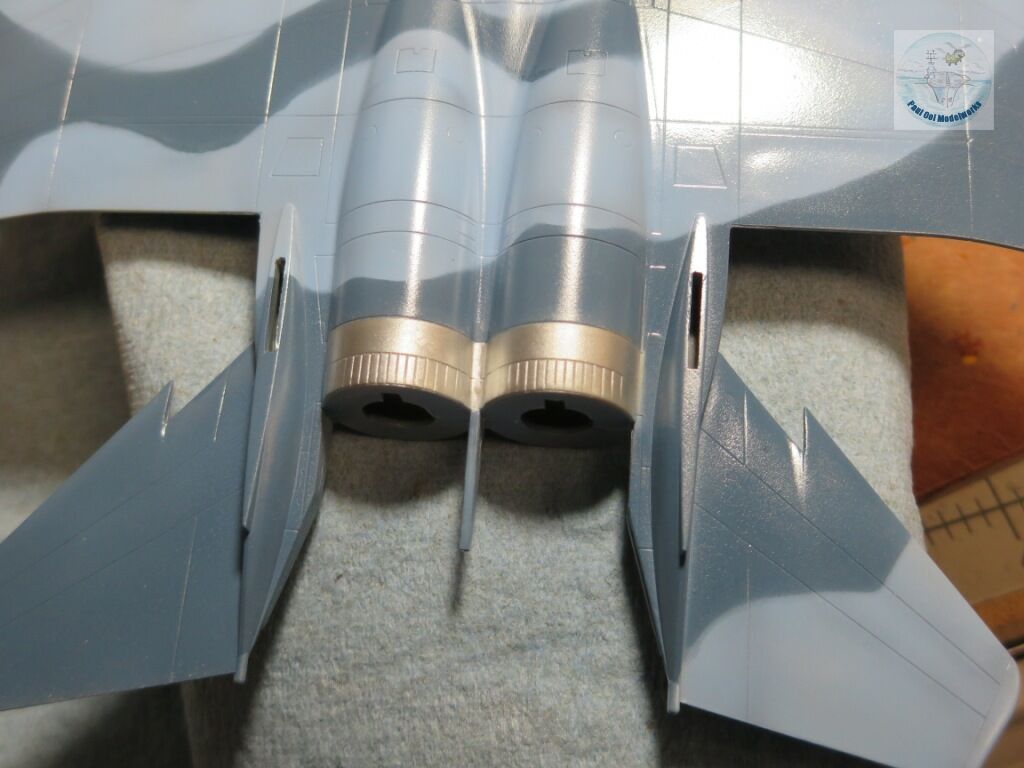
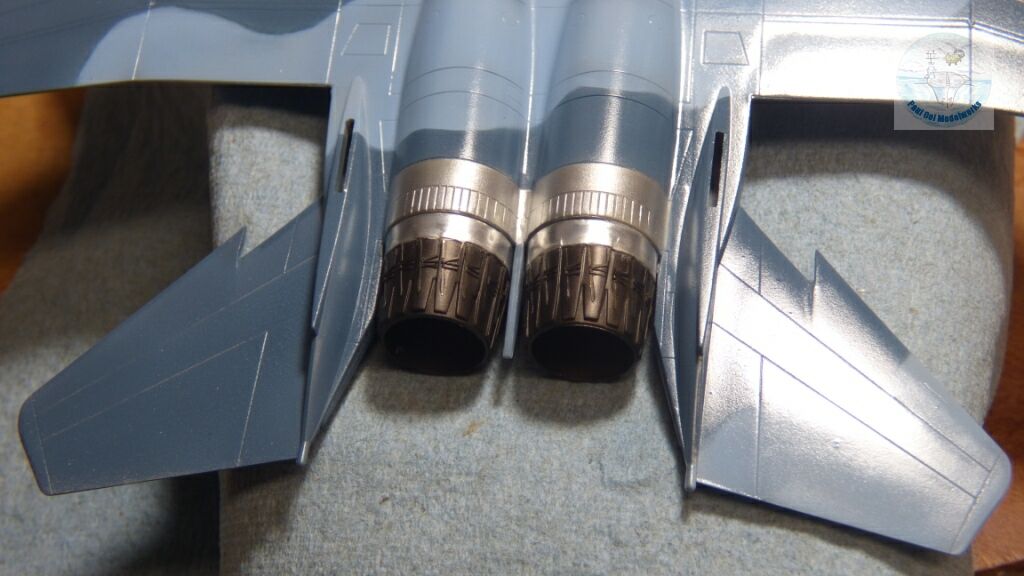
To paint the rear metallized area of the aircraft, I remove the masked bare plastic area prior, and now mask the camouflaged area, just enough to expose the target area for metallized paint. The kit instruction calls for painting this area with silver, but I felt that Polished Aluminum Plate is more accurate. I used my remaining Model Master Buffed Aluminum Plate. Once buffed, I fit the exhaust cans (pre-painted with Burnt Iron) to the rear of the main fuselage. There are also visible gaps between the engine exhaust cans and the fuselage that need to be properly filled so that you do not see an unrealistic air gap between the two surfaces.
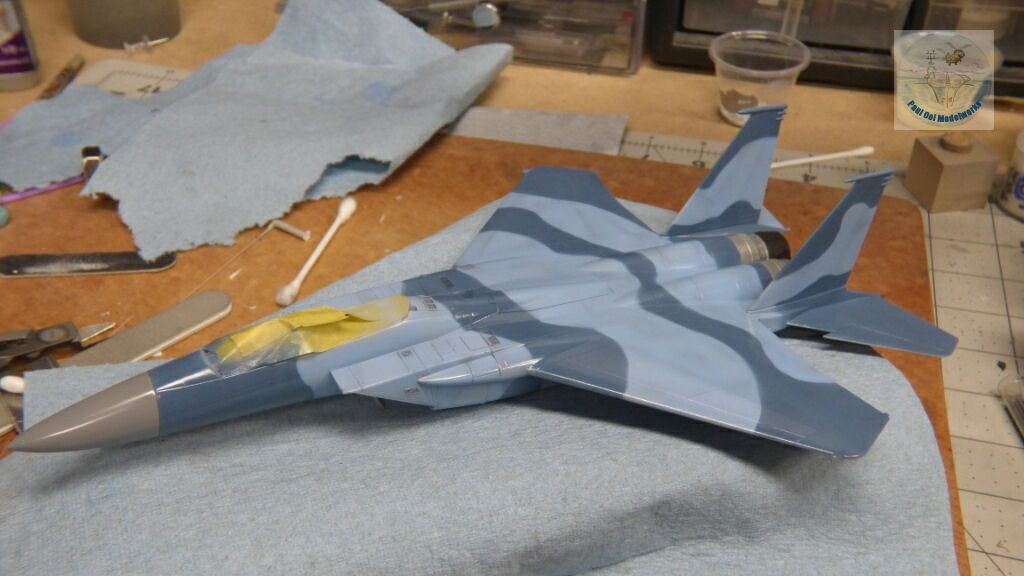
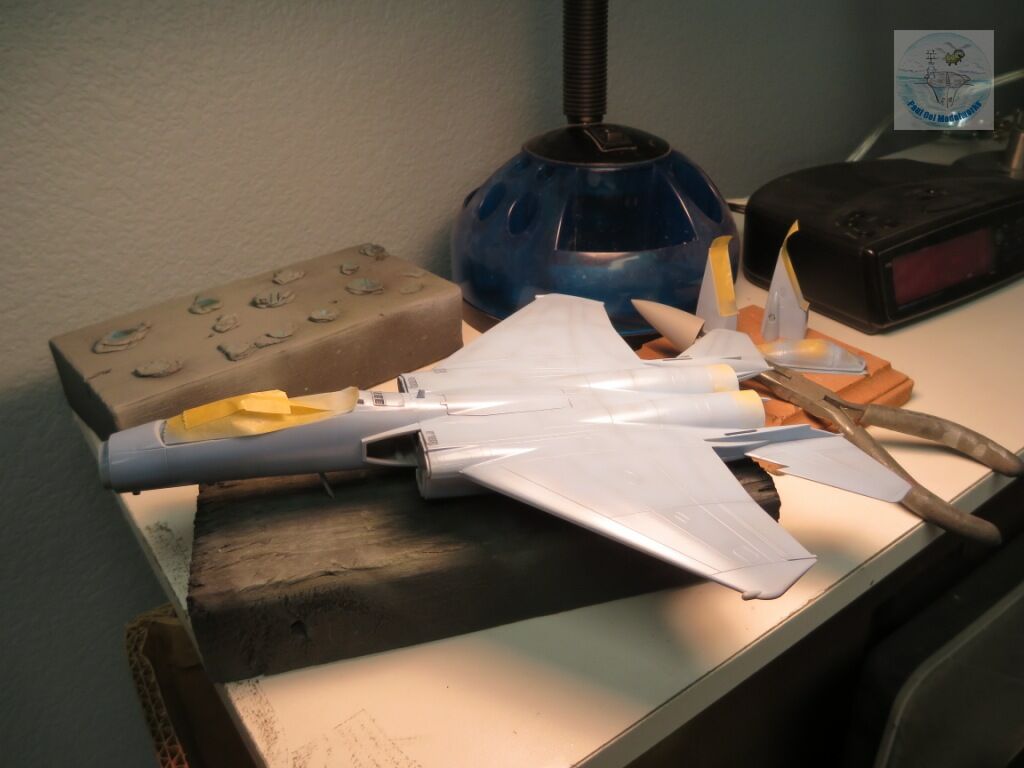
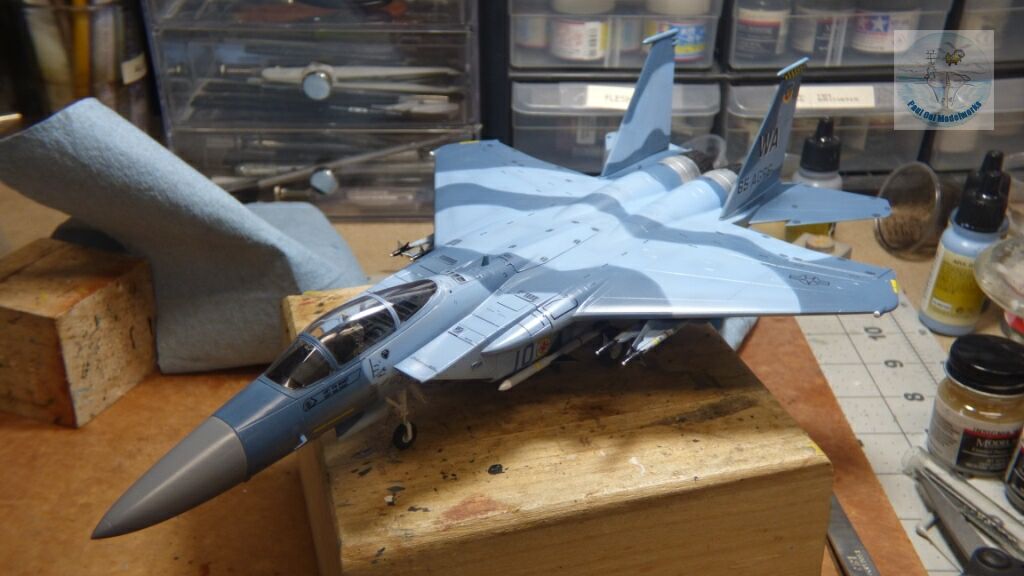
The two rear stabilisers and the radome (painted Vallejo FS36270 USAF Medium Gray) are permanently fixed to the main fuselage. The entire assembly is given another coat of gloss varnish.
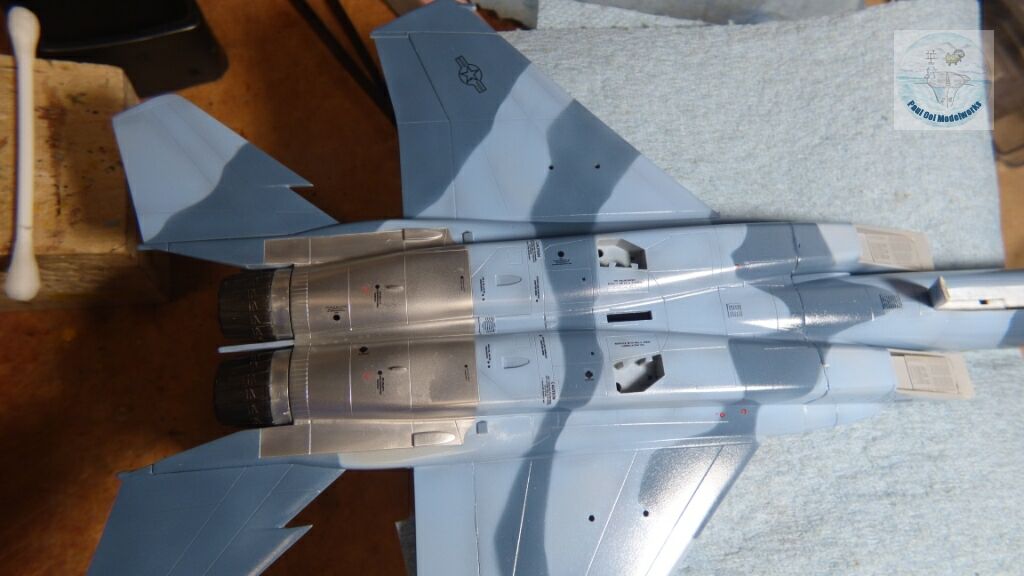
Decaling work for the main fuselage took 2 days, starting with the underside. As mentioned, the decals are good to work with and there was little to no problems with silvering.

The all-important undercarriage struts are attached, and detailed with Eduard parts. The kit was missing the front wheel runway light, and so I added a kit bash part from my spare box.
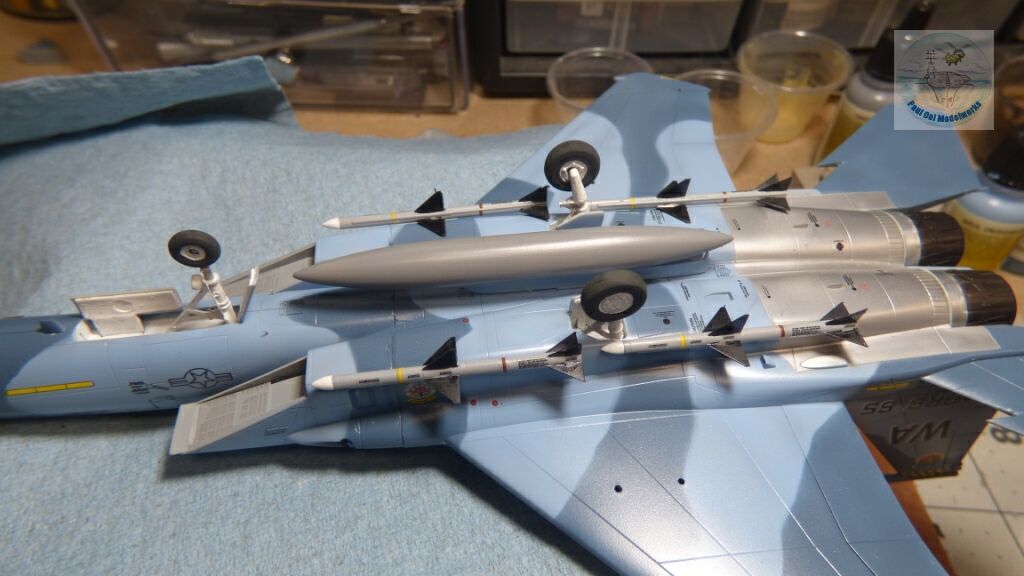
Wheel wells and struts are painted Flat White, the main drop tank is painted FS36270 Medium Gray, and the Sparrow missiles are added to the main fuselage.
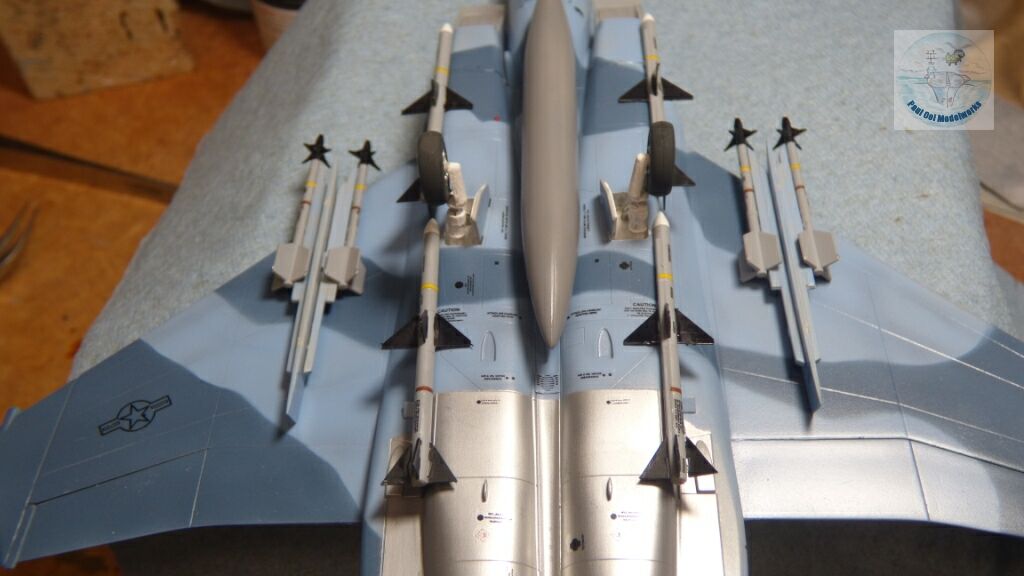
Sidewinder missiles are mounted onto the the wing pylons. The underside details are completed.
The aircraft is now able to sit on its own wheels. The final detailing of the cockpit area can commence.
The dashboard area is painted Flat Black, the gunsights from Eduard are mounted, and the canopy closed. Side pitot tubes are added to the forward fuselage. The entire aircraft is given an oil paint wash of 70% Payne’s Grey+30% Zinc White.
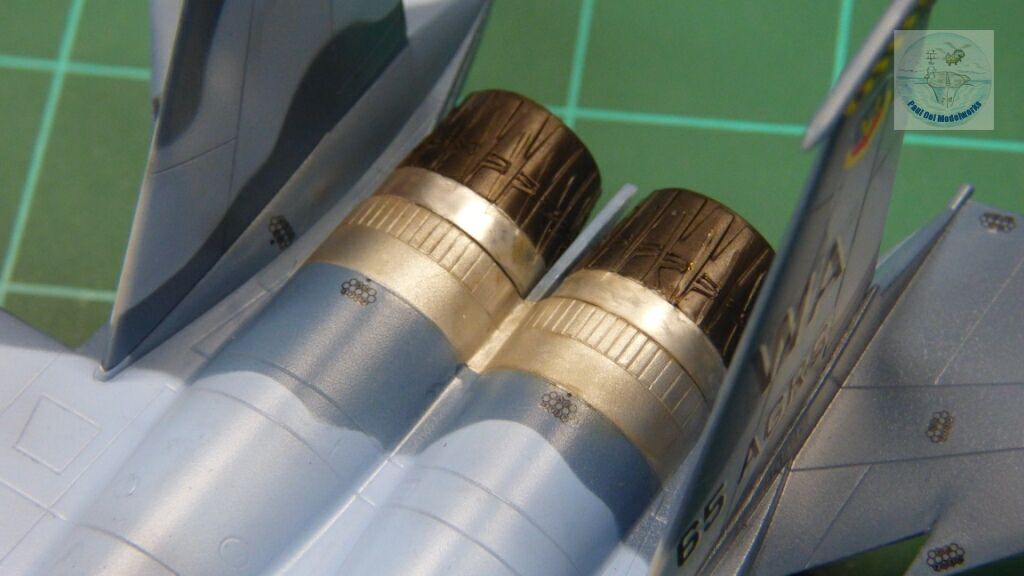
In a final touch, the metallized area around the engines are weathered with Burnt Umber pastel chalk for the heat stress marks.
Leave a Reply