Just ask anyone to name the most important war machines in Germany’s WW2 arsenal and you may get, all with strong justification, names like the Tiger tank, the Messerschmitt Bf-109 or the U-boats. The BMW R75 motorbike should be added to this illustrious list as the motorbike was a strong and hardy vehicle used by all branches of the German armed forces. The BMW R75 motorbike ran reconnaissance, signaling, ambulance, policing, and even assault duties at the front line and in the rear. From the beginning of the war in Poland until the closing fight in Berlin, these tough and reliable motorbikes were to be found. Captured motorbikes were often pressed into duty in both the Eastern and Western front allies. It was a tribute to the good design of this motorbike and sidecar, that the Soviet Union, China and the USA made replicas of them at the end of the war for their own use!
A total of 18,000 or so of these bikes were produced, beginning from the late 1930s until the Eisenach factory was destroyed in 1944. The powerplant was a BMW twin cylinder engine with 745 hp. It had a top speed (on paved road) nearing 100 kph, but it also had a unique ability to run at low speeds of 3-4 kph to match infantry marching pace without overheating. The motor could run on very low quality fuel, making it robust enough to subsist on variable types of fuel especially in the Eastern Front. It also had the distinction of being equipped (in some cases) with heating coils for the rider and passenger in Russia. Another interesting feature was that the road wheels were the exact same type as those used by the VW Kuebelwagen, so they were inter-changeable in the field.
Gallery
Construction Notes
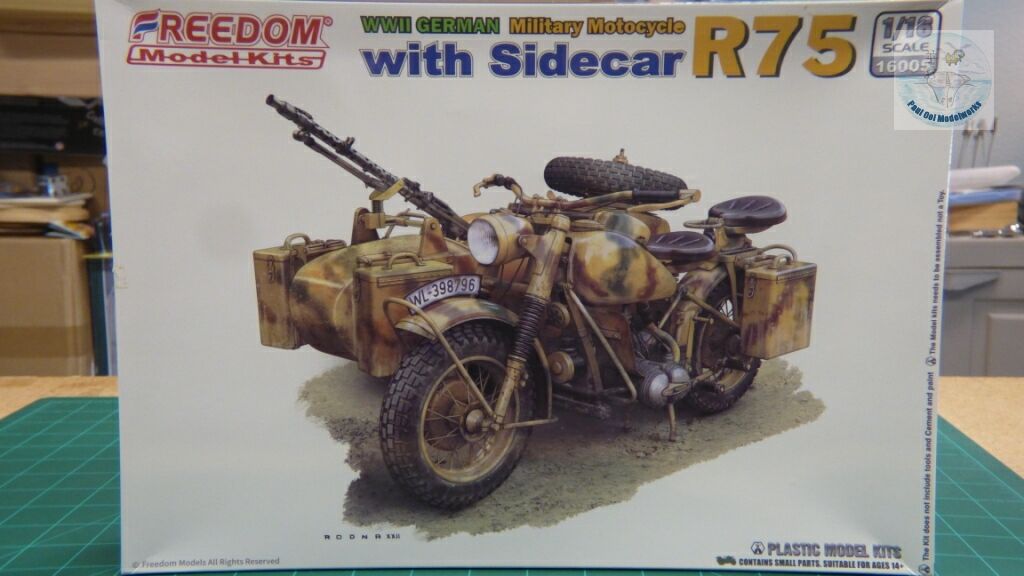
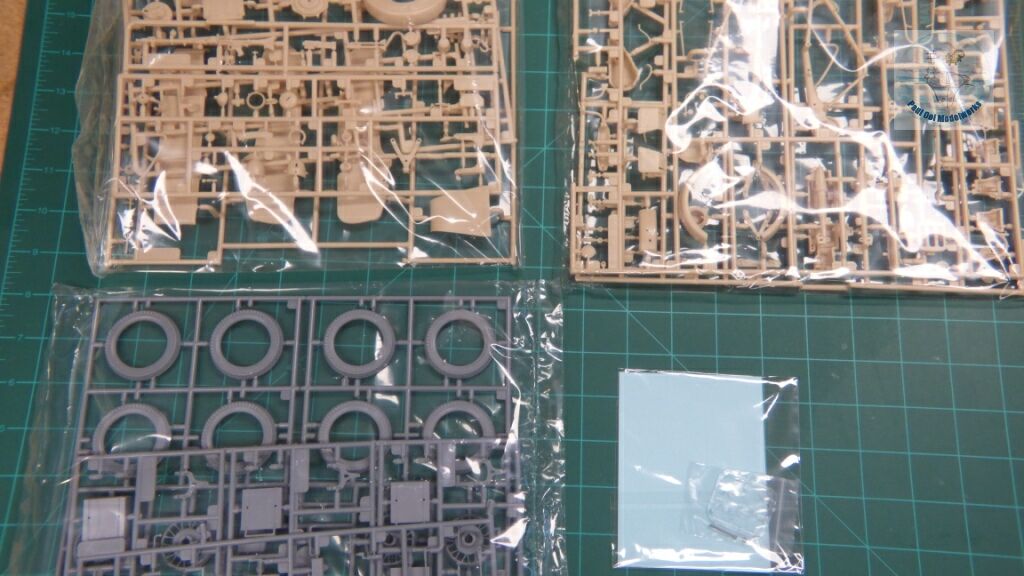
This wonderful 1/16 scale kit is a new release from Freedom model kits from China. It certainly provides state-of-the-art molding and details when compared to the much older Italeri 1/35 and 1/9 versions. The molding quality was crisp without any flash. The clear parts were very impressive, and crystal sharp. There is also a large decal sheet that will allow for markings for the SS, Wehrmacht, and the Luftwaffe. The unit markings available are for the European theater, the Eastern Front, and the North African theater. It is a fairly complicated build, recommended for intermediate and advanced modelers. While the overall fit is good, the pin-to-hole fittings tend to be problematic. It seems like the mold makers did not check the tolerance of the molded pins vs the holes. The pins tend to be slightly oversized, requiring numerous shave-downs of the pins or to drill larger holes. On a few occasions, the ejector pin marks also appeared on pretty prominent places that could not be hidden, like the front number plate. The kit had a colorful and impressive instruction booklet, but there were several glaring errors like the wrong part numbers used, and the wrong attachment locations on the diagrams. The decal sheet had markings for the circular mudguards printed straight horizontal, so these could not be placed radially . They should have planned for these to be shaped appropriately for the mudguards. Also, the decals were rather thick, and required considerable setting liquid to soften even a bit.
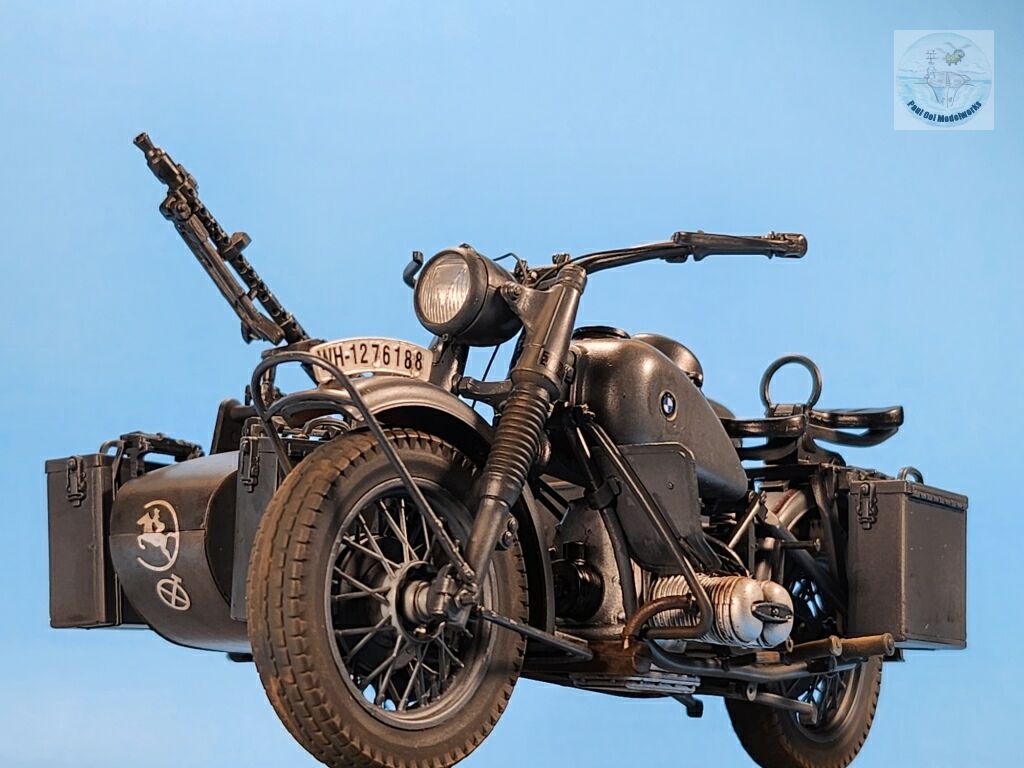
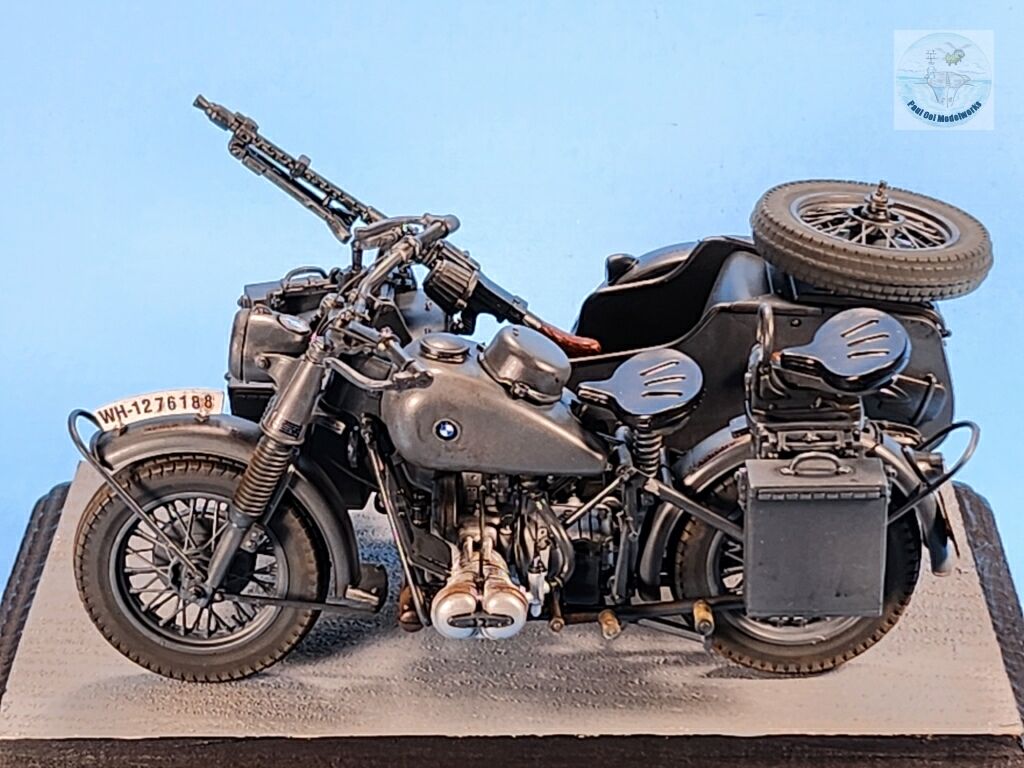
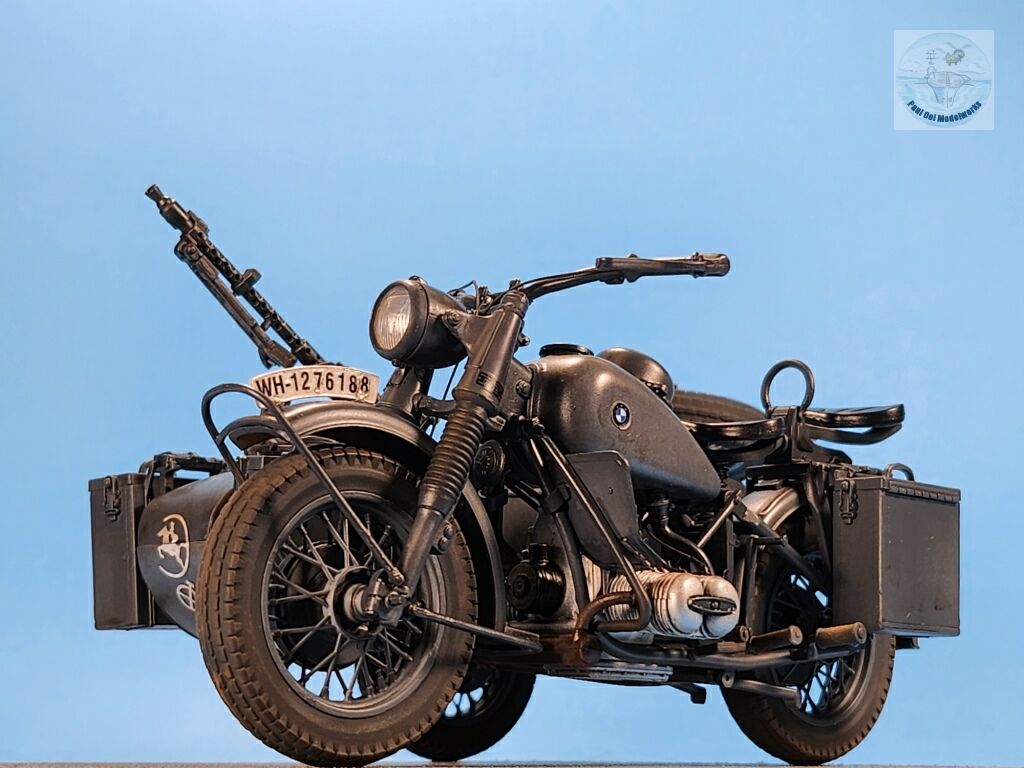
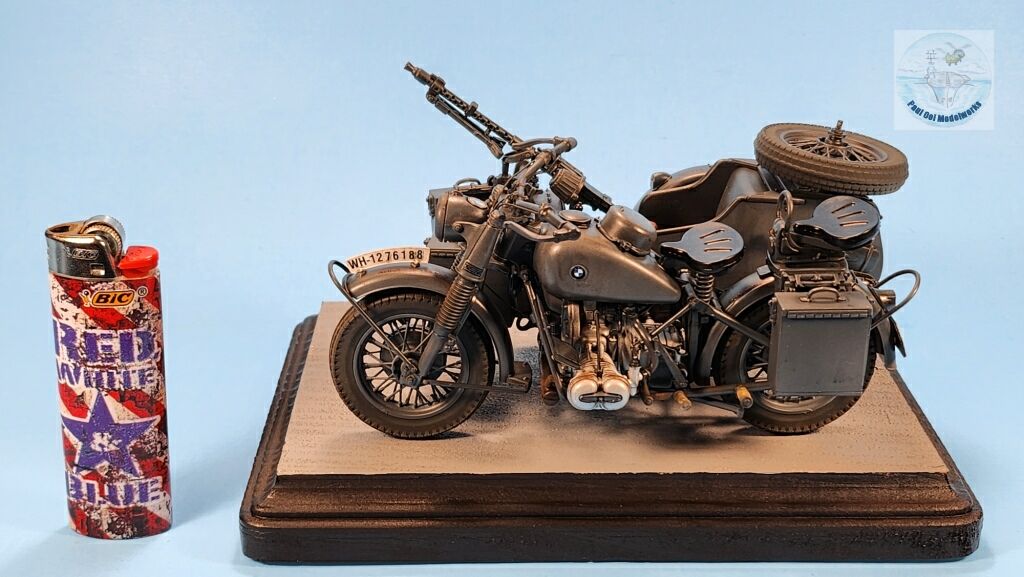
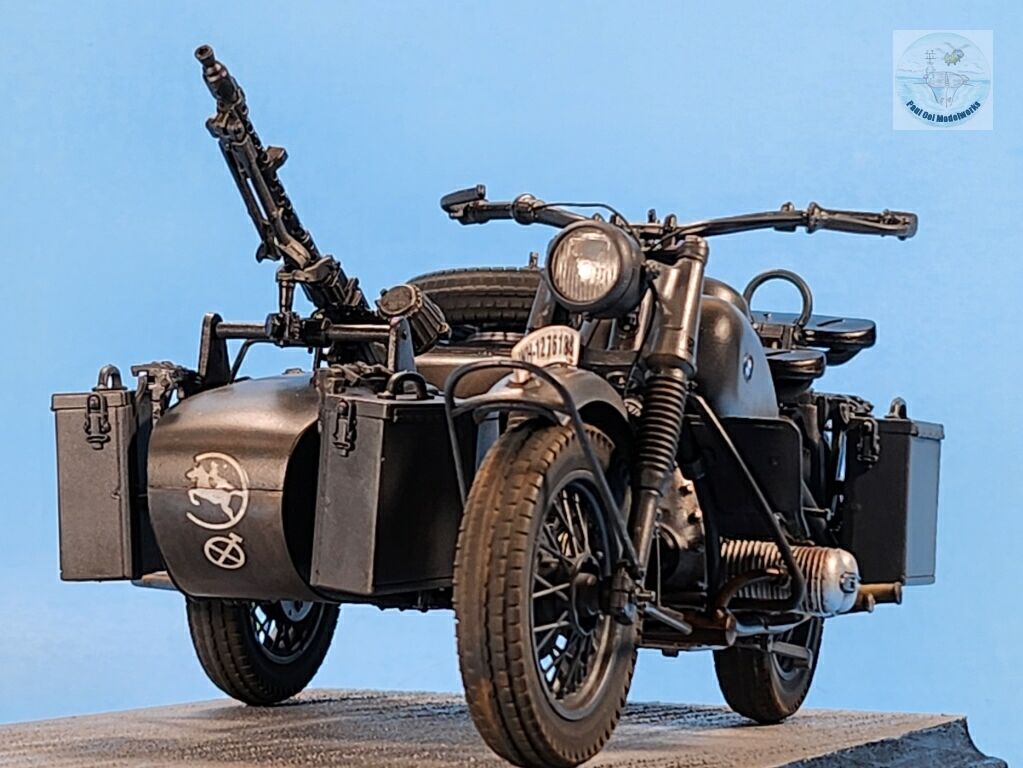
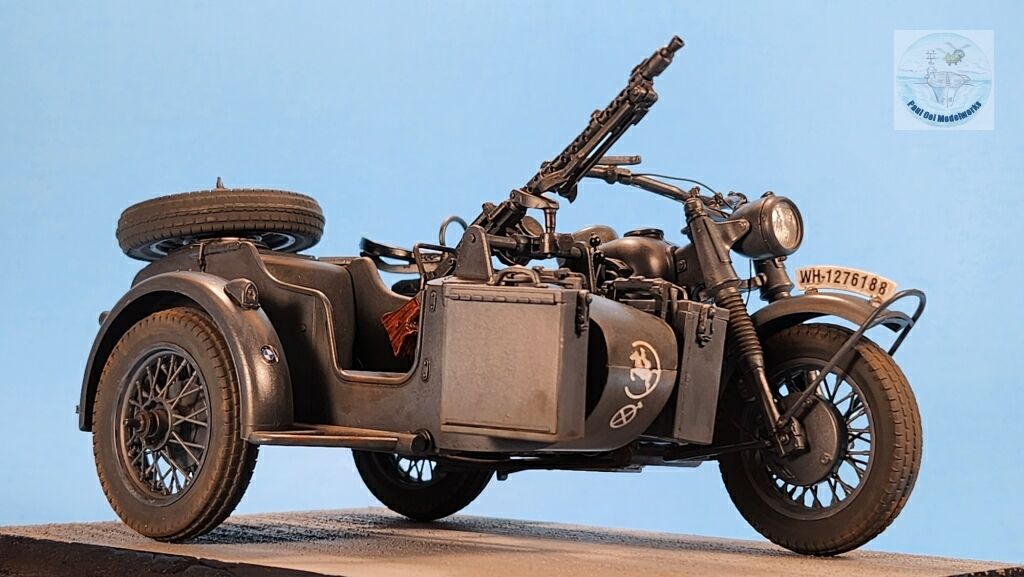
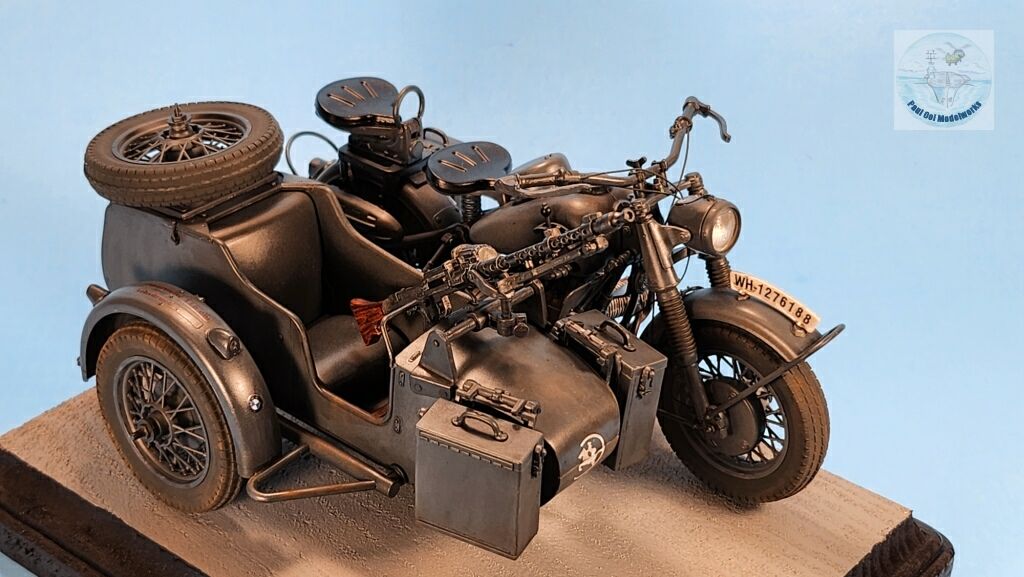
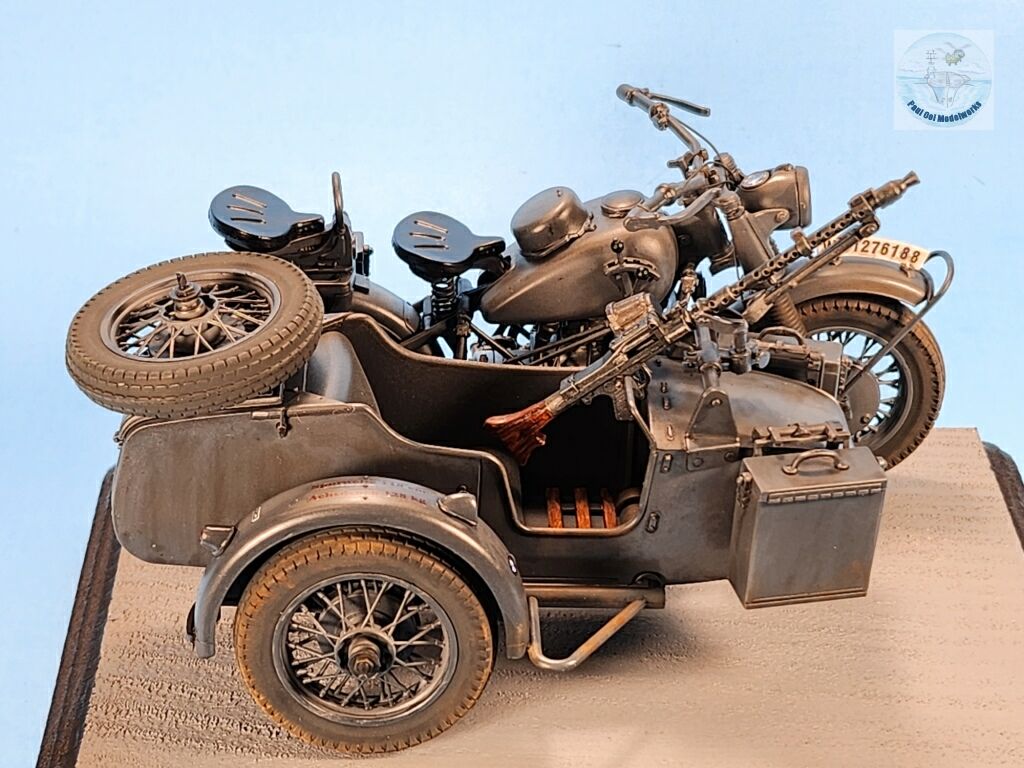
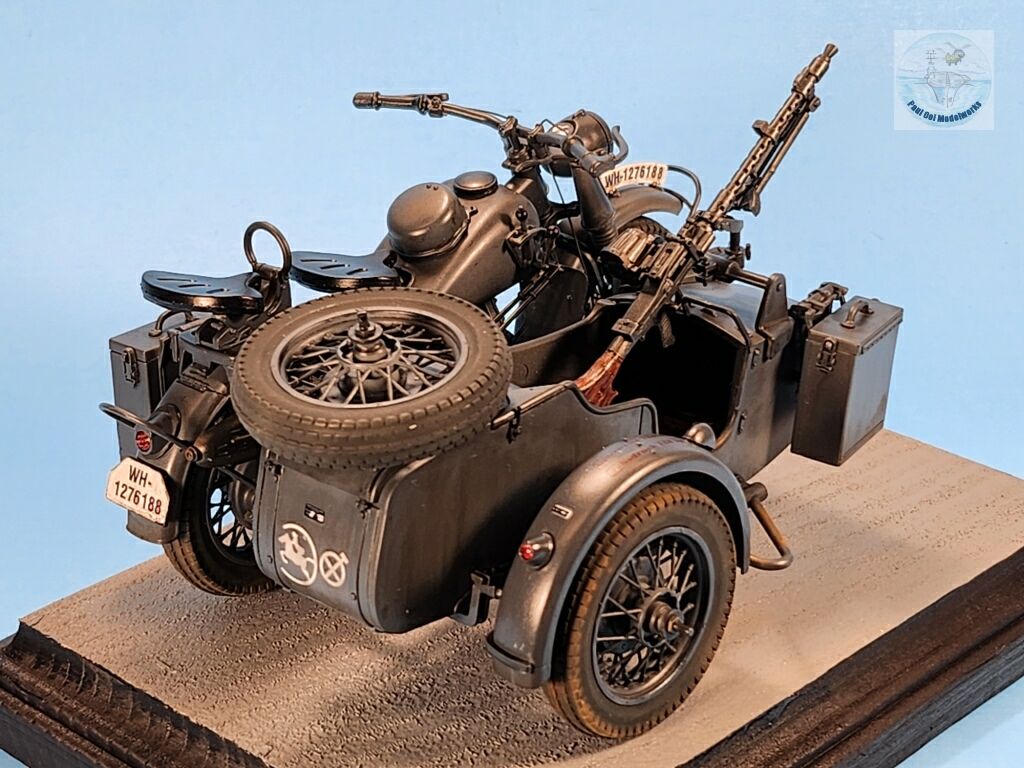
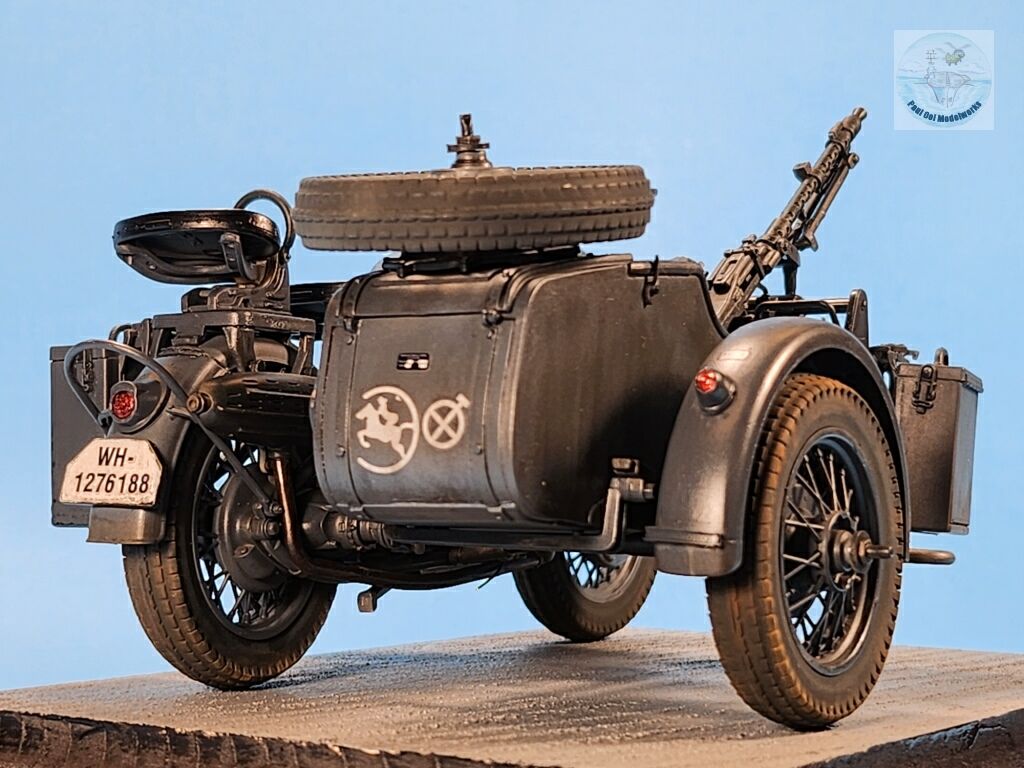
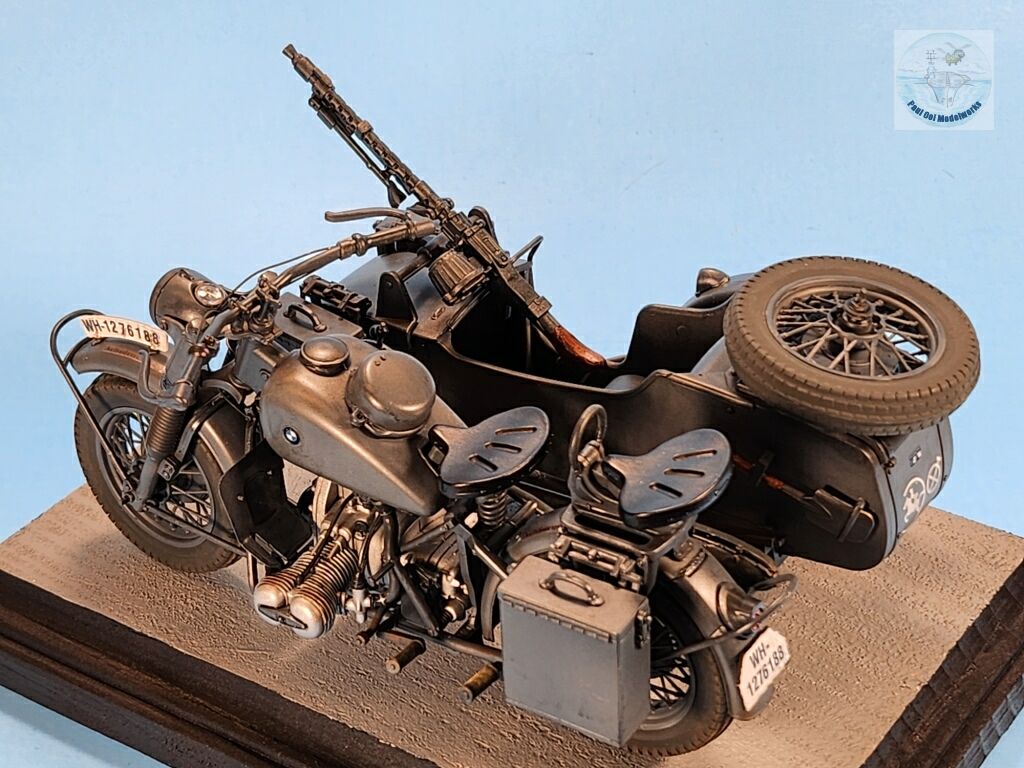
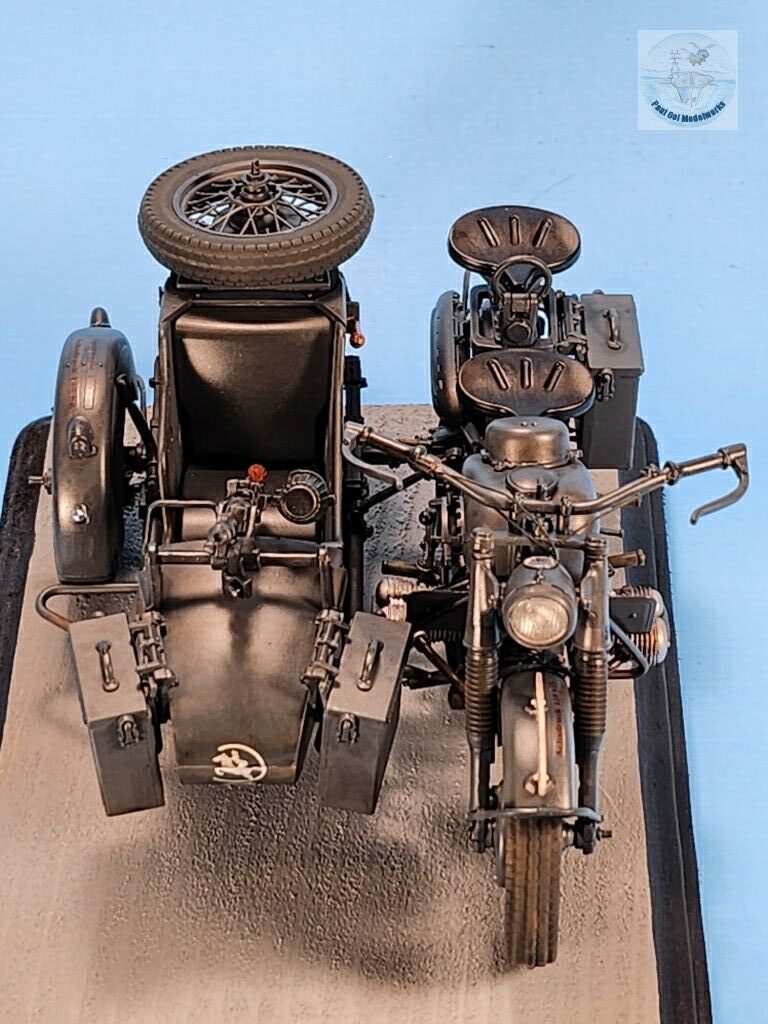
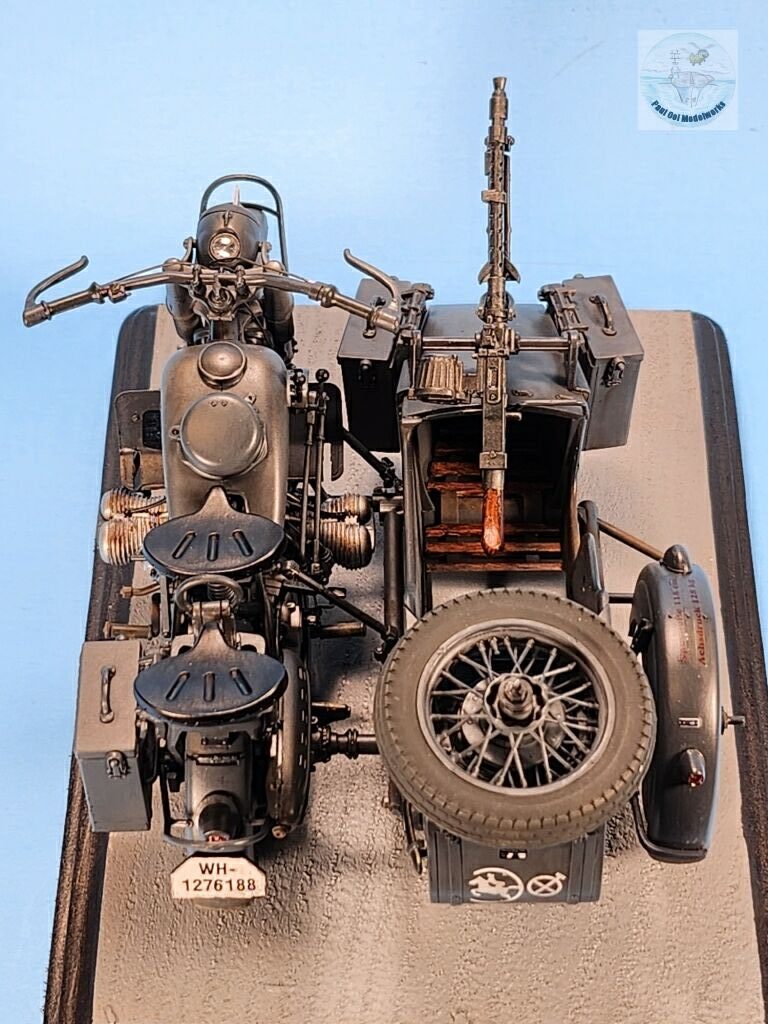
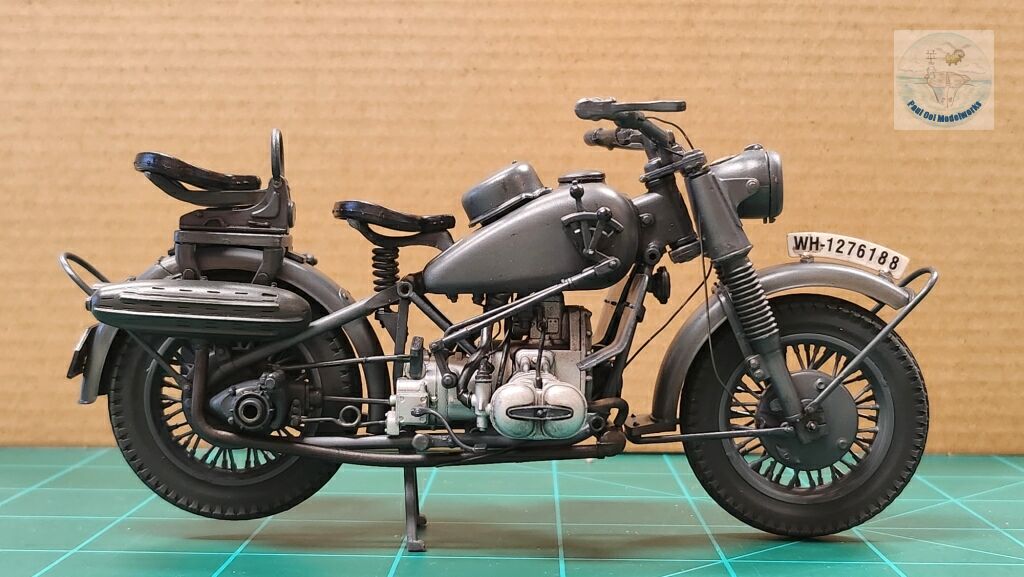
I chose to build the version used in Western Europe and perhaps Operation Barbarossa between 1940-1941. The bike and sidecar were for 24th Panzer Division prior to that unit’s destruction in the Battle of Stalingrad. The color scheme was overall German Grey.
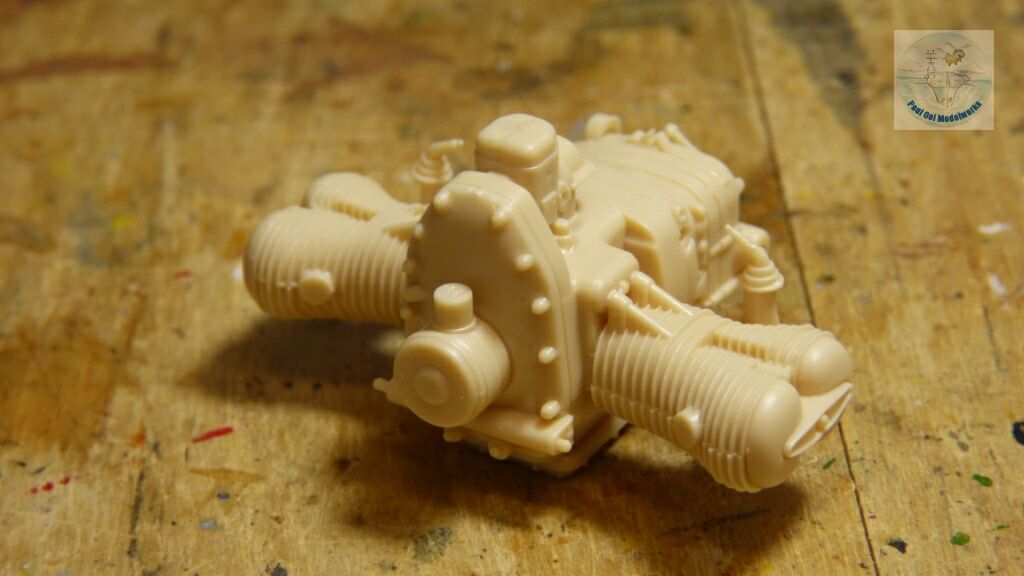
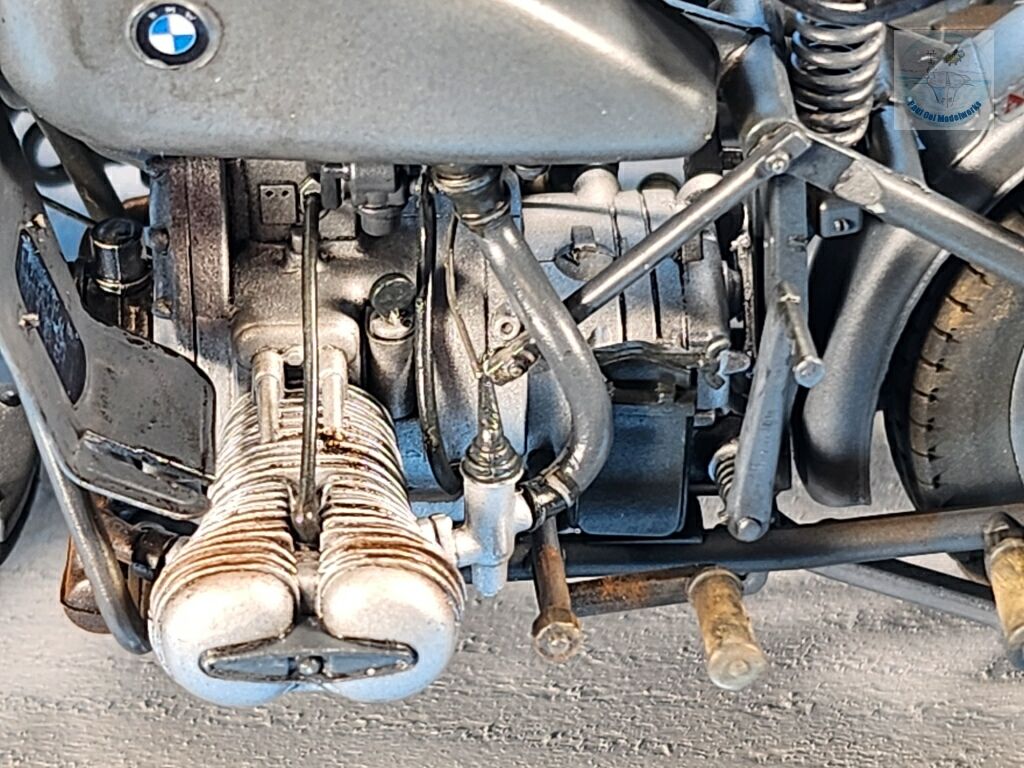
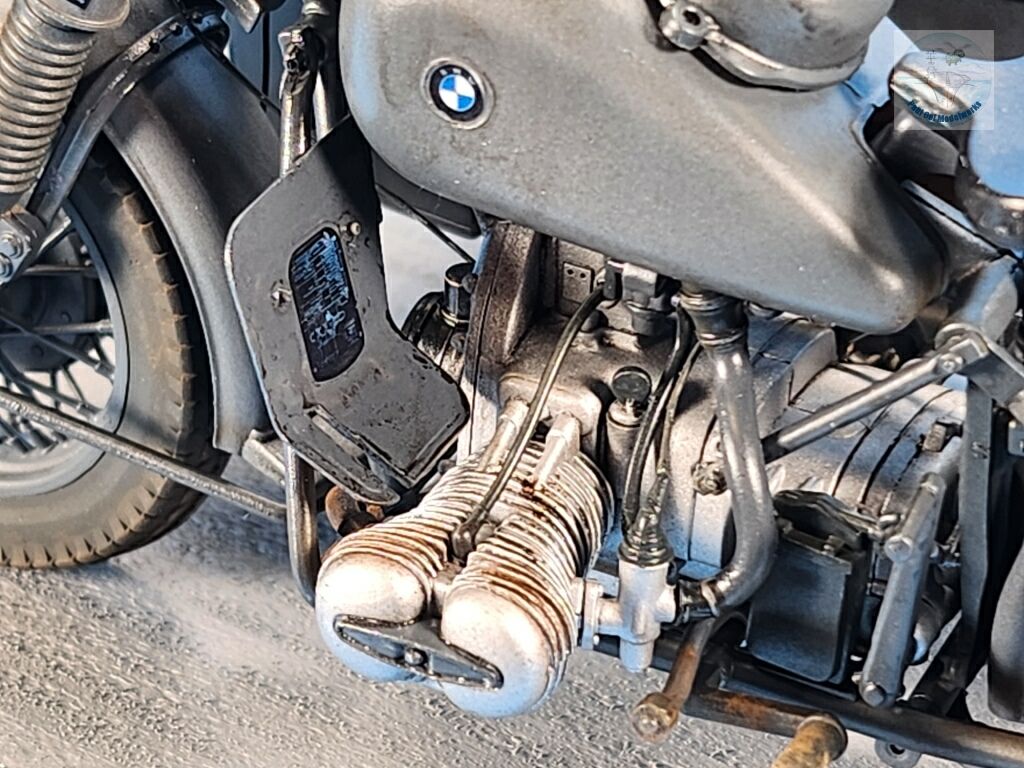
We start with the construction of the engine block and the cylinder heads. This was like a mini-project, and the parts are asymmetrical, so one has to be careful to match the part to the correct right-left orientation.
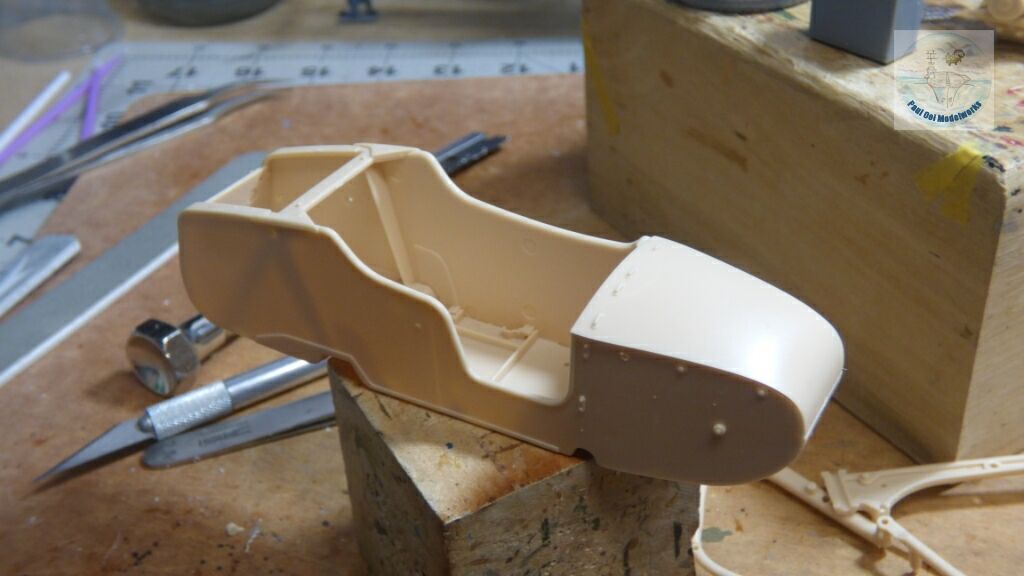
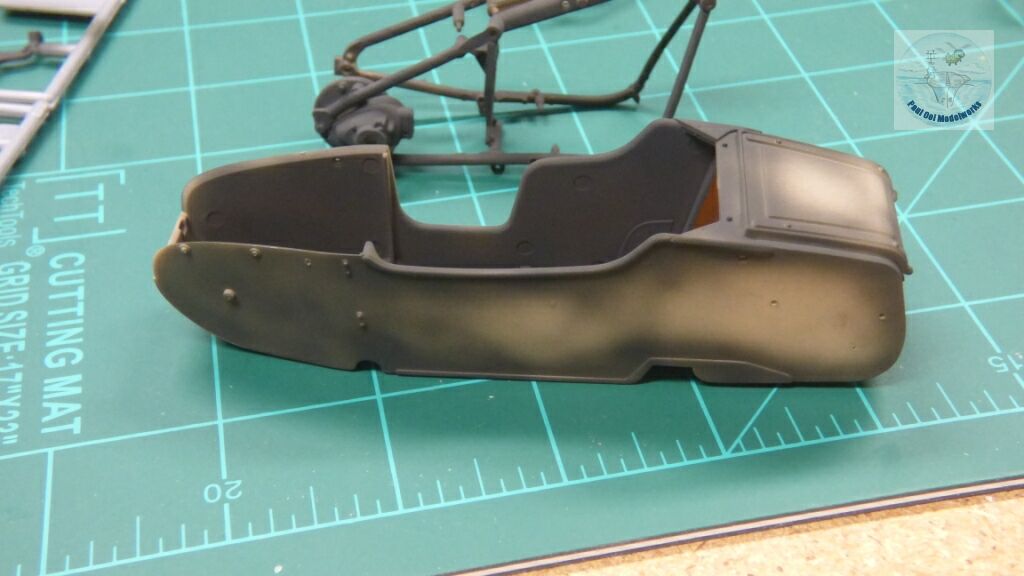
Next, I build the sidecar body, which was relatively straight forward. If you were wondering why I have not proceeded with the main body frame of the motorcycle, it is because the engine block (in flat aluminum) has be sandwiched between the frame halves, which would then require the engine block AND the frames to have been pre-painted. As such, I build all the independent sub-assemblies first, and then paint them with German Grey all at once.

The carriage frame of the sidecar is built next. Again, the left, and right hand side parts are different, so one has to note the orientation.
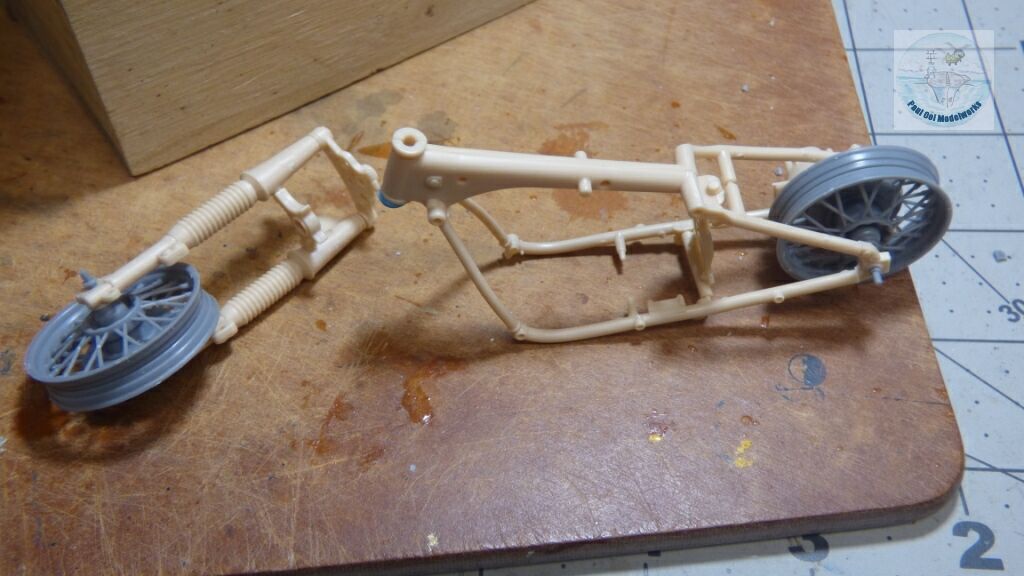
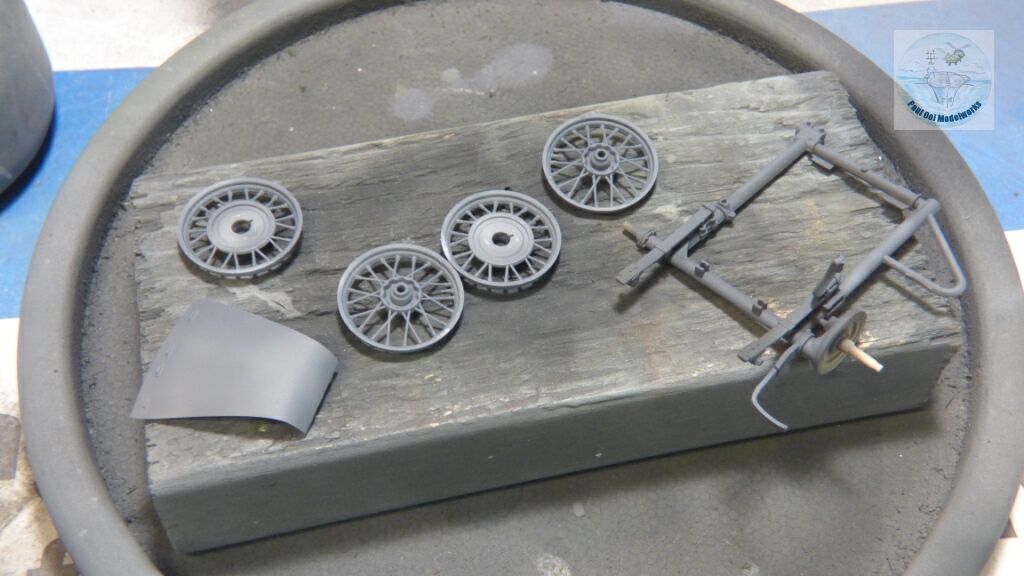
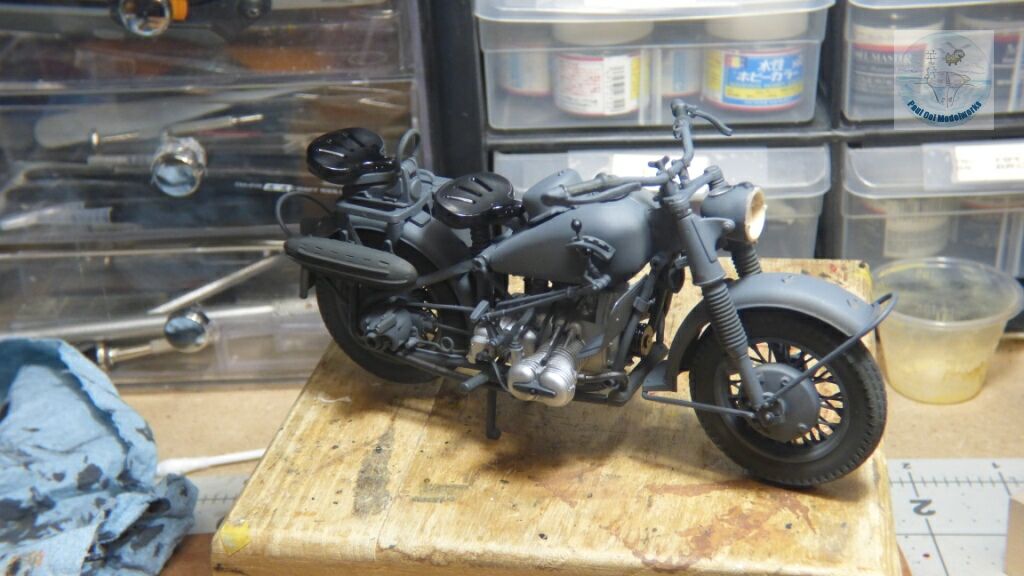
The motorcycle’s front fork assembly, and the body frame are dry-fitted at this point in preparation for spray-painting. The grey-colored wheel hubs are only there for spacing and have not been permanently fitted as yet.
I start with undershading the sub-assemblies with Tamiya XF-69 NATO Black,
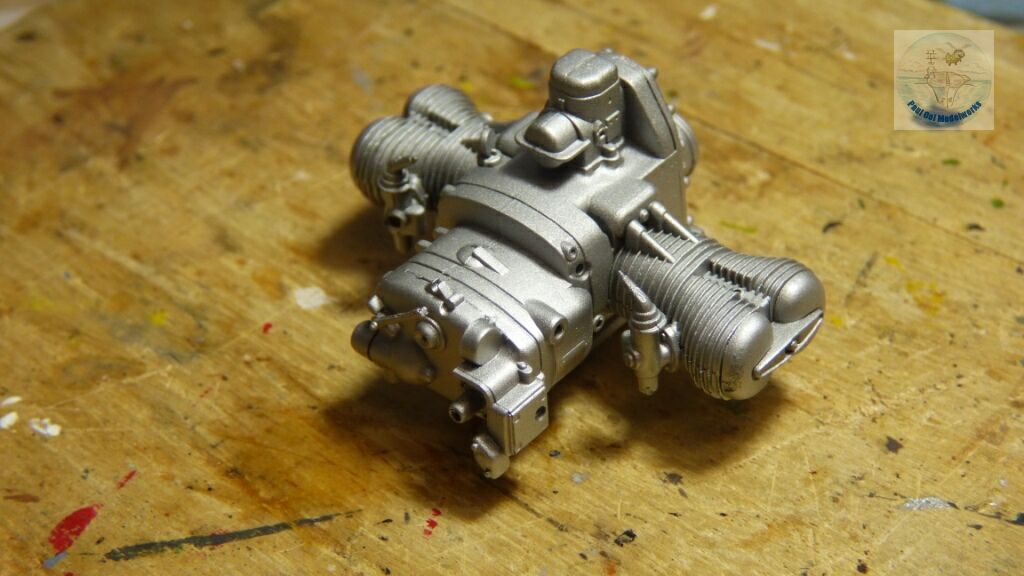
While waiting for the parts to dry, I spray-paint the engine block with Model Masters Metalizer Flat Aluminum. You can also use Tamiya XF-16 Flat Aluminum for this purpose.
After highlighting some sections of the sub-assemblies (not the engine block) with Tamiya Sky Grey XF-19, I overspray the parts with Tamiya German Grey XF-63. At this large scale, not much scale-lightening is required.
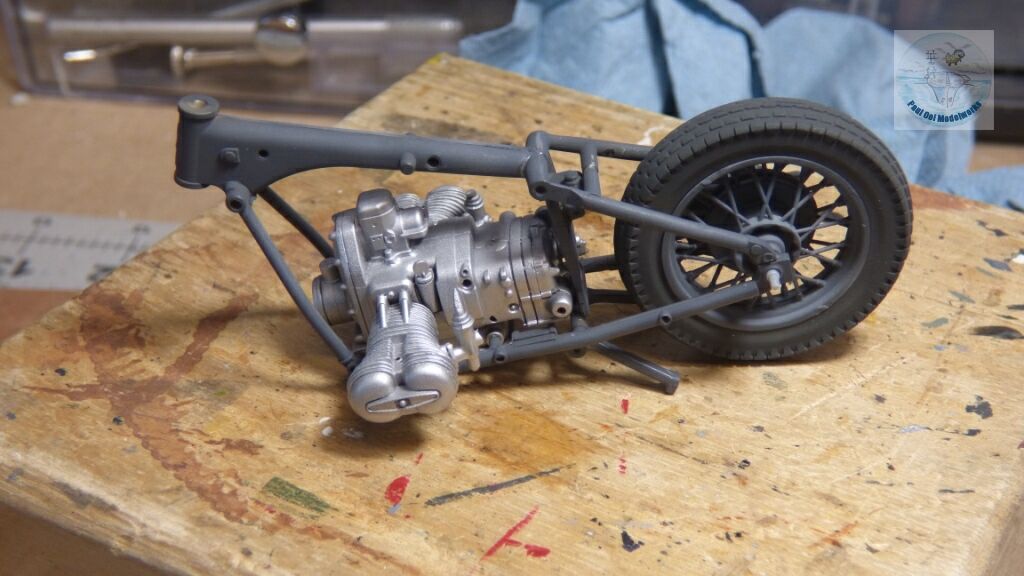
At this point, we are able to insert the engine block in between the frame halves, add the wheel, and snap everything together. You can see why we need to paint these parts separately prior to assembly.
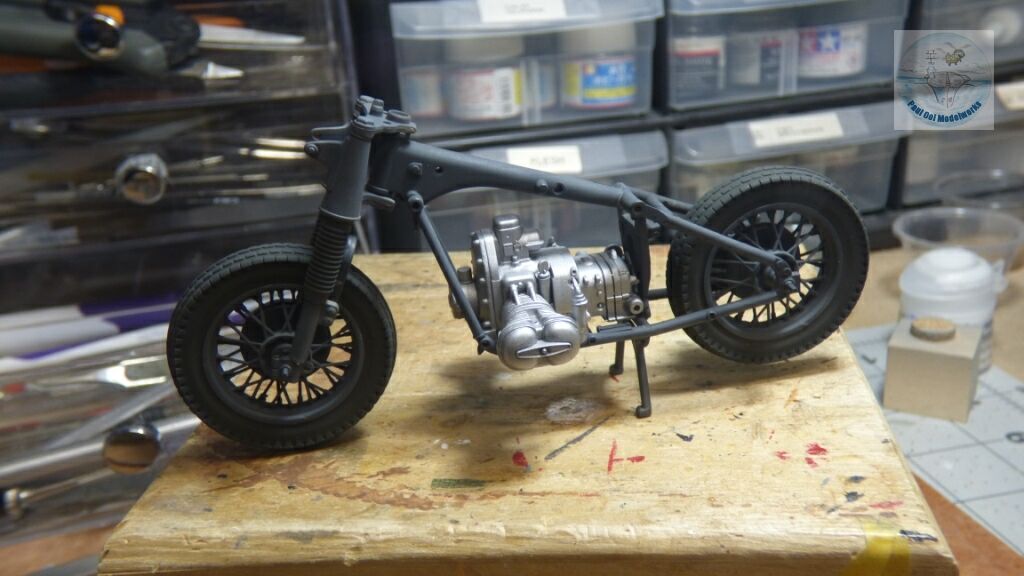
Then, we snap the front fork assembly with its wheel onto the main body frame. The fork is held to the frame with a screw and nut provided by the kit.
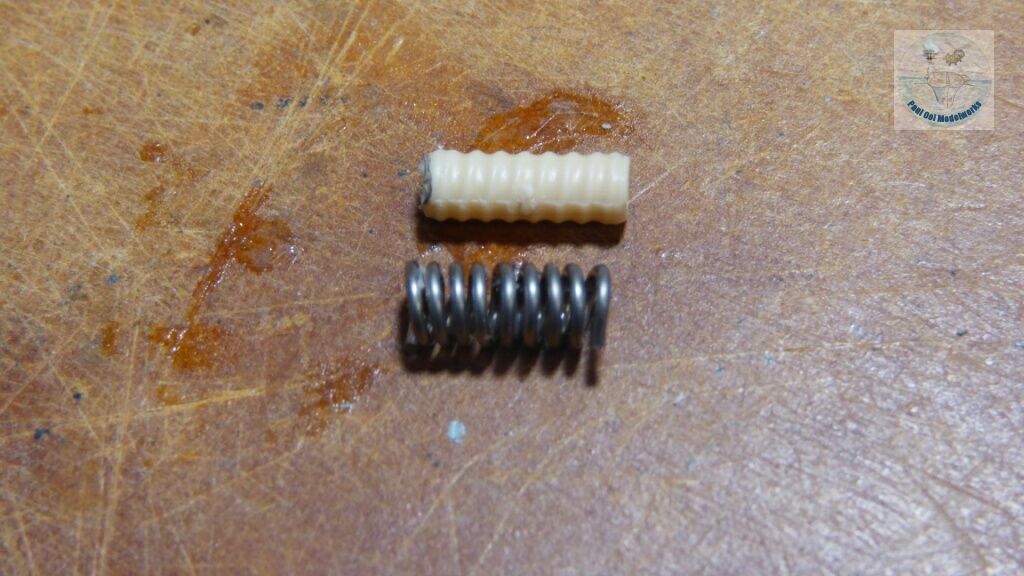
At this point, I replace the kit supplied seat spring (which looks like a hose) with coiled solder wire (0.81mm, or 0.032″ diameter). It looks a lot more realistic than the kit part.
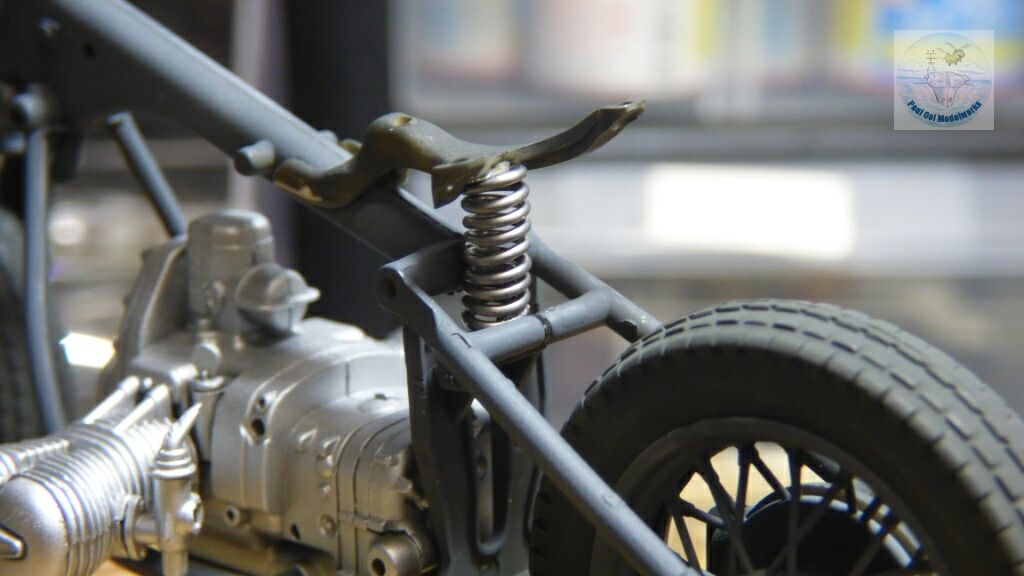
The replacement spring coil in place under the seat bracket.
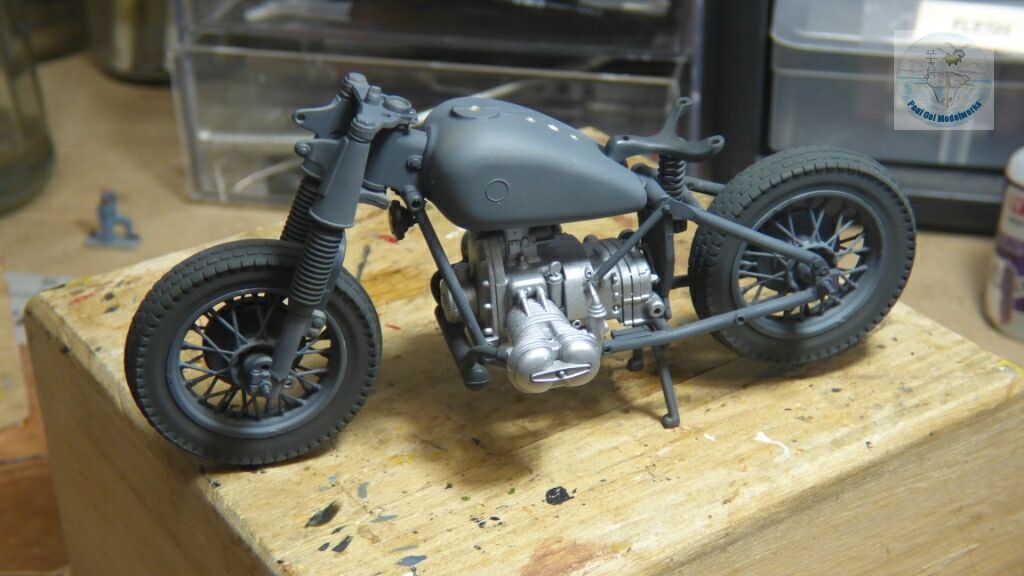
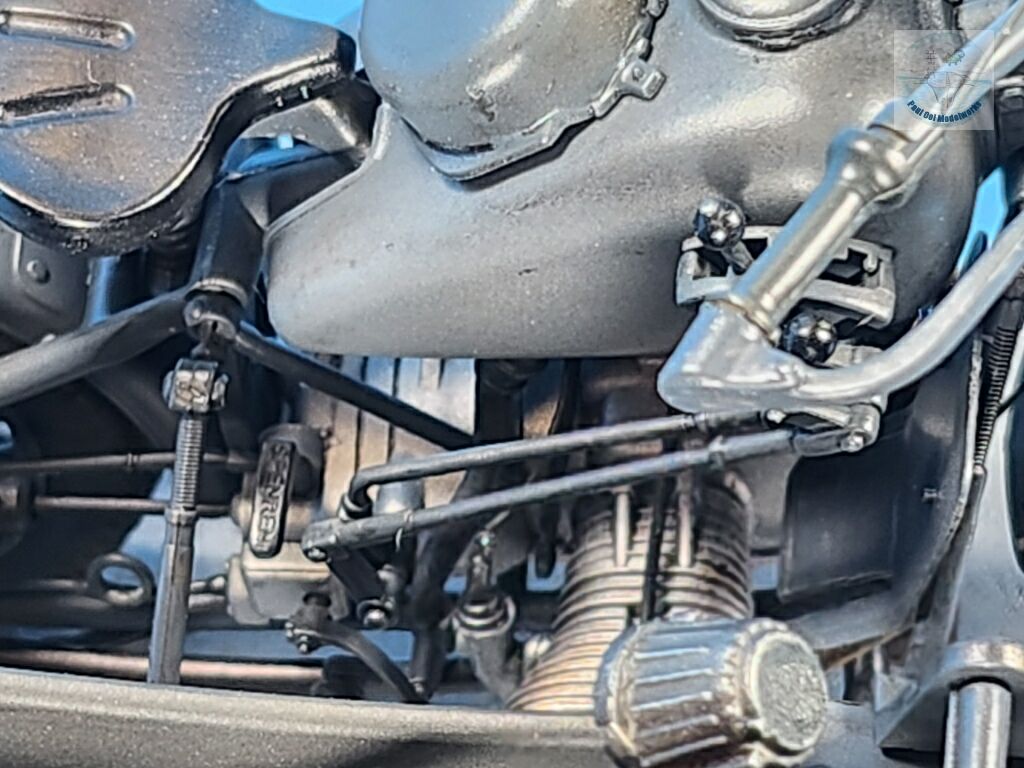
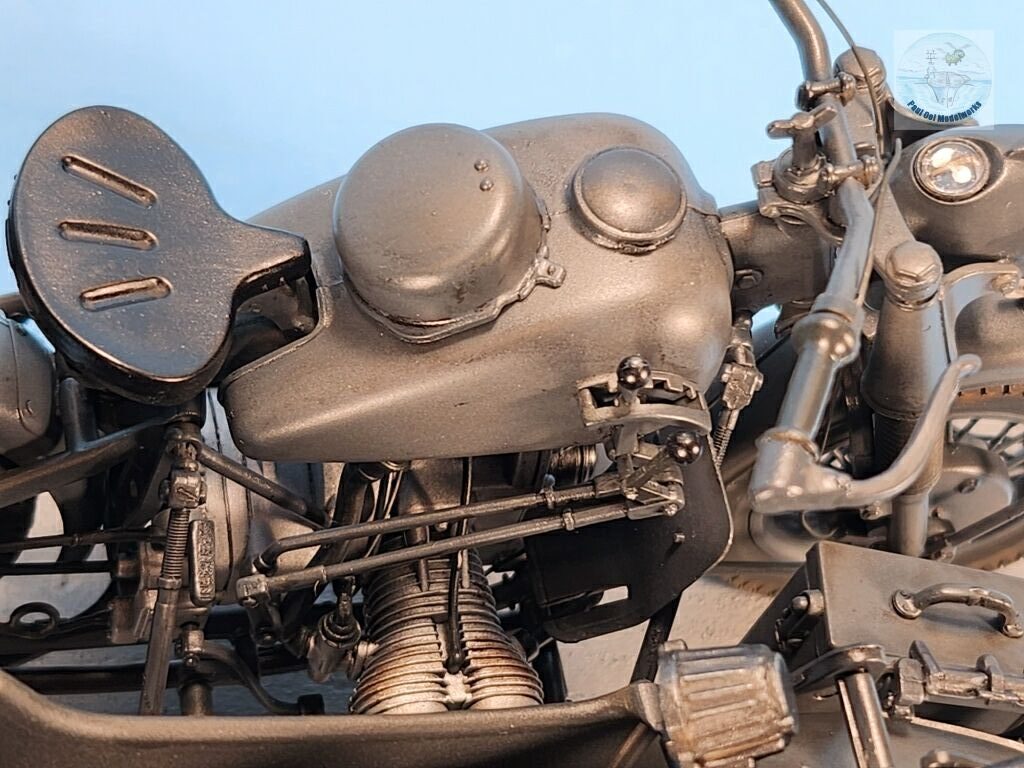
The fuel tank and exhaust muffler is added to the bike frame.
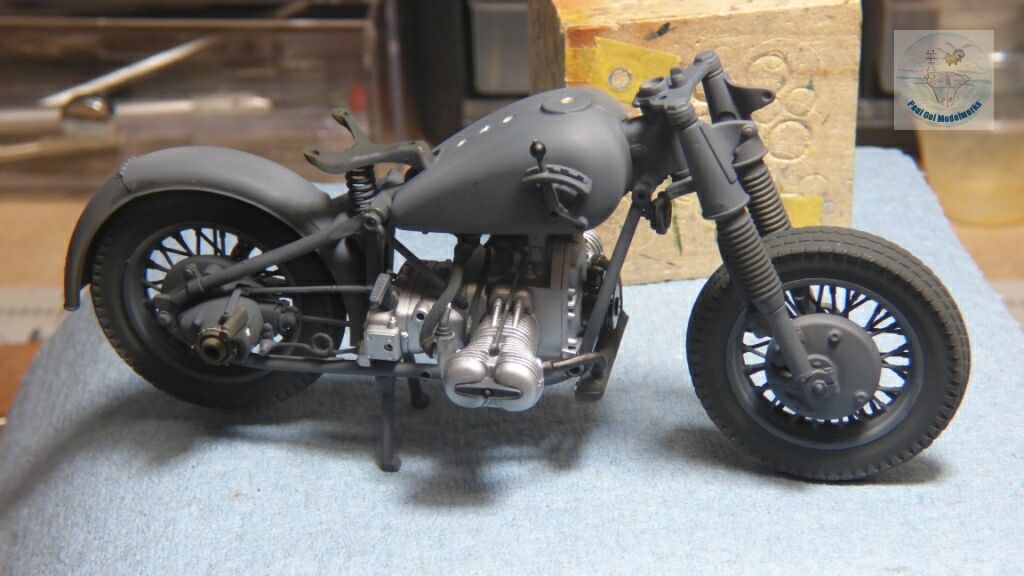
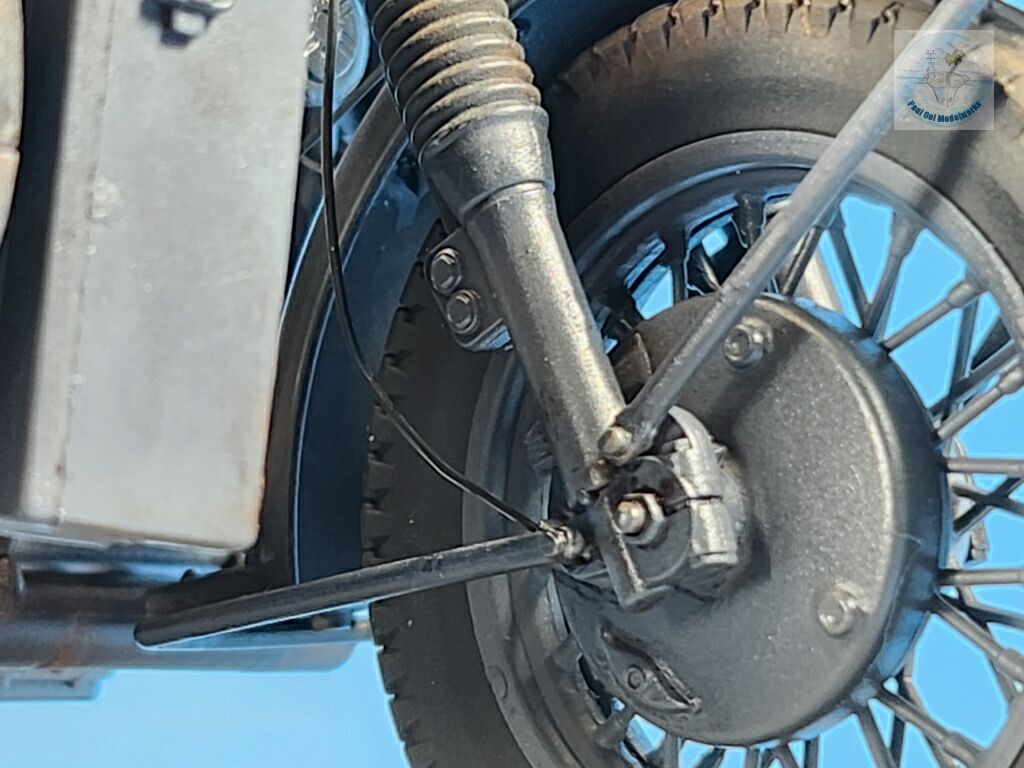
On the right-hand side of the bike, we now add the drive shaft transmission to the rear gear box. Notice that this bike does not use a chain transmission from the from motor to the rear wheel. Several hose connections, and the spark plug connector are added at this time.
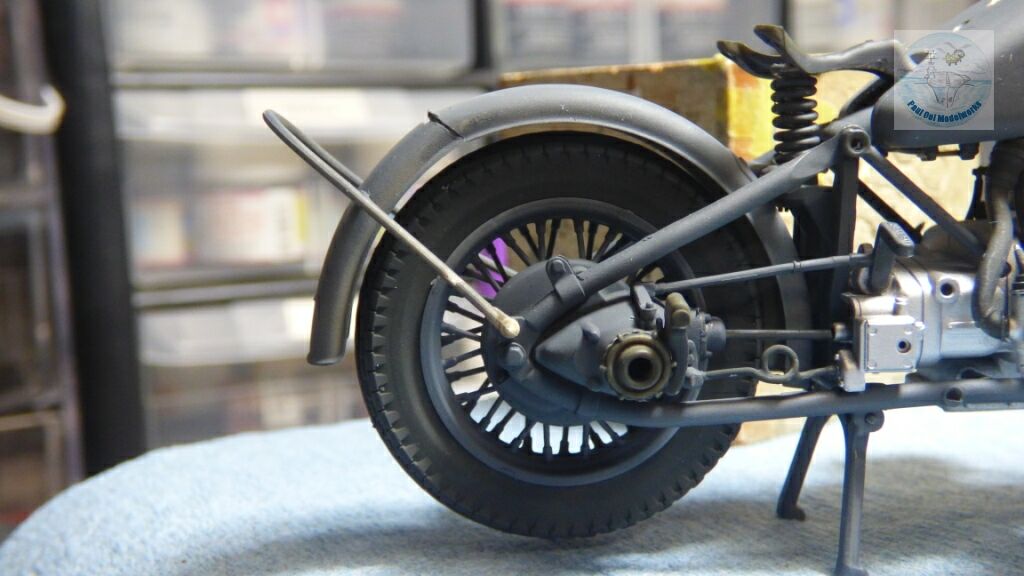
The rear mudguard gets its support strut added. Note the clearance between the tire and the mudguard. That spacing is important and fairly tricky as the attachment points of that mudguard to the frame are few and fragile.
More stuff on the frame. The two forward splash guards, the pillion support above the rear mudguard and the gear knobs at the side of the fuel tank are added. That thing that looks like a German paratroop helmet on the fuel is not a helmet. I don’t know what it is.
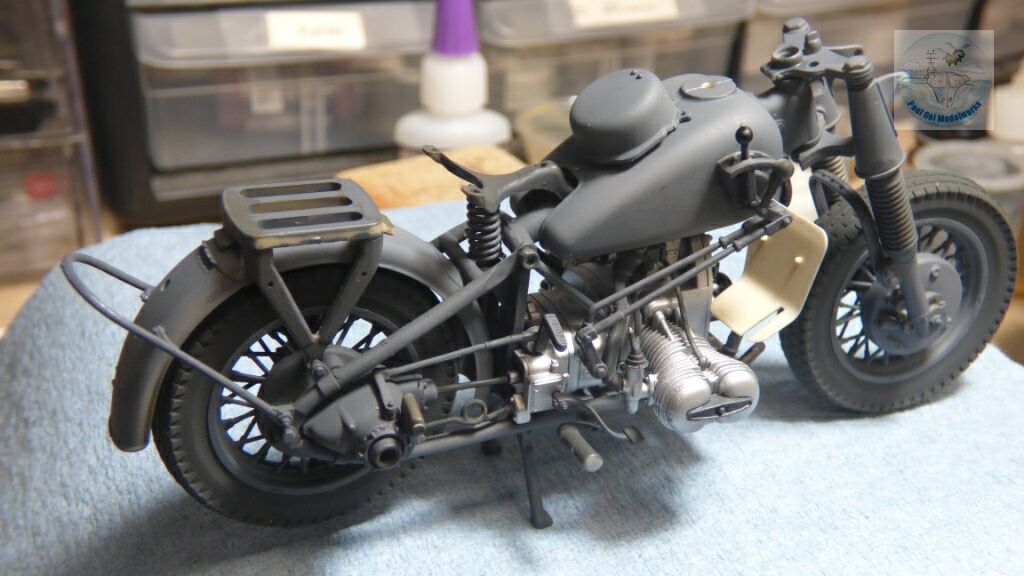
The handle bars and pillion seat bracket are added. Note the bike stand is supporting the frame at the moment. I will fix it in the retracted position towards the very end when the sidecar is attached to the motorcycle.
Most of the parts have been assembled onto the motorcycle except for any clear parts that will be clouded by varnish. It is ready for the varnish application. we will set it aside to build the side car so that both sections can be varnished at the same time.
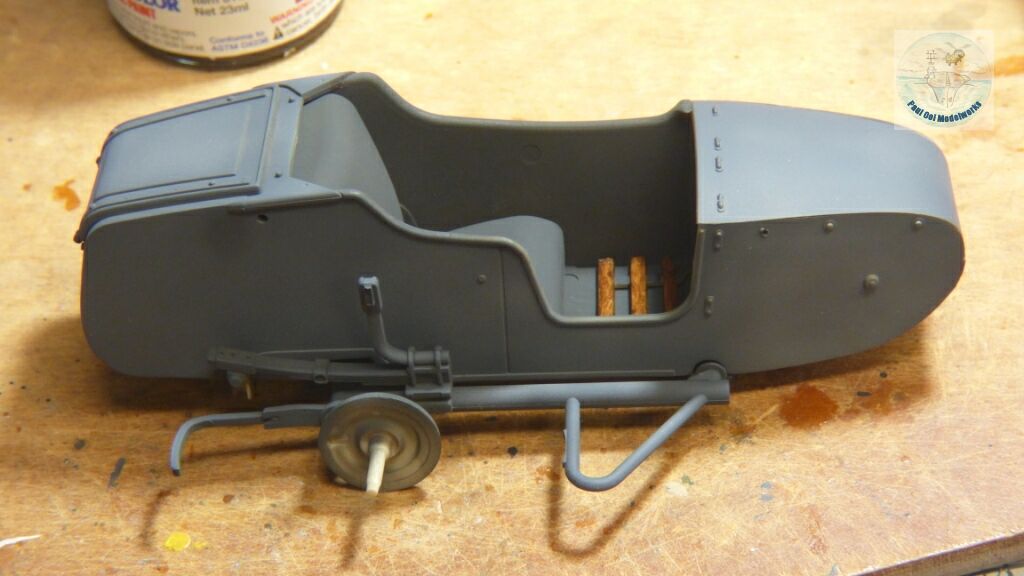
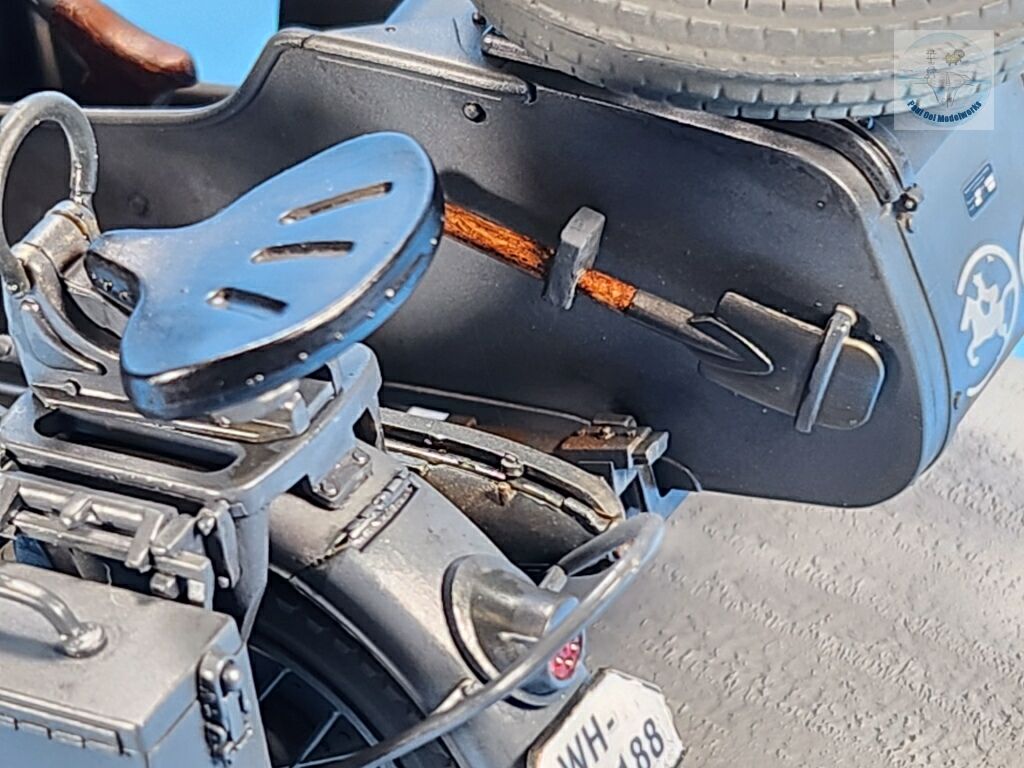
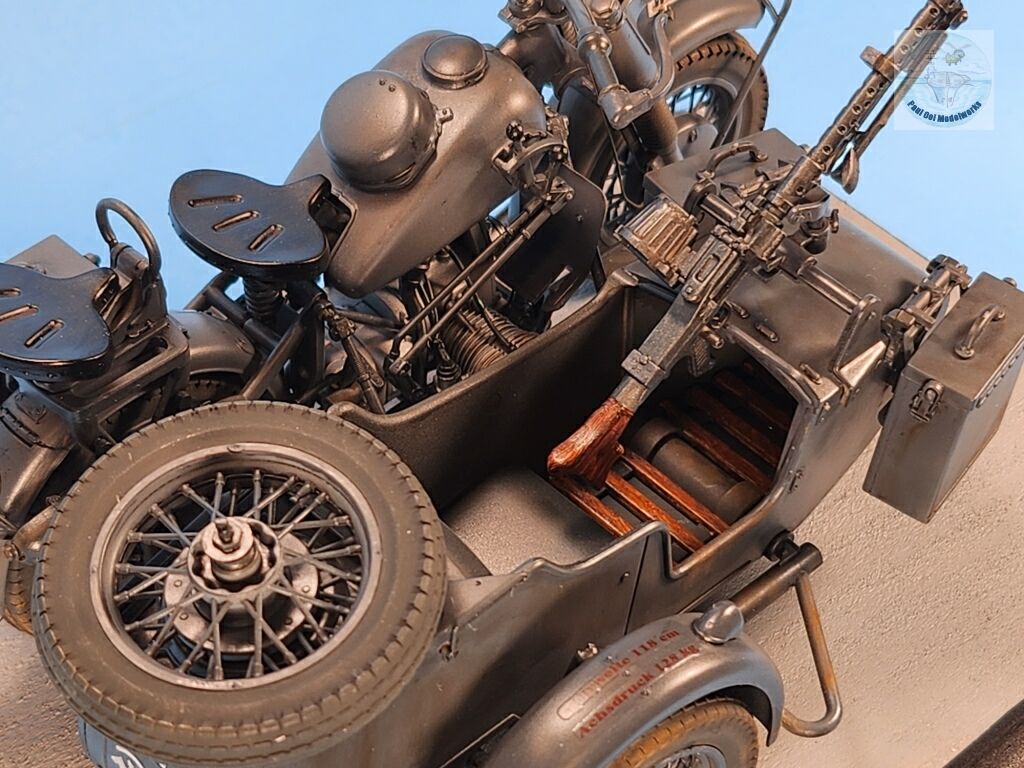
Interior items, like the seat and the floor boards are installed. I use the wood-painting starting with Tamiya Wooden Deck XF-78, followed by Burnt Umber oil paint textured with a rough brush.
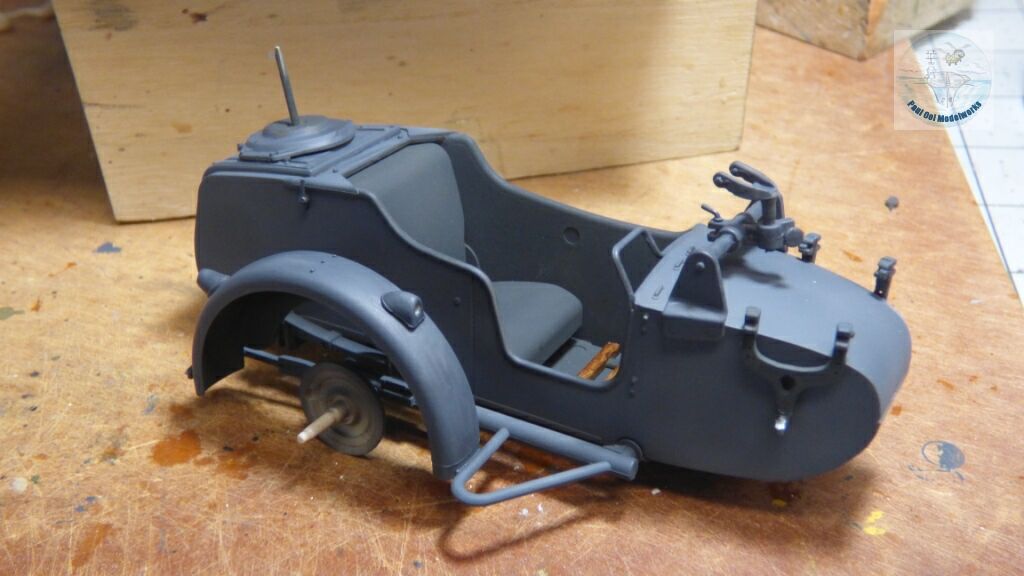
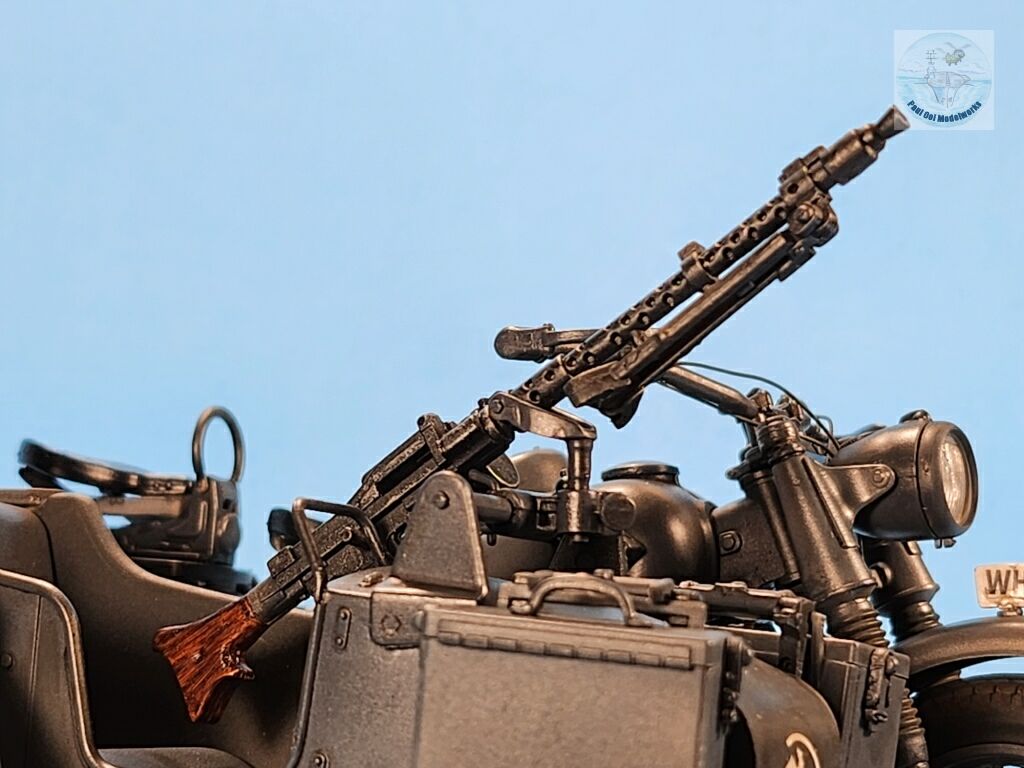
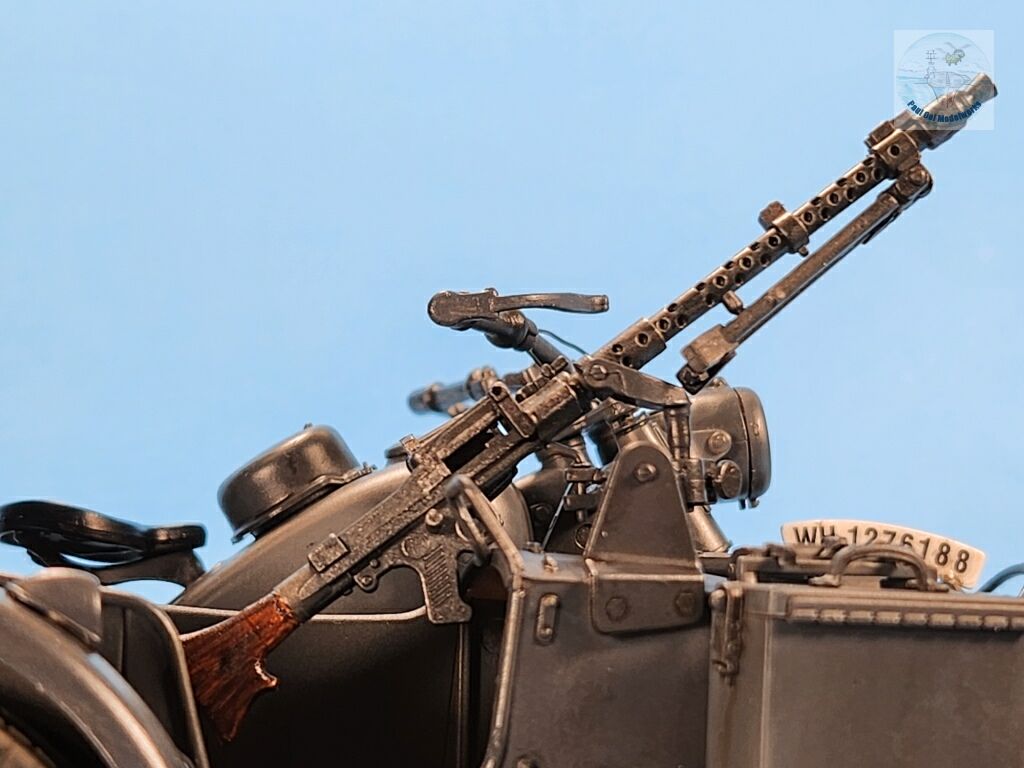
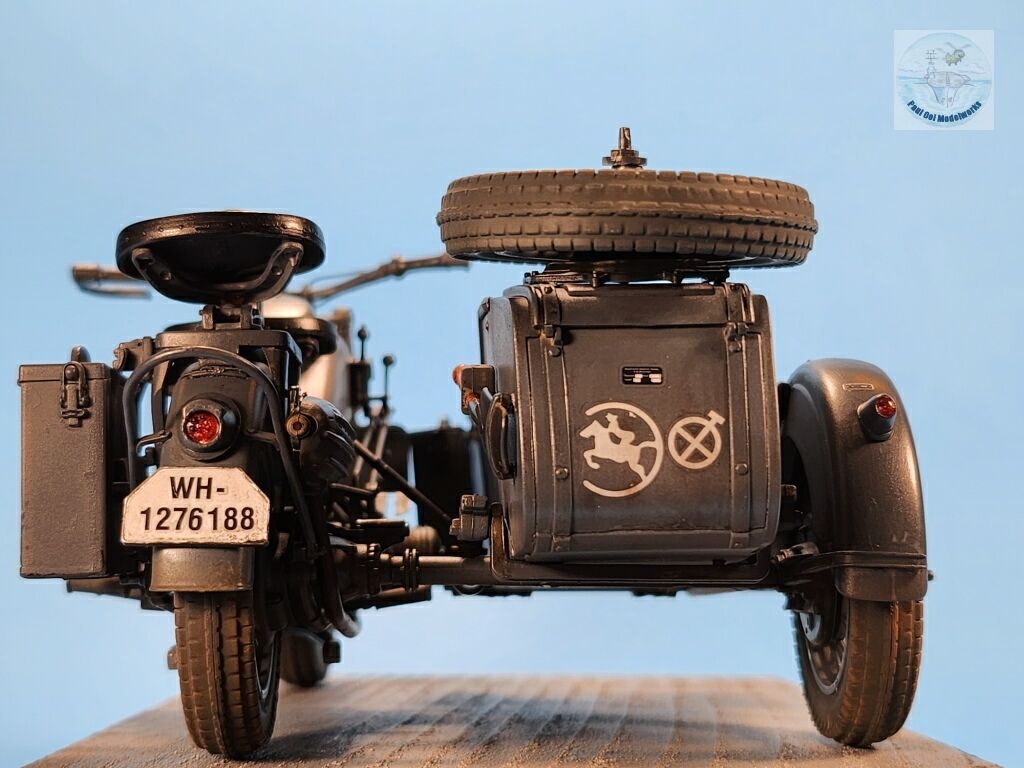
Mudguard, machine gun bracket, and spare tire holder added to the sidecar.
To prep the surface for decals, and to protect the paintwork, I apply several layers of Pledge Polish to both the motorcycle and the sidecar. Allow proper curing of 24 hours or more.
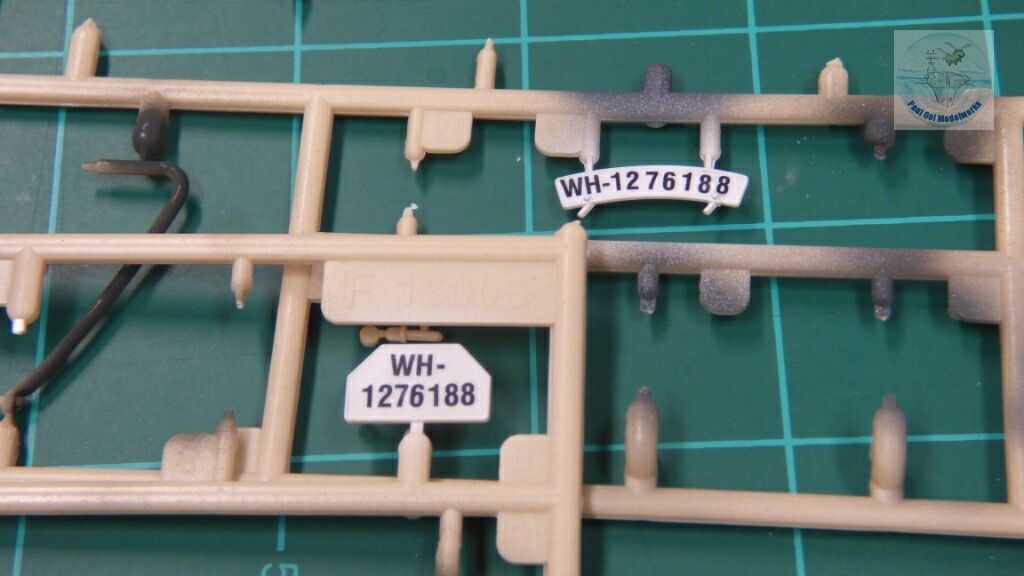
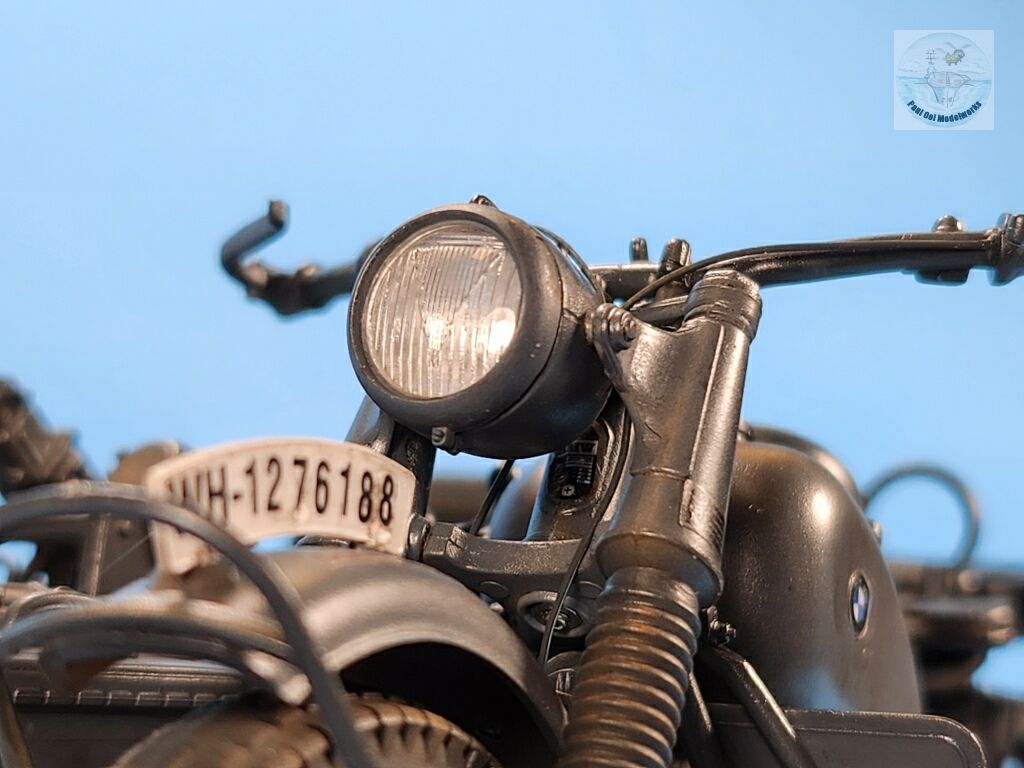
While waiting, I work on the vehicle plates. The numbers need to be arranged separately (a pain) on the plates that I had painted in gloss white, like Tamiya X-2.
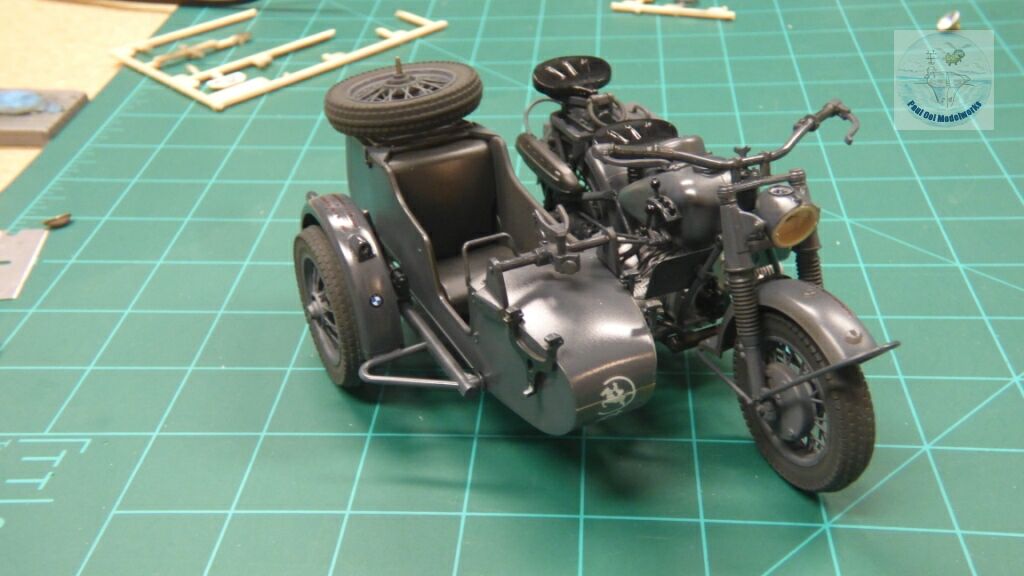
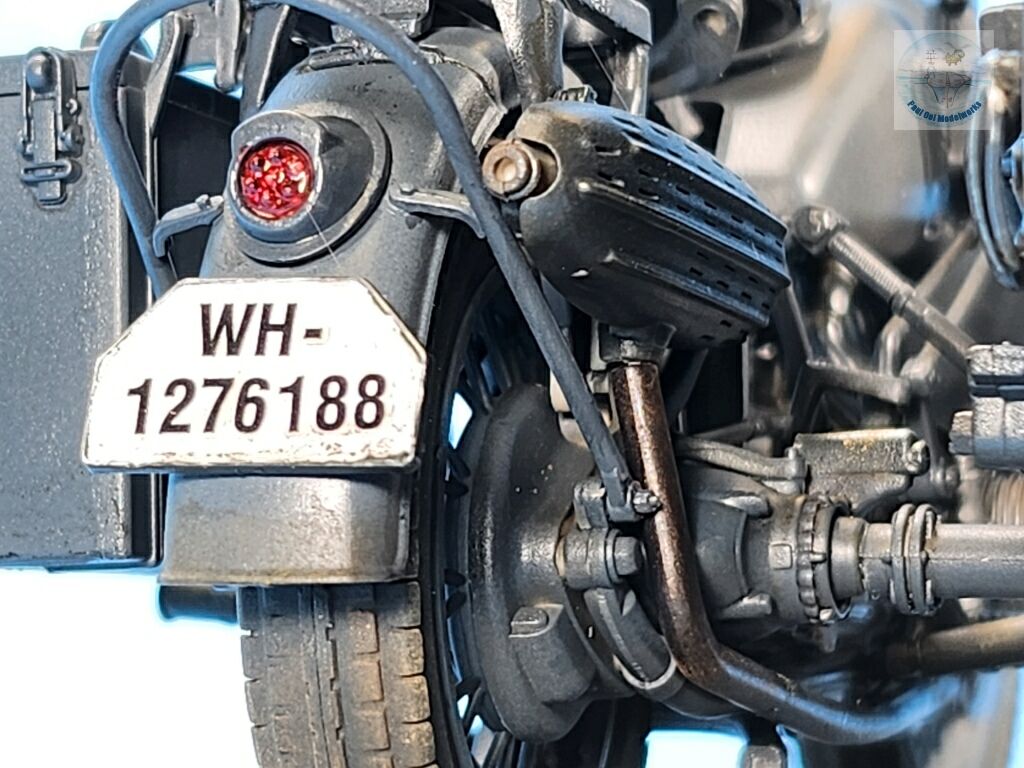
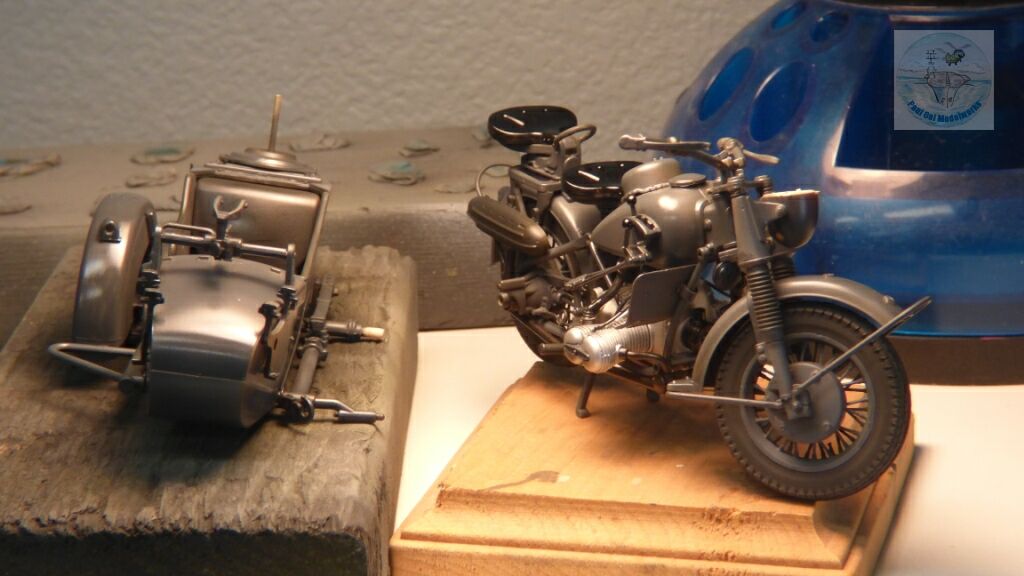
Decals applied to both the sidecar and motorcycle. I have temporarily attached both together. After decals, I apply a final sealing satin varnish over the entire assembly. An oil wash of Payne’s grey/Burnt Umber is applied over the cured varnish.
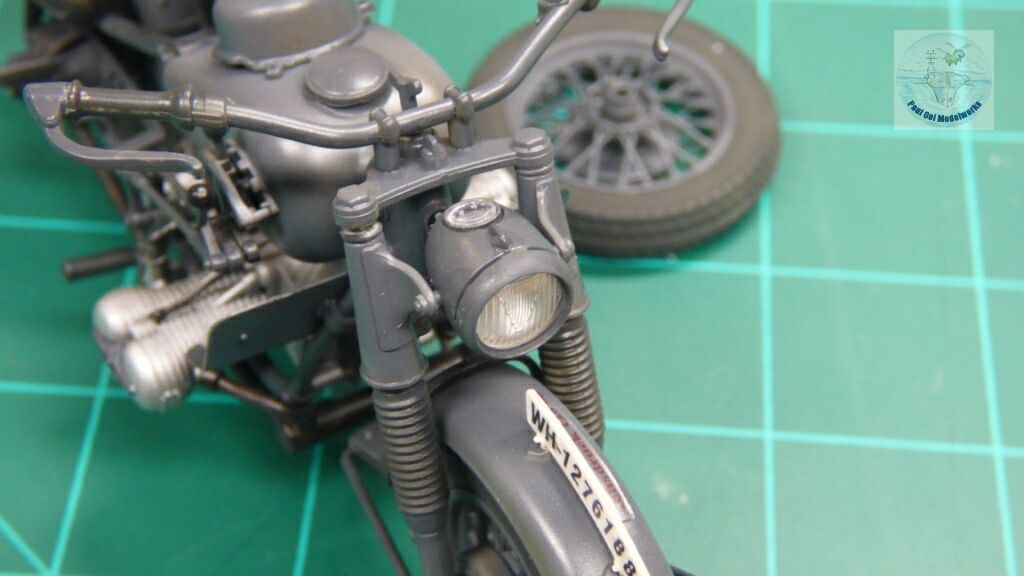
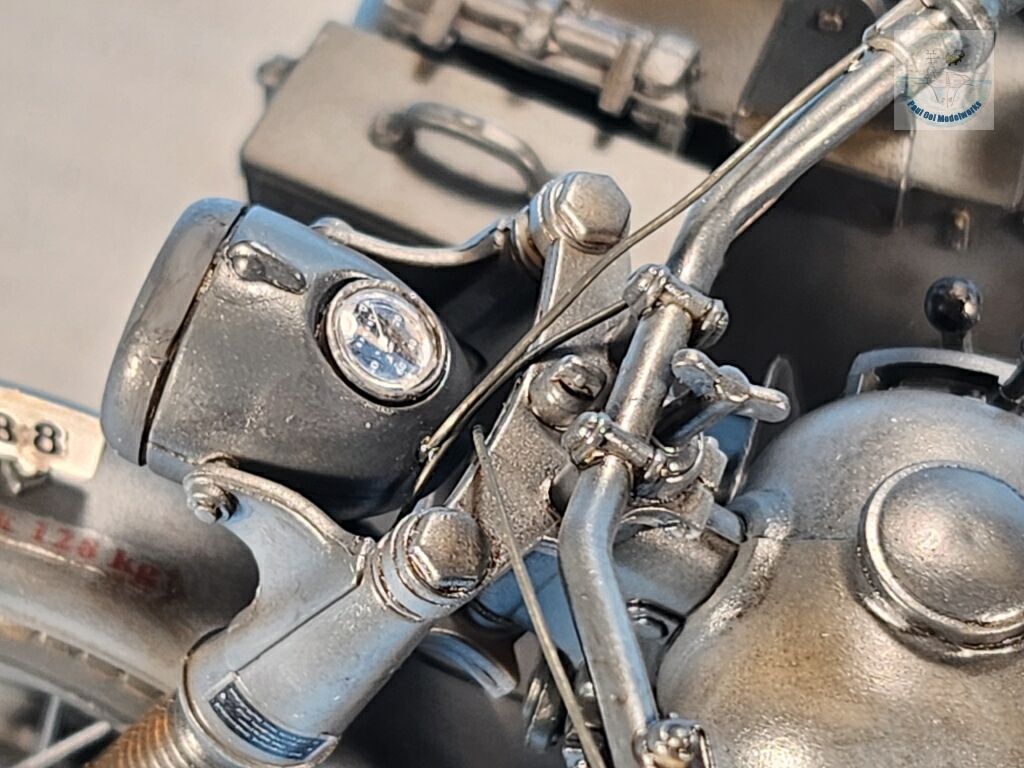
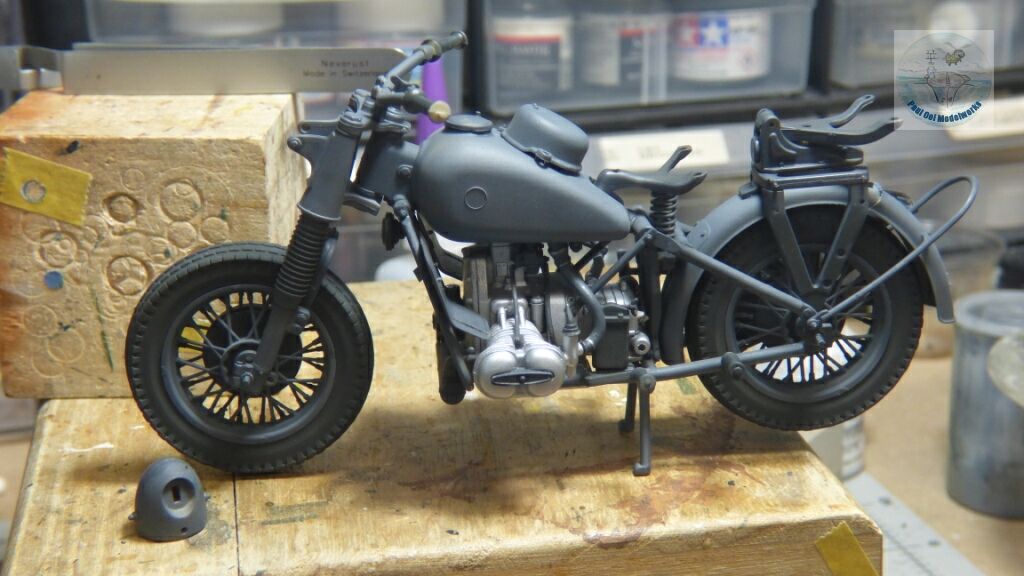
The headlamp is its own special mini-project. I wanted to showcase the realistic lens that came with the kit. Notice also that the speedometer dial is mounted on the headlamp, has its own decal, and also another clear lens over it. HANDLE WITH CARE.
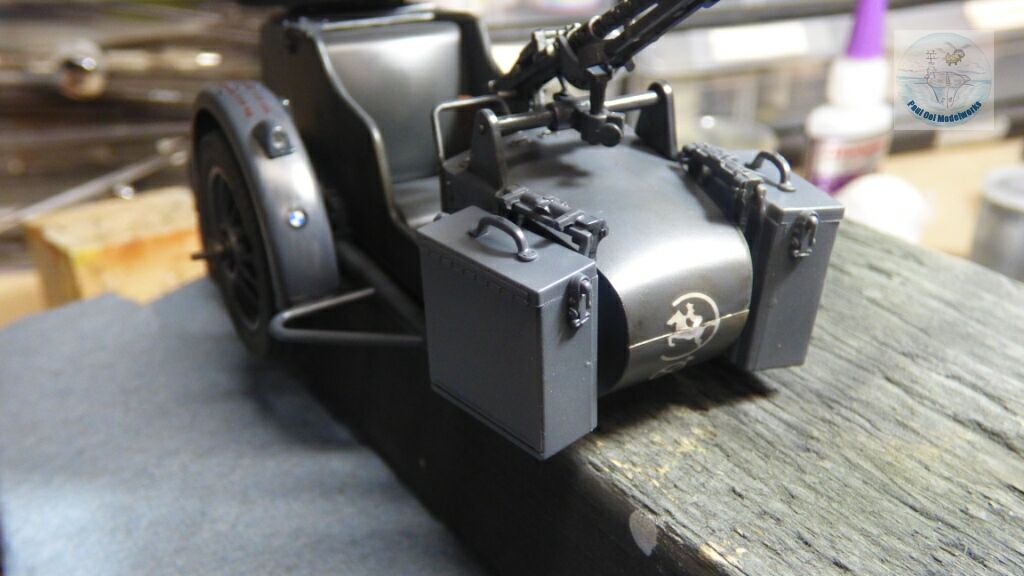
The final bits of parts on the sidecar: the two front stowage containers, probably for ammo, food, tools, etc.
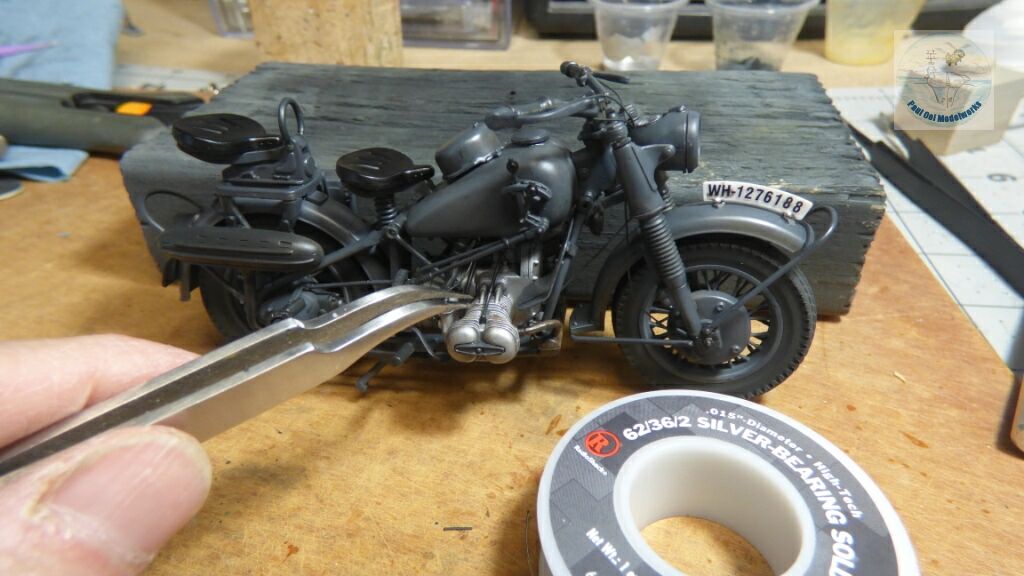
Before the permanent attachment of the sidecar, I attach fine solder wire (.015″ diameter) for the brake cables and electrical connections. Then the two are joined together and we can rev the engine for a cross-country ride!
Leave a Reply