
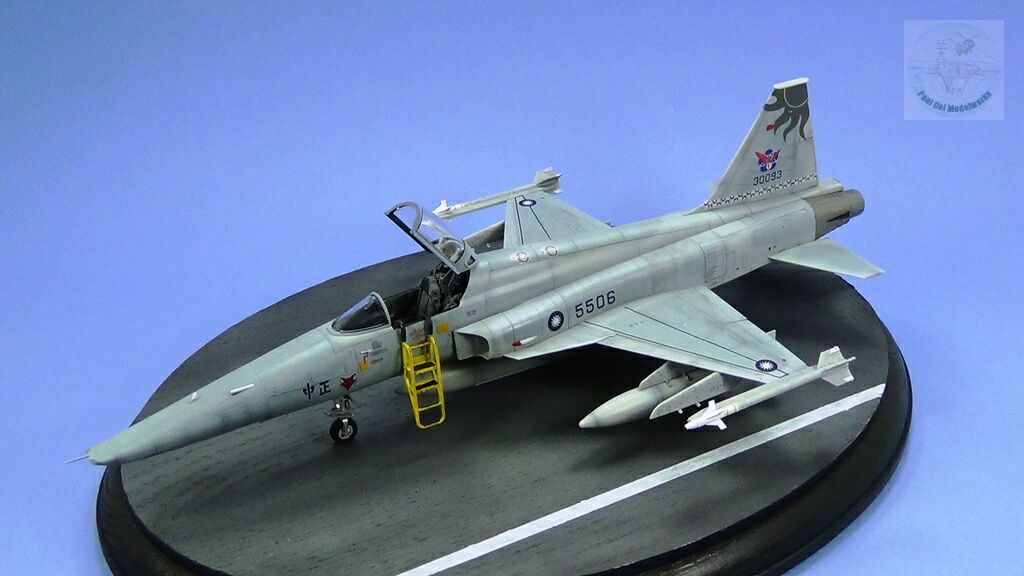
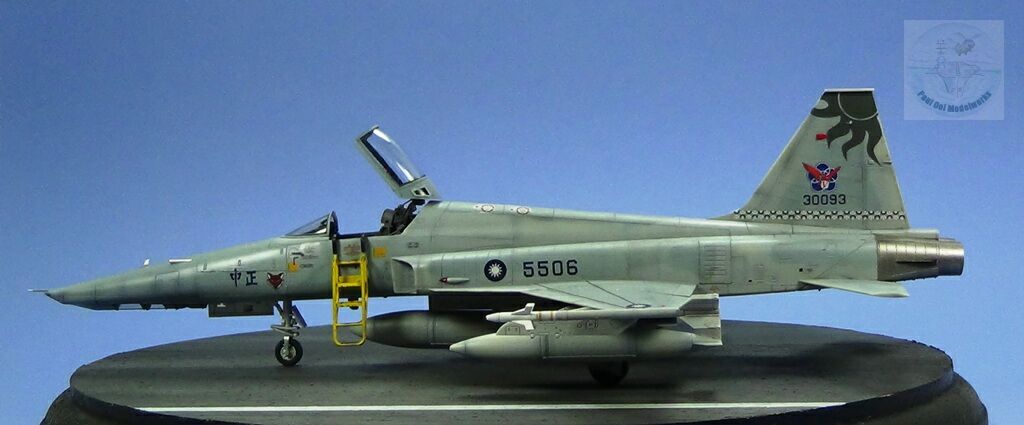
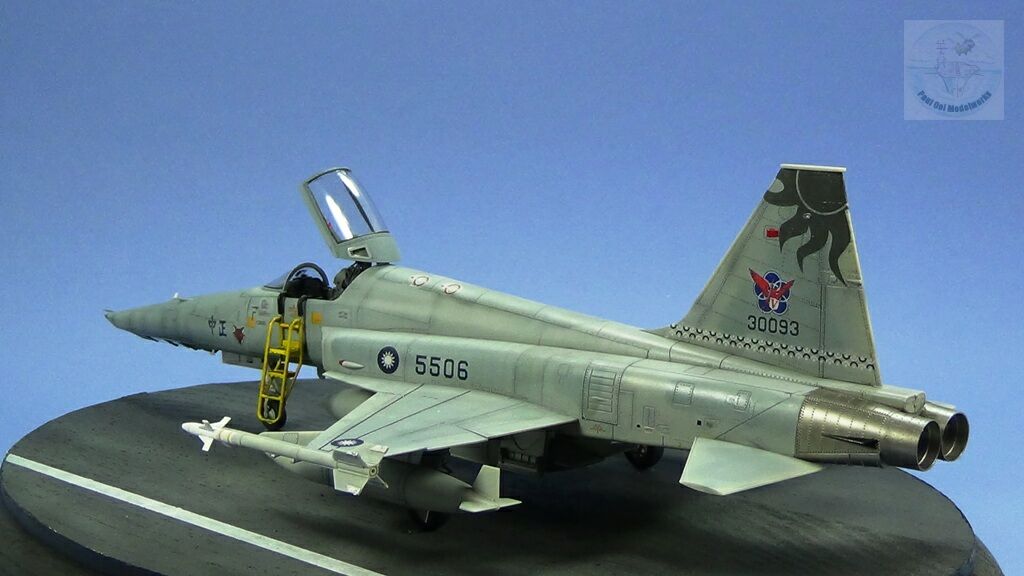
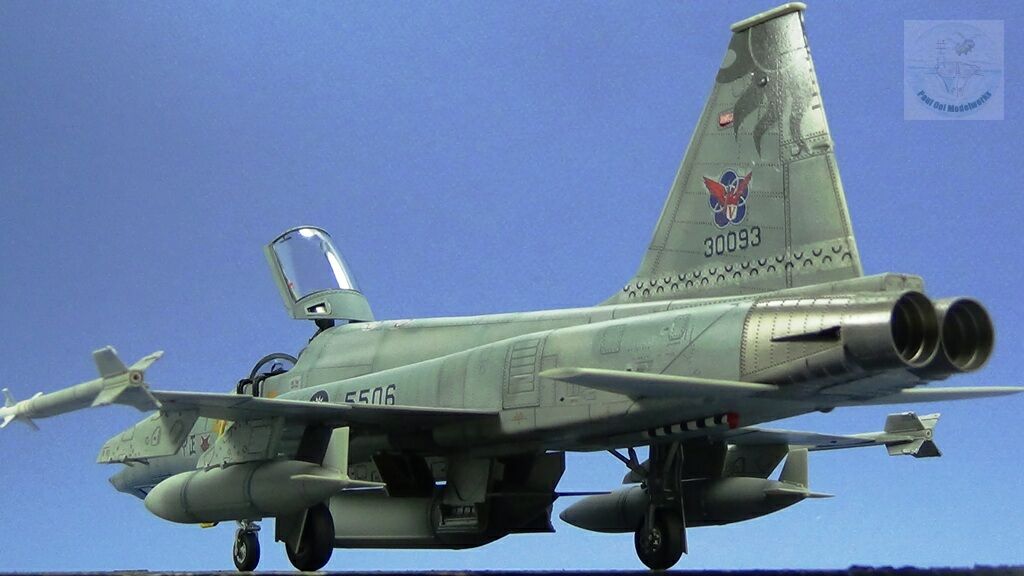
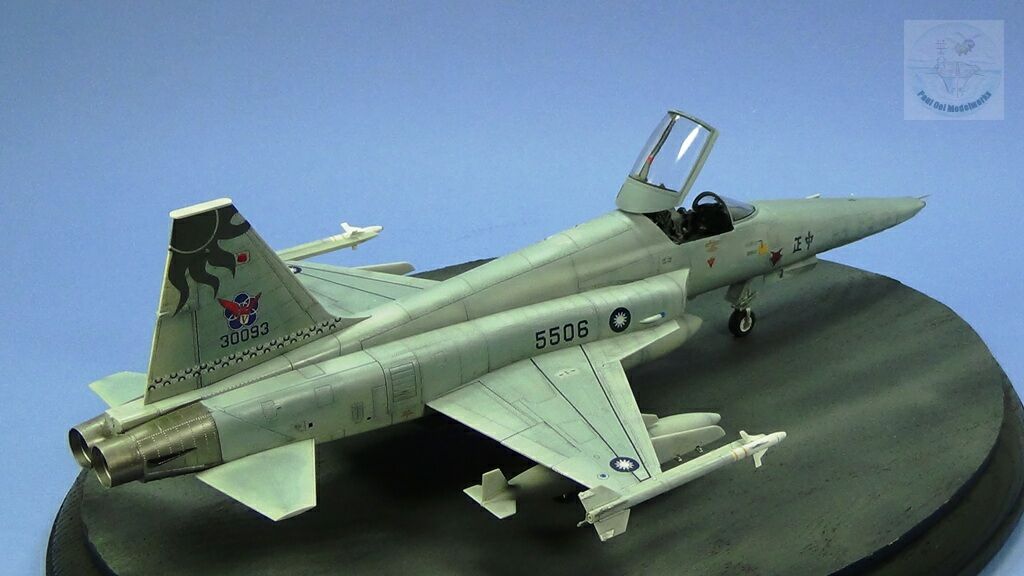
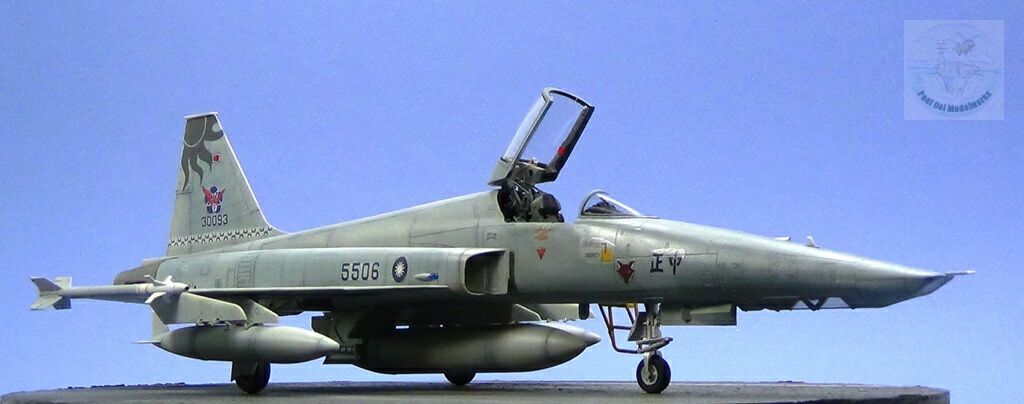
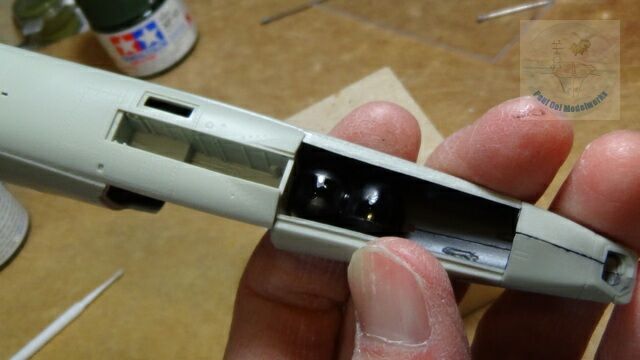
With all that has been going between China and her neighbors, the Taiwan Straits, and the South China Sea have become flash points for international conflict. The Republic of China Air Force (RoCAF) have been operating reconnaissance flights across the Taiwan Straits for decades to keep a wary eye on military movements and naval activity by the rival People’s Liberation Army. The Northrop RF-5E Tiger Gazer is an armed reconnaissance jet operated from the airbase in Taichung and make routine spy missions. Converted from F-5E Tiger II air frames, the front nose section had been replaced with an array of bottom, side and front facing cameras designed and installed by Singapore’s ST Aerospace between 1997 and 2000.
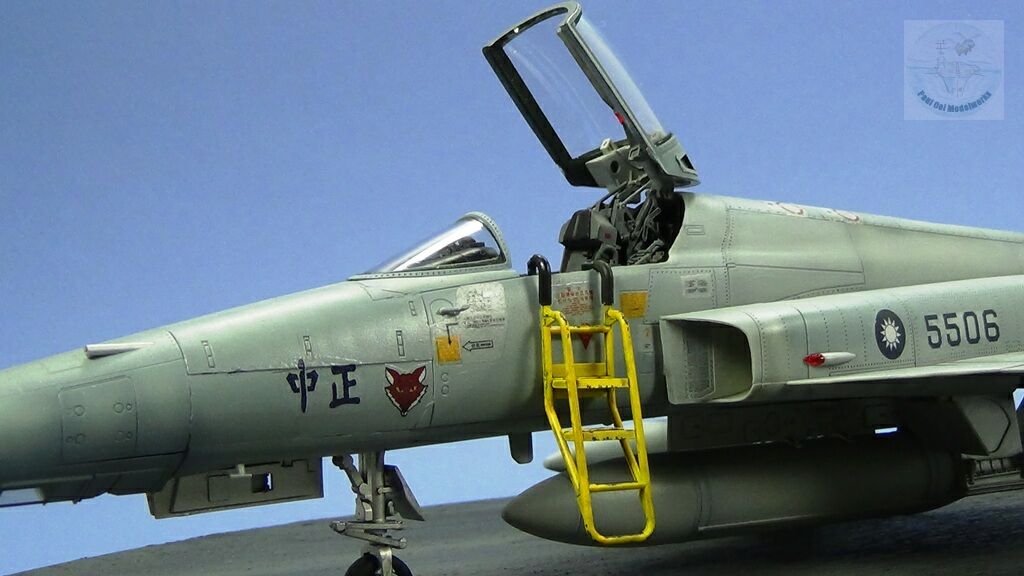
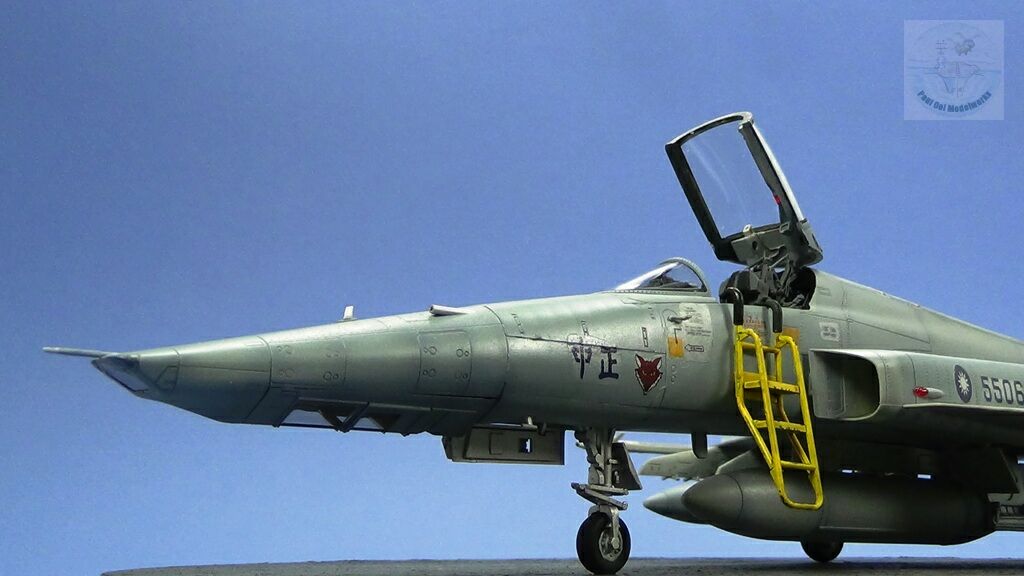
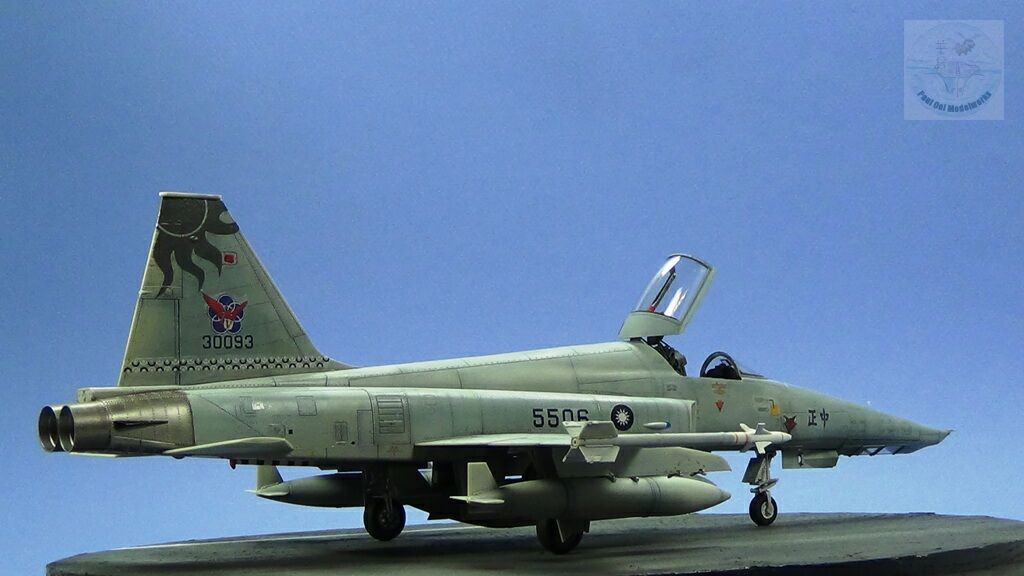
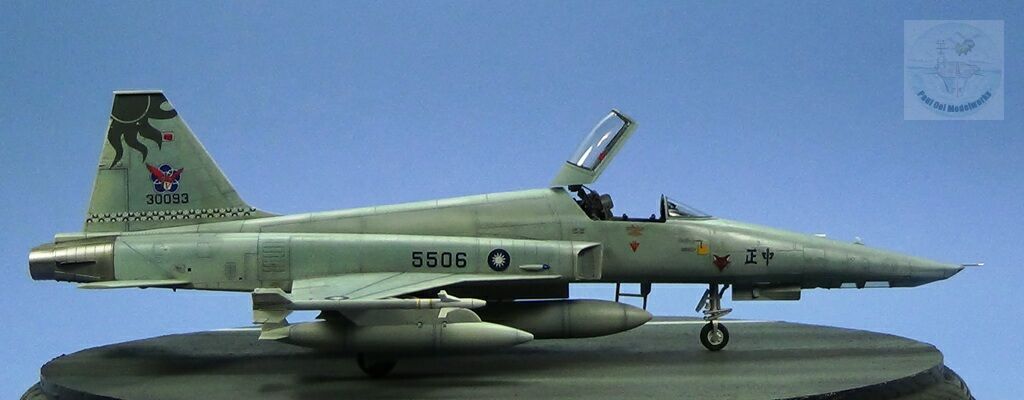
The RF-5E is highly maneuverable and can defend itself quite well with a pair of Sidewinders and a single 20mm M39 cannon. In operation, it is normally escorted by another F-5E or F-16 fighter. The camouflage pattern is a two tone grey (almost bluish in appearance) that is hard to discern unless you get a closer look. I chose to build this aircraft as I think it epitomizes the troubled region where the Tiger Gazer runs the daily gauntlet of getting a closer look at the Dragon without provoking it.
Gallery

Construction Notes
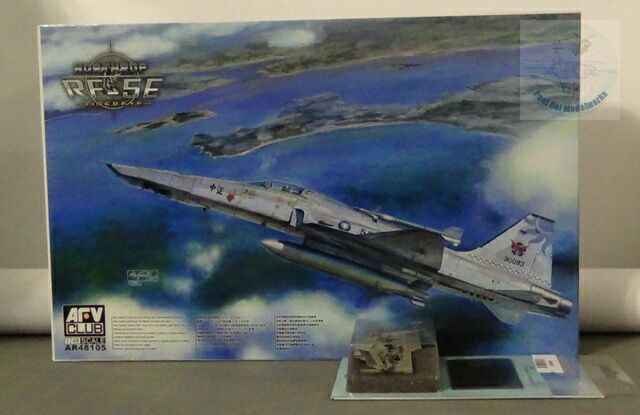
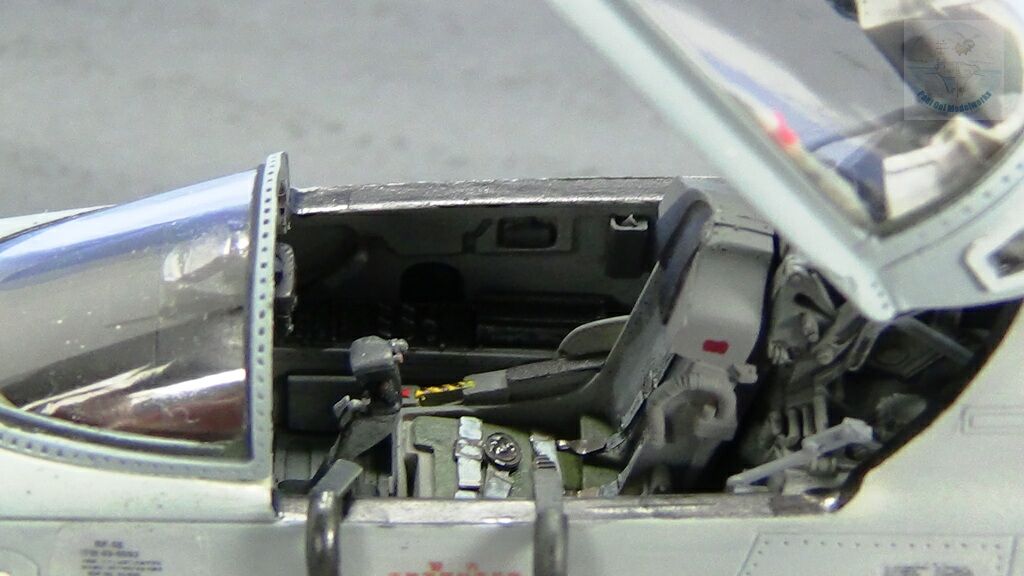
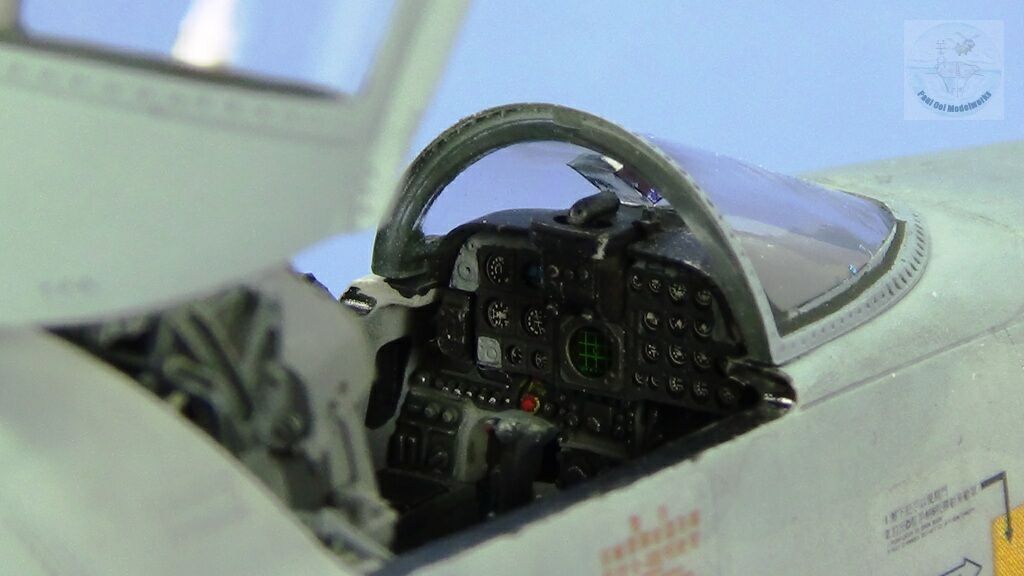
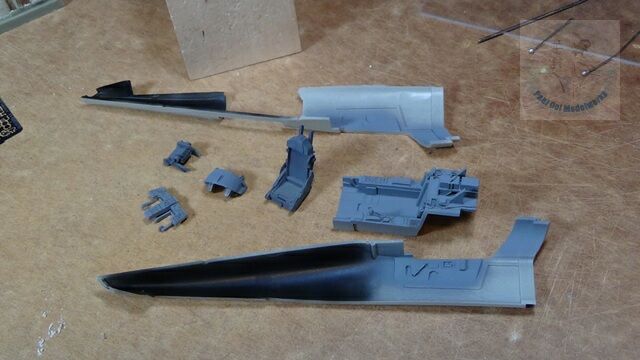
The kit used for this project is the very well-made 1/48th Scale AFV Club RF-5E Tigereye kit which comes with a small photoetch fret for some canopy details. I added an Aires F-5E Tiger II resin cockpit set to improve on the front office details. The fit of this kit is excellent and very little filling was needed for the seams. In fact, the kit has quite a few spare parts leftover after the build that was obviously intended for a two-seater version of the F-5E family. I have one major complaint and that was the decal sheet had a blotchy surface finish to it that seemed to have come from the top lining paper having reacted with the decal film.
The insides of the camera chamber was painted Tamiya XF-69 NATO black, and the inside walls of the cockpit was painted XF-53 Neutral Grey.
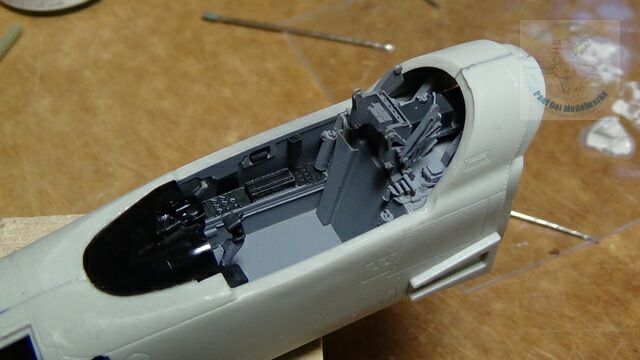
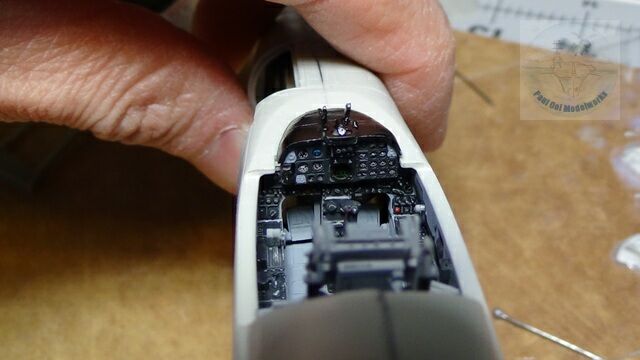
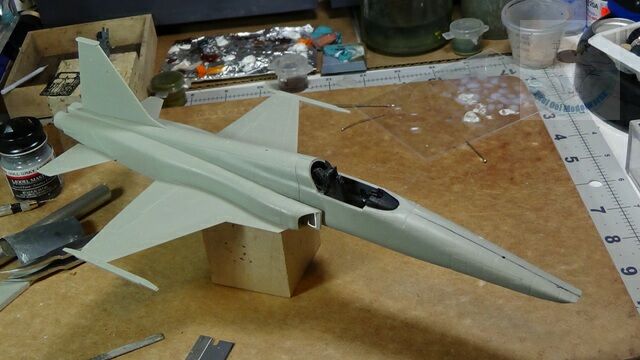
The resin parts fitted very well into the cockpit tub. The instrument panel details are excellent and are painted with black and Neutral Grey. Switches are highlighted with Prismacolor Silver PC949.
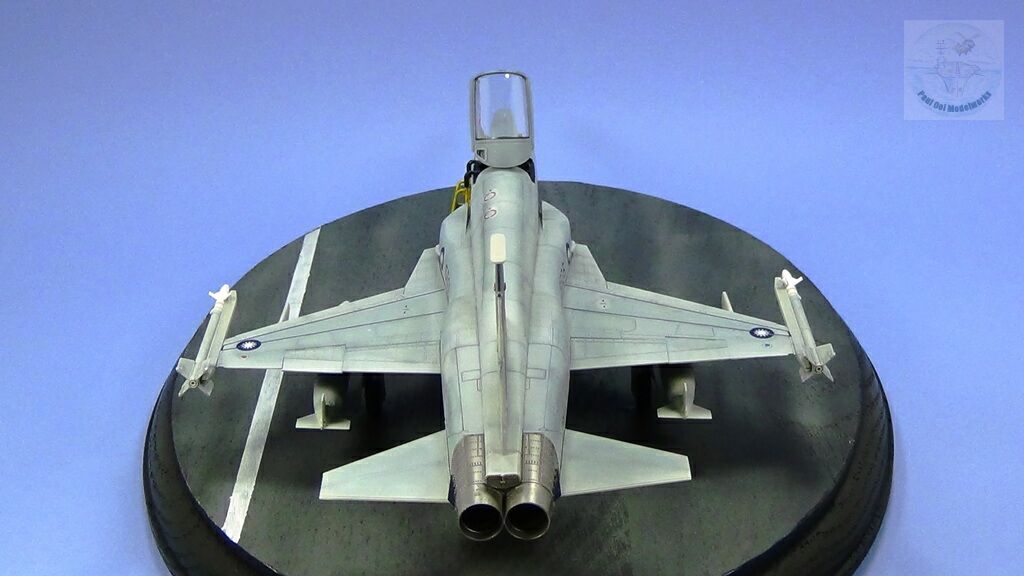
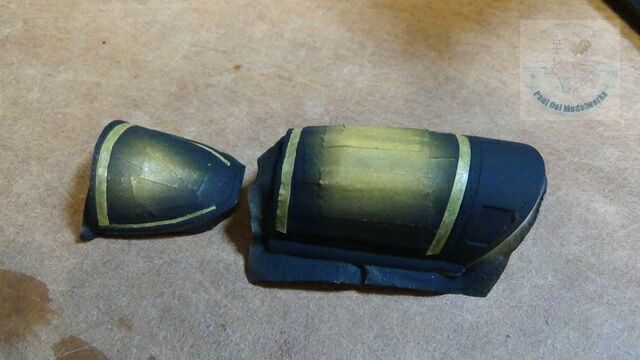
One very important detail. Although the instructions did not call for it, I added about 40 grams of ballast weight into the front nose, making sure to paint them black to merge into the dark interior (there are camera windows under the nose). This ensures that the aircraft will sit on its front tricycle wheel.
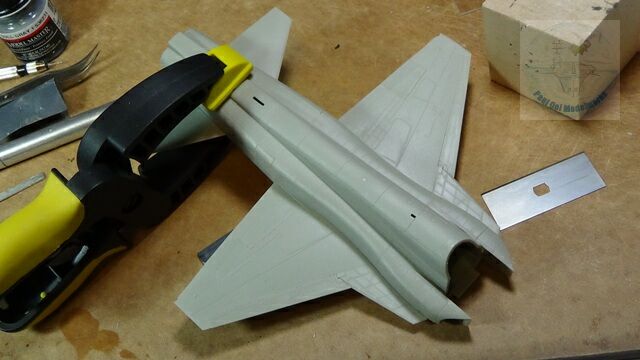
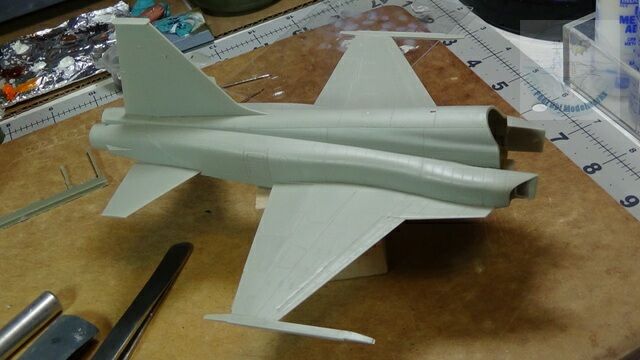
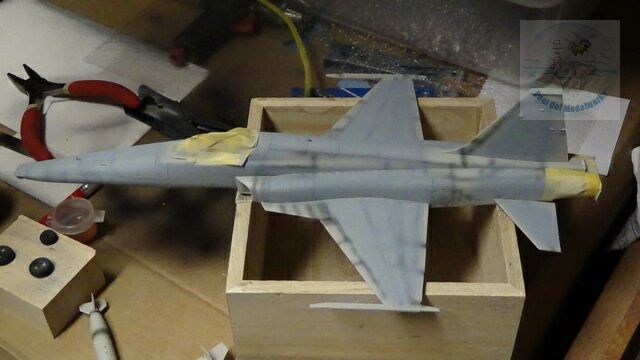
The main fuselage section of the aircraft fits well but requires some firm clamping to make sure that the seam lines are pressed well together.
The next important set of joints are the fit between the front fuselage section and the main fuselage section. There were some prominent seam lines between the two that I filled with very thin stretched sprues.
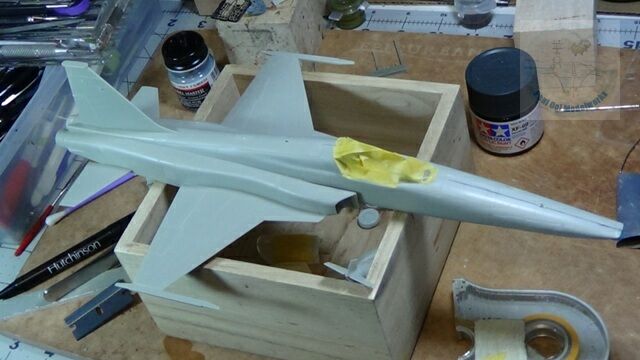
Once all the main sections have been fitted together ( I leave little fiddly bits like the antennae off until much later) then it is time to mask the cockpit, camera windows for painting.
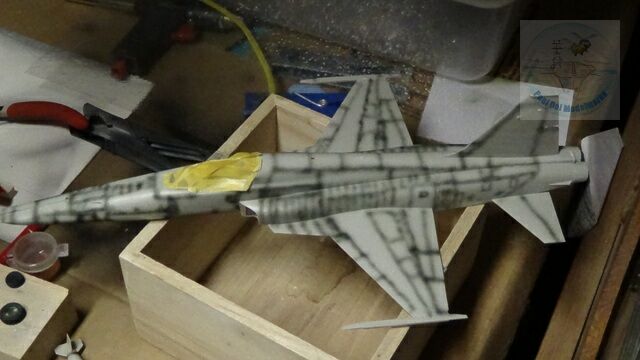
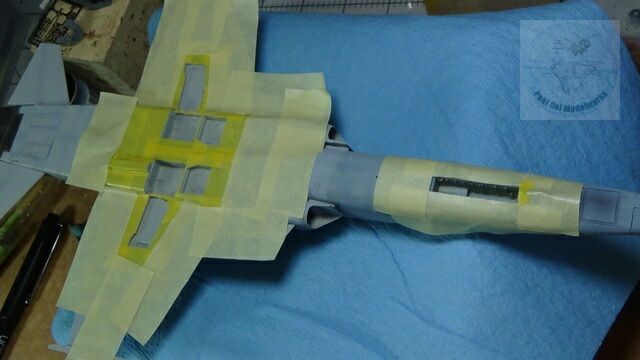
Since this aircraft has a very light grey camouflage pattern, the under shading of the panel lines are especially important. I do this with my usual XF-69 NATO Black, also doing the same for the canopy sections as I will mask a thin strip to make the rubber gasket effect.
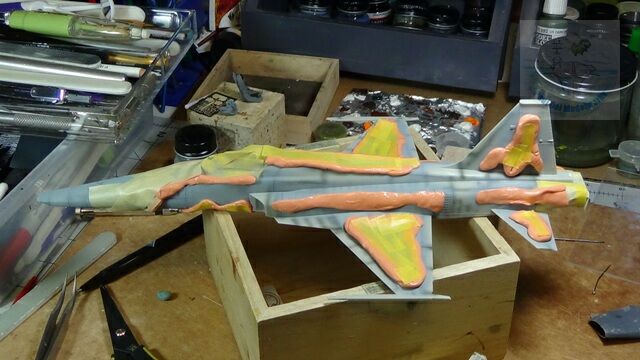
The camouflage painting is done in two steps, first the darker shade of FS36320 Dark Ghost Grey, then after masking the “islands” with Silly Putty, the lighter shade of FS36325 Light Ghost Grey is applied along the edges.
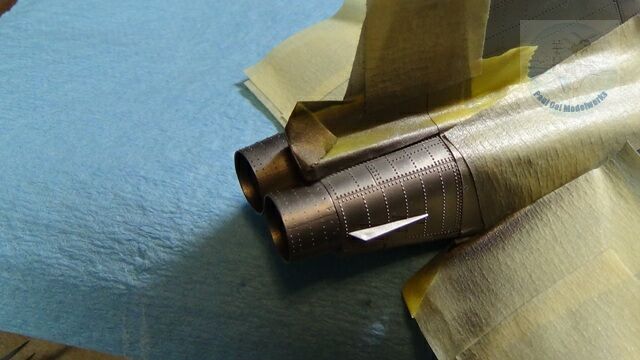
Next, masking of the rear stabilizers, tail, and rear of the fuselage, I apply Metalizer Burnt Metal to the engine exhaust.
Next, I mask off the surrounding sections around the undercarriage wheel wells. These sections are painted with Metalizer Aluminum. After this, I apply several layers of Future Floor Polish to protect the paintwork and prepare for decals.
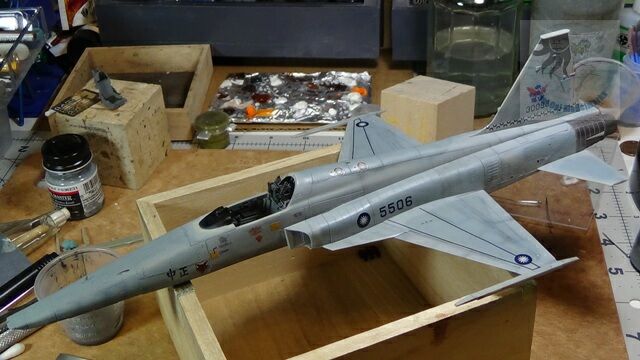
After a couple of days, the decals are applied with some help from the decal softener liquid. As I had mentioned earlier, something needed to be done to repair the blotchy appearance of the decals. After they have dried, I applied several thin layers of Future Floor Polish that helped to make the decal surfaces much more uniform.After this has cured, I applied a wash of Dark Grey oil wash over the aircraft to highlight the panel lines and also stronger shades for oil patches on the underside of the fuselage and near ailerons.
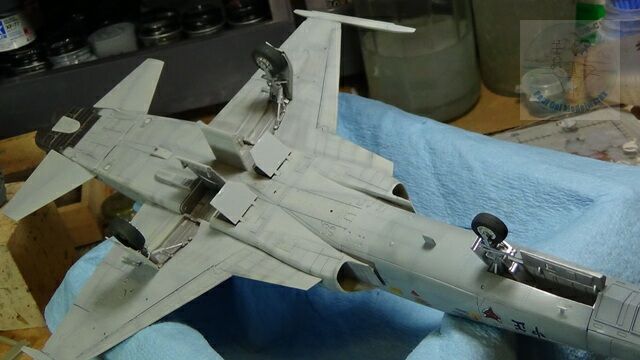
Finally the undercarriage parts and doors are carefully assembled.
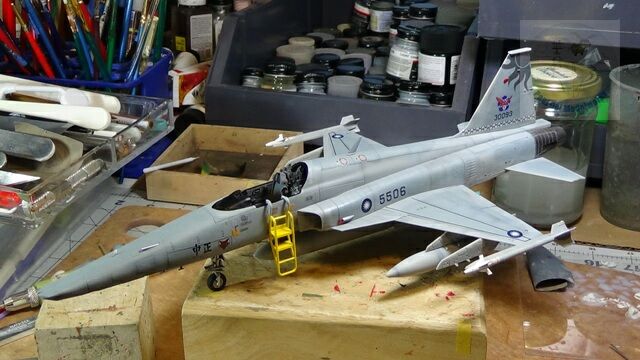
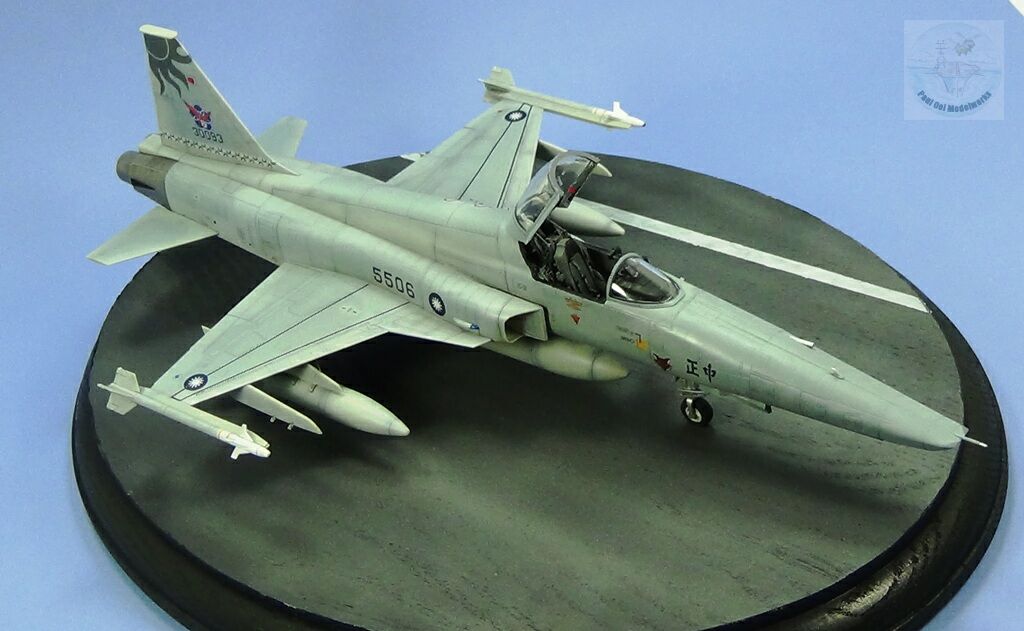
Sitting on its own wheels, I now add the weapons pylons and drop tanks. Although all my reference pictures show the aircraft fitted either with a single central tank or two smaller wing mounted tanks, I chose to mount them all, because the aircraft looks nicer fully loaded. Just my preference.
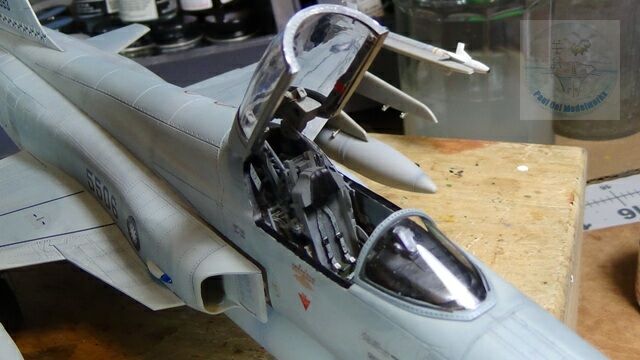
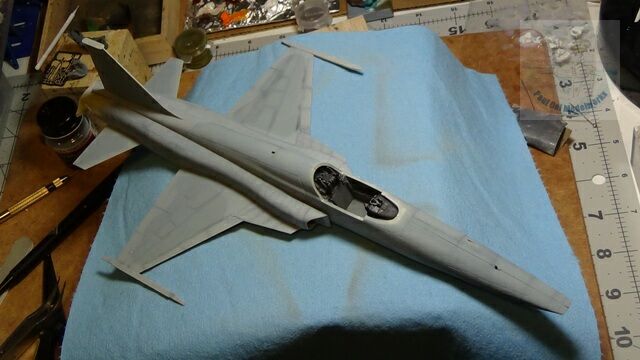
Then comes the part of finishing the ejector seat, and mounting it inside the cockpit, followed by detailing and attaching the canopy bits. Just have to be careful with the clear parts and fitting all kinds of little photo etch bits to them. But they look really nice once done.

All that’s left is to prepare the base and get this beauty to fly!
Another excellent effort resulting in a superb build.
Kudos Paul.
Two thumbs up for you, bro. 🙂
Another wondrously aesthetic airframe.
Well done!
Hello Violet,
Thank you. Paul