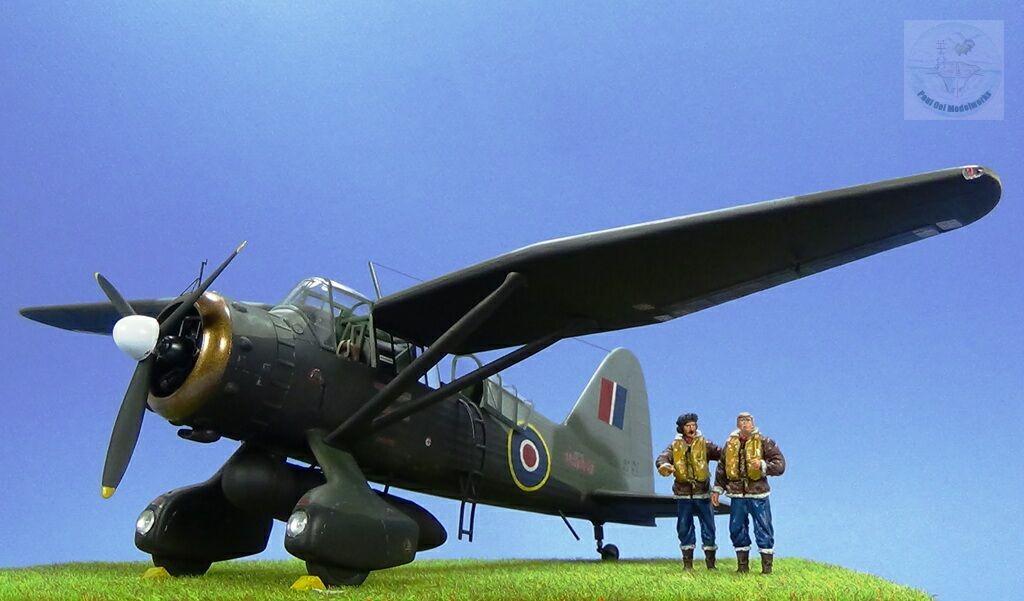
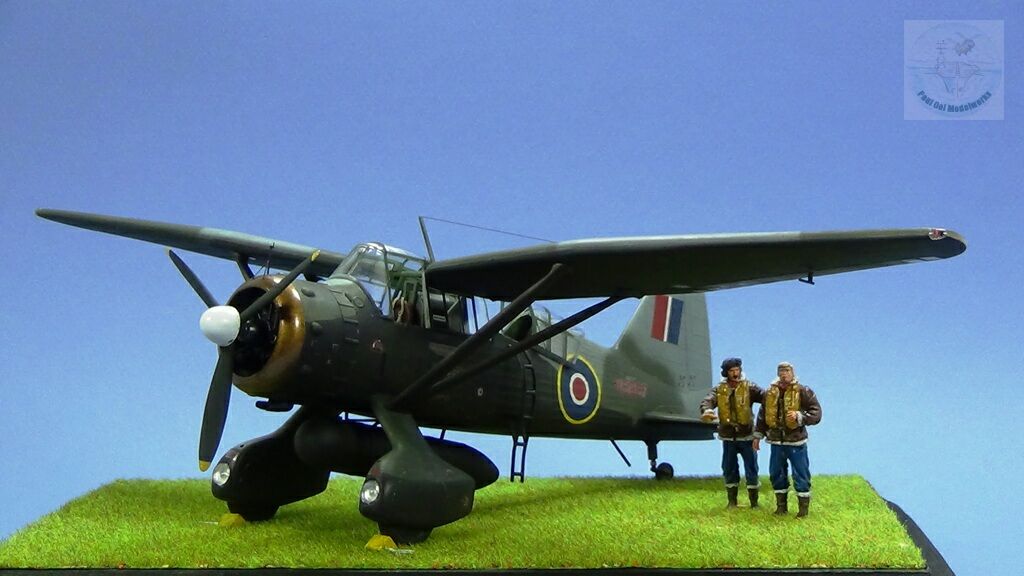
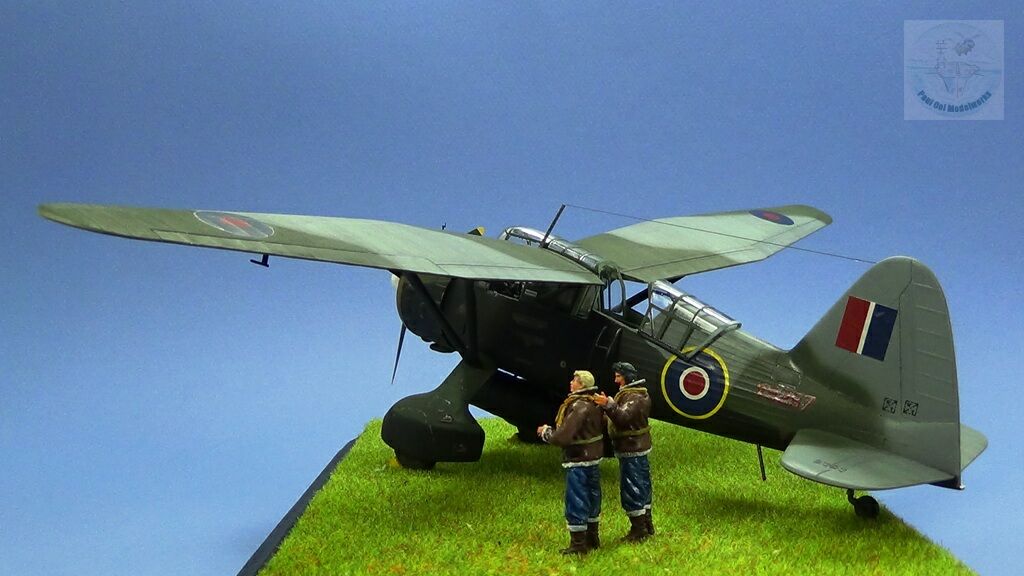
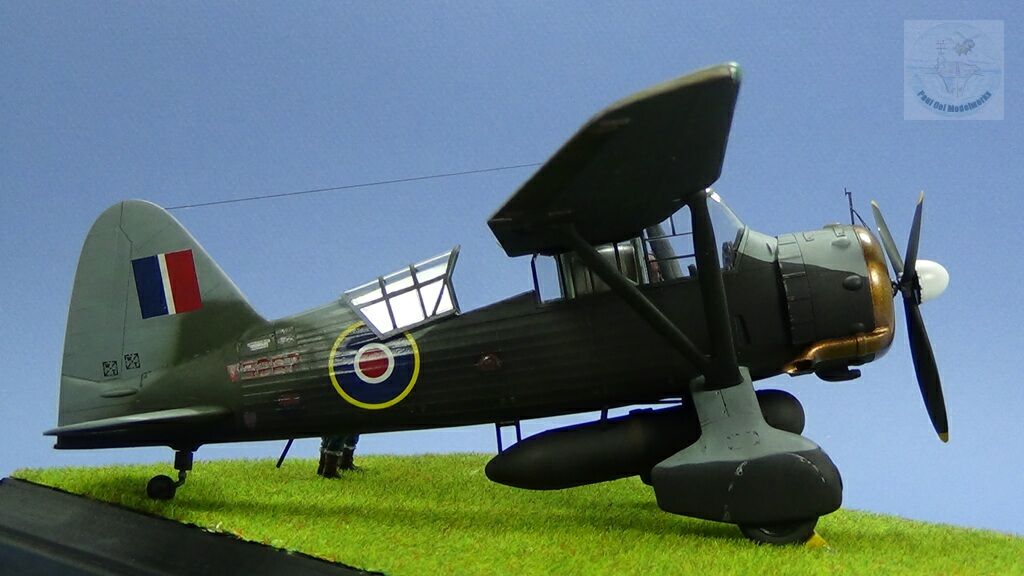
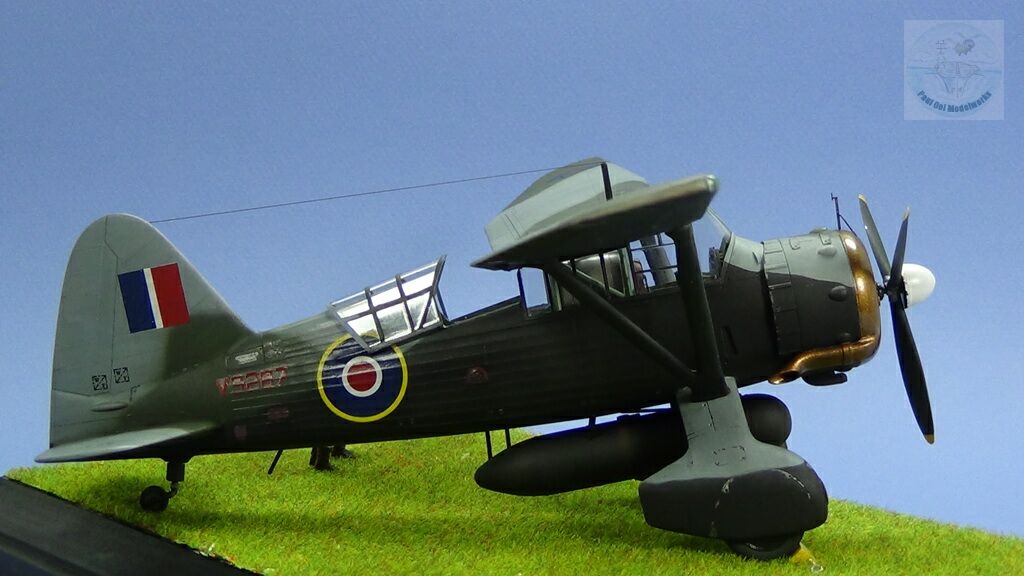
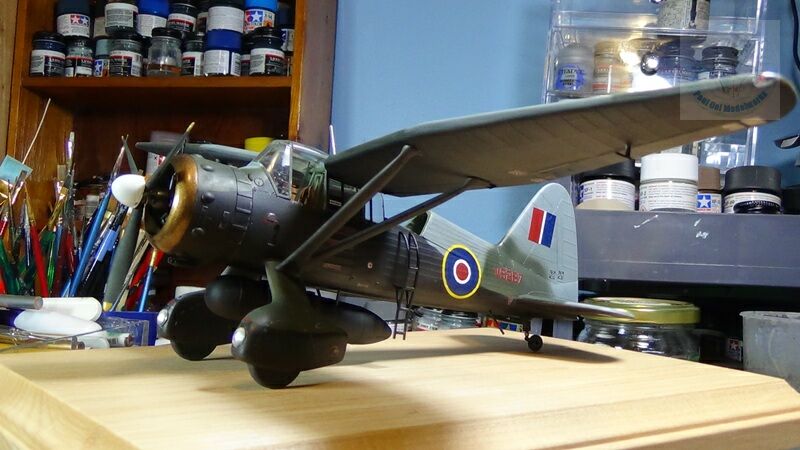
In the bleakest days after the fall of France, and Great Britain stood alone against the Nazi juggernaut, it had seemed like all contact between that country and the continent had been effectively cut off. There were still clandestine operations to be run in occupied France and the legendary airplane that did manage to penetrate German control of European airspace was the Westland Lysander. This ungainly looking aircraft which was hopelessly outclassed as a ground-attack bomber during the Battle of France gained a second career as a Special Duty courier for the SOE (Special Operations Executive). Several units of Lysanders were converted into covert operations aircraft to drop supplies, and for insertion and evacuation of agents in France. All armament were removed to make space for additional fuel tanks, space for cargo and passengers and a special ladder attached to the rear gunner compartment for easy passenger access.
The Lysander flew at night before there were dedicated night instruments or radar, so the aircrew relied on moonlight and ground feature recognition in order to get in and out of France. Other features of the Lysander was the ruggedness of its landing gear and short take-off and landing distance requirement that allowed the aircraft to operate out of small unprepared landing strips. Most of the time, all they had to guide them into the landing area were three or four landing lights. The underside of the aircraft was painted matt black in order to reduce visibility as it flew low and slow into the delivery area. The fact that this aircraft was so stealthy and successful in its nocturnal excursions into hostile territory aroused great interest among the Germans who tried but failed to obtain an intact specimen and remained a mystery craft to them until the end of the war.
Gallery


Construction notes
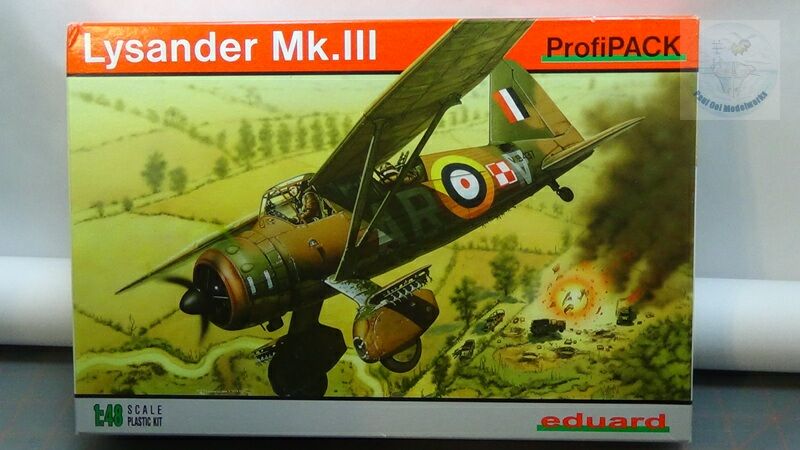
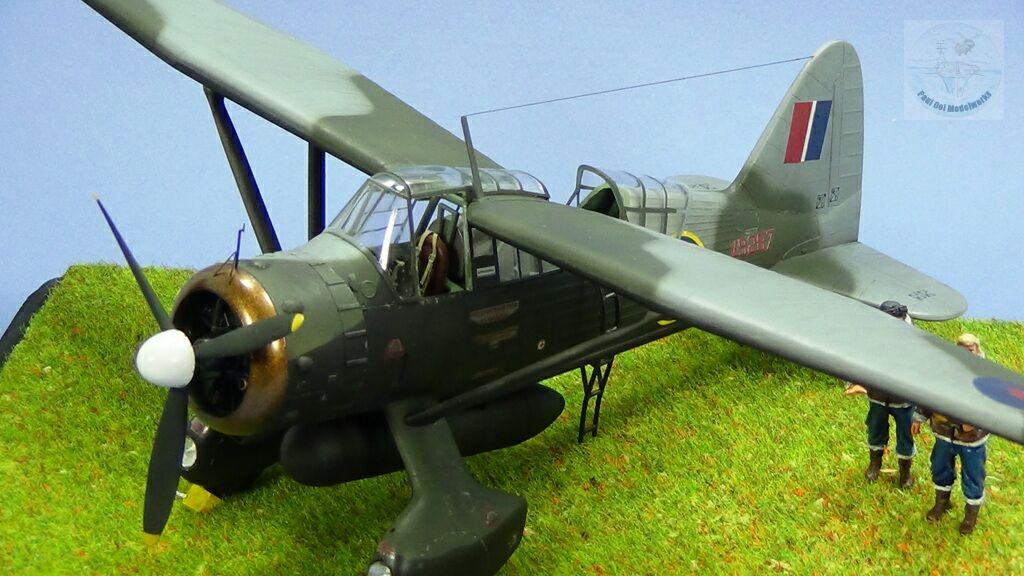
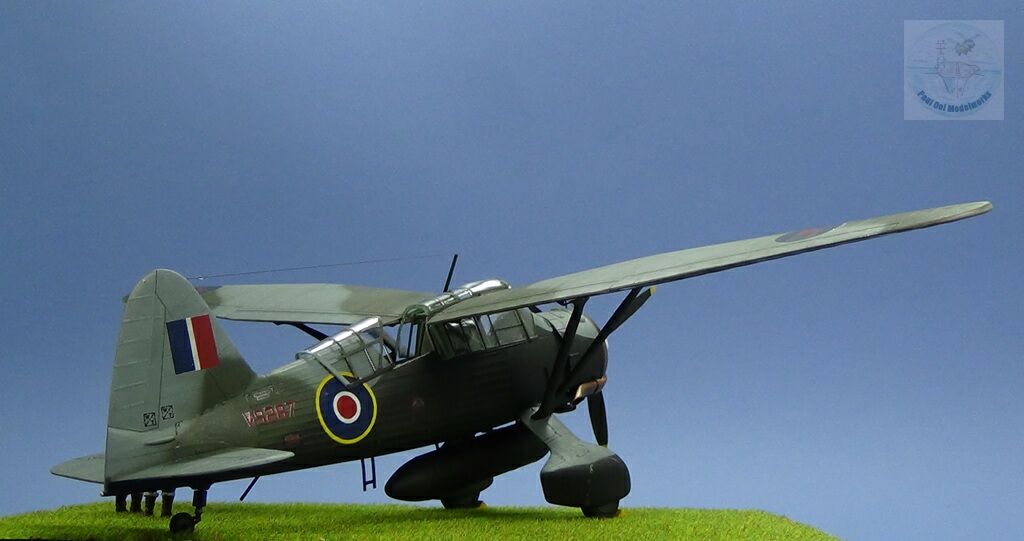
I really liked this Eduard kit from the first time I saw it because it had a great selection of variants and markings to choose from (early war ground attack versions all the way to the all-black SD operators). It is a re-release of an earlier Gavia kit with phot-etch frets and masks for the greenhouse cockpit (a great convenience). Since its legendary role was that of the clandestine carrier, I finally latched on that configuration but I also did not want to build the all-black version, as I already have an aircraft in that livery (Boulton Paul Defiant). So the best compromise was the combination of the grey-green upper side and all black underside camouflage of the No. 161 (SD) Squadron operating out of RAF Tempsford in 1942.
I must confess that I underestimated the complexity of this build. I had initially thought I could have wrapped it up in 3 weeks, which finally turned out to be closer to three months. Because of the way the wings attached to the struts emerging out of the greenhouse, the painting took more planning. The level of detail in the cockpit and gunner/passenger compartments was very good and all are visible after the canopy and windows were fitted. My biggest grouse is that the fit of the wing to it support struts were all wrong, and as mentioned in a previous article by Scale Aircraft Modelling February 2011, needed some adjustment to the placement of the struts to get the correct wing diahedral.

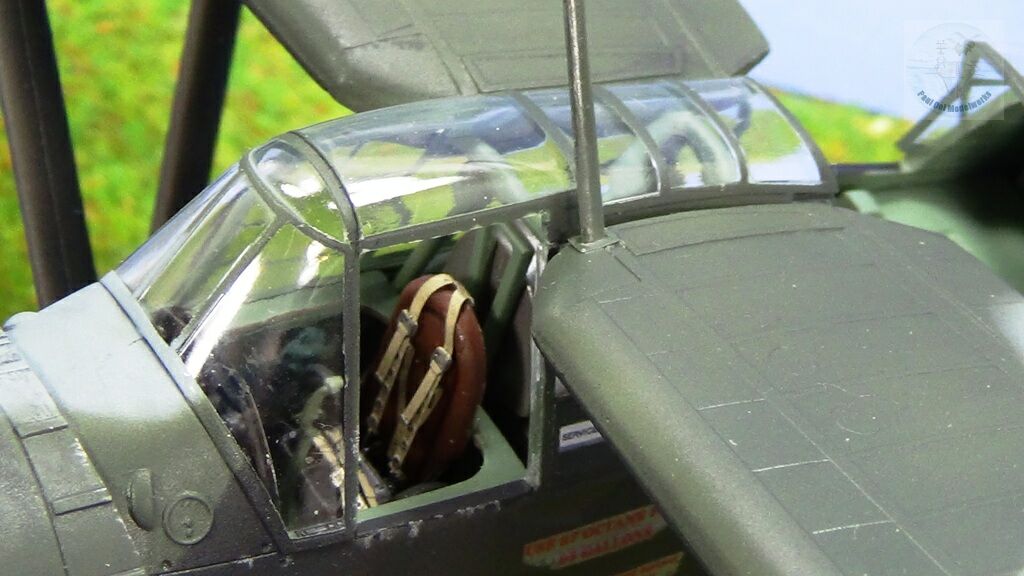
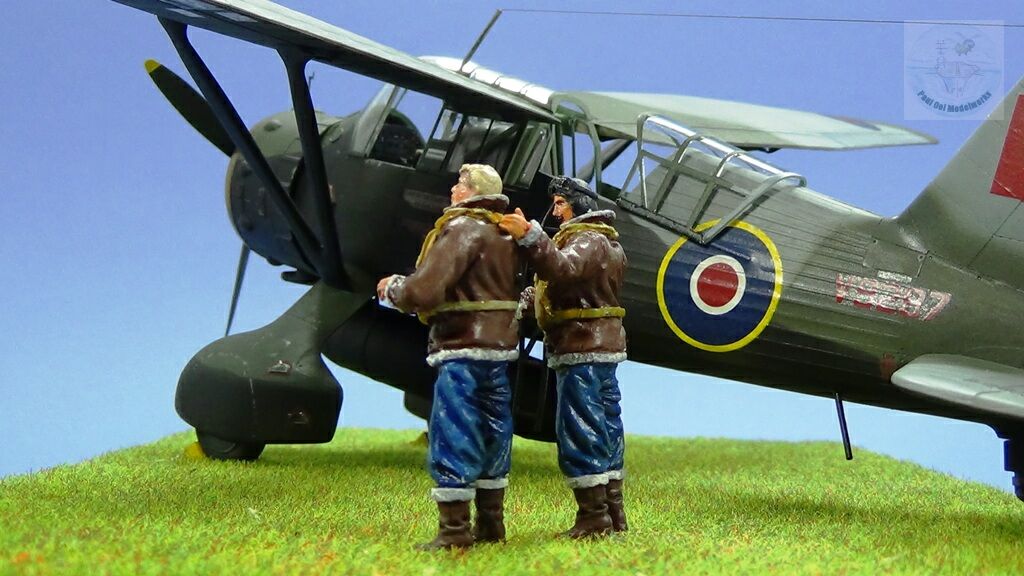
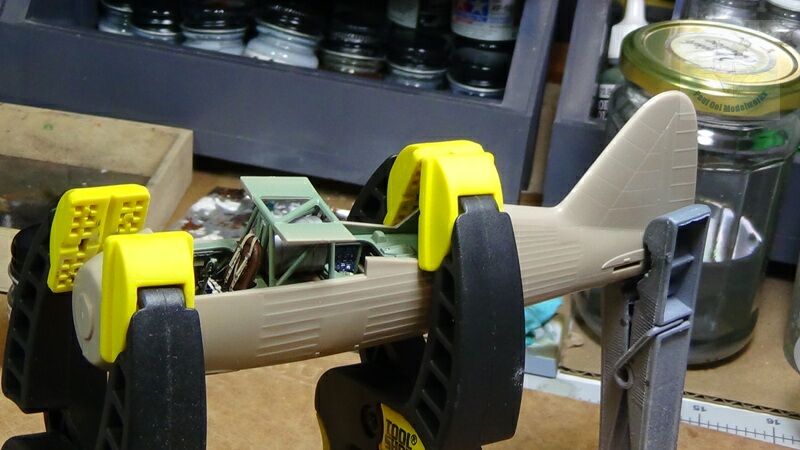
The kit part for the pilot’s chair was too simplified and since this is clearly visible after the canopy has been installed, I decided to make a mini-project out of it by drilling out some of the solid panels. In real life, the “seat” was nothing but a steel tubing “basket” to hold the parachute on which the pilot sat. Talk about bring-your-own-seat!
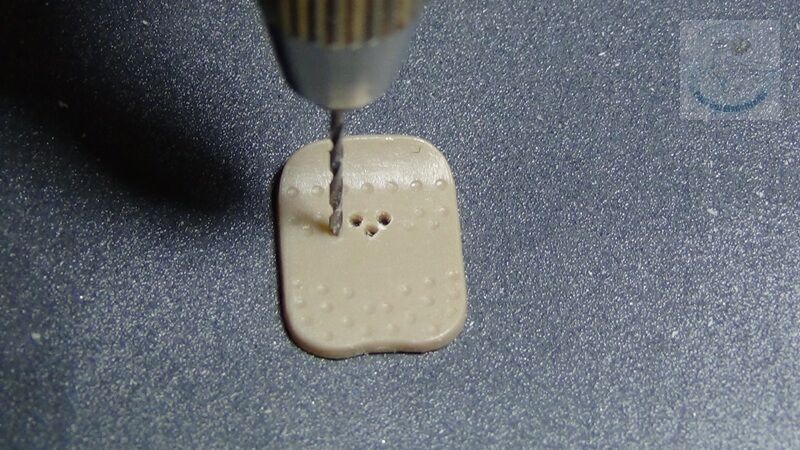
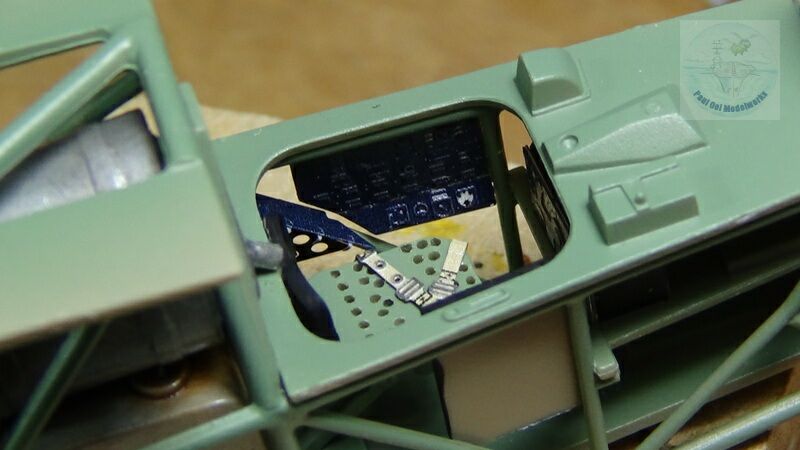
The rear gunner/passenger seat also needed to be drilled out, as the kit part had molded the necessary indentations but did not see fit to mold them with the thru-holes. This is also well worth the effort because the rear sit is very visible even if you chose not to install the twin machineguns.
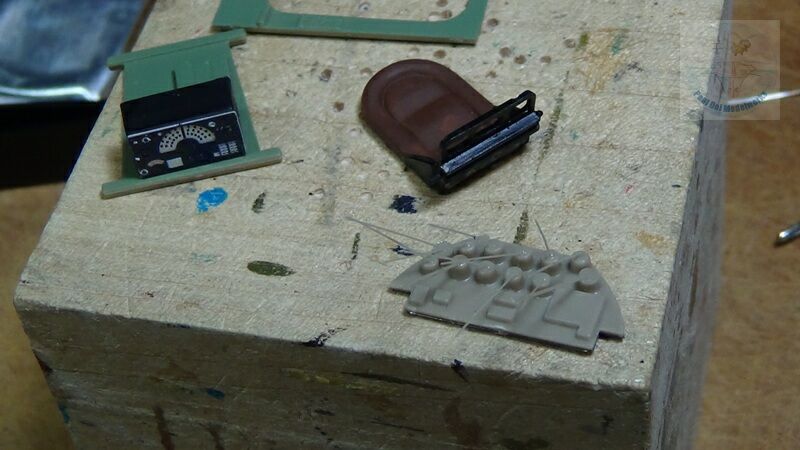
Shortly after, I painted most of the interior components RAF Interior Cockpit Green Model Masters 2062. The pilot’s chair was carefully assembled (such a flimsy thing) together with other fiddly parts.
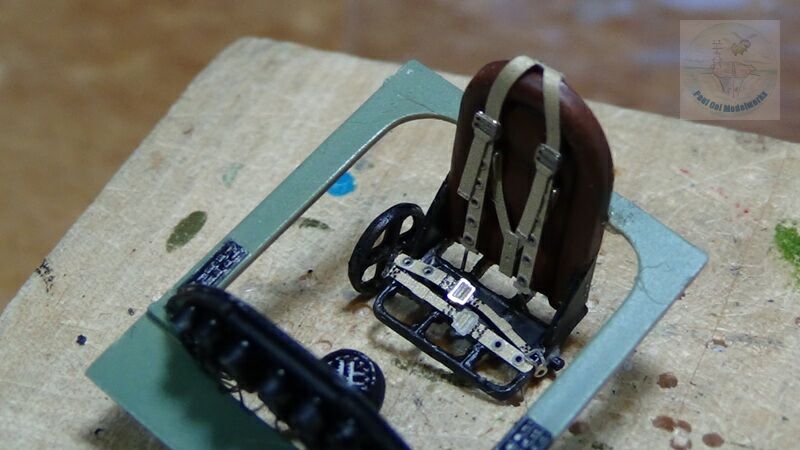
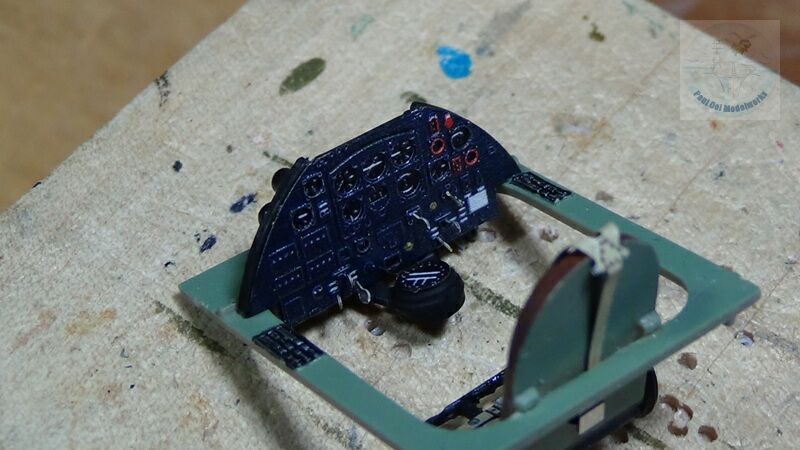
The basic cockpit tub is the first main assembly to be completed. Notice that I have attached minute wires sticking our the rear housing of the dials that are visible even after you close the cockpit.
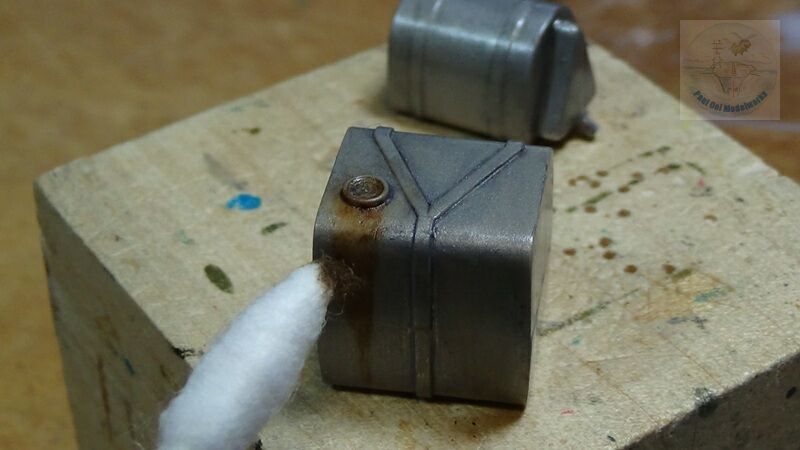
Having decided to build the special duties version, I proceeded to build the special fuel tank wedged inside the crew area, stuck between the pilot and his gunner. Talk about tempting fate, a well-placed German tracer round into that tank and the flight will end pretty fast. I painted the fuel tank steel with a wash of dark grey.
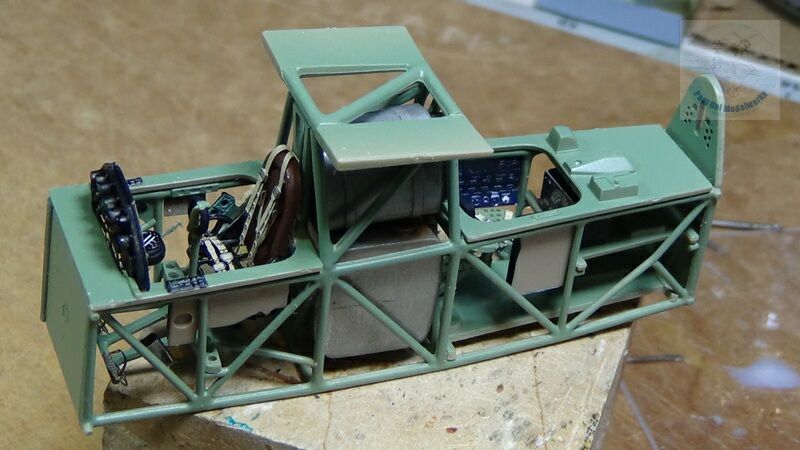

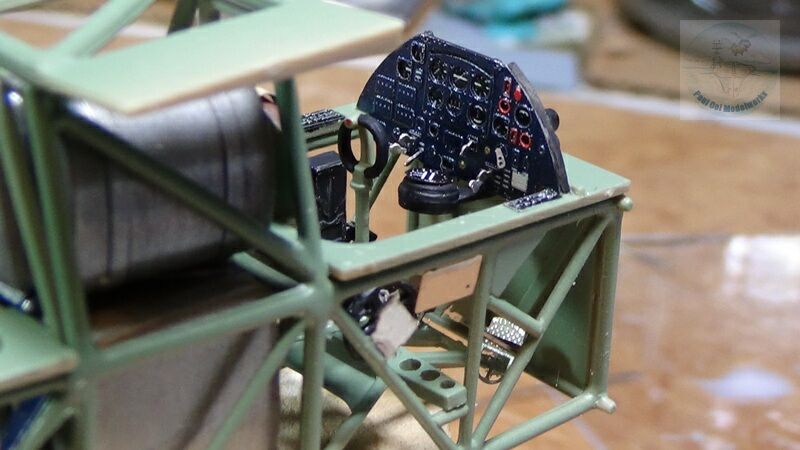
As one can see, the interior details are all encased in this single cage-like entity that was complicated to build but very rewarding to the beholder.
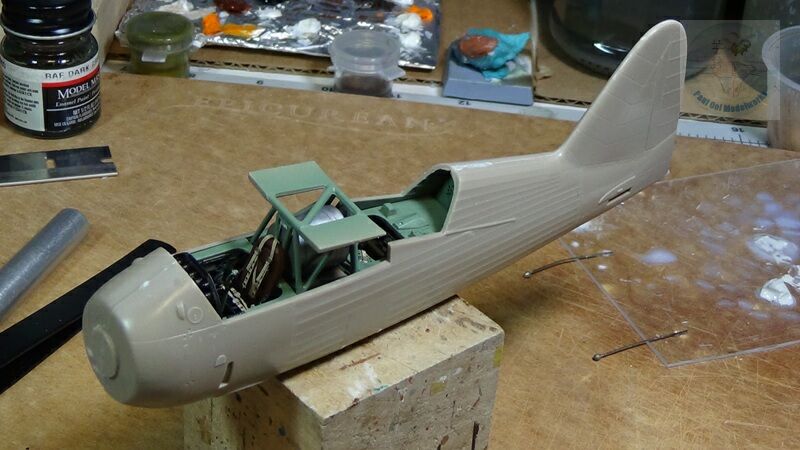
Getting the fuselage halves together with the birdcage insert in the middle is not very easy and requires a lot of patient trial-fitting and then effective clamping to make the two halves realize that they need to be part of the same aircraft.
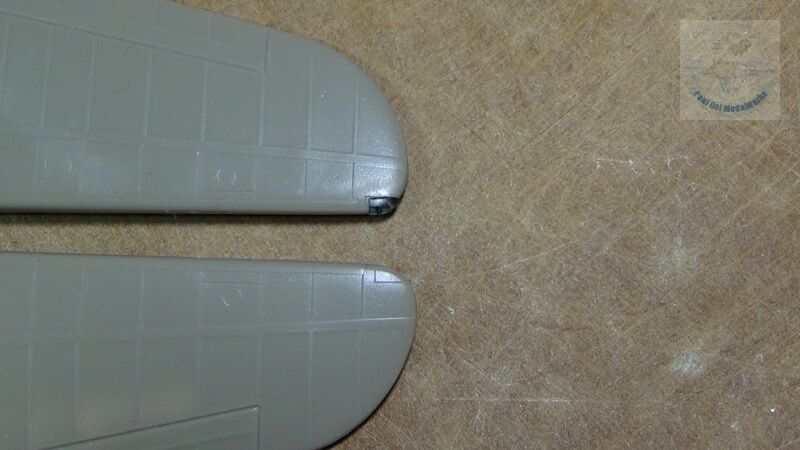
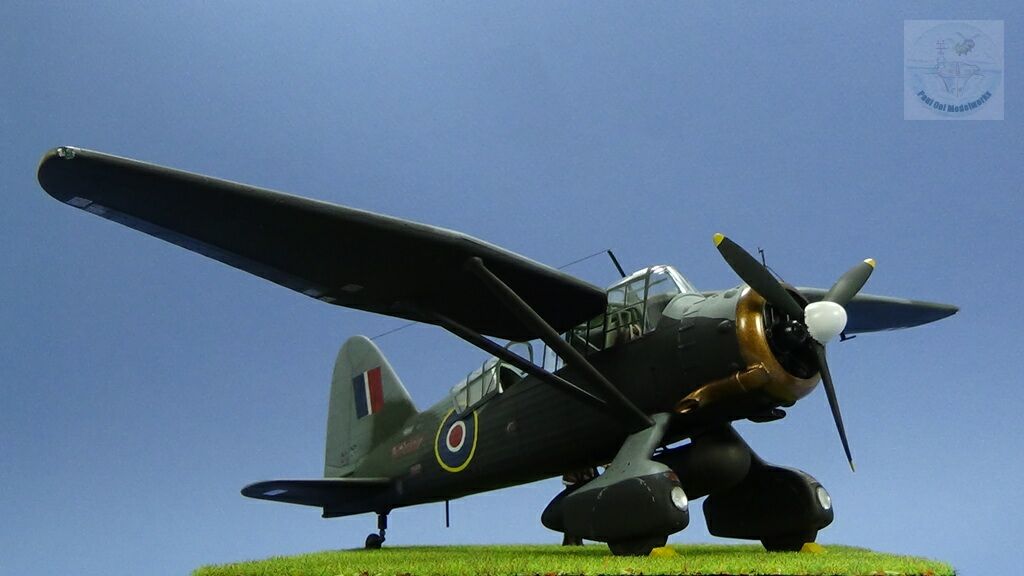
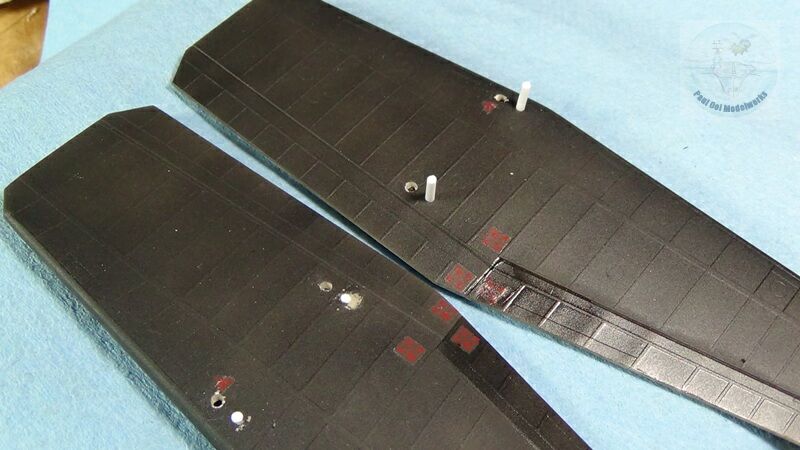
While waiting for the fuselage to set, I start working on the two wing sections, replacing the molded navigation “lights” with real clear plastic sections cut, filed and polished to fit. One can compare the two different wing tips just to see the contrast.
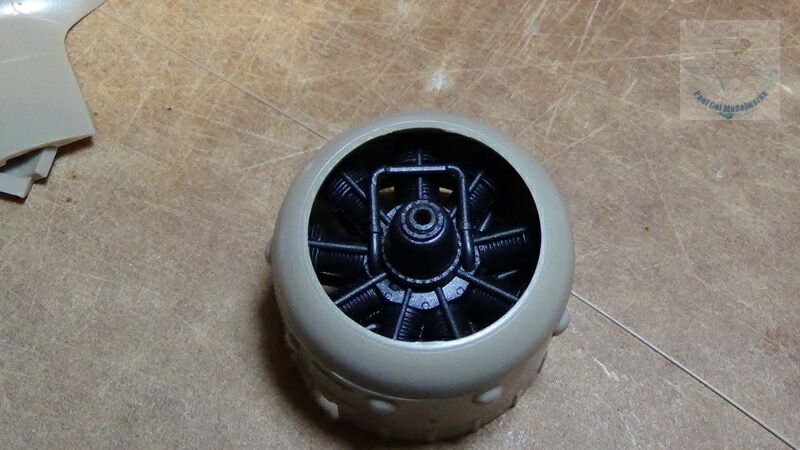
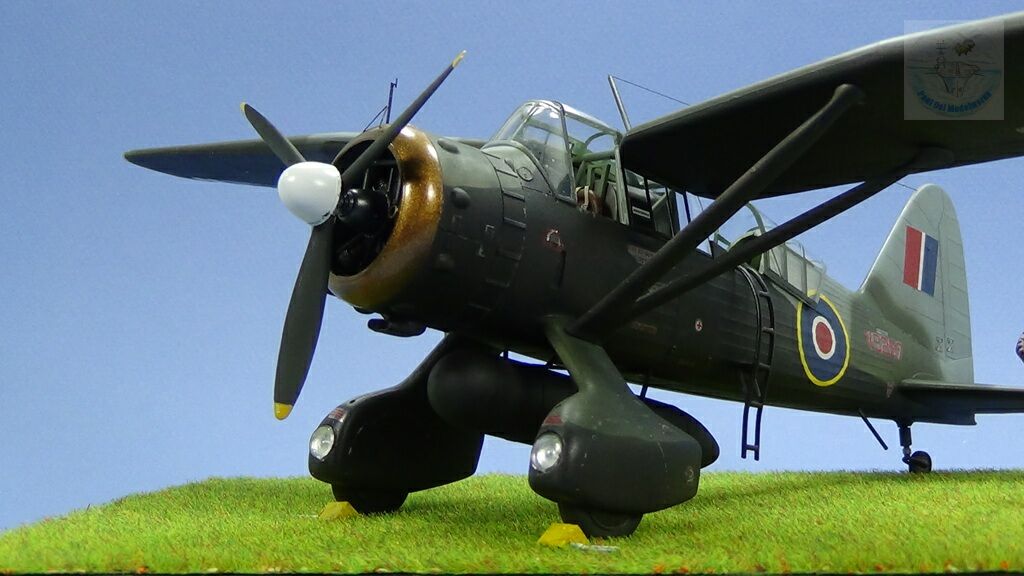
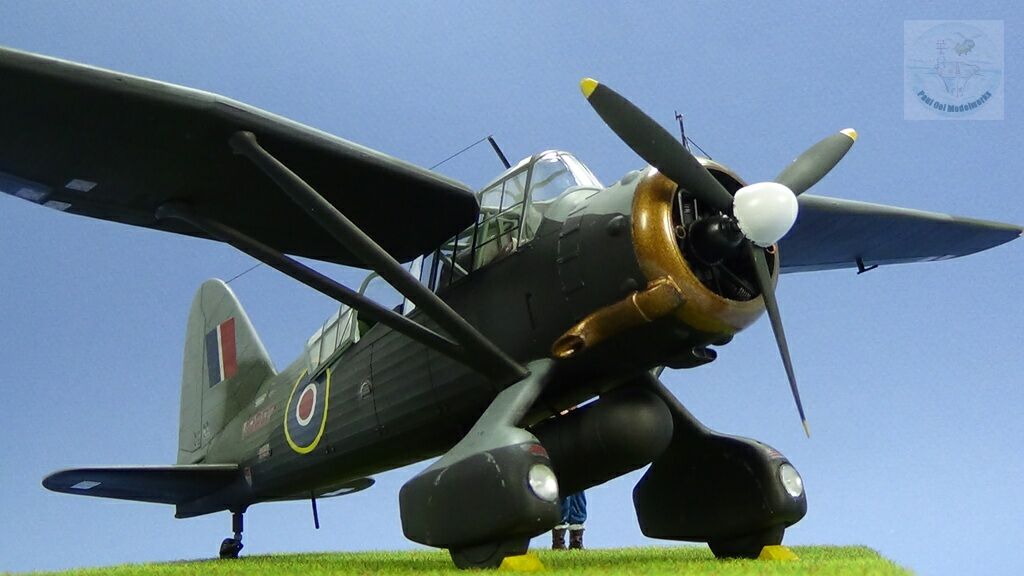
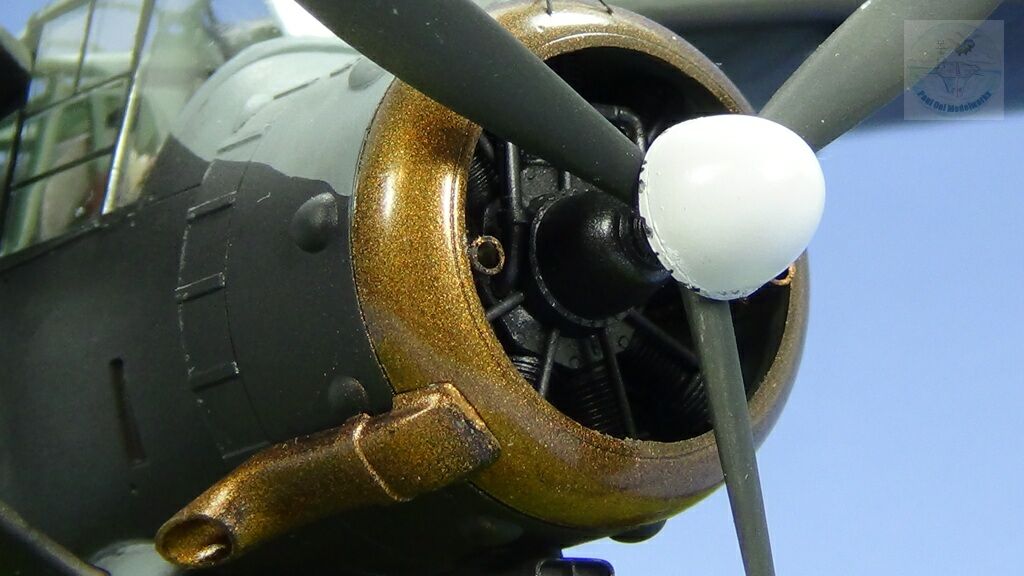
Another section that took a lot of time and work was the Bristol Mercury engine in its cowling. The three sections that somehow have to come together are a little bit smaller in girth than the engine block (you have been warned). One has to carefully file off the ends of the engine blocks in order for the latter to fit properly into the cowling tub. The engine block was painted in gun metal and highlighted with a little bit of Prismacolor PC949 silver color pencil.
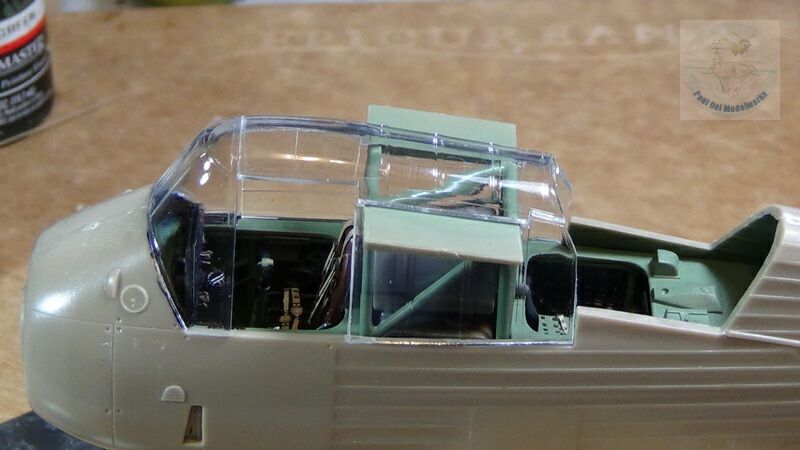
The clear parts that come together to form the greenhouse canopy are very nice, thin and clear. Be careful because they are also very brittle and can crack easily. They have to form this clear structure around the cockpit frames that will be the basis for the difficult parasol wing installations LATER. Please take the time to make sure that your struts are properly in place, as should your clear plastic panels. Any mistakes made at this time will cause the aircraft to have a weird diahedral.
After the fuselage and canopy have been masked, I start with interior cockpit green painted onto the clear cockpit sections, followed by this NATO Black by Tamiya to provide the cockpit struts with more opacity, plus some panel line undershading as well. Once this is done, I can add the two fixed wheels with their spats.
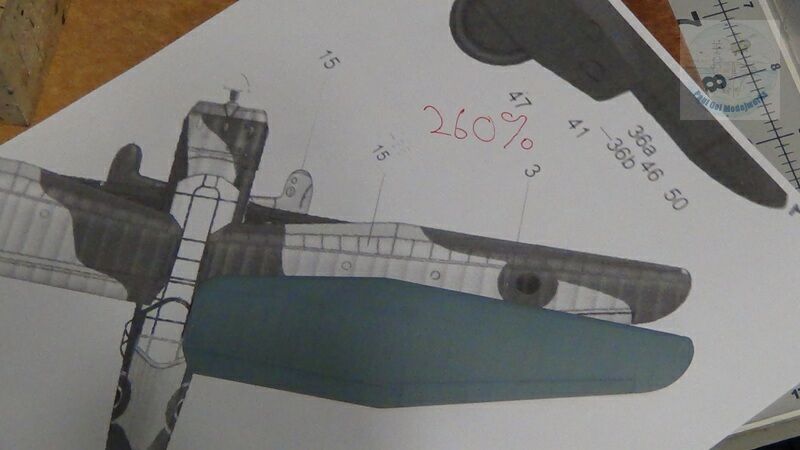
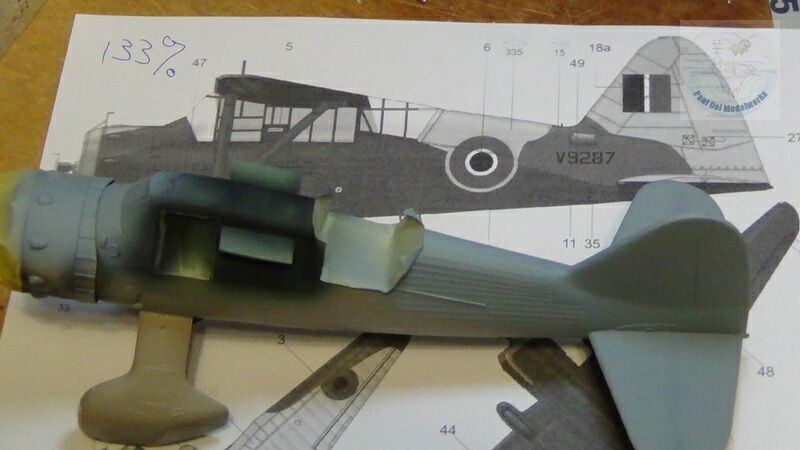
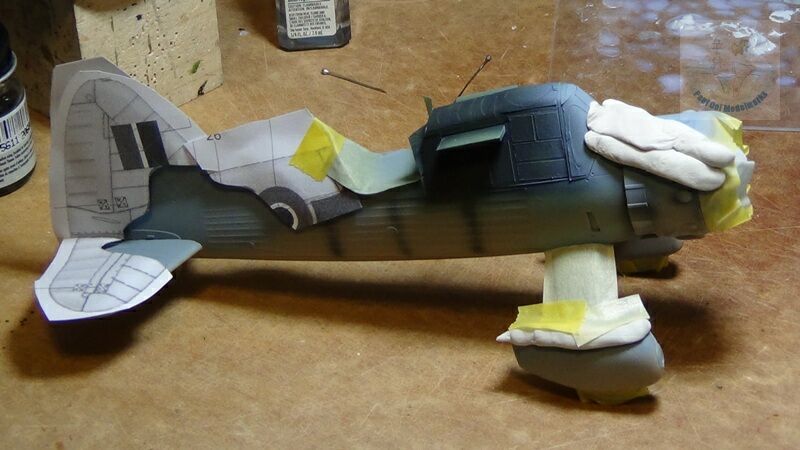
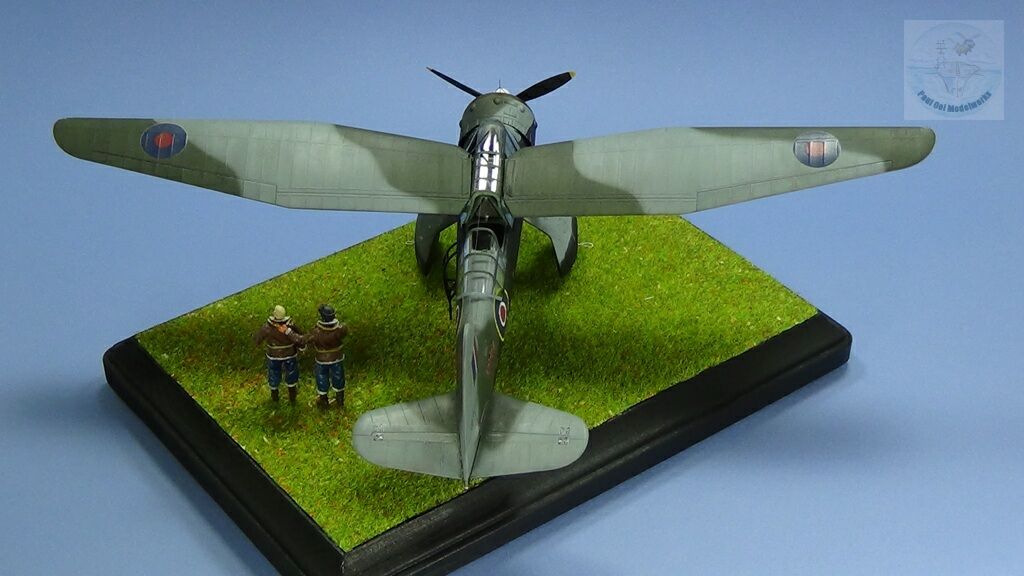
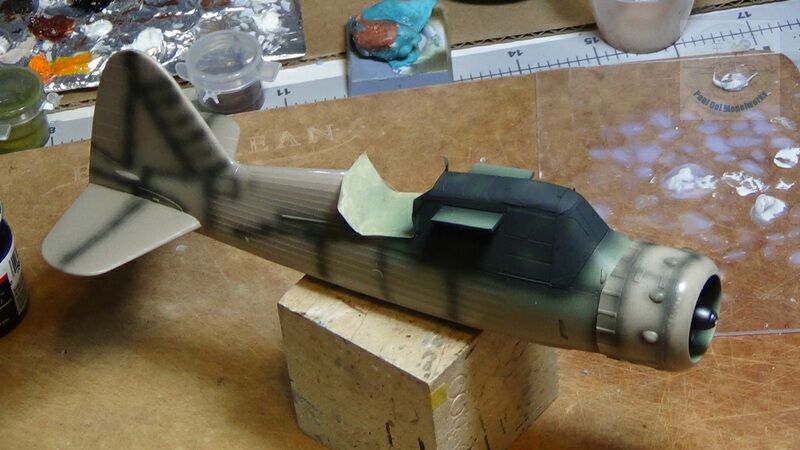
In order to get the closest approximation to the camouflage pattern and have a well defined but soft edge, I used paper templates cut out of the photocopied enlargements of the painting diagram. The plan view enlargement required was 260% while the side elevation enlargement was 133% of the original Eduard paint diagram. For all other bridging areas, I used silly putty to “stretch” the camouflage pattern across the curved sections of the aircraft. The paper templates themselves are stuck on with about 2 mm gap from the actual surface using silly putty as the “holding” agent.
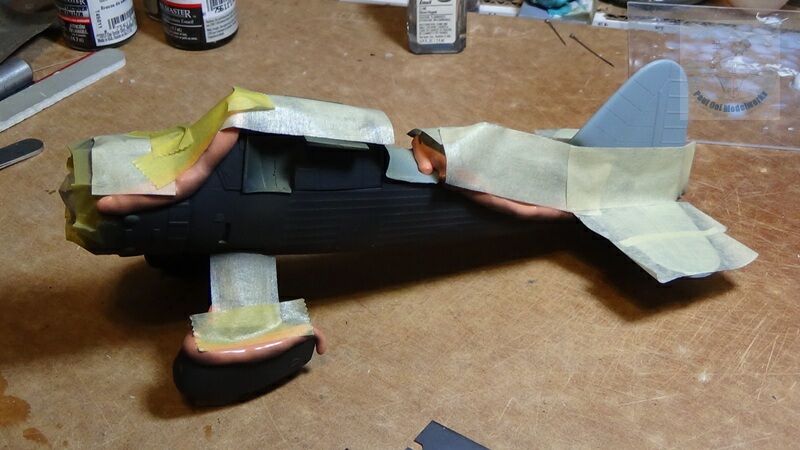
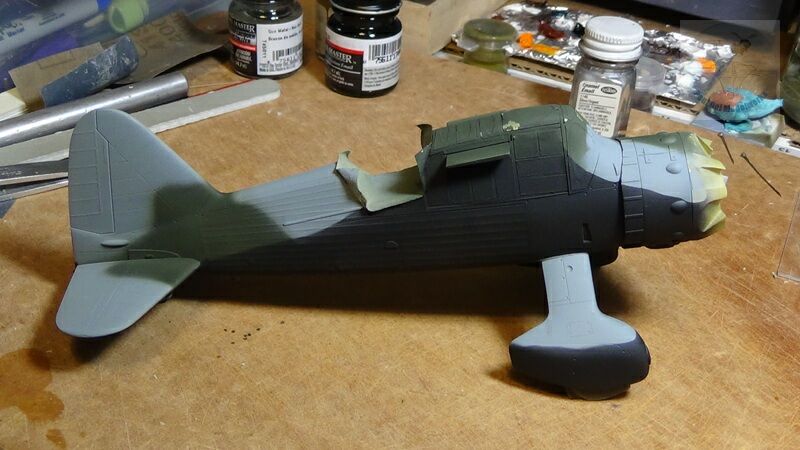
First I apply the RAF Medium Sea Grey (Model Masters 2058), followed by RAF Dark Green (Model Master 2060). Finally, I remove the camouflage masks, re-mask with silly putty, and spray the underside with Matt Black. The whole assembly and wing sections are given several coatings of Future Polish and then decals applied. The decals were slightly disappointing in that several stencils were out-of-register and also the blue roundels had some of the white undercoat showing through.
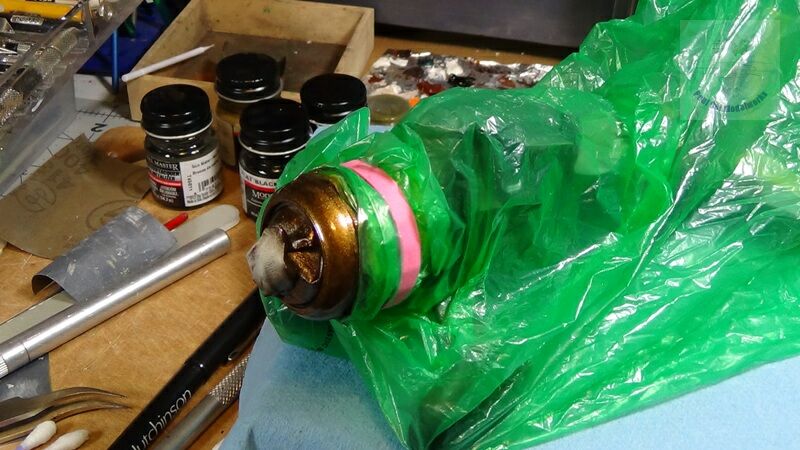

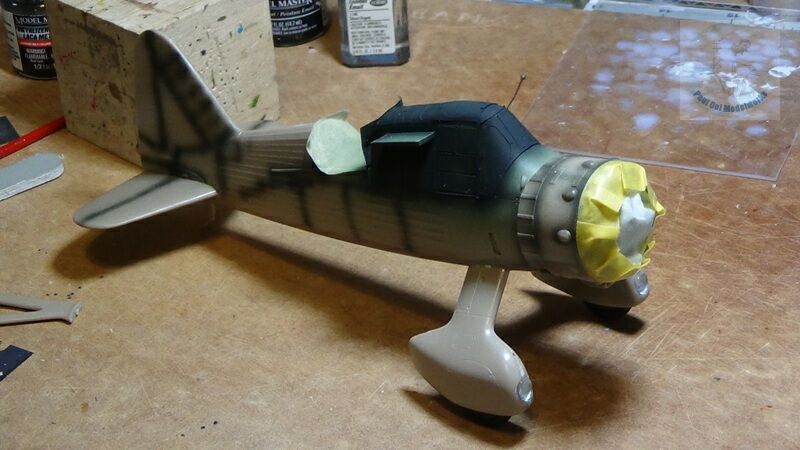
Then I protected the rest of the aircraft while I painted the aircraft front nacelle with first a Gloss Black undercoat, and then followed by Testors Flat Brass 1182.

This is probably the biggest shortfall of this otherwise beautiful kit. As manufactured, the position of the struts to the wing underside would have resulted in the wings drooping. This is clearly unacceptable and have also been described in the previously mentioned UK review. I ended moving the locating holes for the wing underside by 4 mm inboard. The previous holes were plugged with Evergreen plastic stock 1.5mm diameter.
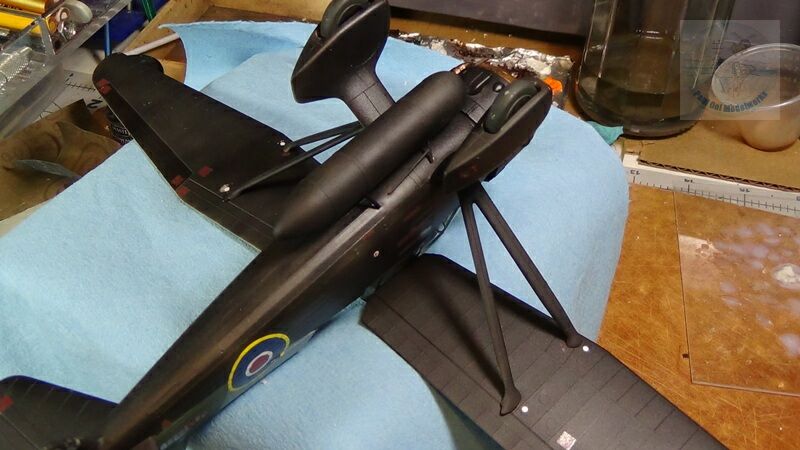
The long range fuel tank and other underside details were added.
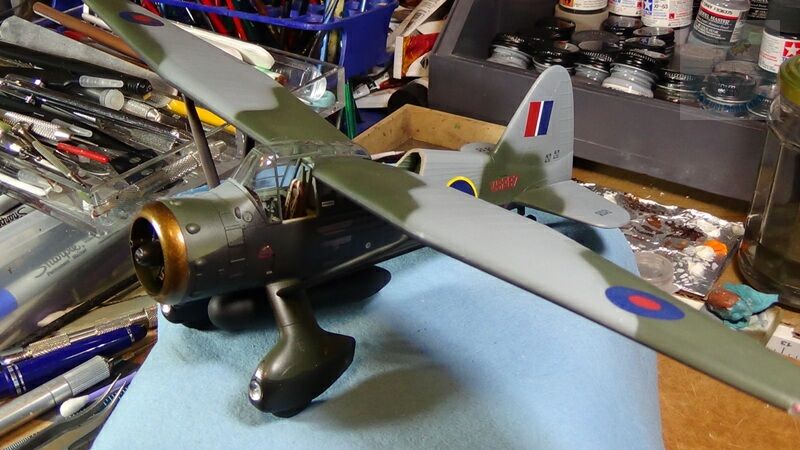
The aircraft is given a final turpenoid and dark grey oil wash overall. It is then sealed with a satin varnish.
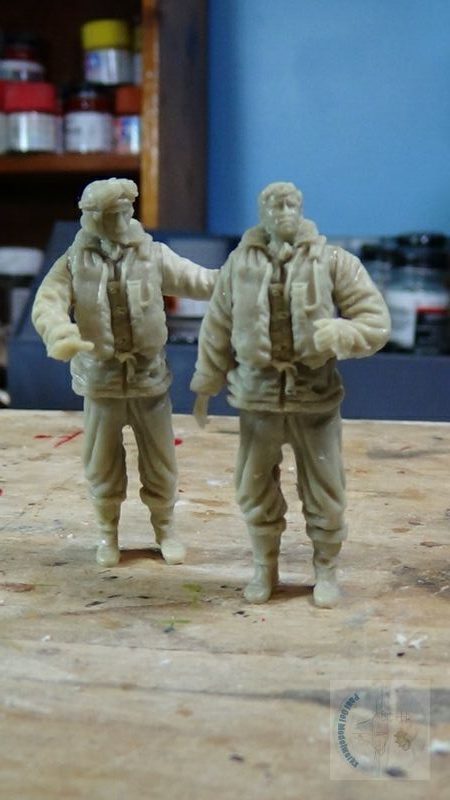
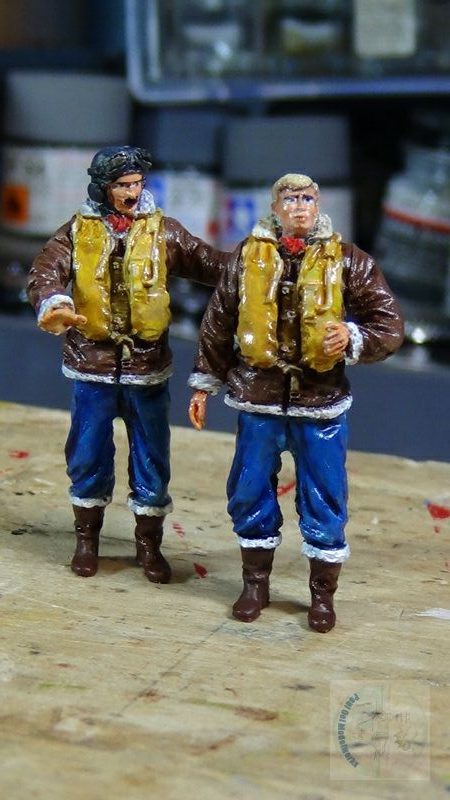
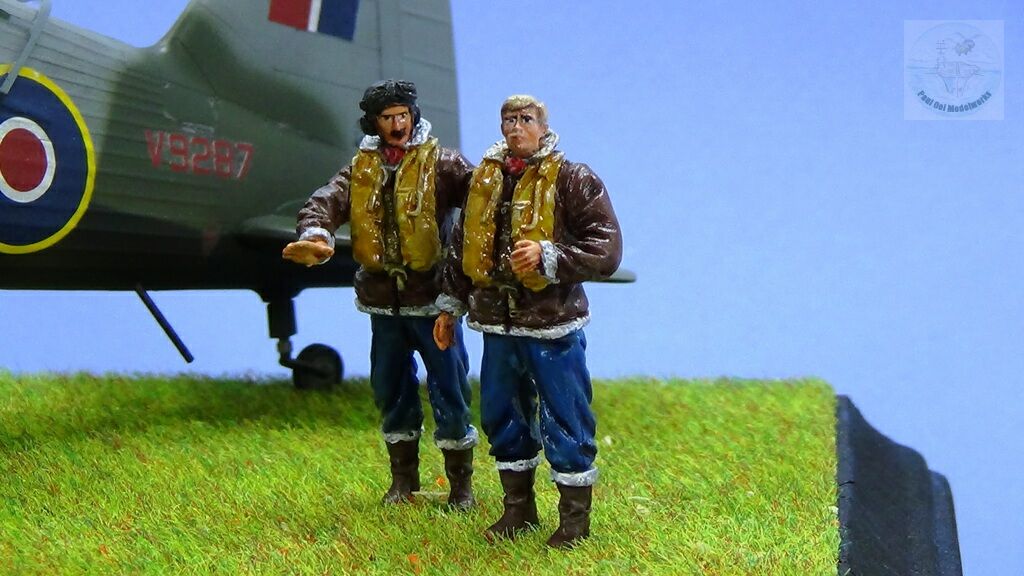
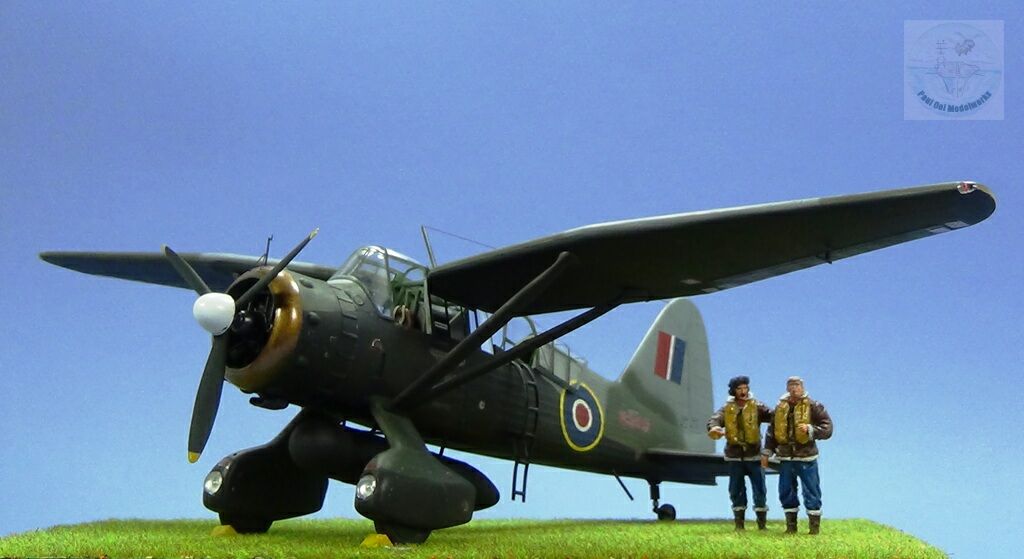
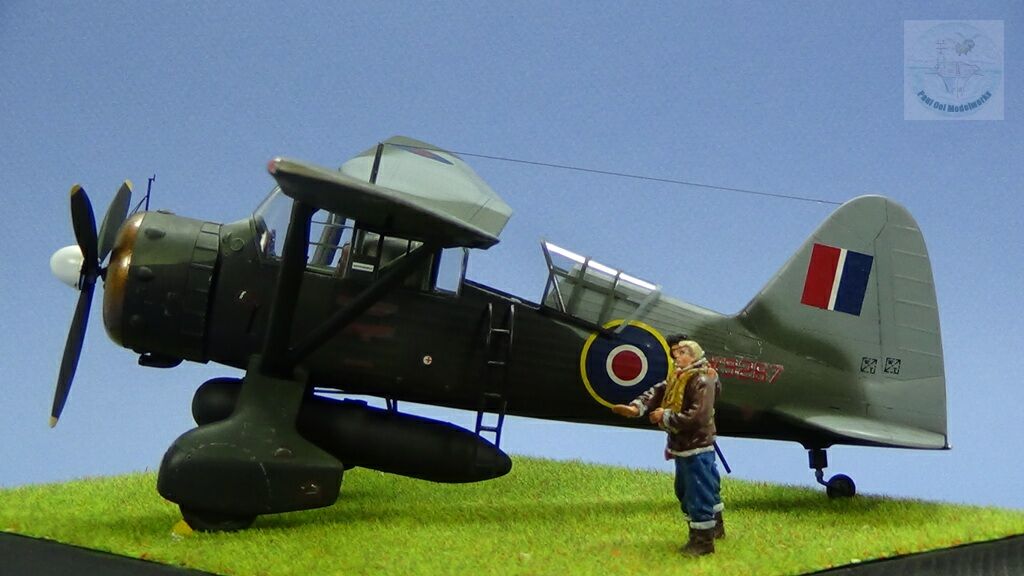
On the way, we also picked up these two guys for the ride. I finished both with acrylic and oils. Both are resin figures from CMK. One seem to be saying, “I’m not sure I want to see Paris this way!”, while the other says, “I’ll keep flying till I see the Moulin Rouge, how about that?”
Excellent work, as usual. Kudos!!!
Paul,
I’ve always been intrigued by the Lysander. Such an ungainly-looking craft, but (from my reading) apparently quite versatile, rugged and reliable.
In particular, I’ve long wondered how the two wings were joined together inside the top portion of what appears to be a continuous (albeit narrow) greenhouse between the pilot and the gunner/passenger. This suggested to me that there was likely no single, continuous wing spar running the length of both wings. And sure enough, your assembly pics show that the root of each wing attaches to a central, tubular steel cube with cross braces (which then must have been firmly anchored to the rest of the “tub” that defines the load-bearing portion of the fuselage – between the firewall and final fuselage taper just forward of the empennage).
And since the dihedral is defined by the complex geometry of two wing roots intersecting with the central “cube”, as well as the precise alignment of the dual, load-bearing struts between the undersides of each wing and the left and right spats, I suspect that this was a very tricky assembly process which likely needed to be “tweaked” or “tuned” for each individual craft in the Westland factory. In that respect, your assembly process of the model is quite possibly a true representation of the real aircraft assembly process.
In looking at the length of the two exhaust pipes, I’m guessing that they were retrofitted to the SD units to be long enough to completely shield the blue exhaust flame which often gave away the position of other night-flying aircraft – especially since the tips point obliquely towards the ground – where German gunners often lurked.
Finally, I continue to be amazed by how you manage to outdo yourself in custom crafting minute details far beyond the limitations of the kit as it comes out of the box. The wires behind the instrument panel, the clear Perspex marker lights on the wingtips and the re-creation of the “basket” seating all stand out on this model.
Keep ’em coming!
Hi Dave,
Very observant of the details, makes it worth my while putting them in 🙂
The Lysander reflects a design one generation removed from the WW1 biplanes with their carefully balanced tension wires and bracing with turn-buckles. The wings are certainly very fiddly at the wingroot, just cantilevered off that “birdcage” construction, and then supported by those large Y-shaped spars. The cockpit glazing is pretty much a glasshouse built around that wing arrangement, giving the impression that the wings sprout out of that crystal palace. Which makes the ruggedness of the original even more astounding.
Paul
Asking questions are genuinely pleasant thing if you are
not understanding something fully, but this paragraph presents good
understanding even.
I am building the 1/48 Guava now. As my father in law flew this plane I am building it with the Polish markings. I would like to know about the seat belts, bought or made, and if made how so? I have also been looking at pictures and was wondering if the canvas was painted the same as the rest of the cockpit in wartime or left a white colour as in some photos. I’m guessing the fuel tanks and strapping were all the same colour. Any help you can supply would be helpful. Thanks
The seat belts came with the Eduard kit. The canvas was generally painted the same as the rest of the cockpit. The fuel tank and straps were painted the same flat black for low visibility. Good luck with the Guava kit.
This is amazing. Is this for sale by any chance? My grandfather flew these and would love something like that.
Hello Nik,
Unfortunately not. My days of building and selling are over. These models are pretty tricky to mail and they are not handling packages very well these days, despite the “Fragile” label.
Paul