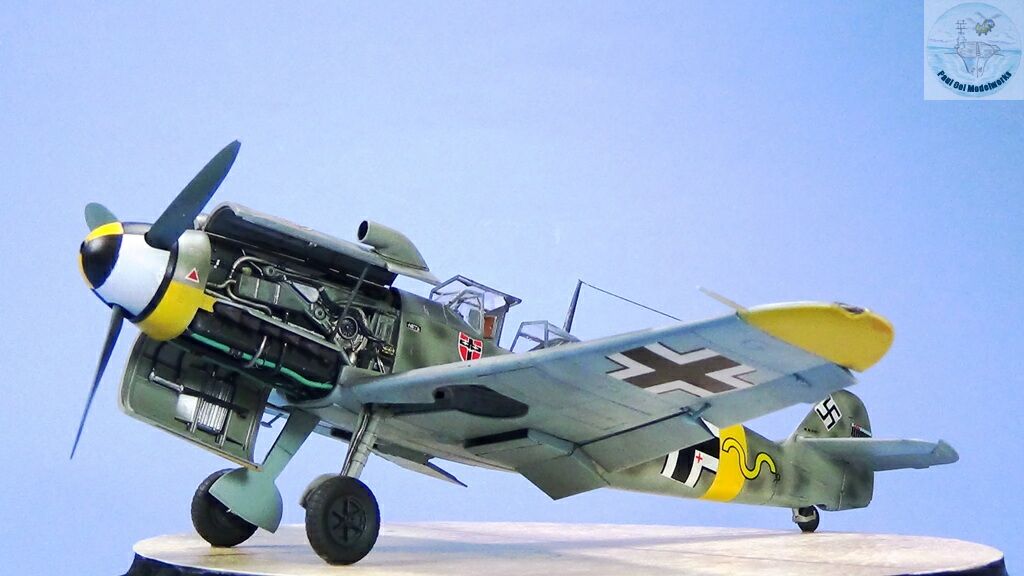
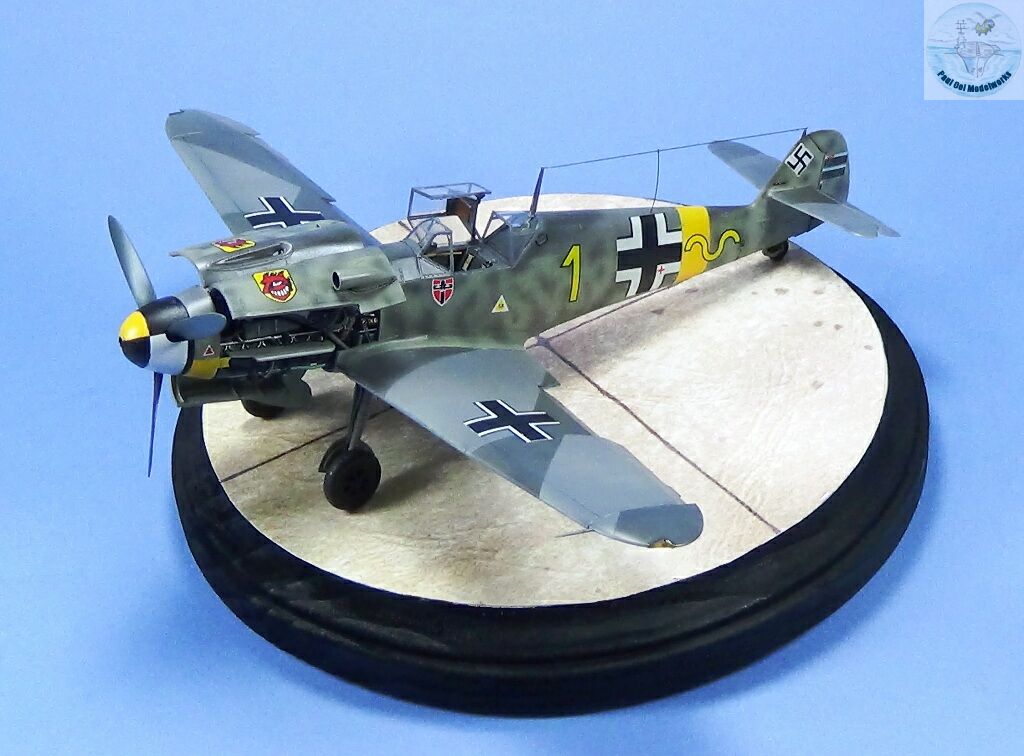
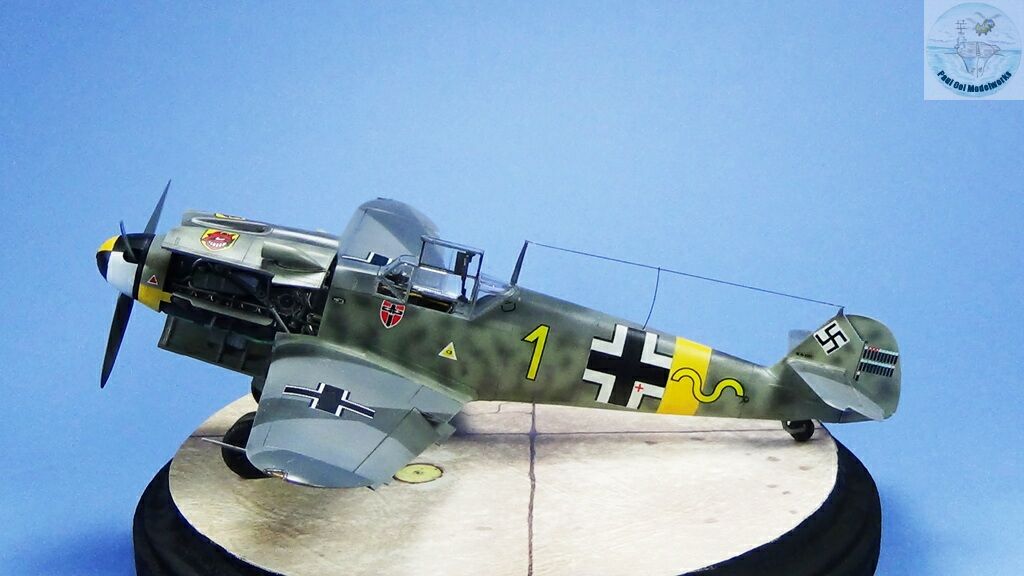
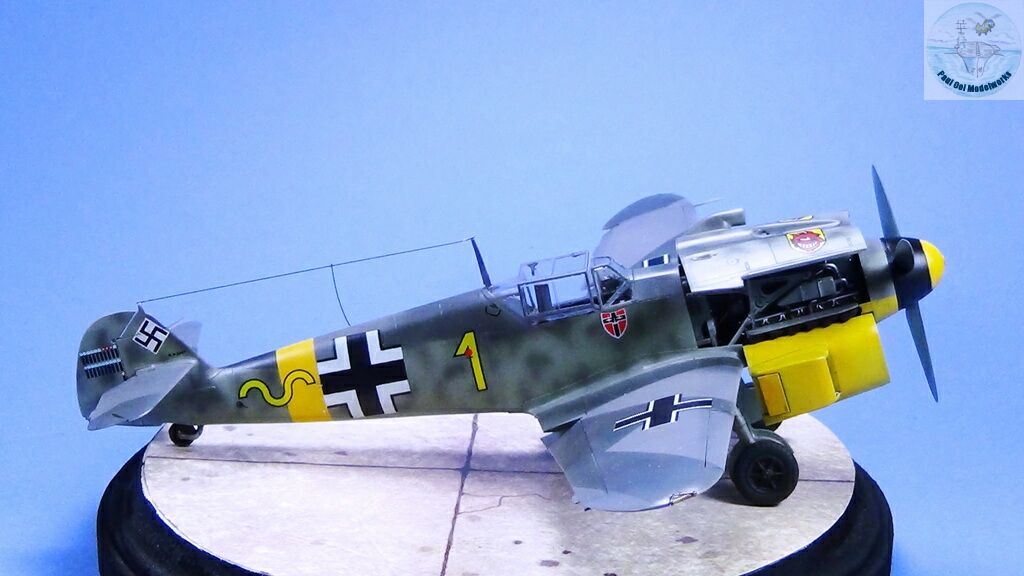
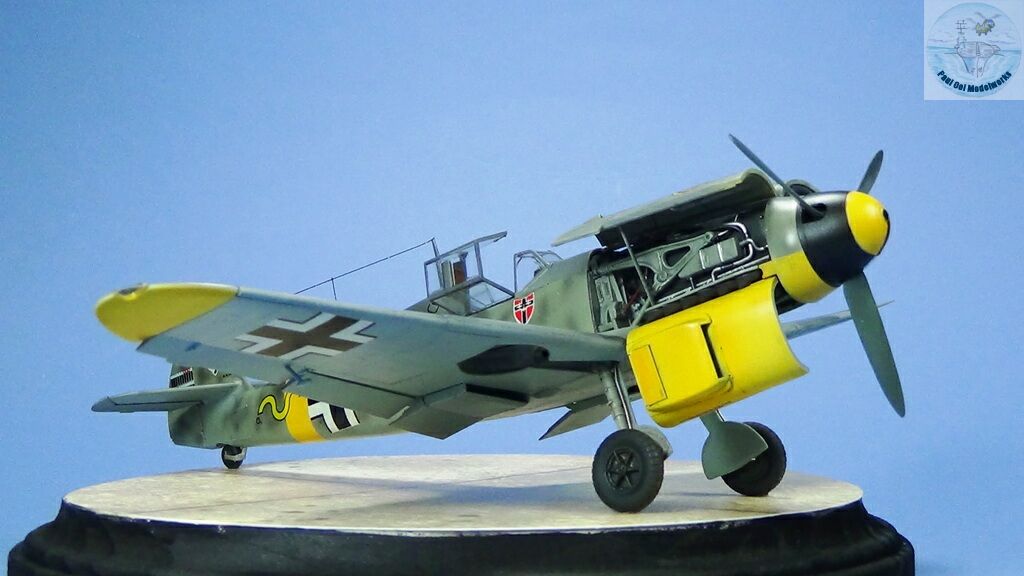
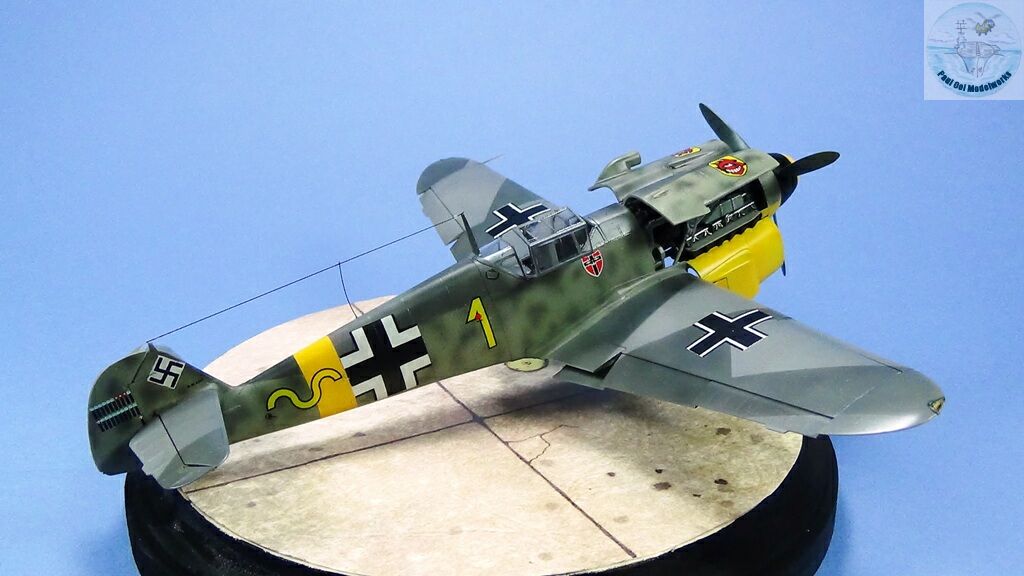
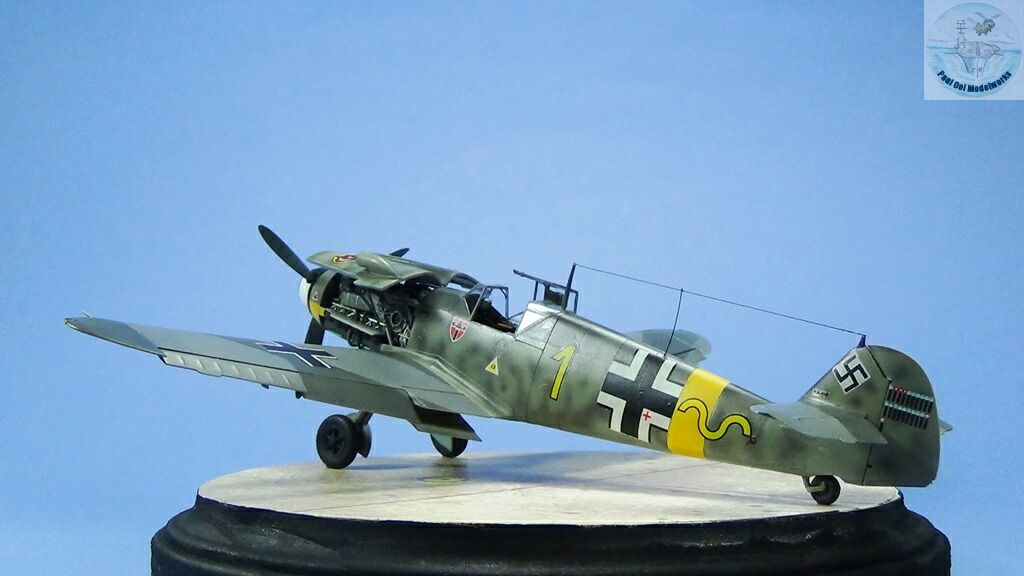
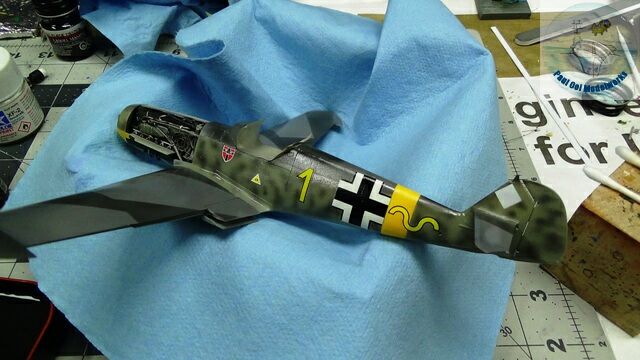
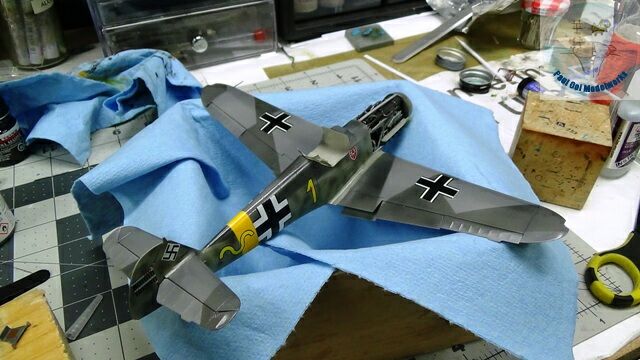
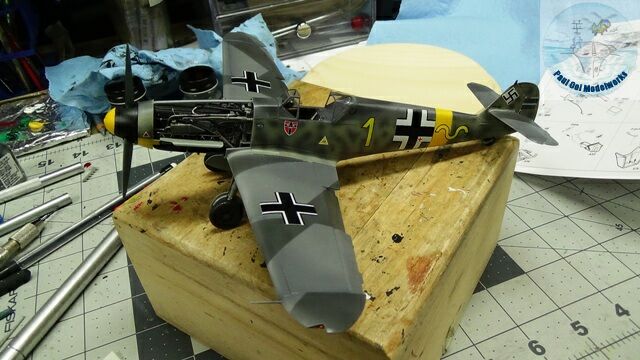
The Bf 109 needs no introduction. I have built this famous fighter in the forms of the Finnish Mersu (Gustav) and the Israeli Avia. What was really missing for me was to build a mottled German hunter that made the Bf 109 into the legend and much-feared adversary in WW2. The Friedrich was the aerodynamic pinnacle of the Bf 109. The designers in Messerschmitt removed the wing armaments and replace them with two 7.92mm machine guns mounted over the engine, and crammed a massive 20mm cannon that ran through the central axis of the engine with the barrel through the propeller shaft. This provided greater stability for the aircraft when the cannon fired and it shredded any hapless enemy caught in the sights. The Friedrich made its mark in the opening days of Barbarossa and was more than a match for any fighters the Soviets had at that time.
I chose the markings of the aircraft piloted by Hans-Ekkerhard Bob, a German ace of both the Eastern and Western Fronts. He ran of a score of 37 kills in the Eastern Front piloting several Friedrichs. This one was lost when he had to ditch it behind enemy lines on June 23rd 1941 after taking defensive fire from a Tupolev bomber. Bob went on to pilot Gustavs in the Western Front, once ramming his G-6 into a B-17 bomber, and lastly the Me-262’s in the final defense of the Reich.
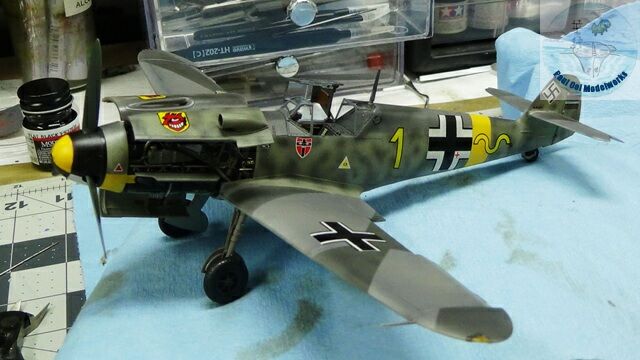
Gallery

Construction Notes
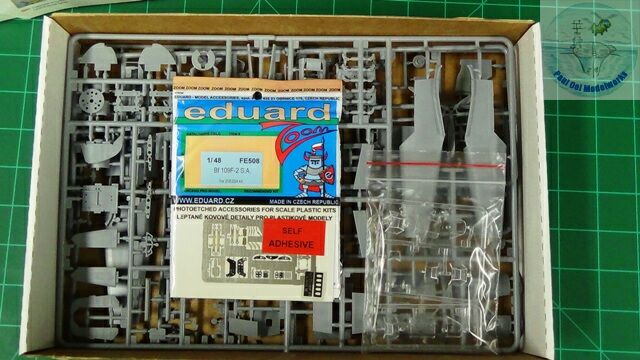
Incidentally I bought this kit almost 10 years ago to the day I completed construction. I also bought the cockpit detailing photo-etched fret from Eduard which really dovetailed with the kit. The Zvezda 1/48 scale kit is very detailed and provide the basic engine block for further detailing. It sat in my closet for all these years together with 3 other 1/48 Bf 109s that I keep telling myself I will build someday. All in all, it is an excellent kit and suitable for both experienced as well as beginner modelers.
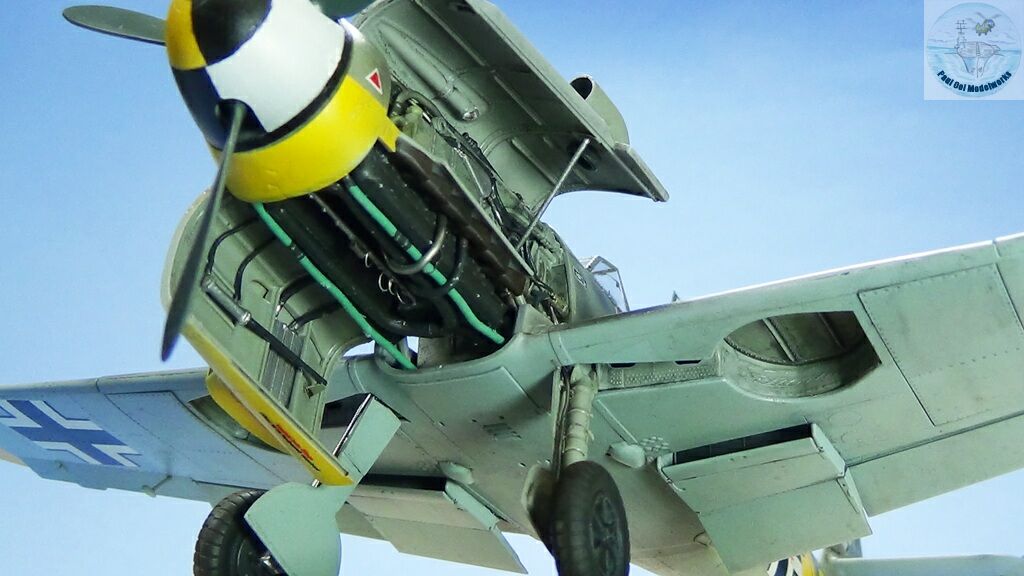
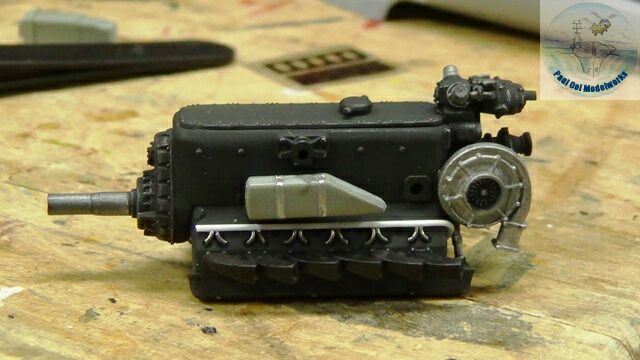
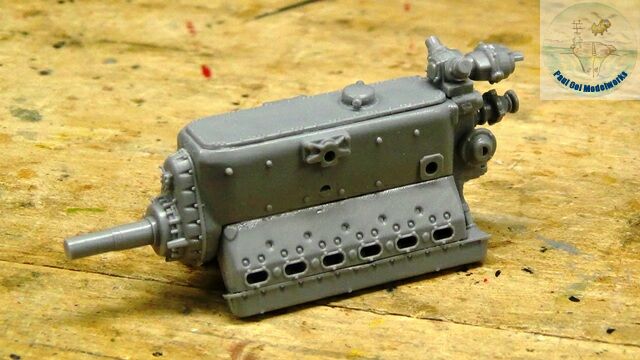 Unlike other kits that start with the cockpit, this one starts with the magnificently detailed BV601E Benz engine block. It is like a kit-within-a-kit.
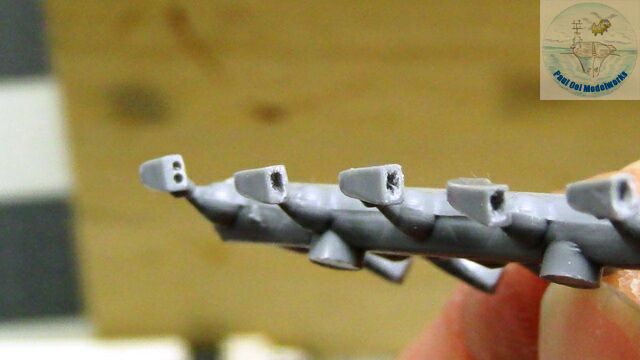 One of the detailing steps I took was to hollow out the exhaust manifolds. I start the process by micro-drilling two pilot holes on each opening, and then use a new sharp Xcto knife blade to slowing ream out the excess until I get a nice square slot. The plastic bits get cleaned up using a little liquid cement in the opening.
 The engine block is painted Tamiya XF-69 NATO Black. The manifold pieces are painted Metalizer Burnt Iron. In order to get them to line up properly, I used a metal ruler to push against them.
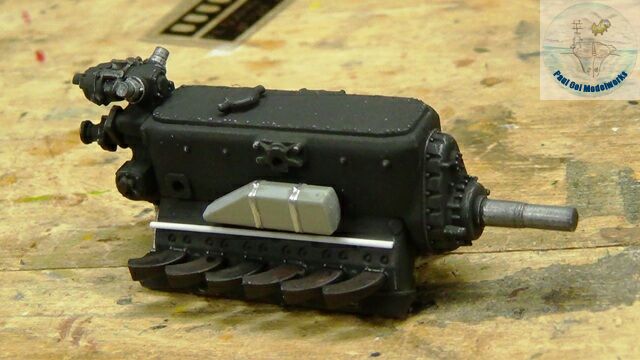
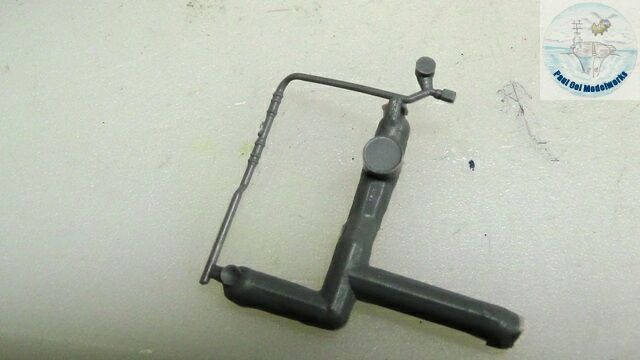
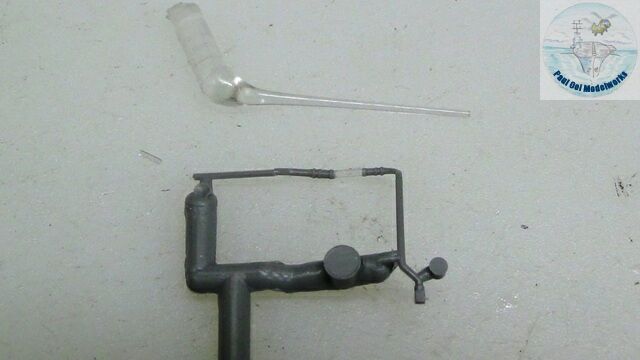
 The kit engine does not provide any of the visible hoses and tubing that one sees in the actual aircraft. Most prominent among these is the ignition plug array that lines both sides feeding into the cylinder heads. The main conduit is made from a plastic sprue while the cables are fine 62/36/2 silver bearing solder wire.
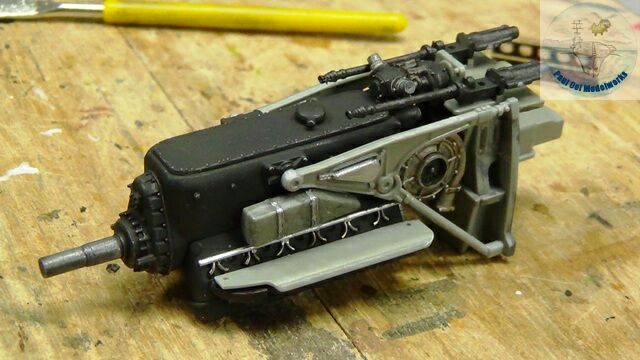
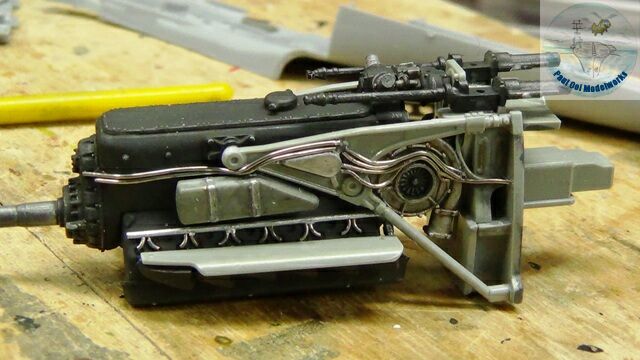
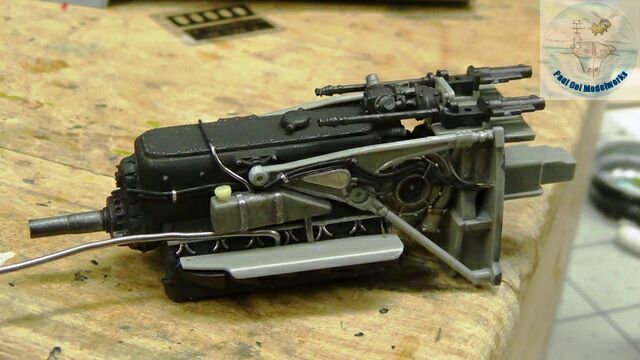
In the first picture in the sequence, the engine mounting bracket, coolant feeder tanks and machine gun mounts are added to the engine block. In the second picture, I ran the silver solder wires from the engine bulkhead to the feeder tank and points forward, carefully running them around the hub of the supercharger housing. These are the lubrication oil hoses that get painted black in the third picture.I added a resin filler cap onto the feeder tank scavenged from my spares box.
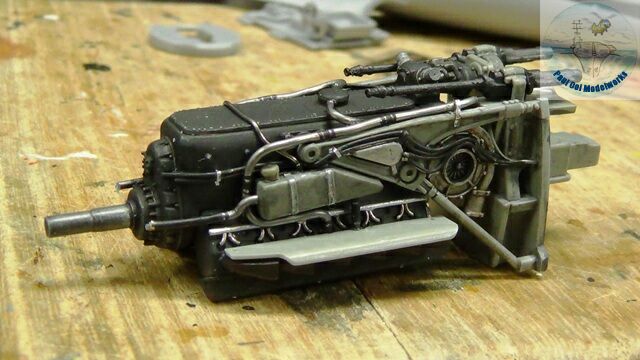
 Coolant hoses made from 60/40 rosin core solder wire are now run across the engine and connection points to the feeder tanks and points of entry in the engine block as well as a couple of supply hoses going to the main coolant tank hidden close to the propeller housing (not yet installed). Black rubber inter-connects are painted on, together with sliver hose clamps and stays. The engine block sub-assembly is done for now. There will be more underside hoses and details later on.
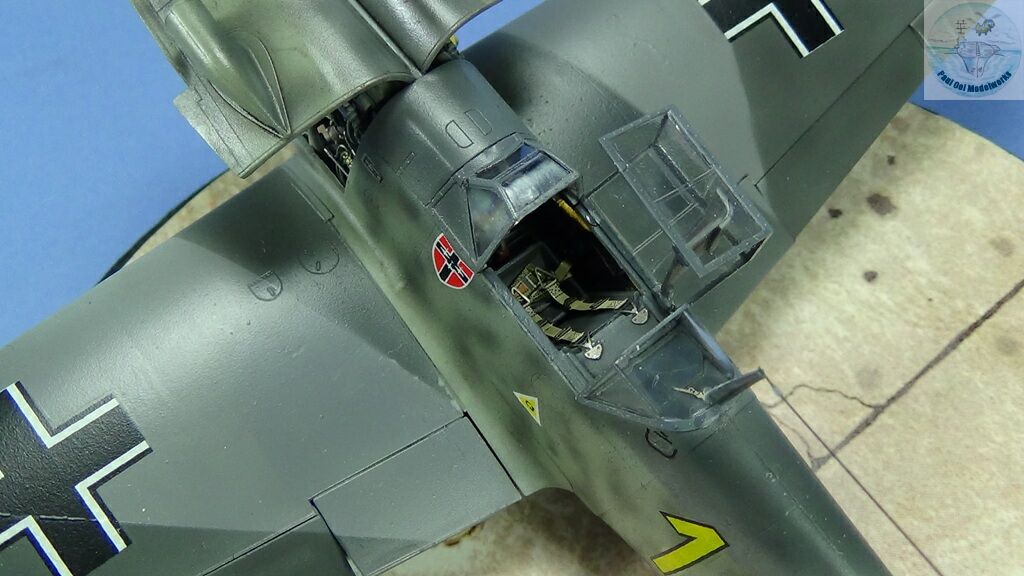
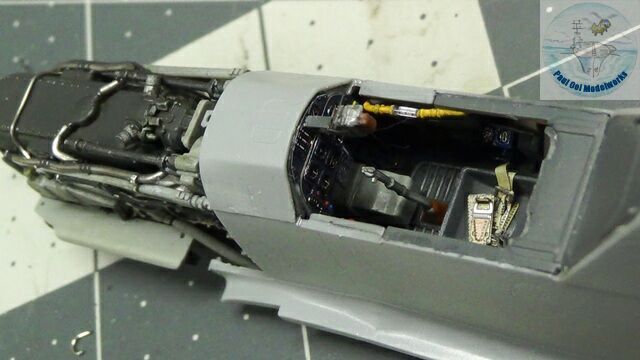
Now, we get to the cockpit assembly. One prominent feature in the Bf 109 cockpit is the fuel line running through it with a sight glass gauge for the pilot to check fuel conditions. The Zvezda part is a simply molded piece of plastic without a clear section. I replaced the mid portion while the part is still attached to the sprue (this is important, it helps keep things in alignment). Stretching a clear plastic piece, I made the sight glass and attached it in the gap using liquid adhesive. The picture below is what it should look like once installed in the cockpit.
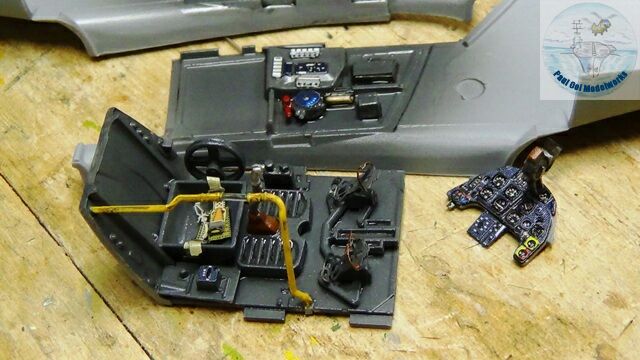
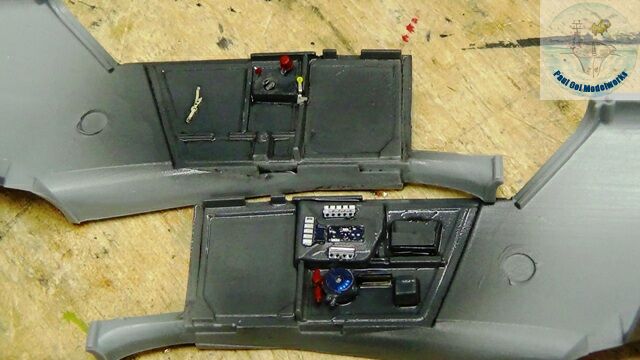 These are the sections of the cockpit prior to assembly. The base color is Schwarzgrau RLM66. Color photo-etched parts are from the Eduard details fret.
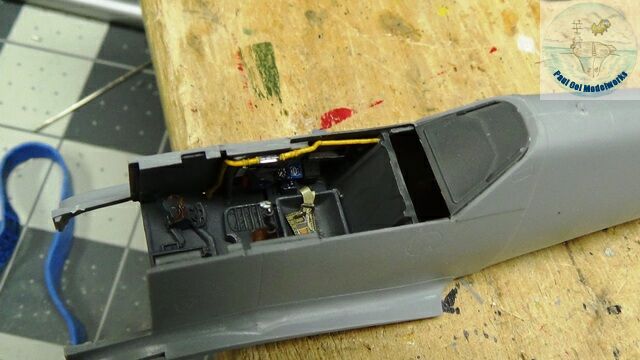
 The all-important joining of the two fuselage halves with the cockpit in between. The fit was very good, and the cockpit sat very well in between. No clamping was needed to get a good seam.
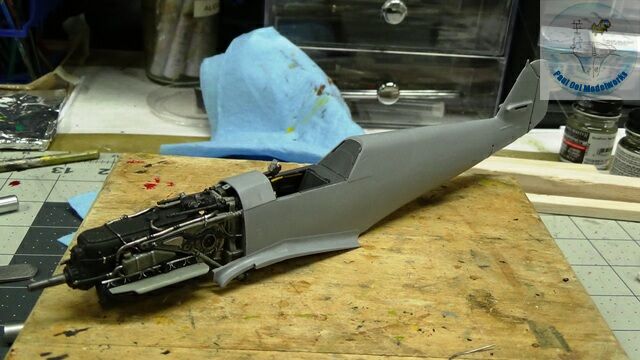
 The engine sub-assembly is then fitted to the fuselage. I test-fitted several times before bonding the two sections together. If the fit is good, the rear of the 20mm canon housing should fit snugly in front of the joystick as seen in this picture (lighter grey object).
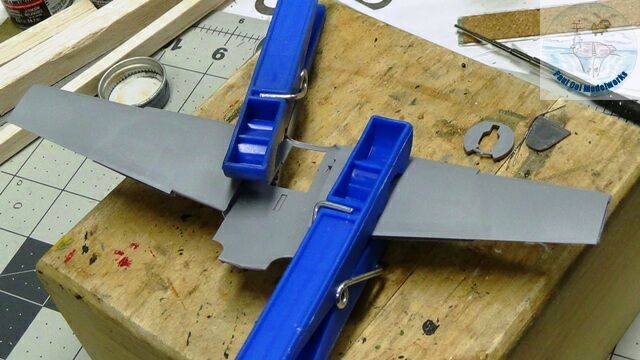
 Next I fit the upper wing sections onto the lower wing half. For some reason, Zvezda included details of the former wing gun compartments, only to seal them up later.
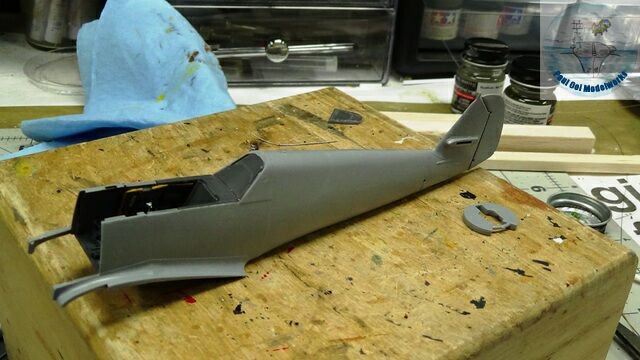
 The fuselage is fixed to the wing section, and a tension tape used to achieve the correct diahedral angle.
 The front section of the fuselage(that includes the coolant tank) is now fitted to the engine assembly with the propeller spindle sticking out.
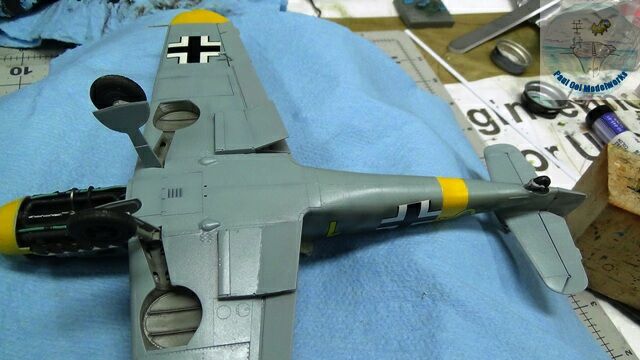
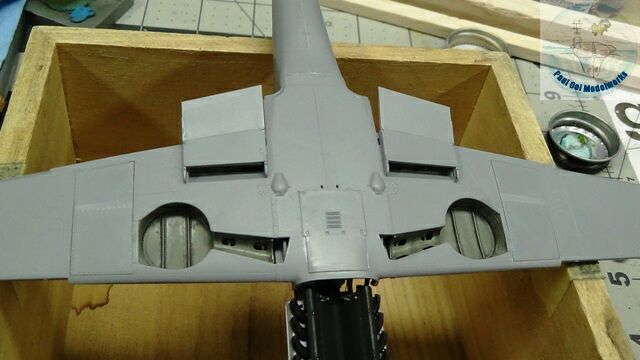 Underside details are fixed at this time. These are the gun compartment doors, the fuselage hatch, and the two coolant coolers.
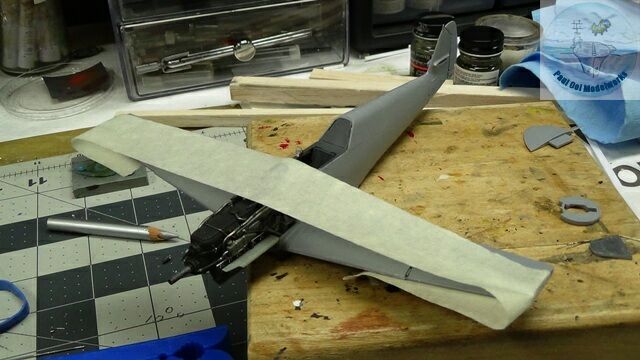
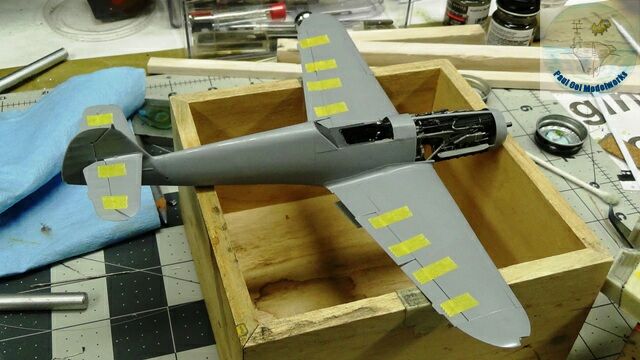 I attached the flaps, ailerons, and rear stabilizers with tape. That is because after painting the undersides and camouflage, they will be removed and properly fixed in their down positions (that are harder to handle when painting).
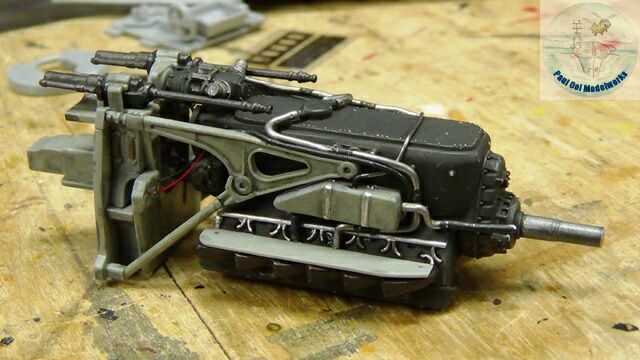
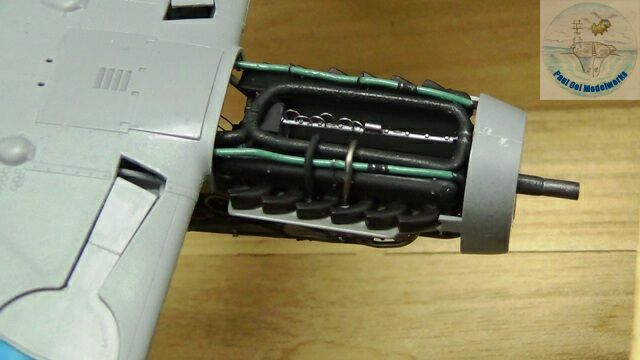 More hoses are added to the underside of the engine compartment at this time including the supercharger loop, coolant return tubes (green).
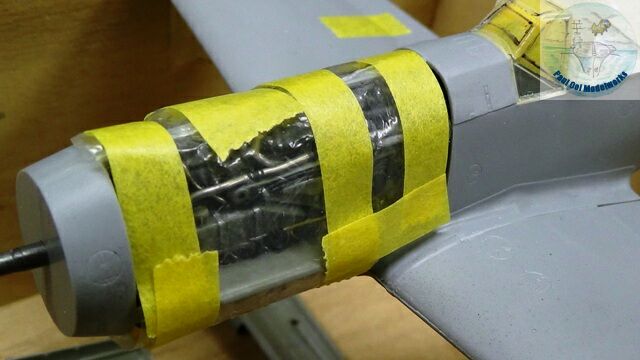
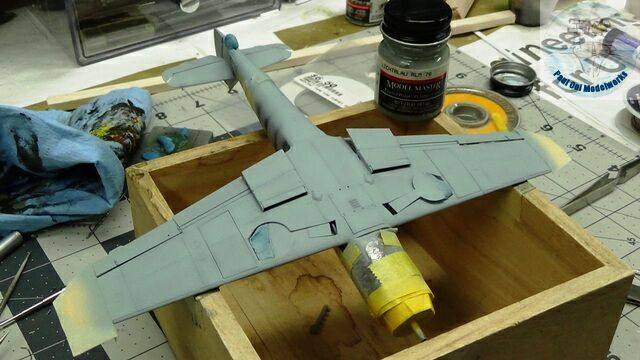
 To mask the engine compartment, I covered the section in plastic, then wrap it together with masking tape. Once the other areas are masked as well, we are ready for the spray booth.
 The windshield section is painted in Schwarzgrau RLM66.
 Under-shading with Tamiya XF69 NATO Black.
 All areas with either white or yellow, are undercoated with Tamiya XF2 Flat White.
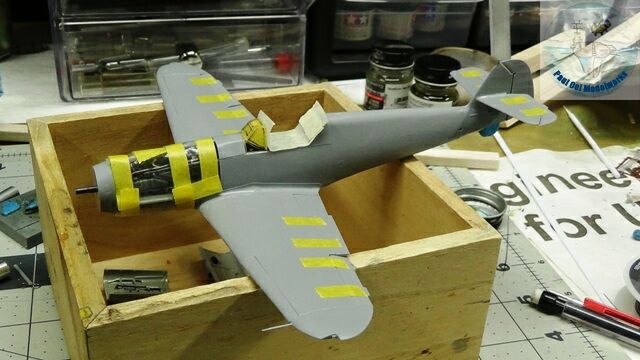
 Yellow identifier band regions are painted in Gelb RLM04.
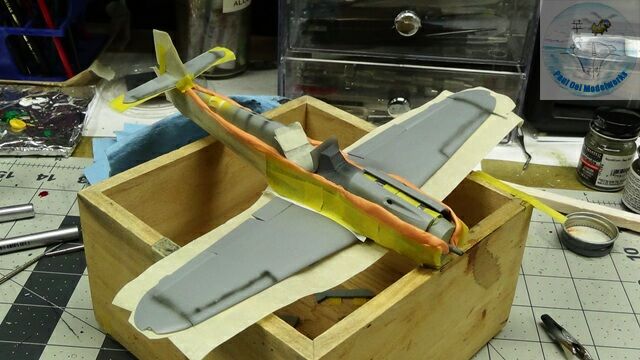
 Masking off the yellow areas, I then spray painted Lichtblau RLM76 for the underside.
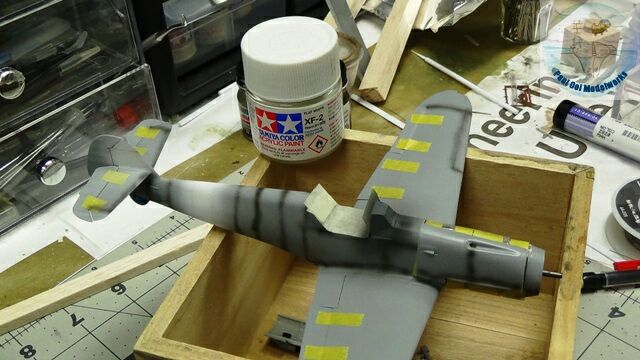
 Then, starting on the top side, Grau RLM02 is sprayed to the side walls and tail rudder of the fuselage.
 Using extensive masking, and putty for the upper camouflage pattern, I prepare the aircraft for the top side splinter pattern.
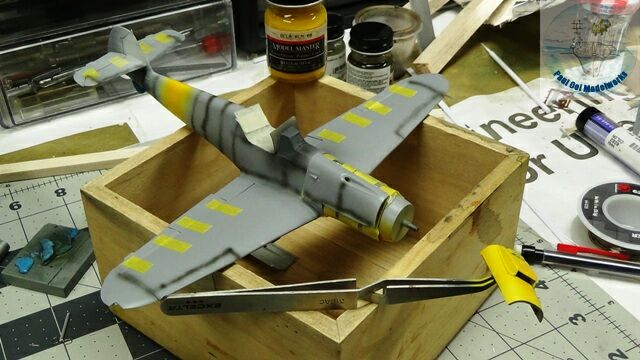
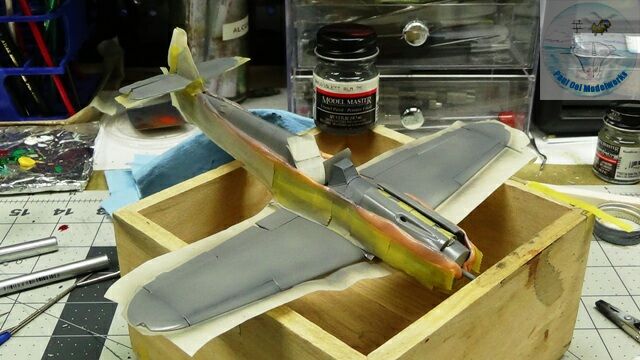 Starting with the lighter shade, I apply Grauviolett RLM75 on the upper wings and fuselage spine.
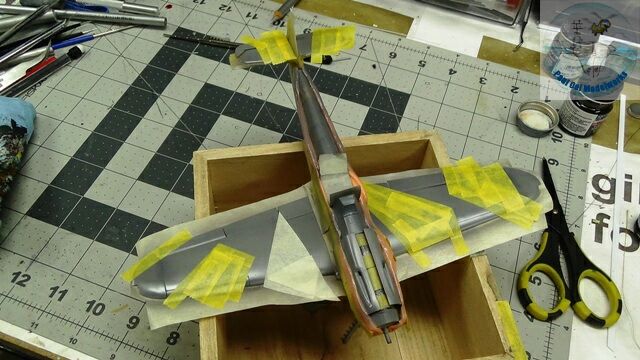
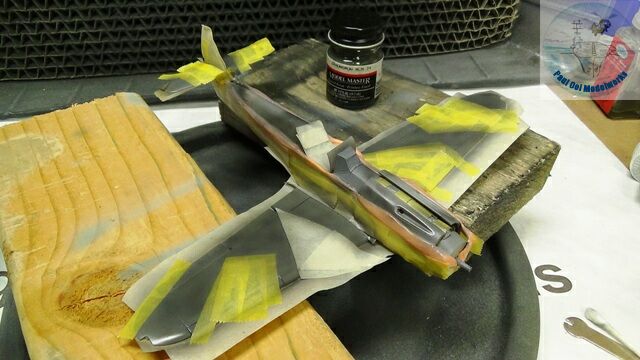

The splinter camouflage pattern is applied in this version only to the wings. The fuselage upper pattern mirrors the splinter camouflage patterns but it is feathered at the edges and merges later into the mottling of the side walls. The Graugrun RLM74 is then applied over the surfaces. I did mix about 25% flat black to RLM74 to darken it just a bit because Model Master RLM74 and RLM75 were too similar.
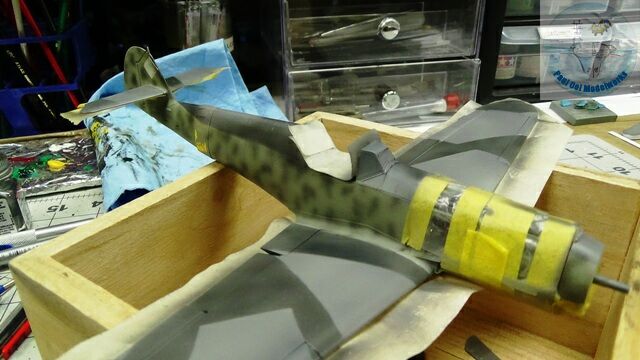
 Now comes the most difficult part of this camouflage pattern (I always joke that a typical German airplane has enough camouflage for three Allied ones). Thinning down the RLM74, and setting my airbrush to about 12 psi, removing the front spray difuser, I make several practice runs on a scrap piece of plastic first just to check on the consistency and distance. Too wet and it will run, too dry and it will spot. Working in small areas at a time, I cover the entire side wall and even blend onto the top side camouflage with measured mottled patches.
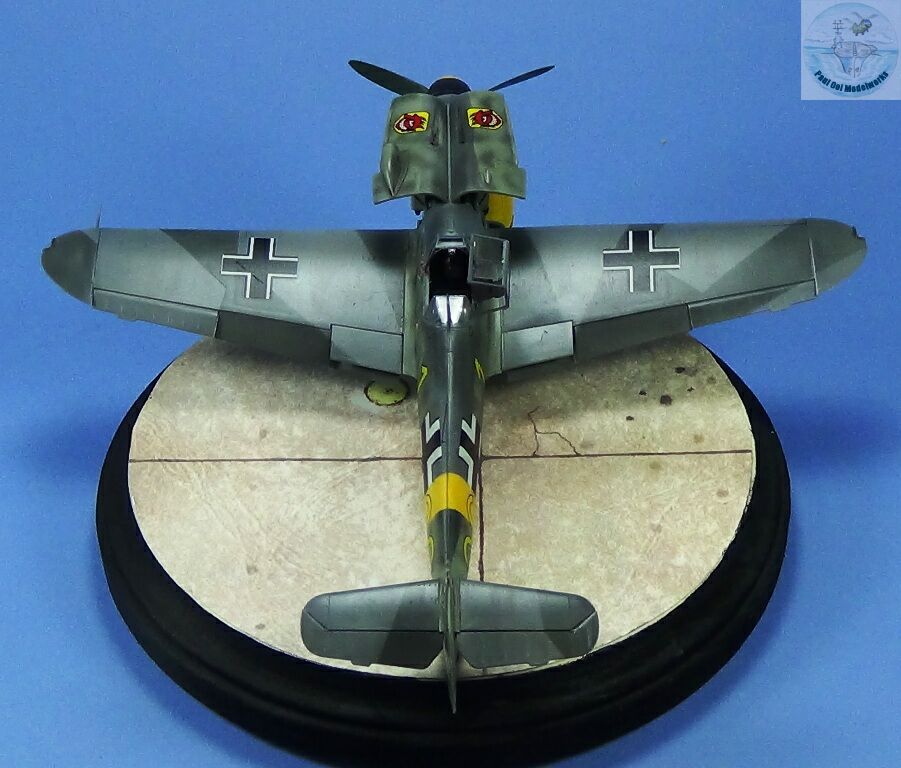
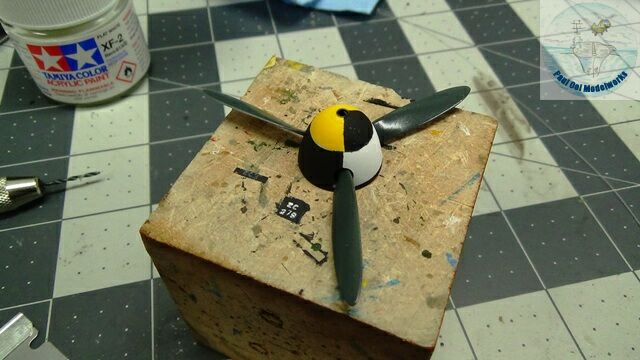 The spinner gets its own treatment of masking in three parts, with Gelb RLM04, White and Black. The propeller blades are painted with Schwarzgrun RLM70. I also drilled through the cannon hole in the middle of the spinner and painted it Gun Metal.
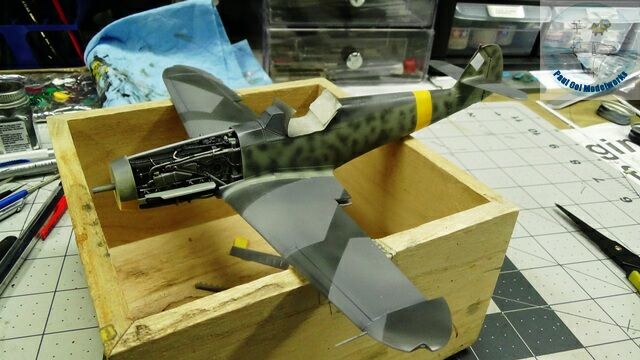
 After applying Pledge (Future) Polish to the entire aircraft, decals are applied. The Zvezda decals are very good and settled easily with just a bit of Microsol. Then I applied another layer of satin varnish to seal in the decals and even out the finish of the entire aircraft.
 The undercarriage are installed after the varnish has cured.
 Sitting on its own set of wheels! Always a good feeling.
 An oil wash of 75% Lamp Black + 25% Burnt Umber to bring out the panel lines and details.
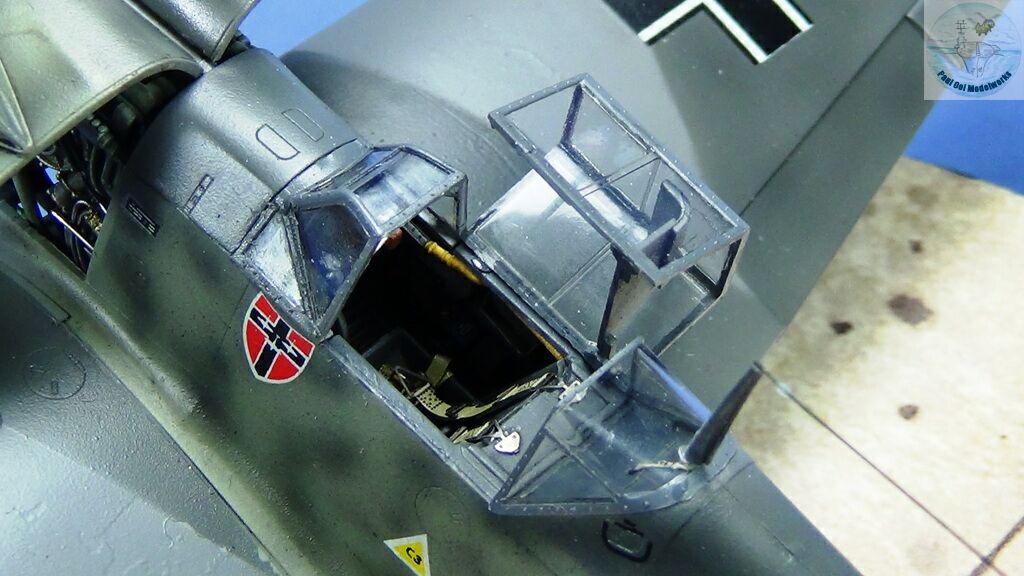
 The very last bit of this model is also pretty nerve-wracking. Installing the doors in the open position for the engine compartments, and the cockpit canopy.
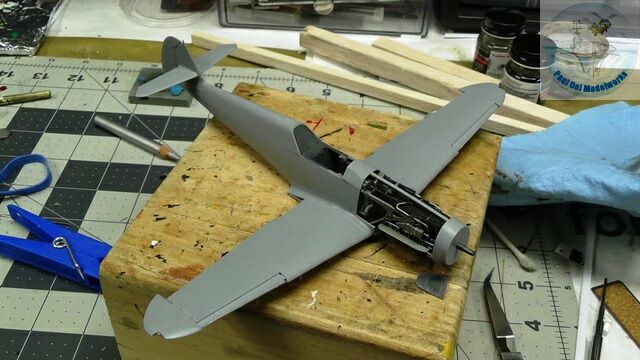
 I debated whether to put this eagle onto a grassy Russian airfield or just show-off its details on a clean generic tarmac. I decided to do the latter for once so that the focus will be on the opened panels revealing the engine details. Let the aircraft speak for itself.
[…] Messerschmitt Bf 109 can really grow on you, as I just built a second one immediately after my recent Friedrich project. Between the Hans Bob Bf 109-F2 and Erich Hartmann’s Bf 109-G6, there were 4 years of hard […]