
I remember as a boy reading UK’s Thunder annual edition with an infamous anti-hero named Black Max. The latter was a Nosferatu-like German aristocrat who used his WW1 fighter plane and 2 giant bats to attack his foes (Allied and German alike, I must say). In one of the episodes, there was a brief encounter with German bombers and raised my curiosity about large WW1 bombers made of fabric and wood. However, given their construction, WW1 bomber models are formidable kits to build, with giant wings, more supporting struts than a fishing pier and rigging to rival a sail ship.

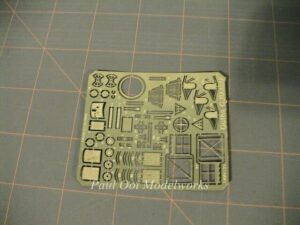
My interest to build the Gotha G.IV arose when I read Fine Scale Modeler magazine’s review of a 1/32 scale kit made by Wingnuts. Lacking the display space for such a behemoth, I opted for the 1/72 scale kit made by Ukraine’s Roden and managed to get Extra-Tech’s photo-etch fret for detailing. The markings I chose was for a night bomber named “Morota(s)” stationed in Belgium in late 1917 with Kagohl 3, the bomber squadron specializing in raids on England. The camouflage colors are attractive and borders on psychedelia one half-century before the term was invented when combined with the fuselage markings. Another point of interest is that the Gotha bomber was the first purpose-built high altitude strategic bomber in the world. The open cabins had little bottles of liquid oxygen for the crew members. It must have been frigid up there for the crew.
Together with the Staakens, these early German bombers were night-time terrors at a time when bombing of civilian populations was a new horror. Unlike the slower Zeppelins, these bombers were fast for their time and flying at high altitude, they were hard for the fighters to catch. There was a sinister air about their existence and they were mysterious machines. They remain so to this day because all surviving Gothas were destroyed under terms of the Versailles treaty.
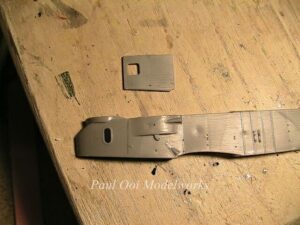
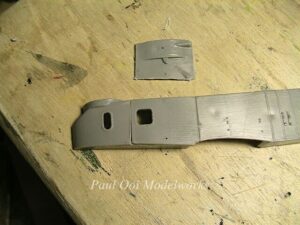
The kit lives up to the reputation of difficult WW1 “birdcage” construction. First, you cut up the front quarter of the port side fuselage to replace the Gotha II/III pilot’s compartment to replace it with a panel suitable for the IV’s. Careful re-alignment needed so that you fuselage remains INTACT.

More surgery. To accommodate the Mercedes 260 hp engines, sections of the lower wing had to be removed.

The minute flight panel (wood with metal dials) gets inserted into the cockpit housing.

As the crew cabin forms, one realizes that the layout is very different from modern bombers. The space is built more like a wooden boat with wood panel walls and partitions and even cabinets. The bulkheads had to be shaved down in order to actually fit snugly between the fuselage halves. A lot of patience is needed.

The interior of the cabins have to be properly finished before joining the halves. Here you can see the wooden walls finished to look like chestnut panels and the internal bomb racks.
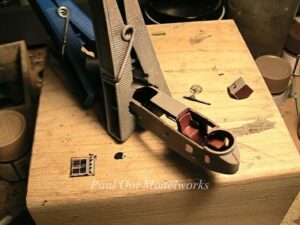
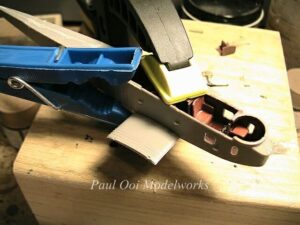
The fuselage assembly process is fiddly since there are no locating pints to guide the halves together. First step is clamp the main fuselage together. After a half-day of drying, the lower wing section gets fitted to the fuselage and clamped for another half-day.

If done properly, one gets rewarded with a fuselage that will help align the wings and the engines together.
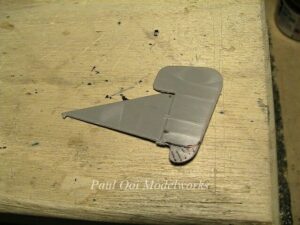
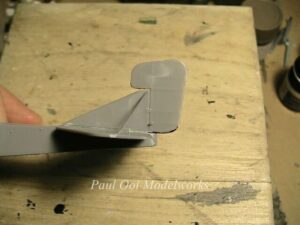
And more surgery. The LVG-built versions of the Gotha had a differently-shaped rudder that required cutting and sanding.

The fuselage is finally complete with the tail section added.
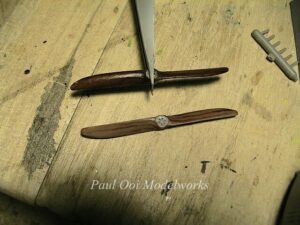
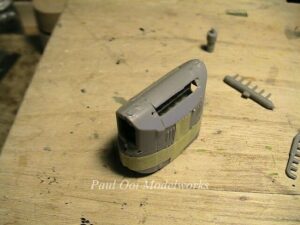
While the fuselage is drying, I start working on the 2 propellers. I paint them to look like the laminated wood structures (lower) found in the originals, then over-coat them with burnt umber oil paint (upper in tweezers). The engine nacelles are another time-consuming section since the kit did not provide good alignment features for the nicely detailed Mercedes engines. I had to make sure that the propeller holes aligned with the openings while allowing the exhaust manifold to exit properly through the housing.
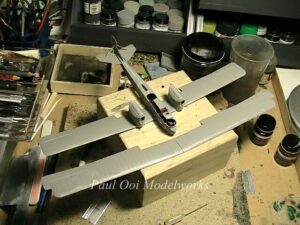
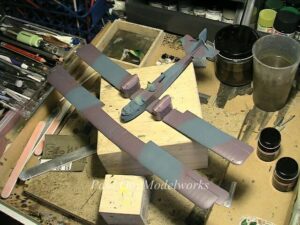
Once the fuselage and upper wing section are completed and masked, it is off to the spray booth. For the night bomber version, I paint the medium blue Tamiya XF18 first, and then apply the WW1 mauve (mix 2:1 Tamiya X-16 and XF-52) free-hand with a fine airbrush set at low pressure (about 10 psi). Seeing purple, baby!

I seal the paint work with several layers of varnish in preparation for the decals and weathering.
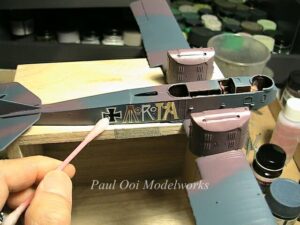
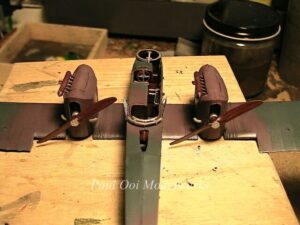
There weren’t many decals to apply, but they tend to be large sheets that need careful placement and moderate amounts of setting liquid. Once dry, I attached the propellers and also rigged the interior of the crew cabin (YES, there is rigging INSIDE the aircraft).
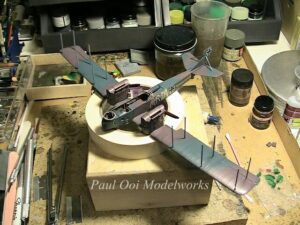
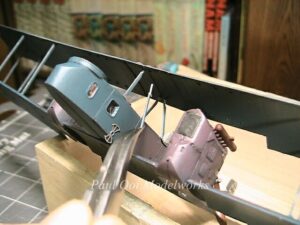
Now comes the big moment…joining the upper wing (all 13 inches of it) to the lower wing and align all 26 struts. First, I like to thank Jeroen Koen’s detailed review of the sister kit, the G.II/III on tips for performing this insane task. Given the variation in molding quality, I had to trim some struts in the middle while slightly extending other with little bits of stretched sprue. First I super-glue the 12 main outboard struts, checking their attitude versus the drawings.

Once dry, I turned the fuselage on its back and align the top of the struts to the under-side of the upper wing (even harder than it sounds). Once the two wings are bonded and somewhat dry (you need some flexibility) I carefully inserted the 12 center struts over the fuselage and engine nacelles. Have a reserve store of Infinite Patience to keep from flinging the whole thing into the trash bin!
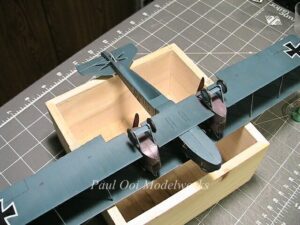
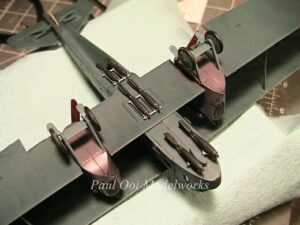
Since I have the aircraft lying on its back, I proceeded to attach the landing gear and the bombs. Later, I had to re-position the last set of bombs because the Roden instructions were incorrect on the placement and one needed to cut the last rack into 2 separate ones and spread them apart to make way for the important “Gotha Tunnel” (visible in the left picture), an ingenious improvisation made by Gotha to allow the rear gunner to fire at at both upper hemisphere and lower hemisphere attackers.

Finally, there were 132 inches of wire rigging to complete. The rigging brings out the birdcage look and it is an indispensable part of this model. At the end of it, there were precious few places to hold onto without getting into some rigging. Time to set the model onto its base and leave it alone! But the results are well-worth the effort.
A week later, I managed to get my hands on Airfix’s 1/72 scale WW1 German Infantry set and adapted 2 suitable figures as mechanic and officer to the layout, so that the scale of the aircraft can be fully appreciated.
Enjoy!


<


Very nice job! I was already impressed until I got to the pic with the clothes pin clamping the fuselage halves together. Then I was simply amazed. Such detail in such a small scale kit.
I suspect the complexity of the struts and rigging that you encountered in building this model was a reflection of that encountered in the construction of the real Gothas. I imagine that each strut had to be carefully aligned and adjusted and each wire tuned as if it were in a piano to evenly distribute all the tensions and keep the wings properly aligned to the fuselage and to each other. Probaby made rigging a Fokker triplane look like child’s play.
I’ve read about the Gotha (and seen a few pics) – but I never realized just how long the wingspan of this plane was (obviously to allow it to reach high altitudes). I was immediately reminded of Kelly Johnson’s U-2 from almost half a century later.
Finally, I wonder what the two white bluges in the center of the top wing are? My first guess was “skylights” – but then why would they need to be so thick?
Hi Dave,
Those two items are dull aluminum colored fuel tanks that they added on to extend the range of the bomber. The earlier versions of the Gotha did not have these external fuel tanks.
Keep visiting!
Paul
Sir Need rigging instructions for a 1:72 scale Gotha by Roden It does not have any in the box Many thanks Bill
Hi Bill, You need to use the rigging instructions from Wingnut’s excellent 1/32 kit that can be found online at this link —> http://www.wingnutwings.com/ww/productdetail?productid=3006&cat=4
Good luck….much patience needed and I salute all fellow modellers who attempt this kit.