• Skip to primary navigation
  • Skip to main content
  • Skip to primary sidebar
  • Skip to footer
  • Home
  • Blog
  • About
  • The Fine Print
    • Disclaimer
    • Copyright
  • Privacy Policy
  • Contact
  • Paul Ooi Modelworks
  • Nav Social Menu

    • Email
    • Instagram
Paul Ooi Modelworks

Paul Ooi Modelworks

Building a better world, one scale model at a time

  • Index
    • Aircraft
      • WW1 Aircraft
      • Inter-War Aircraft
      • WW2 Allied Aircraft
      • WW2 Axis Aircraft
      • Modern Aircraft
    • Armored Fighting Vehicles
      • Artillery
      • WW1 AFVs
      • WW2 AFVs
      • Tractors and Buldozers
      • Cold War AFVs
    • Ships
      • WW1 Ships
      • Inter-War Ships
      • WW2 Allied Ships
      • WW2 Axis Ships
      • Modern Ships
    • NordicCon Show
    • Figures
    • Buildings
    • Sci-Fi
    • Miscellaneous
  • Tutorials
    • Tutorial 1: Making a Wooden Platform Helipad
    • Tutorial 2: Wooden Hard Stand for Aircraft
    • Tutorial 3: Filling Large Plastic Seams
    • Tutorial 4: Diorama, Sicily 1943
    • Tutorial 5: Making a Gun Emplacement with Earthworks
    • Tutorial 6: Basic figure painting (1/35 scale or 54mm)
    • Tutorial 7: Filling Large Mouse Bite Gouges
    • Tutorial 8: Frames for Vacuum Formed Clear Canopies
    • Tutorial 9: Prepared Tank Position Diorama
    • Tutorial 10: Installing Multi-Piece Track System
    • Tutorial 11: Masking and Painting “Bird-Cage” Clear Canopies
    • Tutorial 12 – Aircraft Wing Tip Navigation Lights with Colored Bulbs
    • Tutorial 13 – Installing Wood Laminate Deck for Model Warships
    • Tutorial 14 – Painting a Rusted Muffler and Exhaust Pipe System
    • Tutorial 15 – Painting German Red Oxide Finish for WW2 Tanks
    • Tutorial 16 – Creating a European cobblestone street base
    • Tutorial 17 – Constructing tracks using single track link system
    • Tutorial 18 – Building a small wooden bridge
    • Tutorial 19 – The Wash-and-Dry Figure Painting Method
Home / Aircraft / FMA IA 58A Pucará of the Malvinas – The Argentine Flying Fortress

FMA IA 58A Pucará of the Malvinas – The Argentine Flying Fortress

Aircraft, Modern Aircraft

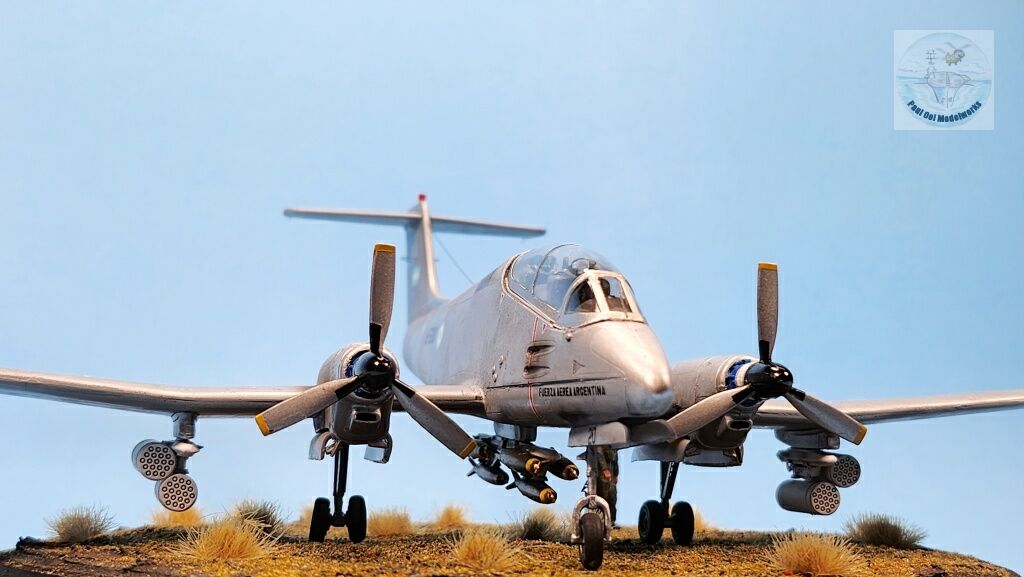
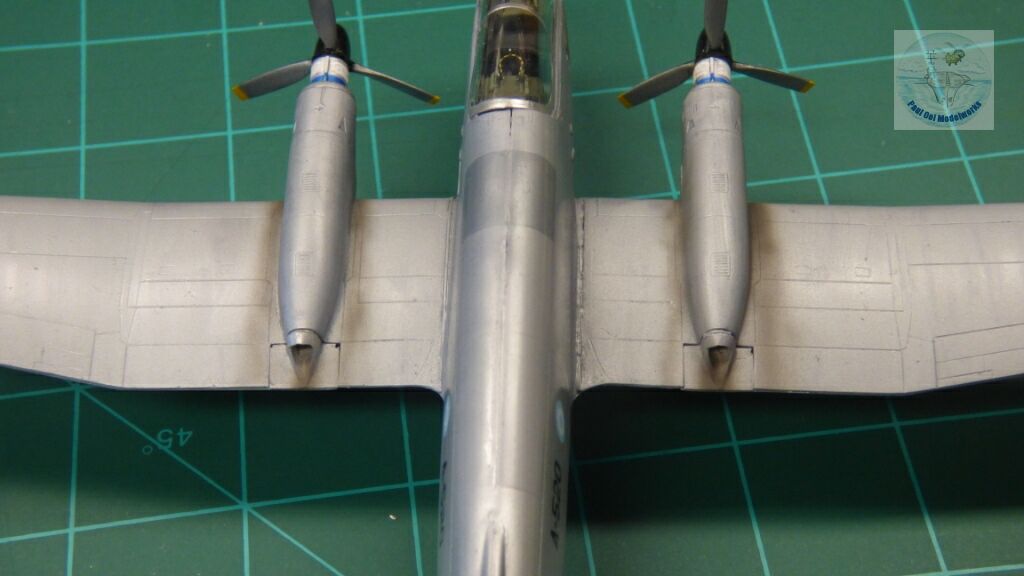
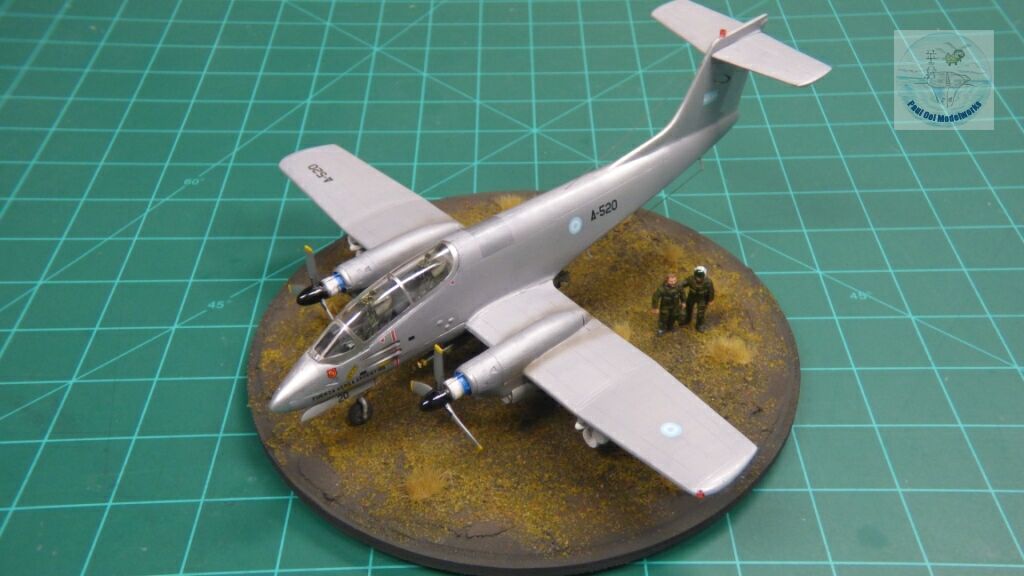
In the late 1960s, the Argentinian Air Force developed a ground attack aircraft suitable for supporting the army in their counter-insurgency effort against communists infiltrating from Bolivia. This aircraft had to be able to stay over the battlefield , fly low and deliver heavy firepower. The result was the twin-propped Pucará, meaning “Fortress” in the Quechua language. Like its bigger, more powerful US counterpart, the Fairchild Thunderbolt, the Pucará’s main weapons were its guns, being equipped with twin 20mm cannons, and four 7.62mm machine guns. It also had three ordnance racks capable of mounting rocket pods and bombs. The aircraft was deployed to the Malvinas or the Falklands following the Argentinian army’s capture of that island group in 1982. The Pucará’s rugged undercarriage could use the rough airstrip on Pebble Island from which to launch their strikes against the British forces. Its ability to carry heavy armament in a small package was also an advantage in harrying the counter-invasion force.

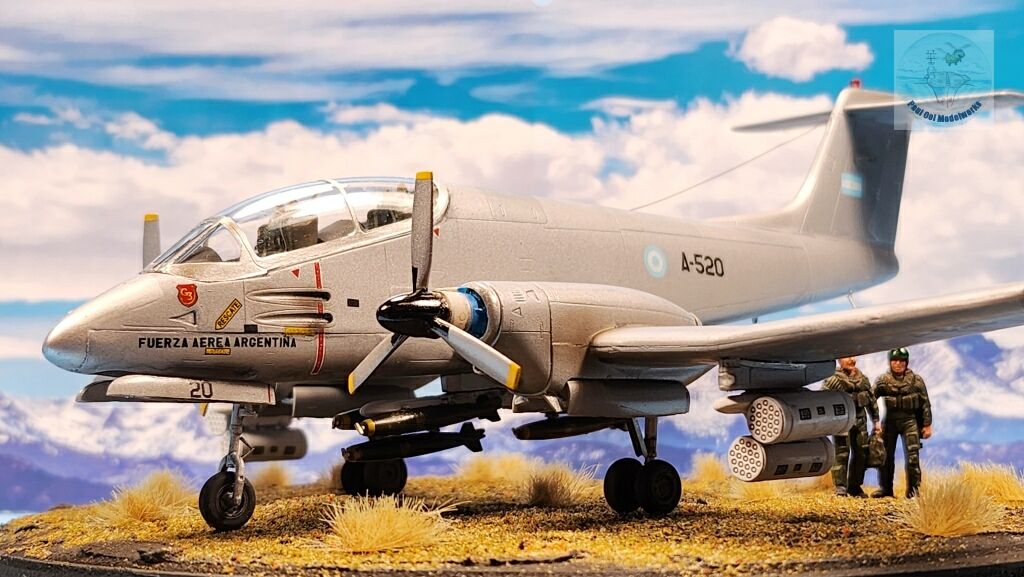
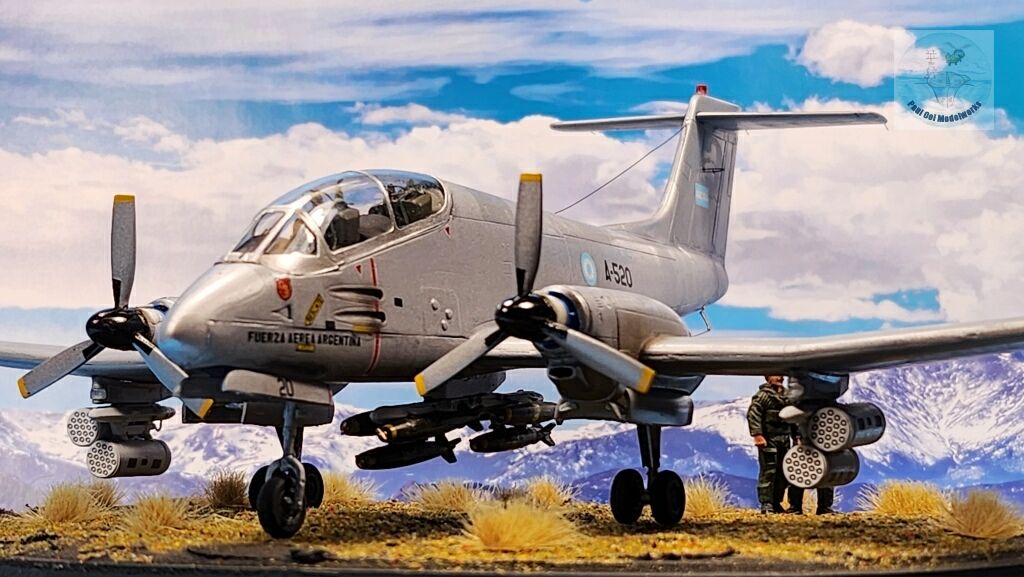
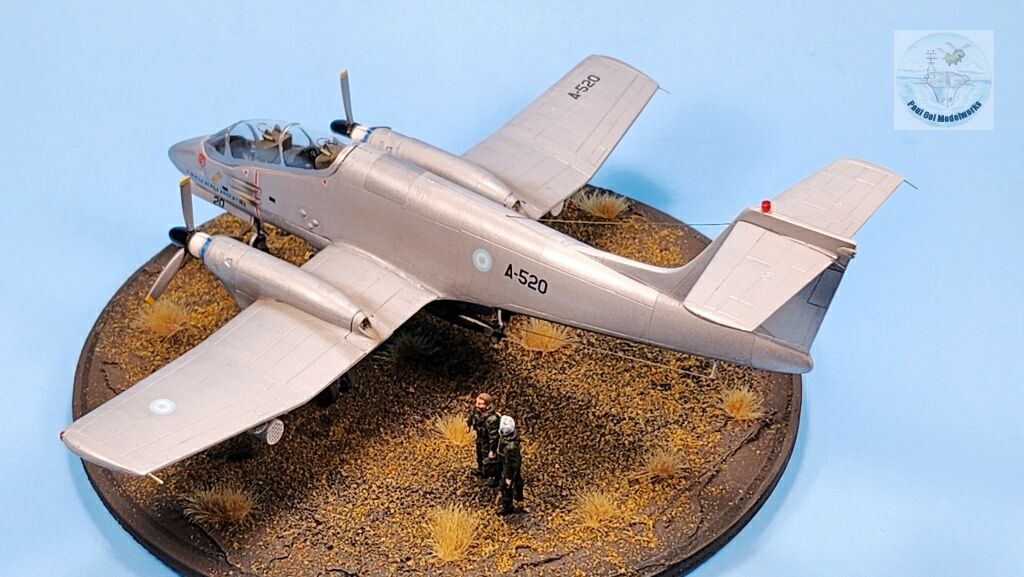
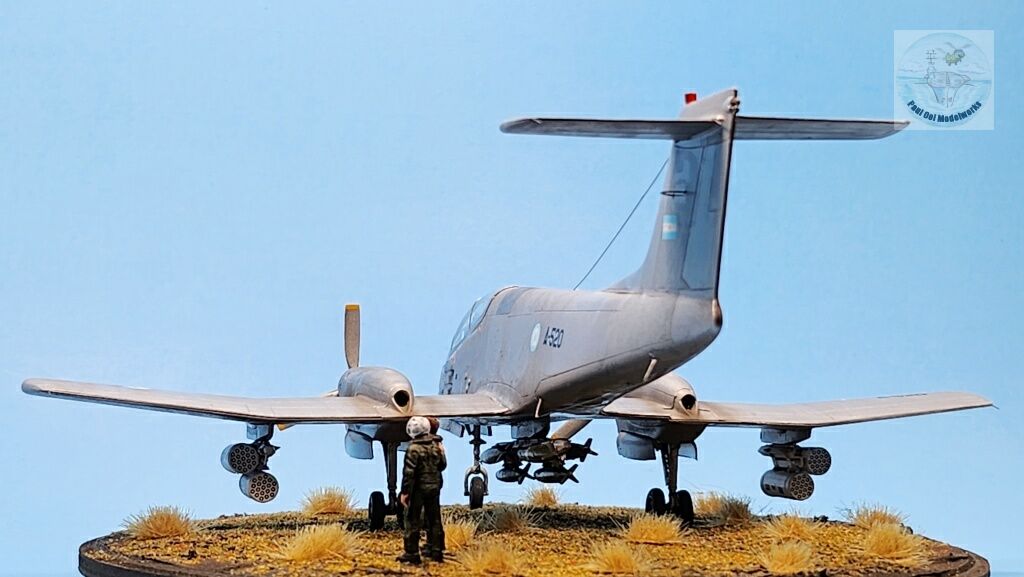
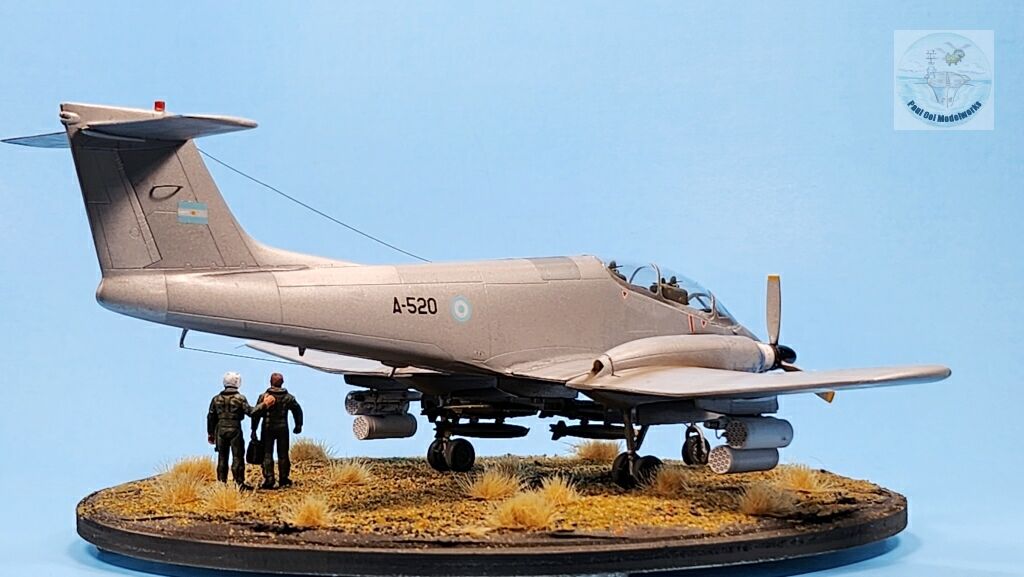
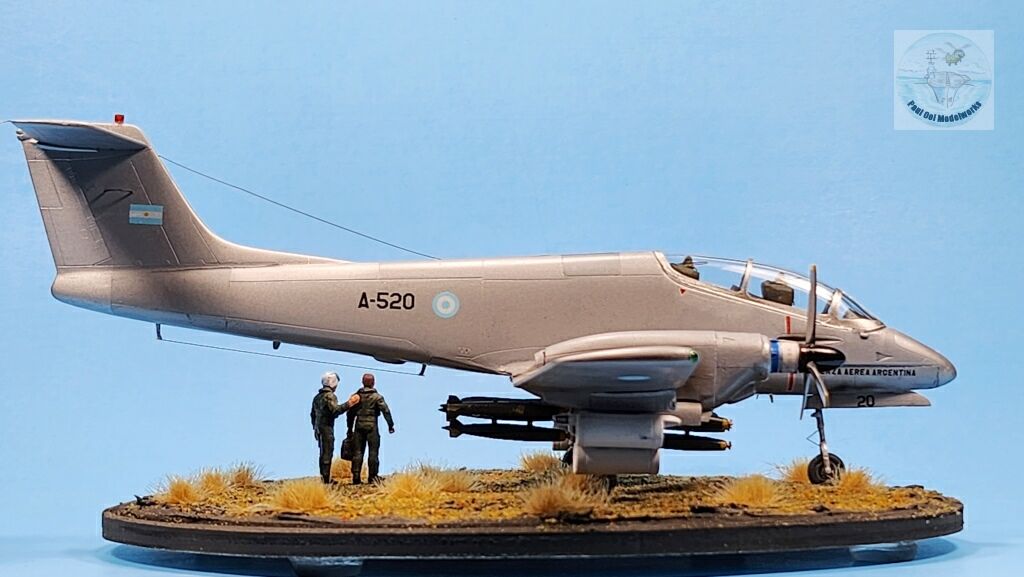
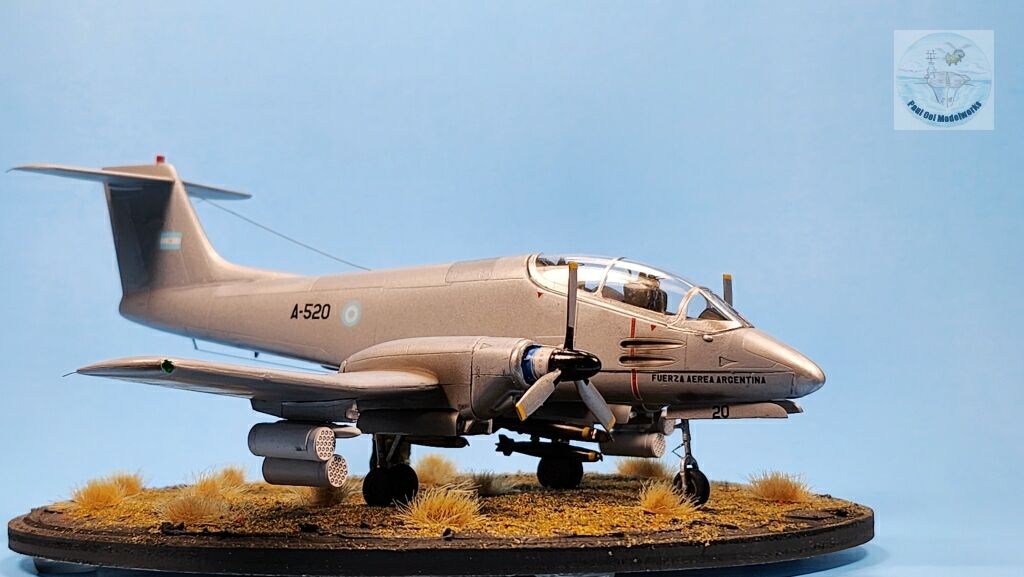
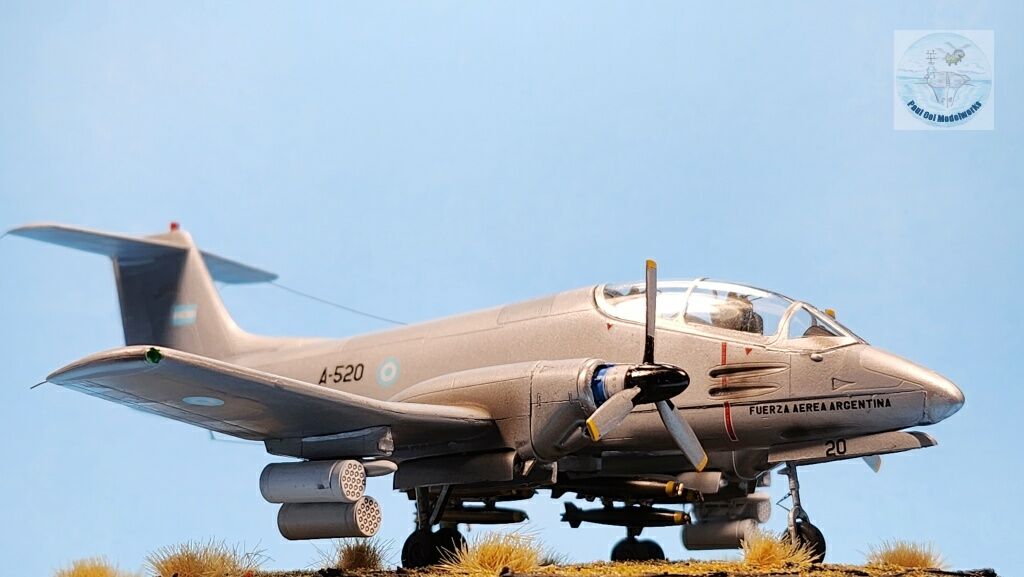
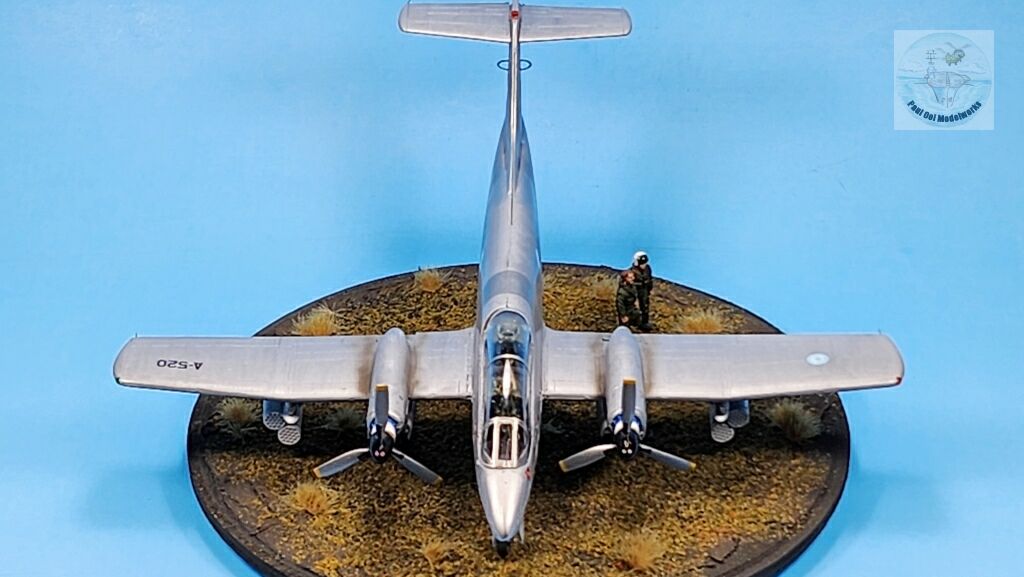
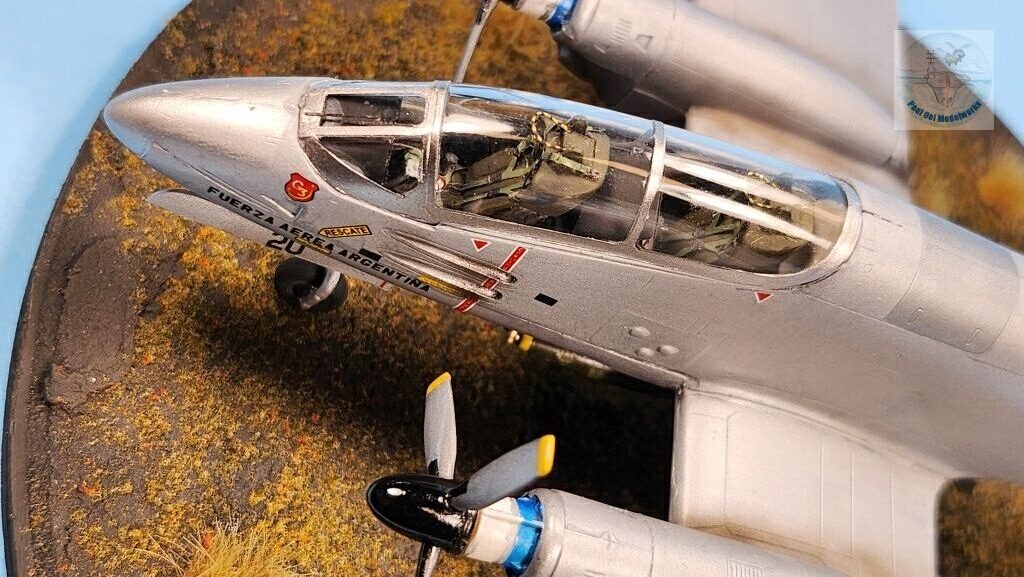
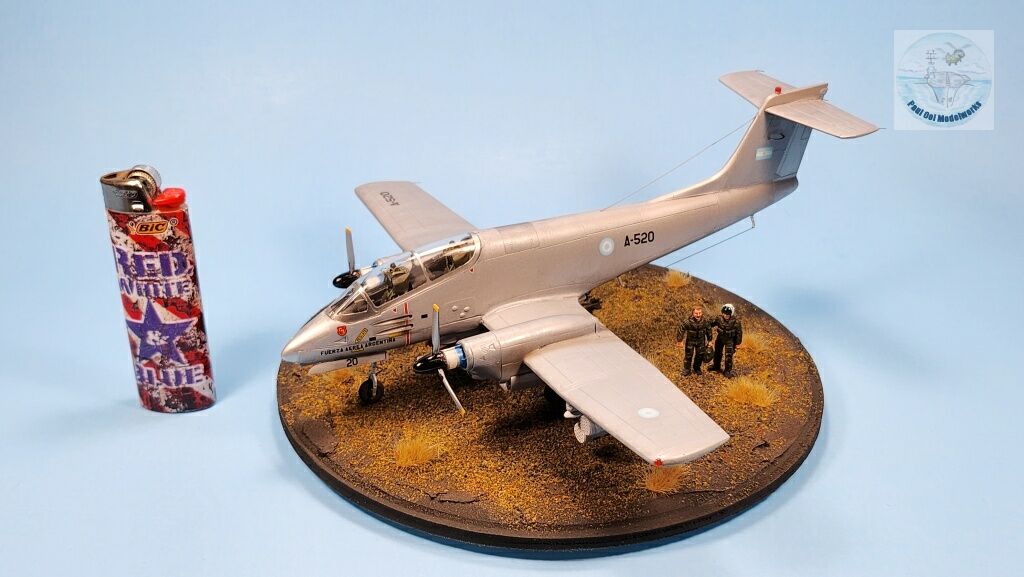
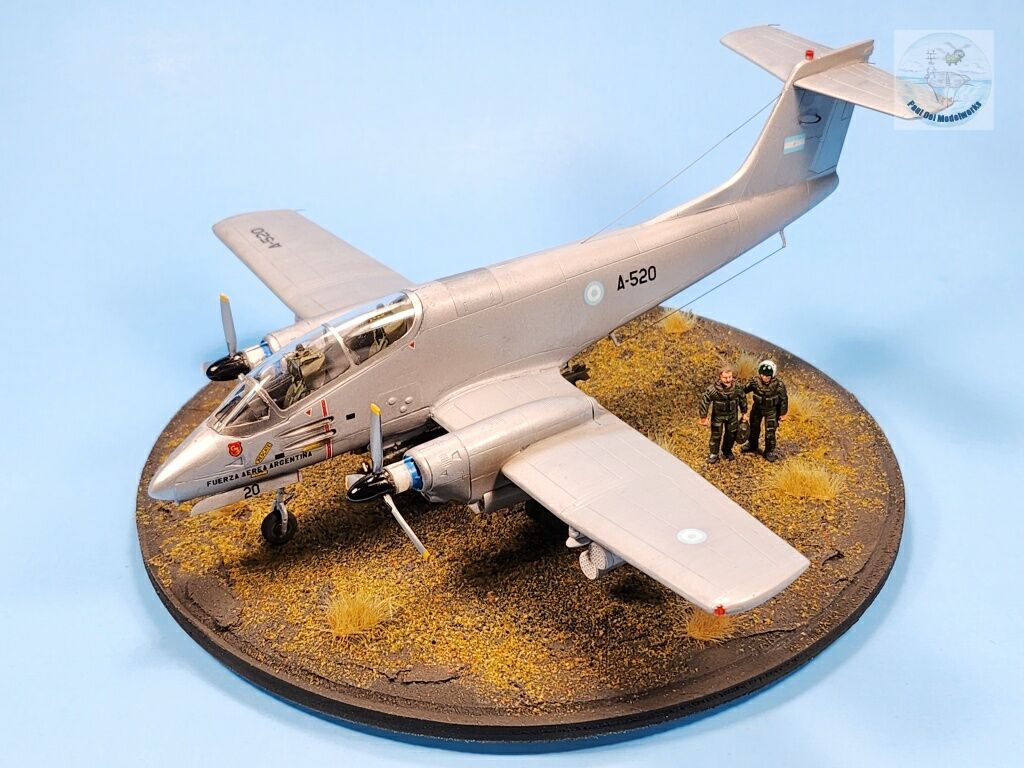
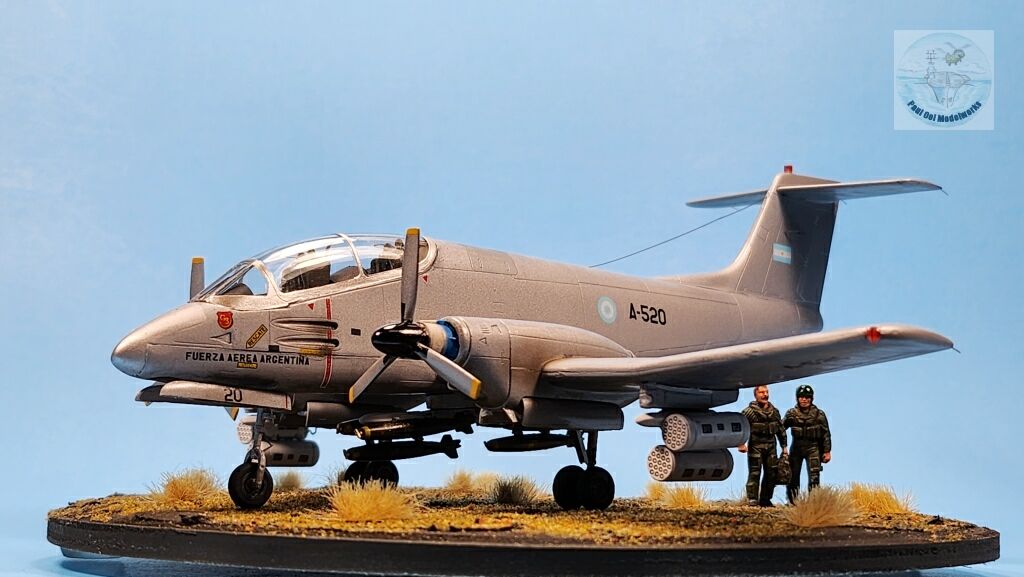
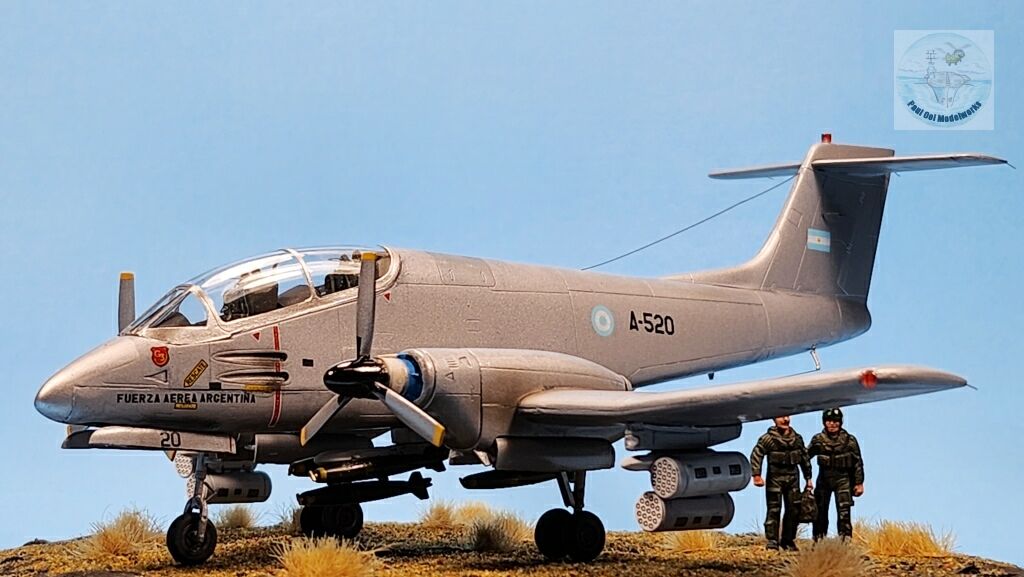
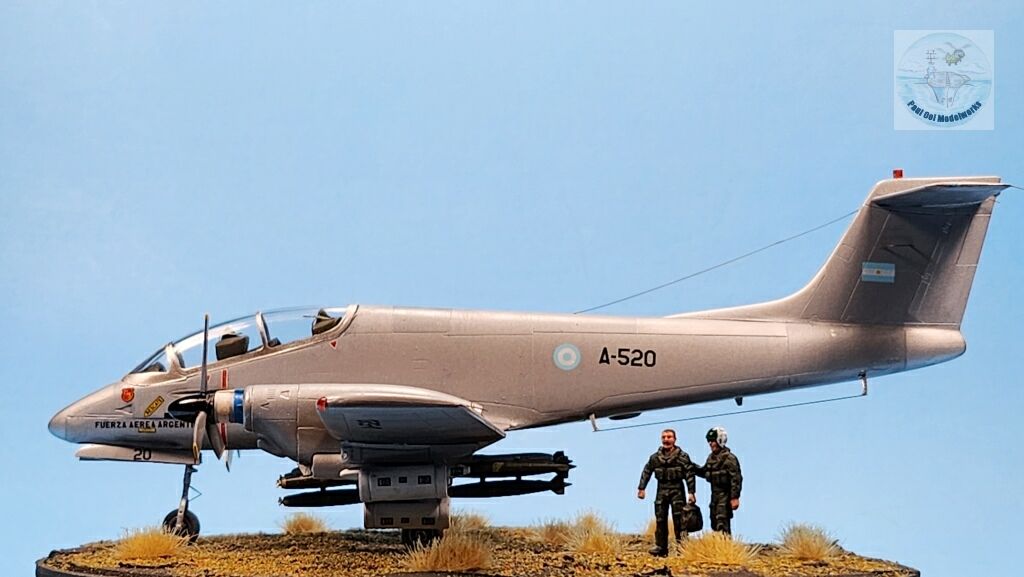
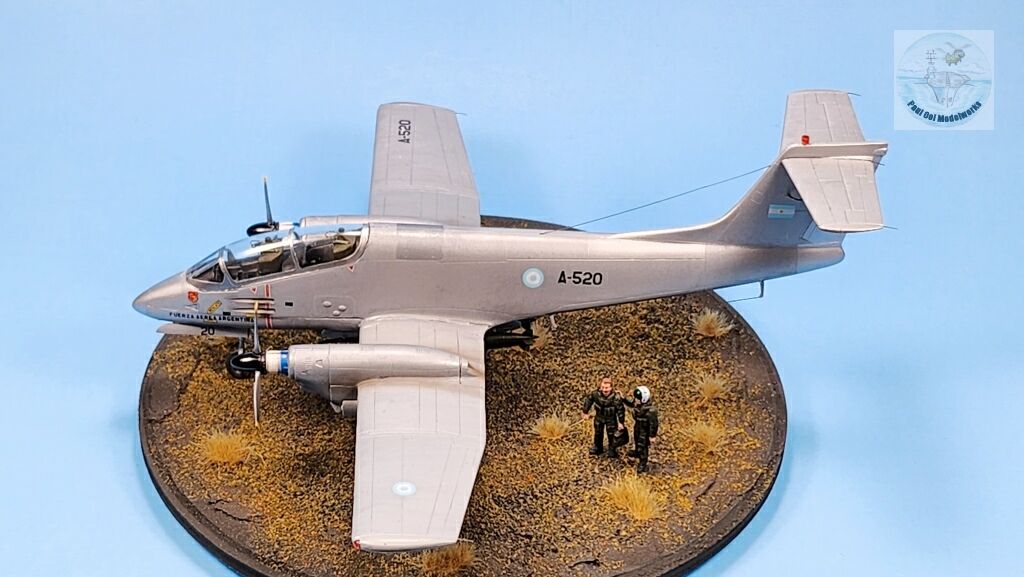
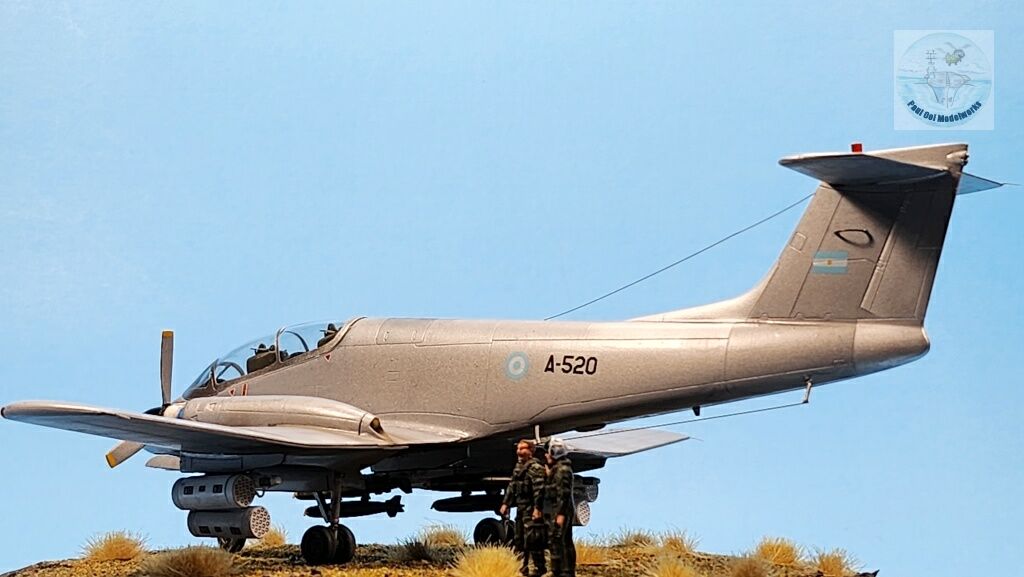
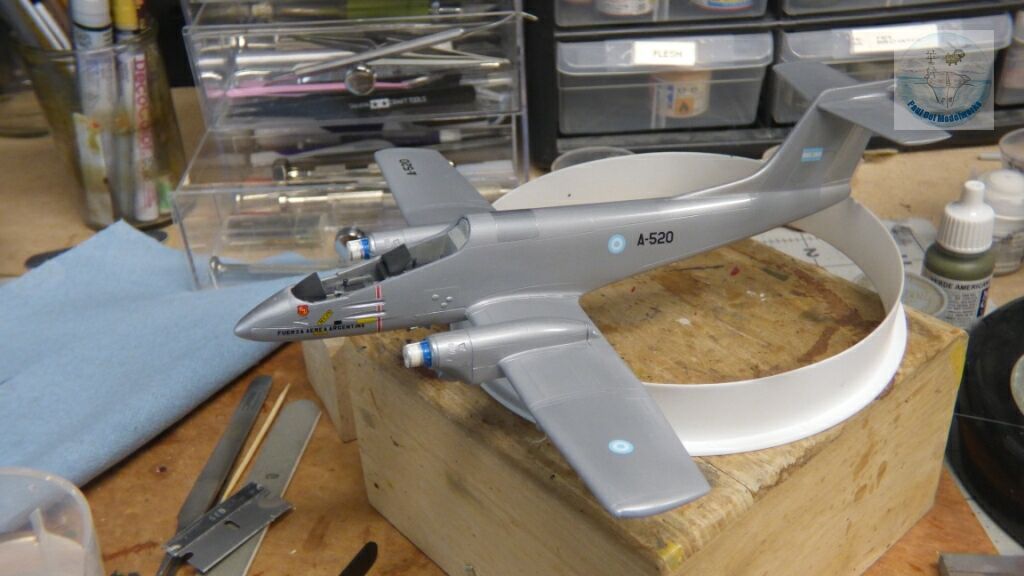
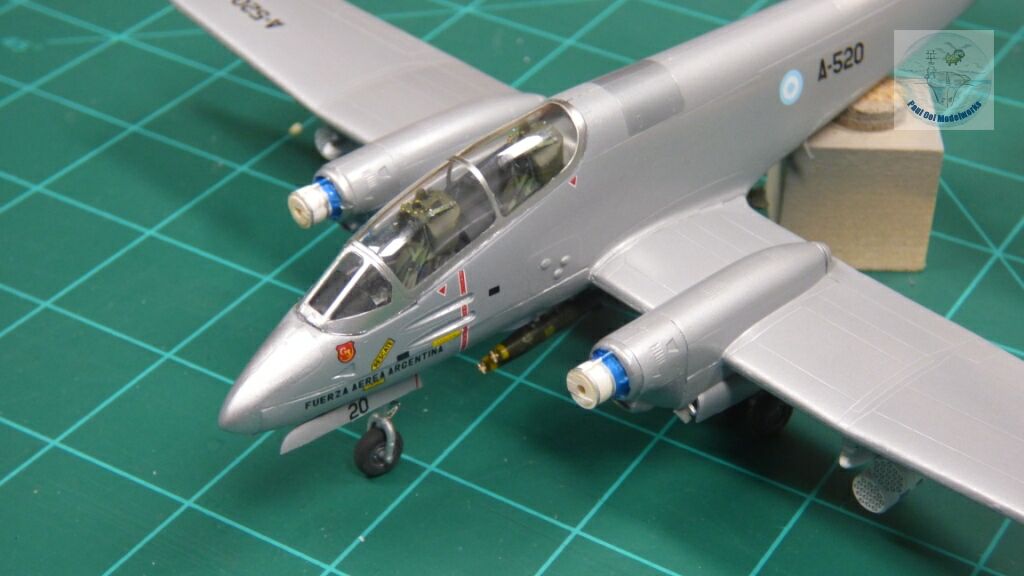
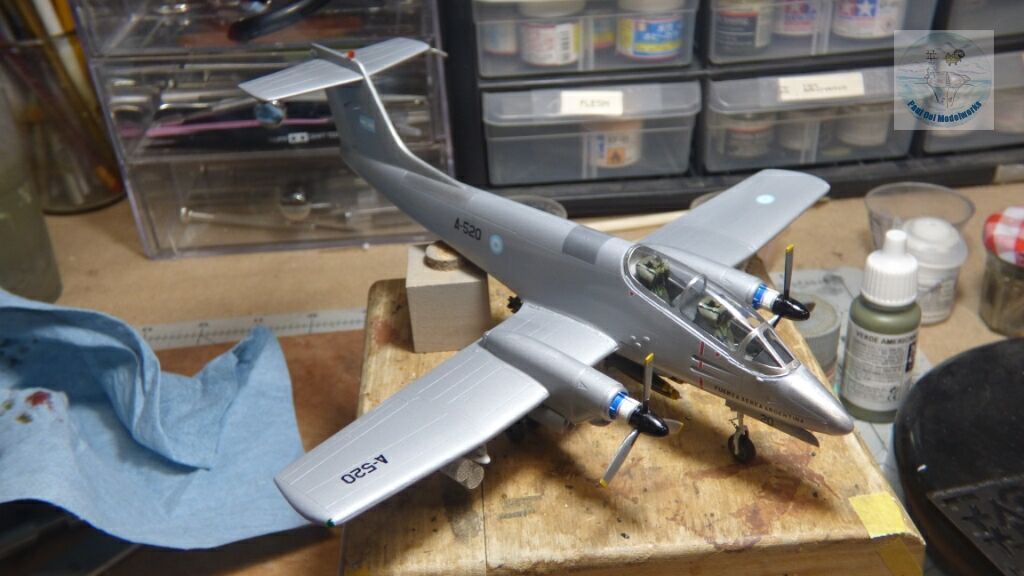
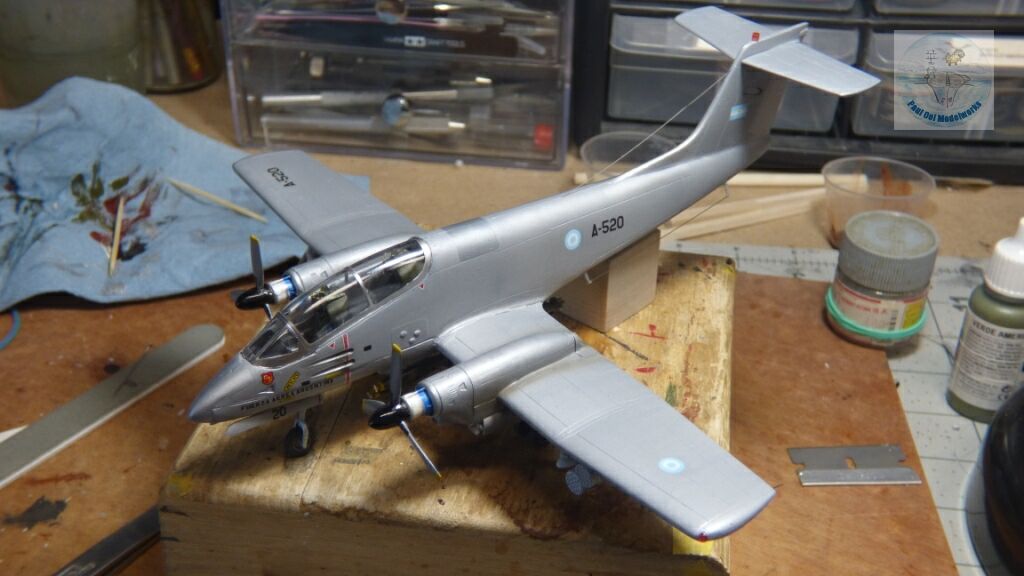
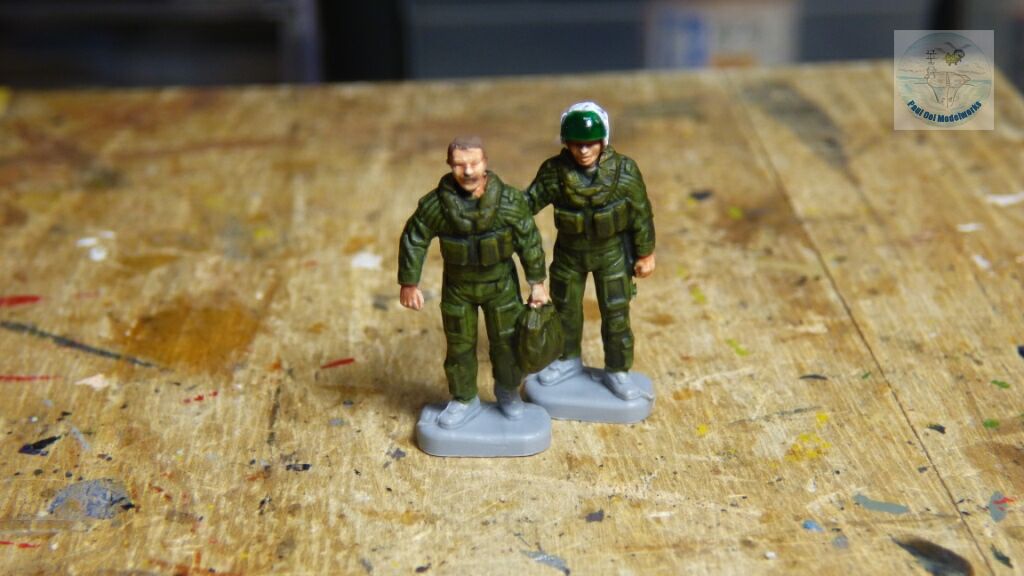
My portrayal of the Pucará’s was aircraft A-520 stationed at Estación Aeronaval Calderón on Pebble Island. It was not painted in camouflage, and still had its peace-time bare aluminum livery. This aircraft was one of those destroyed on the ground by an SAS raid on May 15th 1982.

The Pucará’s other notable deployment was by the Sri Lanka Air Force in their fight against the Tamil separatists. Again, the little aircraft punched way above its size by delivering heavy firepower against the insurgents while operating in rugged terrain. It was literally bang for the buck. Today, the Argentinians still use the upgraded version of the Pucará, called the Fenix with new engines and 4-bladed propeller arrangement for border surveillance and anti-smuggling activities. This version is expected to serve up to the year 2036.

Gallery

https://www.paulooimodelworks.com/wp-content/uploads/2026/03/20260307_210828.mp4


Construction Notes

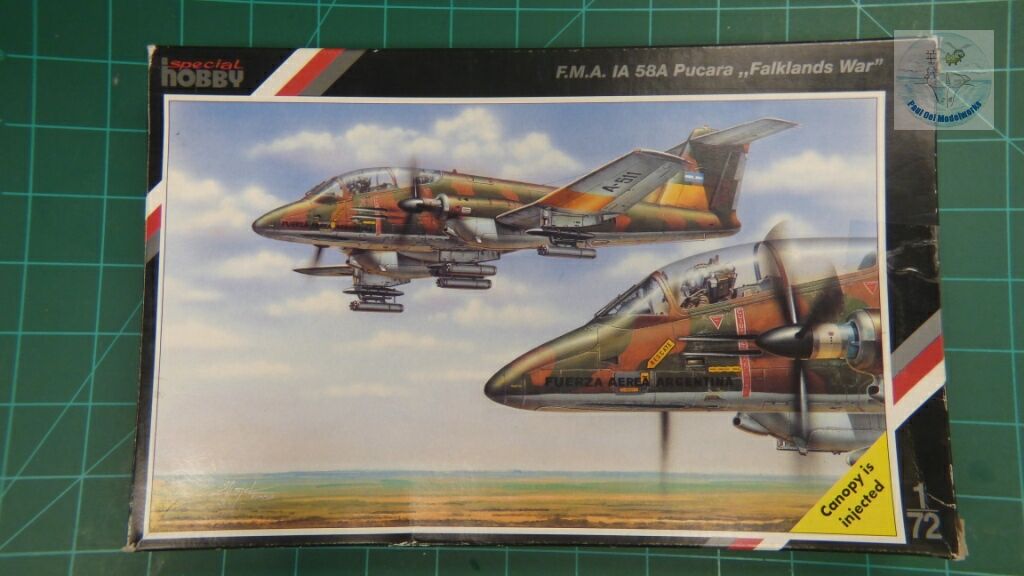
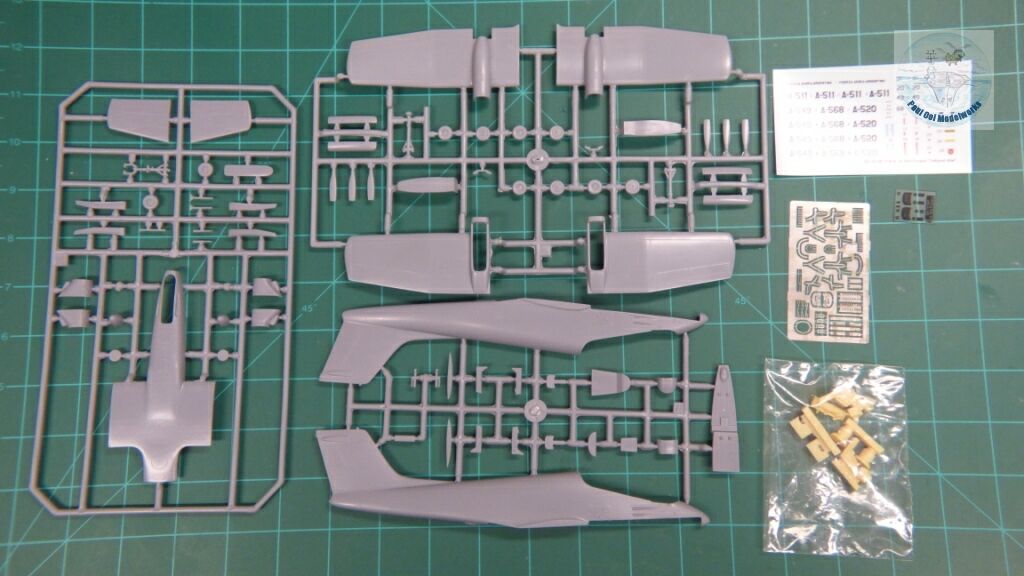
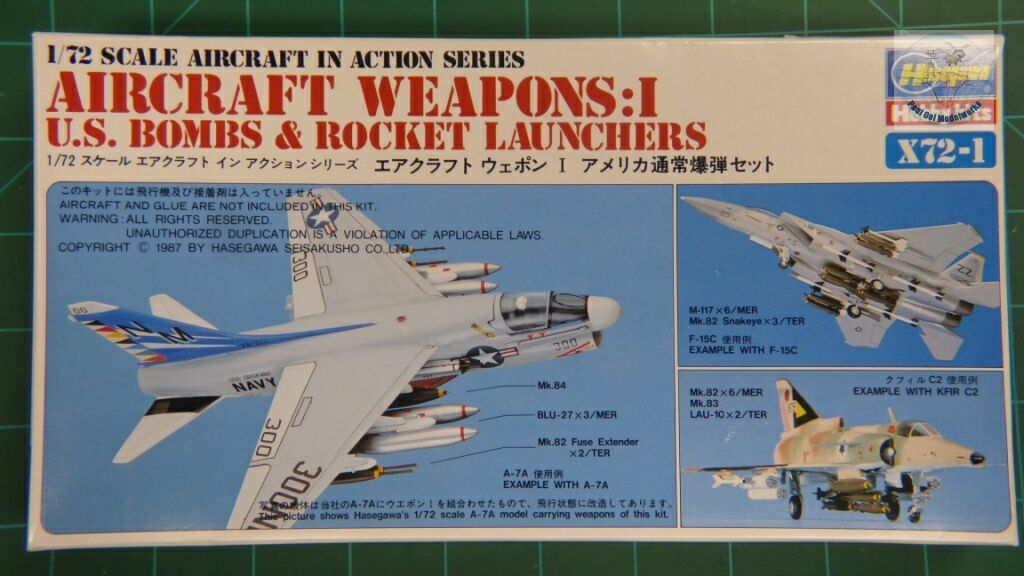
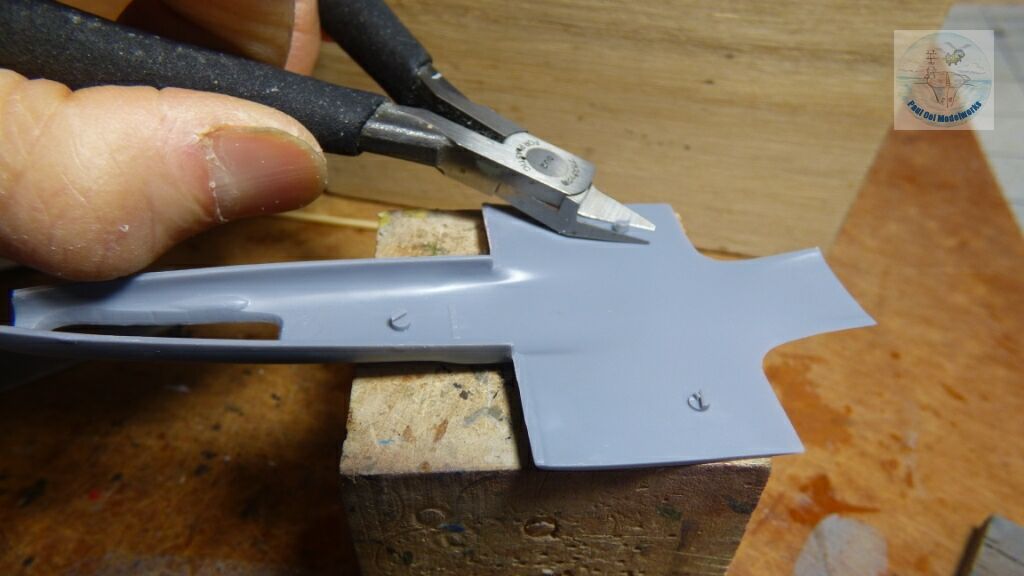
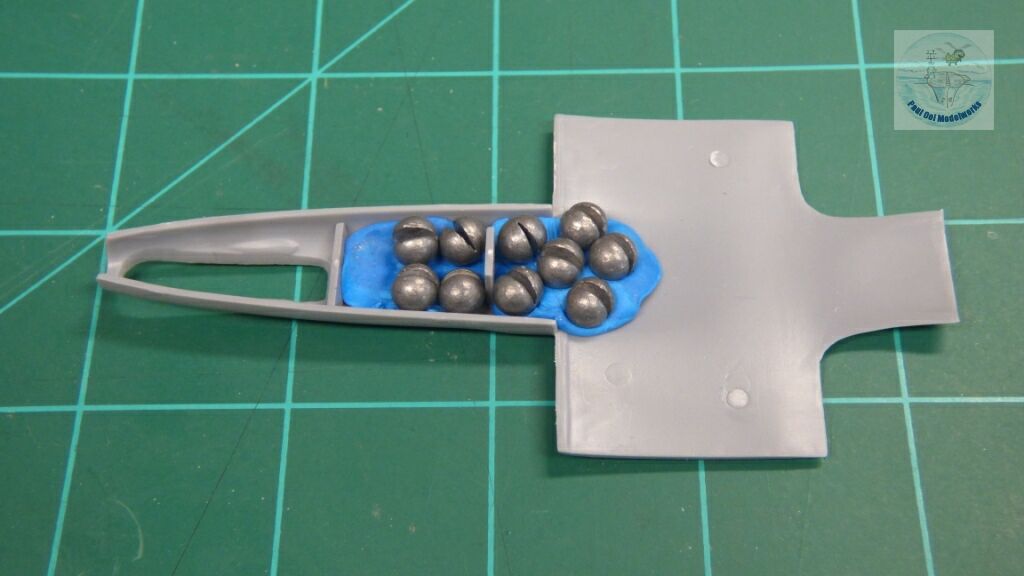
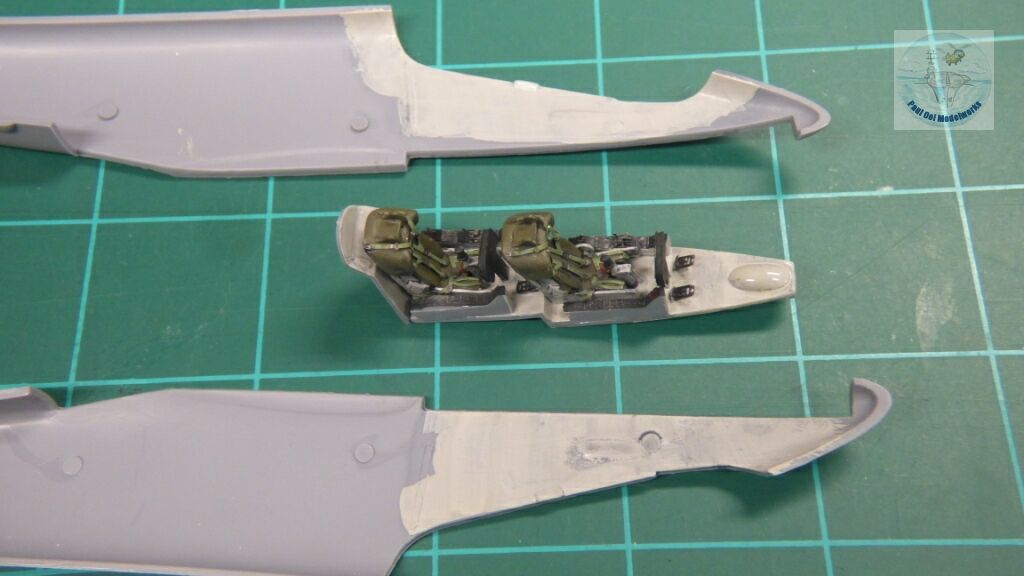
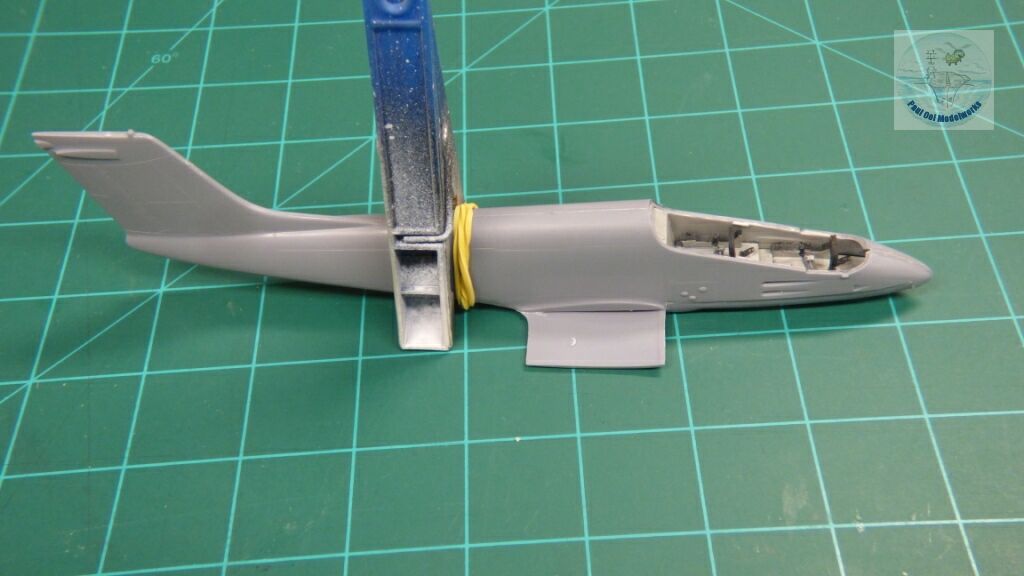
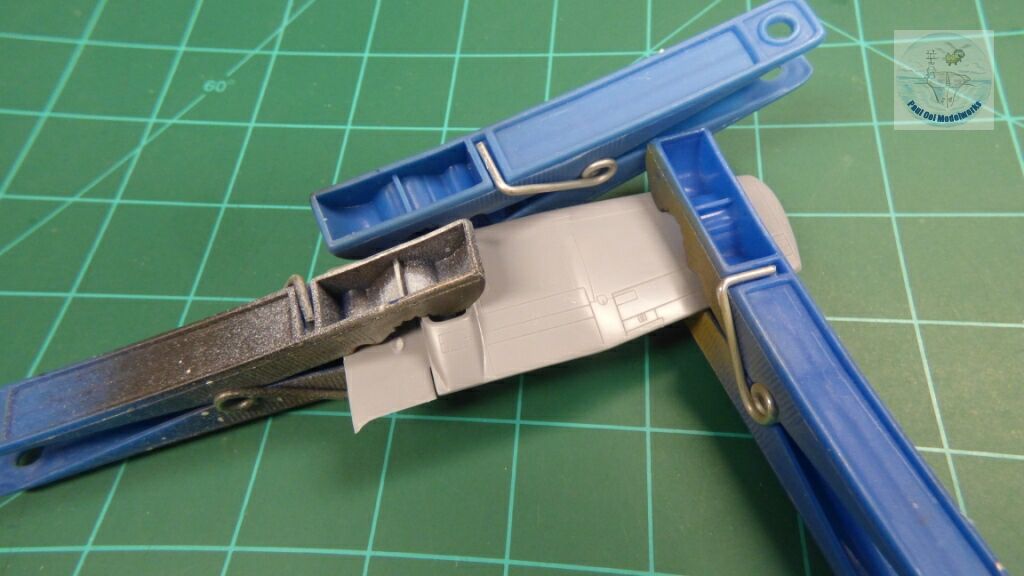
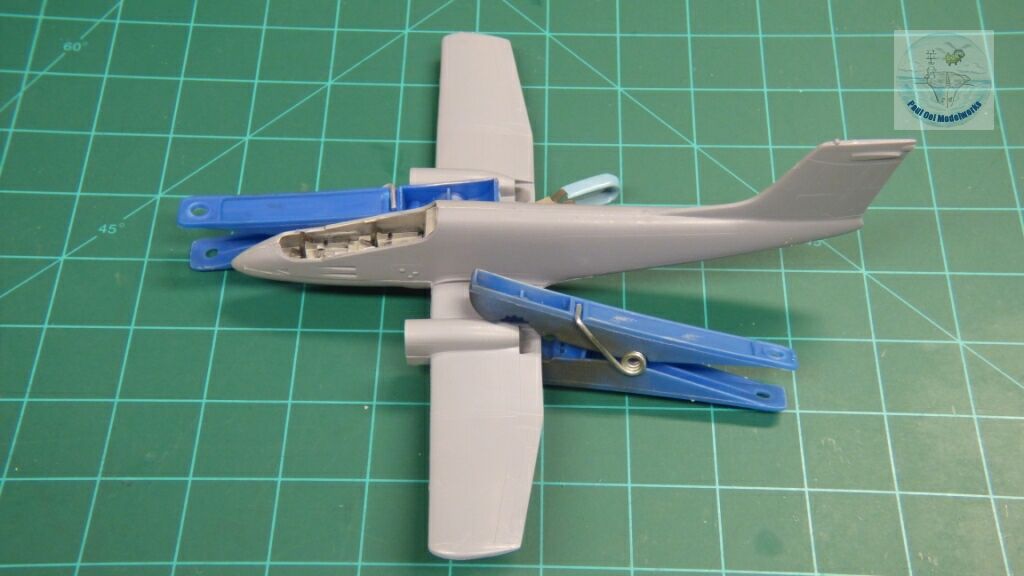
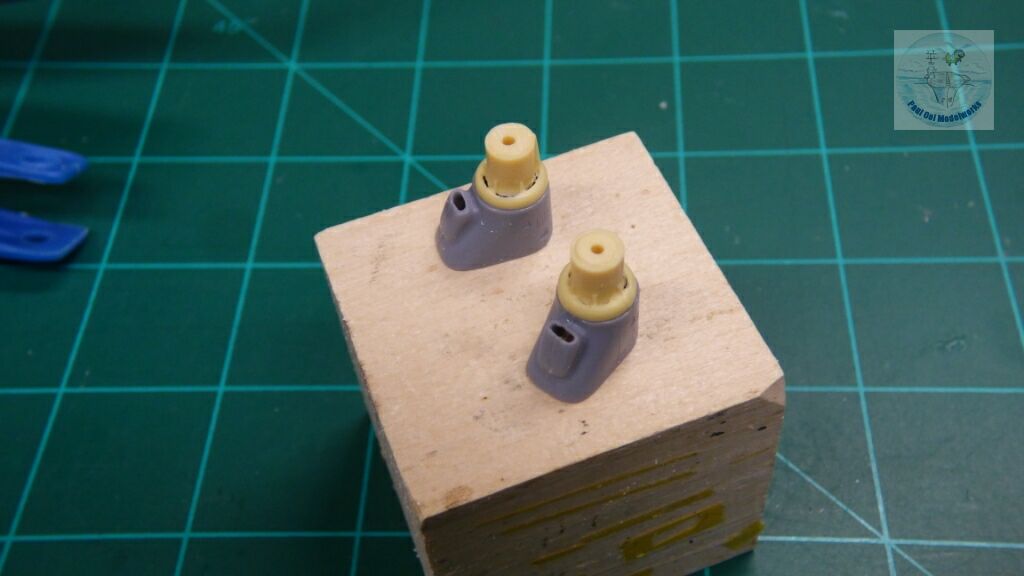
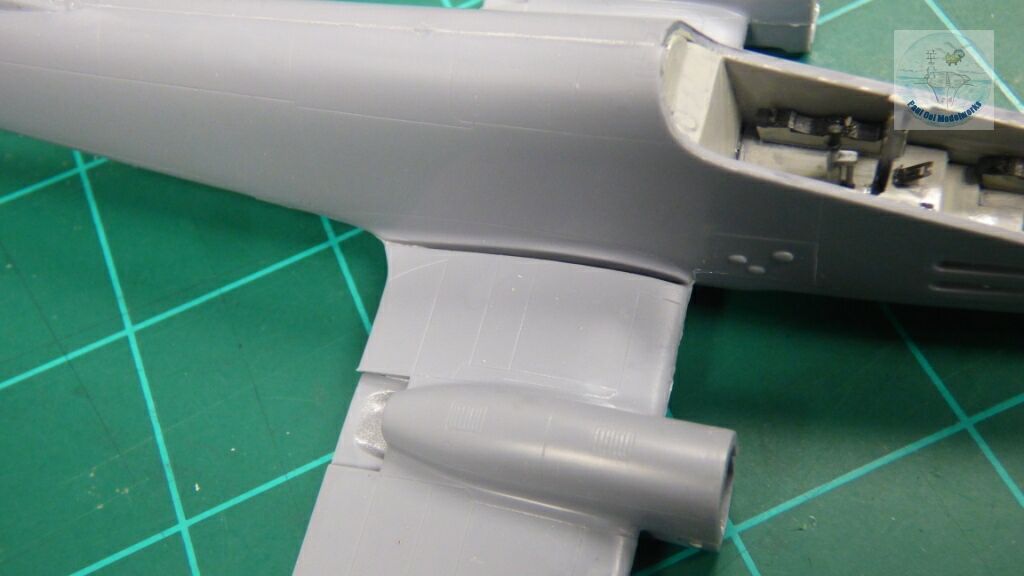
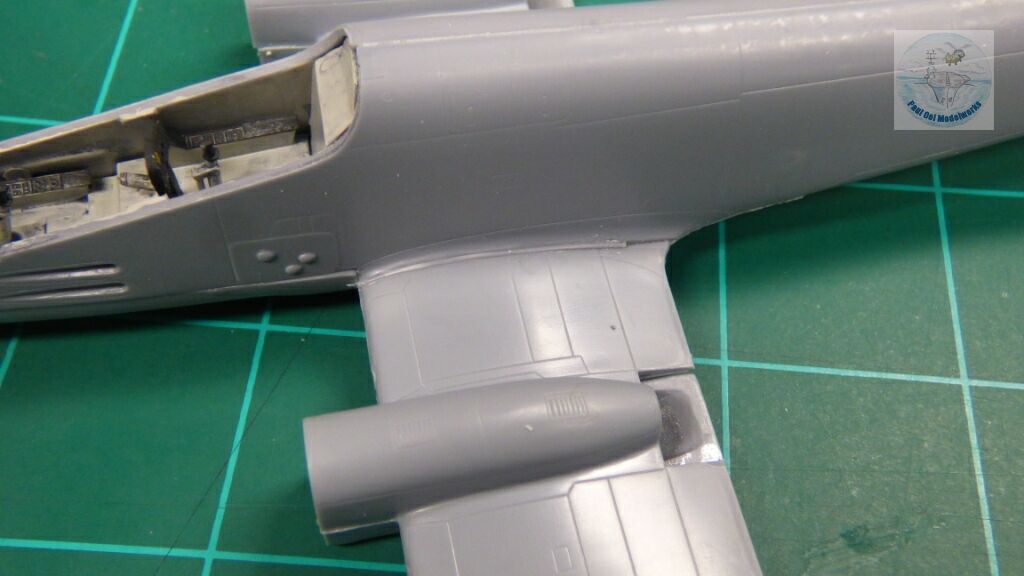
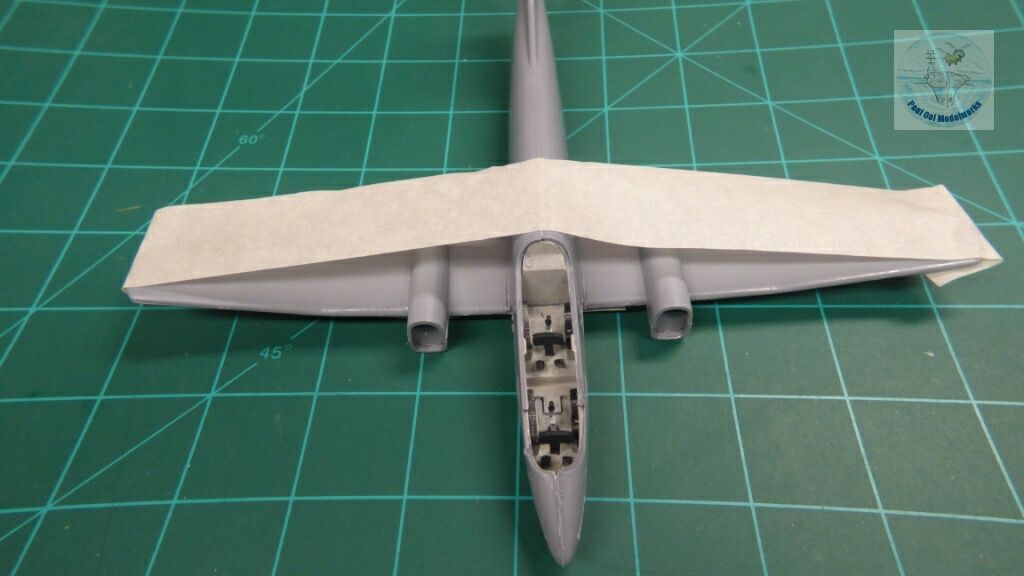
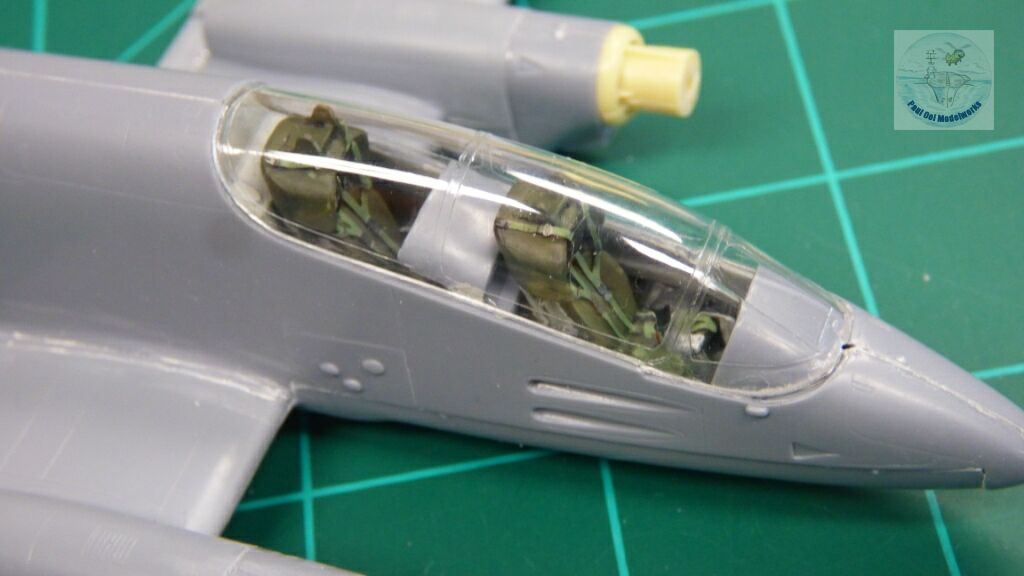
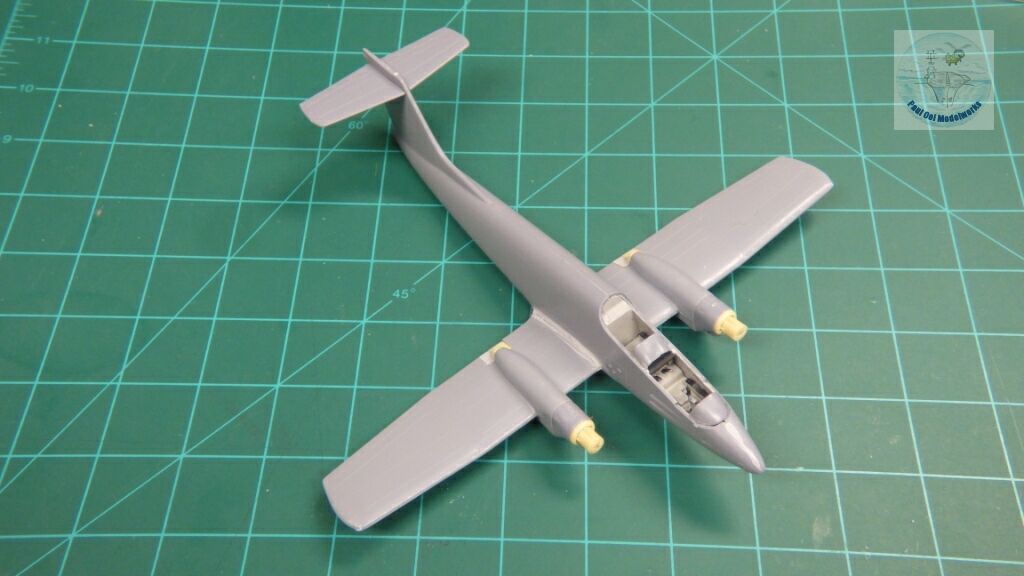
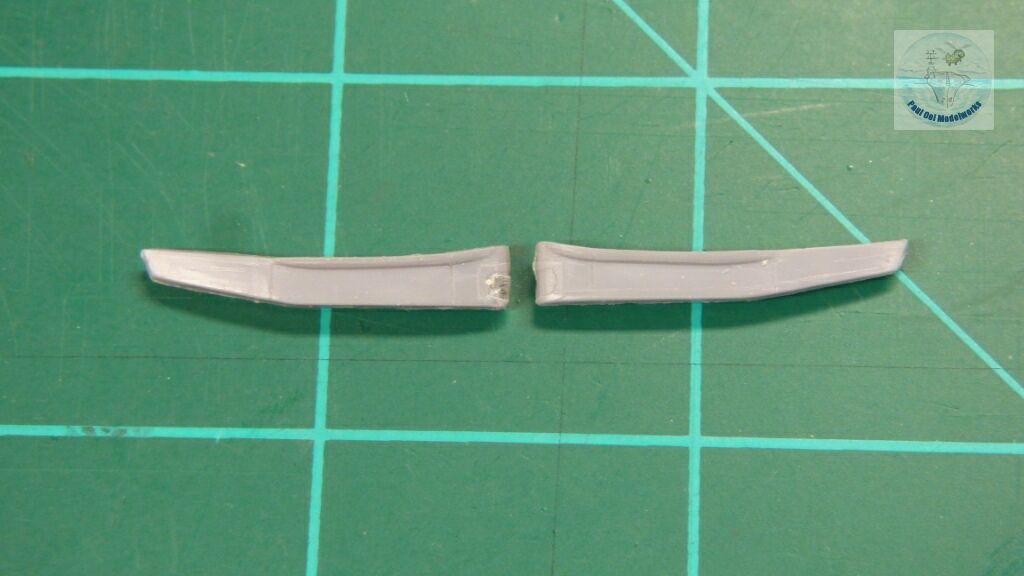
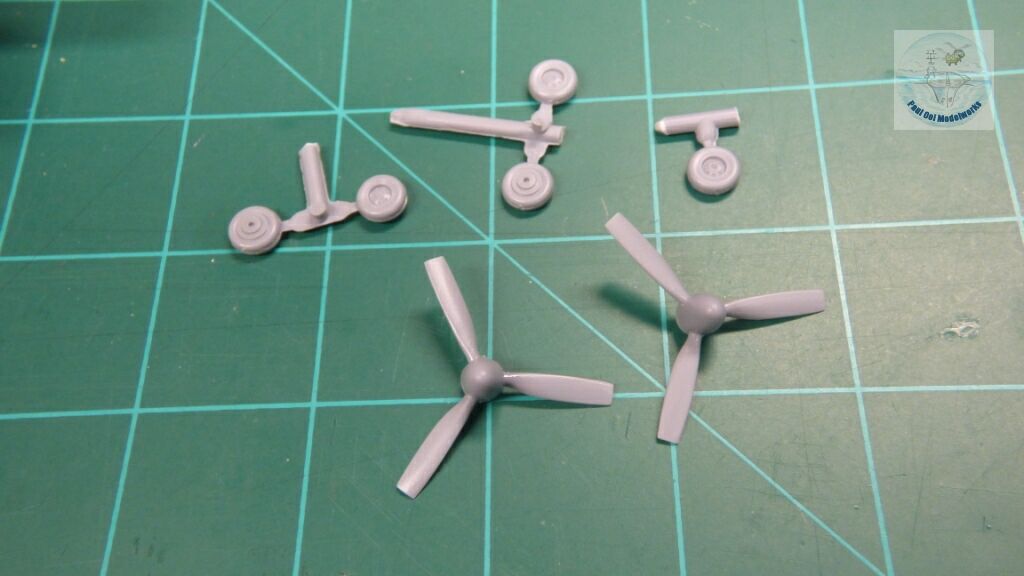
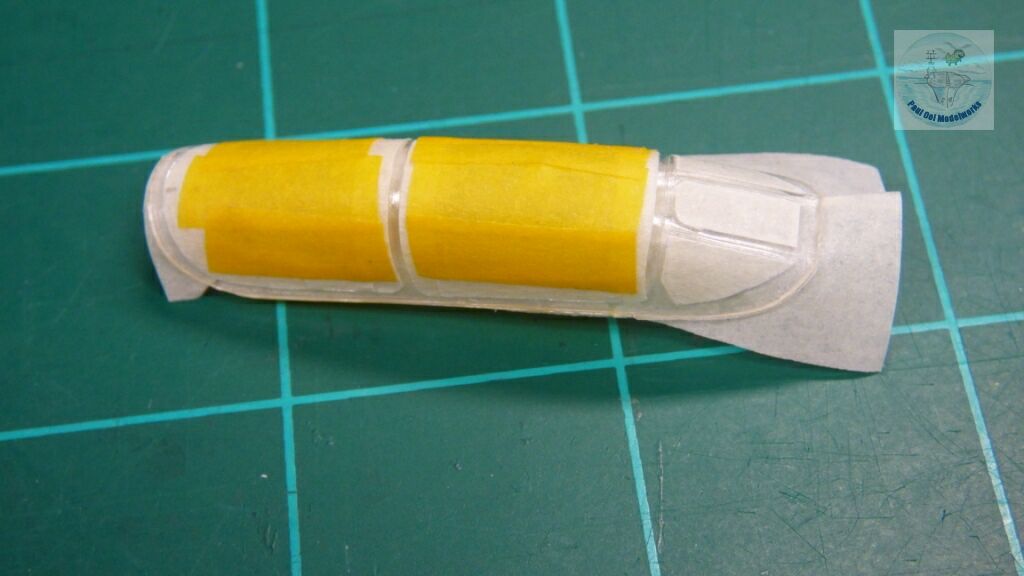
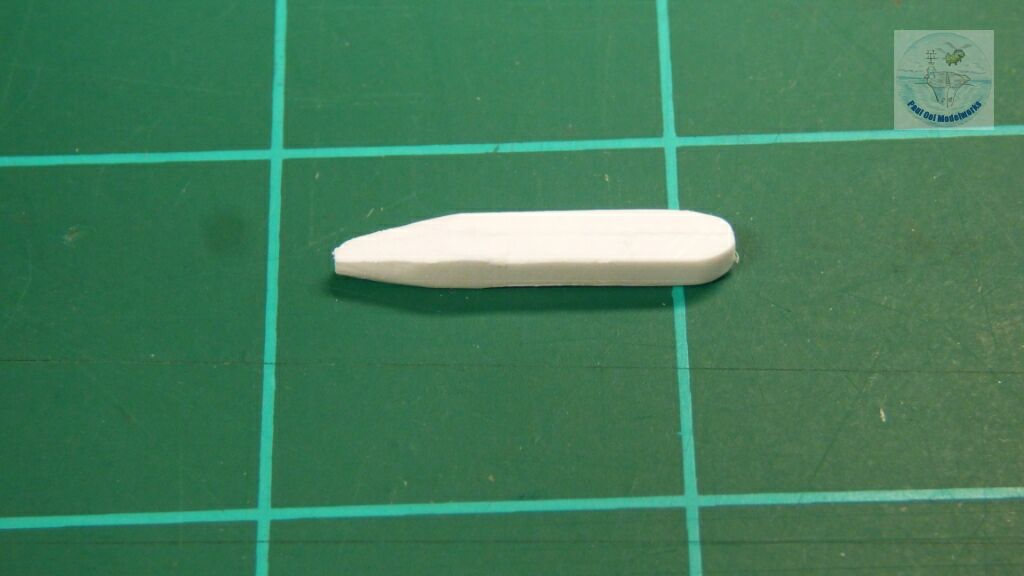
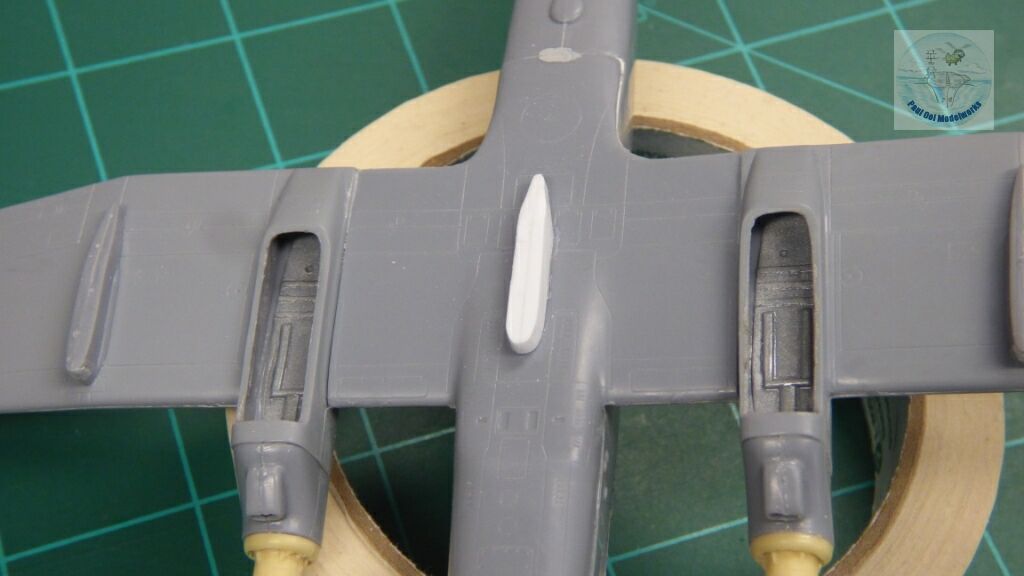
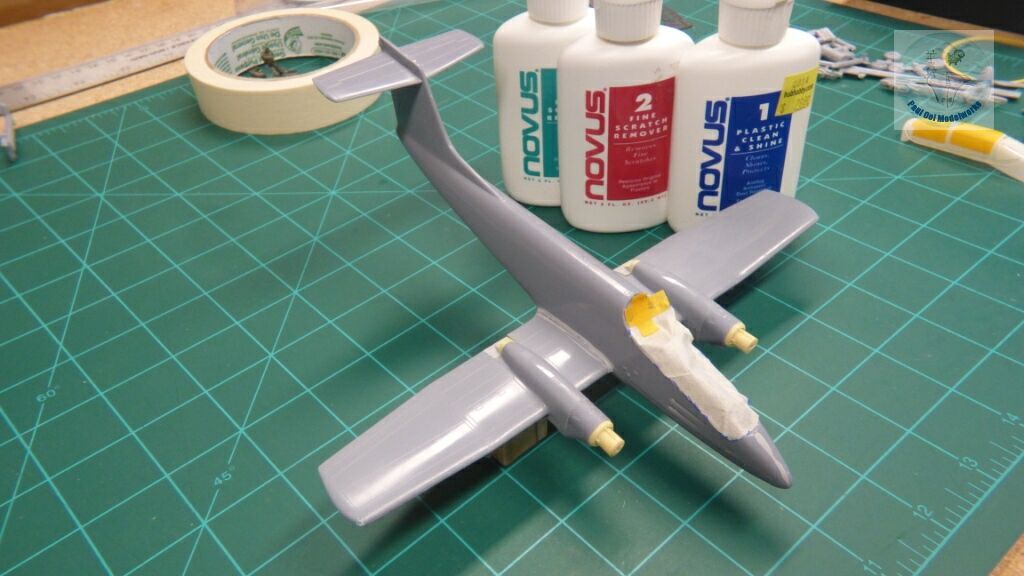
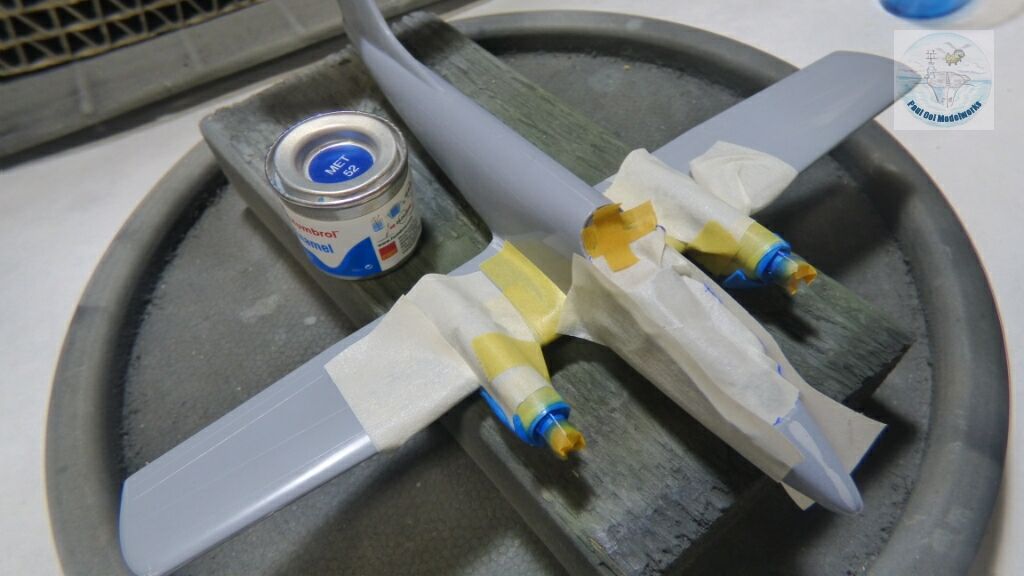
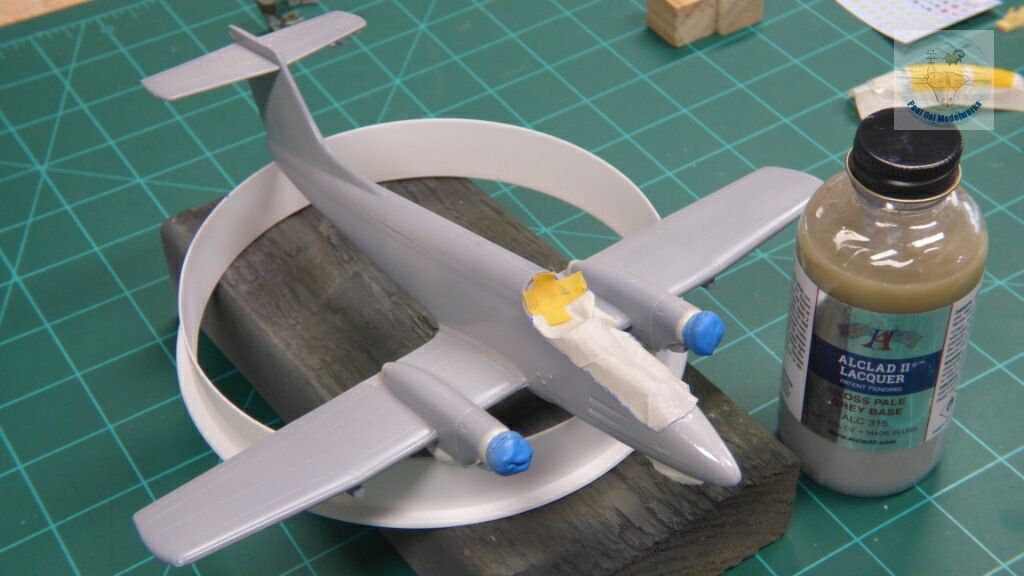
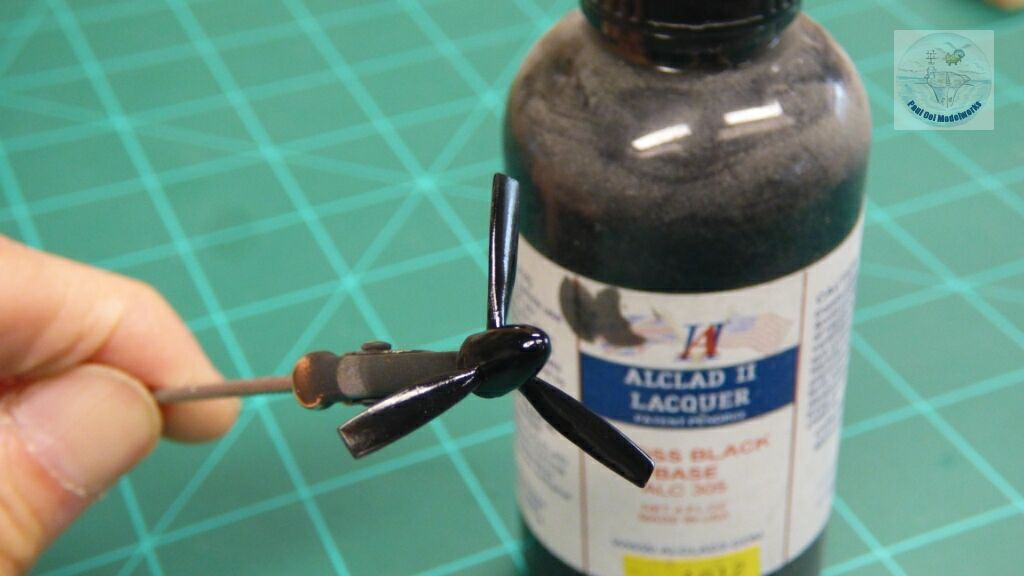
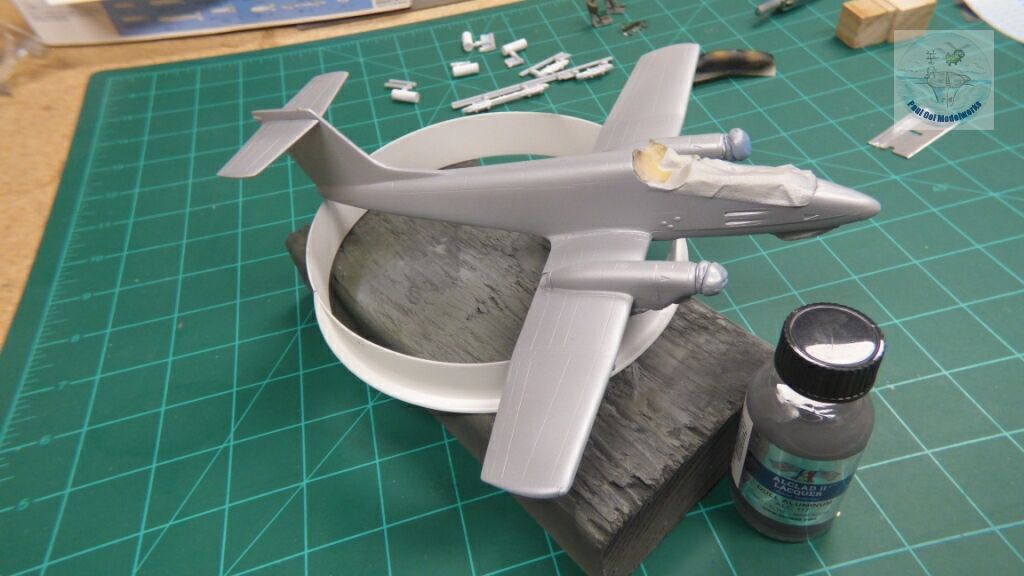
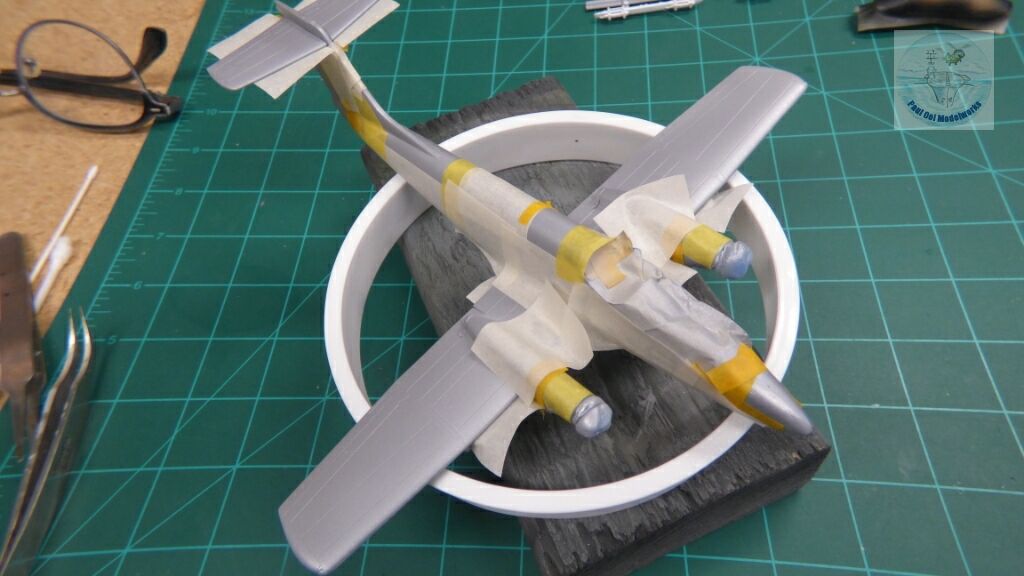
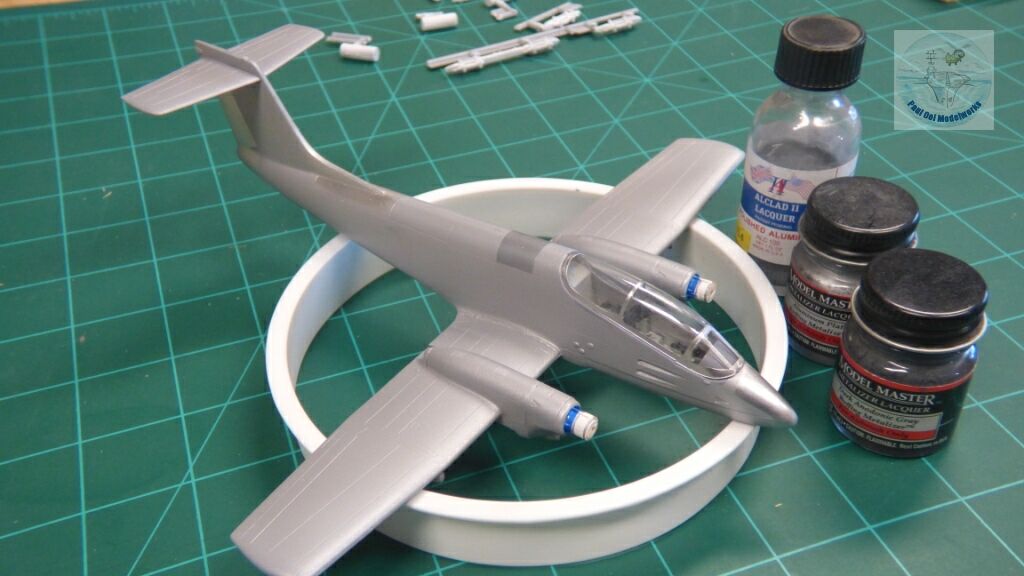
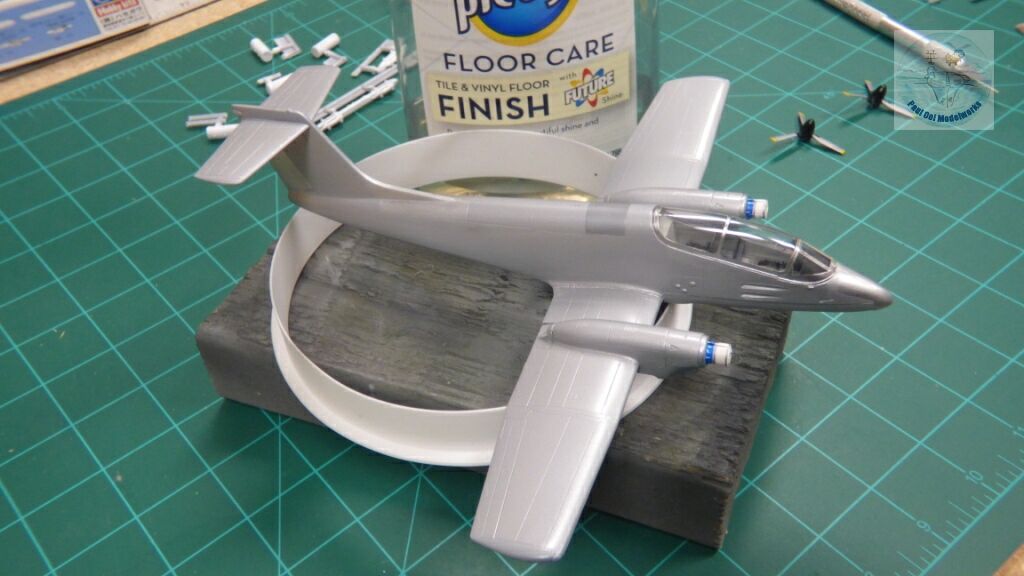
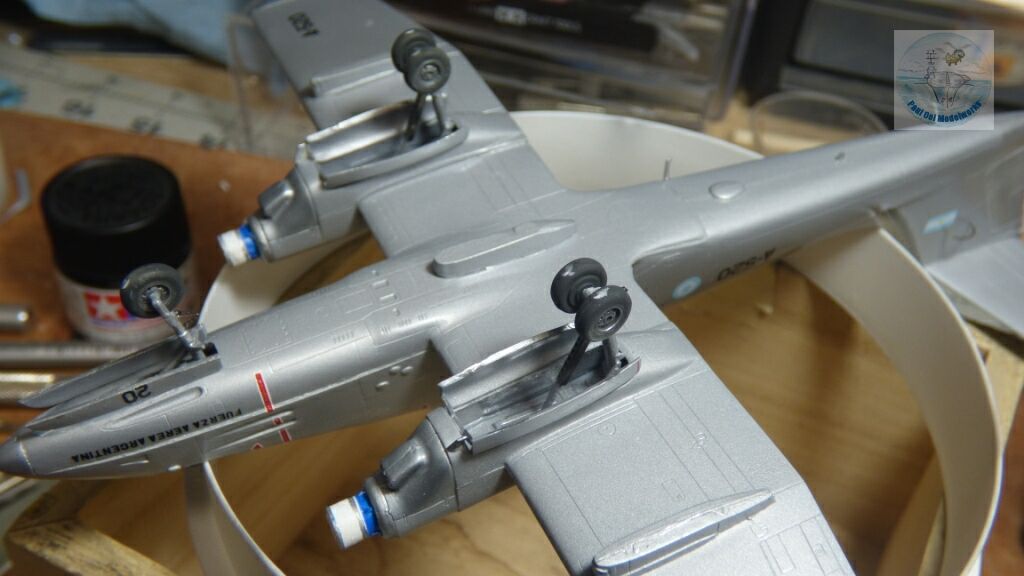
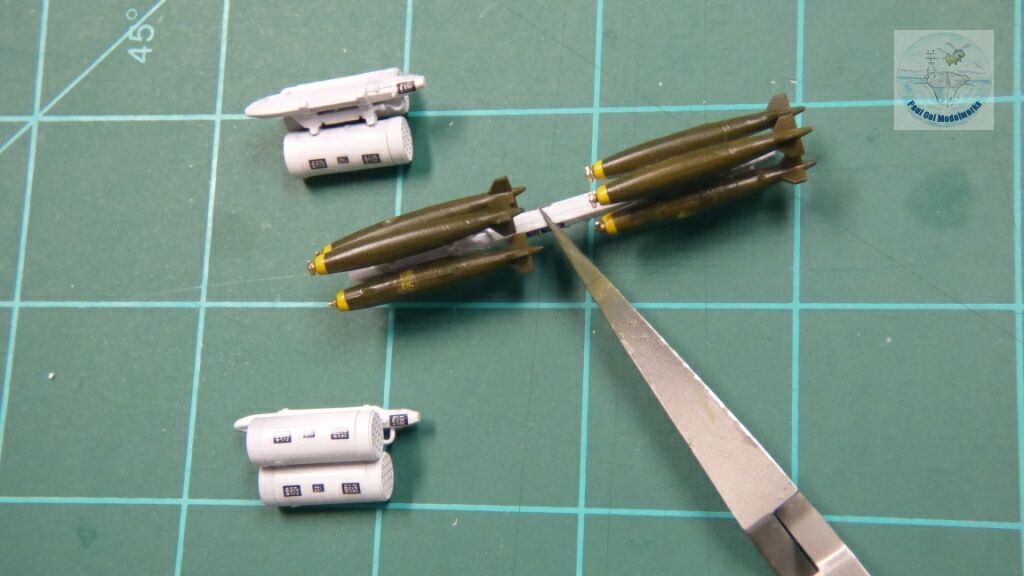
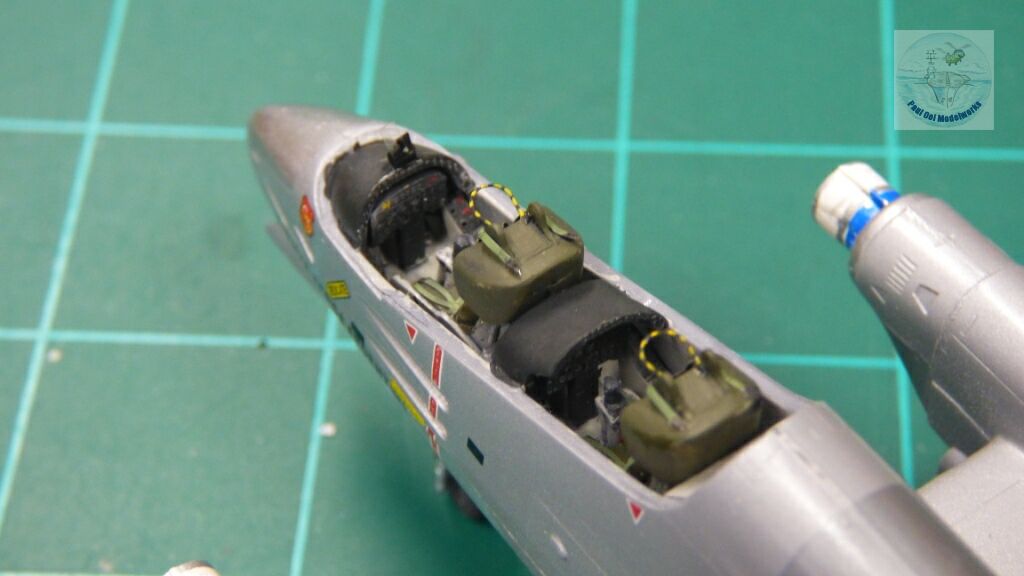
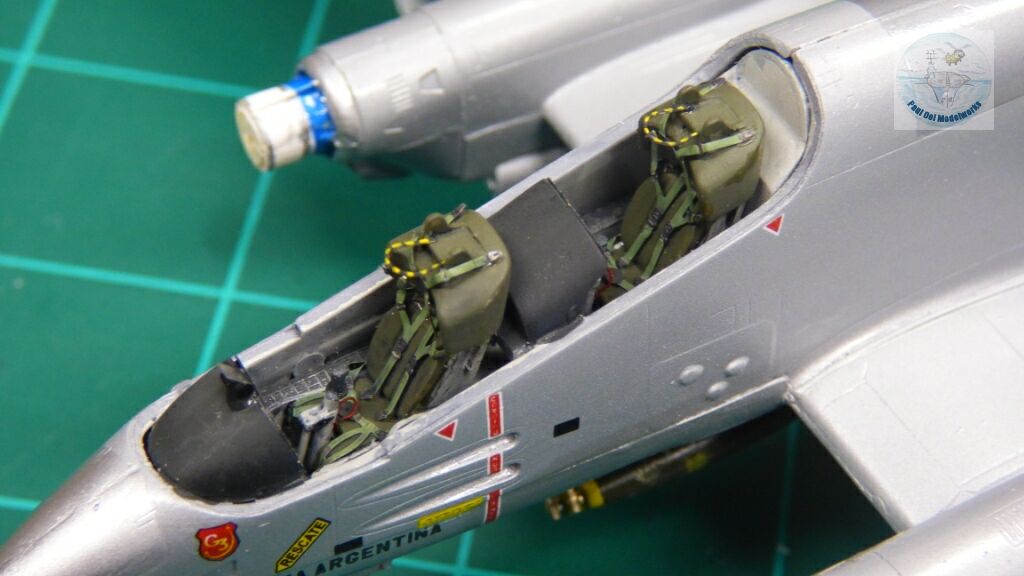
The 1/72 scale kit from Special Hobby (Czech) has been around for more than two decades. I bought this kit at a clearance event 15 years ago, and I had wondered whether to build with the green-brown camouflage or the bare aluminum skin finish. This kit is a short-run format, and includes resin and photoetch parts. The fit is very challenging and I would only recommend this kit for experienced modelers. Also, the kit itself did not include any bombs or rockets. To supplement this kit, I bought the Hasegawa Aircraft Weapons I for the racks, the bombs and the rocket pods. I finally opted for the bare aluminum finish of Grupo 3 de Ataque, Escuadrón Pucará Malvinas on Pebble Island.

We start with cleaning up the forward fuselage lower half tub, cutting off the ejector pins that would prevent a good fit.
Next I added as many shot weights as I could cram into the tub. Sadly, it still resulted in a tail-sitter. 🙁
The main cockpit sections have been prepared, with the walls painted in Aircraft Grey. The green ejector seats have not been glued on as yet so as to prevent damage during painting due to the mask over the cockpit opening.
The cockpit tub has been attached to the lower fuselage section.
The main fuselage section comes together. The fit is difficult and clamping has to be applied to keep the cockpit properly aligned.
The wing sections are also quite tricky, and require multiple clamps to hold in place.
The two wing sections are grafted onto the main fuselage. There are significant gaps at the wing roots.
The engine nacelles are built separately, with the resin spindles grafted onto the styrene sections.
Note the large gaps at the wing root. These have to be filled using the technique described in Tutorial 3.

Compress taping to reduce the wing root gaps and achieve the correct diahedral angle for the wings.
Checking the fit of the ejection seats and the injection-molded canopy.
The full fuselage and engines and T-tail fully assembled.
The wing pylons actually have these clear windows (sensors, lights?). I create these by cutting out the molded windows, graft in clear plastic blocks and sanded down. The one of the left has the clear block fitted in.
Propellers built. The blades have to be individually attached to the spindle. The orientation have to be carefully checked. The wheels halves have also been built.
The main cockpit canopy has been masked and prepped for painting.

To attach the central bomb rack, I scratch-built a bomb pylon (not included in the kit). I use plastic stock to build and shape these parts by using the wing pylons as templates.
To prepare the aircraft for the metallic paint, I use 3 grades of Novus plastic polish to get a clean, glossy plastic finish.
The engine nacelles have bands of Humbrol H52 Arctic Blue. I apply these first, and then mask over them for the main metallic paint application.
Alclad II Lacquer Pale Grey Primer is applied on the aircraft in two coats over 2 days. I sanded some rough areas between the first and second coats.
The propeller assemblies are similarly primed with Alclad II Glossy Black Primer.
Once the primer is fully cured, I spray Alclad II Dull Aluminum all over.

Once the Dull Aluminum has fully cured in 24 hours, I mask some panel sections. Alclad lacquer is very tough and can be masked over without stripping off with the tape. Some high polished sections are painted in Model Master Aluminum Plate, and some dark aluminum sections using Model Master Dark Anodic Grey.
Once all the metal panels have been finished, the aircraft is sealed in Future Floor polish.
Decals are applied.
The undercarriage struts are pretty fiddly and the attachment points are non-existent. Alignment has to be done by eye. Wheel well door have also been fixed (again, no attachment points)
More fiddly bits, this time the bombs and rockets on their racks.

Ejector seats and final cockpit details before closing the canopy.


Adding all the fragile bits onto the aircraft exterior. I had to use a wood block to prop up the rear of the aircraft as despite the weights, I have a rare tail-sitter.
To bring out the panel details and weather the aircraft, an oil wash of Payne’s Grey is applied. I also replaced the tail light with a clear plastic cylinder painted clear red. The navigation lights on the port and starboard wing tips have also been replaced with clear blocks sanded to shape and painted in clear red and green respectively using the method from Tutorial 12.
Using a fine airbrush setting, a thin 50:50 mix of Tamiya XF69 NATO Black and XF-64 Red Brown is applied to points where exhaust soot buildup, and oil stain streams from the engine cover the wings.
With the stretched sprue lines attached, the aircraft is ready to be mounted.
A circular base with autumn shade grass and yellow grass stalks are applied to the dark brown dirt color.
Two crew figures are added from the Italeri 1/72 NATO aircrew kit.
The Pucará is back on the Pebble Beach airstrip. Just in time for April 2nd.

March 8, 2026 · Leave a Comment

Previous Post: « Light and Mighty Tanks of WW2 – Soviet T-70M and ZiS-3 Field Gun from MiniArt
Next Post: Light and Mighty Tanks of WW2 – M24 Chaffee at the Gothic Line from Italeri »

Reader Interactions

Leave a Reply Cancel reply

Your email address will not be published. Required fields are marked *

Primary Sidebar

Hey! It is nice to meet you!

Paul Ooi Modelworks welcomes casual visitors browsing, and enjoying the pictures as well as more serious fellow modelers looking for tips and references on the art of making miniatures and relishing in the challenge. I will be more than happy to answer any questions you may have about the models.

Please feel free to leave a comment or a question.

  • Email
  • Instagram

NEVER MISS A POST

Member of International List of Scale Model Related Web Sites

International List of Scale Model Related Web Sites

Paul Ooi Modelworks

NEVER MISS A POST

Sign up for notification on new posts.

Footer

  • Email
  • Instagram

Categories

  • Privacy Policy
  • Disclaimer
  • Copyright

© 2011–2026 · Paul Ooi Modelworks · All Rights Reserved