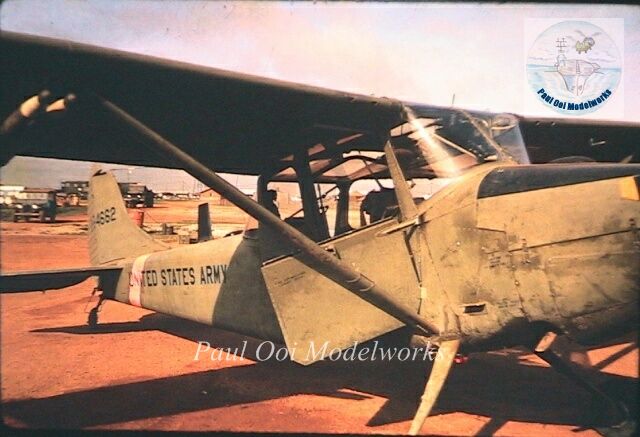
The Cessna Bird Dog was as central to the US war effort in the Vietnam War as were the more iconic aircraft like the Bell Huey and B-52’s. Between 1965 until the end in 1975 (operated by the ARVN), the Bird Dog flew thousands of sorties over the battlefields and rear areas. The intrepid little flyer hovered over the jungle terrain, calling out airstrikes, locating downed pilots, probing for enemy positions, spotting for ground units and even occasionally taking the fight to the enemy with rockets and M-16 a-blazing.
Adapted from the successful commercial Cessna 170, the Bird Dog was received by all arms of the US armed forces. Many soldiered on in many countries and some made the transition back to civilian use, buzzing around airshows to this day. The Bird Dog was rugged, being able to operate out of simple airfields, and takes a lot of punishment. This made it suitable for counter-insurgency and low-enforcement use. In many ways, one could say this is the “Little Plane That Could”.
Gallery:


Construction Notes:
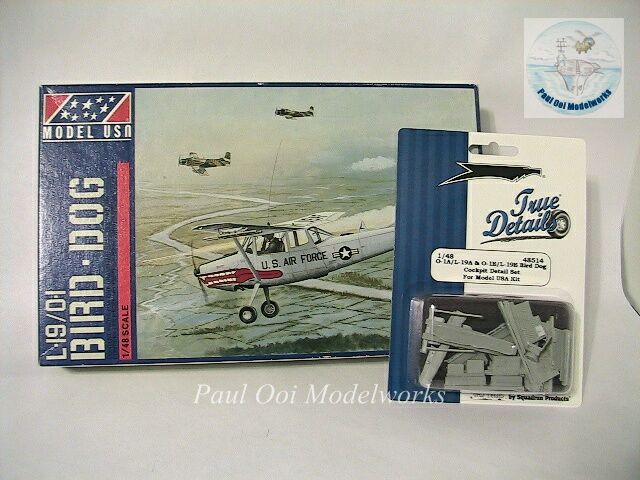
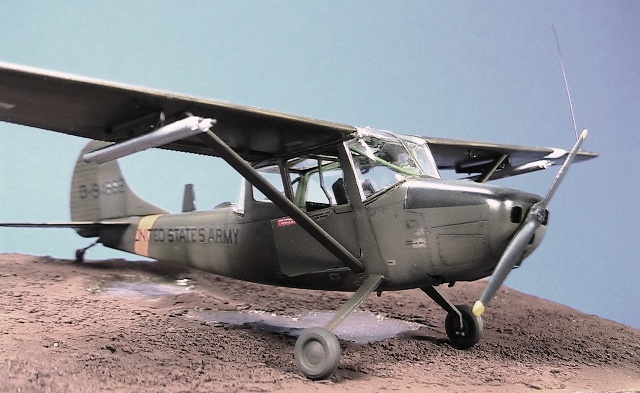
The model kit for the Bird Dog is itself a very rare bird today. When I was asked to build this model, it took quite a bit of hunting to locate this discontinued 1/48 kit from Model USA from 1988. The only other option was the 1/72 scale Airfix kit that is also pretty long in the tooth as far as kits go. Happy with the Model USA kit, I was delighted to find a Fine Details resin aftermarket interior details set online. The latter went a long way to sprucing up the kit interior. The plastic kit had mold distortions that required some arm wrestling plus the decal sheet, while detailed had suffered from age. All the better for a challenging build!
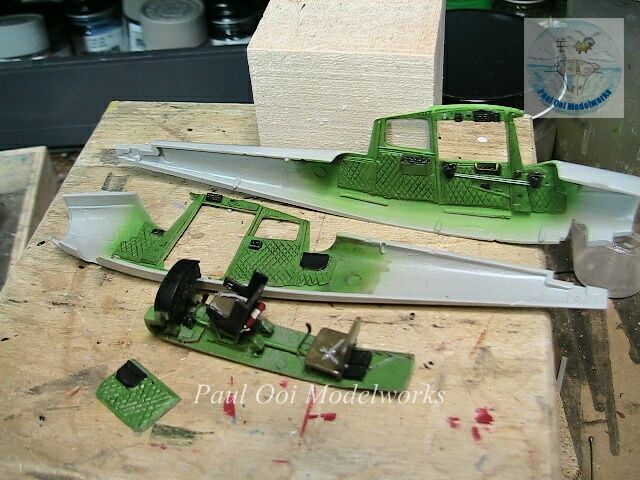
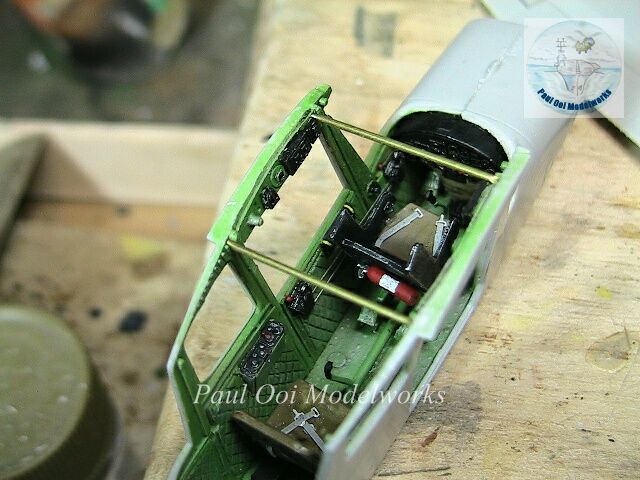
We always start with the main office, so the interior work is our first stop. In order to fit the resin inserts to the wall panels, the kit interior had to be carefully scrapped away and thinned down so that the new panels will not sit proud of the surrounding features. Once fitted (and they do fit nicely), the interior was given a coating of green zinc chromate. Some sources described interior panels as light grey but my research on Vietnam War era pictures of the field spotters tended to favor the green finish.
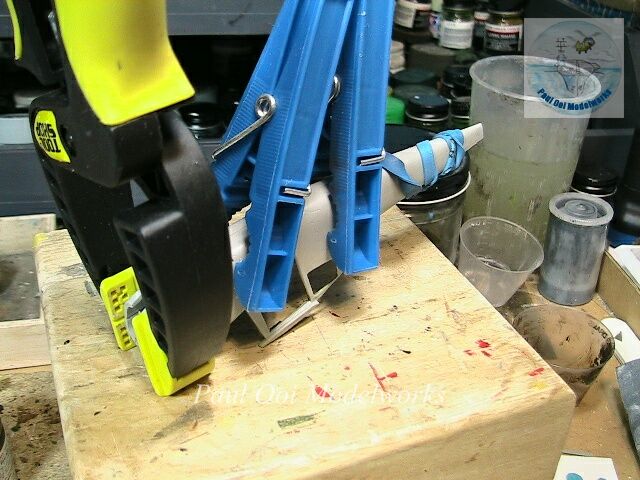
Now comes the hard part. As mentioned earlier, the fuselage halves were distorted and bowed from front to tail. When joined, the tail section separates like a swallow’s tail. It is either that, or if the tail is pressed together, gaping holes appear at the nose section. In order to get this just right with the interior details fitted together, I started from the middle, making sure that the dry fit was right before applying any glue. Then I work my way away from the center, clamping as I go until both halves are securely pressed together and clamped tightly. Once liquid cement cures, the fuselage is secure.

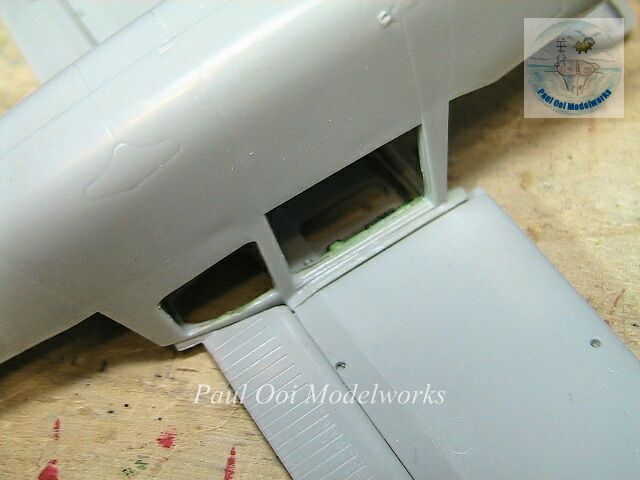
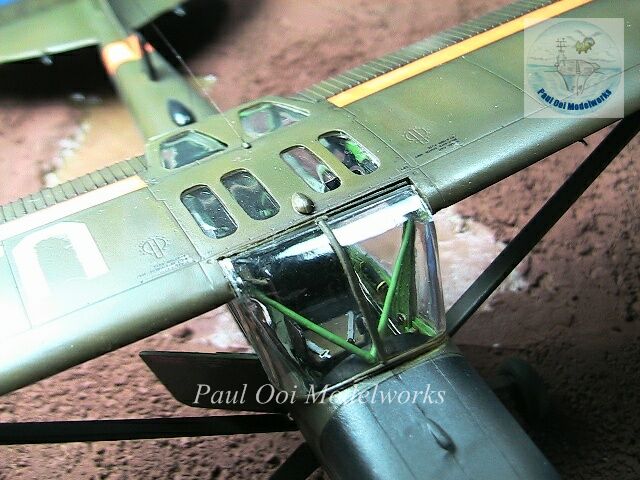
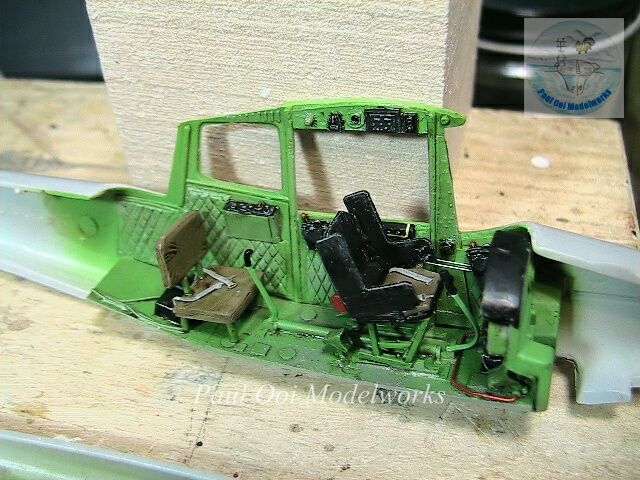
Once the fuselage had bonded together and the seam properly sealed, we deal with the next major problem. When the cockpit gondola section is fitted against the wing opening, I could see a gap approximately 1/4″ (about 6mm) between the fuselage and the wing. The gondola opening is warped in such a way that the opening is narrower than it should be. To fix this, I fashioned two brass wire struts from .8mm brass rods each measuring about 21mm. These are carefully used to gently force open the upper gondola surface until we have a good seam between the fuselage and the wing.
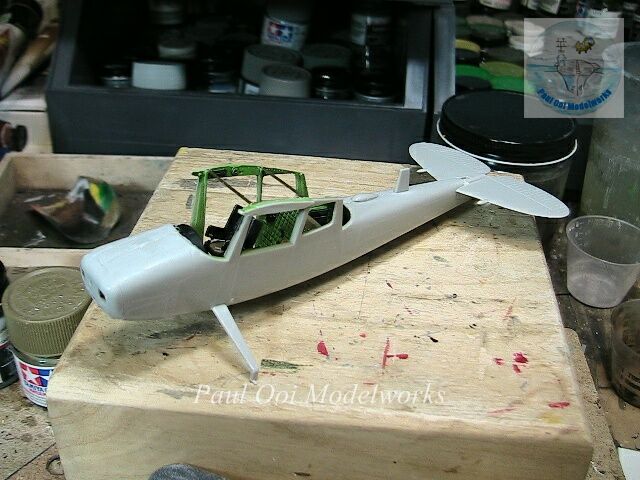
With the fuselage now in more or less proper shape, I attach the tail section and start to tidy up the fuselage seams. There is quite a bit of seam work as I had mentioned earlier that the two halves tend to have clamshell type problems. Nothing that cannot be resolved with some strategic placement of clamps and gentle persuasion.
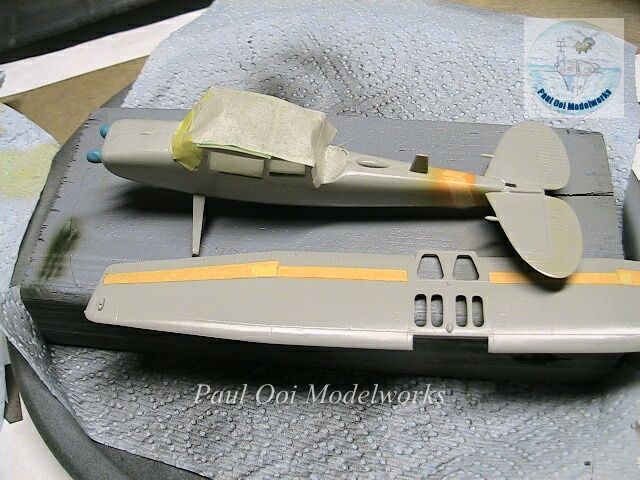
To prepare for the spray booth, the cockpit gondola (without any of the glazing) is properly sealed with masking tape. The way this aircraft assembles, the wing needs to be painted separately from the fuselage. The arrangement of the glazing are such that attaching them to the fuselage and wing section before painting makes for a difficult masking job. The first color applied is fluorescent orange, Tamiya X-6 on the upper wing and fuselage tail band regions. The next is the anti-glare black panel over the nose.

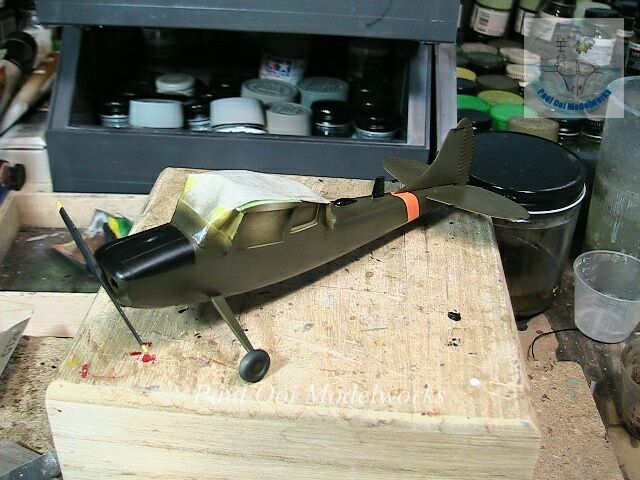
After those two other colors have been properly masked off, I apply Tamiya Olive Drab XF-62 lightened with XF-2 Flat White (about 20%) for scale effect.Then the paintwork is sealed off with Future Floor Polish.
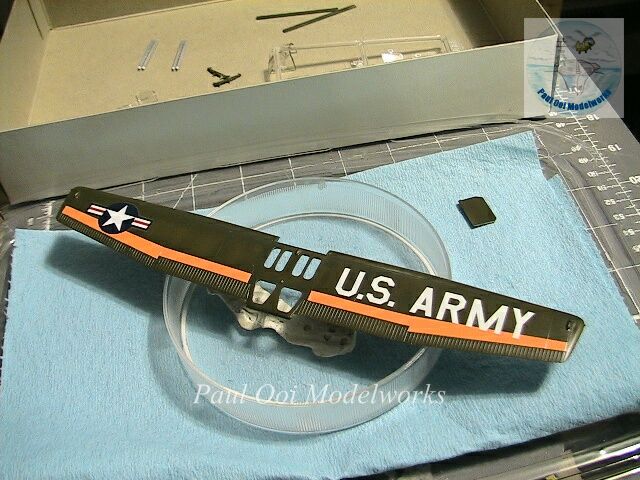
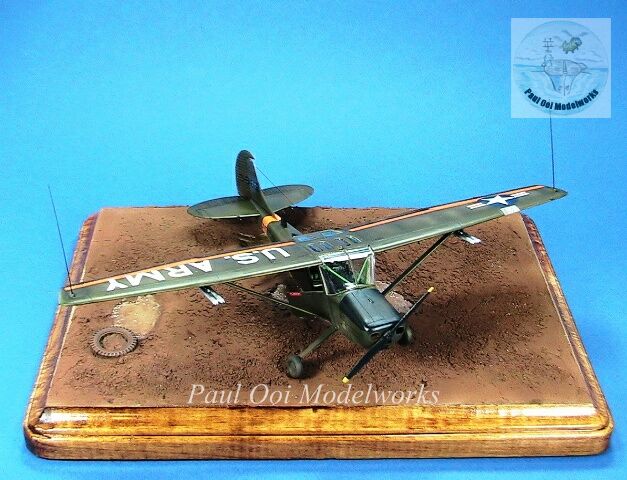
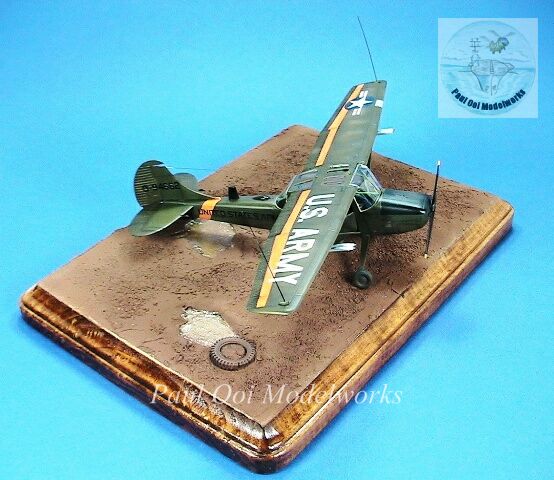
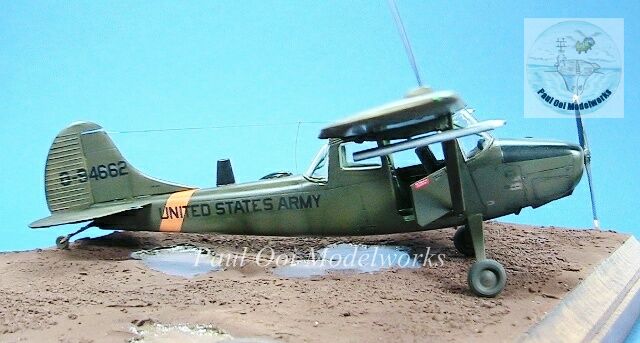
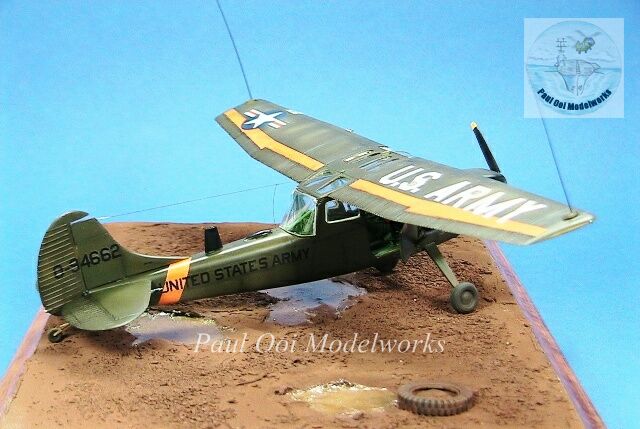
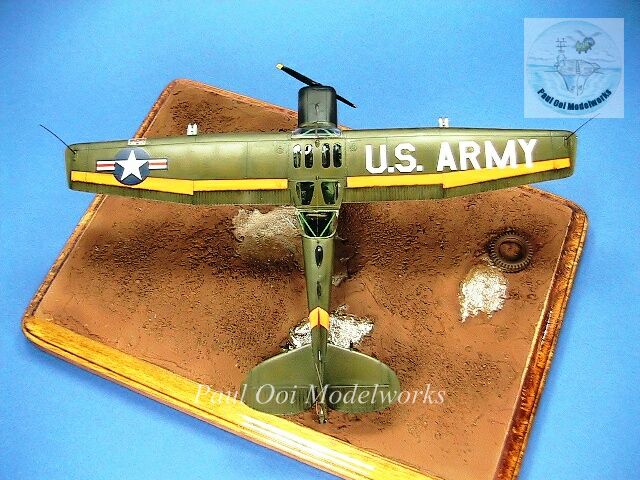
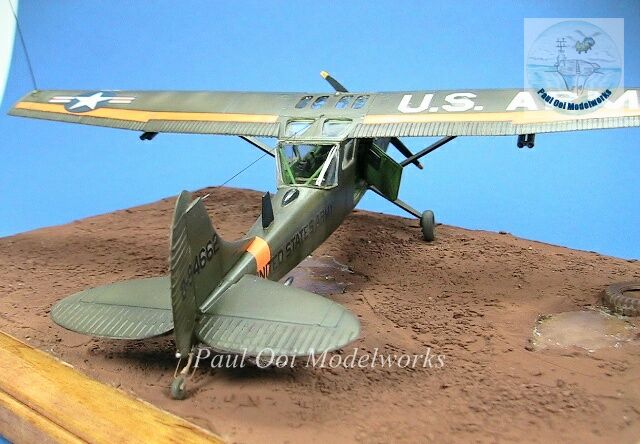
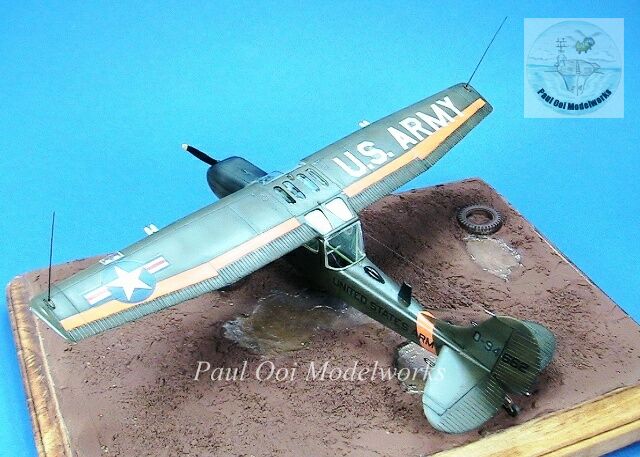
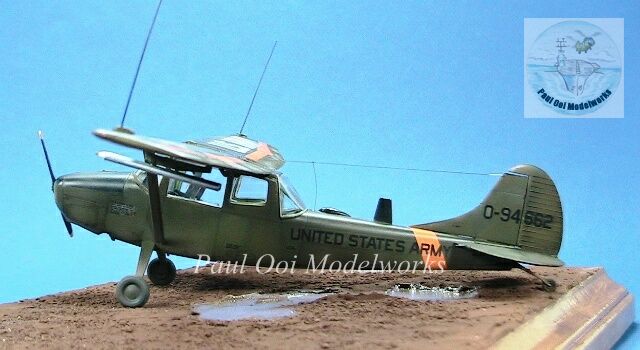
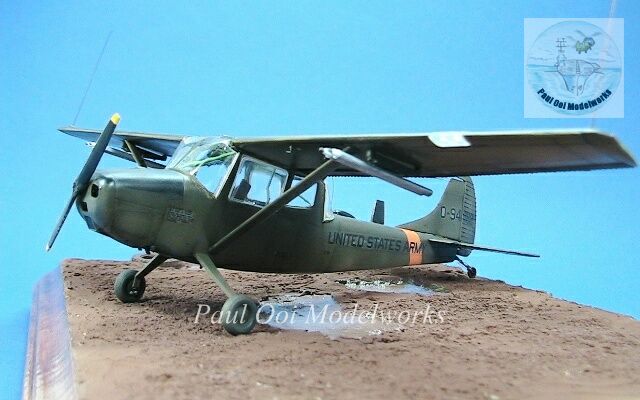
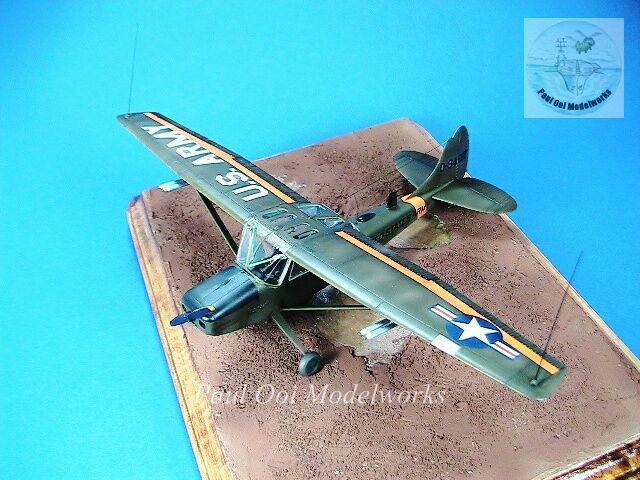
Then the customized decals are applied onto the aircraft. The 45 degree white and black lettering decals came from my surplus decal box. The stenciling and national star-and-bars came from the original kit. The marking for the fuselage were from the visibly toned down ones used in 1966 after the initial US deployment used highly visible orange, white and yellow marking from the State-side units. In 1966, the upper wing markings still retained the white and orange markings to help incoming jets to spot the position of the Bird Dog. In later years, even these were left off as covert missions into Cambodia and Laos pretty much stripped the Bird Dogs of their colorful plumage.
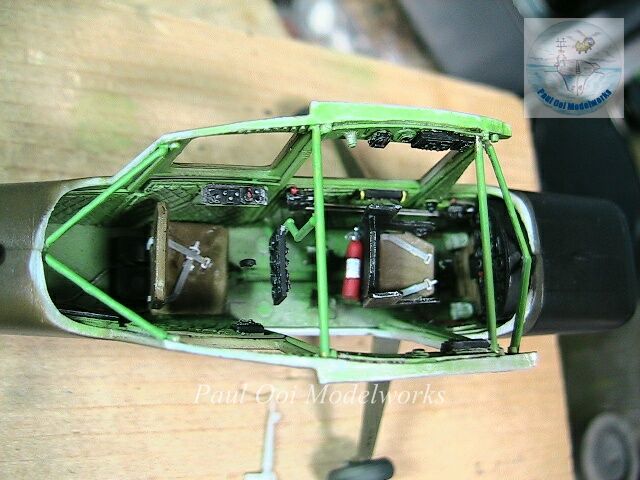
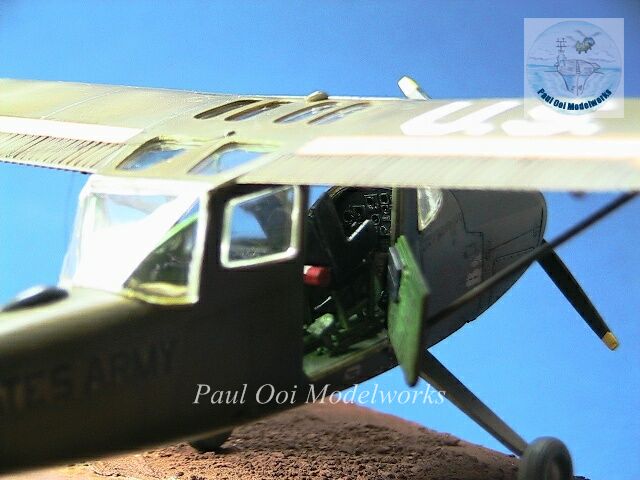
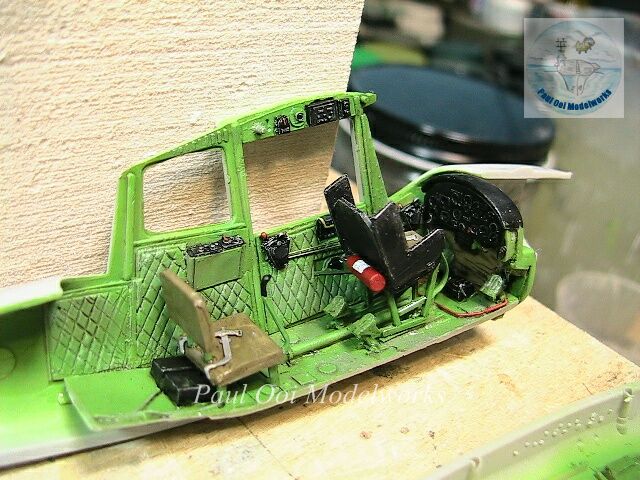
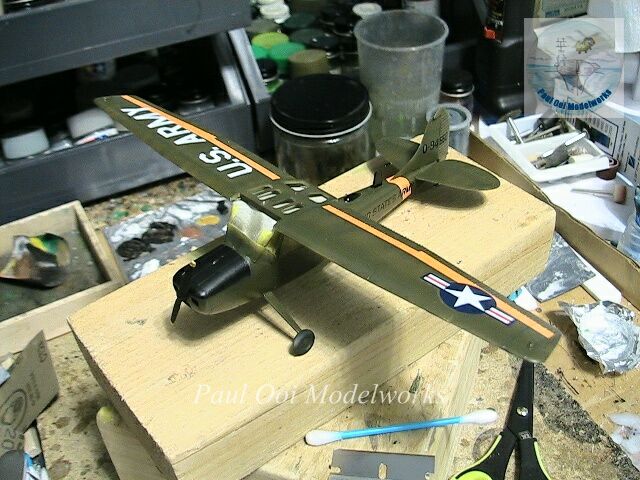
One last check as all remaining small details are installed inside the cockpit gondola, including the pilot’s M-16.
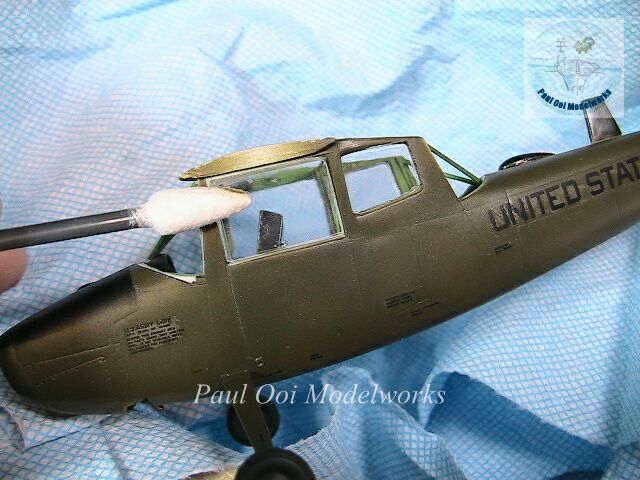
Then I attached the glazing onto the gondola. This is tricker than it sounds because the way the kit was made, these clear parts do not fit well to the openings and a lot of sanding down and seam-filling had to be done.
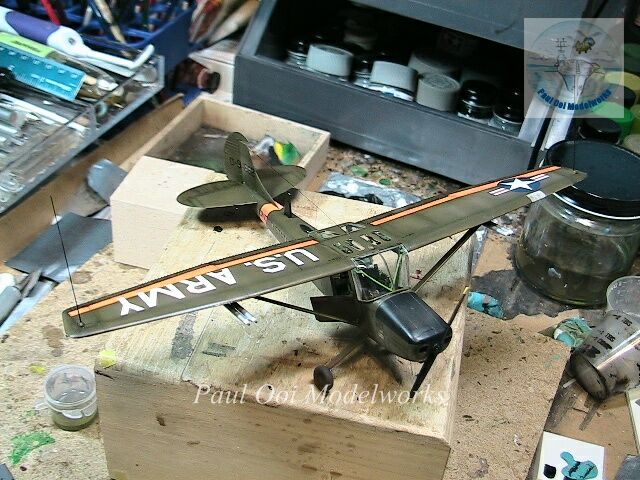
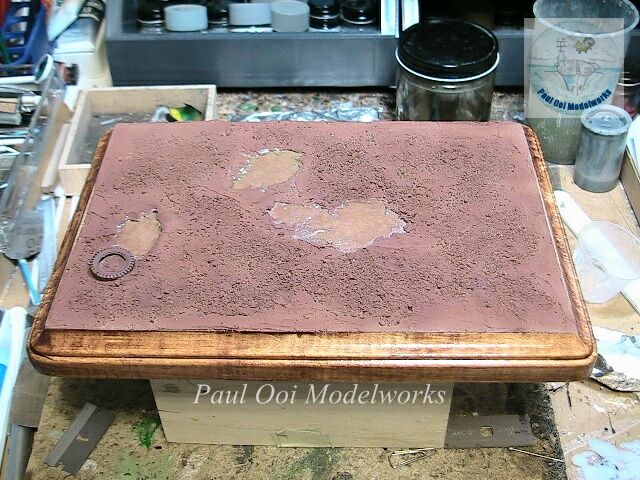
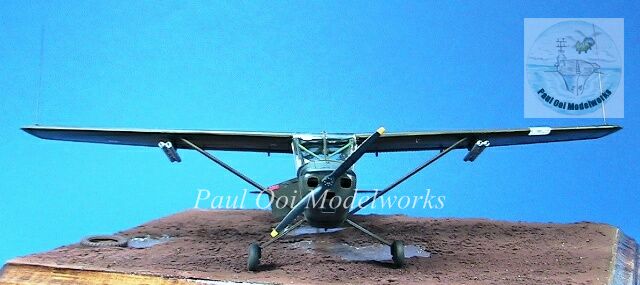
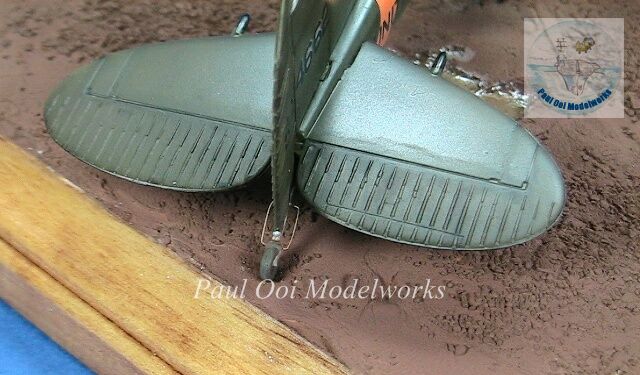
The wing is then installed onto the aircraft, and once the sections were firmly attached, final detailing can be added. Those “killer Prisma color pencils” fitted to the wings are actually aluminum tubes with rockets in them. These are used to mark enemy targets and also for suppressing action. I added the pitot fitting, aileron counter weights and stretched sprue antennae. A final dusting of NATO Brown and Dark Brown for weathering effect, especially around the landing gear and we can mount this little fella to the display base complete with the red brown dirt field of Phu Loi and sloshy puddles.
Where can I get a model. I taught the bird dog at fort Rucker and work on the in Vietnam on 3 tiurs
Hello Chuck,
Since the time I built this kit several years ago, there are now more choices in the market. Roden makes the Bird Dog in 1/48 and 1/32 now, plus lots of aftermarket decals.
https://store.spruebrothers.com/product_p/rod409.htm
https://store.spruebrothers.com/product_p/rod619.htm.
Good luck with your inquiry.
Paul
CW4 (Ret). I Flew the 0-1 Bird Dog out of Phu Loi June 69 to June 70 with the 74 RAC (Recon Airplane Co ). Call sign Aloft – 44. Would love to have a Model
like that.
Hello Richard, Thank you for your service in Phu Loi. Roden makes a detailed 1/32 scale model that is easier to build than the one I did. You can still find it on Amazon.
Paul