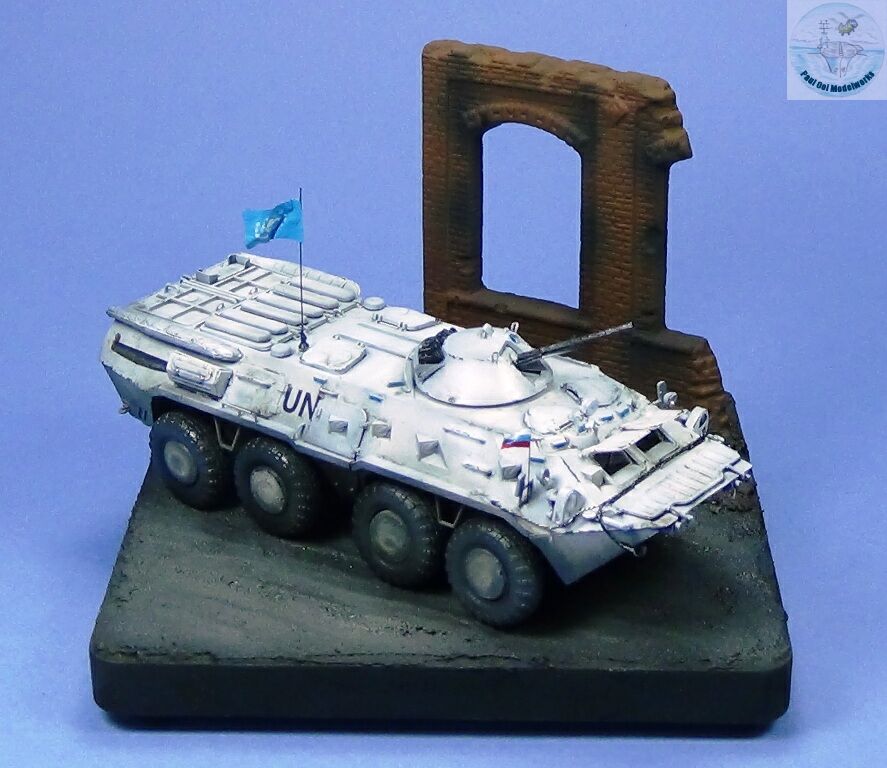
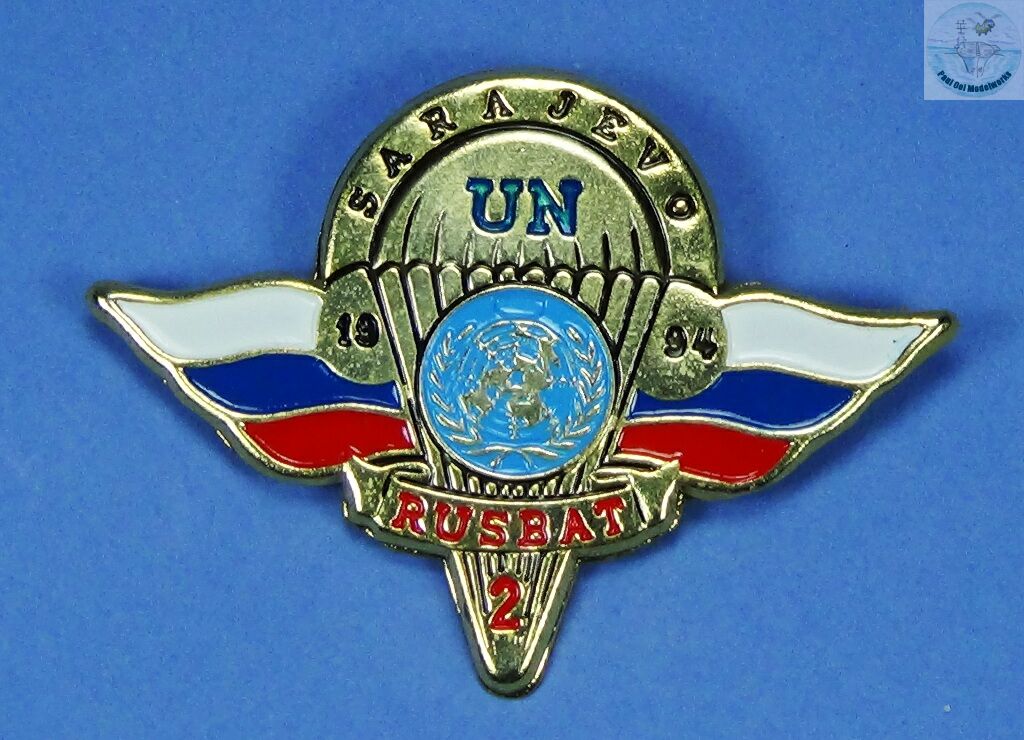
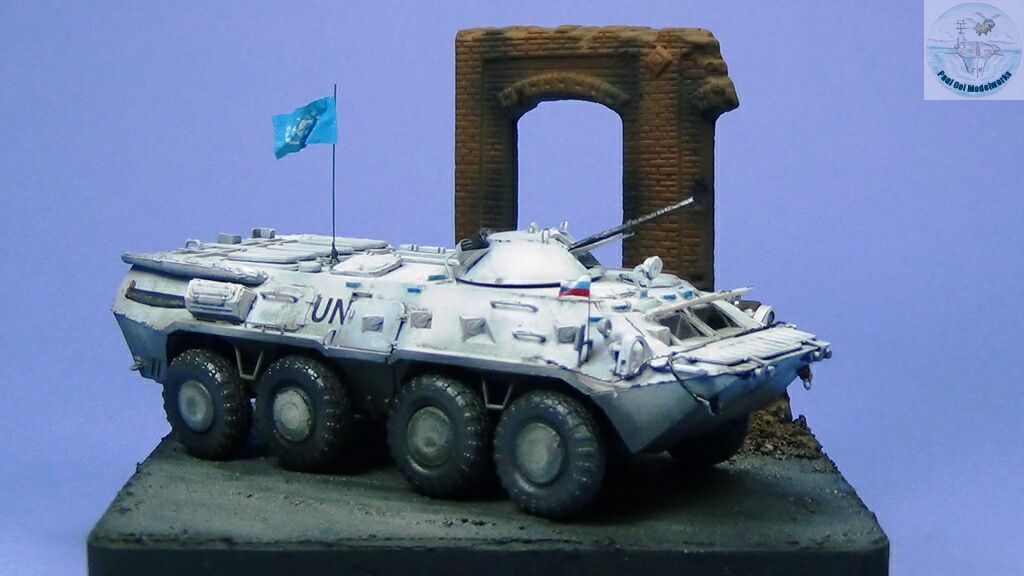
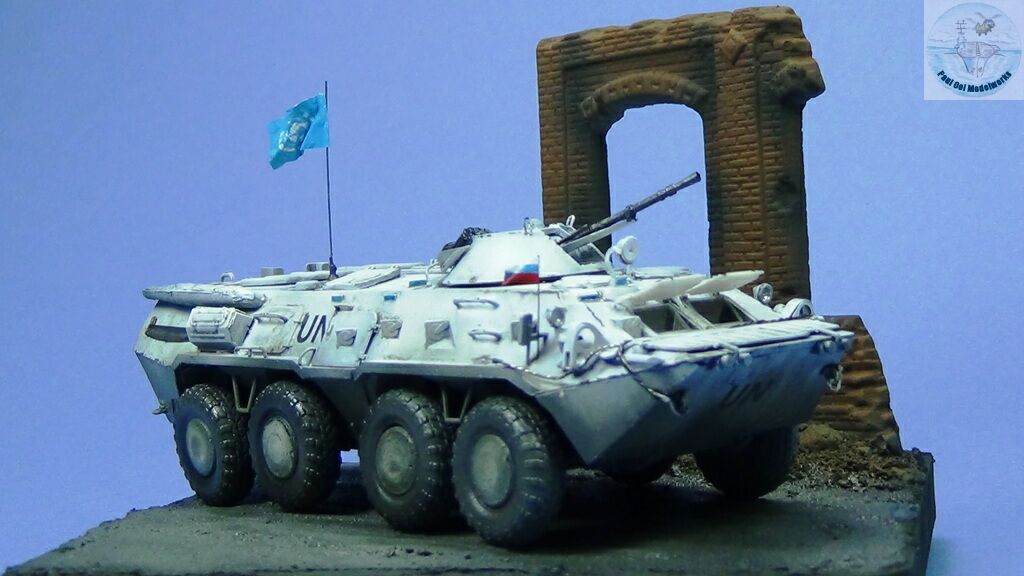
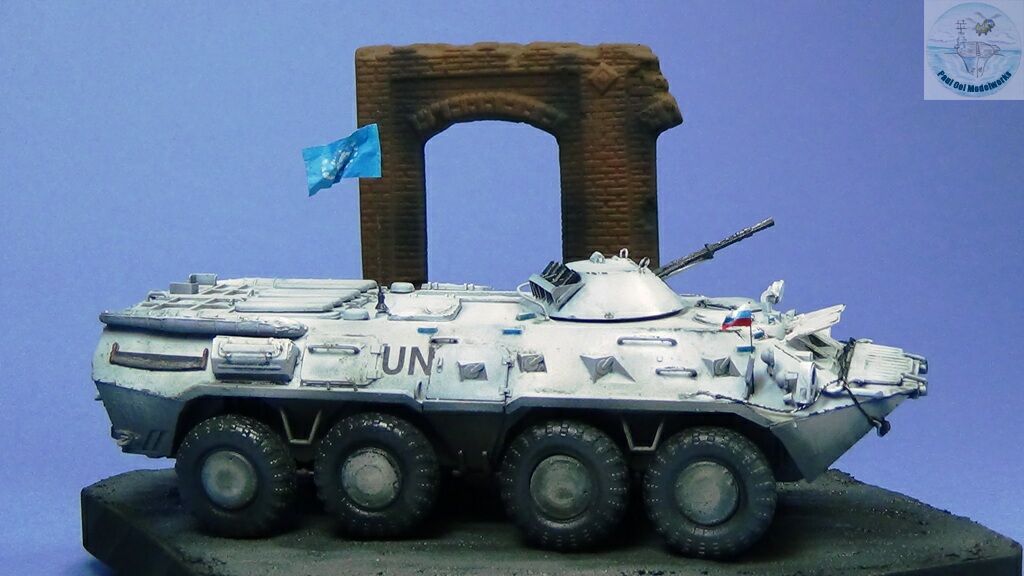
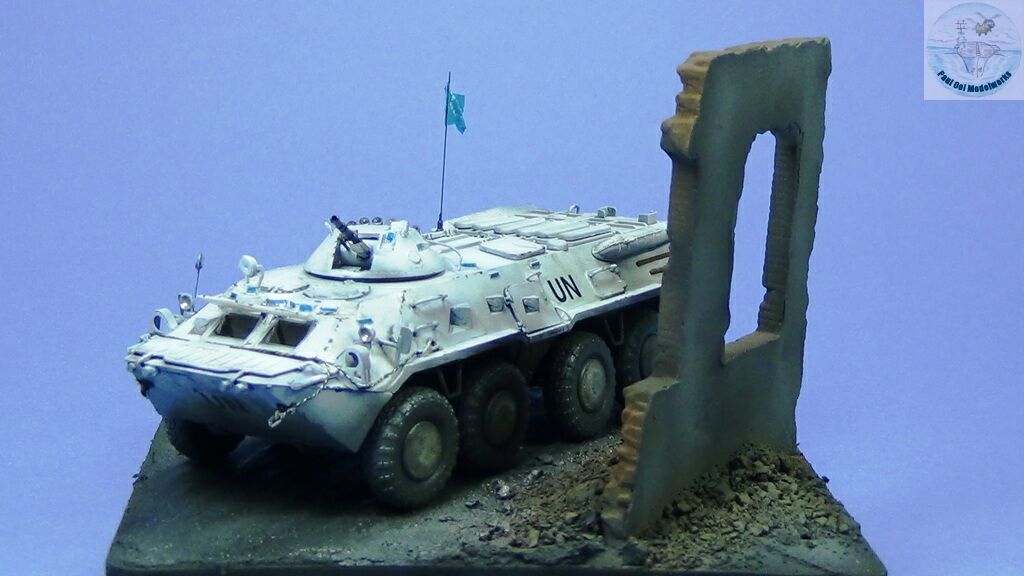
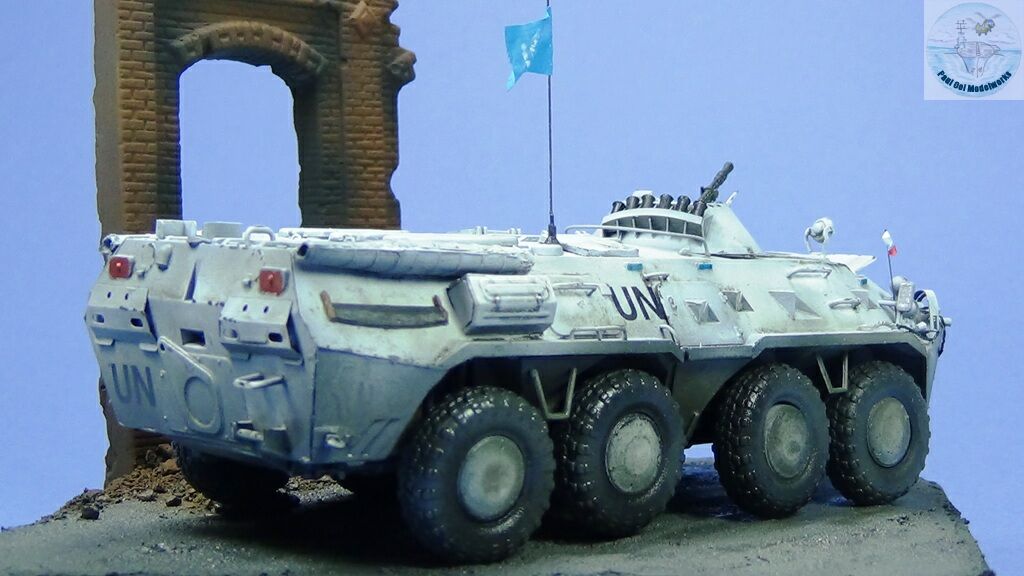
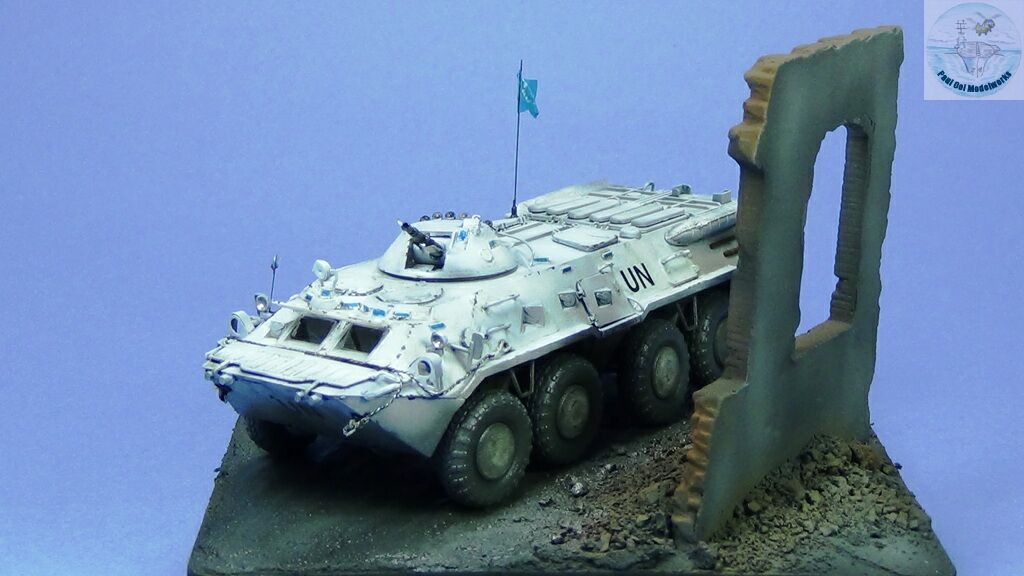
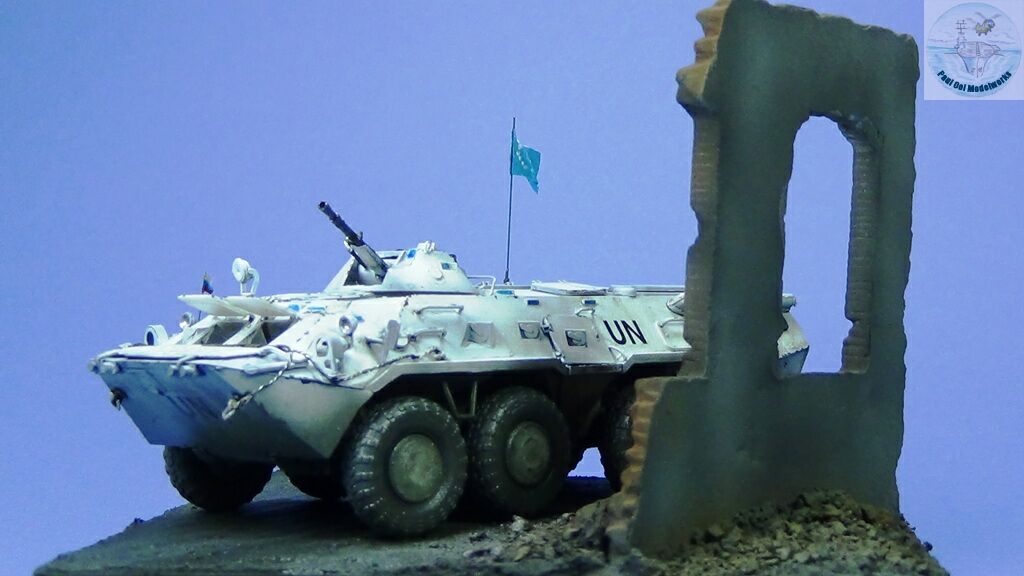
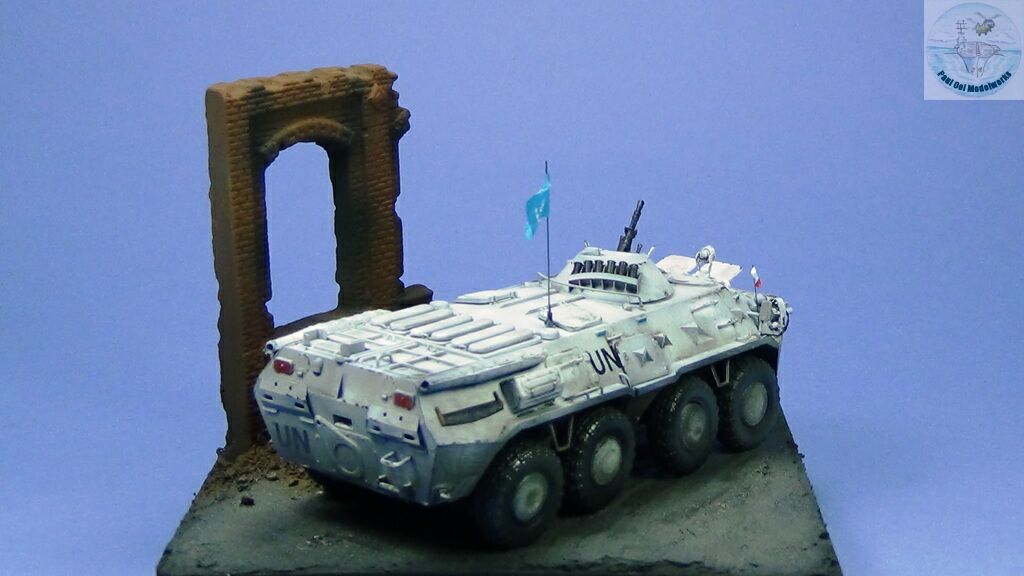
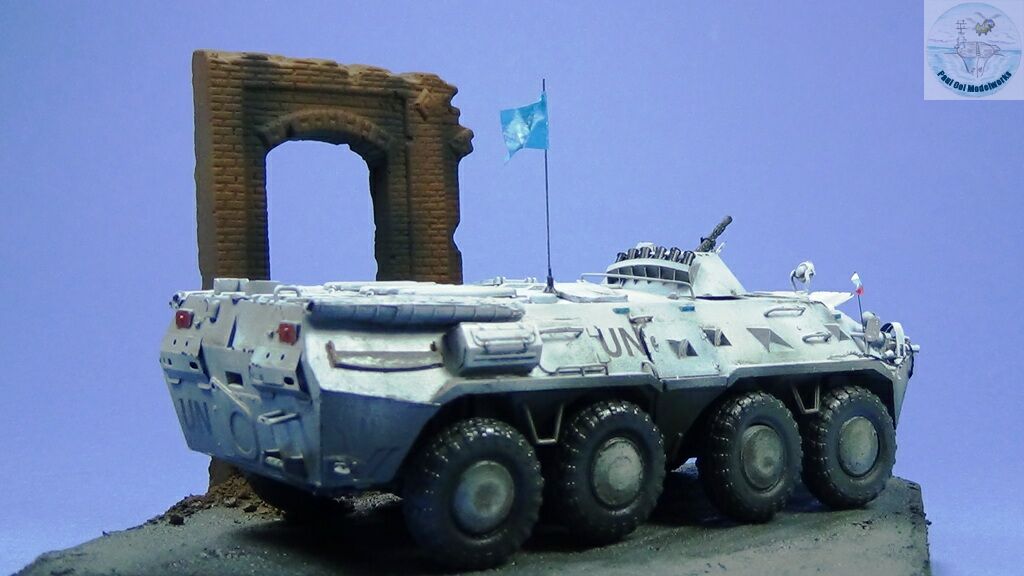
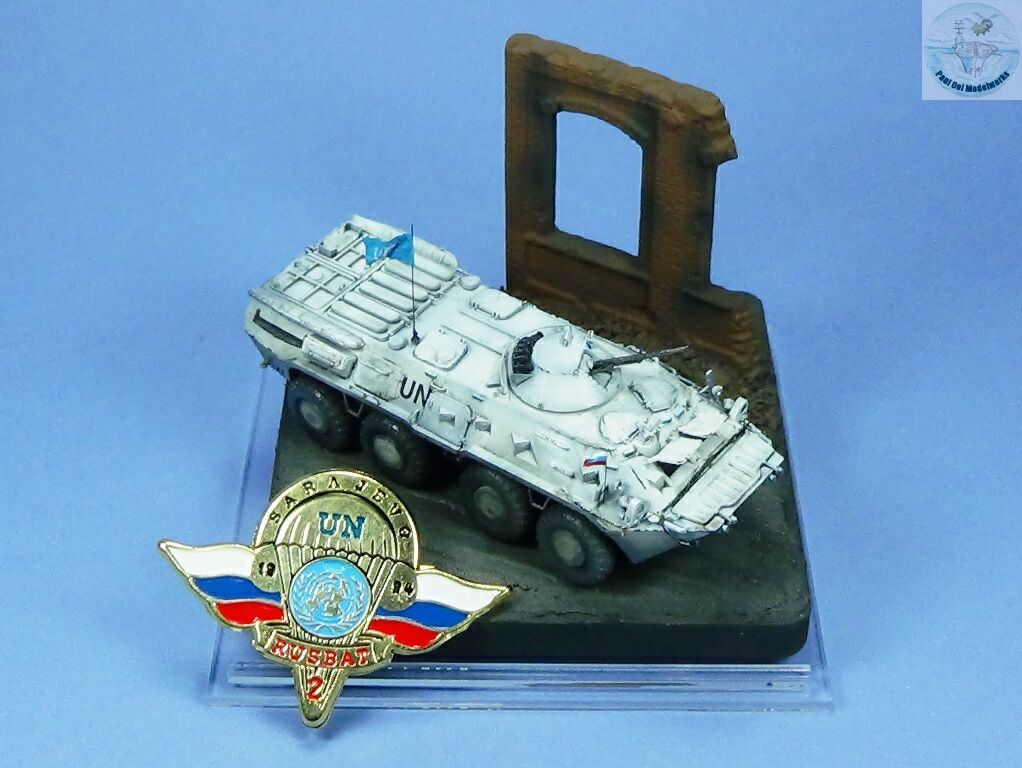
Russian involvement with UN peacekeeping missions started with the trouble in the Balkans in the early 1990’s. Prior to that, the Soviet Union did not involve itself directly with UN peacekeeping, and so the appearance of former Soviet hardware in UN colors was a novelty then. The mission of Rusbat-2 under the umbrella of UNPROFOR around the siege of Sarajevo by ethnic Serbian forces was not without controversy. Despite that, the Russians did manage to restrain the combatants while stationed in the Serb-held enclave of Grbavica. It did help their mission that the Serbs tended to trust the Russians more than the western forces in the UN. This vignette shows a Rusbat-2 vehicle on patrol flying a large UN banner, while the crew rigged a smaller national flag to let the Serbs know that the vehicle is Russian.
The BTR-80 was introduced in 1985 and was a fixture in the Soviet Afghan War. Its variants remain in use with many countries around the world and represents one of the most successful APC’s in use today. The BTR-80 has many capabilities like weapons adaptability (many kinds of turrets mounting all kinds of weaponry) mounted on a rugged 8×8 chassis. It has great mobility over rough terrain, has fording capabilities, and provide the troops with reasonable protection.
Gallery

Construction Notes
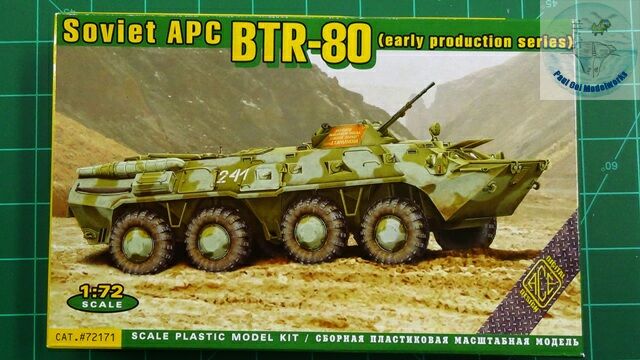 This 1/72 scale kit of the early production BTR-80 comes with poly wheels, and a small photo-etch fret along with the plastic parts. For a kit of this scale, the level of detail was incredible. However it takes a lot of experience and skill to build this kit because of the major re-construction needed (especially the turret) just to assemble the kit. This fit was generally challenging and many part joints needed rework and re-sizing. I did like the variety of decals and paint schemes available, two from the Afghan War, and two from the Balkan campaigns.
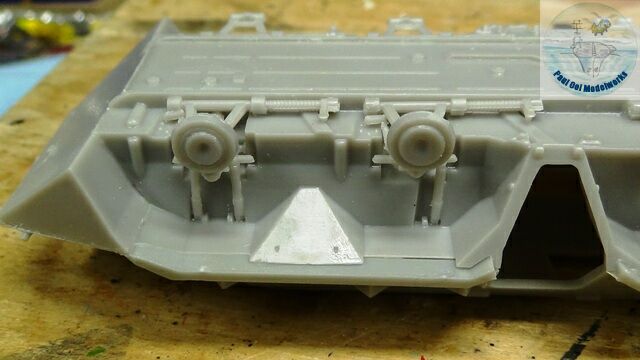
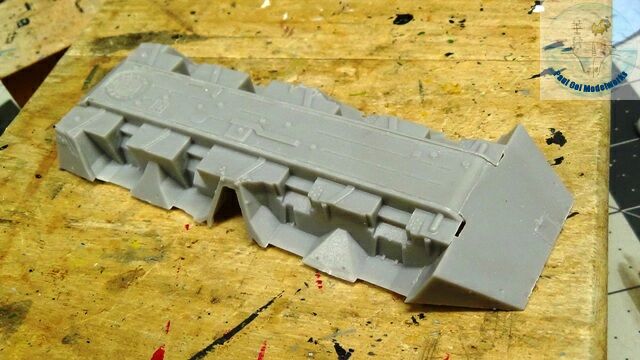 The first step was to construct the main hull tub. This was made out of five separate parts without much guidance for the fitting points. Note the gap between the front glacis plate and the undercarriage. I filled this with sprue later on.
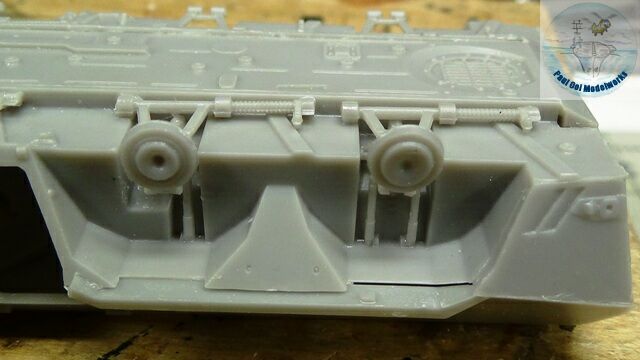
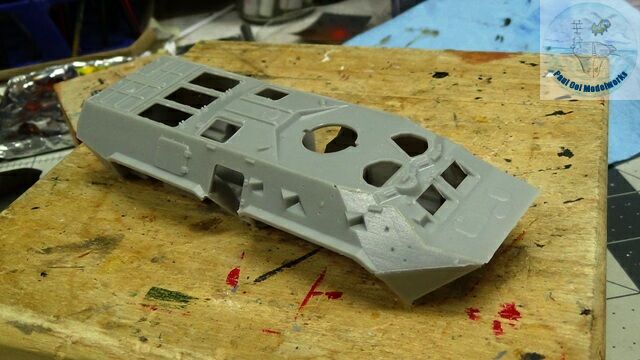 Next, the upper hull sections are attached to the main hull tub. Again the fit was not precise, and some adjustments in alignment had to be done to minimize any gaps that may appear. However, once properly aligned, the shape is accurate when compared to actual photographs.

The most intensive build in the kit is the eight sets of suspensions. Each set of wheels have about 5 pieces of parts to fit together. The most important thing is to make sure that the wheel hubs all line up and are co-planar when you set the model assembly on a level surface. Otherwise, the wheels will be lifted up and off-kilter when completed.
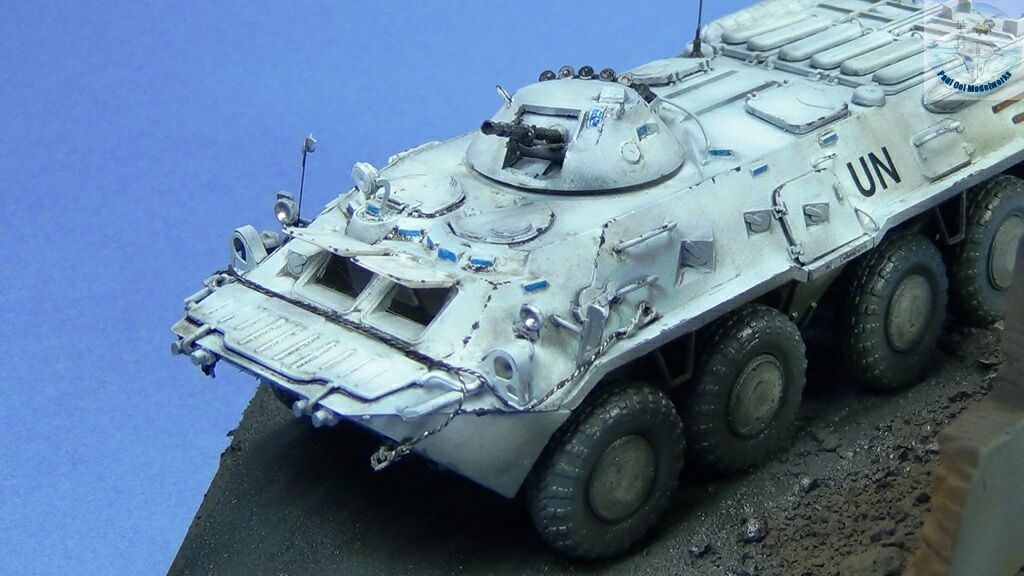
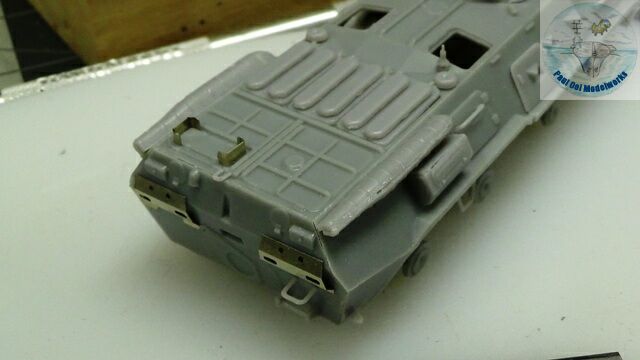
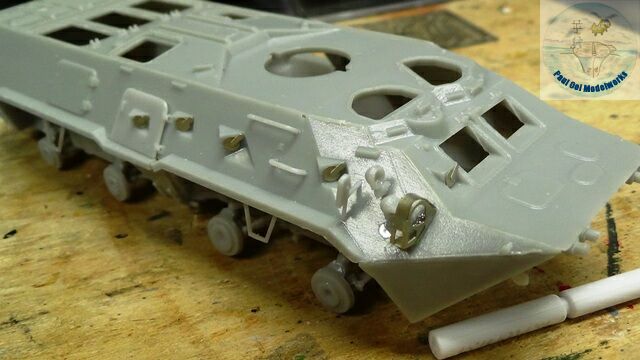 Once the chassis is completed, I can start adding details on the upper hull. I start from the right hand side forward quadrant. And working in a counter-clockwise manner. There are plenty of railings (for troops to hold onto as tank riders and climbing on and off) . Note the covers for the multiple firing ports.
 In front, the most prominent feature is the wading bow plate and folds outward to increase the height of the leading front edge of the vehicle during a water fording operation. Do not install extended unless you are simulating a water fording, or a vehicle just about to commence or have recently completed such an operation. Under normal circumstances, the raised bow would obscure the view of the driver.
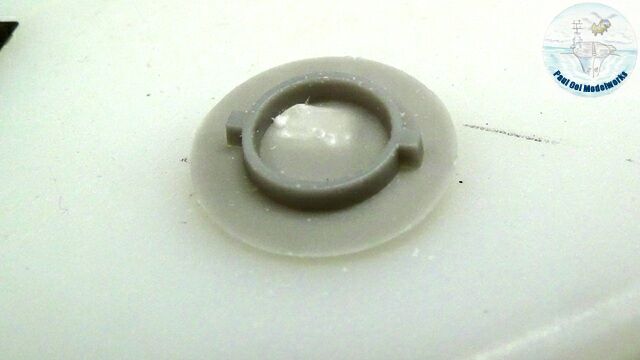
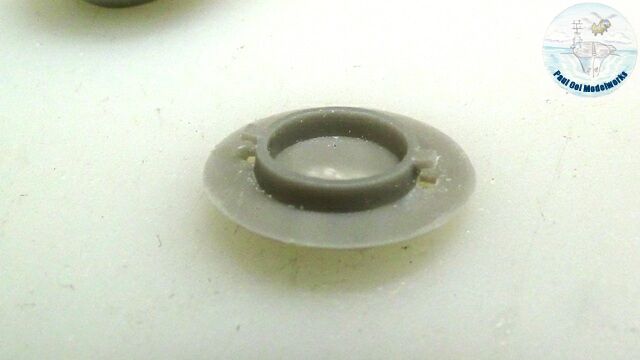 For some strange reason, Ace Models did not make a proper turn clearance for the turret ring. The orientation tabs were already too thick to fit into the key-holes of the main hull turret ring. I had to carefully slice away the solid plastic tabs in order to allow the kit’s turret to rotate.
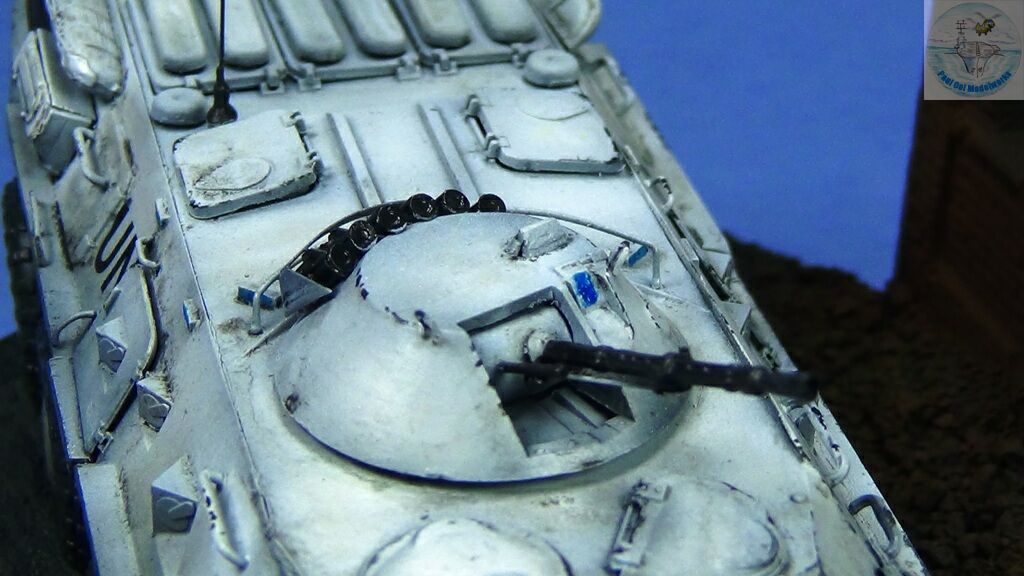
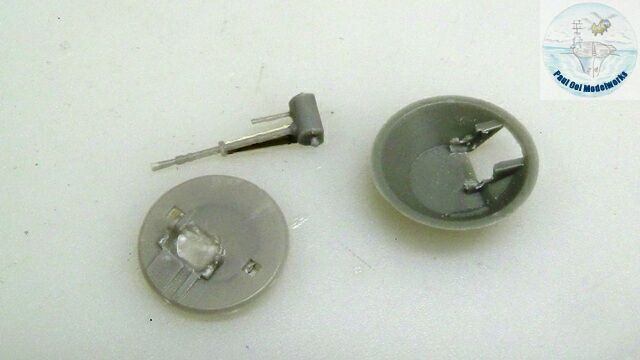 The turret itself had the worst fit. Without major work, the upper and lower halves of the turret could not close together with the 14.5mm KPVT machine gun mount. Using a machine tool, I had to grind away sections of the turret mount in order to create enough turning arc and clearance.
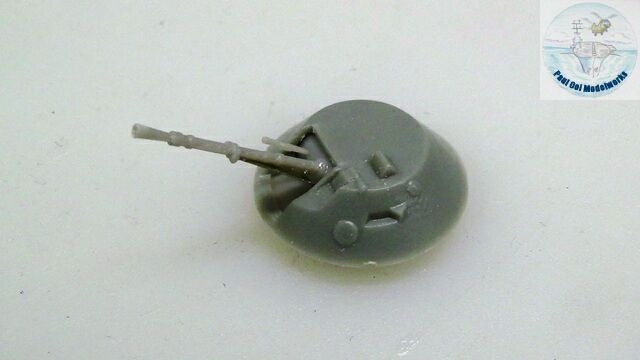 After some dry-fitting and grinding, the turret assembly came together. I also hollowed out the main KPVT muzzle.
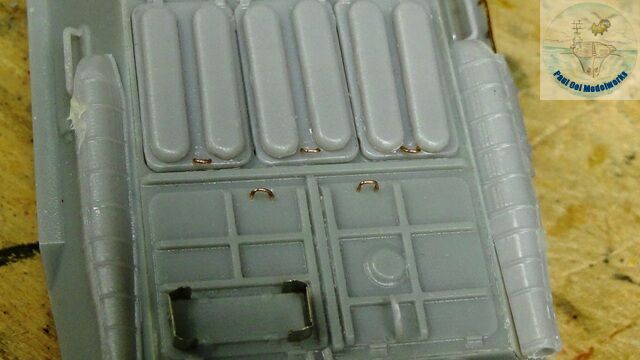
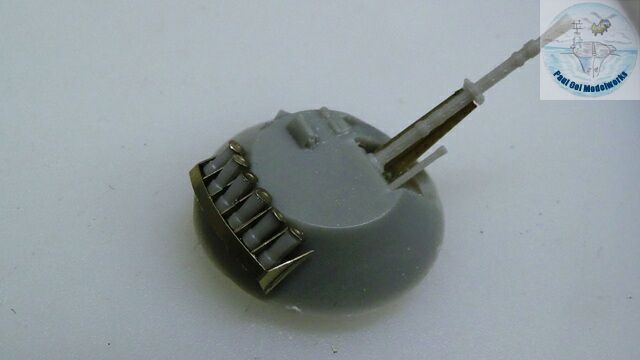 Next, I built the multiple grenade launcher array fitted on the rear of the turret.
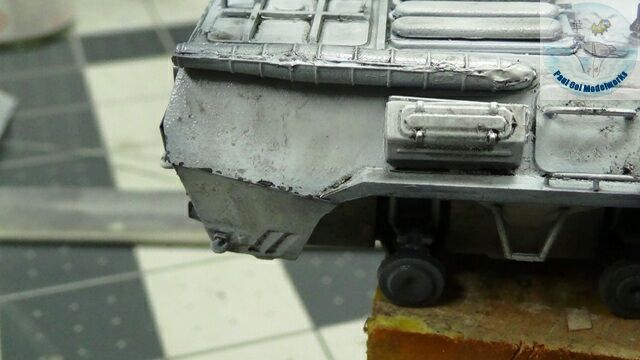
 The vehicle’s rear is then fitted with the two over-sized exhaust housings, and rear features. The exhaust fittings had large gaping gaps that I managed to fill with Squadron white putty.
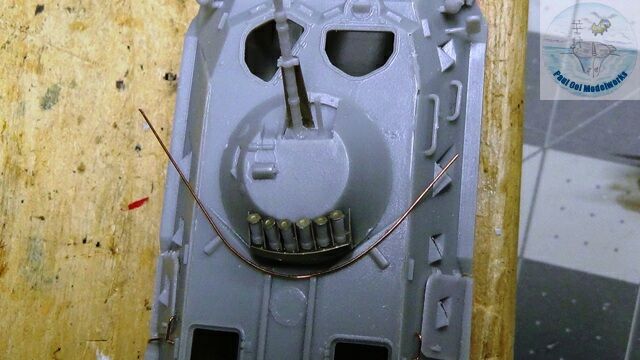
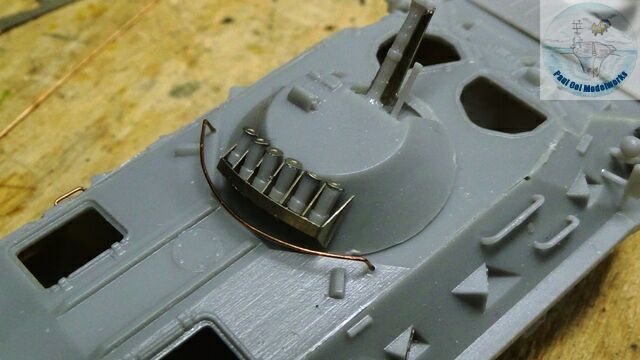 The early BTR-80 had a semi-circle guard rail behind the turret. In order to make this, a used a 12.5 mils thick phosphor-bronze wire, made the initial bend on a mandrel to get the correct arch around the turret itself. Then, marking where the attachment point were with a marker pen, I then carefully bent the attachment points at the same angle relative to the plane of the curve. With some minor adjustment, the guard rail is successfully fitted onto the main hull.
 Using 8 mil phosphor-bronze wire, I made these smaller handles for the engine compartments.
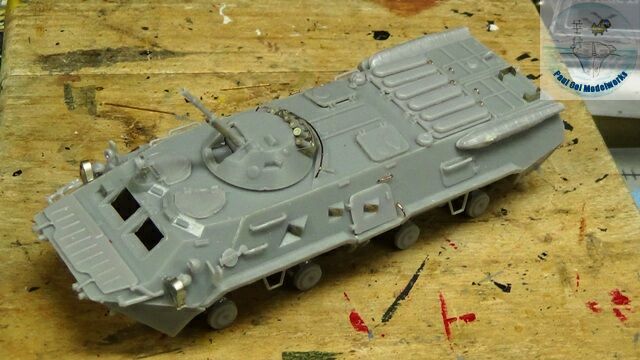 With additional fittings on the left side of the vehicle, the main hull is now ready for the spray booth.
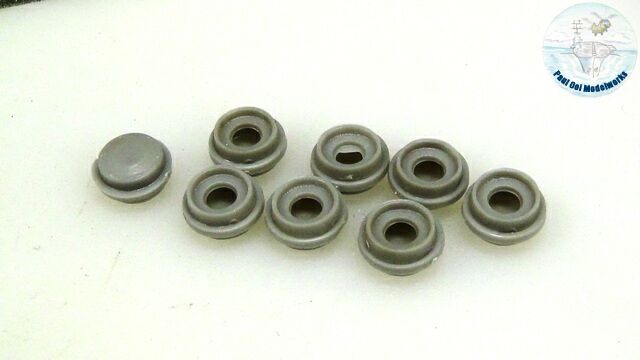 Let’s not forget the eight wheel hubs as well.
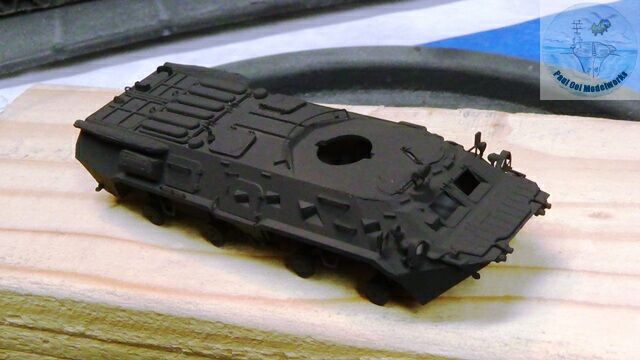
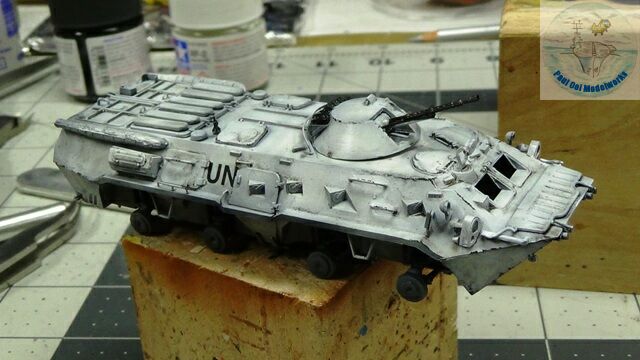
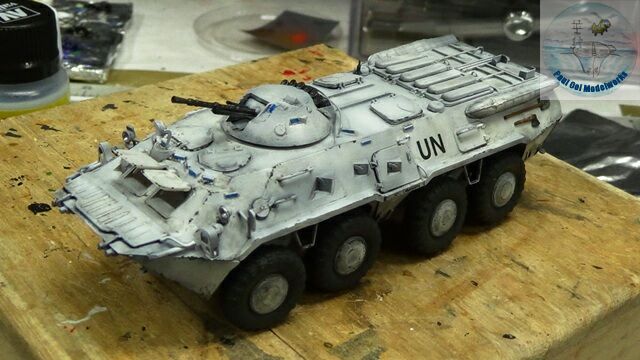
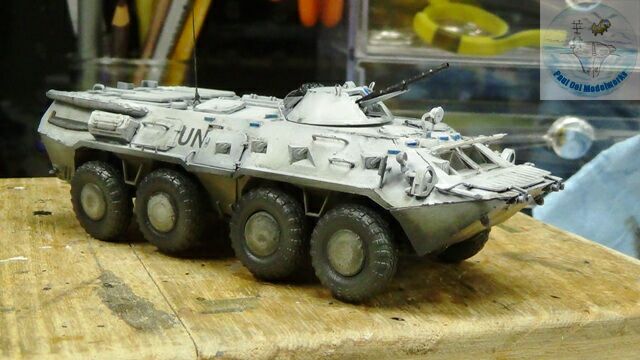
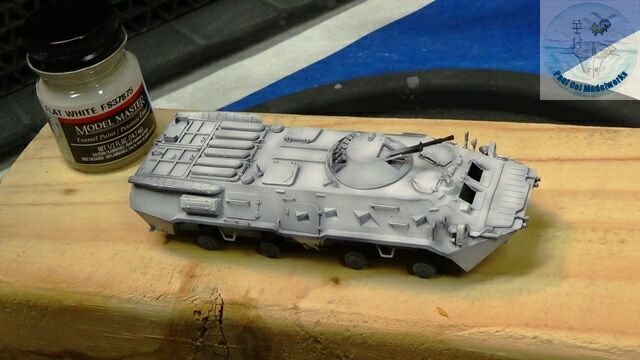 Using Tamiya NATO Black XF-69 as a primer, then I go over the hull with Model Master Flat White FS37875. By changing the intensity of coverage,I get gradations between dark grey in the shadows to bright white for the highlights.
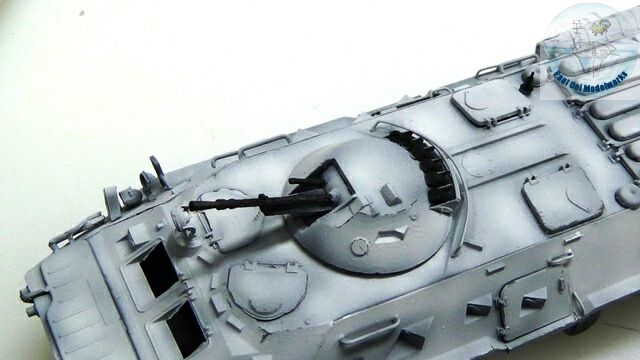 I go over the barrels of the 14.5mm and coaxial 7.62mm machine guns with Metalizer Gun Metal.
 Next, I go over areas of heavy wear with a fine brush, apply Tamiya NATO Black where the white paint has worn off.
 I give the underside machinery and chassis area an oil paint pin wash of 50:50 Ivory Black/Burnt Umber.
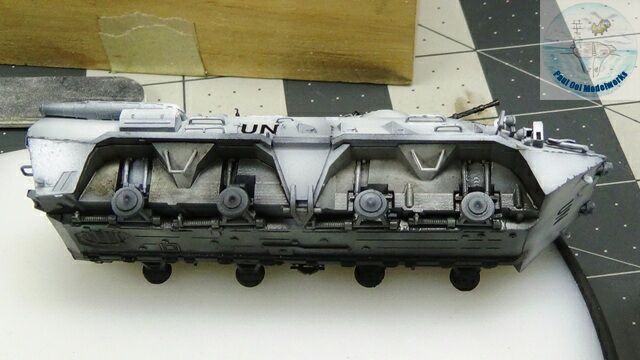
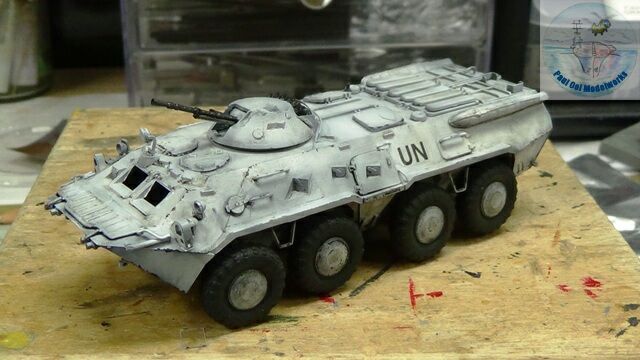
 The heavy urban grime and mud wash of 60:40 Ivory Black:Naples Yellow is next. I apply it very heavily in layers and allowing sections to just free flow, thus creating the realistic effect of flowing mud on the exposed undersides.
 Once the wash is dry, I fit the poly wheels (I repainted these in Tamiya NATO Black, only use acrylic paints to paint poly parts as enamel and lacquer paints may attach the soft plastic) over the wheel hubs and attach them to the chassis spindles. All the wheels are more-or-less touching the ground. Yay!
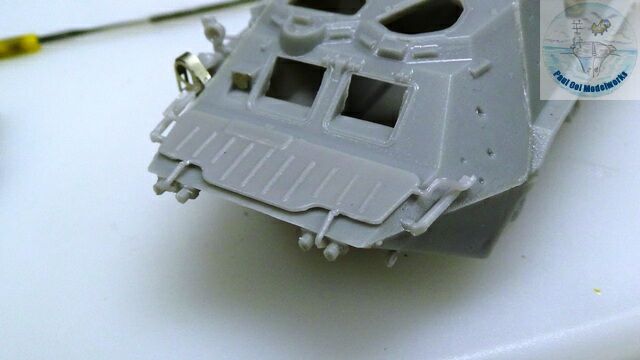
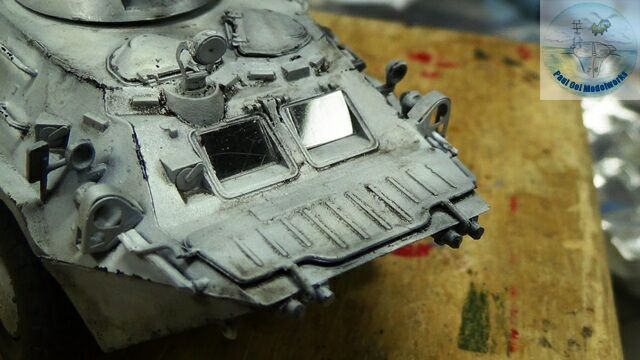 I cut two pieces of clear plastic film to make the front windshields. These did not come with the kit so I made them from my spares box.
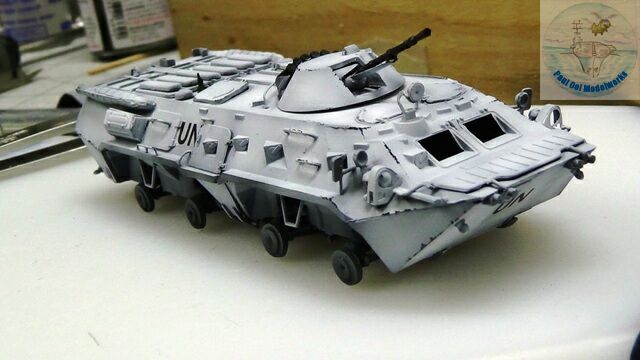
 I attached the tow blast shields over the front windshields in their raised positions (unless they are under fire or combat maneuvers, BTR’s are driven around with the blast shields raised). I also paint in the periscope glass onto all the crew vision ports with Tamiya Clear Blue.
 Another round of weathering, this time a layer of Tamiya 50:50 NATO Black:Buff wash sprayed onto the undersides and wheels, then a glaze of Vallejo Industrial Splash Mud to give the underside a wet muddy look.
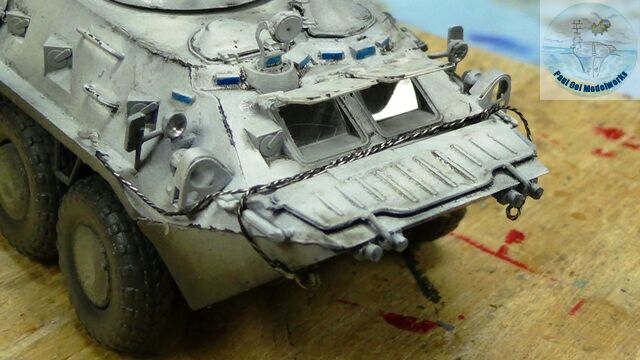 Tow cables are added to the front of the vehicle. There are tow sets to be fixed based on real life pictures. These did not come with the kit, so I made mine from fine wire twisted together.

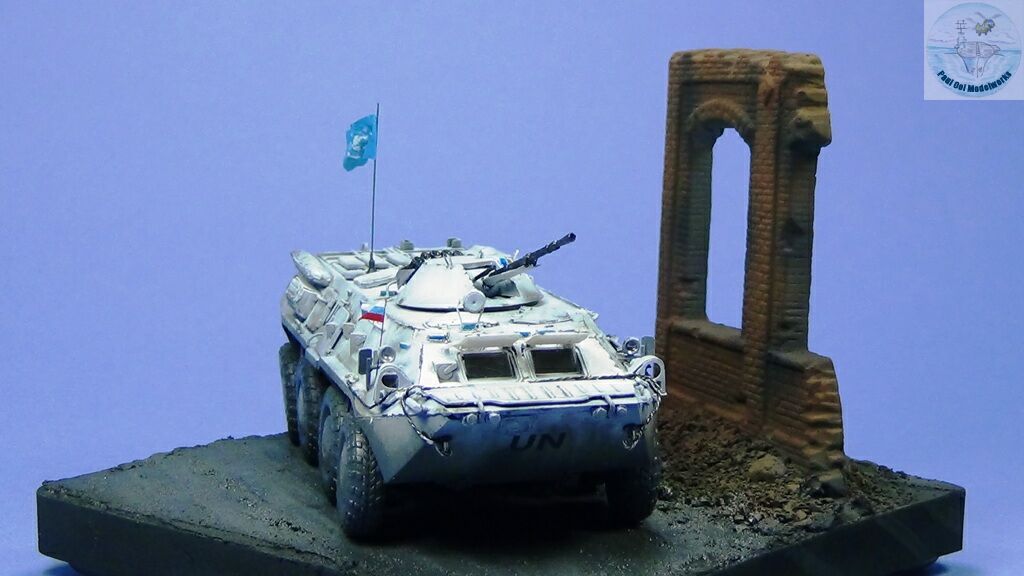
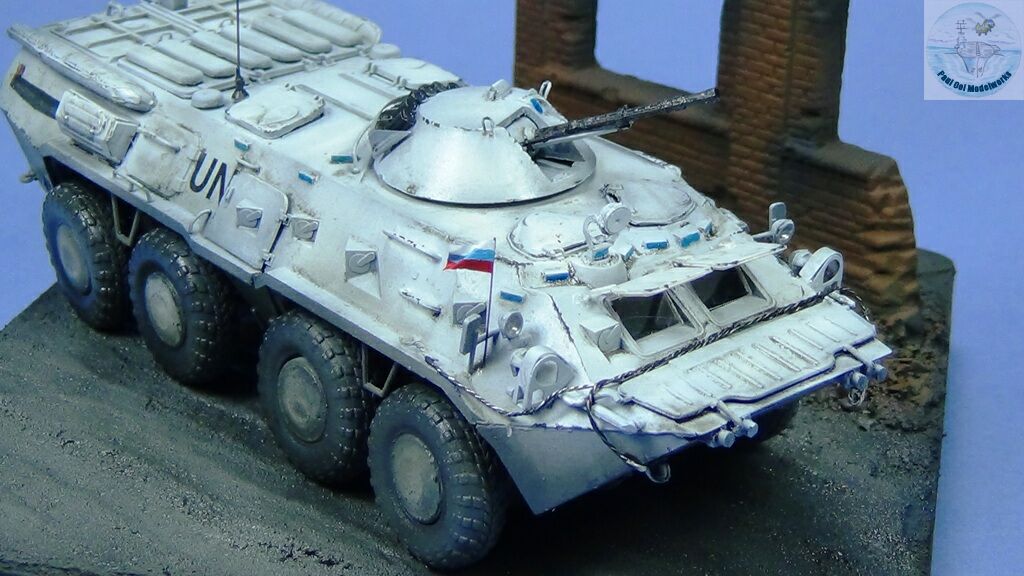
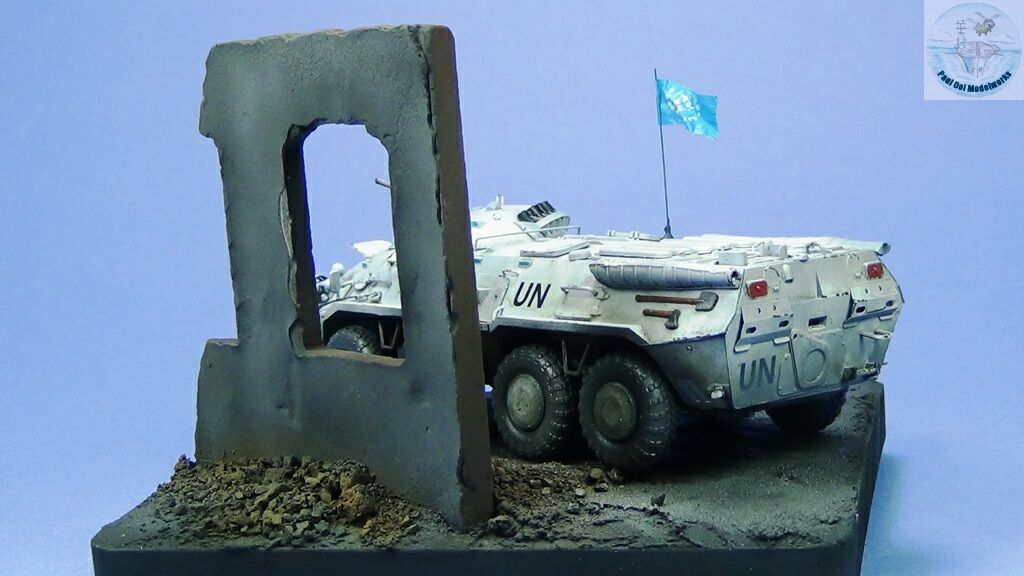
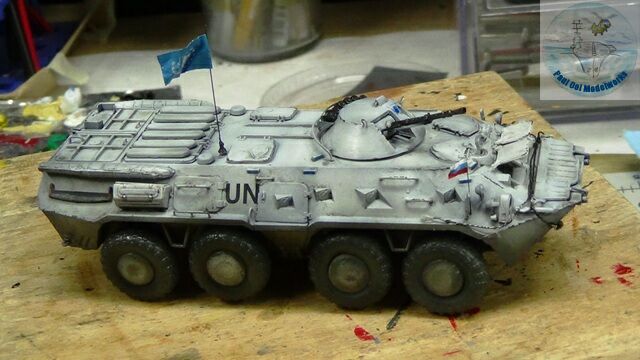 Aluminum foil flags for the UN and the Russian Federation are painted on, and the attached to the antenna and rear view mirror.
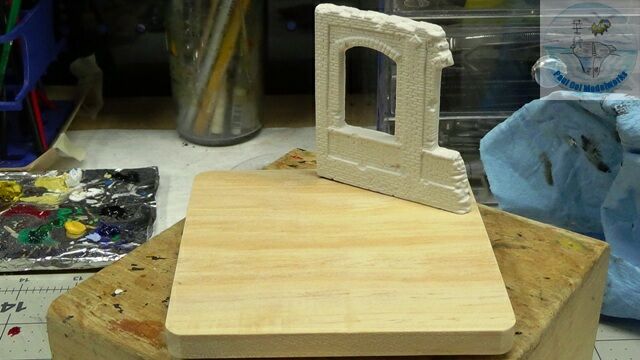
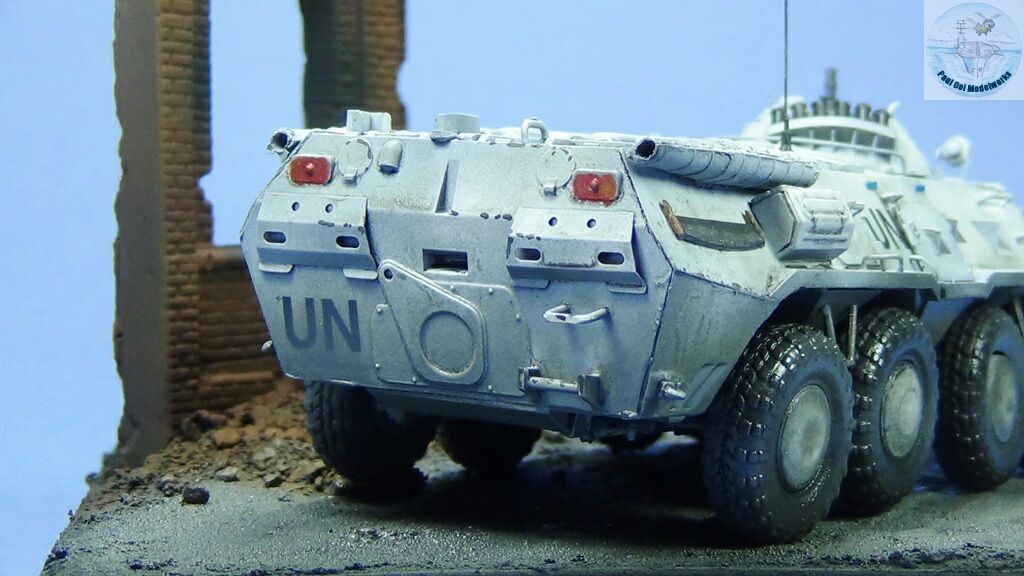
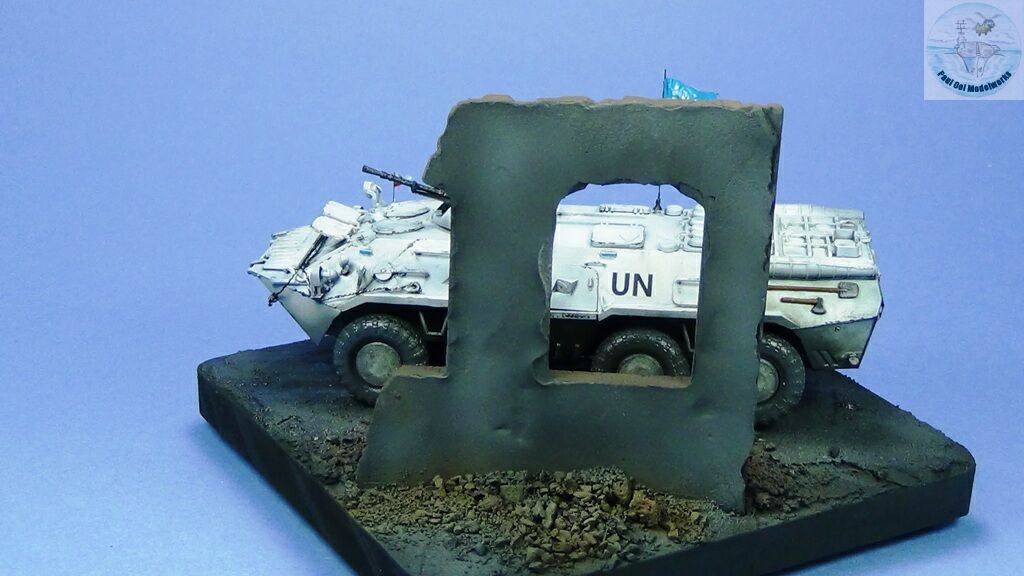
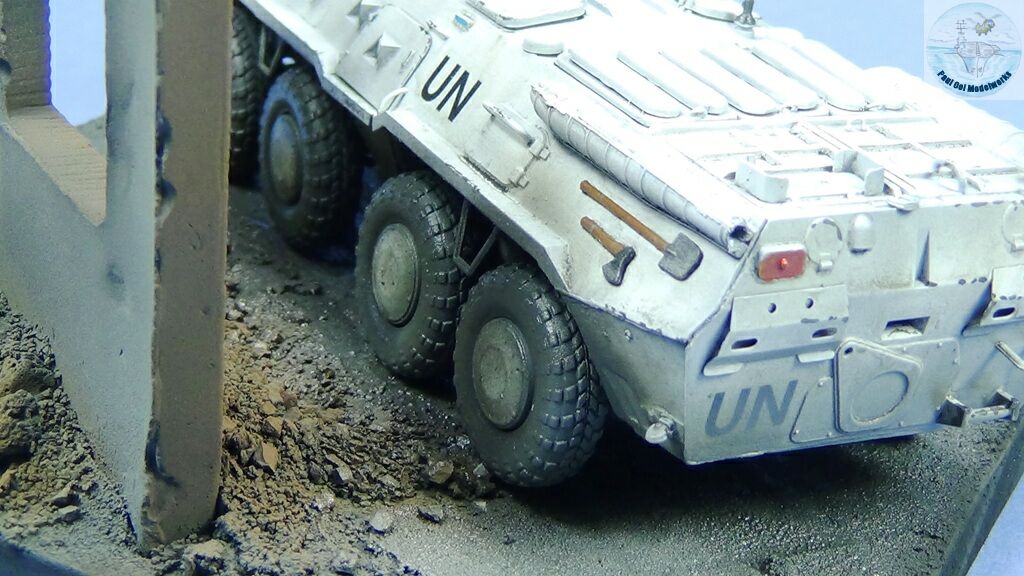
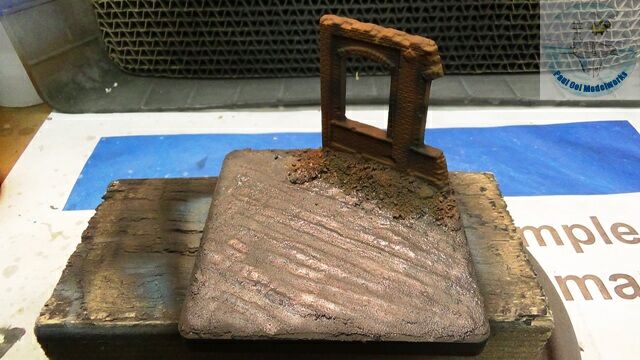 The display base shows a ruined brick facade with debris, lining a muddied road typical of Eastern Europe.Note the shiny muddy surface on the road, created with brush application of the Vallejo Splash Mud glaze.
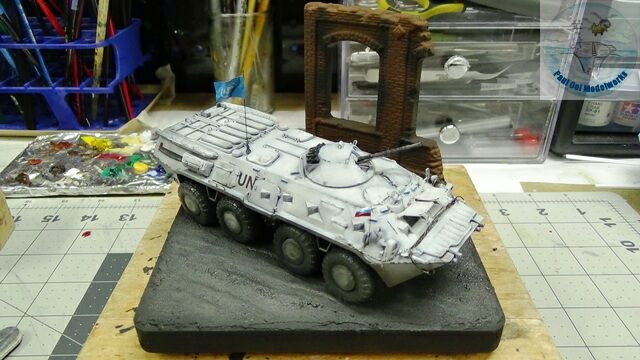 And all it takes is to get this muddy white Russian vehicle on the road!
Leave a Reply