A former crew chief in the USMC contacted me to build this Super Stallion based on some excellent color photos that he had provided me. The pictures were so detailed that I could build the interior of the helicopter right down to the contents in the cargo bay. The challenge was to find the right kit for the project. Italeri made several variants of the Super Stallion but they were out of production (different from the Sea Dragon which is available). I managed to snag one last kit from an Internet site and combined it with a Big Ed Eduard photoetch set for the Sea Dragon.
Happily, the decal sheet from Italeri already provided 80% of the markings for Marine helicopters in the early to mid-80’s (the period of interest). What I needed to do was to make my own decals for the aircraft number for the nose and the fuselage. The customer also gave specific details on how the aircraft should look on the ground. Specifically, the hatch at the nose was to be kept open for ventilation, and that a replica of his helmet was to be made with a communication umbilical wire spool attached to it and looped like a lasso at the tip of the refuelling probe!


The project starts with a “facelift” where I drill out the nose to open a square hole for the hatch. Then I built the replacement hatch out of plastic card, being careful to test fit many times over. The other preparation was for the interior walls of the cavernous cargo section. Since this area was very visible (I intended to keep the rear ramp open), the texture of the walls must simulate the noise-damping lining of the prototype. I used aluminum foil to achieve this finish.


Next came the front office. Using the photoetch parts, the front space came alive with screens, dials and seatbelts. The customer gave me specific information about adding the crew chief’s seat directly behind the cockpit bulkhead just beside the main door facing the cargo hold. He also gets to operate the 50 caliber should the occasion arise (rarely), but most of the time, he kept an eye on stuff going on in the cargo hold. I also added in the fold down bunk seats that line the walls of the aircraft, scratch-building them out of plastic rod and paper.

More details were added to the interior, since this aircraft was going to be (almost) fully furnished inside. Orange conduits for switch boxes, a first aid box, personal duffel bags, backpacks, even a thermos container. Ammo boxes and two unmounted 50 calibers, wooden crates of stuff lined the cargo area. This phase took almost a month.


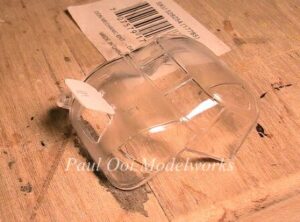
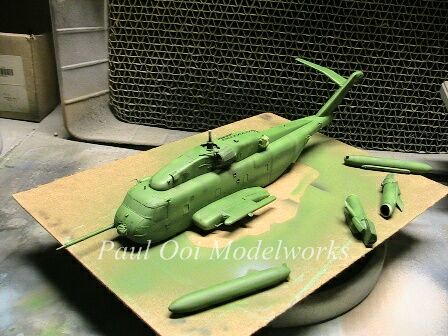
Finally, it was time to seal up the interior. The fuselage was large and complex. The halves were quite tricky to fit together, capped with the large clear plastic section at the front end with the cockpit making a very tight fit. On top of all that, there were 2 side sponsons to fit and pressed into place. Rubber bands and clothes pegs were a must. Once the fuselage was securely fitted, the rest of the exterior features were added. The two main engines, and 2 exterior fuel tanks were built separately and kept aside for the spray booth, only to be fitted after painting. With masking in place, we are finally ready for the spray booth.

The aircraft was painted in Testor’s Field Green, which has the correct FS code for mid-80’s Marines aircraft. At this stage, there is a strong resemblance to Kermit the Frog.


The “prince” emerges when we seal the paintwork under a protective varnish, apply the decals and then weather the aircraft with oil leaks, spatter from the prop wash and soot around the 3 giant exhaust pipes. Weathering is always the fun part of a project, provided you do not over-do it as a little goes a long way.


While the paint dries, I get to work on the huge main rotor (7 blades, 14 inch diameter for a 1/72 scale model) and also the rear spinner. I also started work on the concrete tarmac on which to mount this huge helicopter. Once the aircraft gets mounted on the tarmac, I fit in the minute details like the red “remove before flight” tags, metal grounding strips and the antennae around fuselage.
As builds go, this one was very challenging but I really enjoyed the finished product. In one of the shots, you can see why we COULD NOT afford to leave the cargo area bare. Enjoy the rest of the pictures.


Aun, I am wowed by your description of how you birthed this model. Simply amazing! Should also publish the customer’s comments.
Why couldn’t you the cargo area bare?
Pretty uninteresting. Not what the customer wanted.
Remember the German night fighter “Uhu”? Got a model of it? And an American nuclear-powered aircraft carrier like the Constellation sailing beside a WW2 Jap carrier would be soo cool!
I do have an unbuilt Uhu. In fact I have lots of experimental German aircraft kits from Huma and Revell Germany. Also have unbuilt carriers. Just simply don’t have the time to build my own stuff because of customer back orders.
I just found out the Constellation wasn’t nuclear powered. Got a Nimitz class carrier?
No. Too many people building these big guys and they are hard to display. Prefer less common themes like the small US jeep carriers of WW2 or Japanese float plane tenders.
Simply amazing – Thank you so much for building this for me. Brings back many memories! It’s proudly on display!
Hi Paul,
It was a pleasure to build.