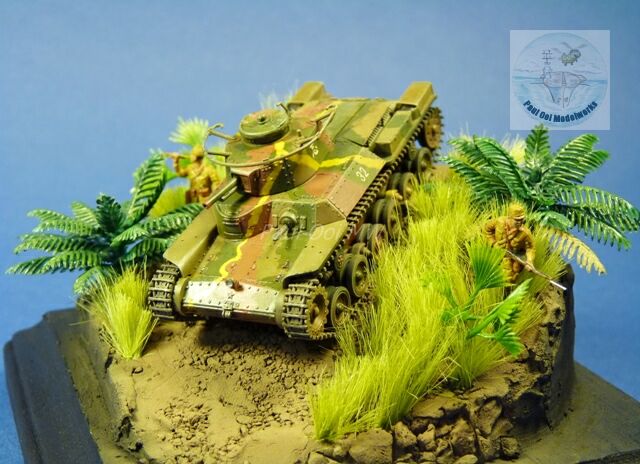
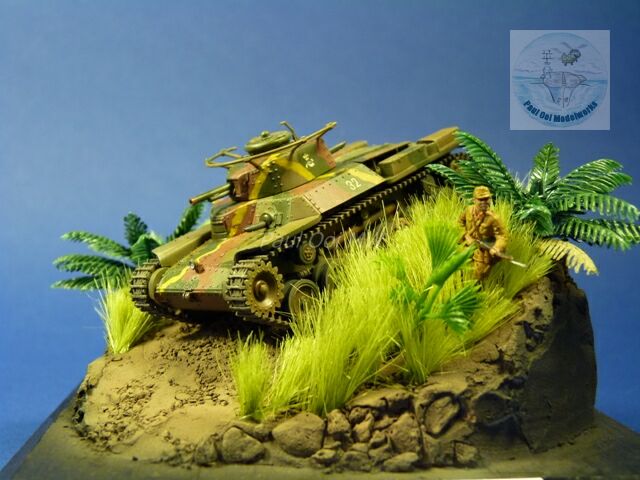
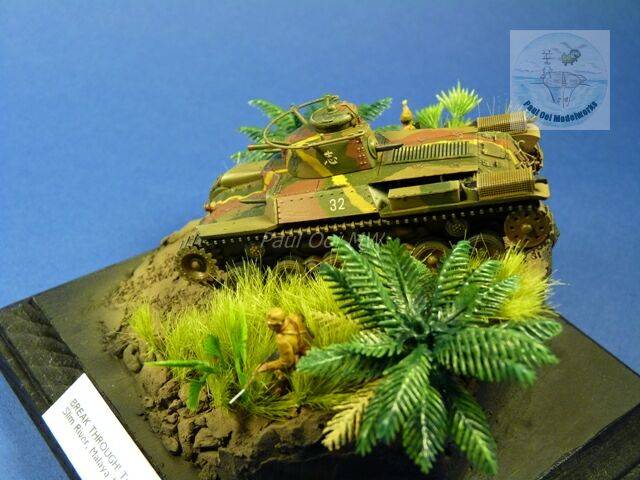
The Japanese conquest of Malaya happened at lightning speed, starting on 8th December 1941 from the the amphibious landings in Southern Thailand, and quickly developing into a two-pronged advance down the East and West coasts of the 500-mile long Malay peninsula, finally converging on the island of Singapore by February 1942. During the push down Malaya, the Japanese army encountered several sharp battles with the Allied troops. One of the major battles fought along the West Coast was at the strategic river crossing at Slim River, the northern gateway into Central Malaya and the capital of Kuala Lumpur. In this battle several groups of Japanese tanks broke through the Allied positions and destroyed two Indian regiments.
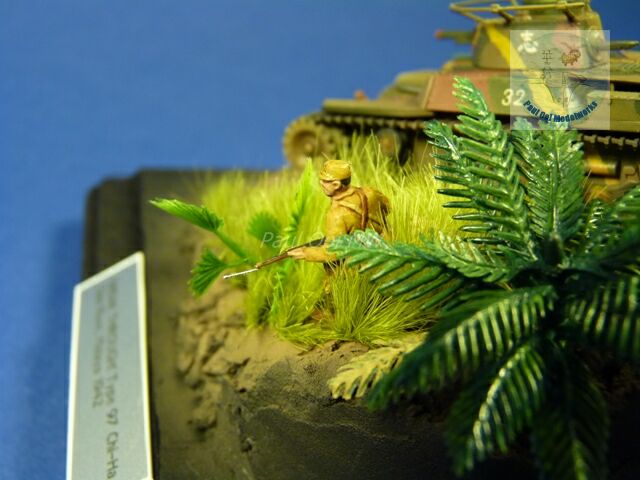
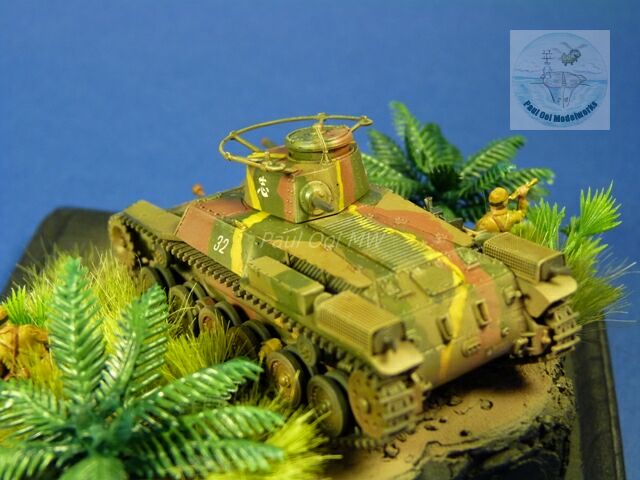
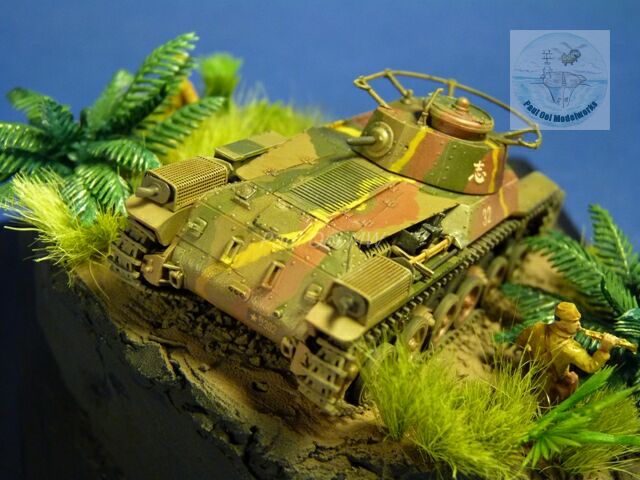
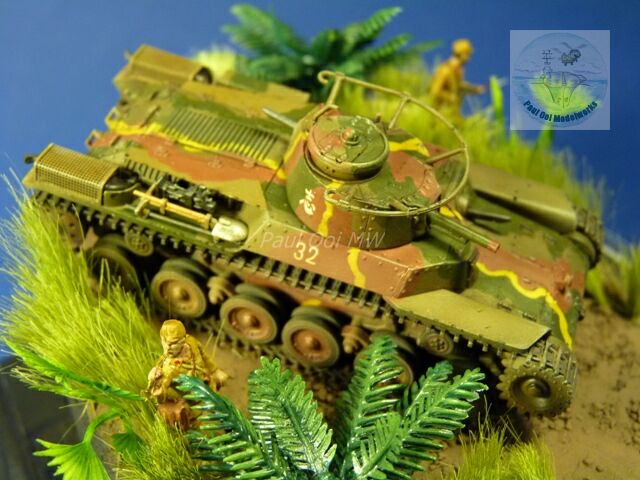
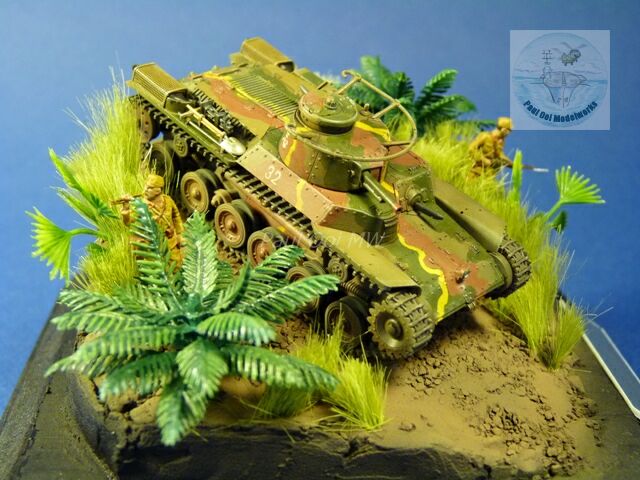
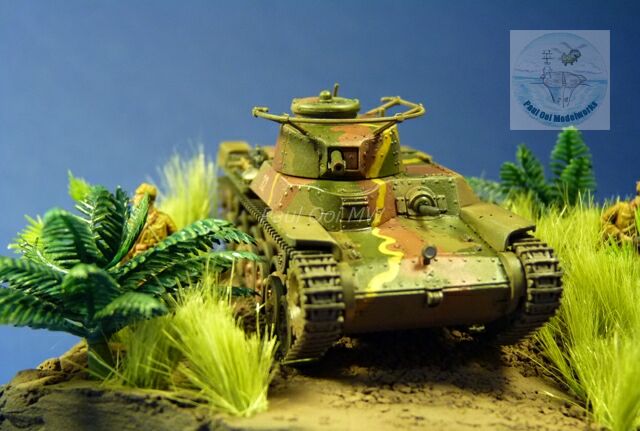
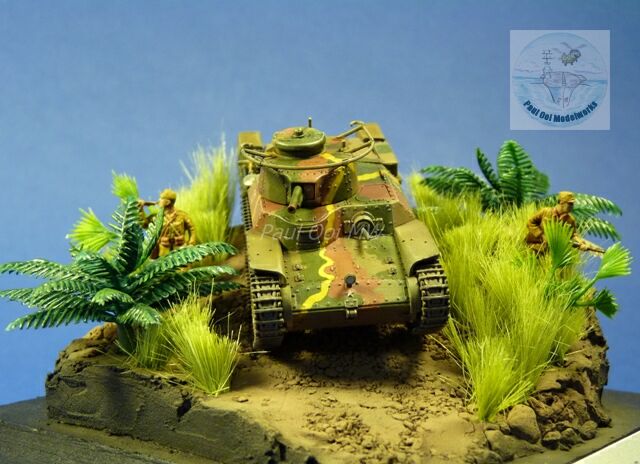
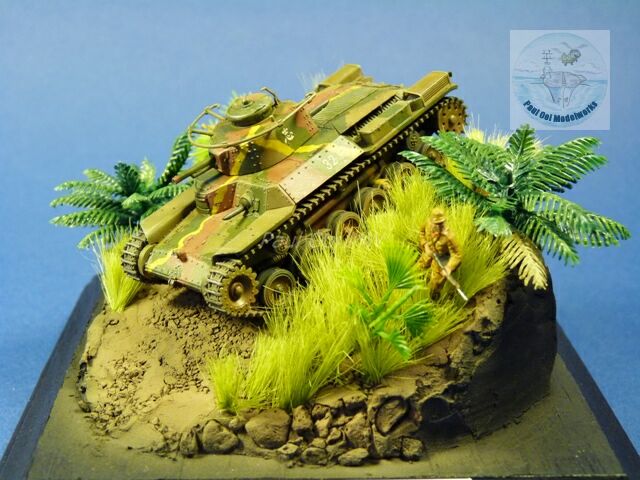
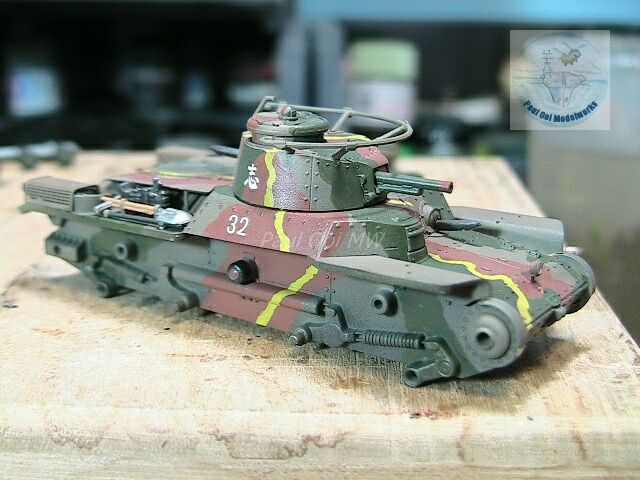
The Type 97 Chi-Ha was the most advanced tank in the Japanese arsenal and these spearheaded the Japanese assaults at the British Indian army positions at Slim River. The Chi-Ha was a relatively small infantry support tank with a 57mm gun. In the Malayan campaign, the British did not have any tanks to counter the Japanese tanks, giving the Japanese a decisive edge. Further more, British military doctrine at that time did not prepare the troops for jungle fighting. I decide to portray the Chi-Ha racing down an unpaved Malayan country lane, enclosed by typical Malayan “belukar” secondary forest. The Japanese found that they could outflank many British defensive positions by sending their columns and troops through the lanes crisscrossing the “belukar”.
Gallery:
Construction Notes:
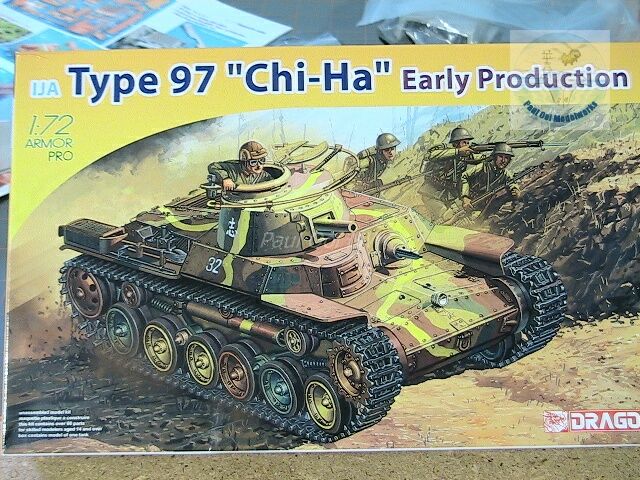
The Dragon 1/72 scale early type Chi-Ha is an excellent kit with very sharp molded details. The kit came with decals for a 1941 Chi-Ha from the 1st Tank Regiment that fought in the Malayan campaign. I also obtained a few Japanese Army figures from Airfix for the vignette.
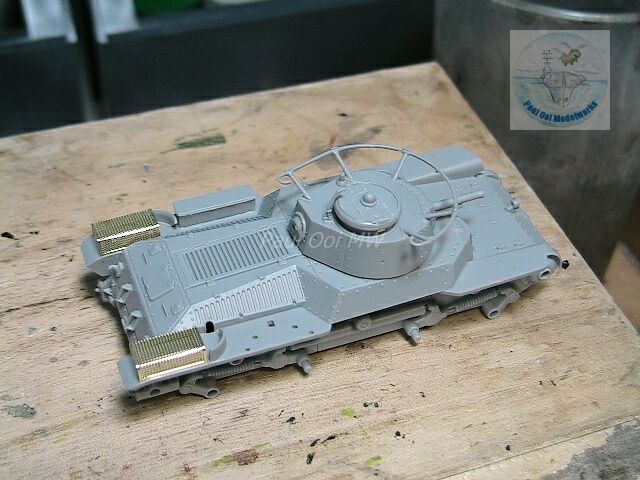
Initial construction of the hull and turret proceeded very fast. The fit was generally very good and I did not have to use any filler or putty at all. Note also the 2 photo-etched muffler screens at the rear of the hull.
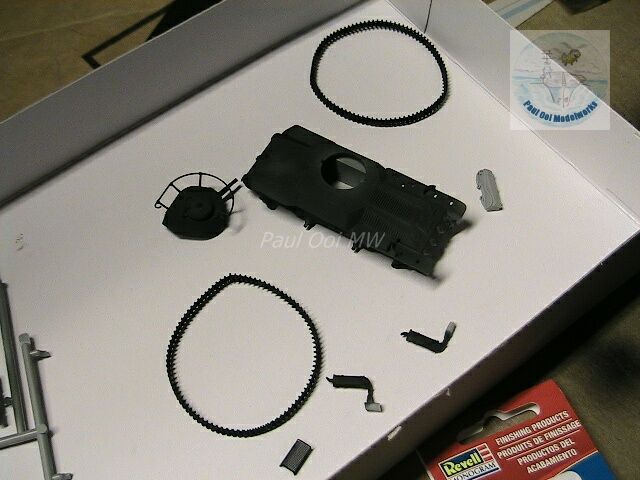
Once the main sub-assemblies and the DS (Dragon Styrene) tracks were assembled, I primed them with Tamiya NATO Black XF69.
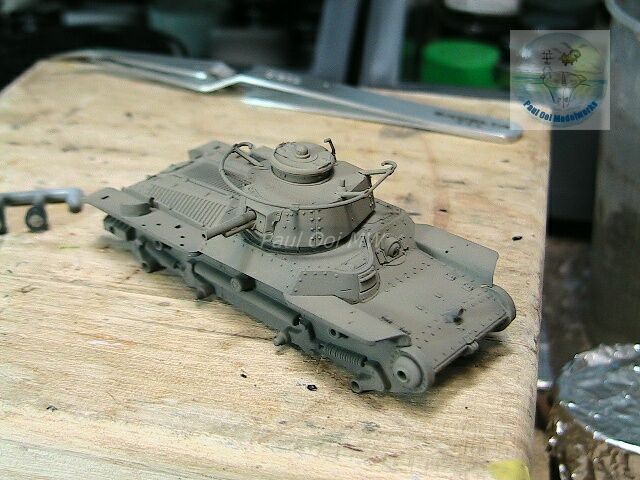
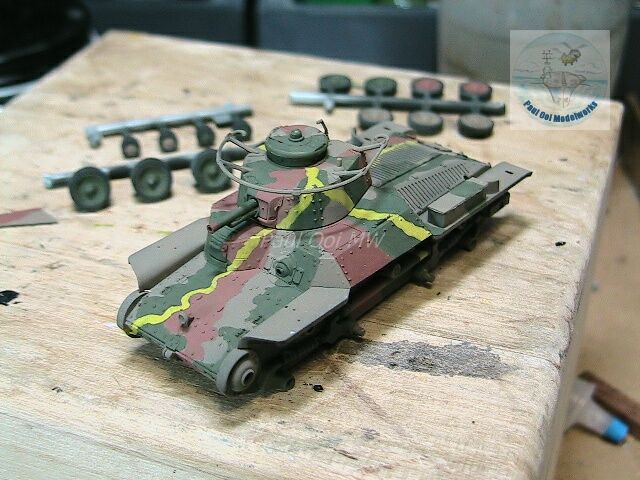
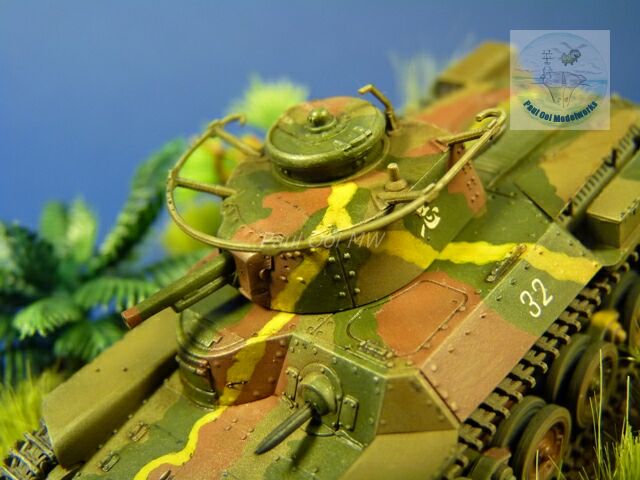
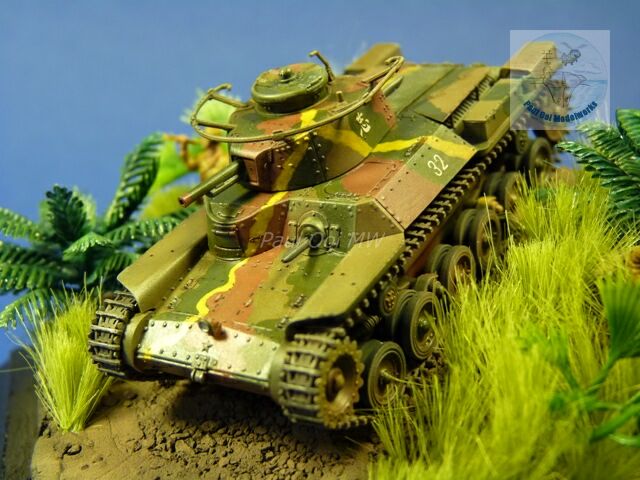
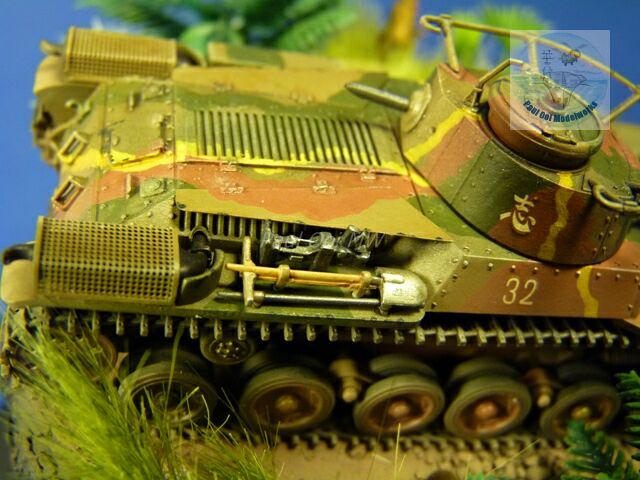
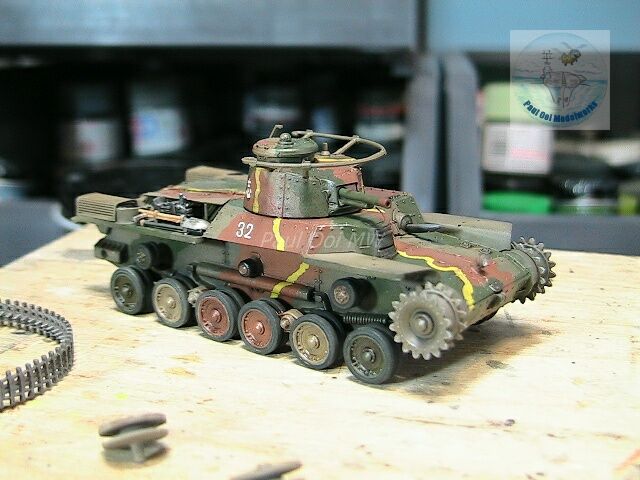
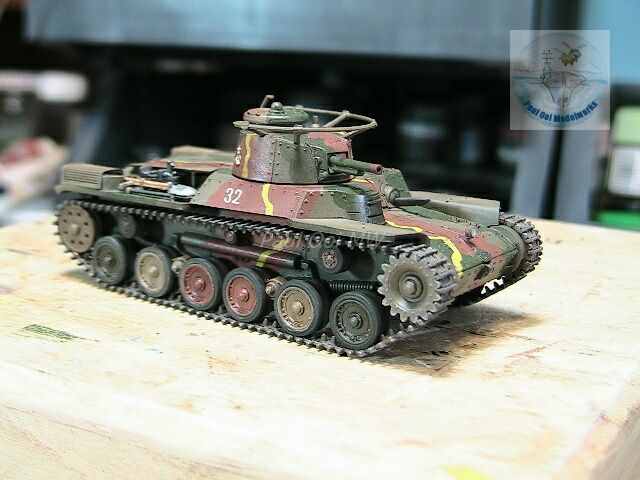
The Chi-Ha was covered in a 4-tone camouflage scheme that was unique to the Japanese Army, especially the bright yellow streaks across the tank hull. I started with Tamiya XF49 Khaki which I brightened with 20% XF2 flat white. After that, I hand-painted the camouflage patterns of Tamiya NATO Brown XF68, also brightened with 20% white and Tamiya IJA Green. Finally, I mixed a ratio of 50 Flat Yellow:30 Khaki:20 Buff for the yellow streaks.
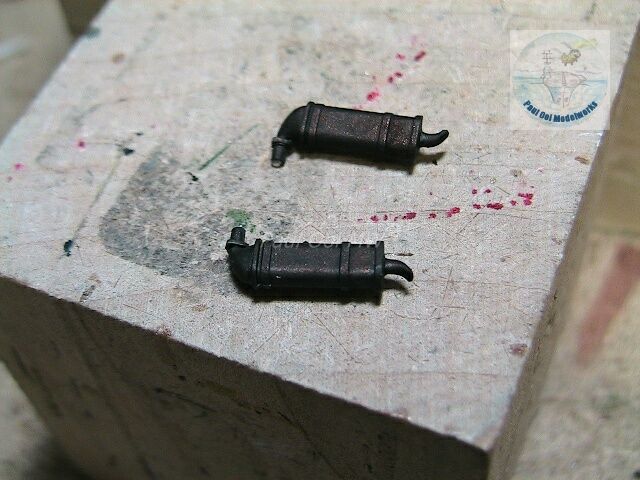
While waiting for the tank hull to dry, I painted the muffler with Testors Burnt Iron lacquer. Then came trouble…
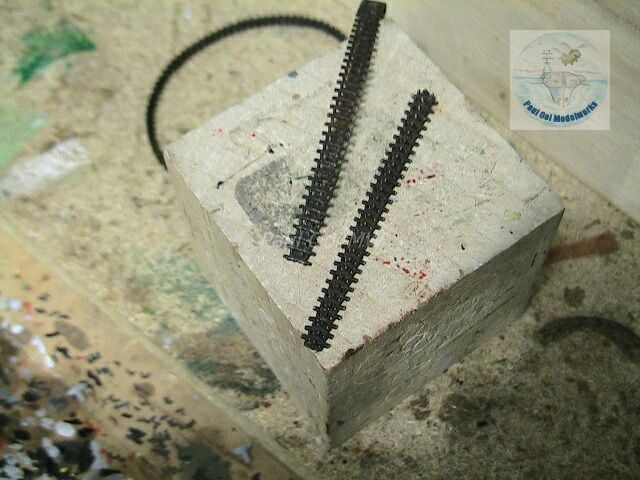
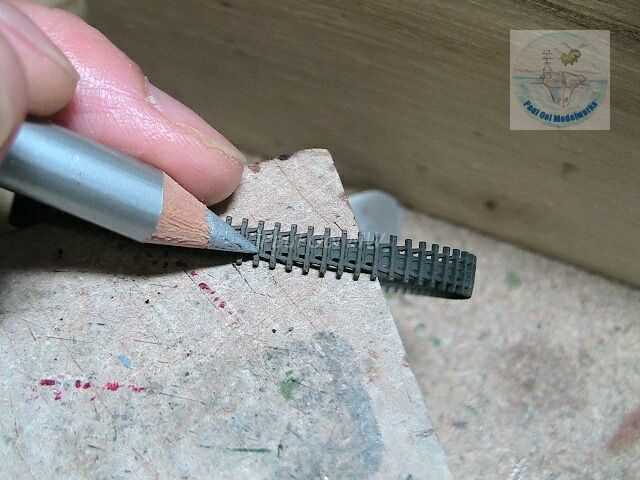
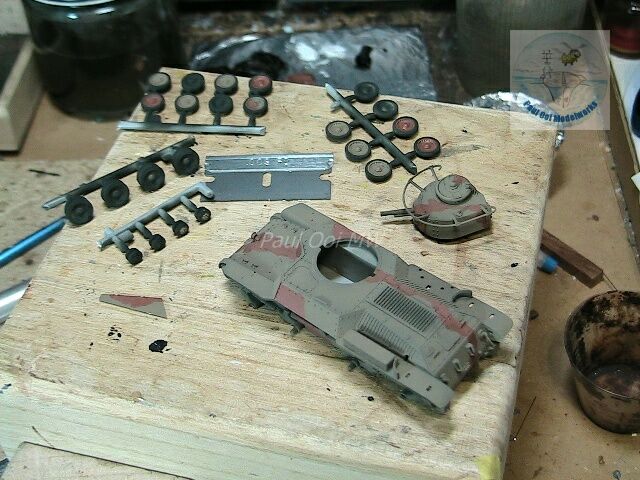
I wanted to prepare the tracks and used my normal oil-based wash method. It turned out that the DS track material did not like turpentine and started disintegrating in a short time. In trying to stretch the track loop over the road wheels and sprockets, the tracks just broke in places. It was a disaster! I wrote to Dragon Care to get a new set of tracks. In future I know now that DS tracks can only be painted and weathered with water-based acrylics.
While waiting for new tracks, I applied the decals, and then seal the whole assembly with a matt varnish.
Then the road wheels and front drive sprockets are attached. I left the rear return sprockets until I attached the tracks. I also applied a wash of oil-based Burnt Umber to the whole assembly and wheels.
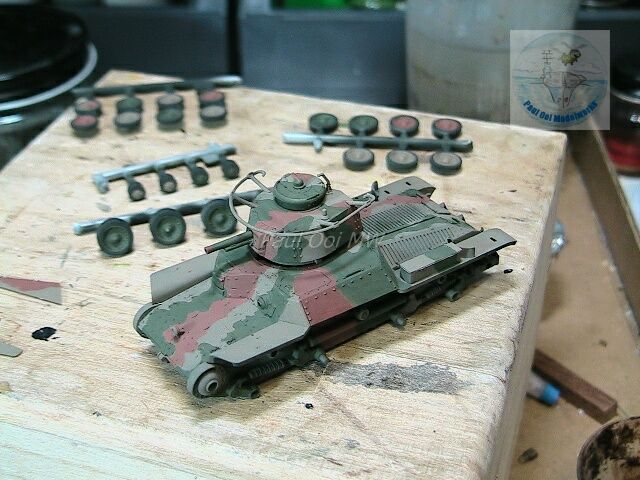
Finally with new tracks installed, the tank assembly is complete.
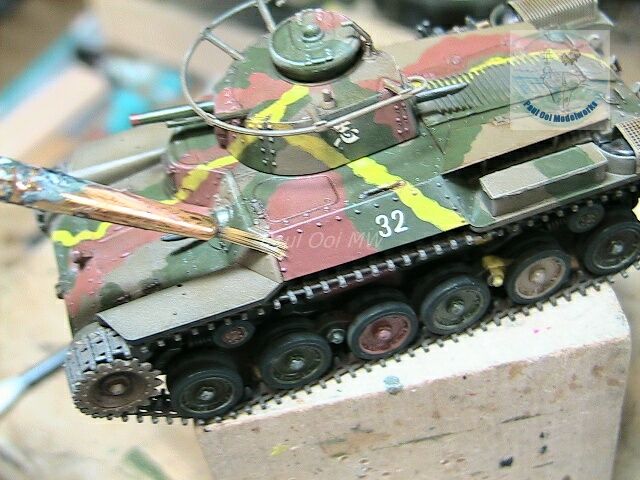
I highlighted the rivet details and edges with dry-brushing of an oil color mixture of cadmium yellow, titanium white and a bit of burnt sienna.
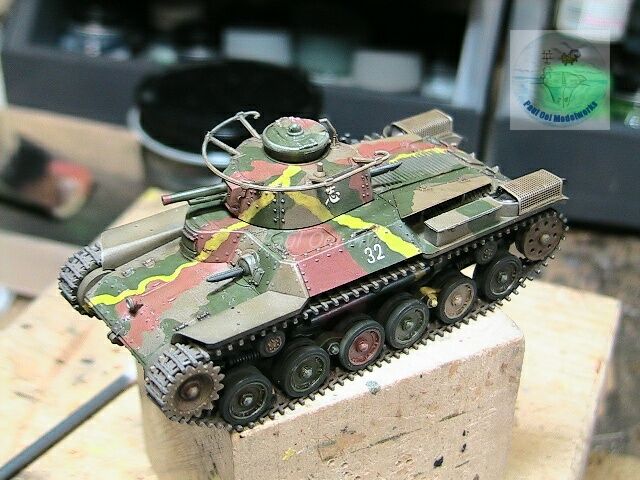

Weathering of the lower half of the tank was done with road dirt and dust using an airbursh spraying diluted Tamiya Dark Earth.
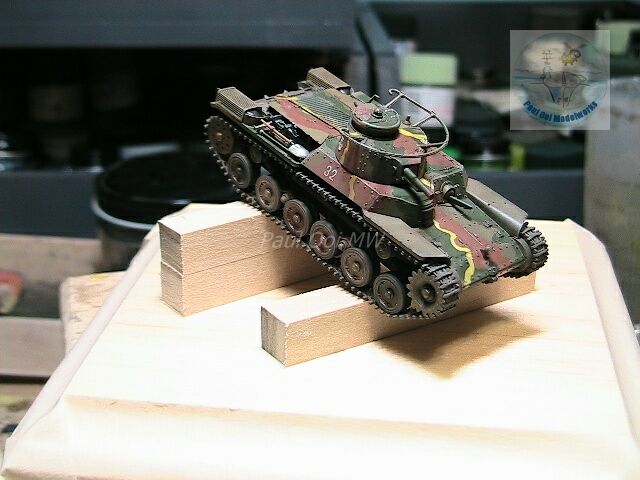
I checked a few different arrangements and elevations that would best portray this tank. I decide to show it charging downhill.
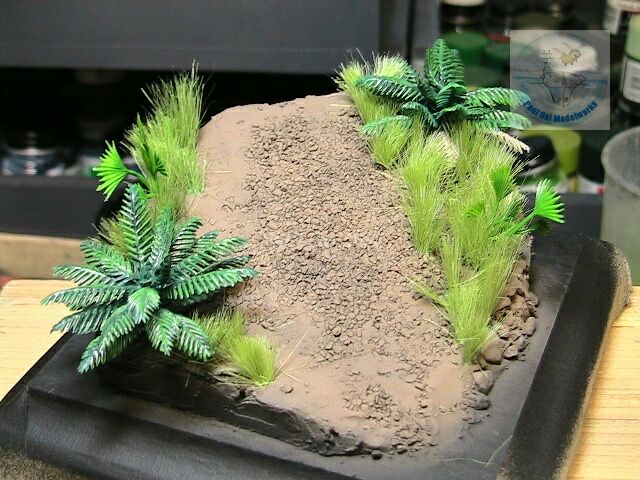
I built a plaster base and populated it with tall “lalang” grass found in great abundance in the Malayan “belukar”. I also added a few miniature nipah palms and monkey palms.
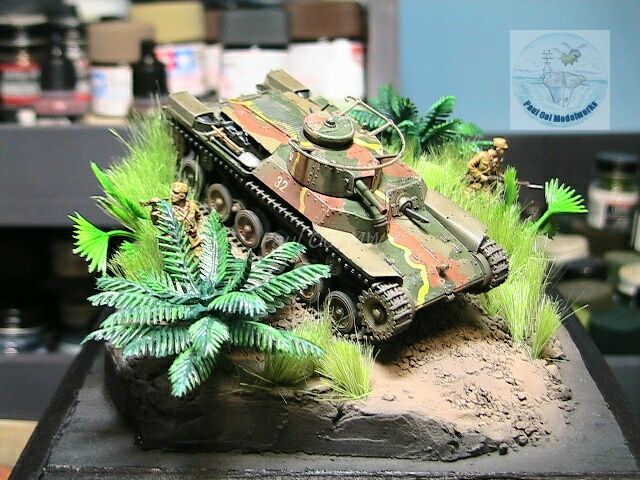
At last the tank was attached to the base together with the two Japanese Army figures.
[…] be painted with oil or enamel paints (they will dissolve and disintegrate, see my post on the Chi-Ha Tank). After a coat of NATO Black, metal parts were painted with Tamiya Gun Metal, and highlighted with […]