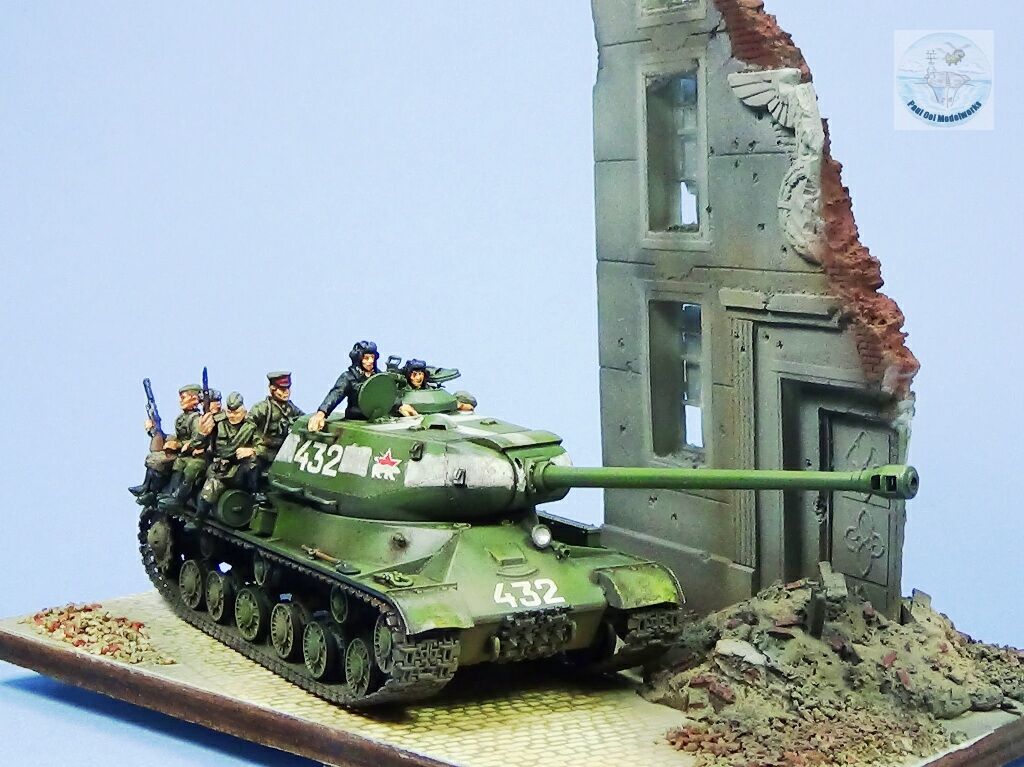
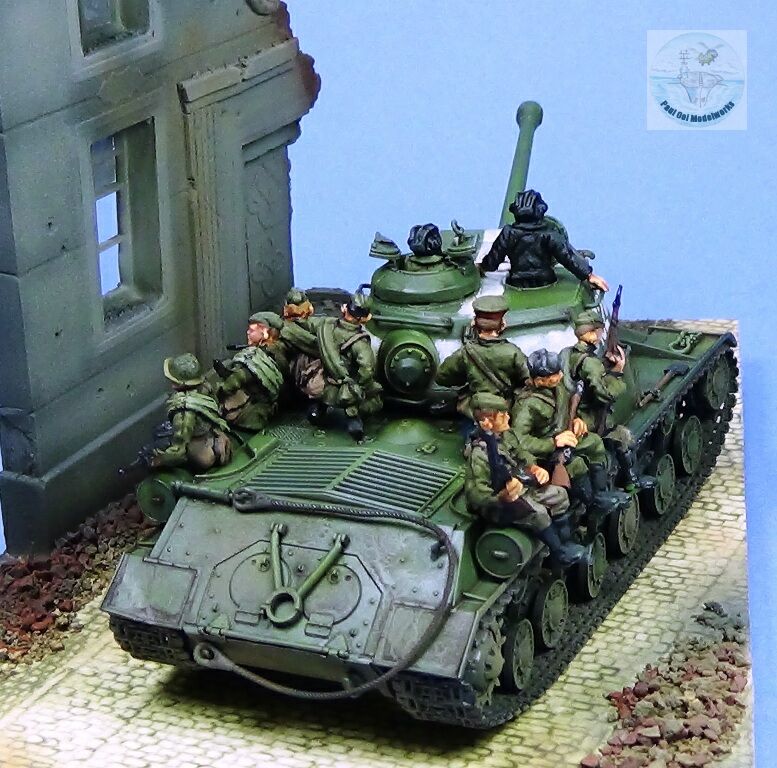
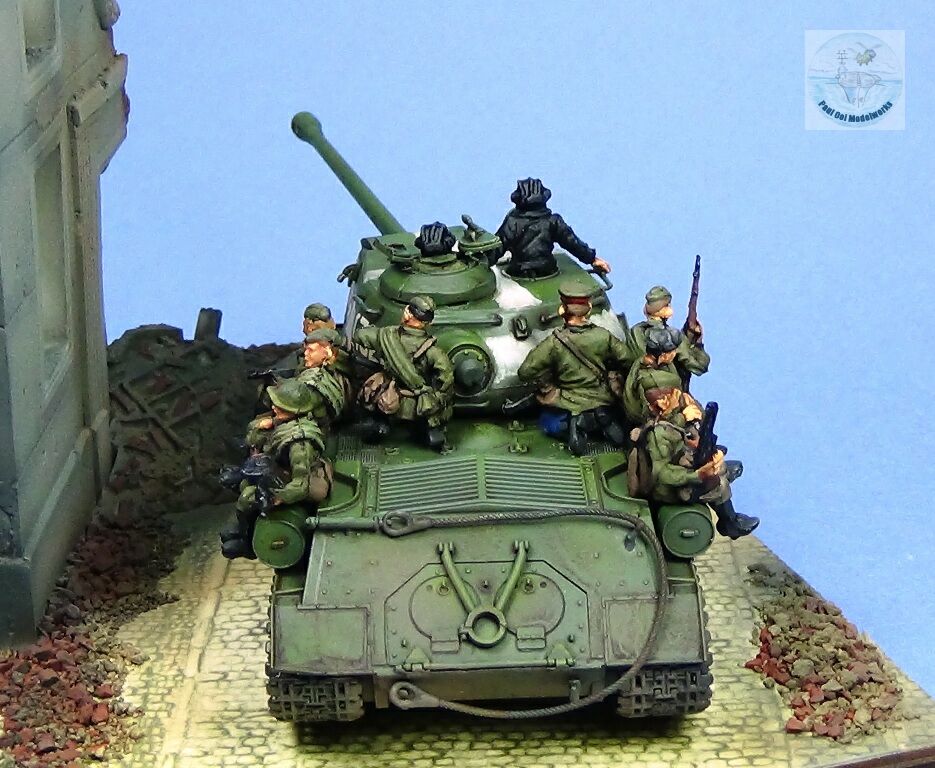
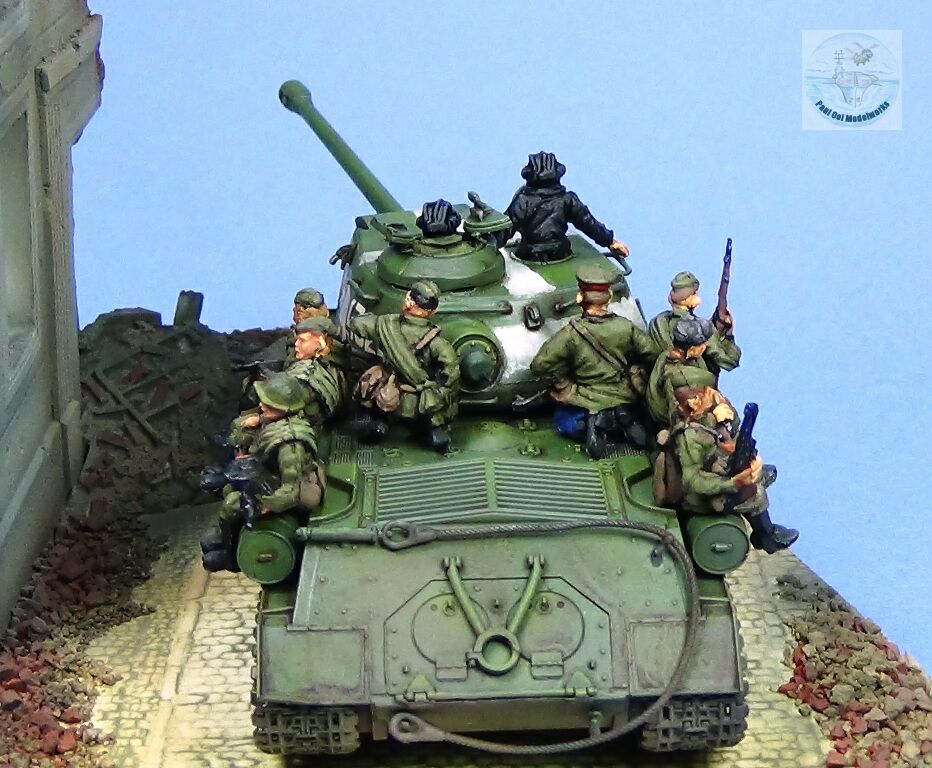
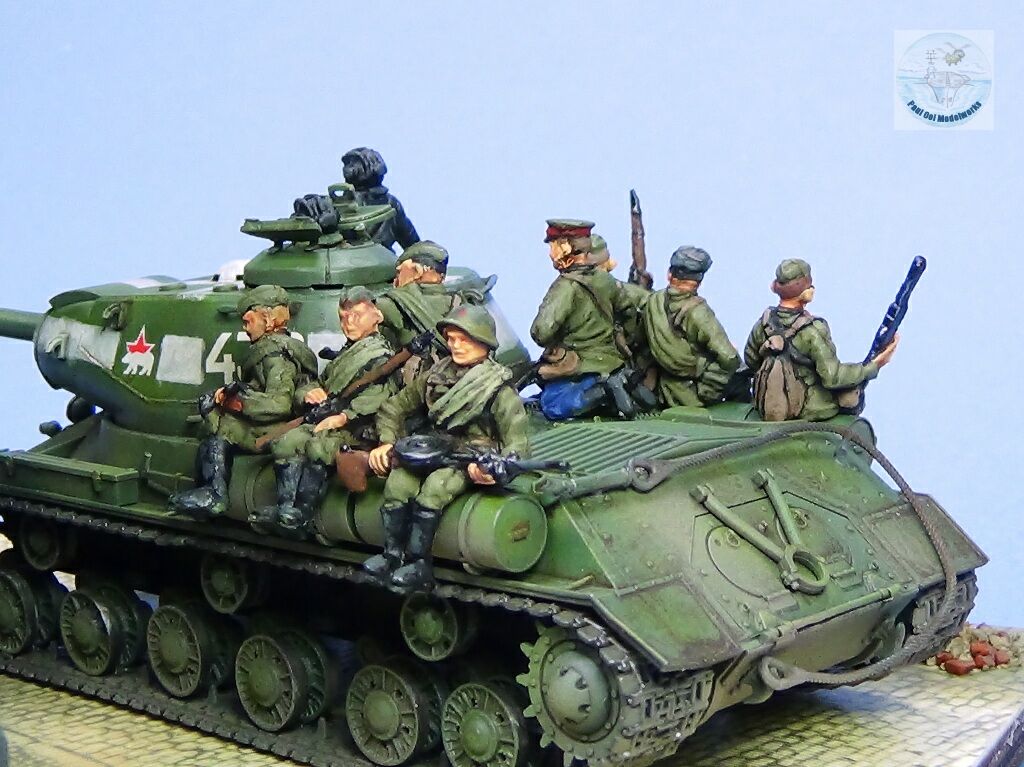
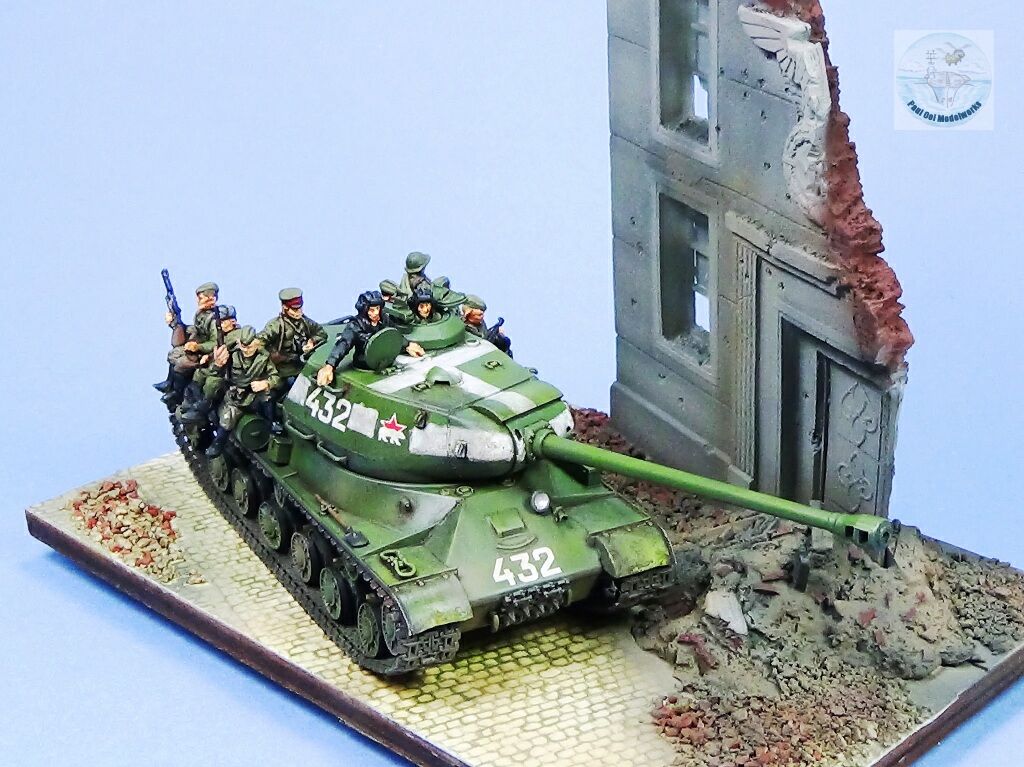
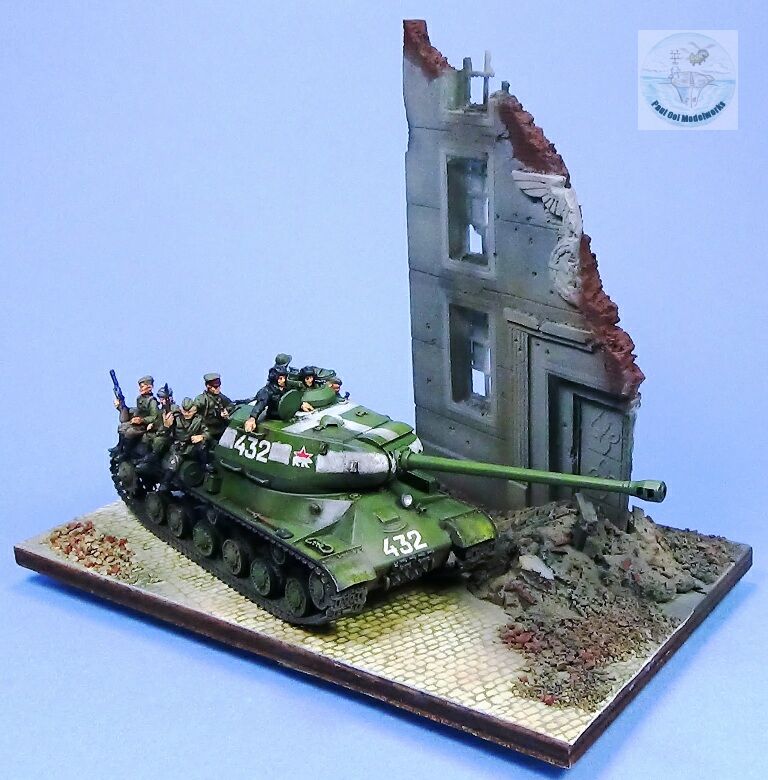
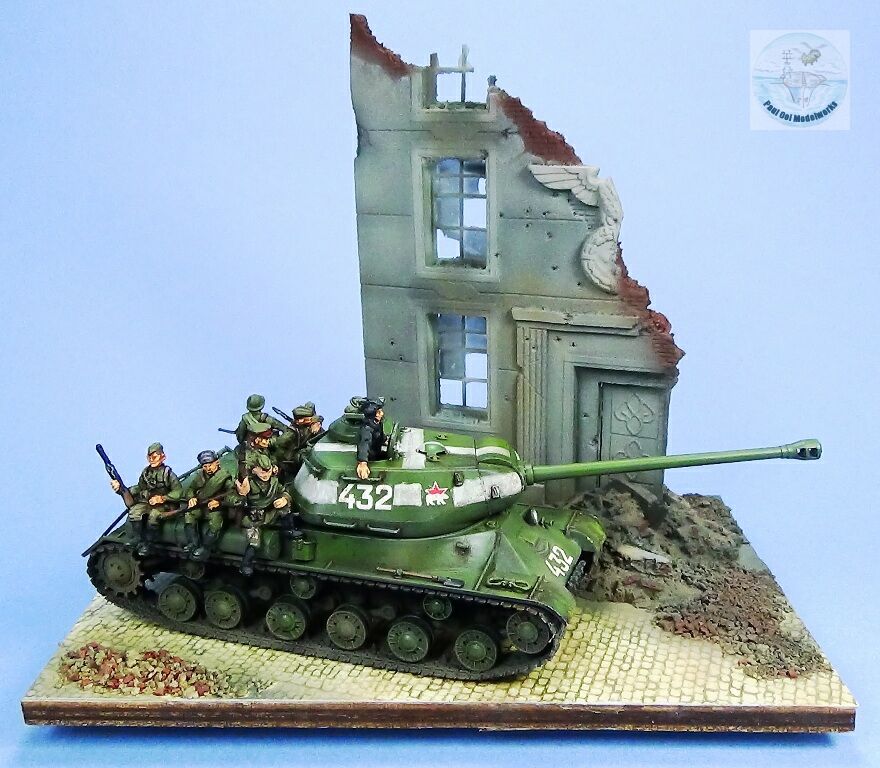
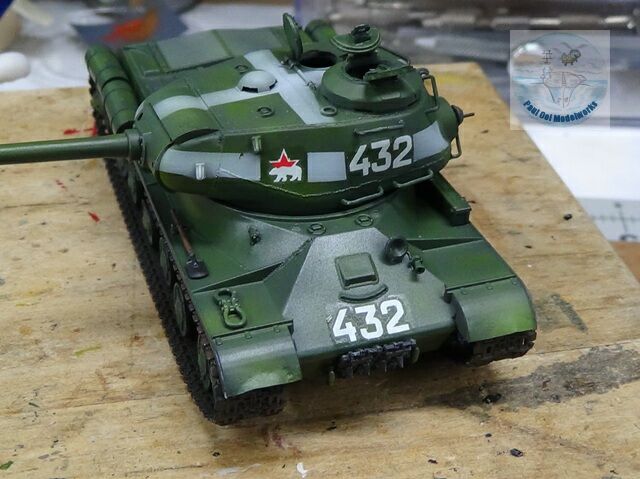
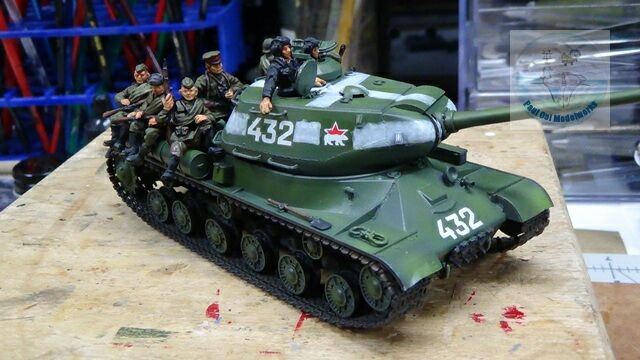
The final two weeks of the Third Reich were terrifying ones for the combatants involved and the hapless civilians trapped in the fighting. The Battle of Berlin pitted 2.3 million Soviet troops against 760,000 German troops in a densely built urban area. The result was a horrific bloodbath with more than 200,000 dead and another 400,000 wounded, not counting civilians killed. The Soviets had overwhelming superiority in artillery and armor, a stunning reversal from the total unpreparedness just four years ago during Barbarossa. The iconic face of the Soviet armored might was the JS-2 Heavy Tank. This behemoth was armed with a 122mm high velocity gun designed to penetrate the thick armor of the King Tigers and Panthers. It became the building block on which future Soviet tanks were based on.
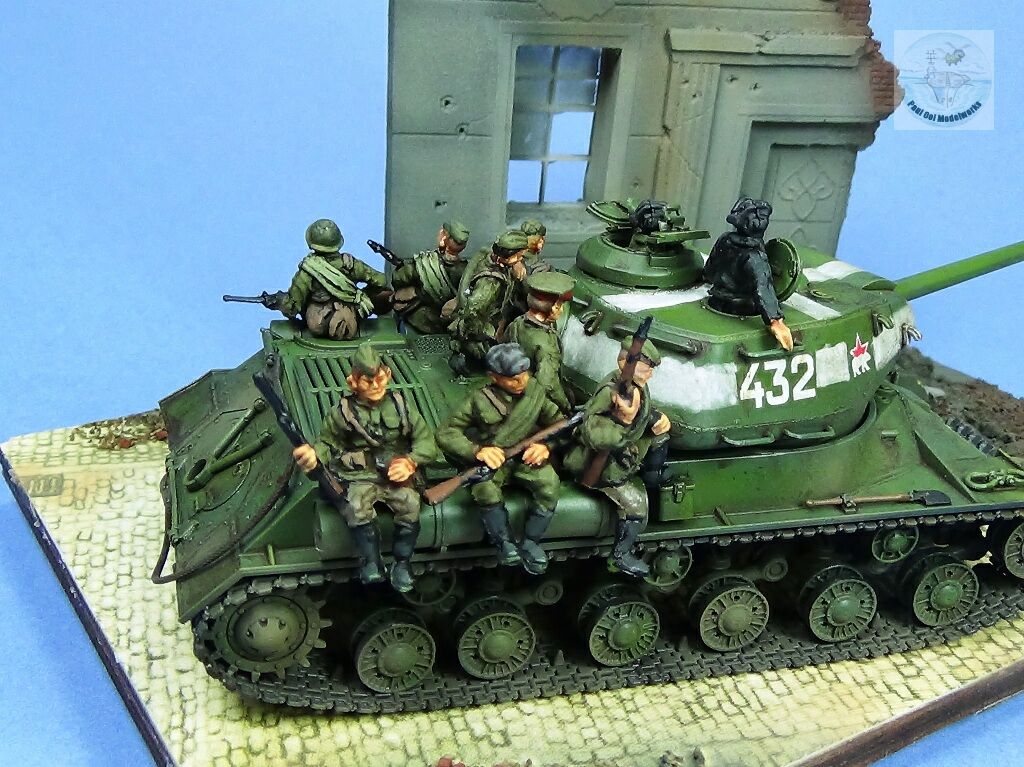
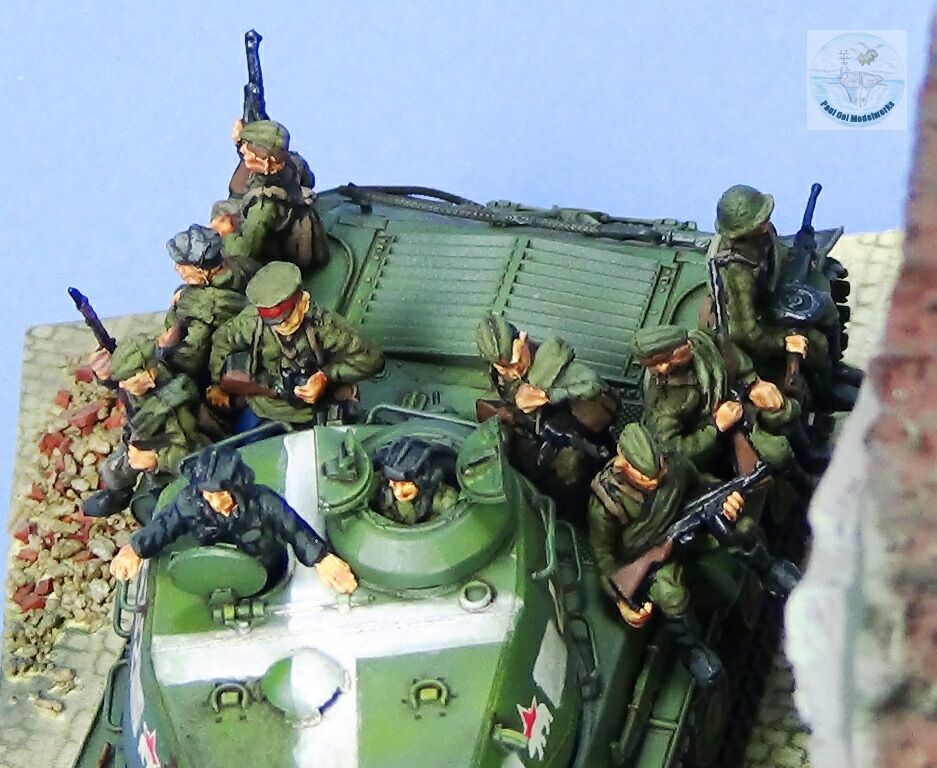
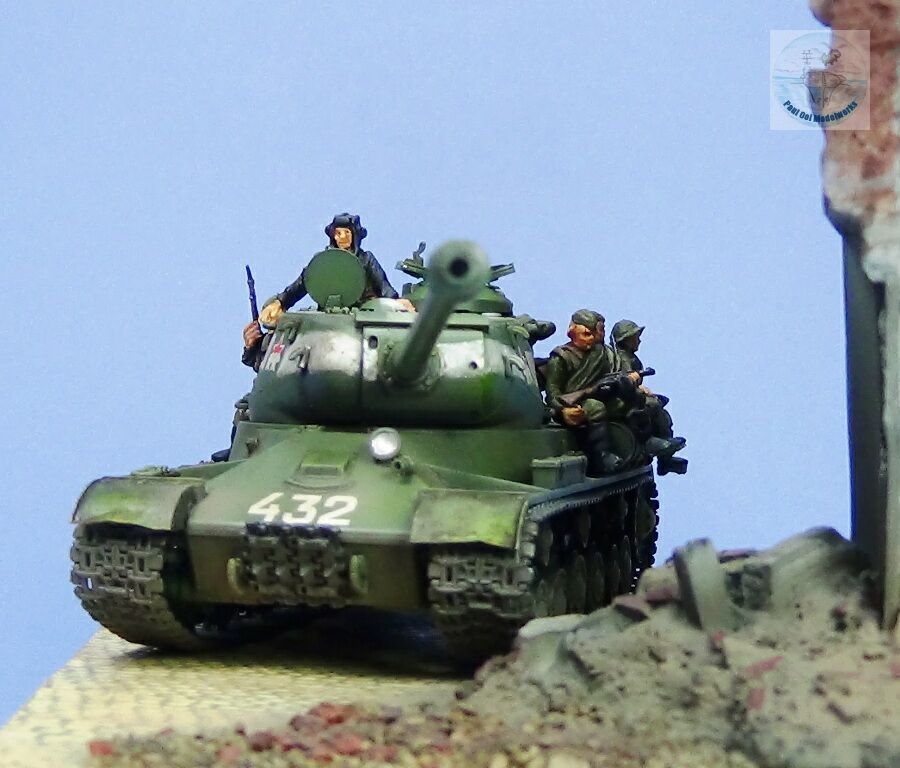
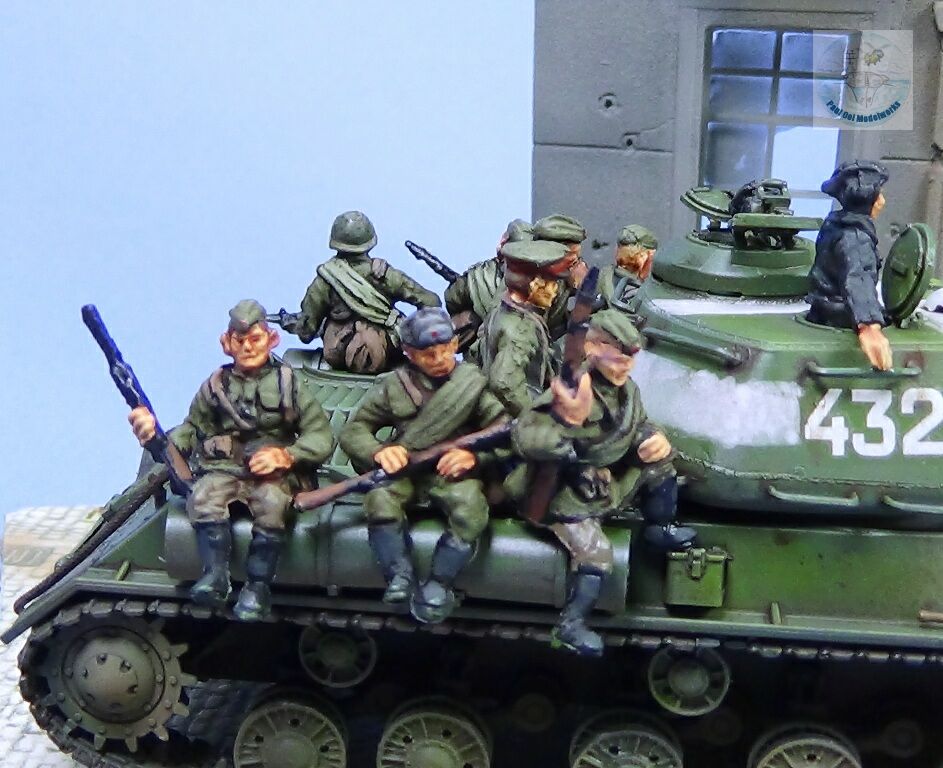
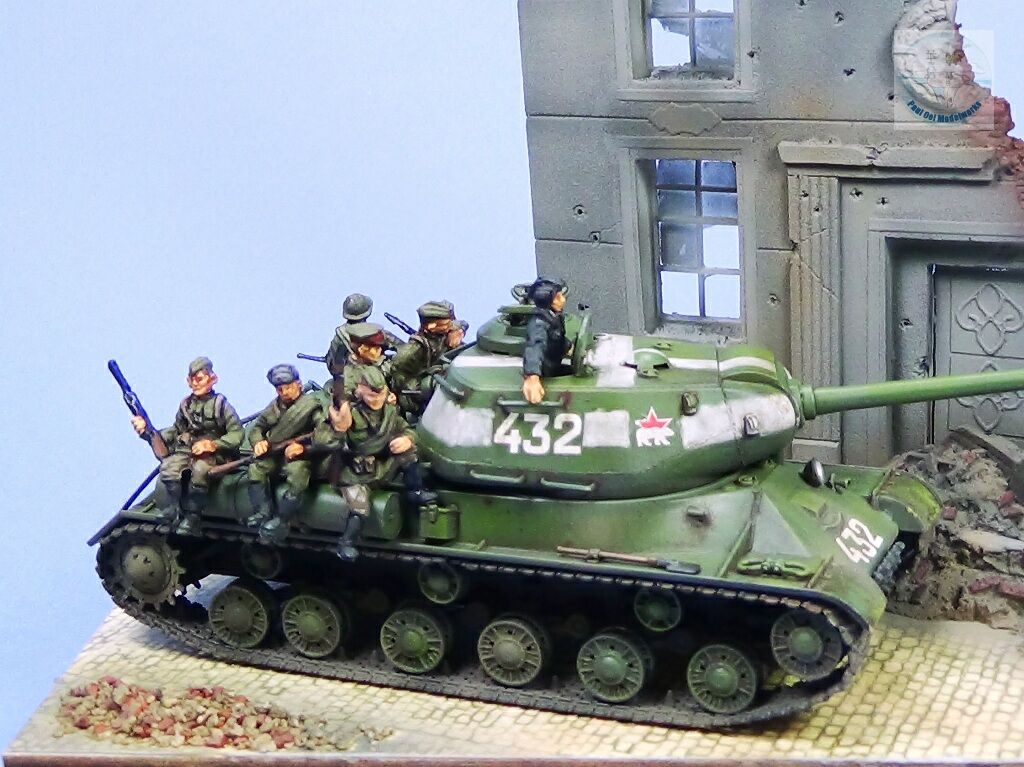
The JS-2 weighed almost 50 tonnes, and had protection to withstand the famed German 88mm gun. While its top speed of 23 mph was sluggish compared to the T-34/85, it made up with sheer firepower and heavy armor. Also as the Soviets converged on the heart of Berlin, advance was slow and the fight went from street to street so the loss of speed was not an issue. The elite Guard tank units were equipped with JS-2 that systematically took out German defensive positions . Whenever a building or bunker was too well-defended, the Russians would bring in the JS-2 and demolish the entire structure with the 122mm gun. To prevent German troops from ambushing the tank with mines or panzerfausts, Soviet troops often rode into battle on the back of the tanks and fan out to engage them. These were the most enduring images of the final assault on the Berlin citadel.
Gallery

Construction Notes
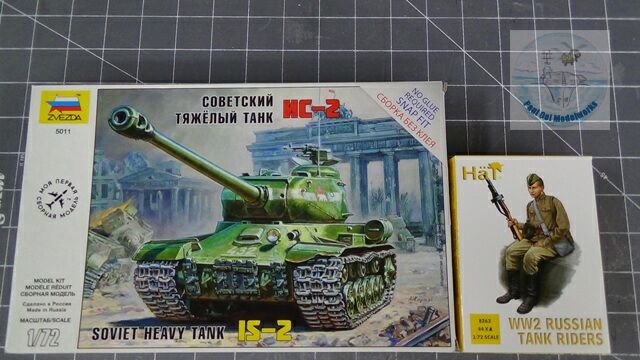
I have been wanting to build this “Berlin” scene for a long time, originally conceiving it for 1/35 scale. However I decided to scale it down to 1/72 and found the Zvezda snap fit JS 2 and HaT’s Soviet tank riders to match. Despite the snap fit nature of the tank kit, Zvezda provided all the fittings and details to be found for a regular plastic model kit. The fit for most of the kit is marvelous and the molding quality was excellent with crisp details, right down to (some of) the prominent welding seams found in Soviet tanks of that era. The 1/72 scale HaT figures match the tank very well, with expressive actions that can match anything in 1/35 scale.
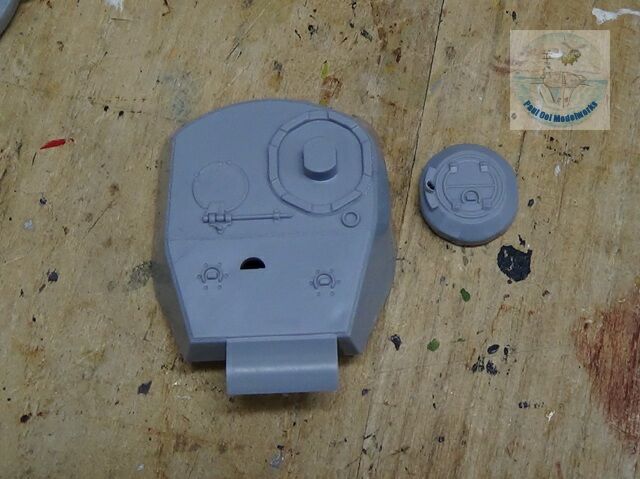
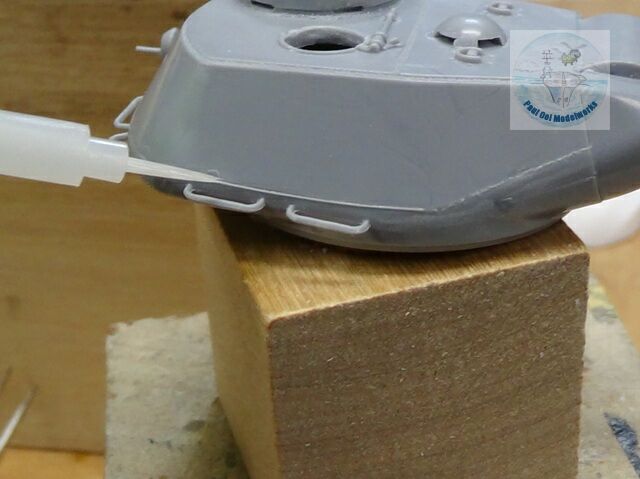
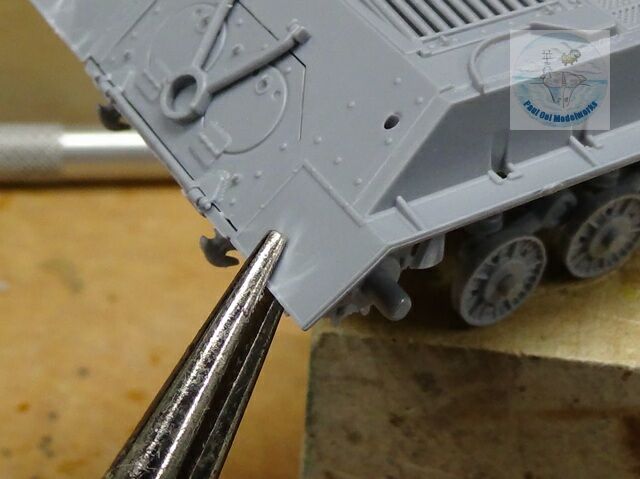
We start with the turret and immediately I had to reckon with some renovations. My vignette requires the tank crew to be seen at the hatches. Since this is a snap fit kit, the turret hatches were all shut.
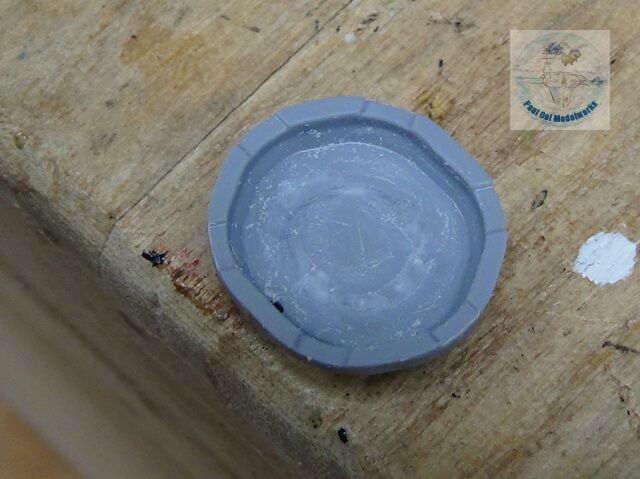

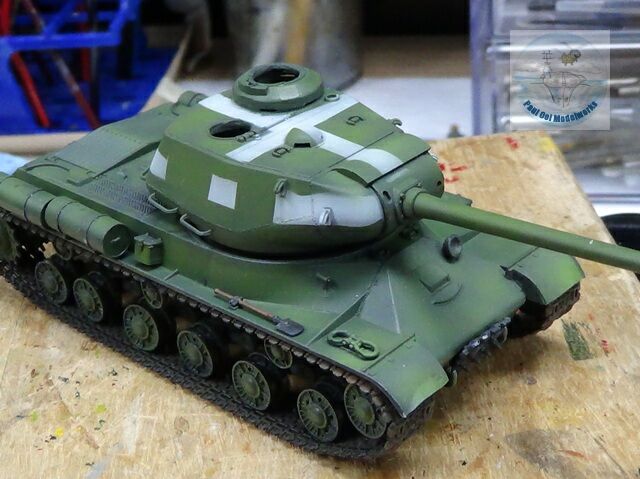
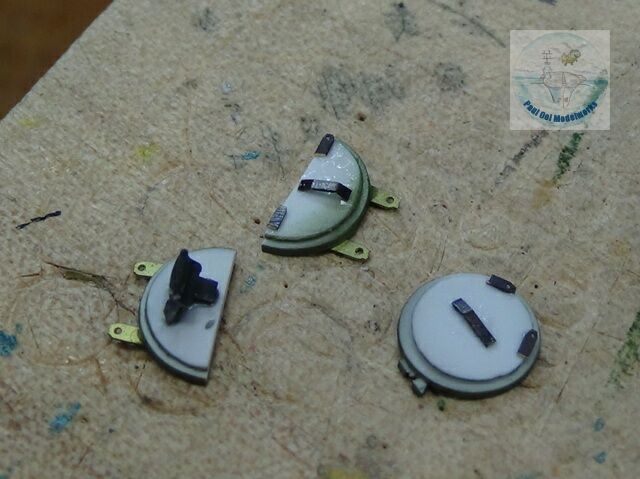
I cut away the snap tabs for the cupola, and also carefully drilled out the gun loader’s hatch. I will replace the hatches with scratch-built ones from plastic stock later.
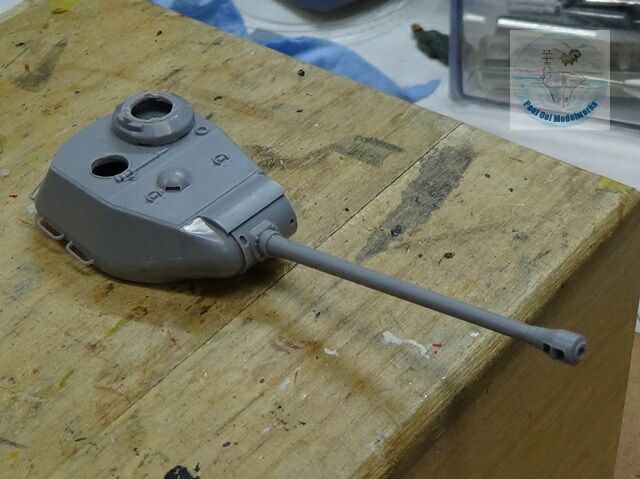
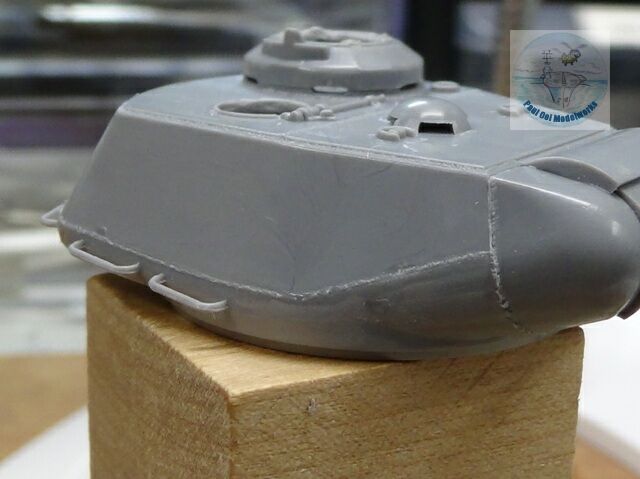
In building the rest of the the turret, I noticed that the seams corresponded the actual real life weld joints. However as a part joint seam, there was no weld bead detail, so I planned to address this later in the build. I also drilled out the gun barrel.

The hull came together very easily, and I still used plastic adhesive despite this being a snap fit kit. In fact it came together too easily and I should have left off the chassis to make track insertion easier. Instead with the upper mud guards on, it became a tight squeeze later on to get the track sections in.
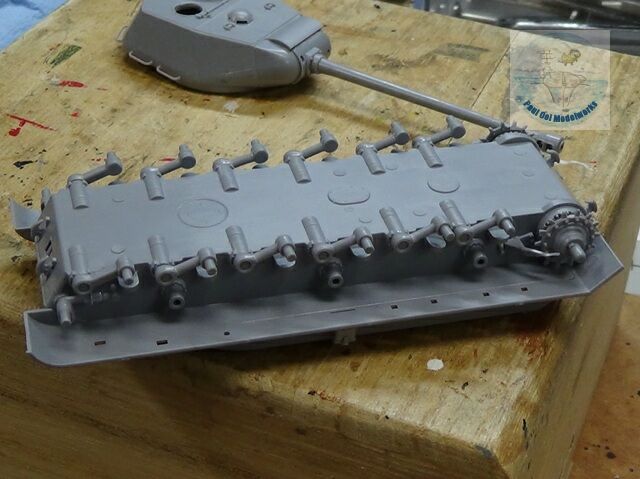
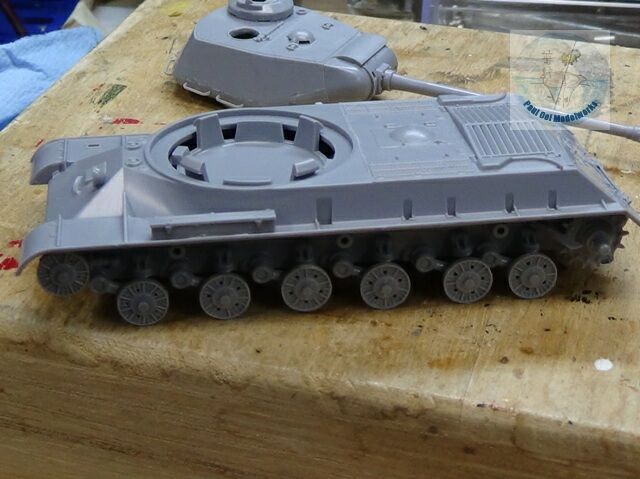
I proceeded to install the torsion assembly and bogies for the chassis. So far so good. Although this is touted as a snap fit kit, some of the insert tabs are very tight. A couple of of tabs for the bogies actually broke when pushed too hard, so I had to be extra careful , using cynoacrylate to repair those broken joints.

Earlier on, I had mentioned about the lack of the correct weld seam texture at the actual joint of the clam-shell sections of the turret. To make a well bead, I first apply section of stretched sprue over the joint line. This sprue is then softened using liquid cement so that it “melts” into the joint line. Then I use a steel stylus to shape the soft sprue material to approximate those weld patterns seen at actual Soviet tank seams.
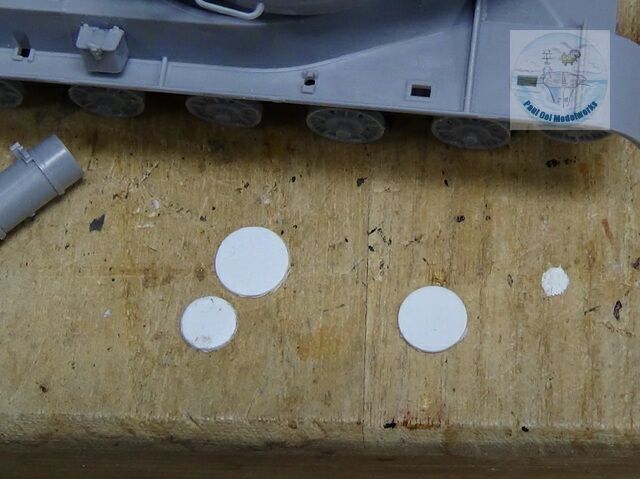
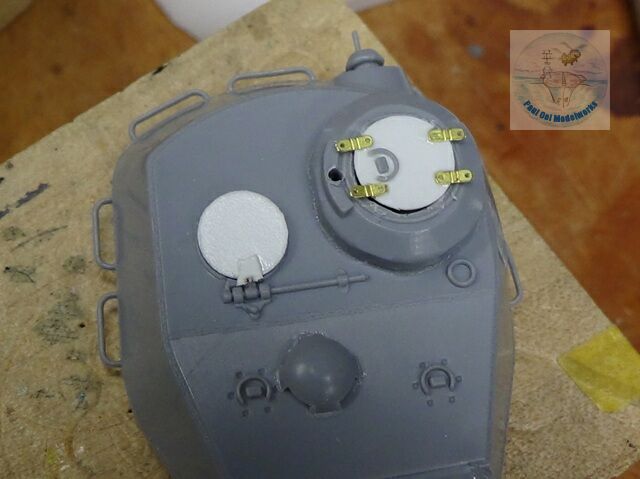
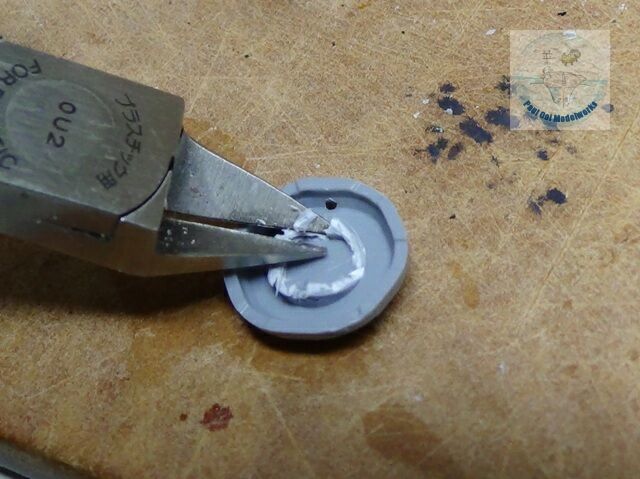
Remember the hatch covers that we drilled out earlier on? Now I use leatherwork steel punches to make new covers with Evergreen plastic stock, and then rebuild the hinge and periscope details with spare photoetch and plastic parts.
Most wartime pictures of JS-2s show the mud fenders to go missing or badly dented. I decided to go with dents so I used a pair of long-nosed pliers to carefully twist the fenders.

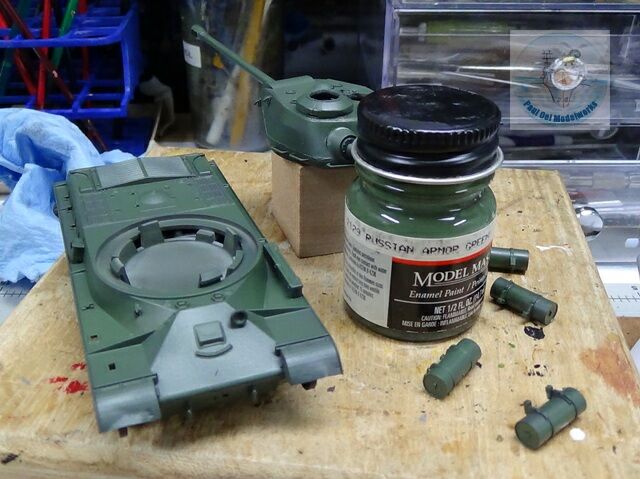
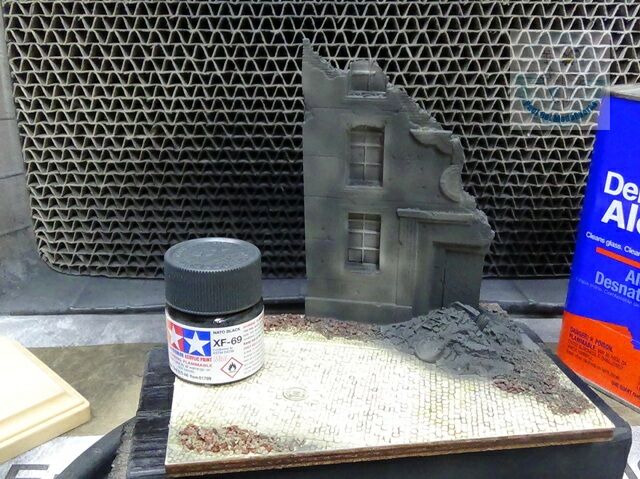
As is my normal practice, I apply a primer coat of Tamiya NATO Black followed by Model Masters Russian Armor Green.
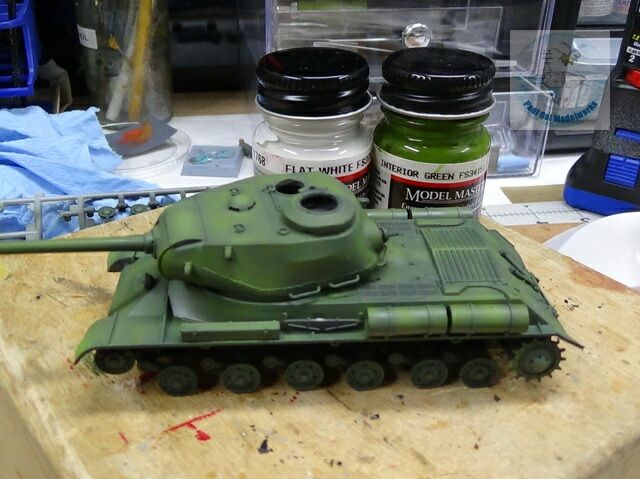
Then I highlighted some areas with Model Masters Interior Green FS34151, and then some super highlights with a mix of 1:3 Insignia White: Interior Green.
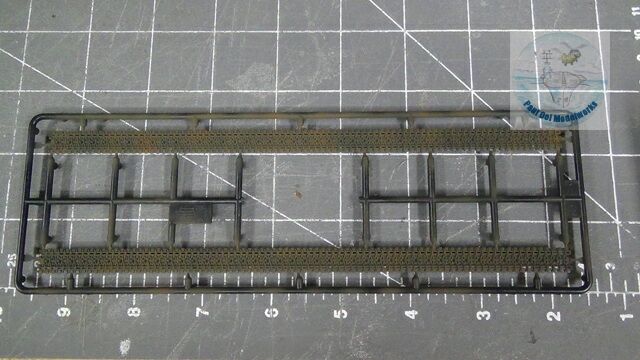
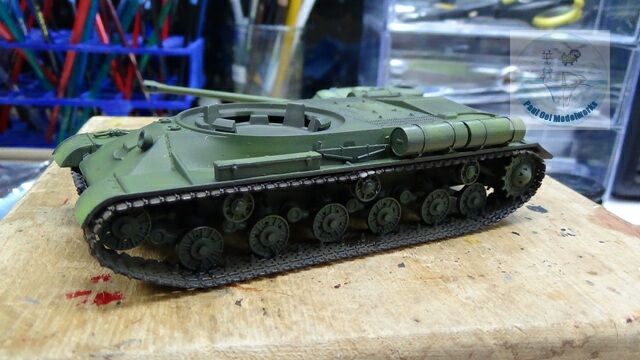

The polystyrene tracks came in a gun metal color, but I over-painted these with Tamiya NATO Black, highlighted with pencil lead details, and then patches of Tamiya Flat Earth. The tracks had these large mounting bracket meant to line up with the upper follower wheel holes, but these turned out to be hard to align. So I decided to treat the tracks like usual wrap -around tracks fixed with glue to the bogies. This approach worked much better for me.
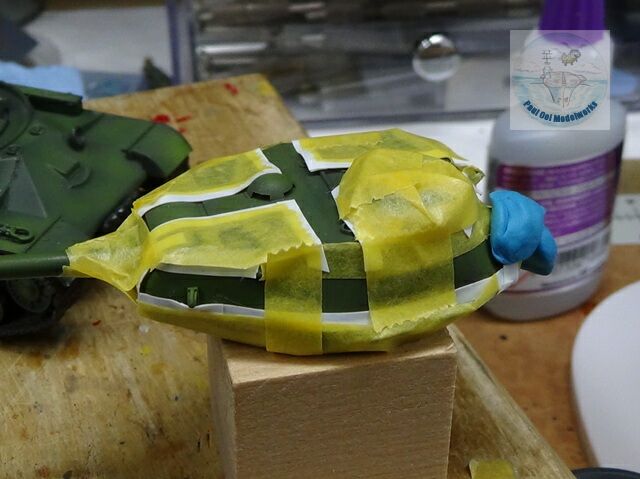
In the Berlin campaign, the Soviets found themselves in danger of being accidentally struck by nearby Allied aircraft from the USAAF and RAF. To solve this problem, it was agreed for Soviet tanks to have large white identification crosses painted onto the turrets. The kit came with some white strip decals but these were too uniform and neat, unlike the field-applied originals. I decided to spray paint these on after masking, using diluted Tamiya Flat White. Then I sealed the paintwork for decals and weathering by spraying 2 coats of Pledge Floor Polish.
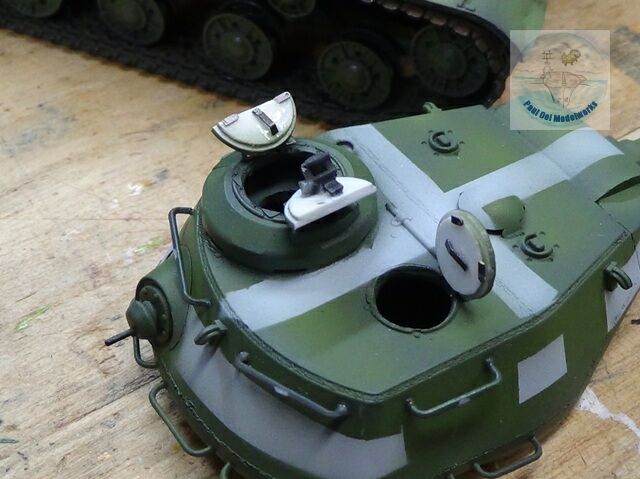
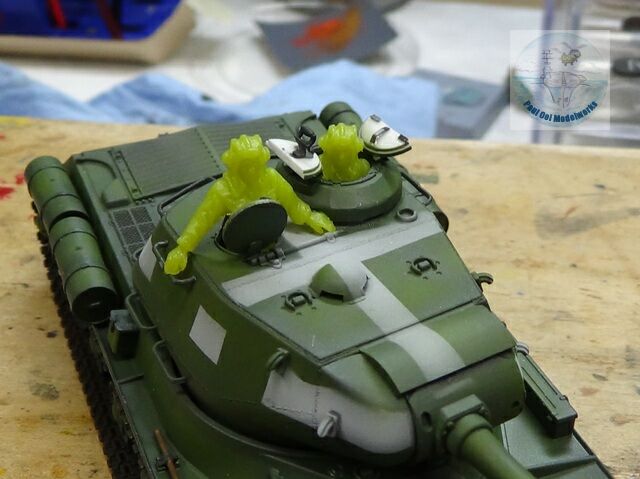
Remember the hatches from earlier on? I now construct the interior details for those hatches using scrap plastic and spare photoetch parts. I also did some trial placement for the tank crew.
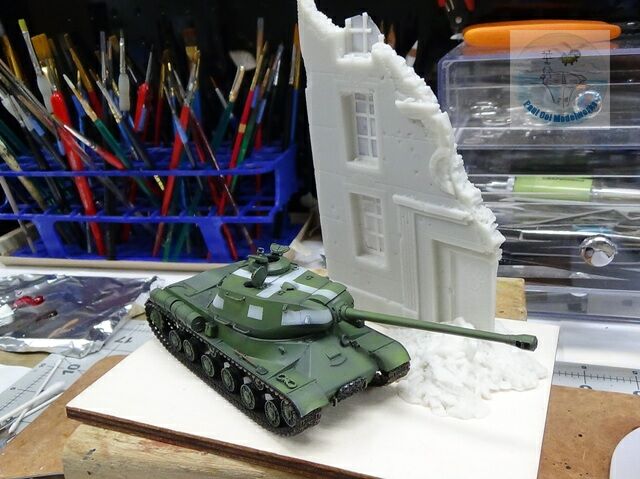
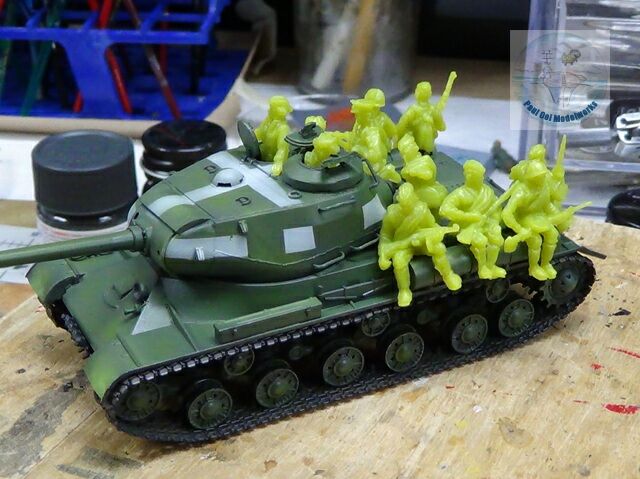
I also did some trial placement of tank riders as well as the layout of the diorama showing the tank making its way through the ruins of central Berlin government buildings.
I painted on Microscale’s Micro Gloss directly at the decal sites, and then once dried, I applied the decals. This helped the decals to settle well without silvering, and then the area was sealed under a satin varnish.
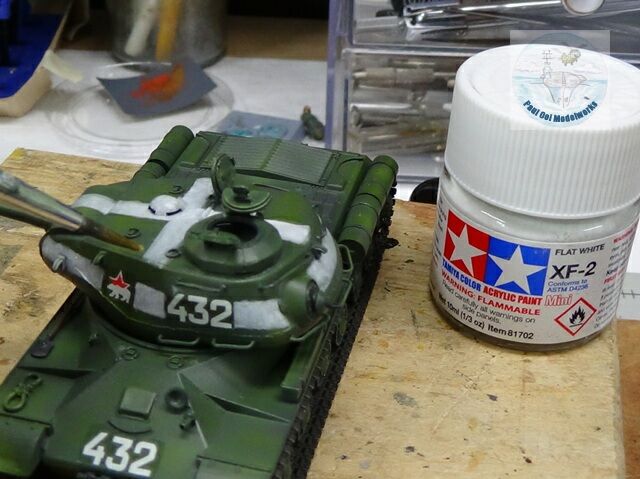
I hand-painted more Tamiya Flat White on the identification marks to remove the masked effect and create more of the field-applied look found in the actual photographs of JS-2s in Berlin.
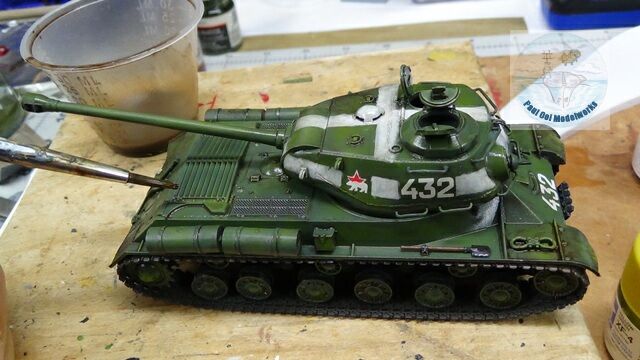
I applied a generous weathering wash of 3:1 Burnt Umber: Lamp Black Oil Color mix.
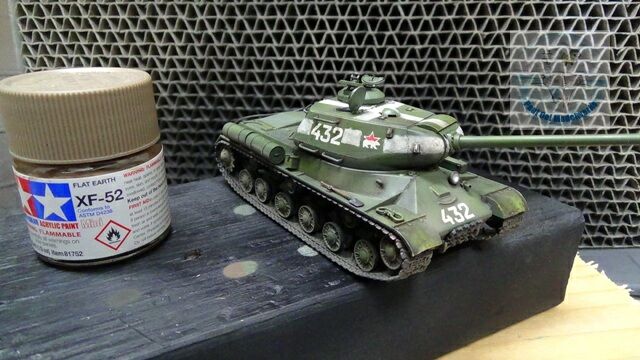
Finally, diluted Tamiya Flat Earth was sprayed to the underside and tracks to weather the tank with dirt and mud.
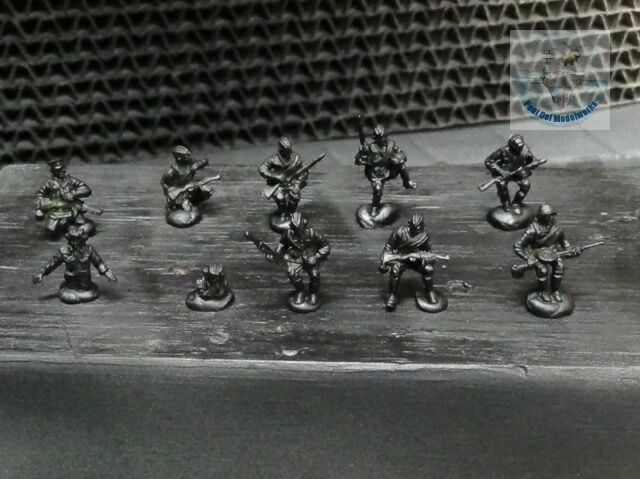
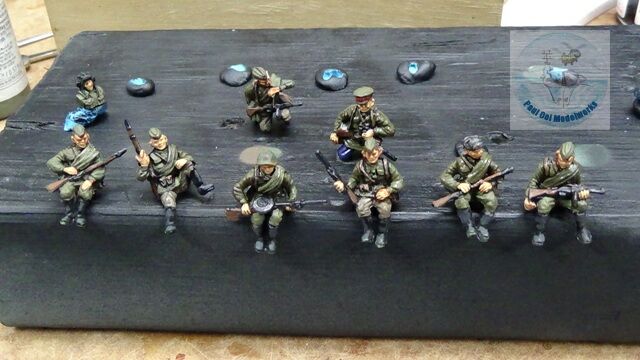
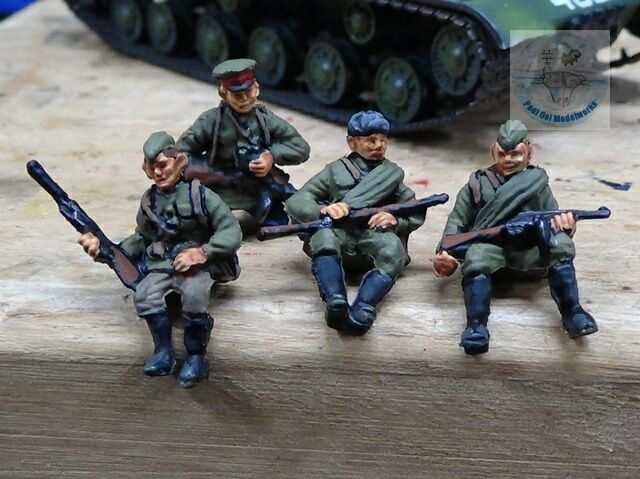
The Tank riders were first primed in Tamiya Flat Black, and then painted with Vallejo colors. The Soviet uniform base color was Vallejo 70.924 Russian Uniform WW2, and then various shades of khaki from Tamiya applied to give some variation. I will post a future tutorial on painting 1/72 scale figures.

The figures are then dry-tested to see which positions were most suitable on the tank.
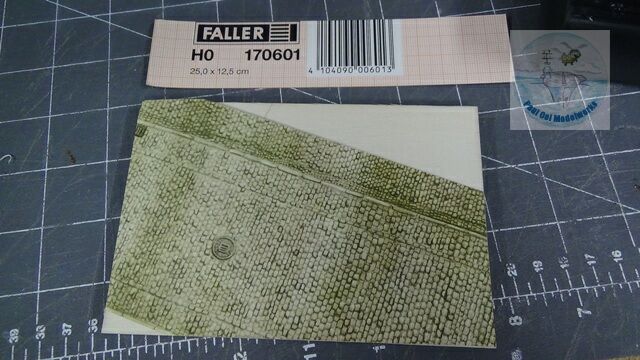
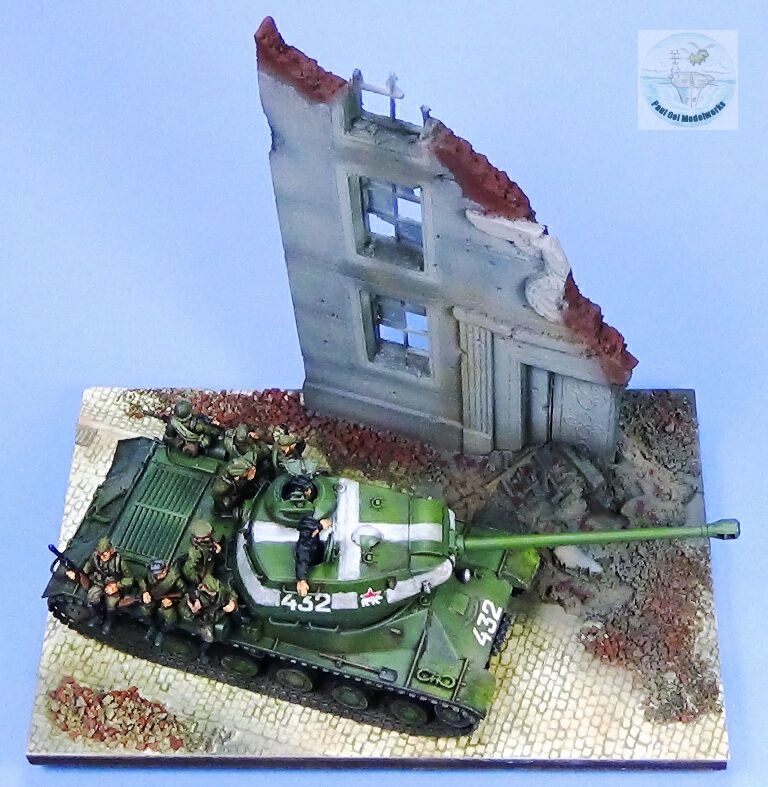
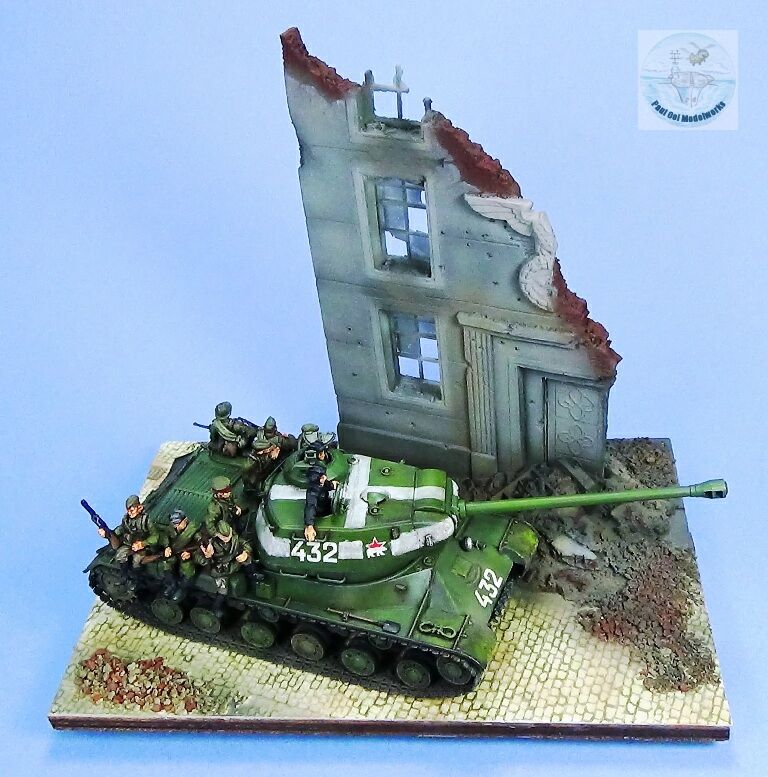
For the base, I started out with a 4″ x 5″ plywood board and cardboard cobblestone street HO 170601 from Faller. The cardboard was firmly glued to the wood base using Lineco pH Neutral white glue.
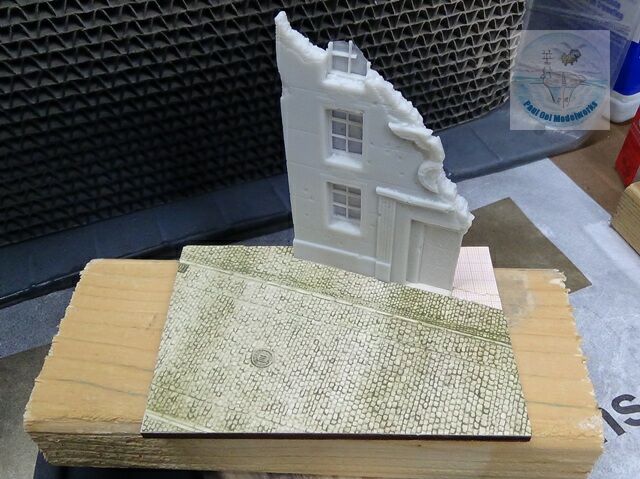
The resin building facade was from Reality In Scale Berlin ’45. I attached the resin piece onto the plywood board.
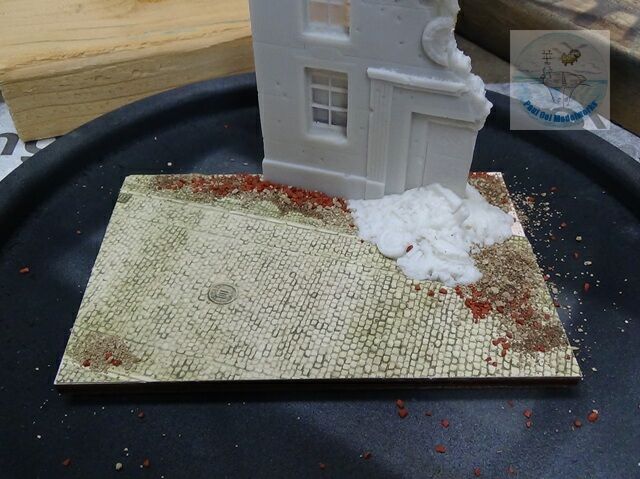
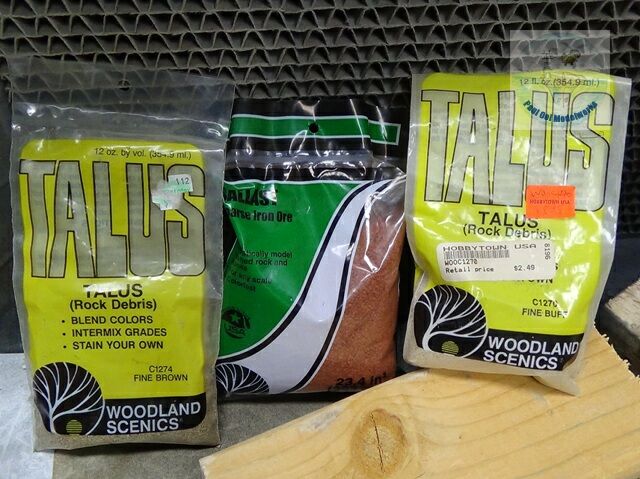
The resin building comes with a nice pile of rubble literally at its doorstep. I augmented that pile with smaller debris piles from various talus from Woodland Scenics.
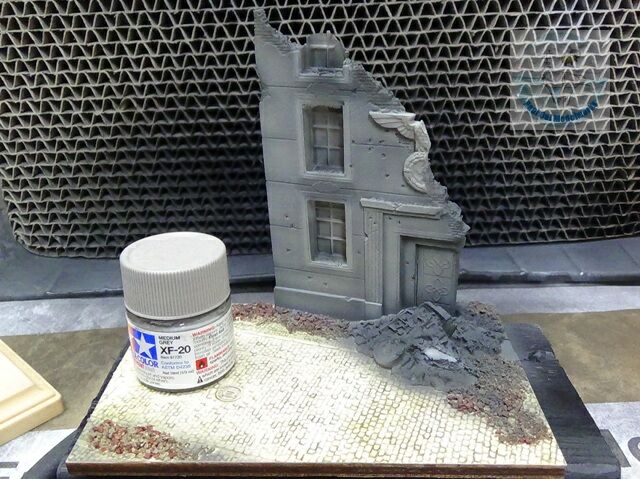
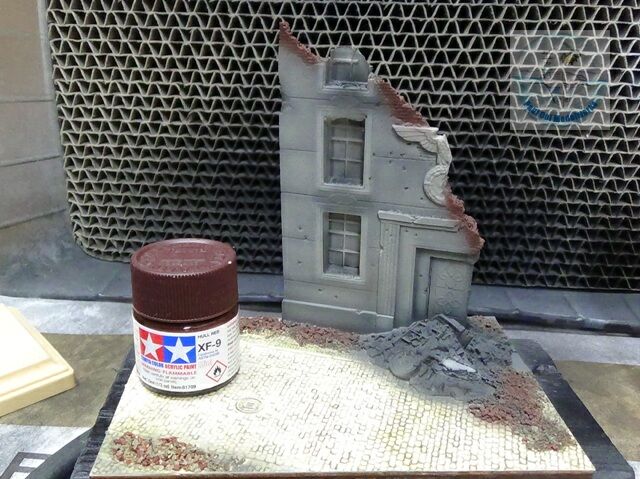
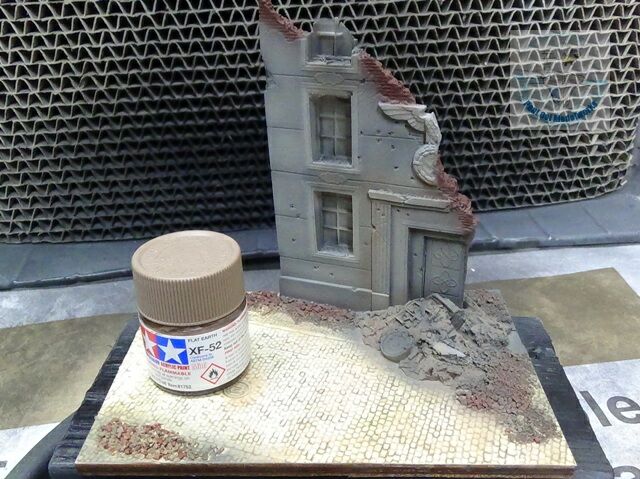
To paint the building facade, I started with a blotchy primer of Tamiya NATO Black. This is then followed by the stucco textural surface using Tamiya Medium Grey. By varying the thickness of the grey paint, I could highlight more of the shattered marble Nazi insignia on the building. Next, the exposed bricks were painted Tamiya Hull Red, followed lastly of all with random patches of Tamiya Flat Earth.
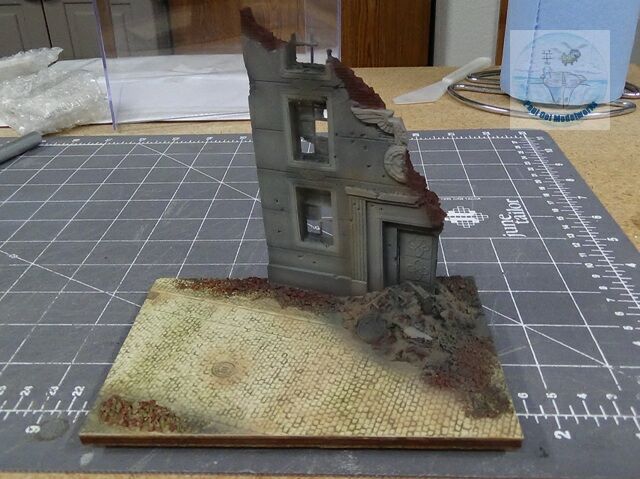
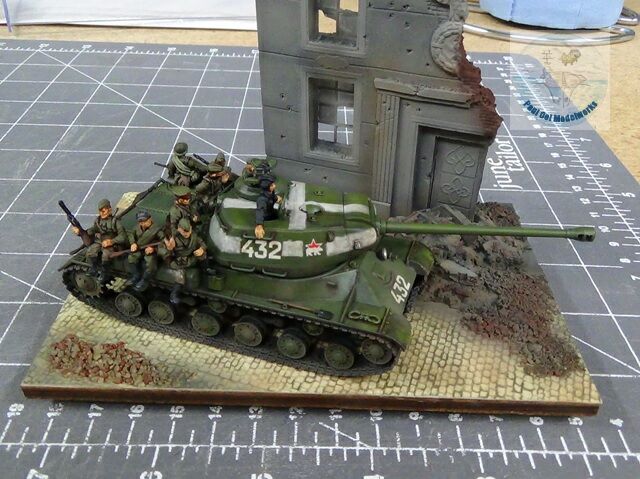
There were a few more touch ups for the rubble pile details (paint the bricks, stray Panther wheel) and the base was ready for the big Soviet steamroller. Onward to Victory!
Ciao, molto bello!
Ho preso spunto per il mio IS2 che sto costruendo adesso (solo modello, no diorama)
Ciao Gianfranco,
Buona fortuna con il vostro progetto! Sono contento che il mio post sia un’ispirazione per te.
Paolo