
The Israeli version of the Mirage III, also known as the Shahak was the single most iconic aircraft of the 1967 Six-Day War. These graceful and sleek fighters of the Israeli Airforce were silver streaks bringing sudden destruction over the skies over Egypt and Syria. The phenomenal success of the Mirage III made it a top seller with many other air forces around the world in the wake of the Six-Day War. The Shahak continued to soldier on for the Jewish state, being one of its main fighter jets until it was replaced by the F-16 in the 1980s. During that time, it featured prominently in the 1973 Yom Kippur War, and the First Invasion of Lebanon in 1978. Squadrons of Mirages in Northern Israel were also involved with the dogfights and interception missions against the Syrians over the southern border of Lebanon in the early 1980s.
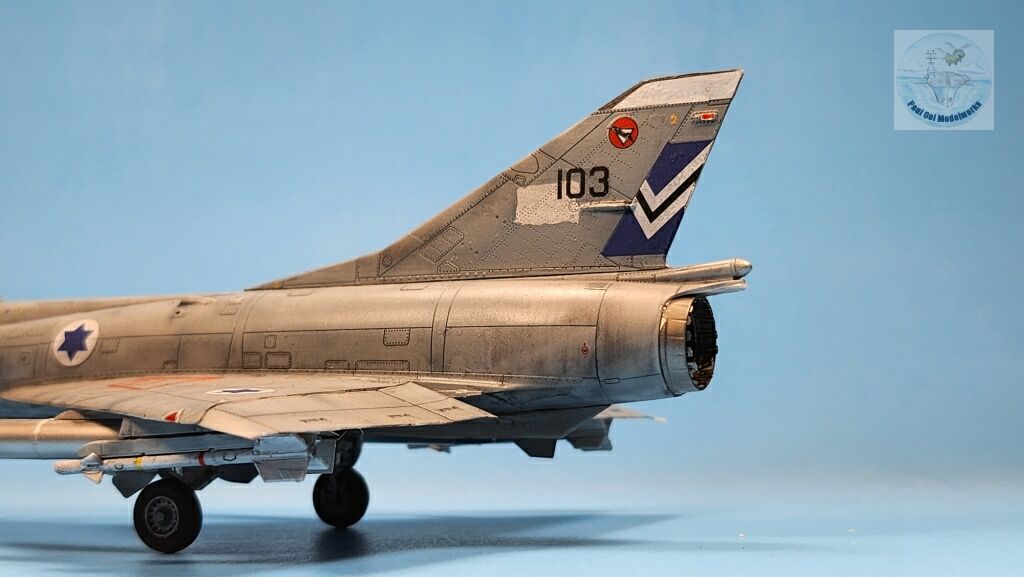
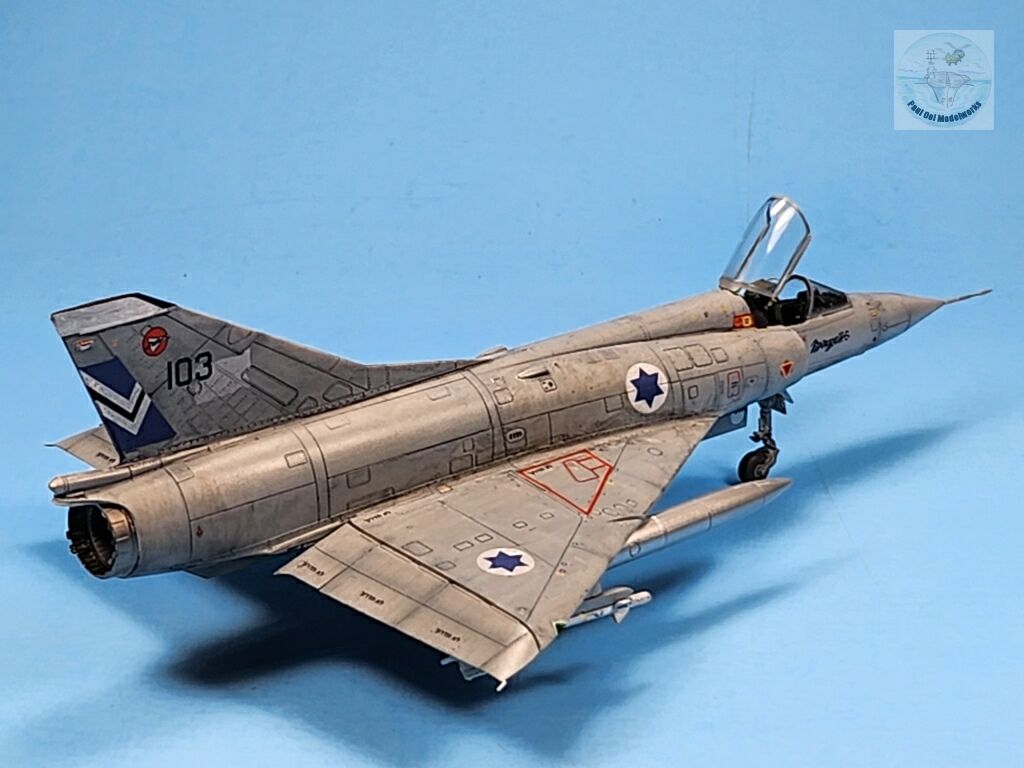
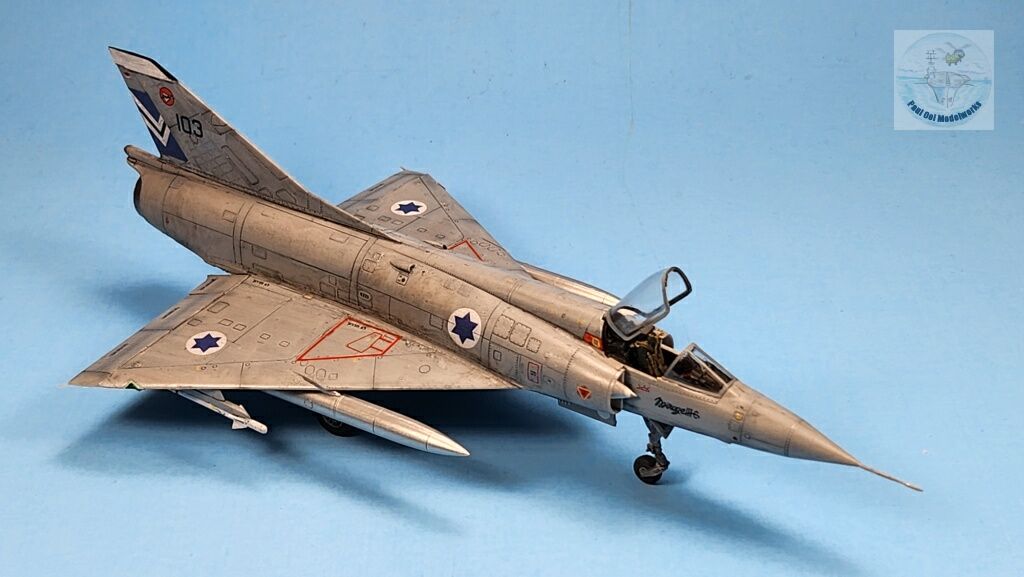
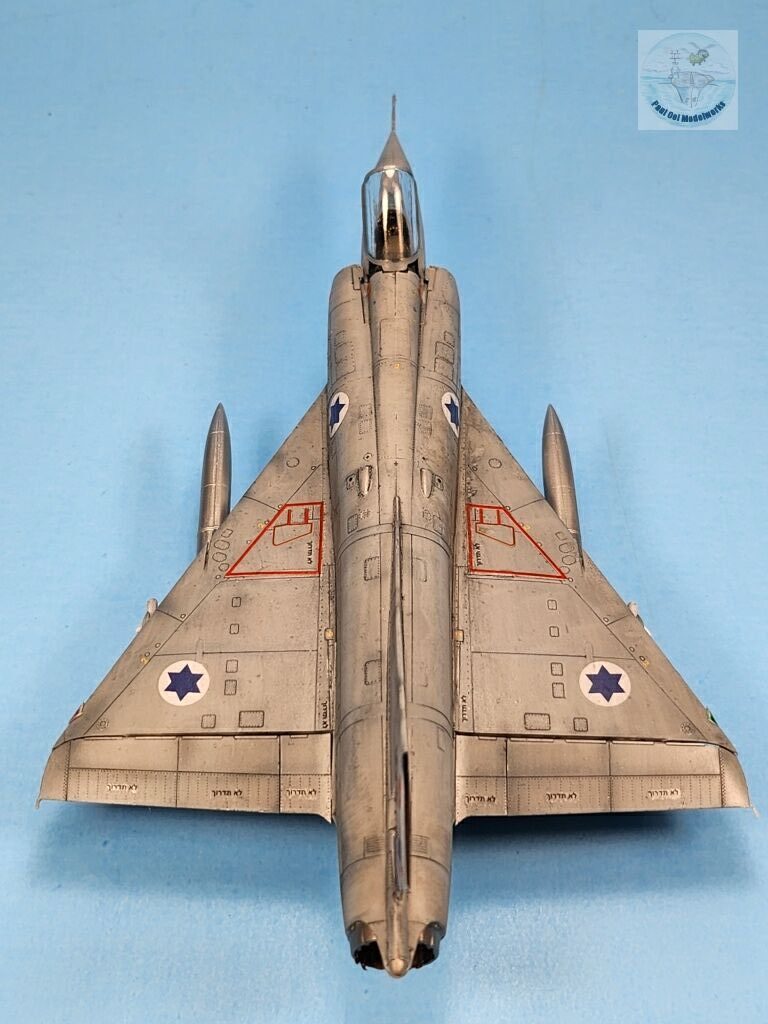
I decide to build this 1/72 scale model of the Mirage IIICJ in its final Ghost Grey livery from 1981. The battle-worn veteran is shown here, streaky with oil and grease from long use, but still as deadly as ever in its fight to defend the Galilee and the Israeli positions at the Golan Heights. While the color guide shows a tow tone Dark Ghost Grey and Light Ghost Grey, reference photographs from 253 Squadron seem to show a more uniform grey finish. This may be a photo lighting effect, or the bleaching of the grey shades under the sun may have turned them into a seemingly uniform light grey of sorts.
Gallery


Construction Notes

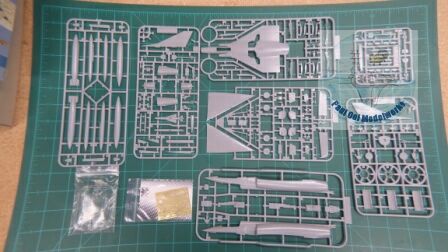

This short run kit from Modelsvit of Ukraine are full of alternative parts, a photoetched fret, and even paint masks. This is a complicated kit for 1/72 scale and should only be attempted by experienced modelers. The decal sheet is excellent and the transfers are nice and adhere well to the surface. The fit can be challenging, especially in the cramped, small area that is the cockpit. There are parts of the kit that I felt were a bit over-engineered, but the results can be very rewarding.
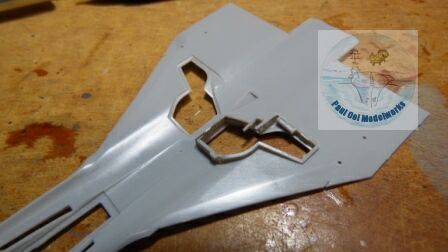
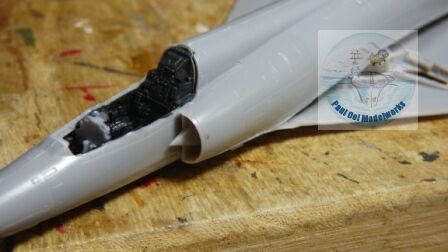
 The cockpit area is very detailed and very cramped. The floor space beneath the cockpit is taken up by the forward wheel well, so there is precious little space left for the weights. I held these small split sinkers with blue tack, which adds some of its own weight as well. This picture shows the ejector seat in place, but I actually did not attach it until close to the very end of the building process for ease of handling and to prevent damage to the very delicate seat assembly.

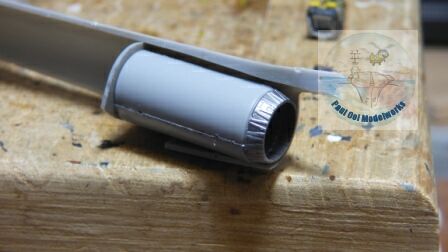
Next, I work on the engine can, painting it in Burnt Metal.
 The fuselage fit is reasonably good, but it does require careful alignment and getting the very tight cockpit section to fit. The fuselage halves are not very rigid as there is a cavernous void in the middle which will only firm up once the delta wing sections are fitted.
The delta wing underside section is a large single piece that extends from the front wheel well almost to the rear exhaust. The side walls of the shallow wheel wells have to be built around the openings.
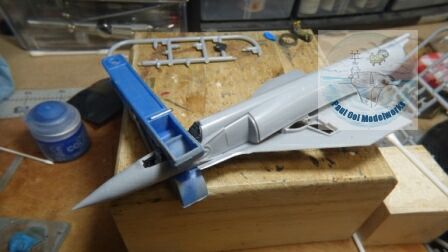
The wing underside gets clamped onto the main fuselage. The fit is very fussy, and one has to be very careful doing this as some of the sections can be easily damaged.
 Next, we assemble the intakes on both port and starboards sides. Be careful as the nacelles are not the same on each side. Note the orientation carefully.
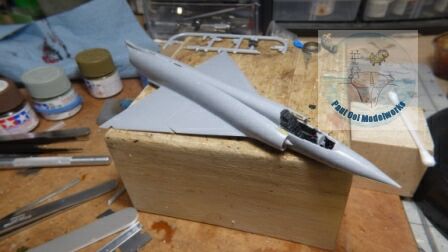
The upper wing halves fitted nicely without issue, especially along the wing root. Given the prominence of the delta wing root line, this was a huge positive!
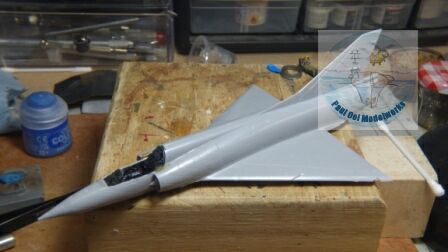
The rear stabilizer is a butt fit with very little guide for attachment, so careful alignment is necessary. There is a long seamline on the starboard side that i had to fill using the technique from Tutorial 3.
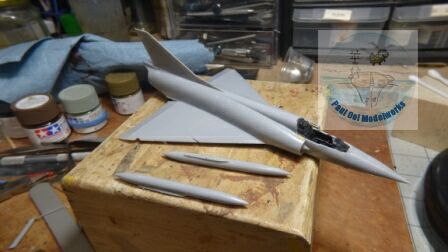
The drop tanks are next. This kit requires a surgical replacement of the rear tips of the tanks to fit a stabilizer fins used in the 1981 version of the Mirage Shahak.

The two Sidewinders were assembled with their tail fins.
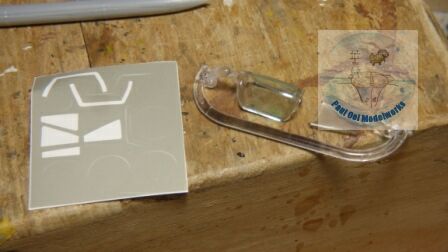
The kit comes with masks for the canopies (yay!). I apply these onto the ones I intended to use. The other canopy that is molded for the closed position will be used to protect the cockpit during painting.
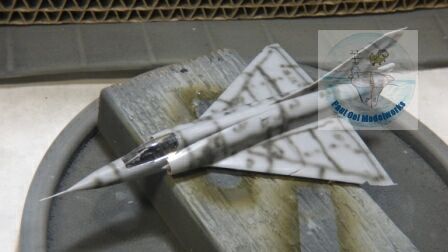


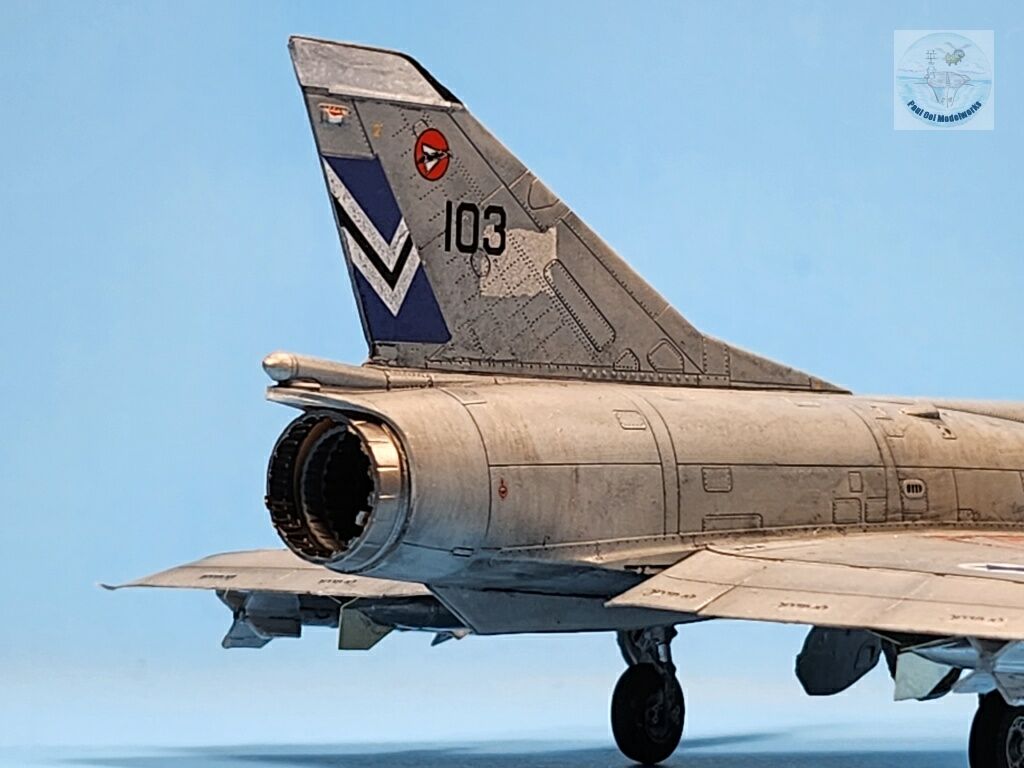
The painting scheme is relatively simple. After the undershading with Tamiya NATO Black CF-69, I applied Light Ghost Grey FS36325, followed by a freehand top side pattern of Dark Ghost Grey FS36320. The two shades are very close and in this particular scheme, it is hard to tell them apart. In photographs from the 1980s, the jets looked like they were a uniform grey appearance.

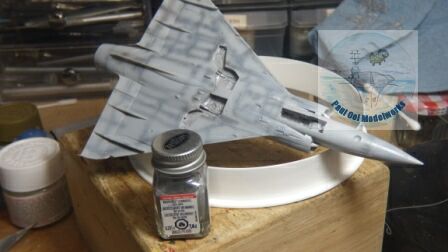
There are two patches of aluminum on the rear stabilizer that seem to be painted out serial numbers. I used my Metalizer Non-buff Aluminum but any matt aluminum paint would do.

A generous glossy finish using Quickshine Floor Polish (applied in several layers) seals the paint finish and prepares the model for decals.
The wheel wells are hand-painted with Testors flat aluminum enamel paint.

Finishing touches of steel are applied to the rear chute housing and the tip of the engine nacelles using Testors Steel.

The arduous decal application now begins and it will take me about 4 days to apply the 119 decals (!), a lot for such a small aircraft.

The decals are sealed under a satin varnish coat.
The all-important undercarriage assemblies, drop tanks, pitot tubes are assembled.

It is good to be on its own wheels. The nose weights did their job perfectly despite being only a diminutive 4 grams. Because of the small amount of available ballast space, I was worried that this would be a tail-sitter.

Only at this point do I insert the finished ejection seat, and build the gunsight with the supplied clear acetate sheet and photoetched side releases for the main canopy. In the past, the ejection seat sometimes gets damaged by masking during the painting of the model.

The model is given an oil wash of Payne’s Grey, which is a bluish dark grey wash that works well with Ghost Grey. The maintenance areas and engine housing is given an additional wash of a a 30:70 mix of Burnt Umber + Payne’s Grey.

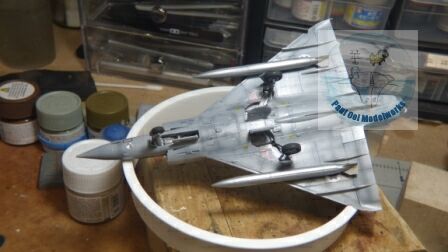
The last step is to attach the main canopy in its open position to allow a good view of the highly detailed cockpit.
Leave a Reply