
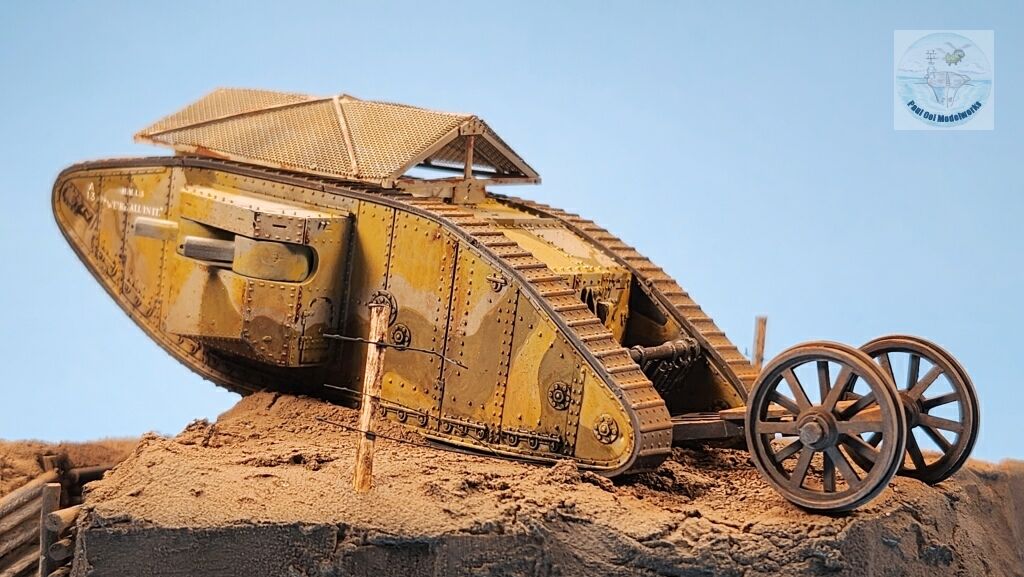
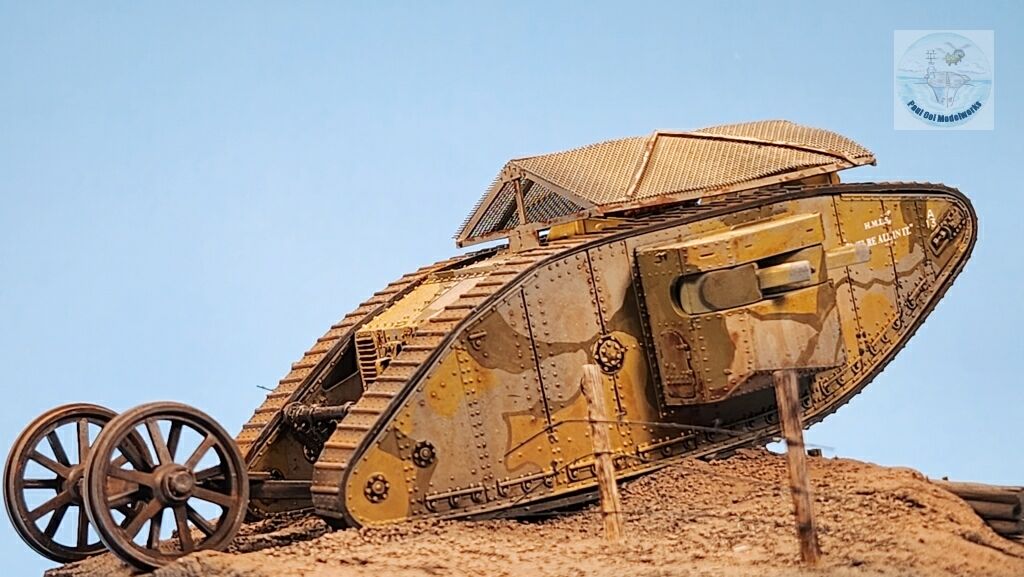
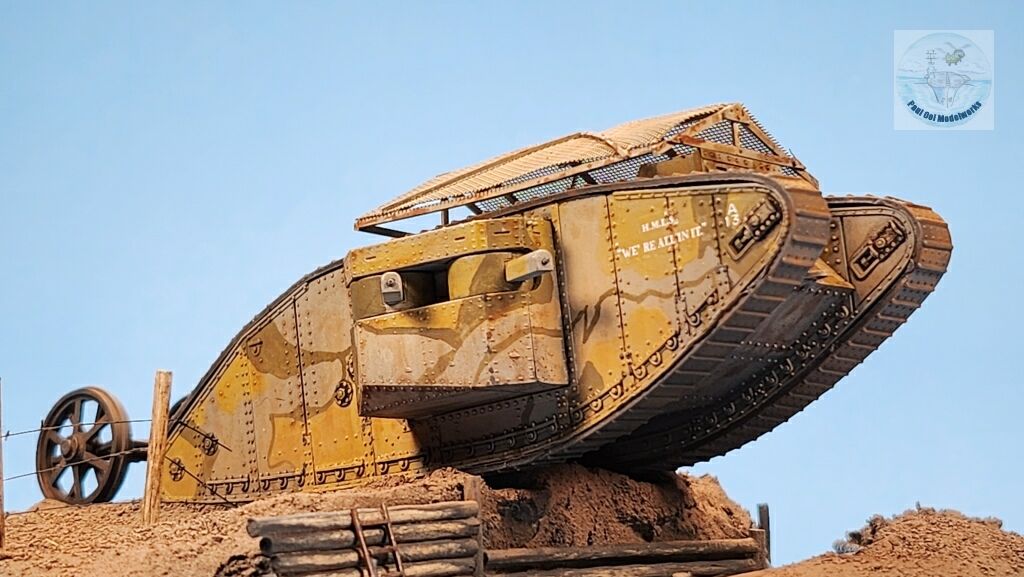
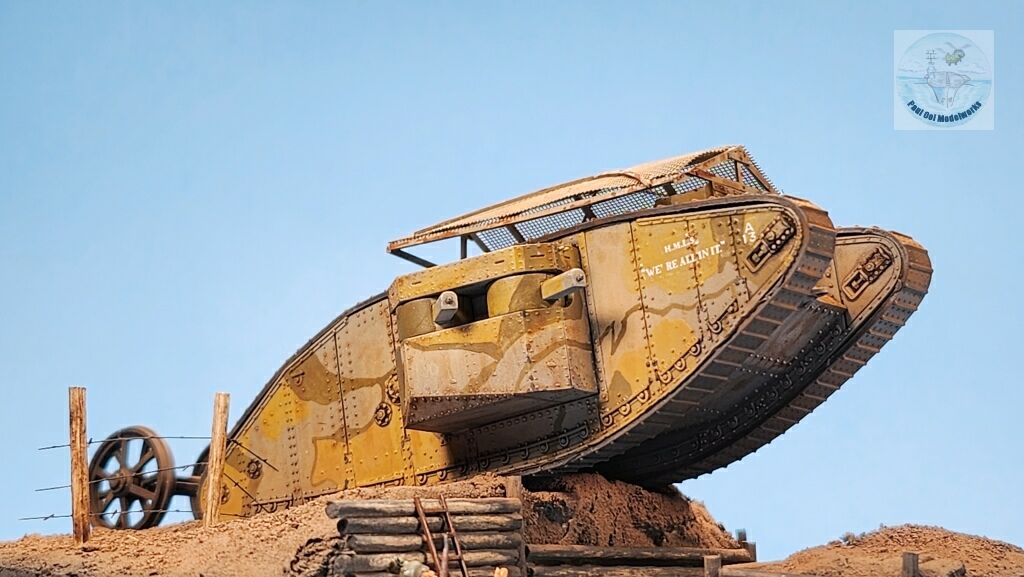
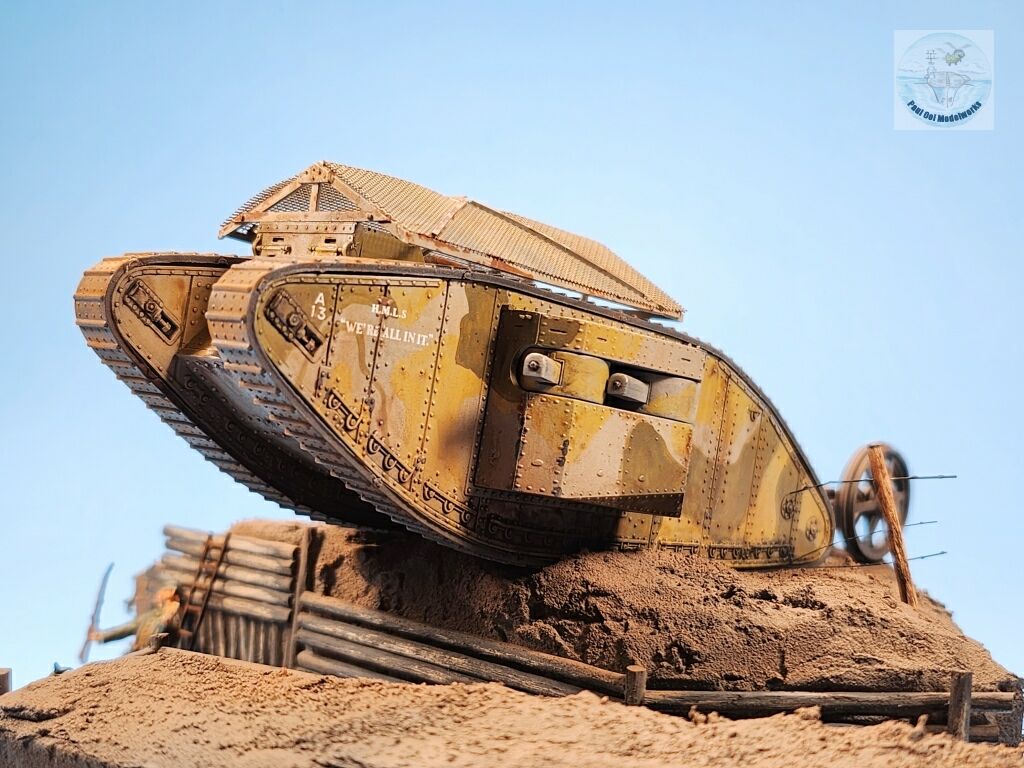
To the German soldiers in the trenches, these early Mk. 1 tanks must have been like invaders from another world. The 28 ton behemoths were slow (3.75 mile per hour), but if they did survive the artillery and mechanical failure, they wreaked havoc at the enemy trenches. Since the average “no-man’s-land” was between 100 to 200 yards, without stoppage and driving in a straight line , the Mk.1 could make that crossing in one minute and take the fight to the Germans in their trenches. Within that same distance, thousands of infantrymen would have been cut down by machinegun fire and mortars in a few minutes, and so the tank was an idea whose time had come. The initial vehicles were dubbed “landships” as the closest resemblance that the early 20th century mind could think of were the naval dreadnaughts. So much so that the individual tanks used to be named like ships, with the acronym HMLS for His Majesty’s Land Ship. The “ship” analogy extended to the way the vehicle was steered, requiring a steering trailer similar to a ship’s rudder at the aft section. Later on, this cumbersome and potentially vulnerable trailer was eliminated once a transmission system that could do the turns using only the tracks became available.
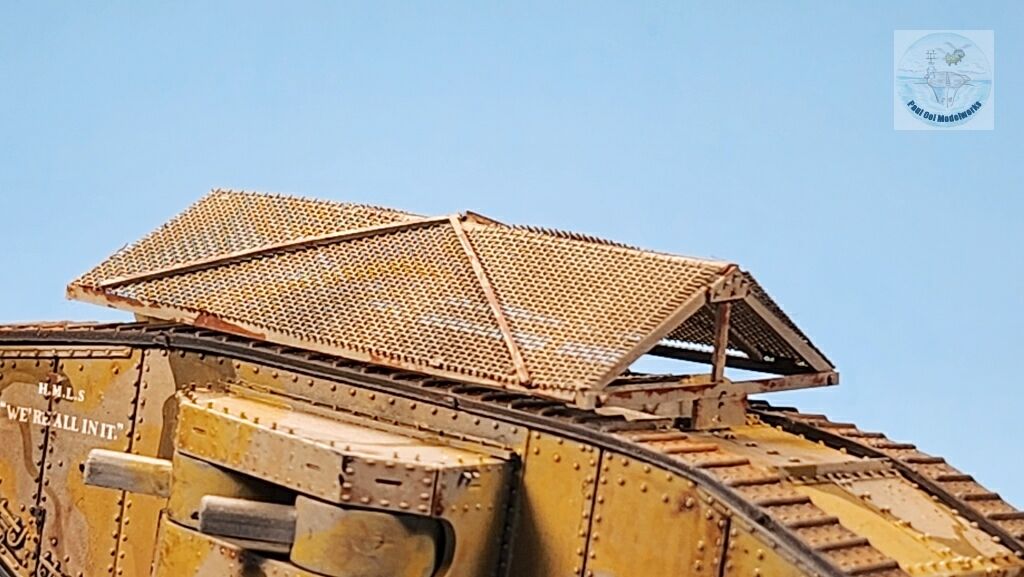
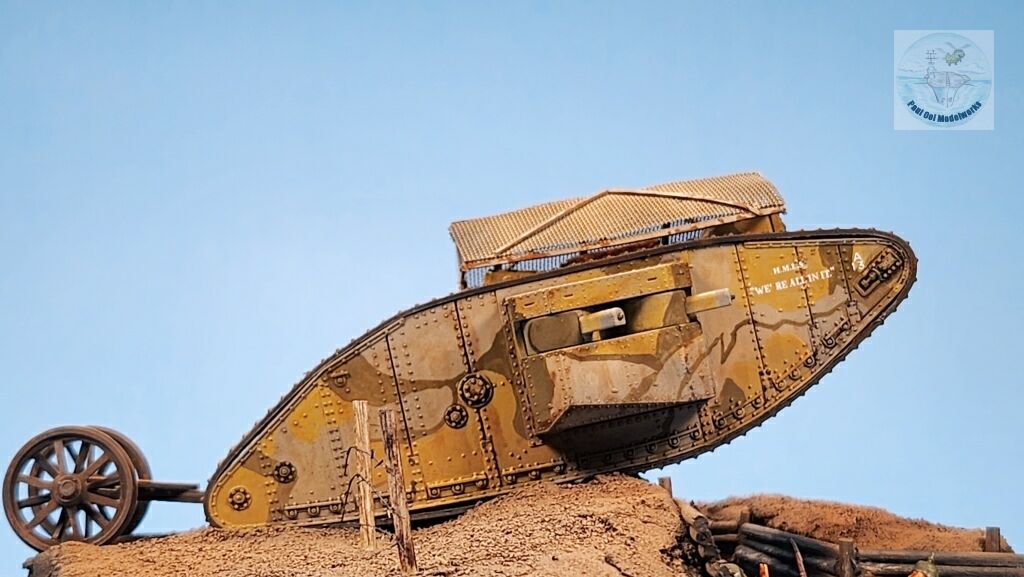
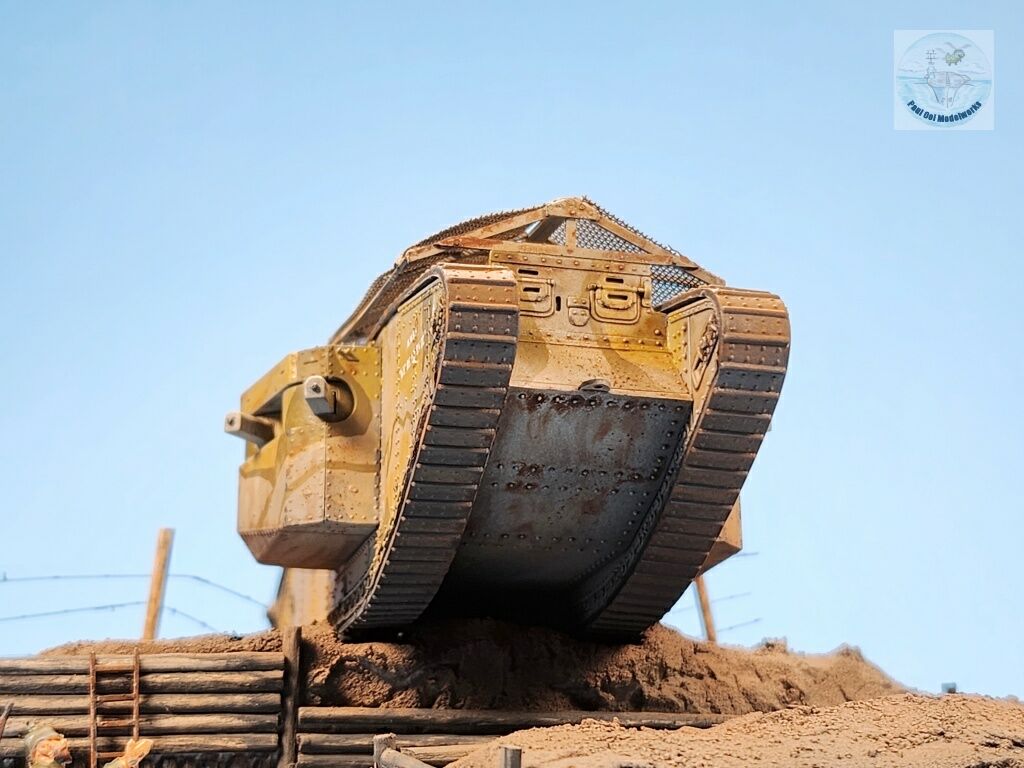
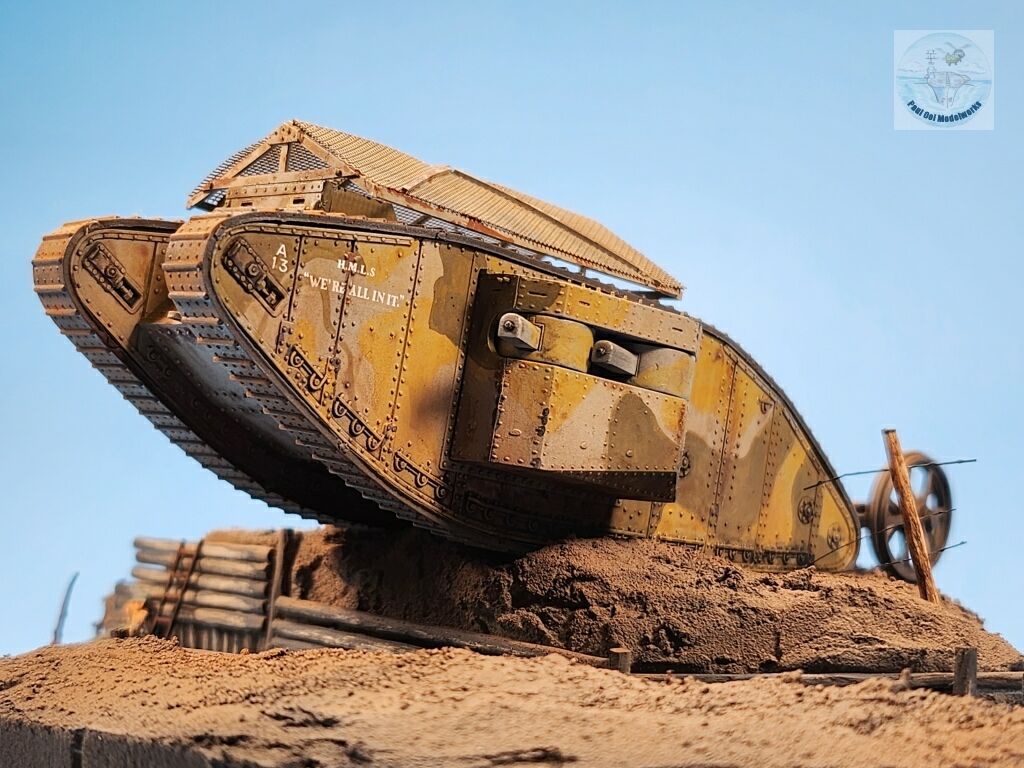
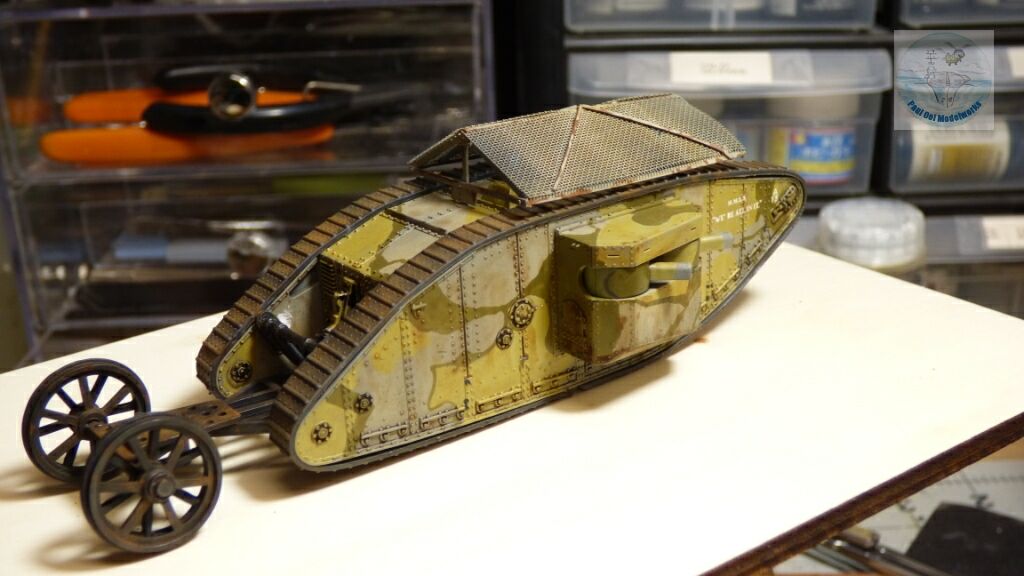
This model of the “Female” version was armed only with machine guns as opposed to the 6 pounder naval guns of the “Male” tanks. However, the machine guns were much more useful in suppressing the defensive fire of the trenches and the “Females” were far more effective on the field. The Germans discovered that you could disable the crew inside a tank with artillery or with hand grenades thrown onto the roof due to the concussion induced inside the confines of the steel box. The tank crews quickly countered this threat with a steel mesh canopy over the crew compartment, and this is what I had scratch-built.
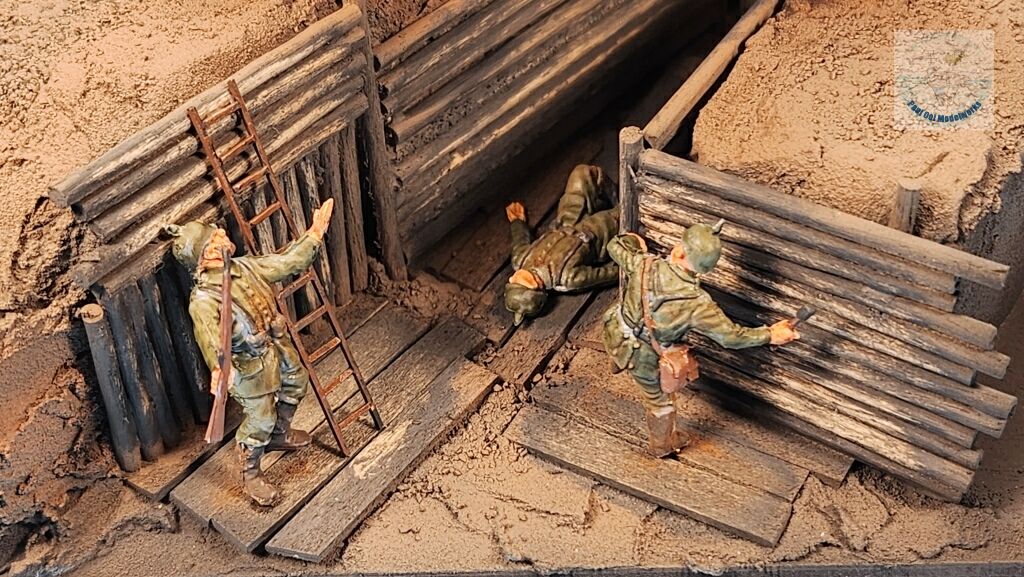
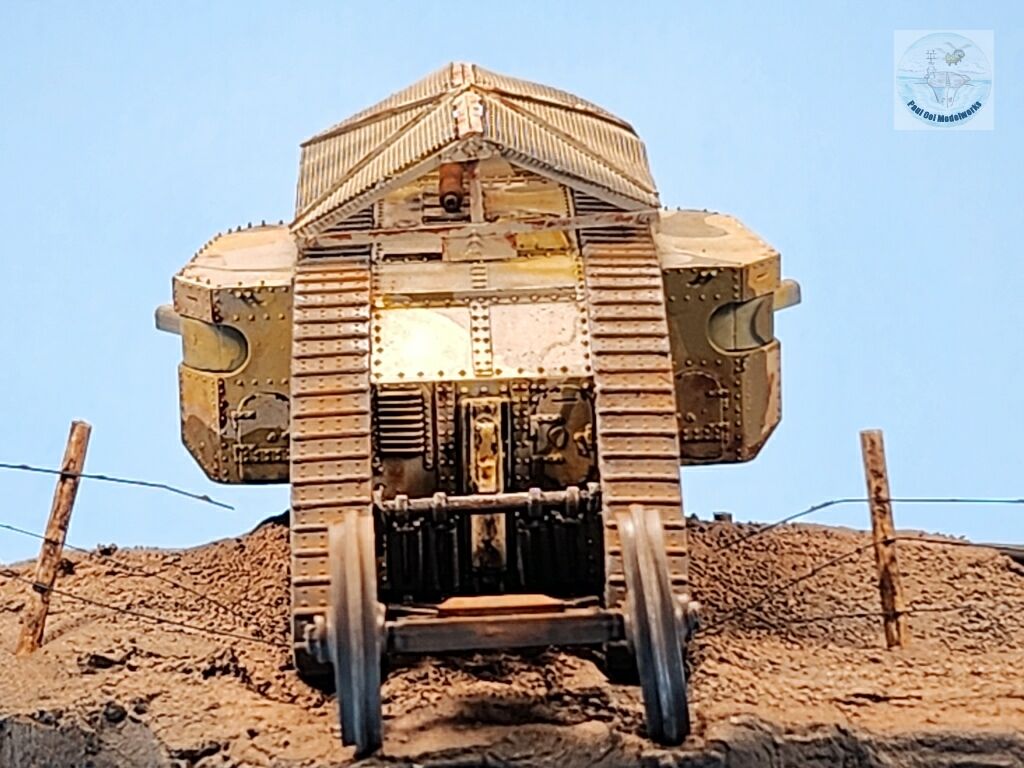
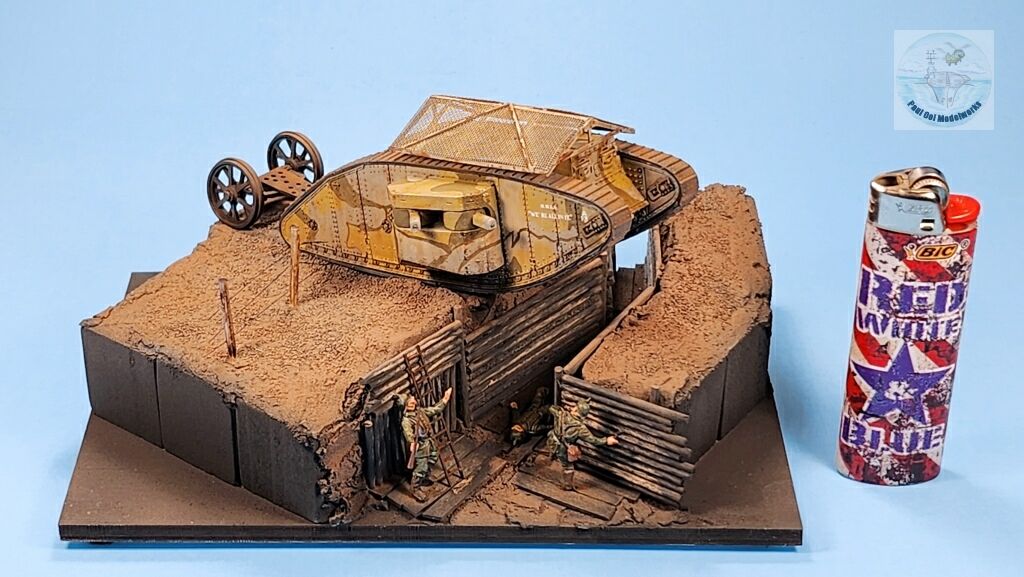
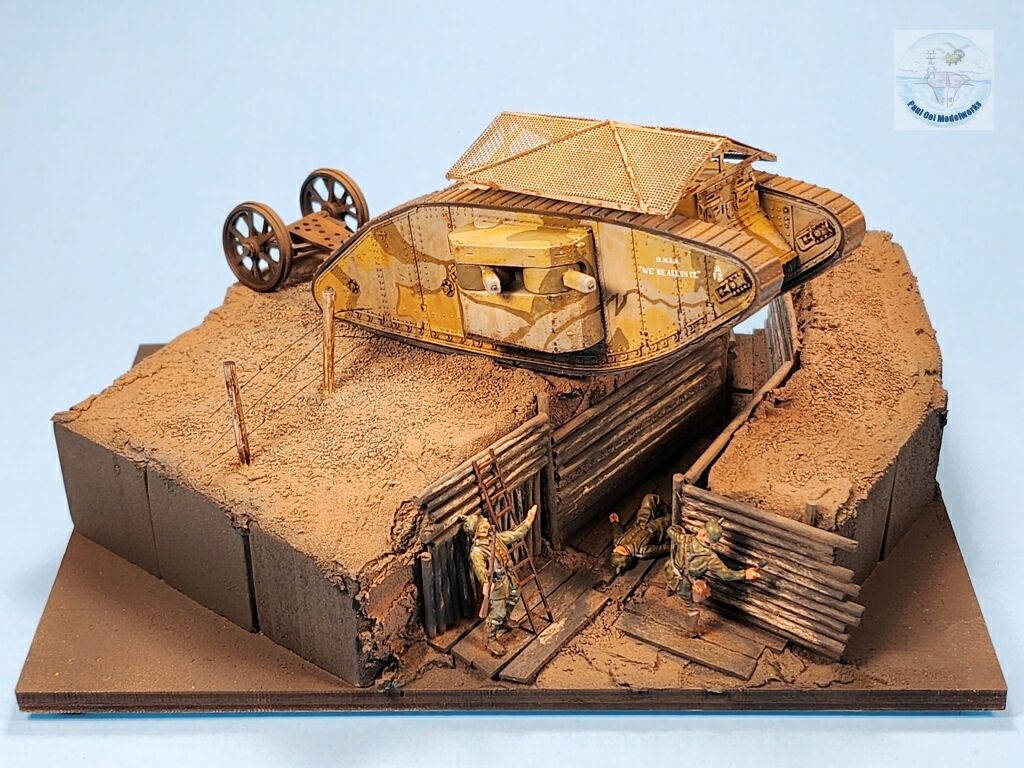
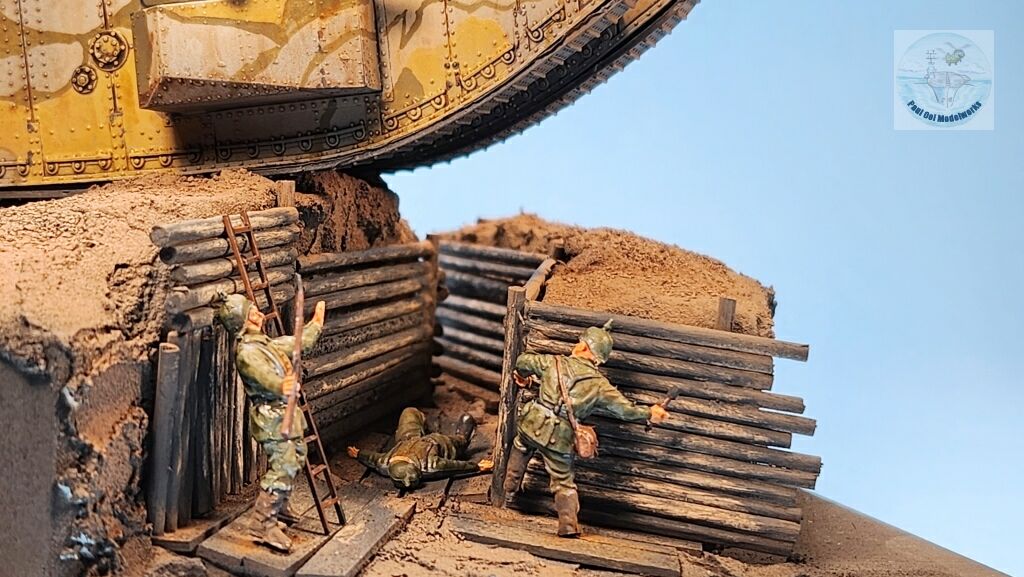
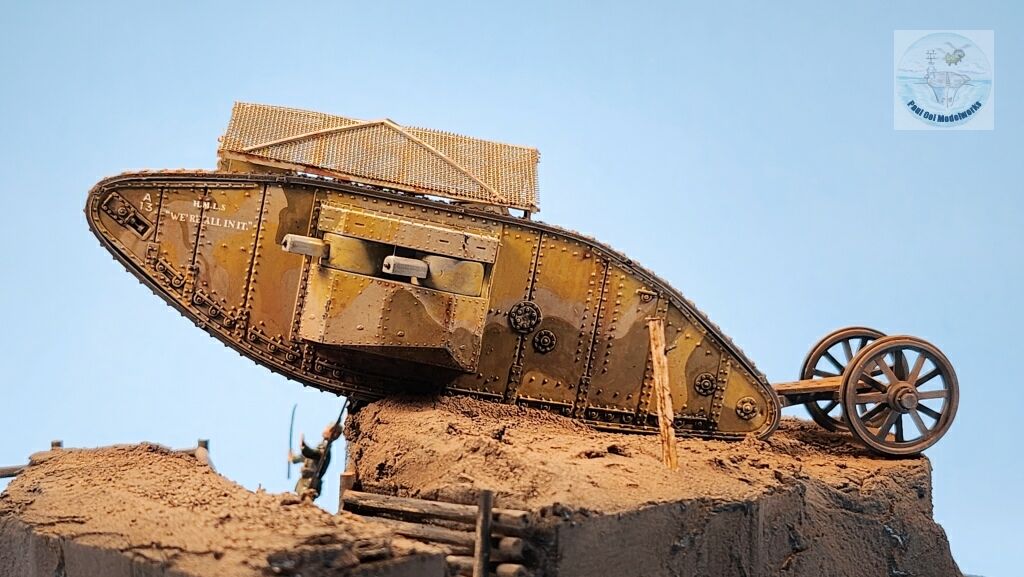
I wanted to convey the terror and confusion within the trenches when one of these tanks breach the defense line and crosses over to crush a trench. A trooper attempts a final desperate attempt by flinging a grenade at the steel monster while another gestures in despair and panic. A third guy already checked out as the four machine guns rake the span of the trench with deadly fire. Nothing in their lives has prepared them for this new form of mechanized warfare.
Gallery

Construction Notes
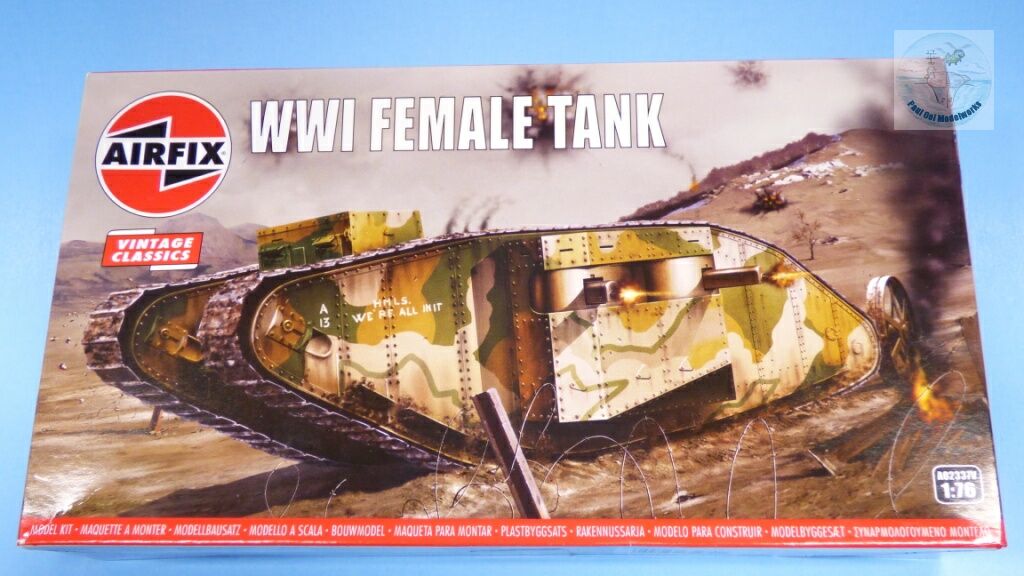
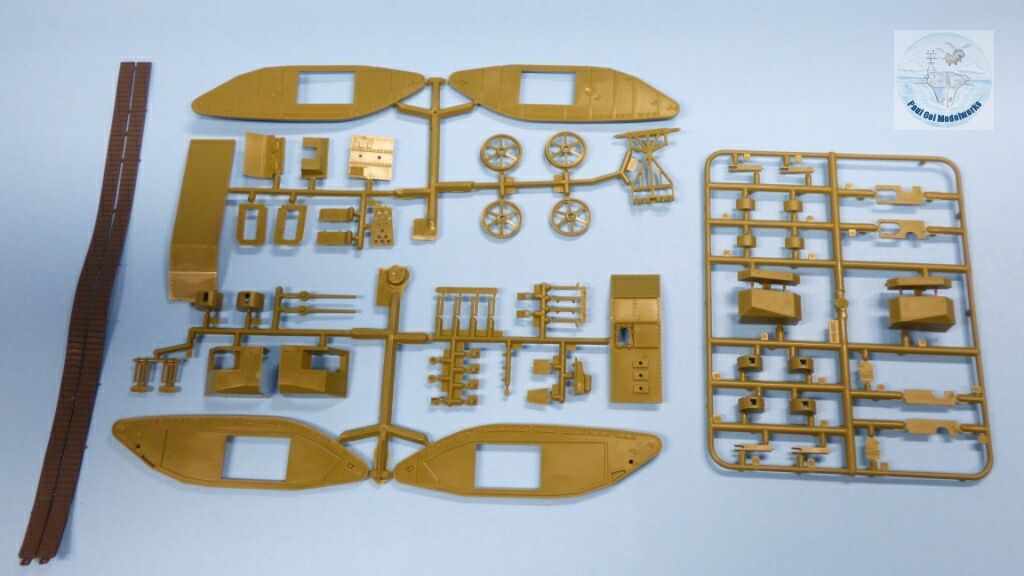
In recent years, the number of World War 1 AFV kits have grown significantly. However in 1/72 (or 1/76), the number of choices are still comparatively small. The basic Airfix kit of this Mk.1 has been around since 1967. The “Female” machine parts is obviously a newer sprue seen on the far right. The fit of the parts are surprisingly good, and the level of detail quite acceptable for a kit this old. The tracks are the old “rubber band” ones but for this particular model without any road wheels showing, it works quite well. I also like the challenge of taking venerable old classic like these and build them to modern detailing standards.
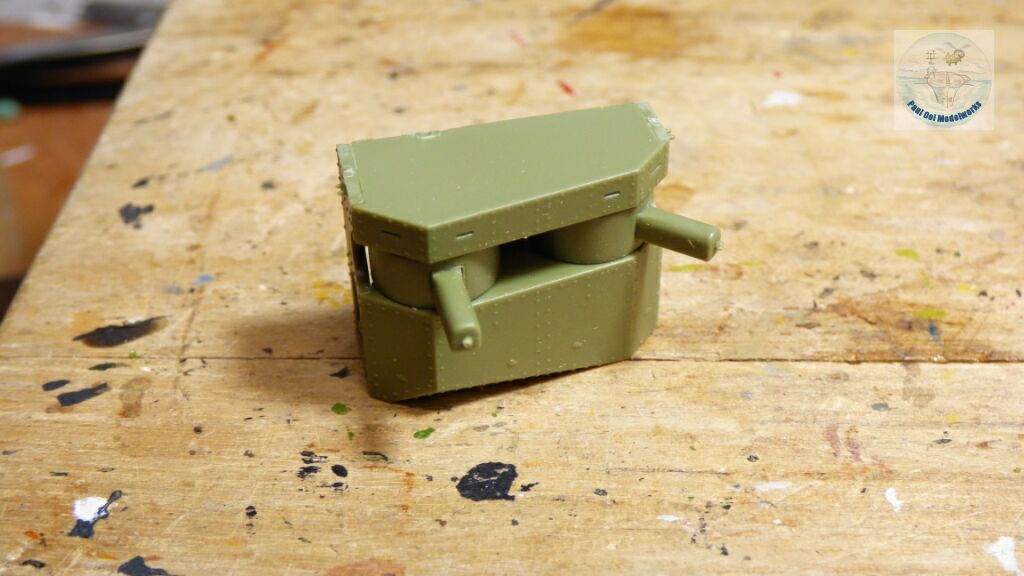
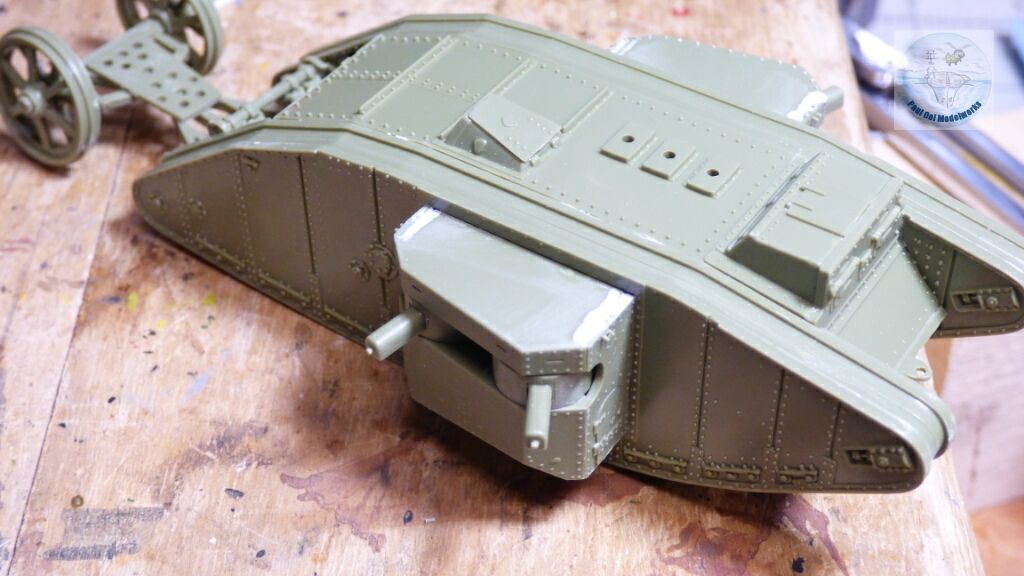
We start with building the two fighting compartments on the port and starboard sides of the hull. These turn out to be trickier than it first appears. One has to be careful not to let liquid glue “jam up” the machinegun turret.
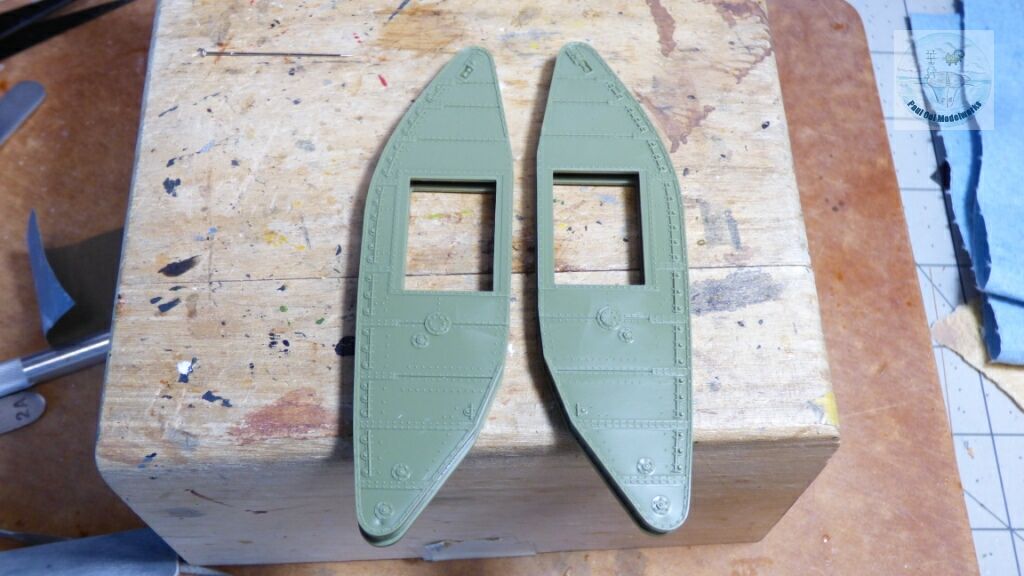 The characteristic rhomboid shapes of the main hull is immediately apparent.
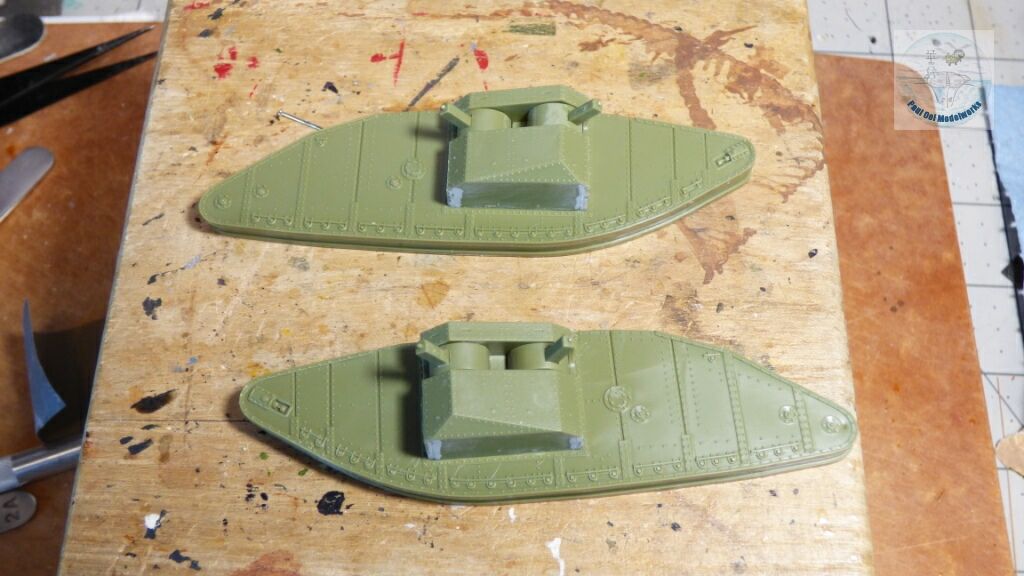
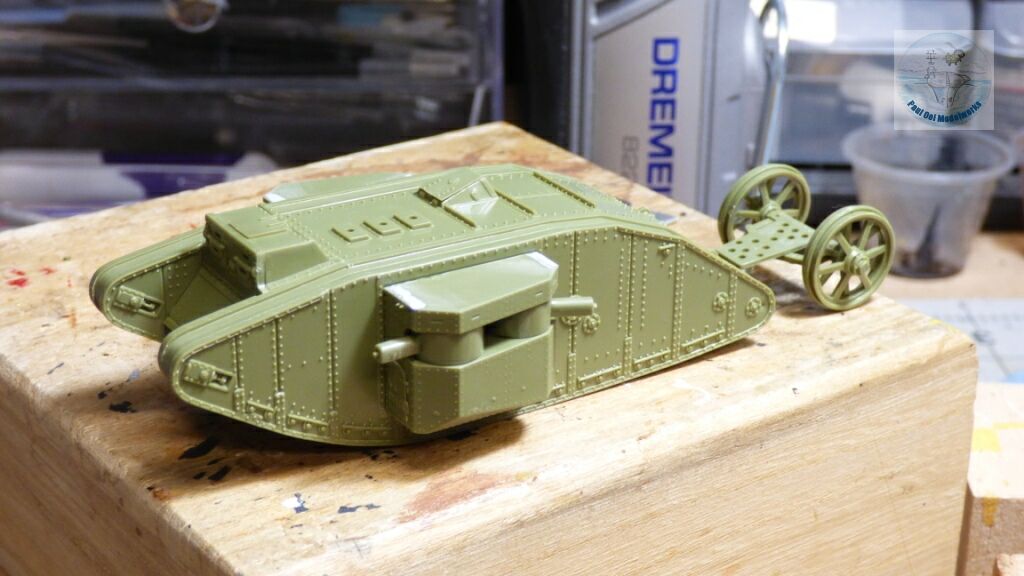
The fighting compartments get assembled to the track sections of the hull. I got these on facing the wrong way (what a rookie mistake!) and had to re-do.
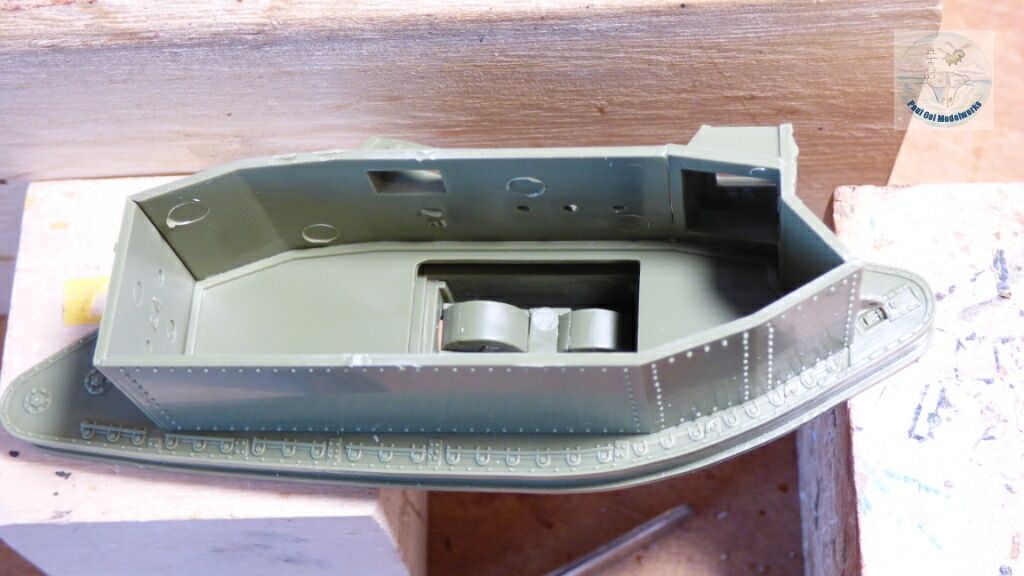
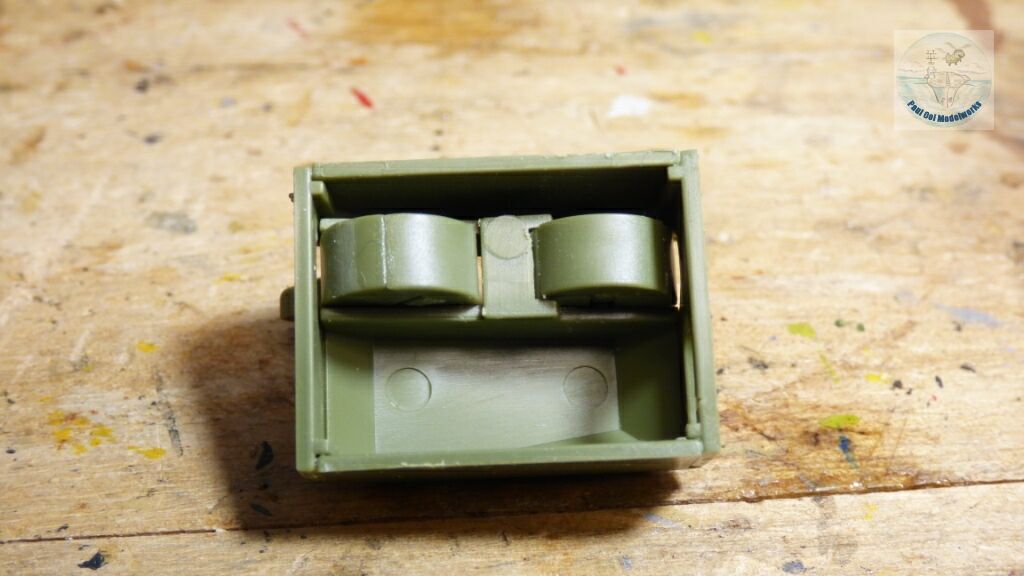
The crew compartment itself is a simple affair (but get them aligned correctly) with no interior detail at all. In real life, the space is actually quite cramp as the central part of it is occupied by that old tractor engine (a whopping 105 hp!), and the the rear end is taken up by the steering mechanism, none of which came with this kit.
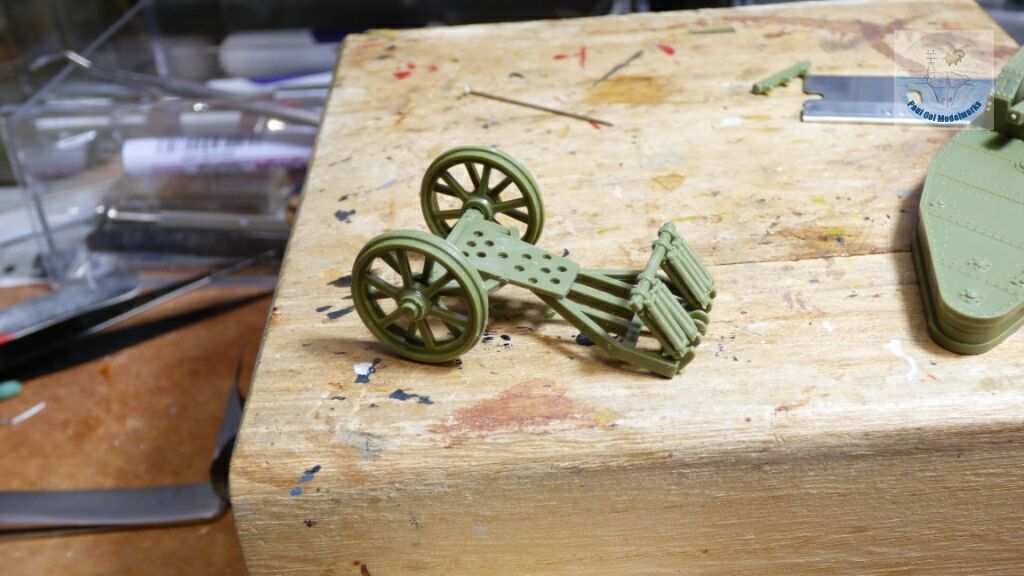
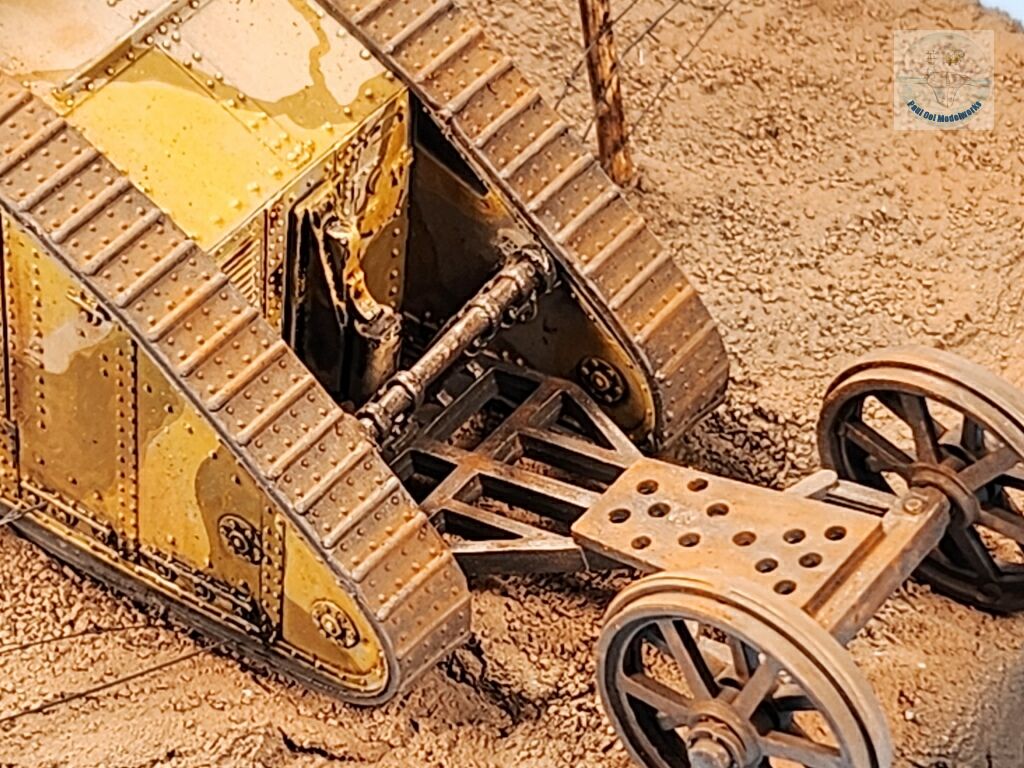
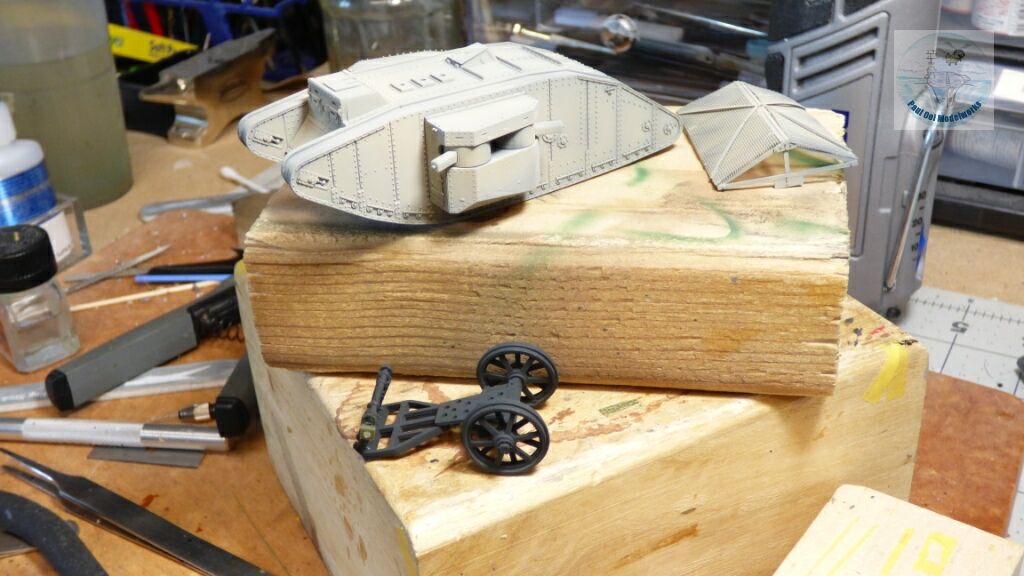
While the rest of the hull is very solid and sturdy, less could be said about steering trailer, which is a a fiddly bit of assembly.
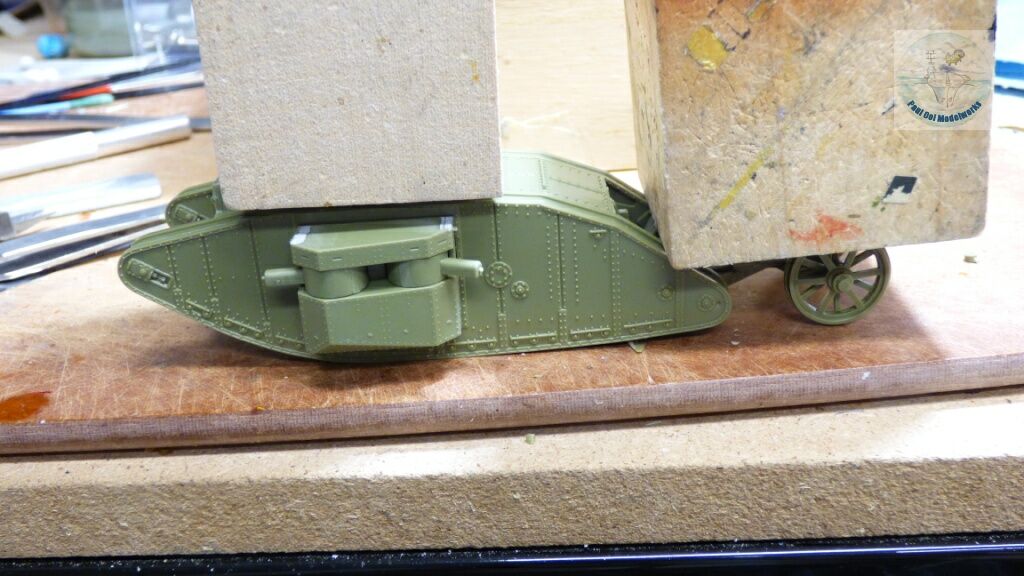
To get the trailer to sit coplanar with the main hull, I weigh down both the main tank and its trailer with solid wooden blocks. Once the glue dries, I separated the two again so that I could paint the inner walls of the tank.
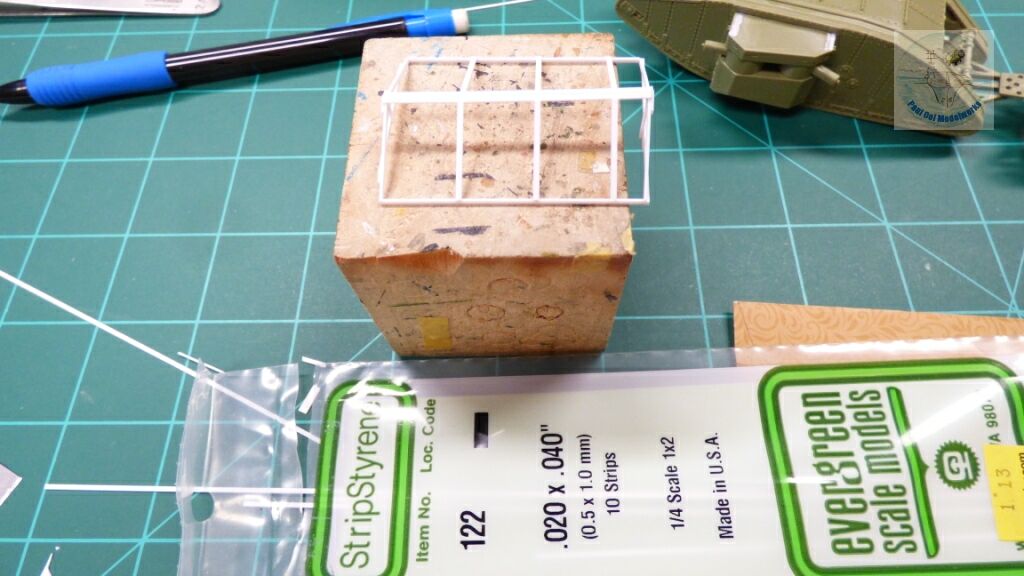
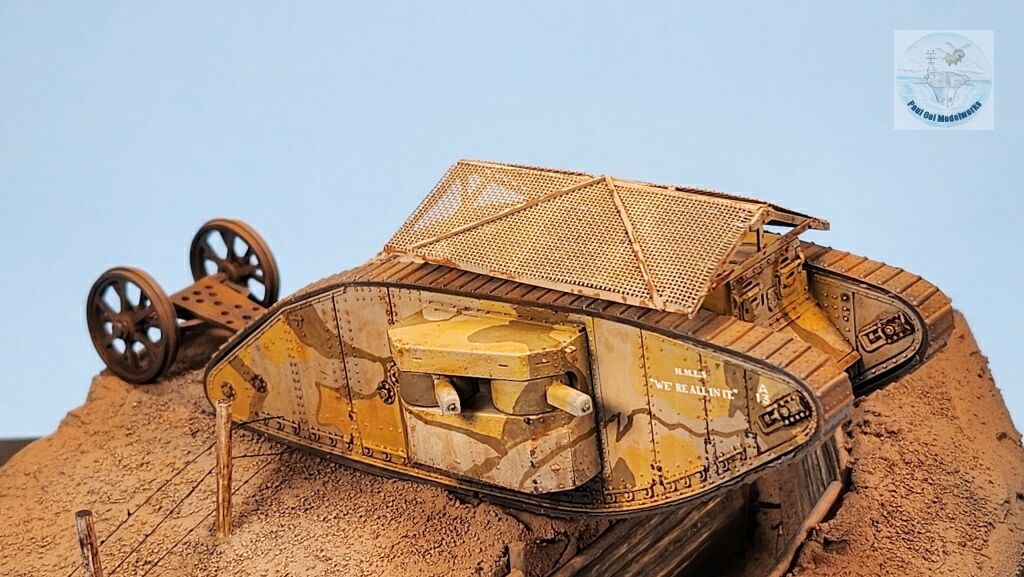
 Then a started scratch-building the anti-grenade canopy. I use 0.5x1mm plastic styrene strips to build the frames, and then I used a fine mesh attached with cyno-acrylate. At this stage, the structure is still a bit wobbly.
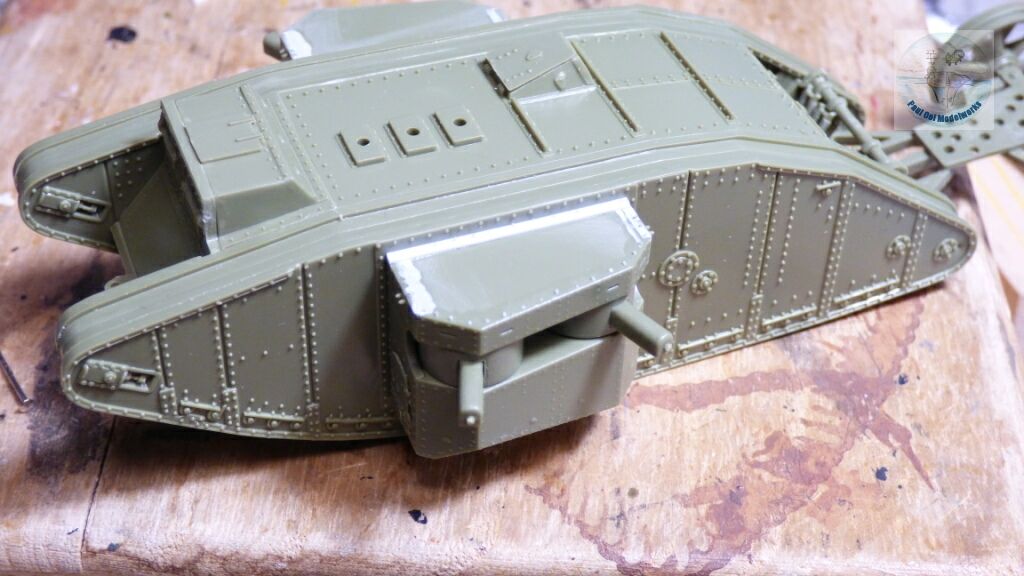
The other area where there was a glaring absence of details were the two side fighting compartments. The top of the boxes was totally devoid of any detail, while surrounded by all these wonderful rivets. I added “rivets” using stretch sprue rods, attaching, and then cutting them down to a very thin dot for the rivet heads.
I pre-shadowed the hull in my usual Tamiya NATO Black and Sky Grey, followed by Tamiya Buff XF-57 lightened with 20% XF-2 Flat White. The steering trailer was painted NATO Black and left that way (for now). The anti-grenade canopy was also painted in a mix of Buff+ White.
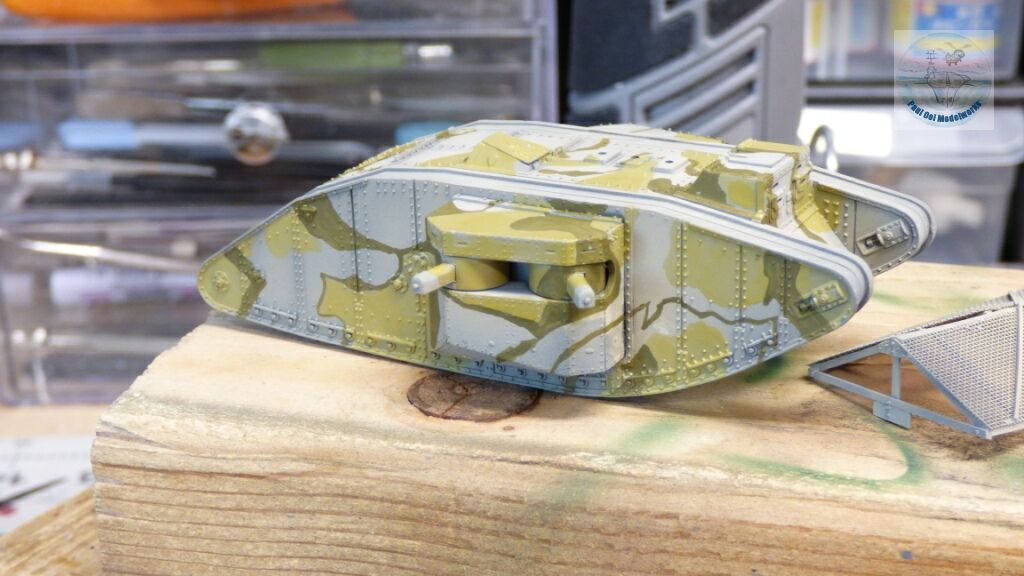 The unique camouflage pattern was hand-painted, using enamel paints British Middlestone and Olive Drab from Model Masters.
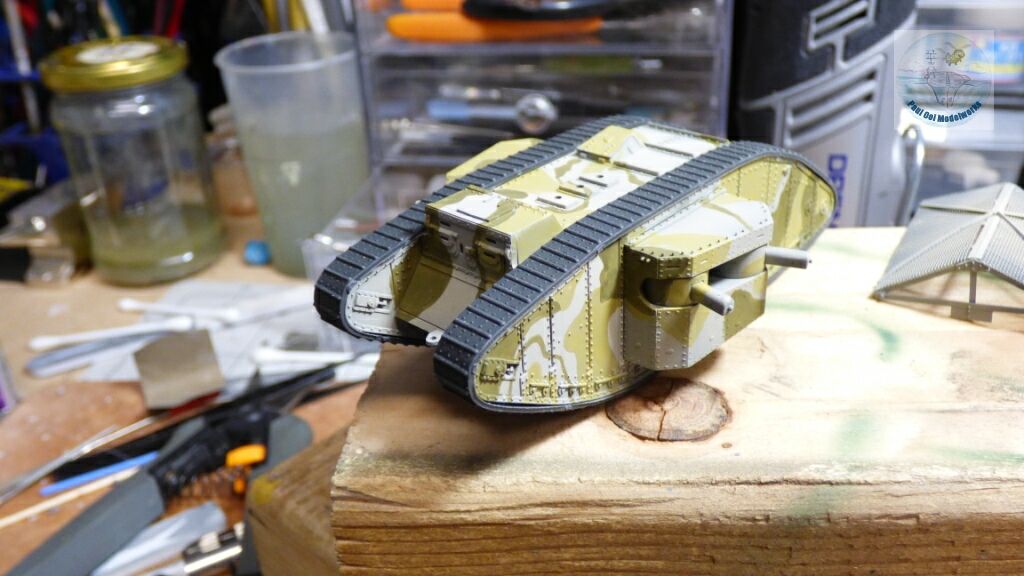
Next, the tracks get cemented on with Cyno Primer, followed by the cynoacrylate adhesive itself. Tracks ON!
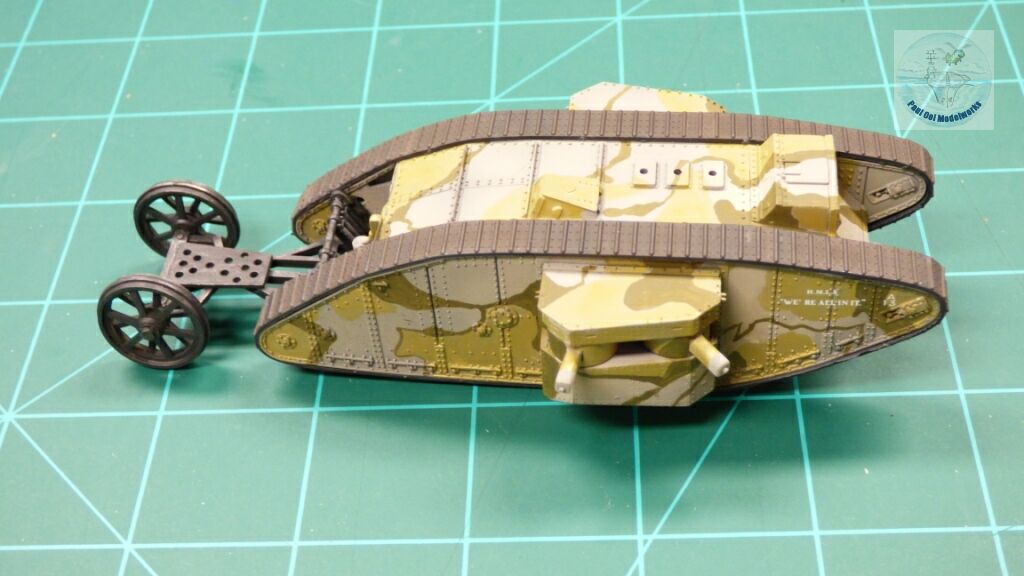
The Steering Trailer gets affixed on permanently now. Decals are also added, and then sealed with a satin varnish.
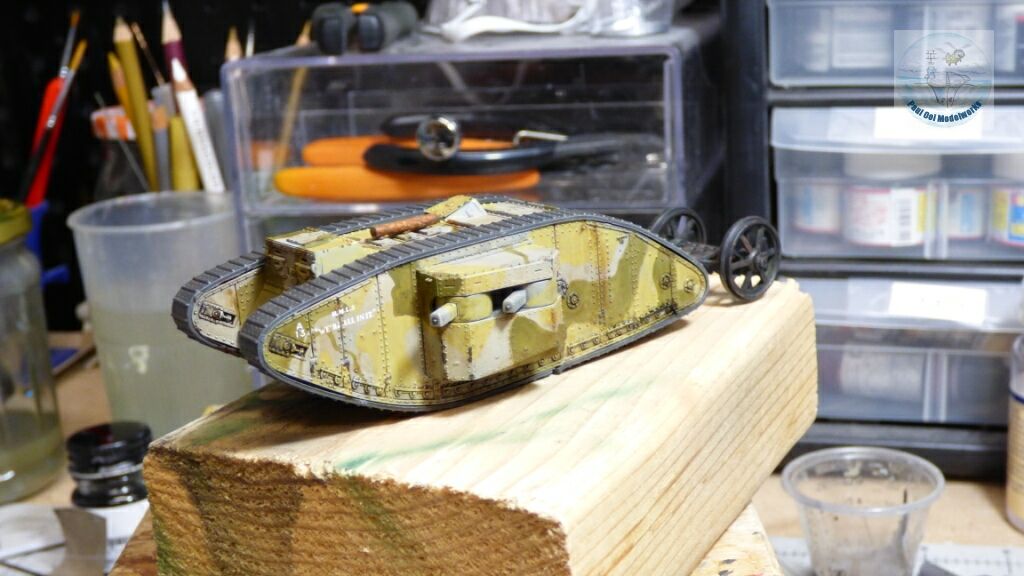
The weathering is now done, first with painted black chips, then with oil washes of Burnt Sienna, followed by a pin wash of Black+Burnt Umber, and then various pastel chalks for rust stains.
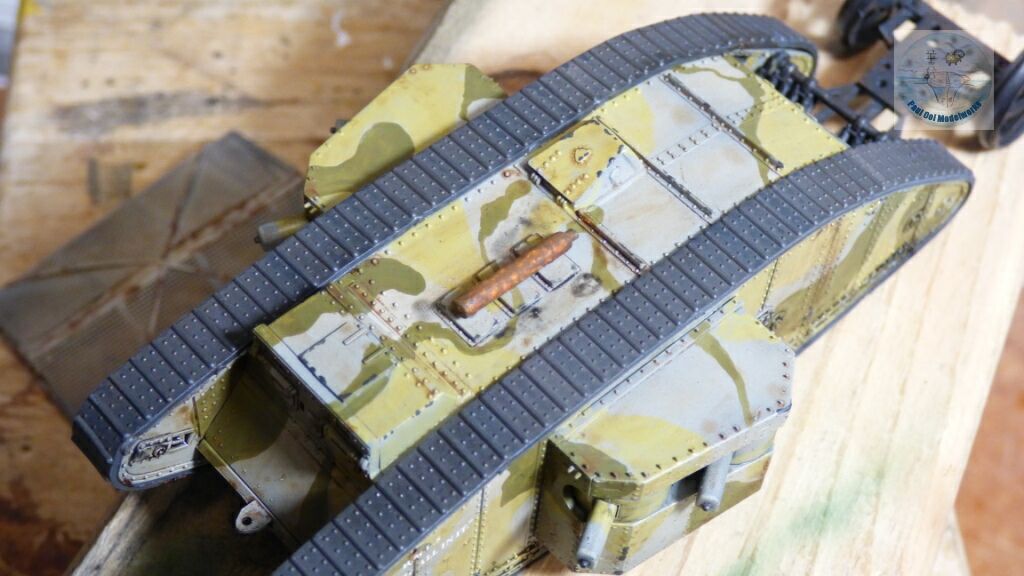
Take a good long look at this view, as it is about to be obscured by the anti-grenade canopy.
The canopy is applied, and we are off to the races, or in this case, trenches!
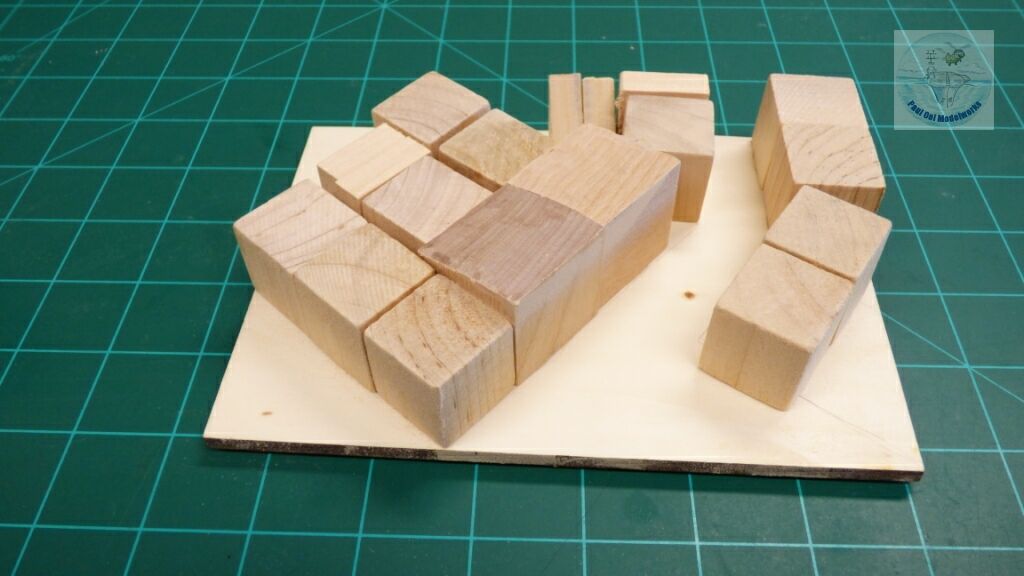
Building a display base with trenches is quite a project in itself. I start with using wooden blocks to create the trench topography.
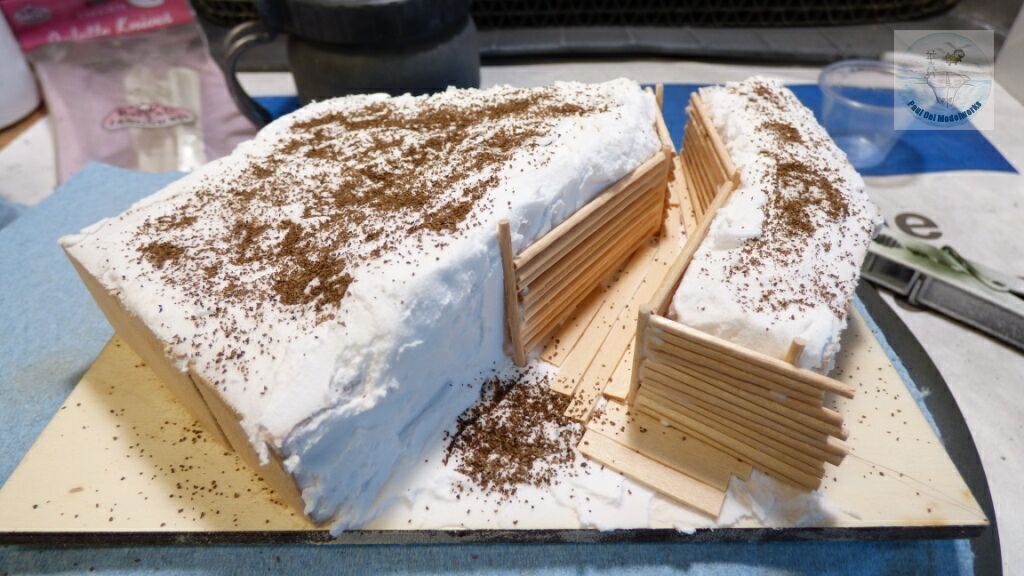
Plaster get applied over the wood blocks, and the landscape sculpted to shape. While the plaster is still wet, the floor boards (made from HO scale wooden planks found at the hobby railroad section) are laid, and then mini-dowels to form the trench walls. Add white glue as necessary to secure the planks and wall.
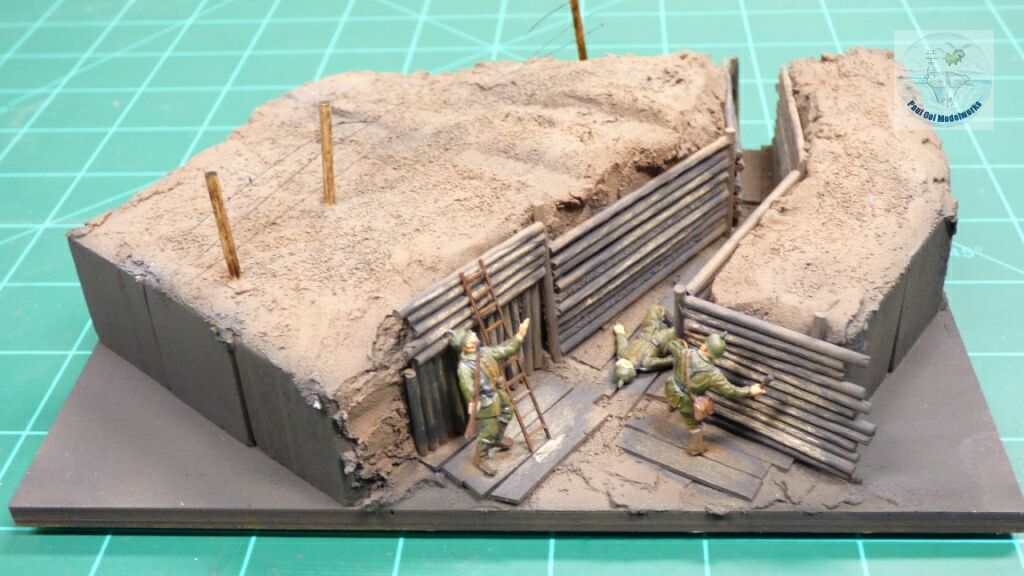
Then the landscape get painted with Tamiya Flat Earth over NATO Black and Sky Grey under-shadow. Figures and ladder get added last. The barb wire fence above are made from mini wooden dowels (posts) and stretch sprue “barb wire with “glue dot” barbs.
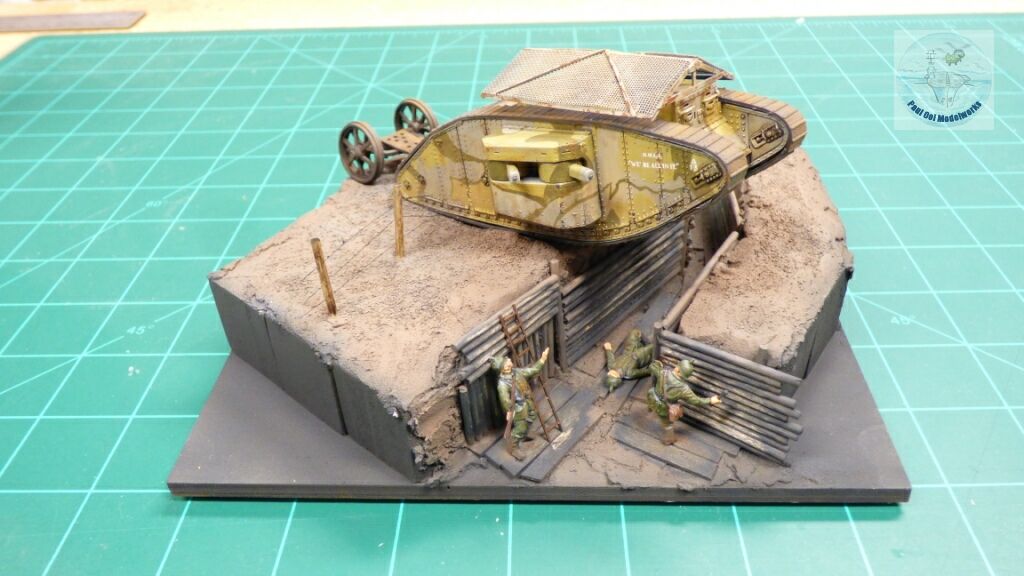
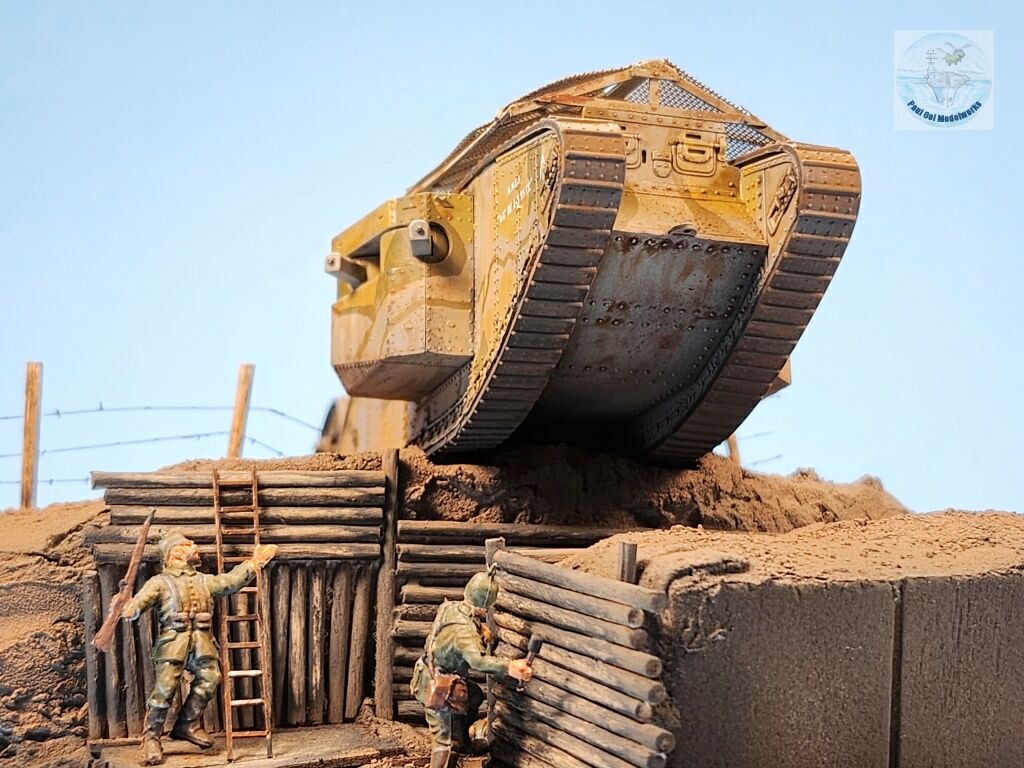
Weigh it all down with a big tank about to crush the trench!
Leave a Reply