I love the beefy look of the Hawker Typhoon. Back in 1973, I attempted to build the 1/72 Airfix kit of that time and failed miserably, since I did not comprehend that the undercarriage was angled forward and my efforts to force it straight resulted in broken struts. The “Tiffy” was the only aircraft in the RAF that could match the Fw190 in 1941 in power and endurance, and then became a legend as a ground-attack fighter bomber. Apart from the Spitfire, the Fleet Street war comic hero Biggles sometimes flew the Typhoon in the Far East to take out Betty bombers. It was “Tally Ho” time as the Typhoon unleashed streams of rockets and cannon shells into enemy troop columns or cargo freighters. In reality, the eight 3 inch rocket salvo from the Typhoon is equivalent to a single broadside from a Royal Navy destroyer and did a lot of “shock-and-awe” in its day. Relative to other British fighters, the Typhoon was big and hefty, earning another nickname, “Britain’s Butcher Bird”. I have encountered other reviewers who did not appreciate the history and the effect that this bird had on the opposition, and I wish to correct that ill-informed characterization that this was ever a lacklustre ground attack fighter-bomber.
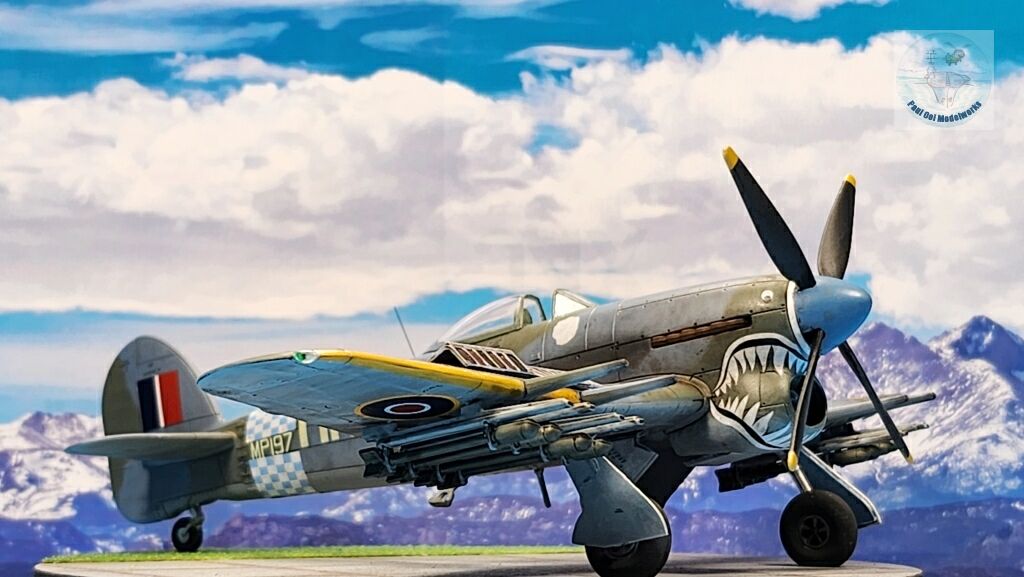
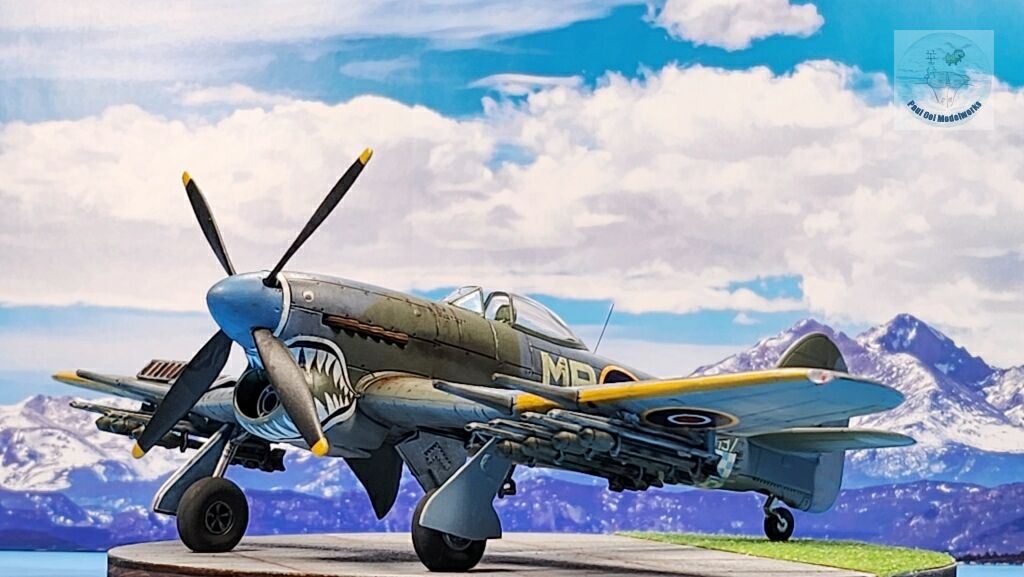
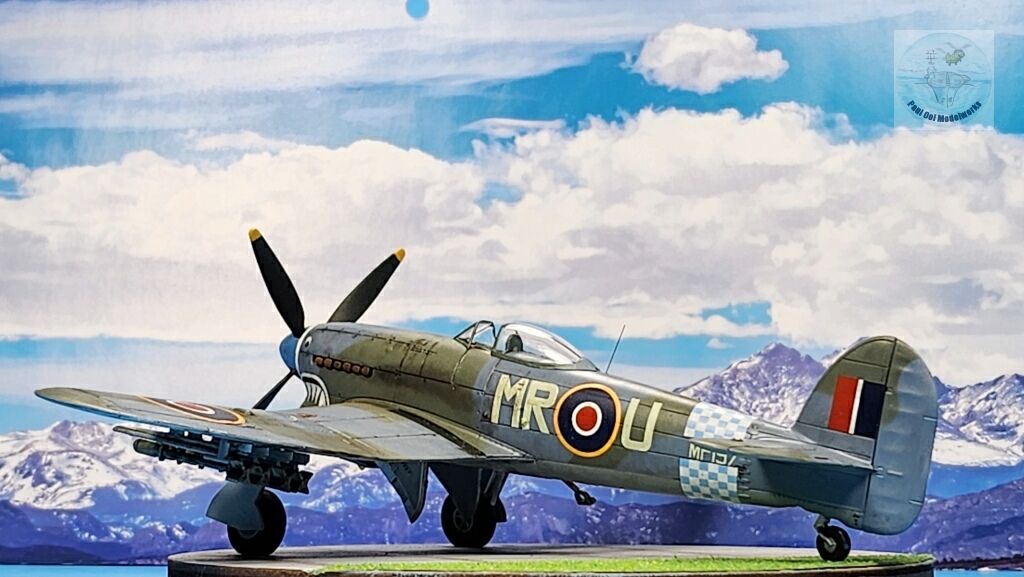
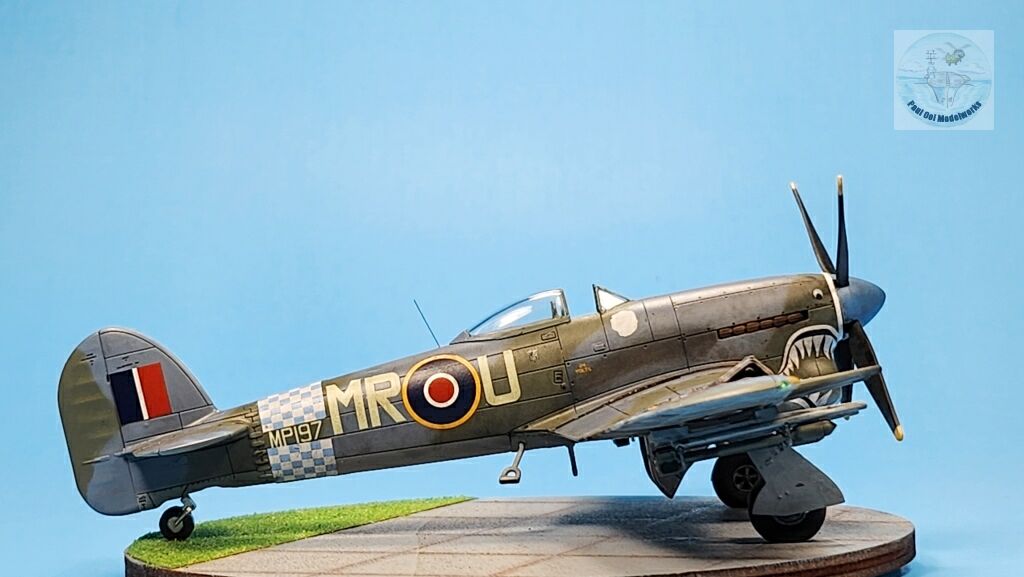
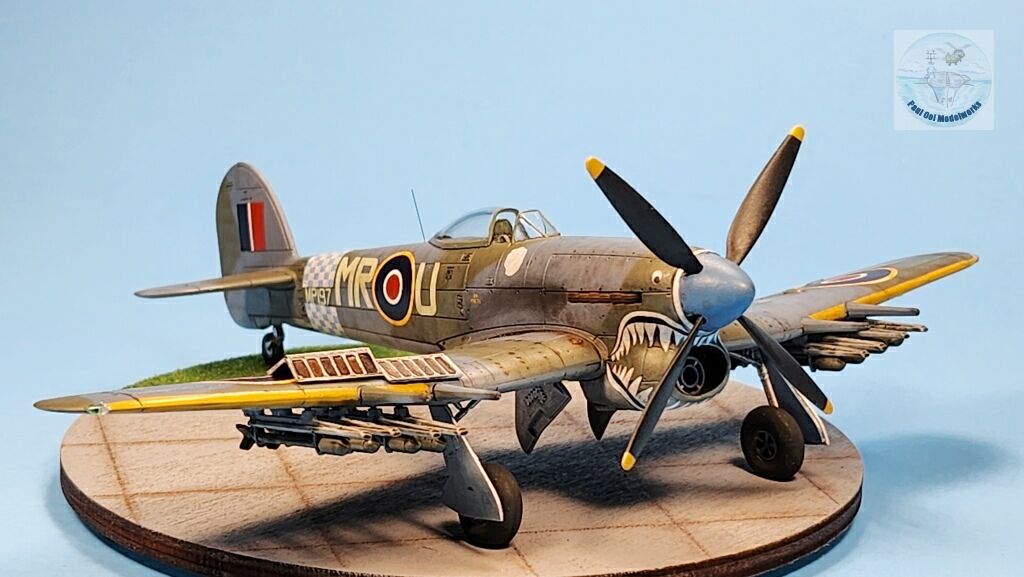
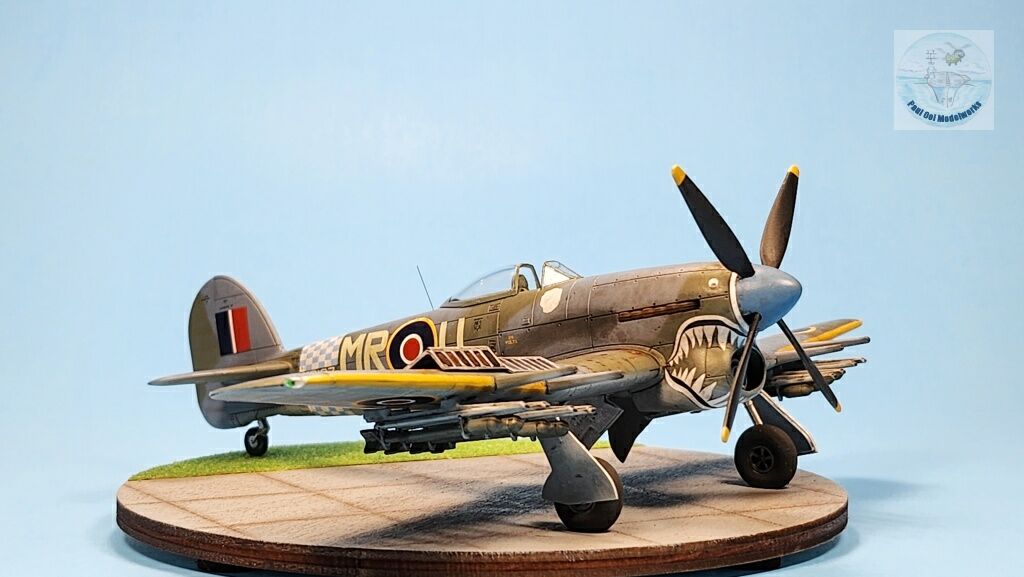
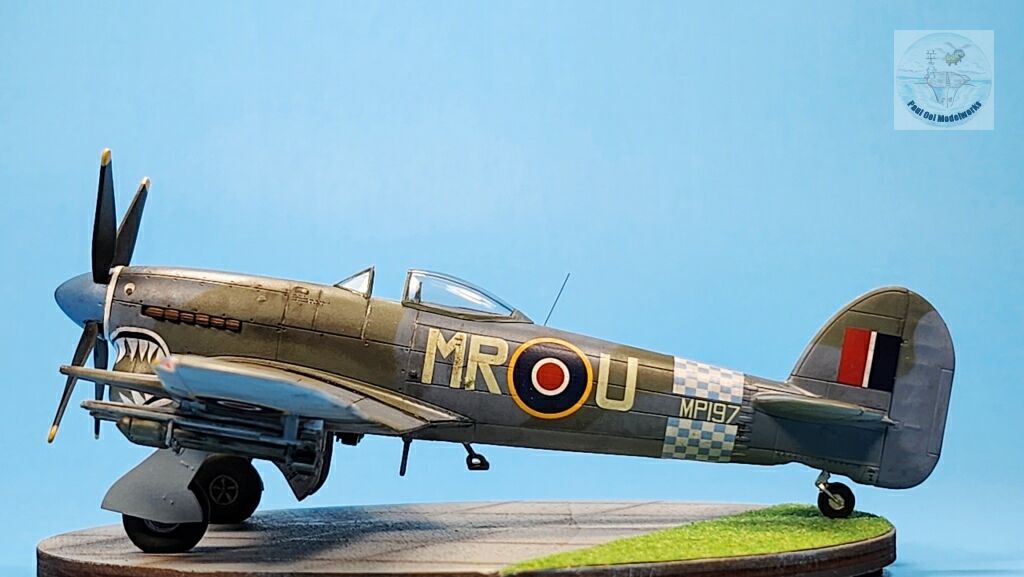
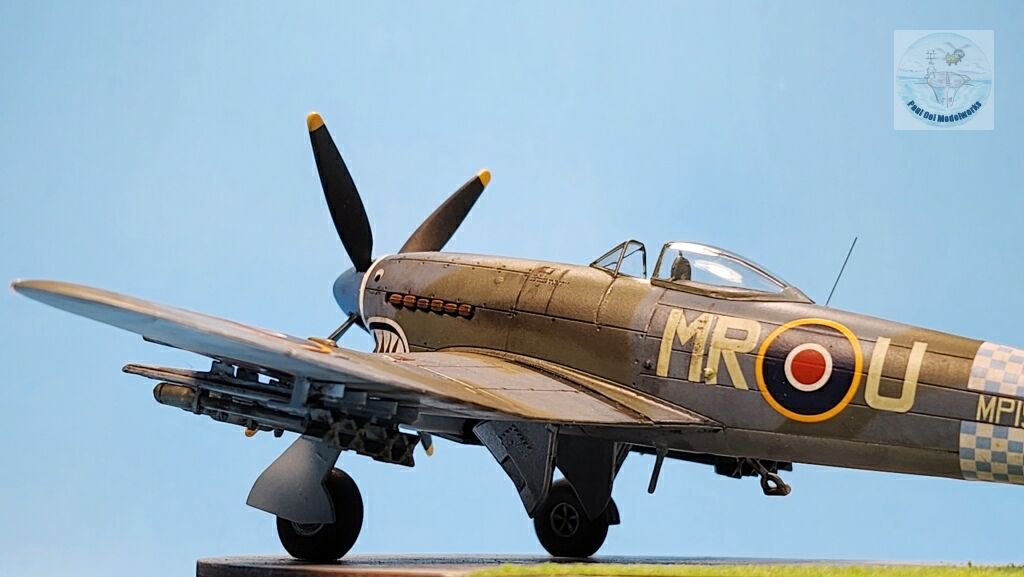
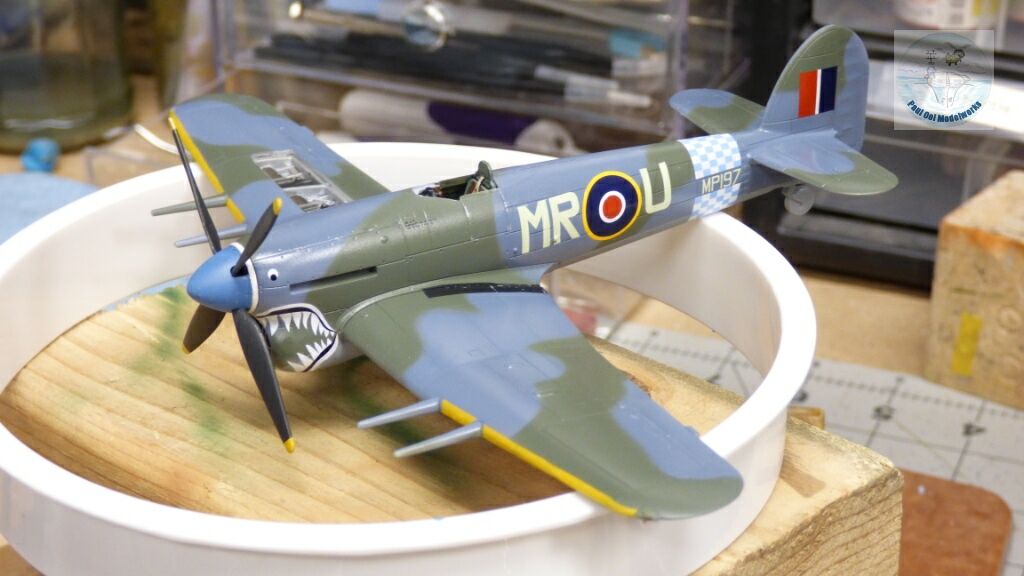
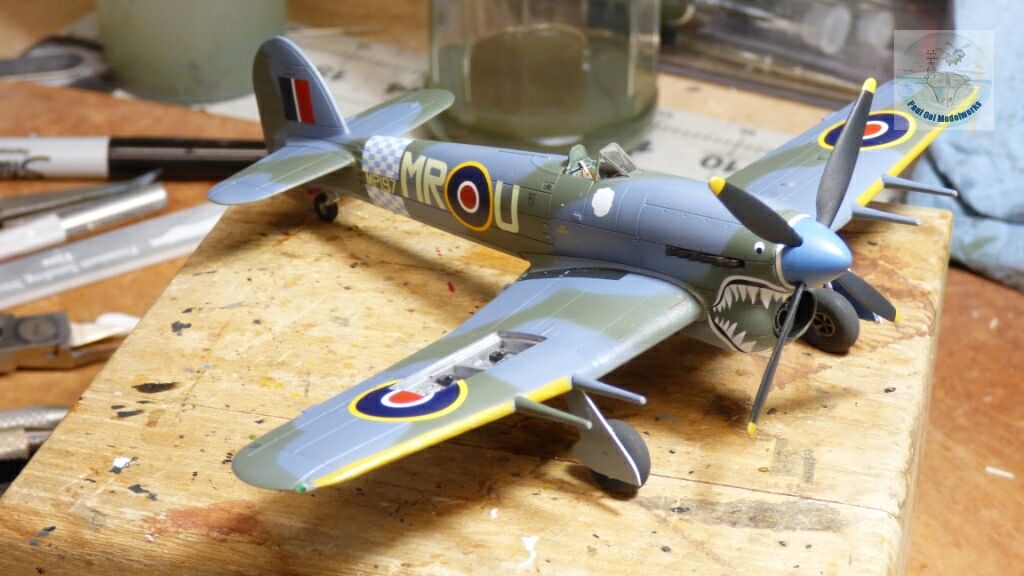
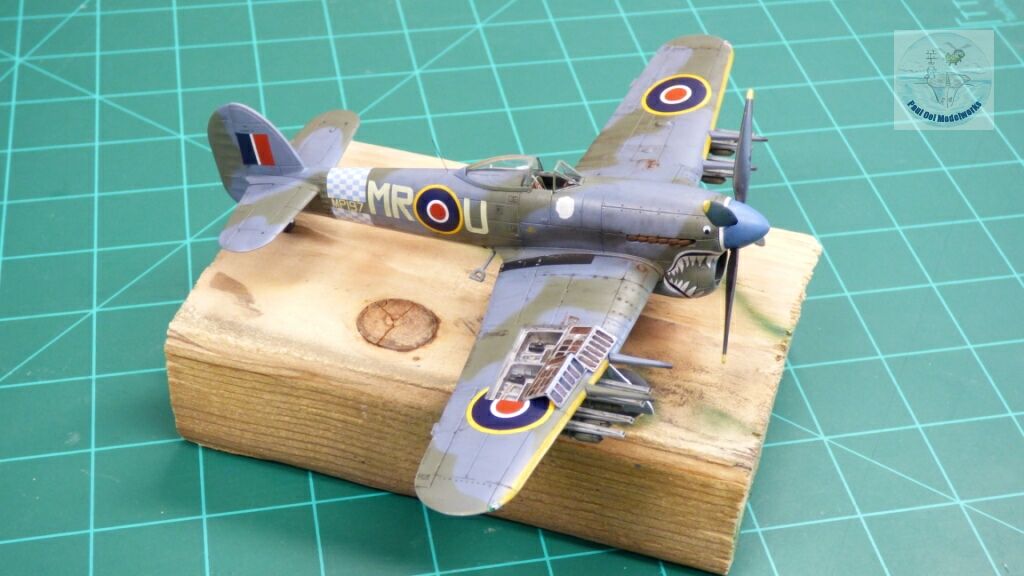
The Typhoon had its glory moments during the annihilation of the German armor and troop columns at Normandy, in the Falaise Pocket, and the subsequent interdiction of German reinforcements during the Rhine crossings. The roar of the British “Jabbos” as the German troops called them meant that it was time to head for the trees and hold on for dear life until they go away. Of course, you will have to walk all the way home as your ride is probably in flames or smashed to smithereens. One eye-witness account by a German officer talked about how frightened they were of the Typhoons. On one single occasion, a planned attack with 7 tanks was wiped within minutes after the Typhoons swept through their formation. I chose the livery of the 245 Sqn “North Rhodesian” with the interesting teeth (I don’t think these are shark’s teeth, more like leopard or lion) and that bright blue nose. I really enjoyed this build after waiting 50 years!
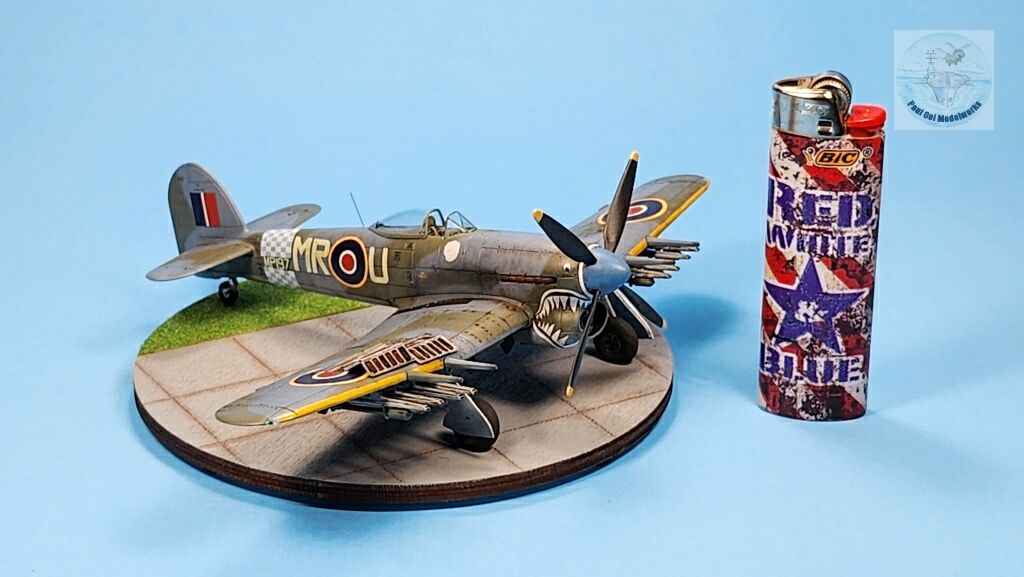
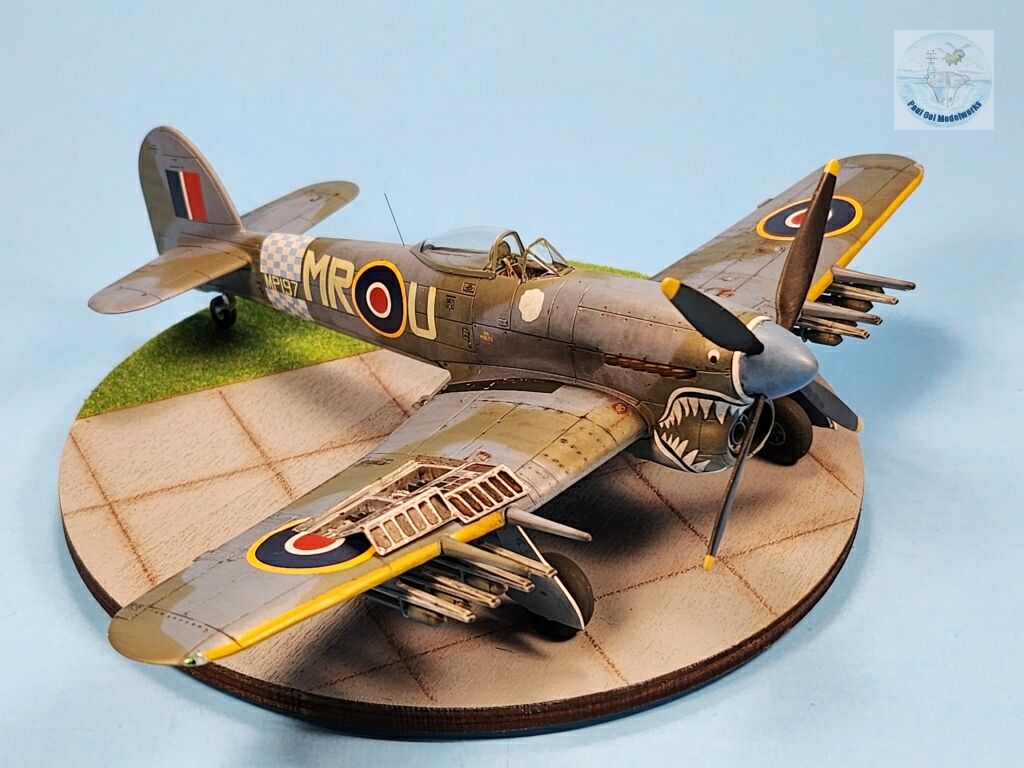
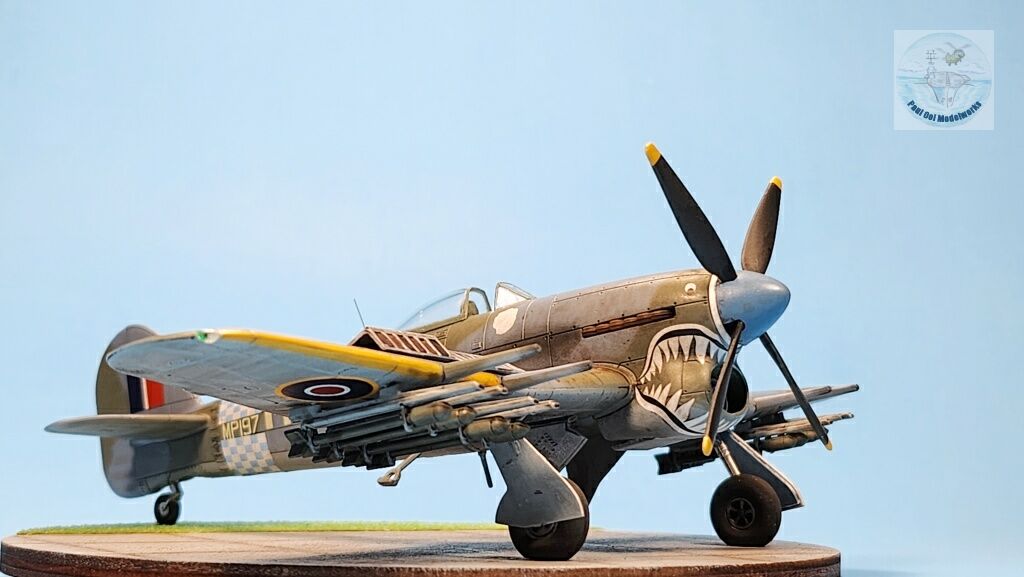
Gallery


Construction Notes
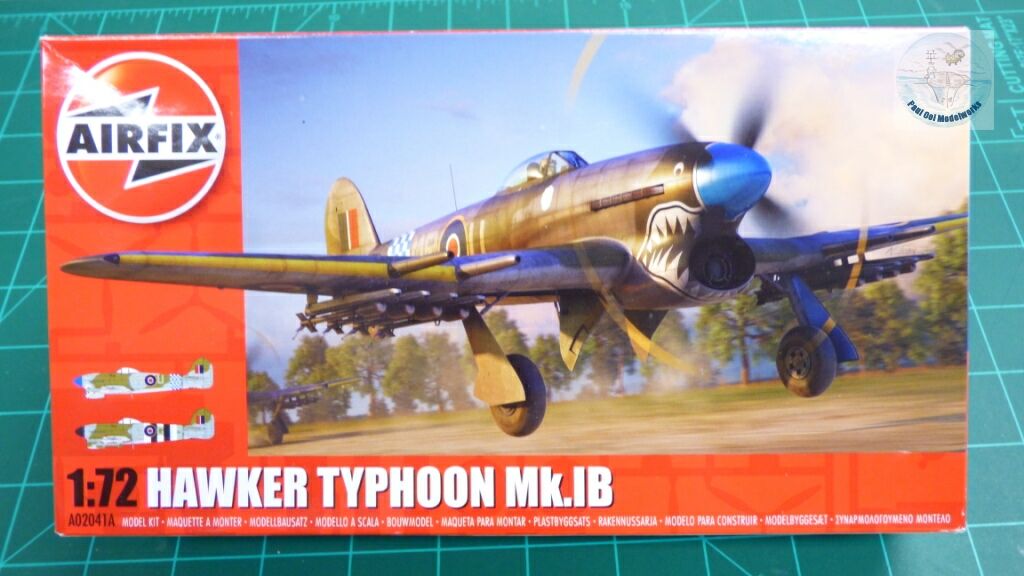
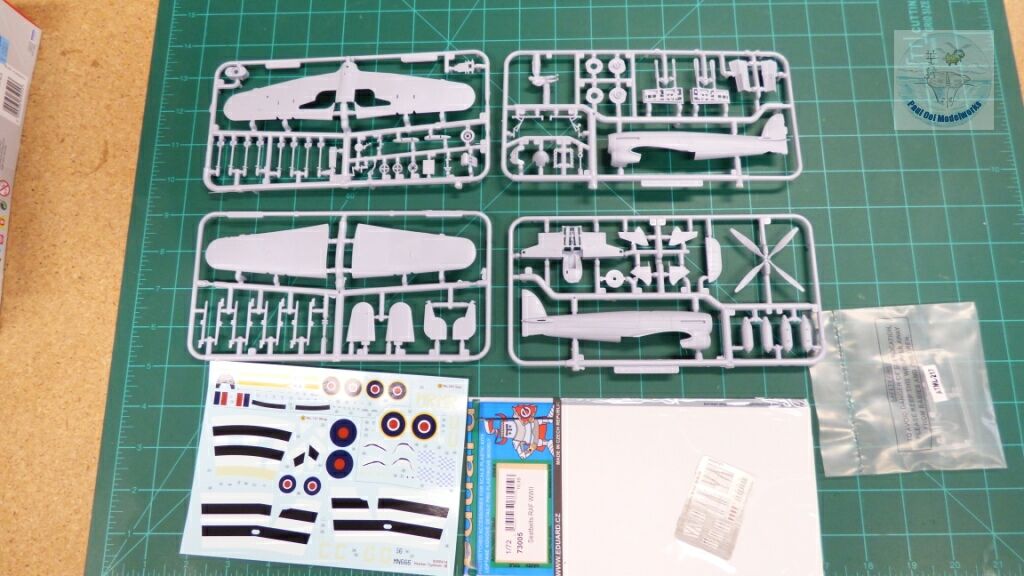
The 1/72 Airfix kit was a (relatively) new tool in 2013, and re-boxed for these markings in 2019, the year I bought it. The level of detail is very good, and for those who love a good challenge, you could build BOTH gun bays opened. The decal sheet is excellent and the only after-market item I added was Eduard seat belts set since I did not want to include the pilot figure. The fit is generally good and certainly better engineered than the kit from the 70s. However, this aircraft and the color scheme does have some tricky bits that need attention in how we build and paint this aircraft. I was a bit disappointed with the presence of flash among the parts, but it was more of an irritant and did not prevent a good build.
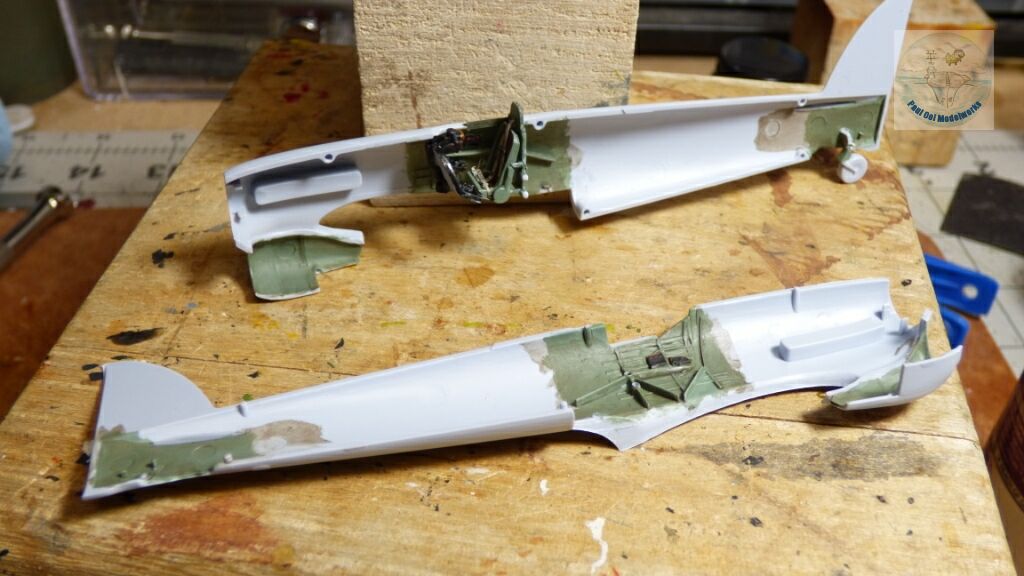
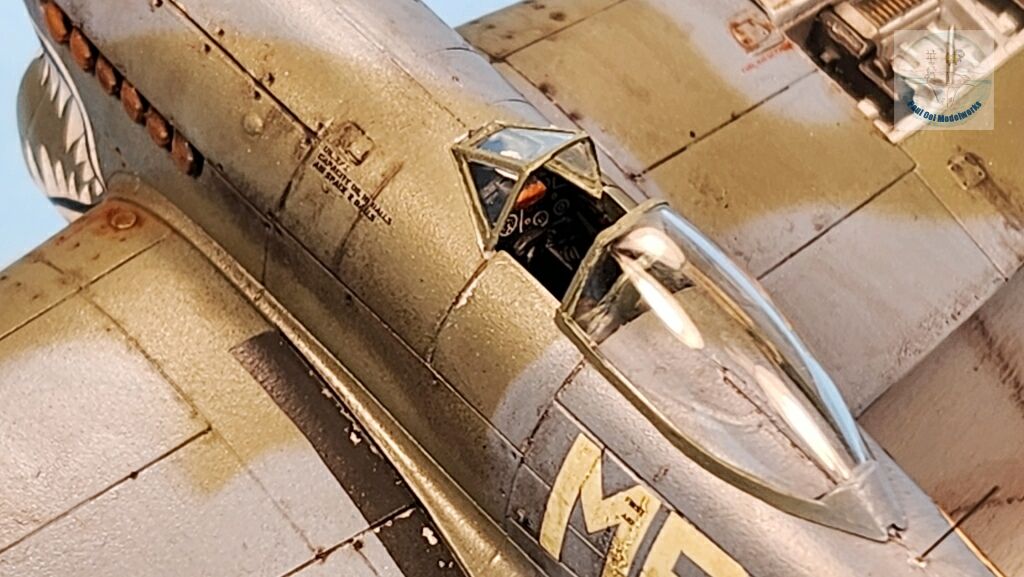
As usual, we start with all the interior parts. The cockpit space was painted British Interior Green that I still had from Model Masters. However, I realized later that the chin radiator and rear wheel bay needed to be painted aluminum or silver instead of the usual interior Green because the Typhoons were actually built by Gloster who used the aluminum dope paint. Because the cockpit space is so squeezed and hard to see, I did not invest in a detailing set, and stayed with the kit parts . On the other hand, the Eduard seatbelts set was visible and excellent.
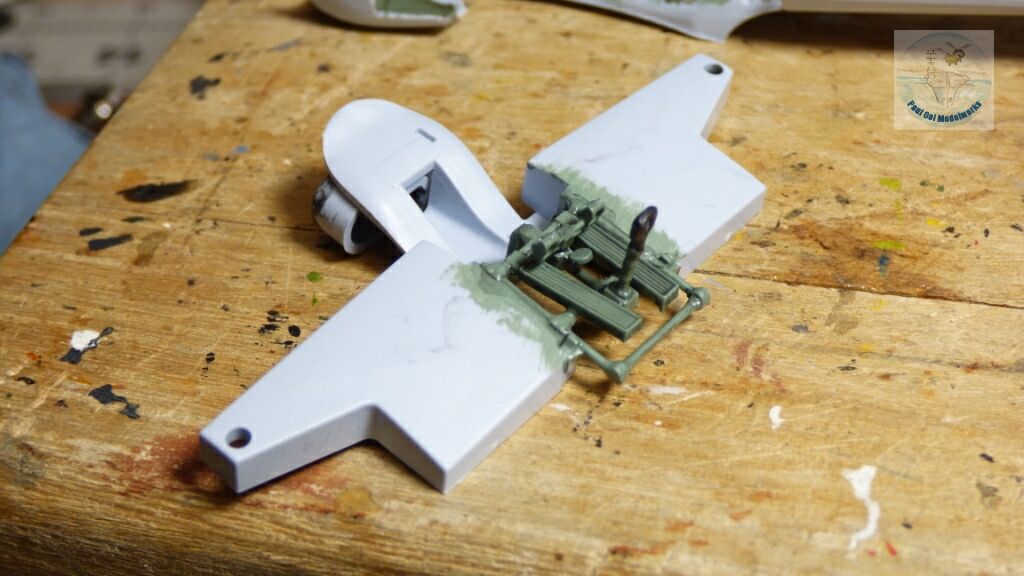
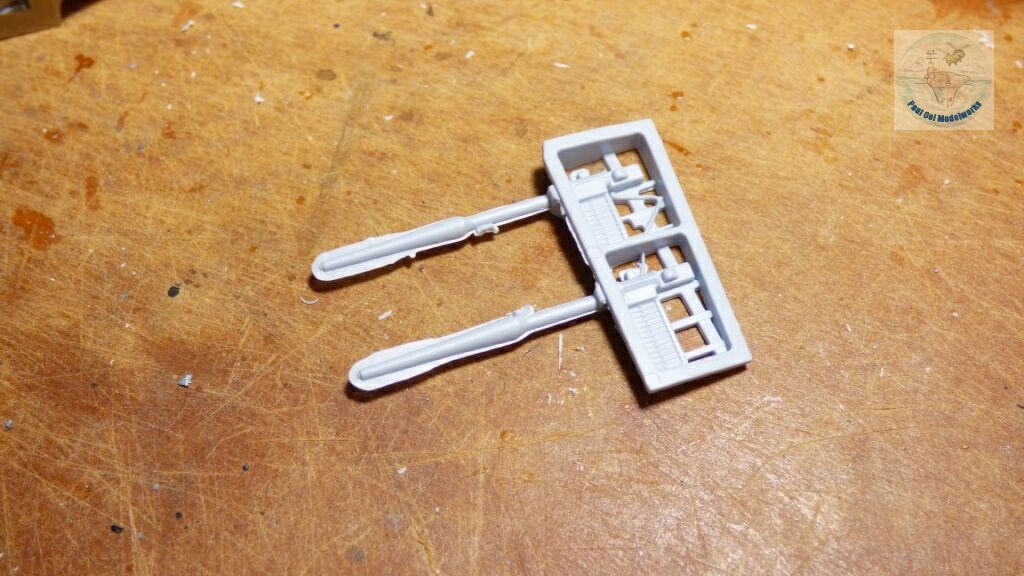
The cockpit pedals and joystick are attached to a floor board that integrated with the port and starboard wheel bays. This is an unusual arrangement, but it is effective in simplifying the lower assembly and avoid trying to perch a delicate cockpit frame between fuselage halves. However, I do strongly advice frequent checks to make sure everything can squeeze into the cockpit cavity.
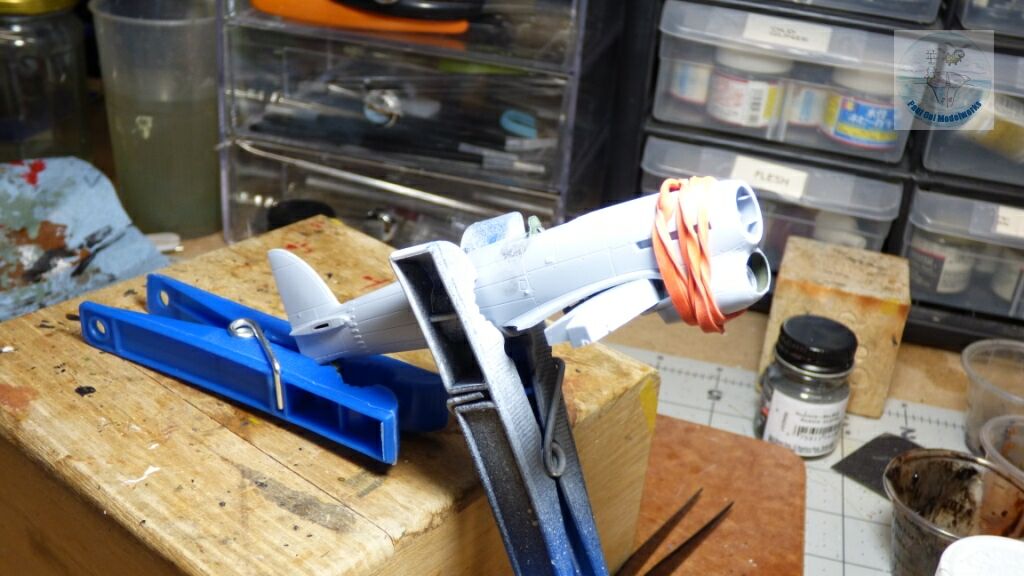
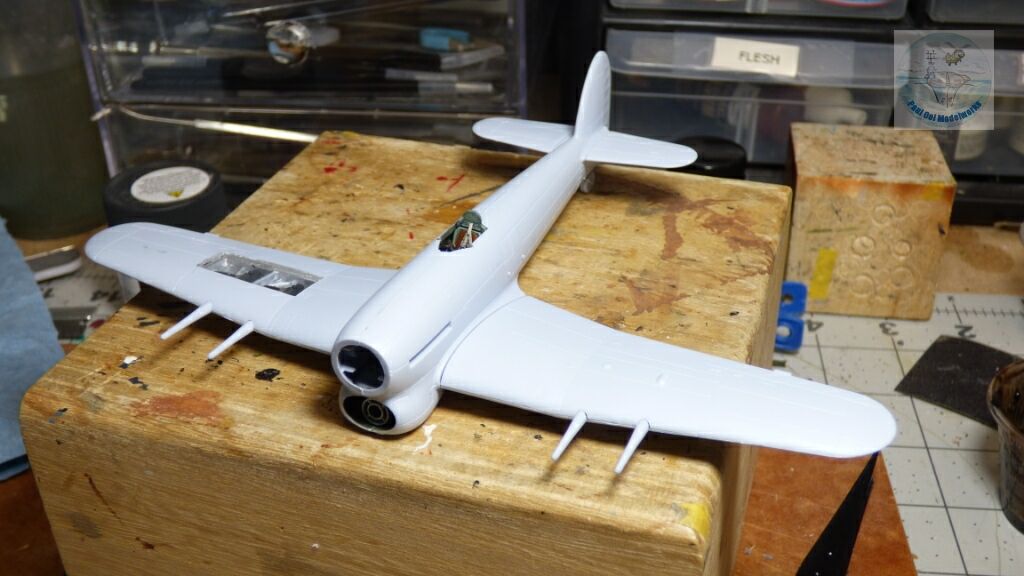
When the halves go together, the chin radiator tended to flare out a bit. I had to use a tight rubber band to squeeze the front and it worked out.
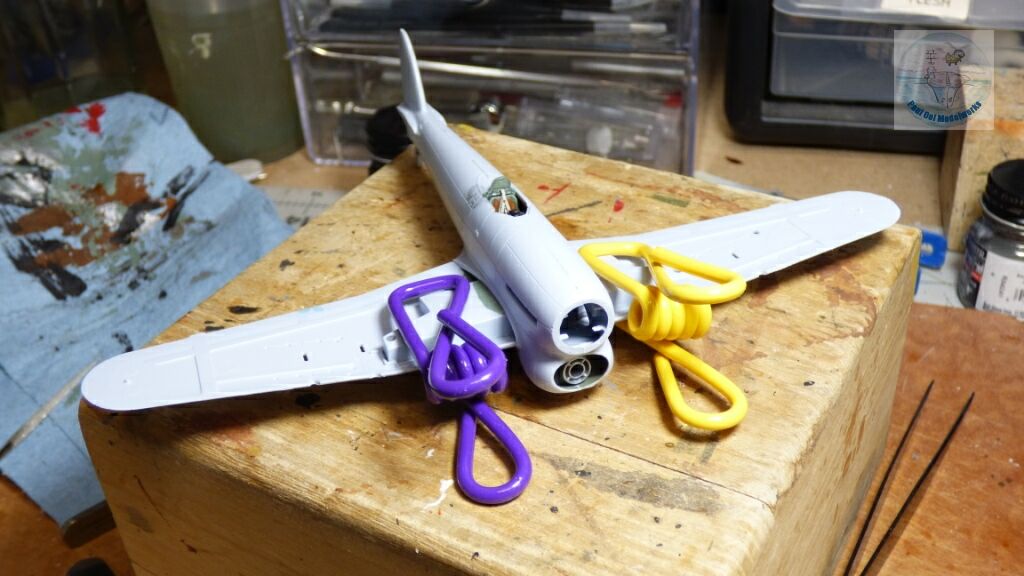
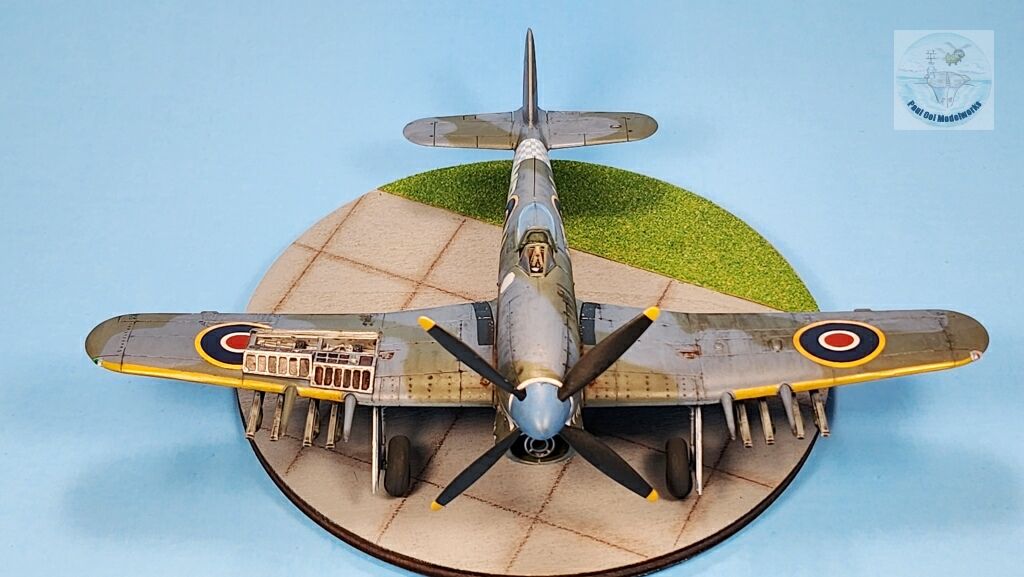
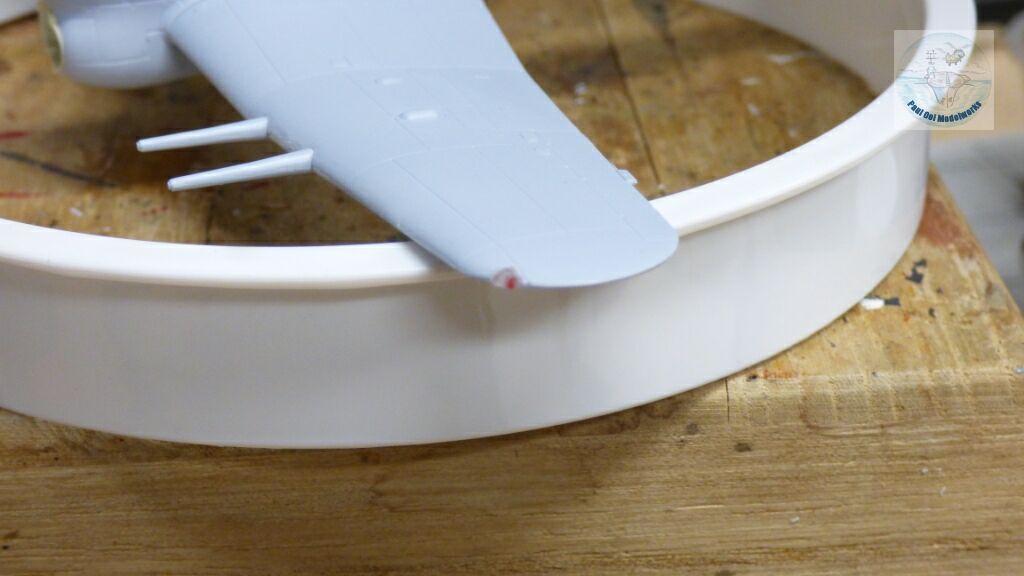
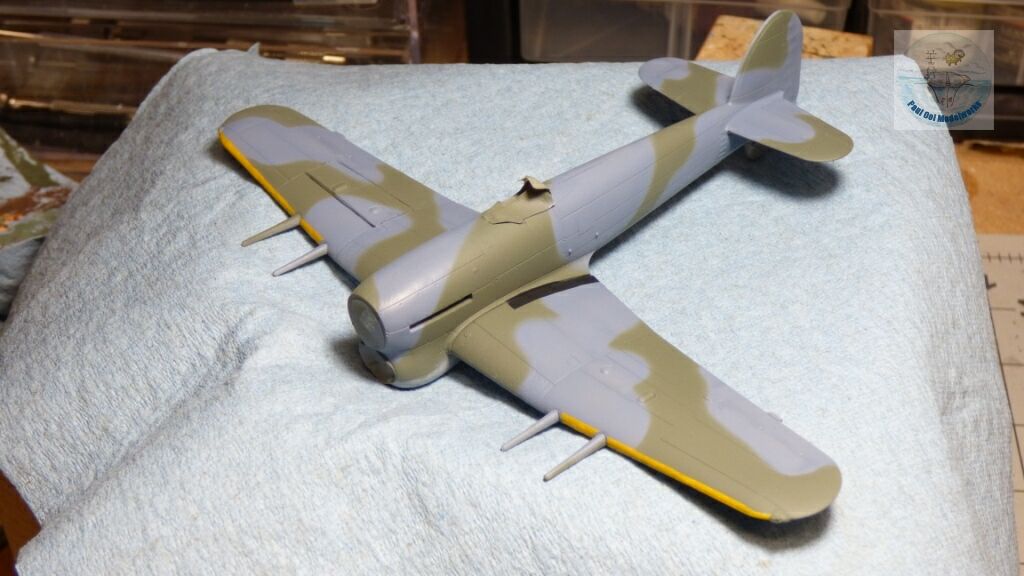
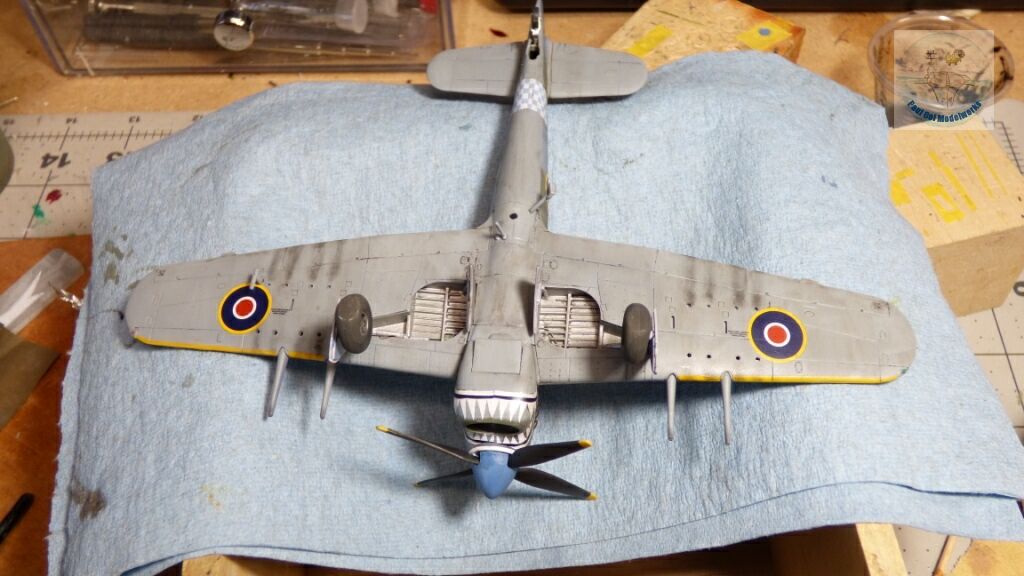
The next critical assembly step is to get the underside wing (a single piece) to press up against the wheel bays. This defines the dihedral angle of the wings, which is why I clamped them tightly with those clips (no, I am not a Vikings fan, the colors were incidental).
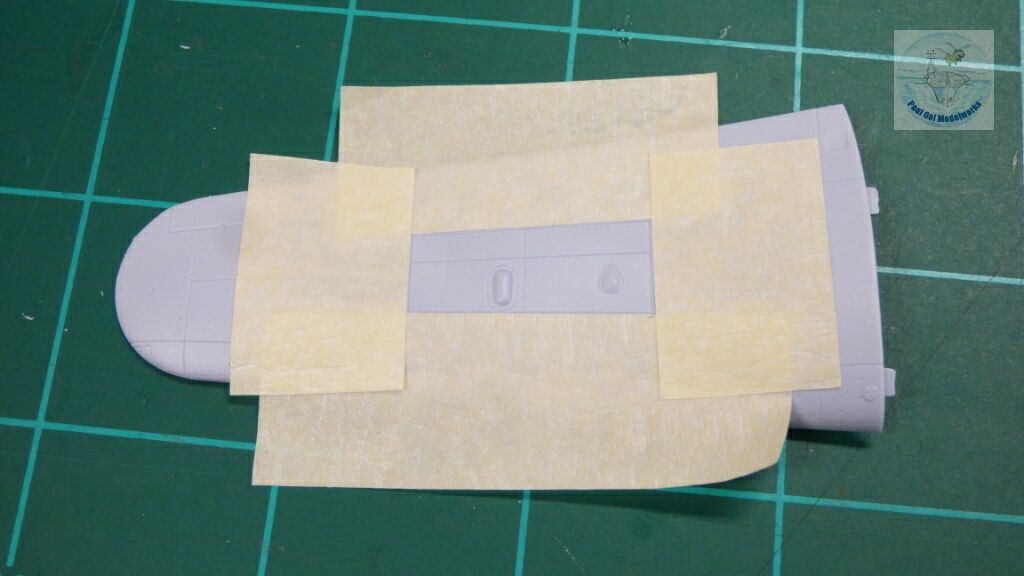
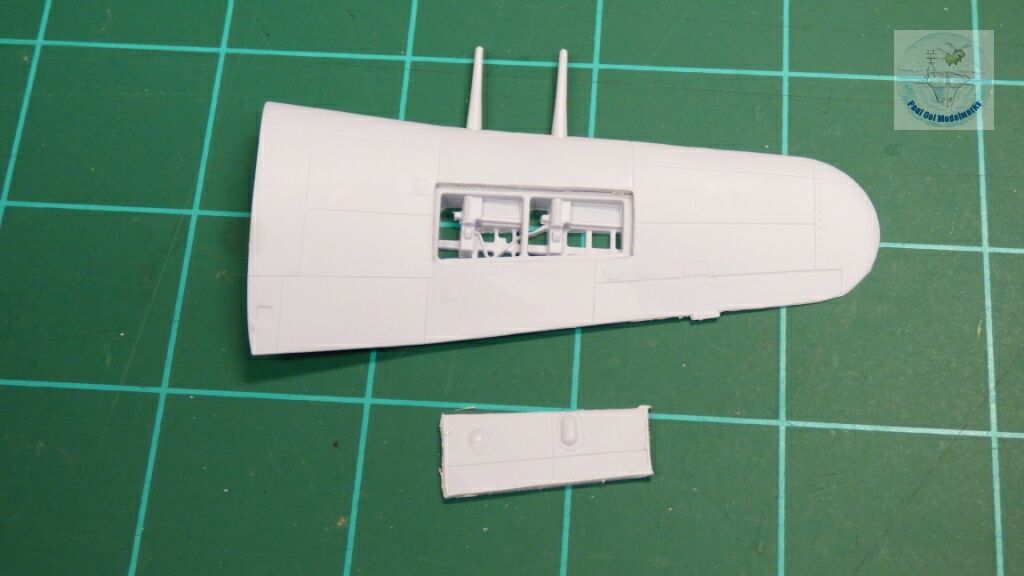
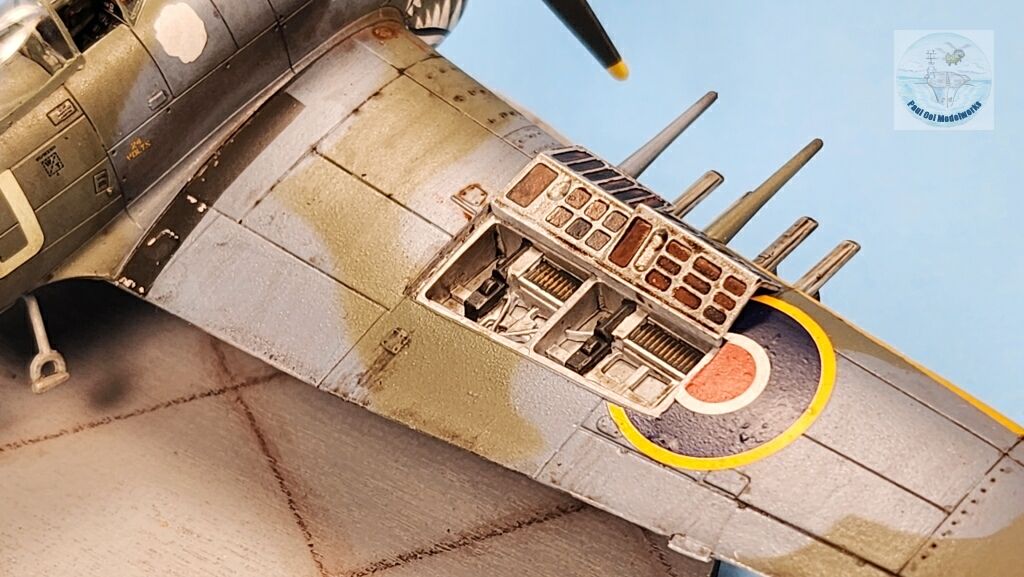
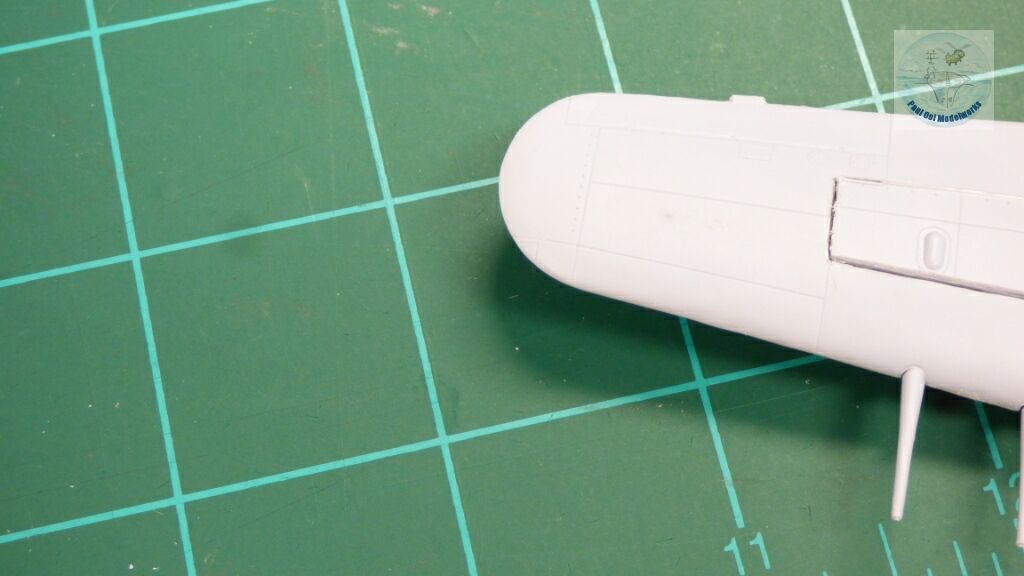
I wanted to display only the starboard gun bay. This requires careful surgery of the starboard upper wing. I lined the port doors to be removed with masking tape. Then I used a sharp scribing needle tool to thin out the panel lines and only when I can see the light through the scribed area do I use a sharp X-cto knife to do the final pierce and cut. After that, the edges have to be squared off with flat edged diamond files. The gun bay insert should dovetail with the new opening if done right. If not, buy a new kit. If this cause you to lose sleep, do not build this option and the kit will be fine without opened gun bays.
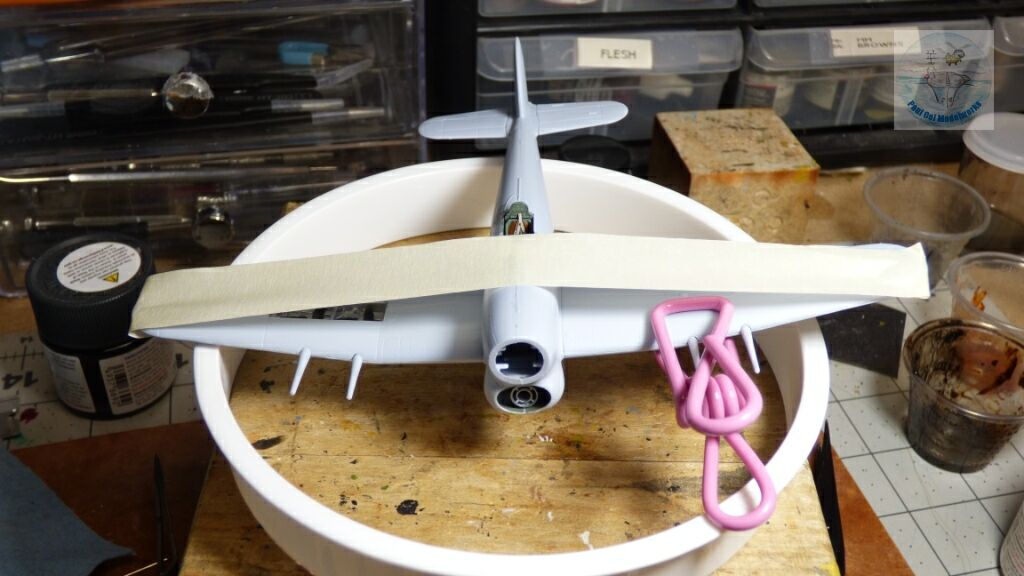
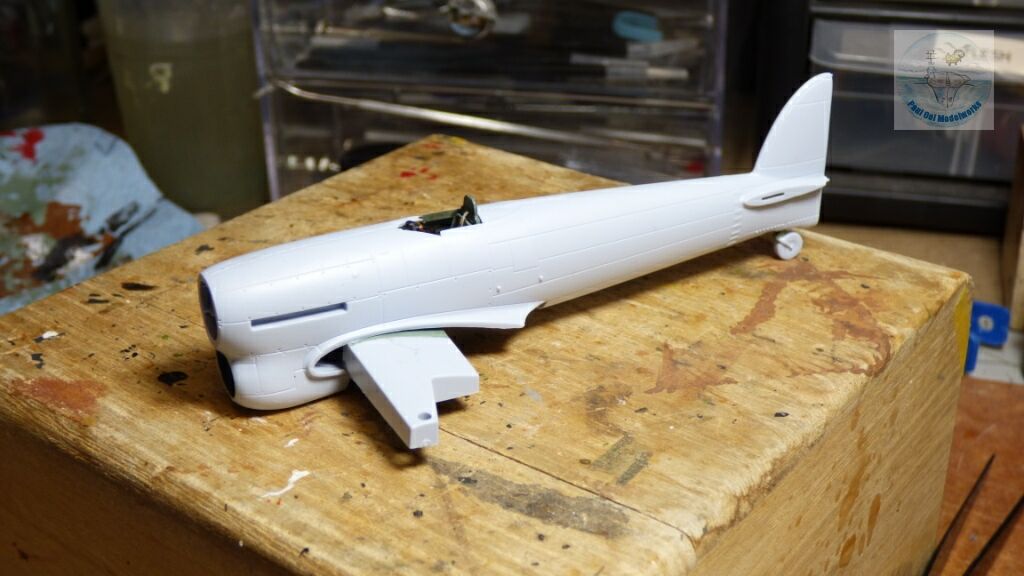
Once the upper wings are installed, I use a single span of masking tape to hold them in compression so that the wing root seams are nice and tight without a gap, while the angle of the wings to form the dihedral correspond with the actual aircraft. This is also a critical step. Allow the assembly to cure WELL.
The next delicate operation is to change the kit’s wing tip lights from the solid plastic molding into a clear bubble complete with a colored light bulb floating in there. I will show how this in done in Tutorial 12 Aircraft Wing Tip Navigation Lights with Colored Bulbs. Again, you don’t have to do this, but if you are getting into serious IPMS competition, this could be a difference between gold and silver.
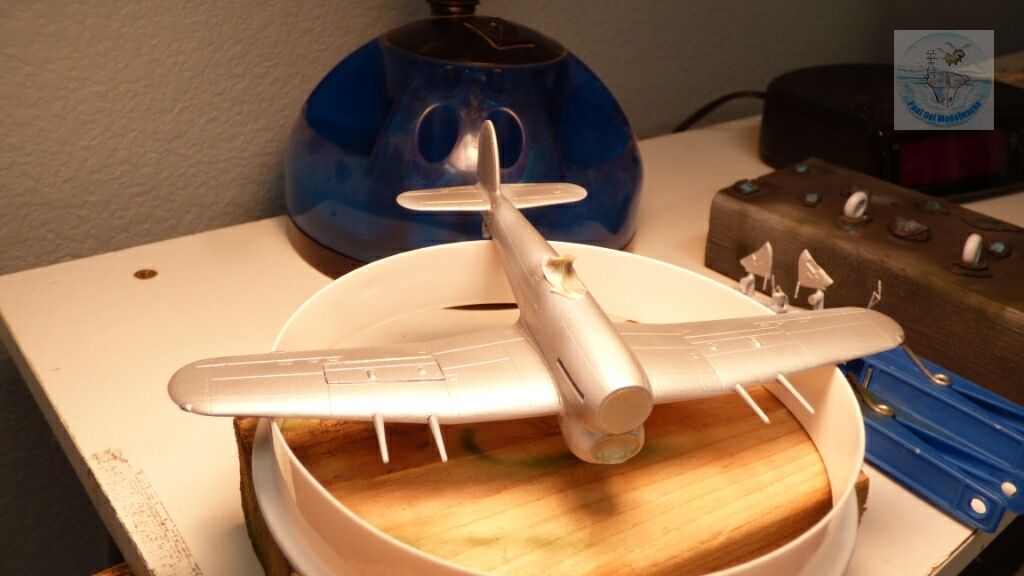
I sealed off the cockpit opening, the spinner cavity, and the chin radiator opening in preparation for painting. I also sealed any of the clear parts under liquid masking. Then I primed the entire fuselage with Testor’s enamel aluminum. This provides a bright and tough prime base for the future layers of paint.
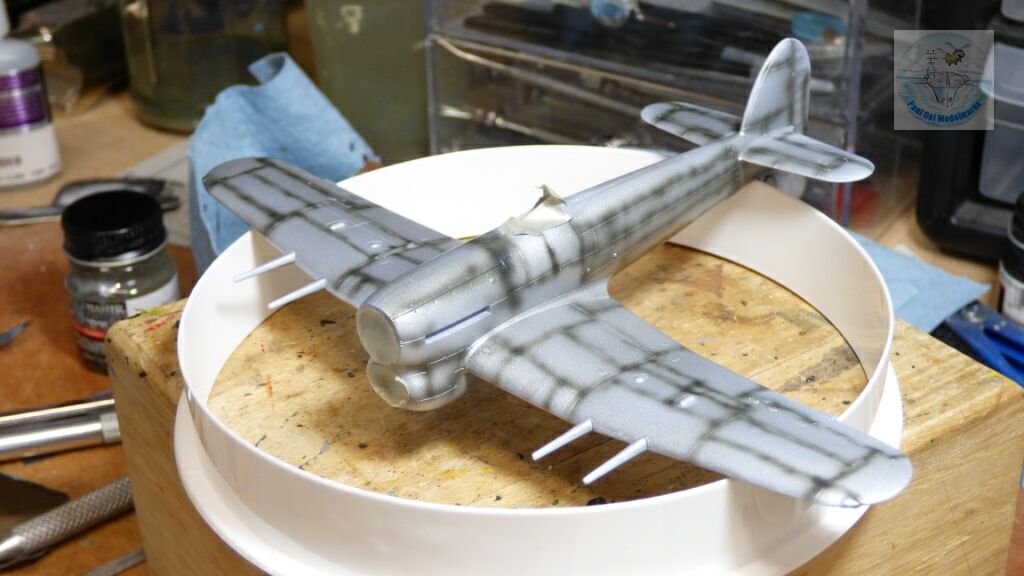
This is followed by the usual under shadow layer of Tamiya NATO Black. Then I protected this finish with Pledge floor polish to prepare the fuselage for the camouflage layers.
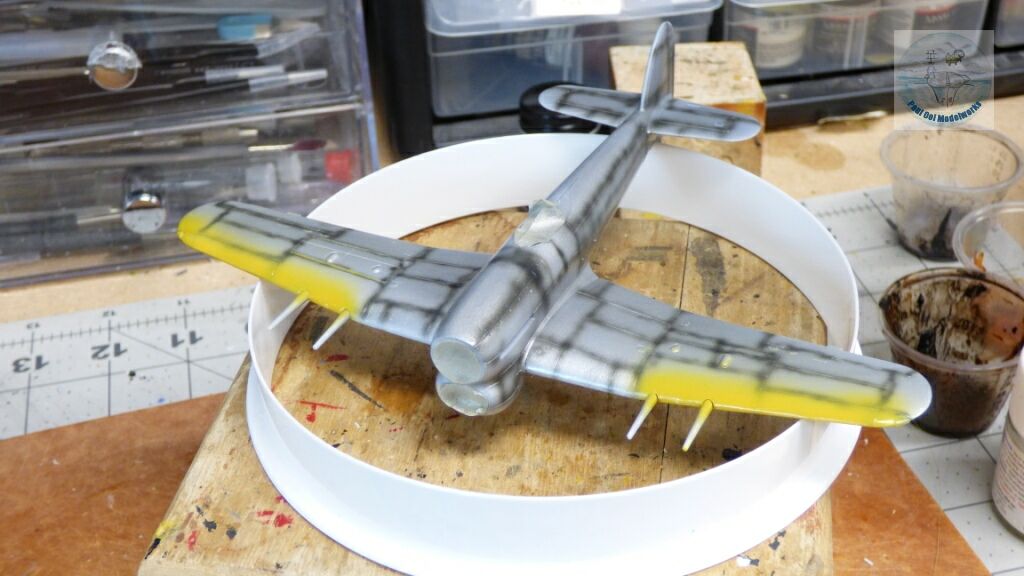
The kit came with yellow leading wing edge decals, but experience tells me that it is far simpler to paint the Model Masters Trainer Yellow onto the edge, and then mask it before painting the main camouflage scheme.
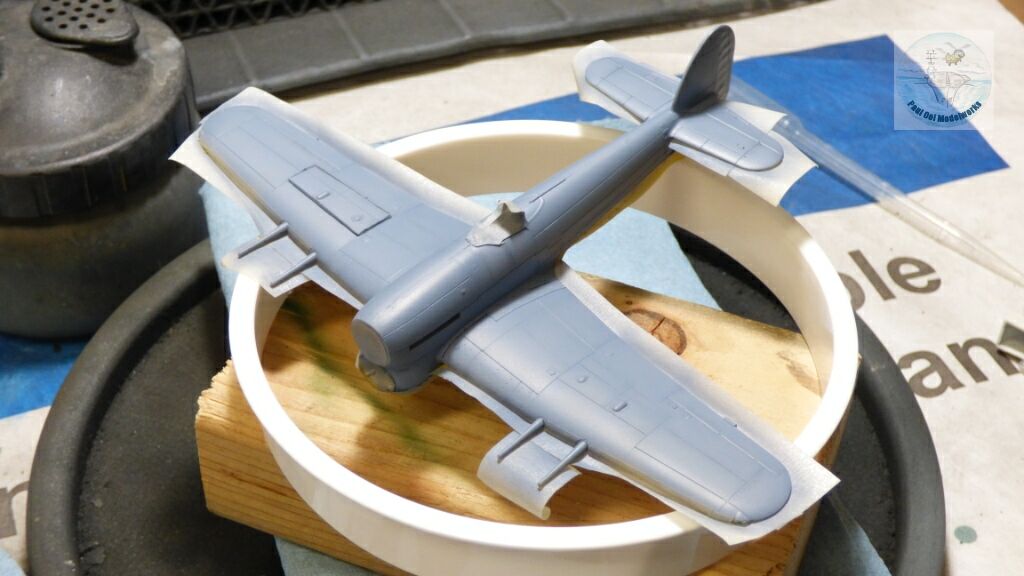
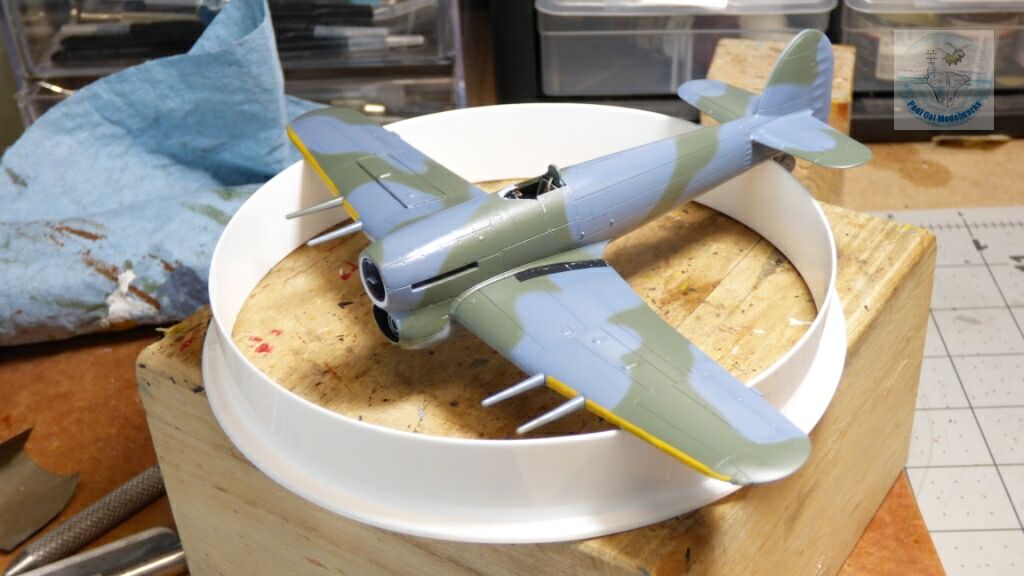
The first camouflage layer is RAF Medium Sea Gray for the underside. Then the top side is sprayed with Ocean Grey. Depending on the brand of paint used, this can vary in shade and intensity from very dark grey to middle bluish gray. I had some Model Master acrylic Ocean Grey that seemed light but actually struck the right level of scale lightening for 1/72, so I decided to use that one.
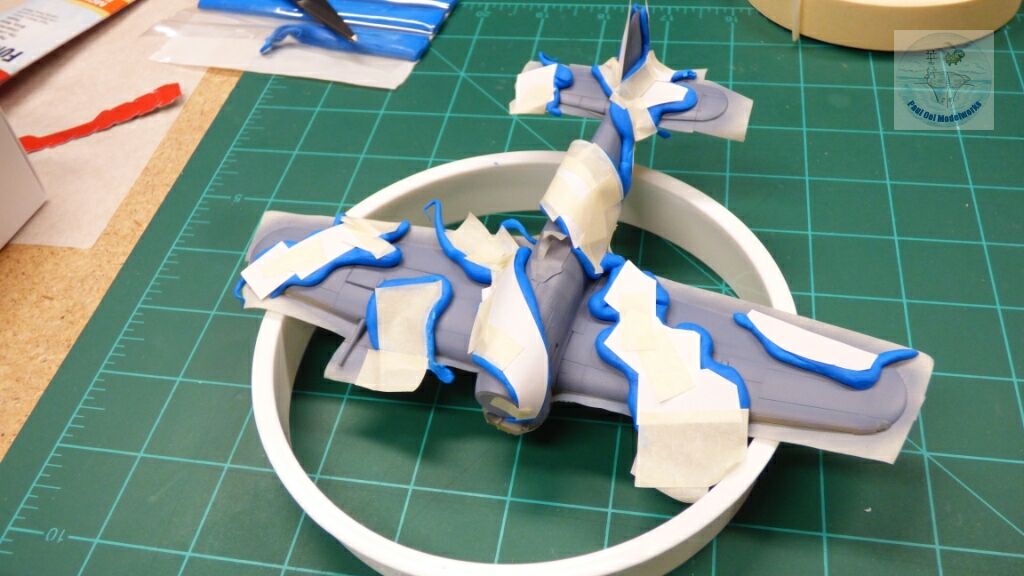
It has to get messier before dawn breaks, and so the aircraft has to endure the attack of the worms (this time, blue) so that we have a softer edge to the camouflage pattern. Over this, we spray RAF Dark Green, lightened with 20% White, 10% Insignia Yellow for scale.
Once the tape and silly putty comes off, I prep the surface for decal work with Pledge floor polish.
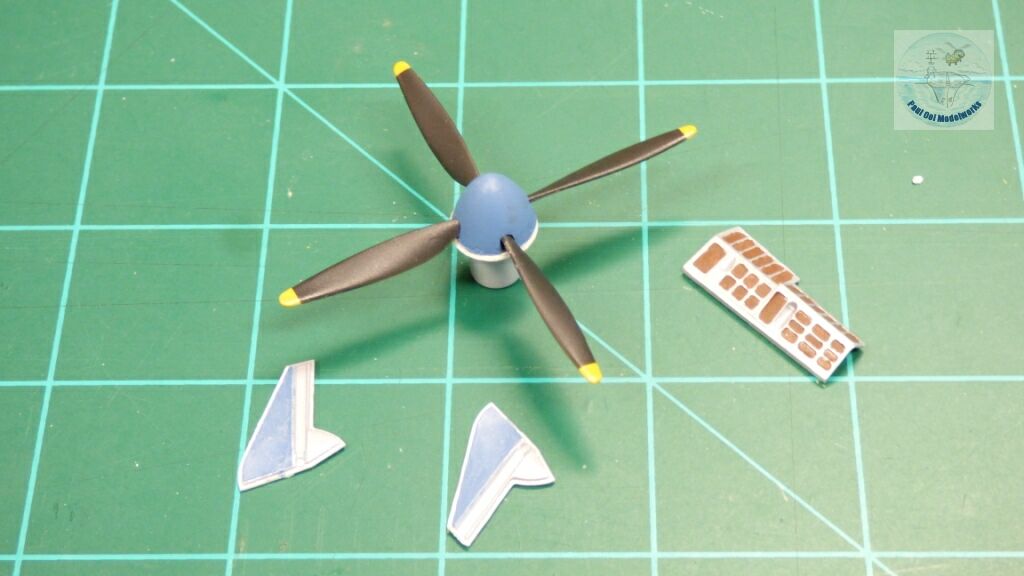
While waiting for the varnish to dry, I get to work with the spinner assembly and other accents. The kit calls out for Humbrol WW1 Blue. The closest shade I can find is the Model Master Flanker Blue/Grey + 10% Cobalt Blue.
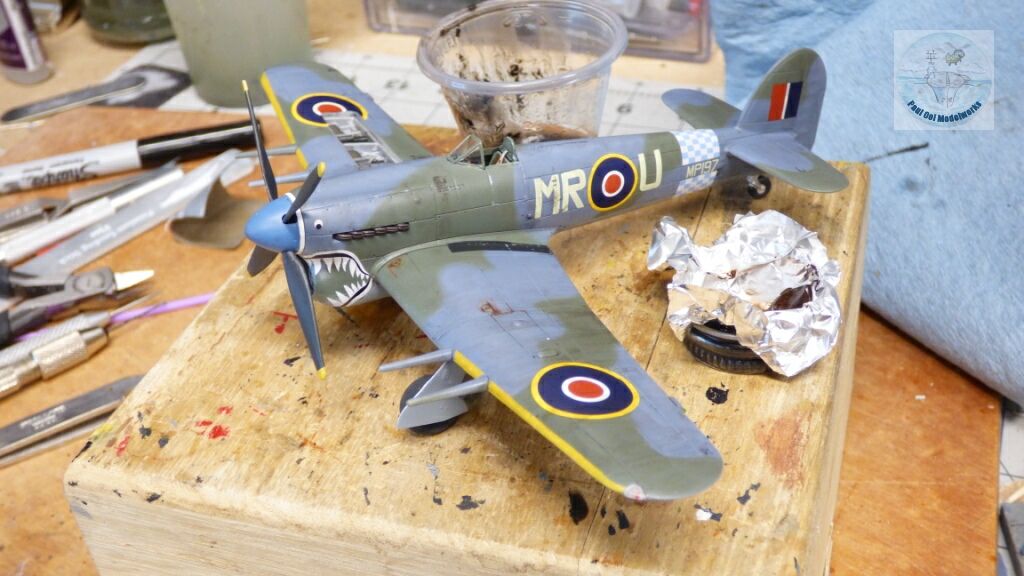
Decal work comes next, with special attention to the alignment of the call sign alphabets on the port and starboard sides.
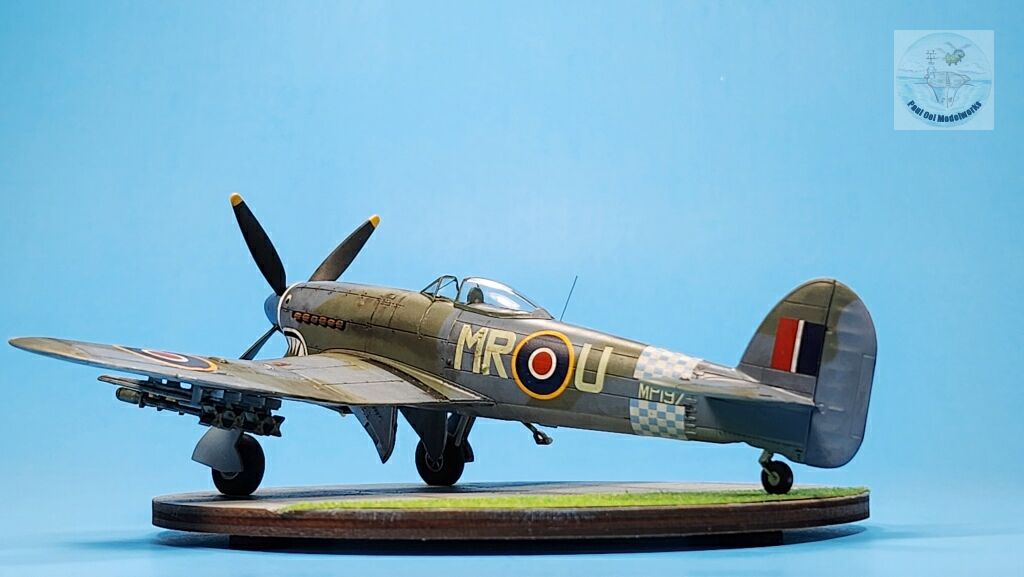
The Typhoon gets its wheels. Since this was where I ran into grief half-a-century ago. I paid special attention to the alignment. It is good that Airfix provided the main tires with the “weighted look” as its plane reference helped to determine the angle of the struts. I made sure to give it plenty of time to set before putting it to work.
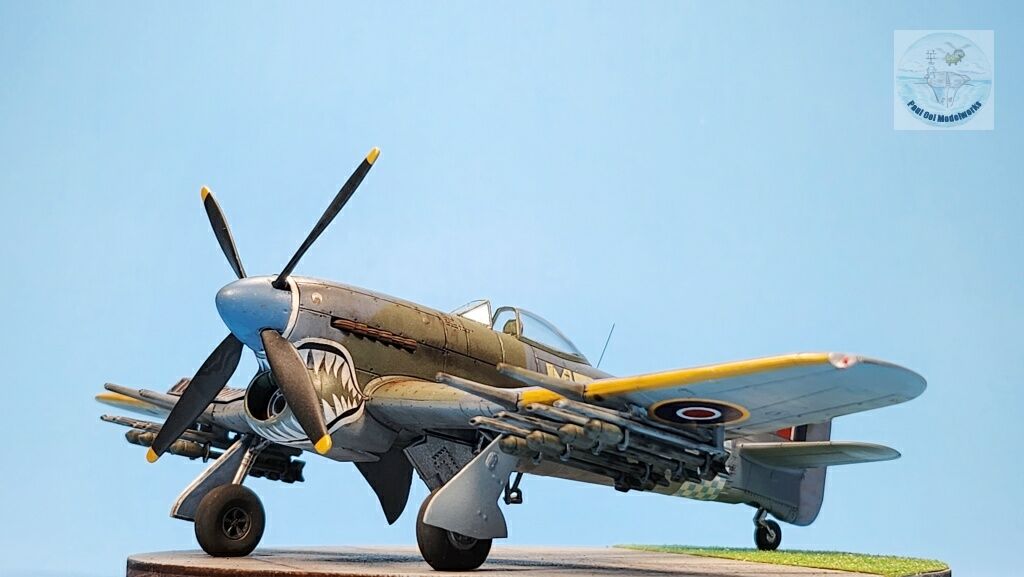
After sealing the decals and paintwork under a satin varnish, we can do the heavy weathering for Tiffy. In this build, I decided to show heavy wear at the end of the war in Europe circa May 1945. I studied period photographs and noticed that there was not so much chipping of the planes (maybe the aircrew had cans of paint to touch up after every mission) but lots of grease stains and hydraulic oil leaks. I gave the aircraft an overall 70% Ivory Block+30% Burnt Umber oil wash, and also pin wash for the panel lines. I used Burnt Umber oil wash for the fuel ports.

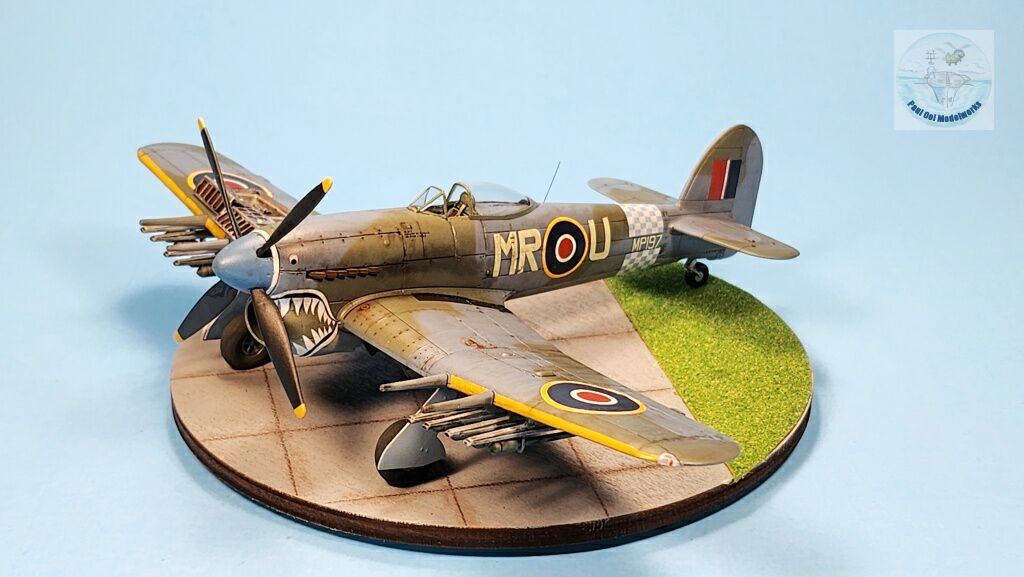
While the oil wash dries, I assembled the eight rockets and their railings.
I used pastel chalk (black, dark brown) to make the rocket streaks on the underside wings.
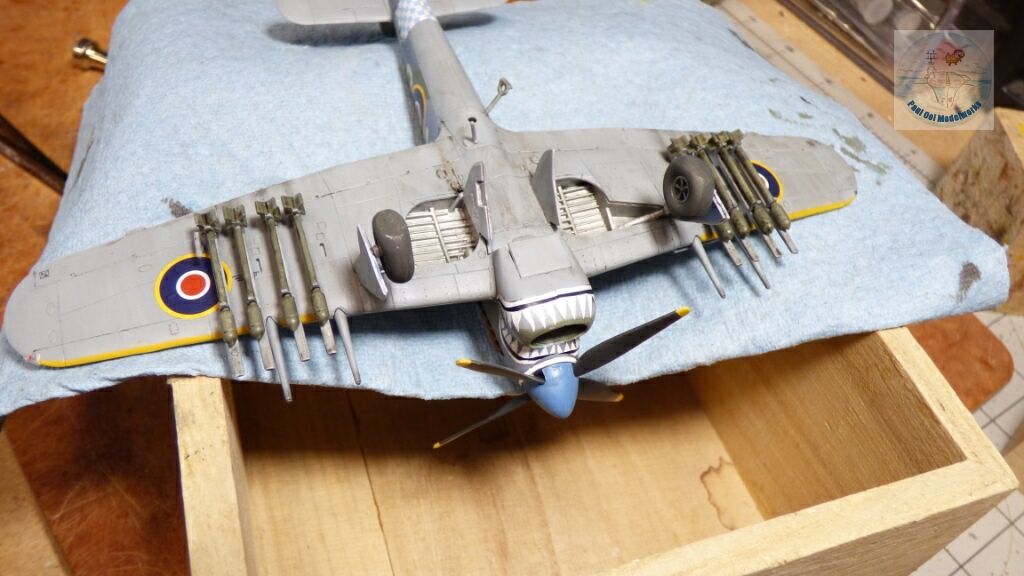
Once we install the rockets, it all gels together!
Final touches: doors for the exposed gun bays (the brown color on the doors are for the actual leather used in the original), bubble canopy, more pastel chalk for the exhaust plumes from the pipes.
Quite simply, amazing. It’s difficult to comprehend the levels of skill and patience required to complete something like this in this scale to such a high standard. I first thought this piece was in 1/24! Plenty of inspiration for my upcoming build -which will be in 1/24 scale. Thanks for sharing your work. Incredible!
Hello Jason,
Good luck with your 1/24. Lots of details. The magic is in the paint job!
Paul