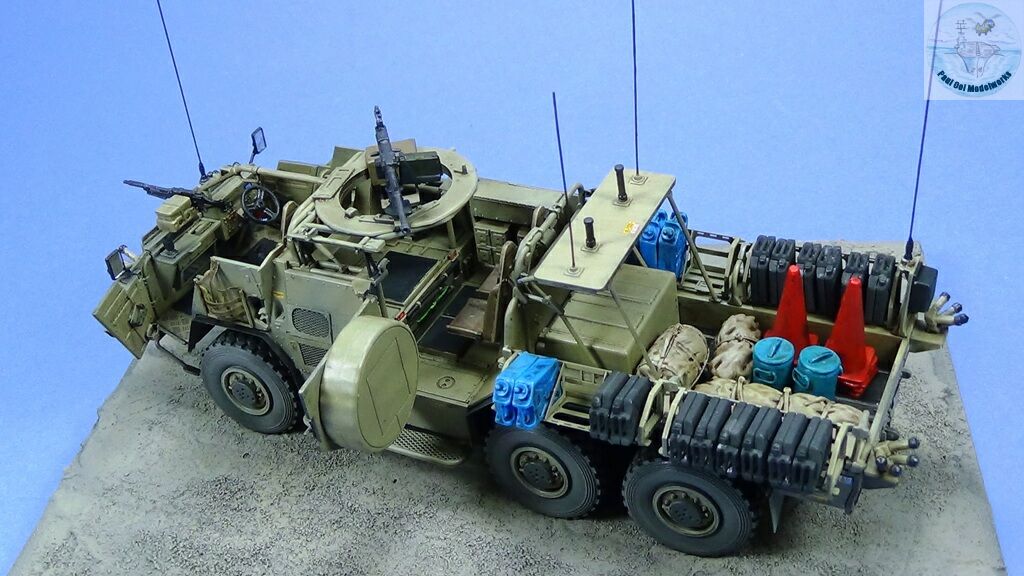
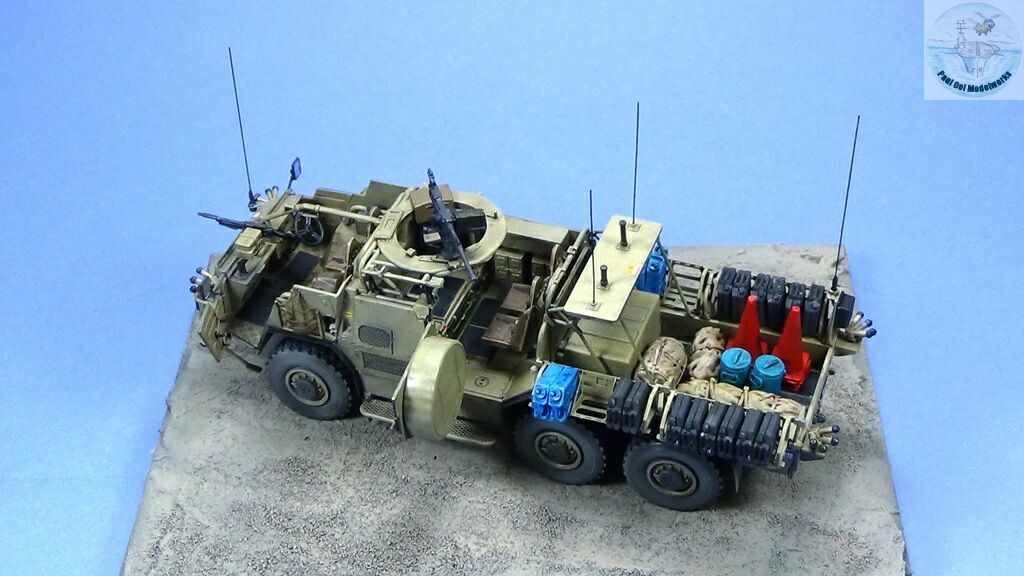
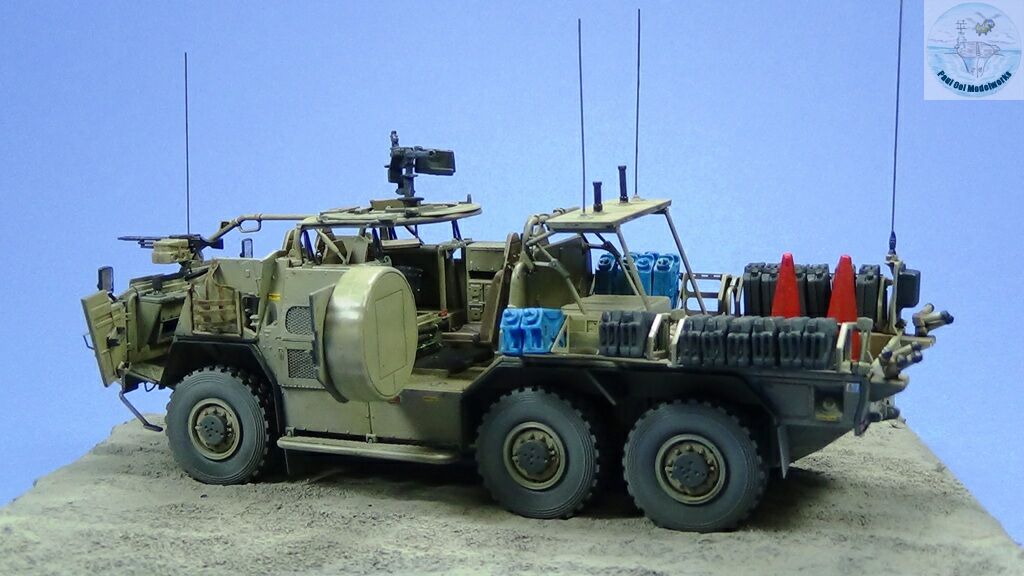
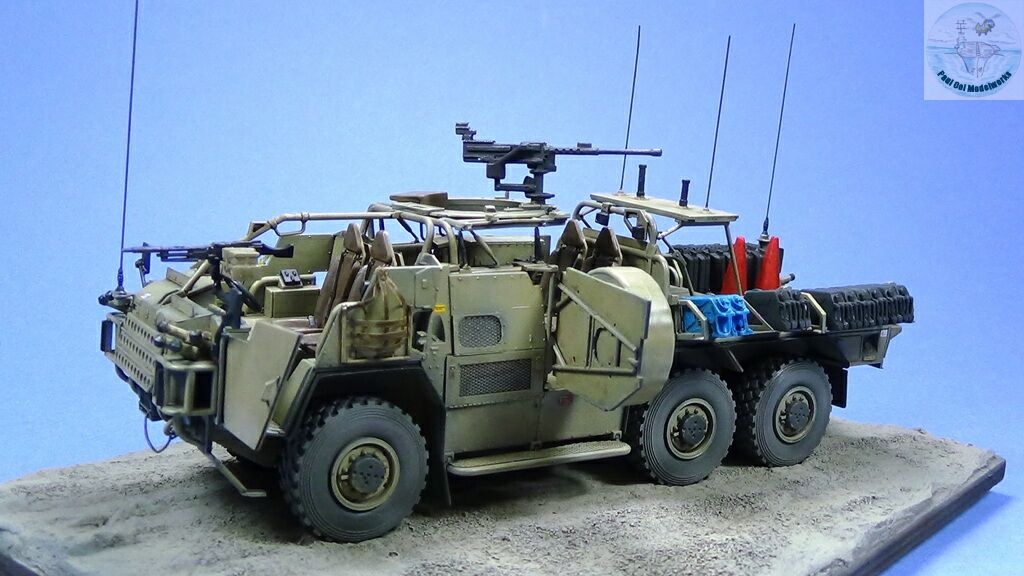
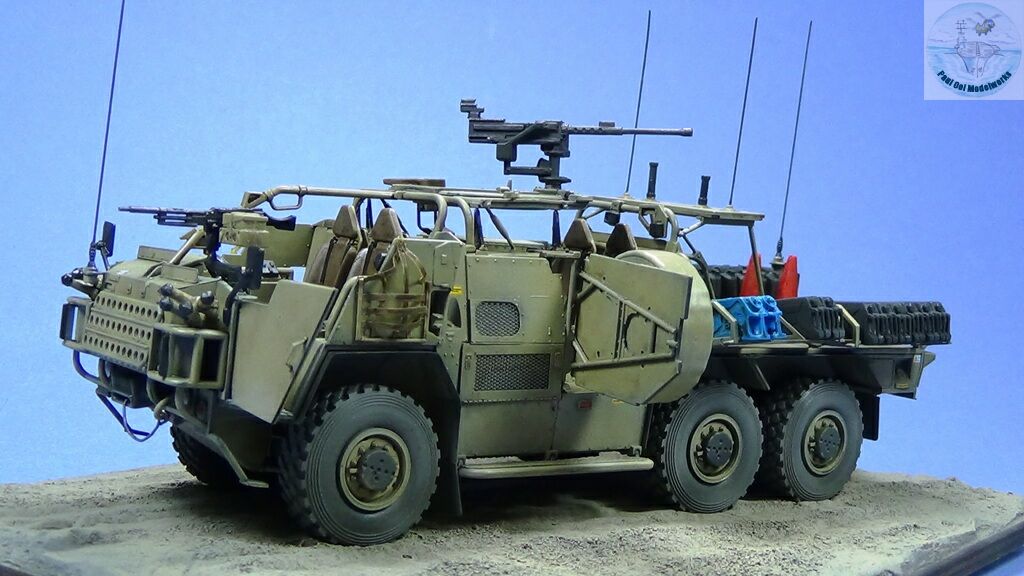
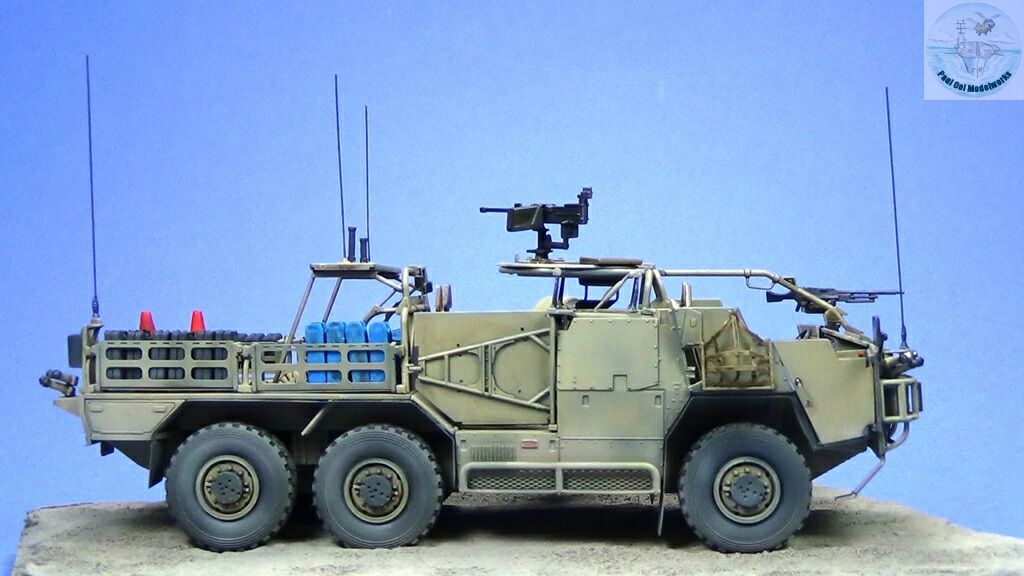
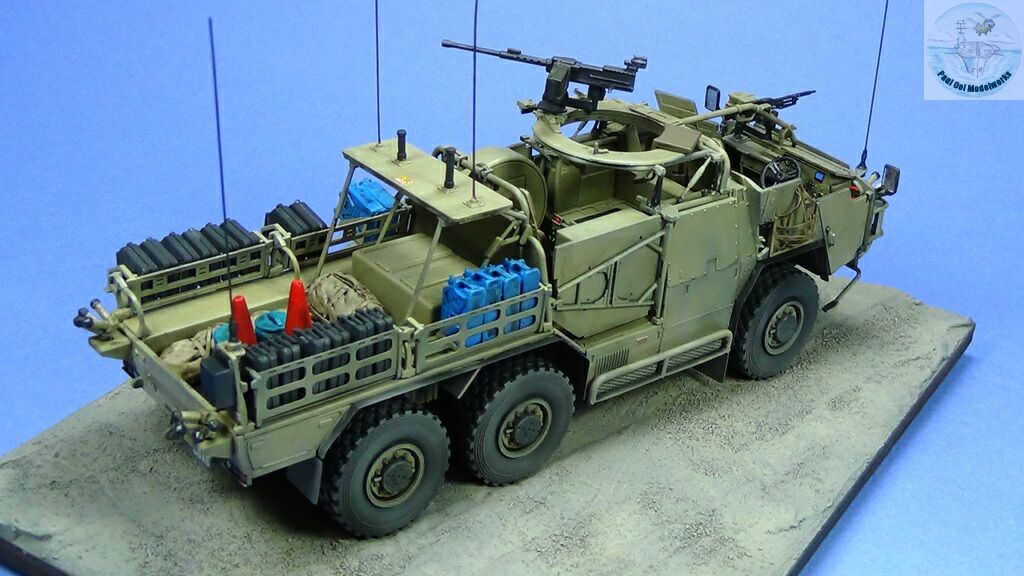
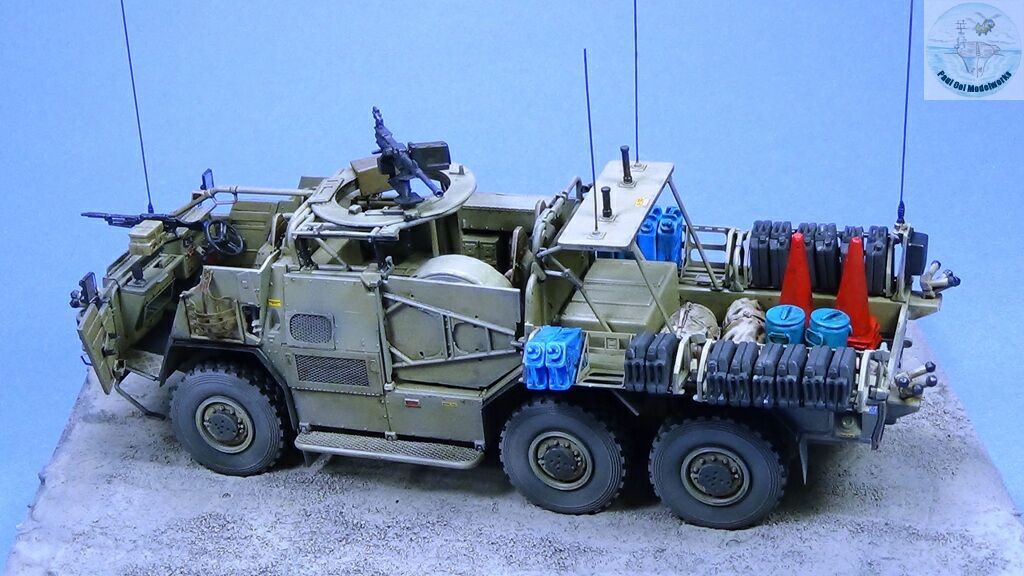
The Supacat Coyote is the modern incarnation of the much-vaunted British Army tradition of Long Range Desert Patrol vehicles stretching back to the deserts of North Africa during WW2. First deployed in Afghanistan, the Coyote can haul heavier equipment while providing fast-moving battlefield reconnaissance. The special air suspension that it is equipped with provides a good ride over rough terrain, while its ground clearance allows it fording capability in water up to 1 meter deep. The layout of the truck is unique with its open cab and utilitarian structure allowing for all kinds of equipment to be mounted to the bars. It also has ample rack space for carrying water containers and extra fuel.
Gallery

Construction Notes
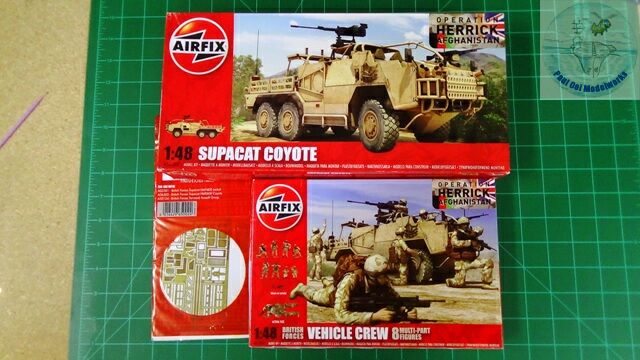
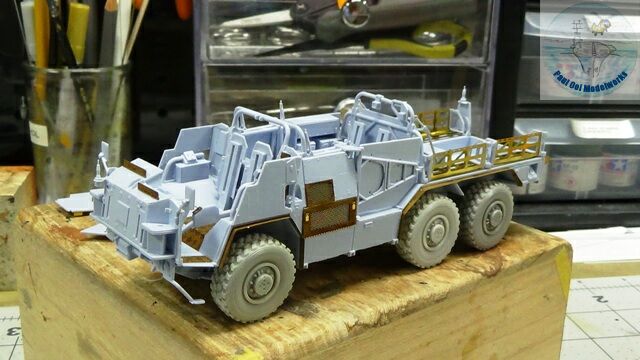
I bought this kit some years ago when it was newly issued by Airfix, including the crew set, and the photoetched kit that was probably made by Eduard for Airfix. There are enough parts in the kit to build the 4-wheel version called the Jackal. I thought I had everything to make a complete diorama but I was mistaken on two counts, as we will see later. The Coyote truck kit itself is highly detailed with crisp molding as should befit a modern state-of-the-art offering. The fit of this kit is very good and I did not need to use any fillers or putty at all.
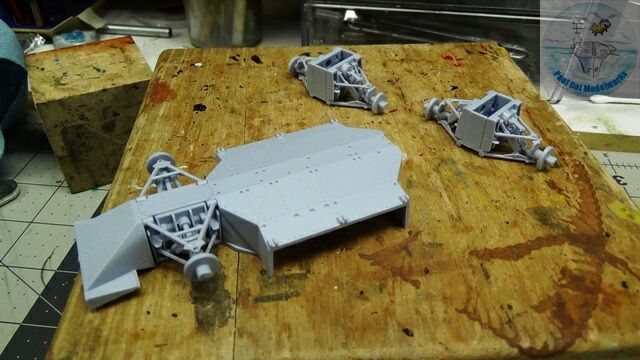 The complex suspension system was nicely done with easy fitting despite appearances. The alignment of the parts are perfect and help to keep all six wheels at the same level, a feat even for modern kits.
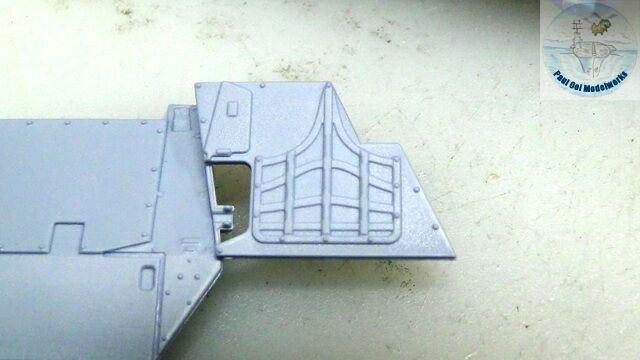
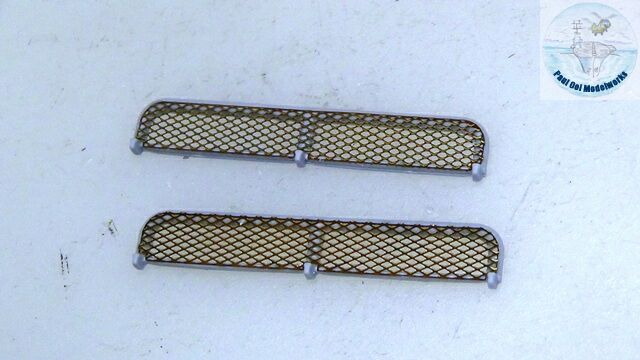
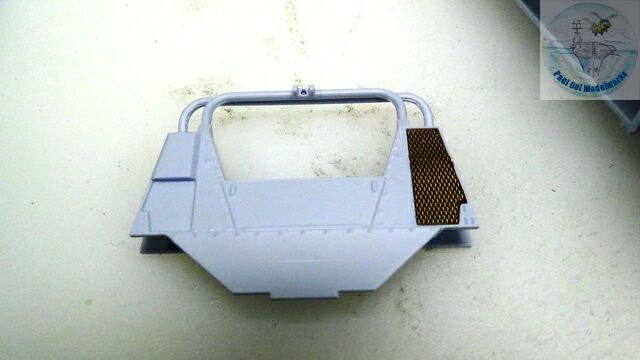 Be careful to check with the photo-etched frame instructions for adding of detail grills, like this one attached the driver’s compartment bulkhead.
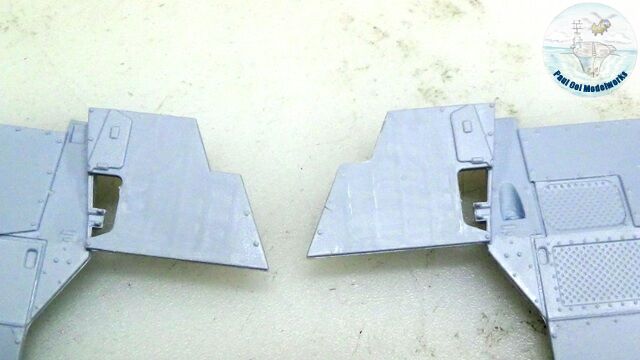
 This is what the crew cab looks like without the seats.
 The bungee straps basket carriers on port and starboard sides of the cabin looked pretty flat and un-convincing as molded by Airfix. I decided to make my own from masking tape (!). For a start, I used a sharp chisel blade to remove the molded features. I will add something later in this article that will make it all worthwhile.
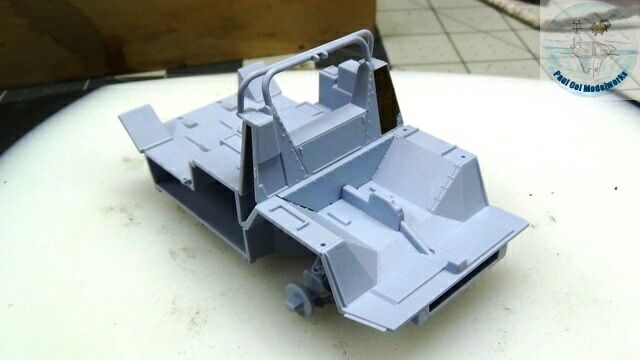
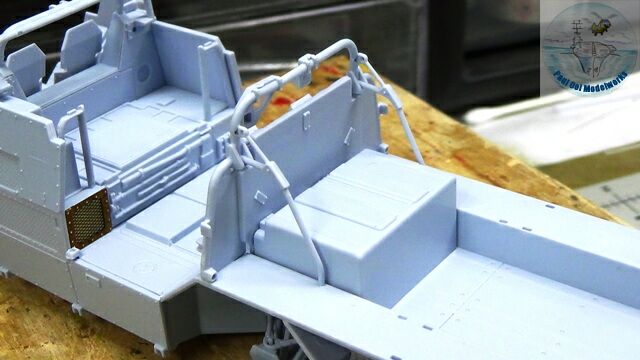
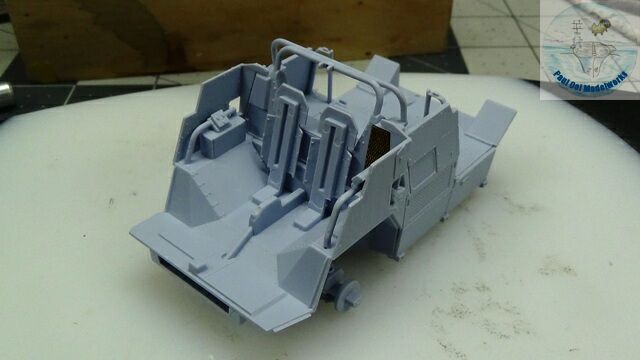 More details like seat brackets, control consoles are added to the crew cab.
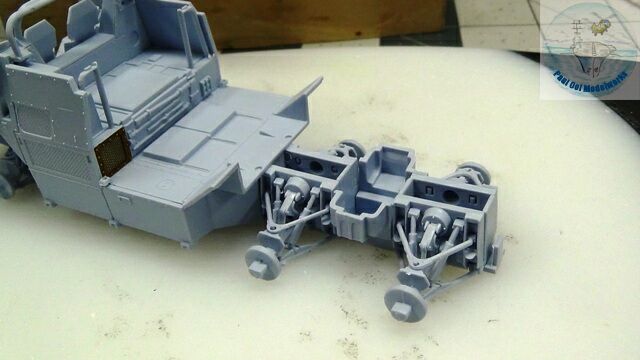 This is where the Coyote (6 wheeler) part ways with the Jackal (4 wheeler). The flat bed chassis portion is added in now.
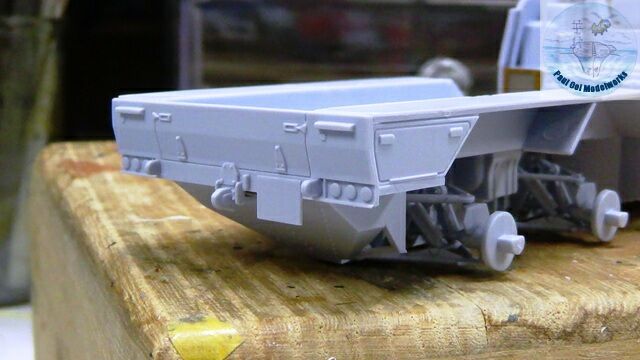
 Adding the flatbed portion onto the chassis is a pretty straight-forward construction.
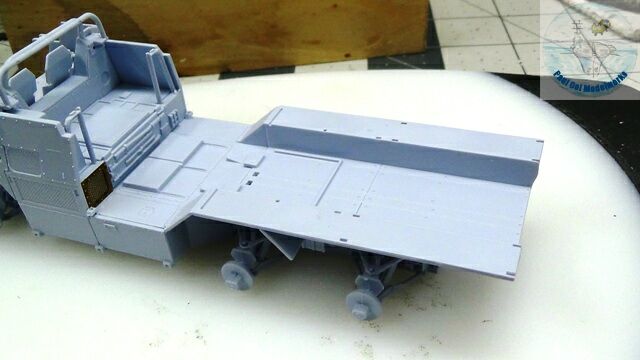
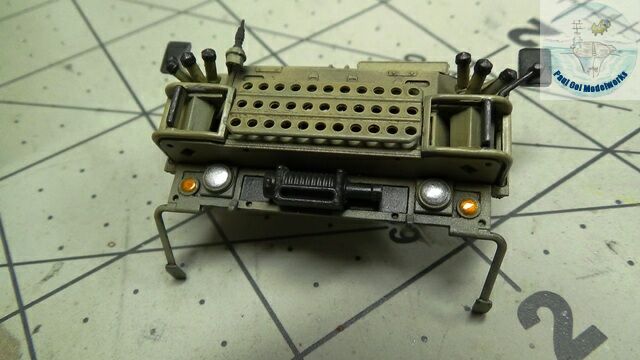
 The second bulkhead and the electronics chest gets added to the flatbed section.
 Test-fitting the rear doors. The fit is very good and needed no adjustments.
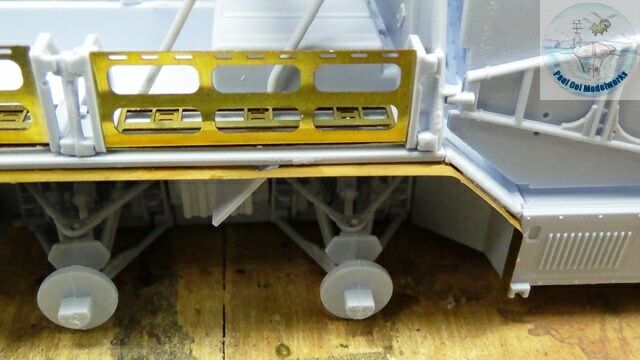
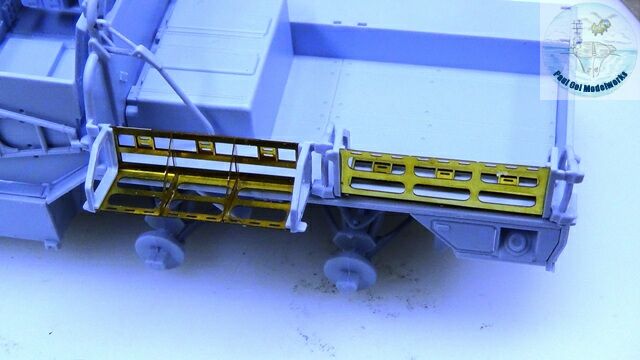 I replaced the plastic racks with the photo-etched ones. The latter are pretty tricky to form and mount. I would only recommend these excellent photoetched parts for experienced modelers. These need to be built so that they can be flipped open for easy unloading.
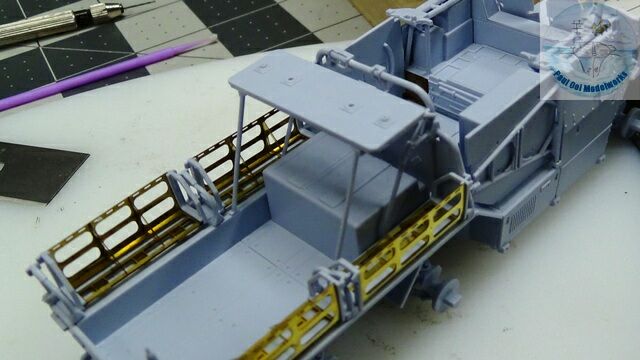 Test fitting the antenna and radio communication platform (not yet glued down).
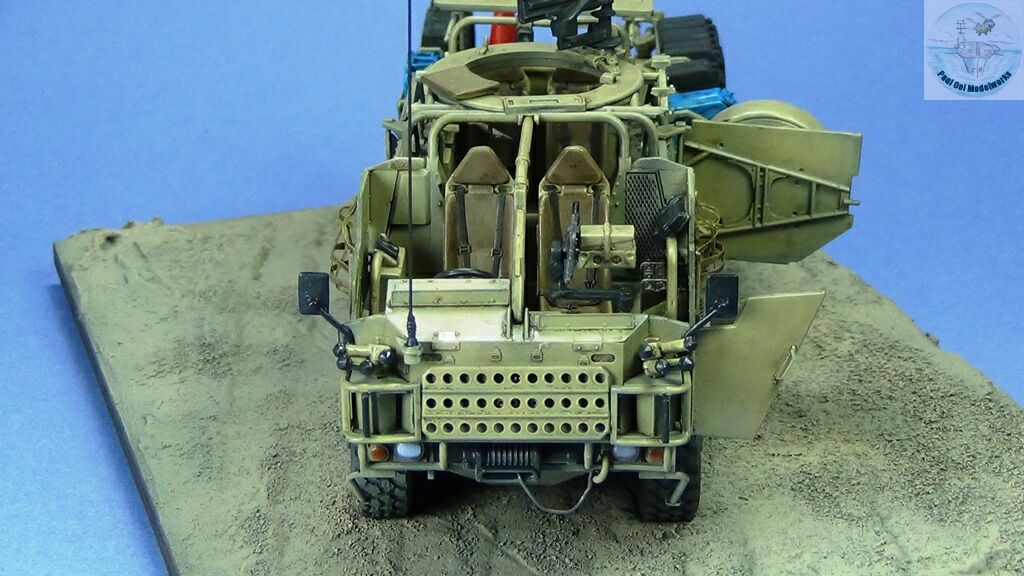
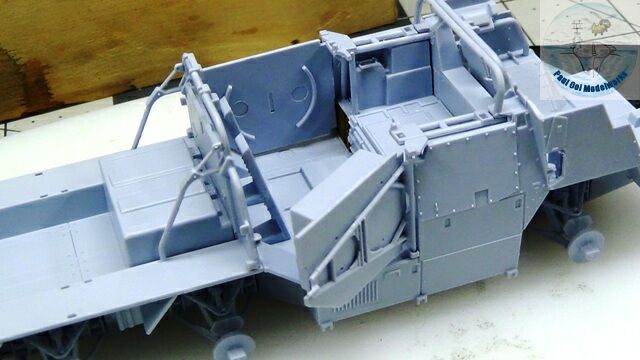
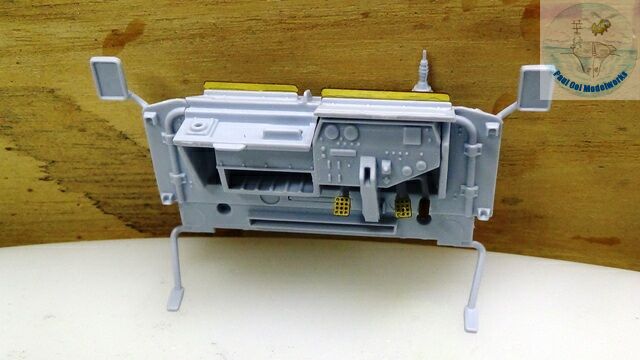
 Most of the main hull is complete. The dashboard and vehicle front is still a separate sub-assembly that I am just dry-fitting here.
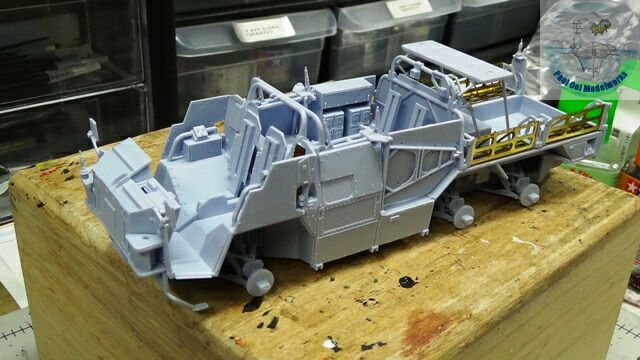
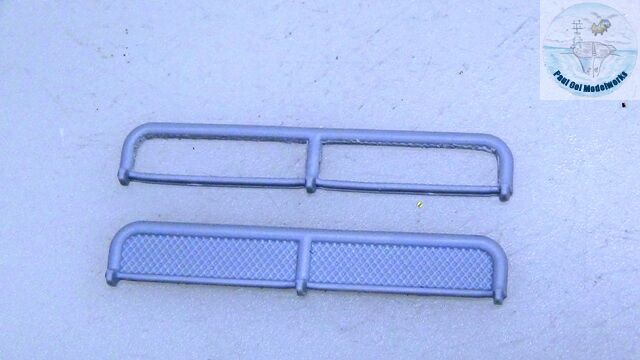
 The photoetch kit has additional fender parts, for all four wheel wells. I had to cut the recess for the two rear fenders so as to clear that plastic fender clearly seen here.
 More photo-etch details for the front console and driver’s panel.
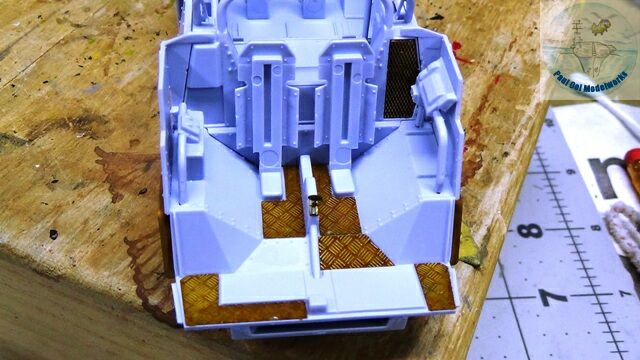 More photo-etch details added to the driver’s cabin. I love these typical “diamond” plates being added to the flooring.
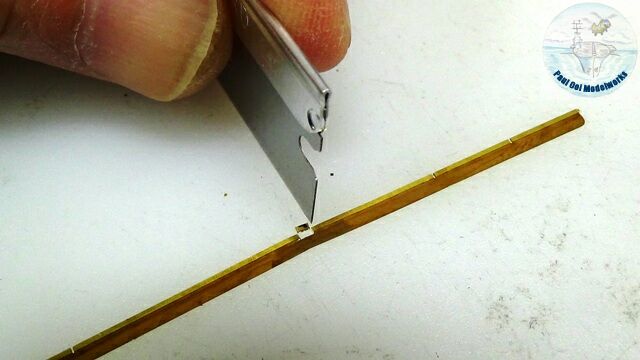
 Adding the grating pieces to the step platforms at the sides of the vehicle are painstaking as I have to first cut-out the molded plastic “grating”.
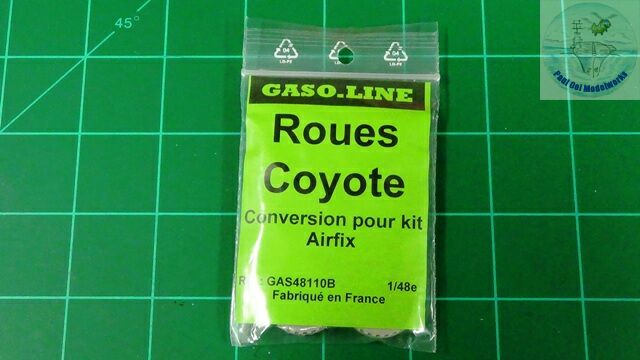
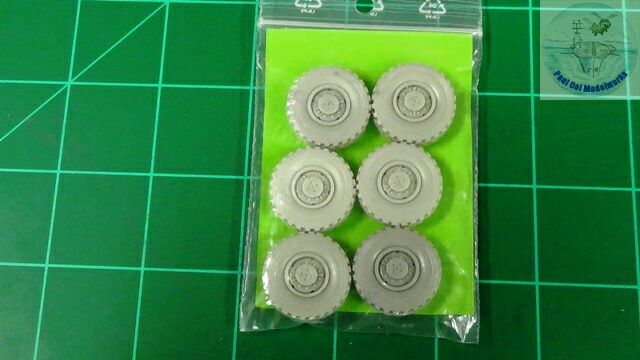
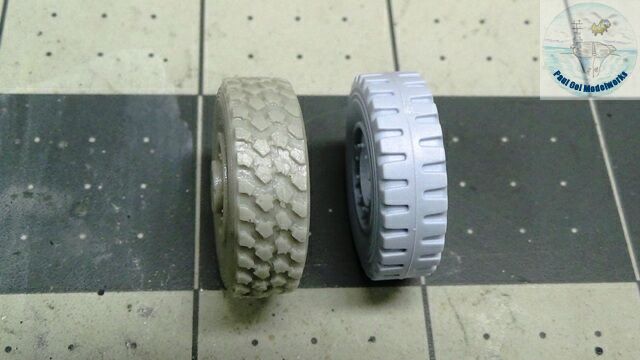 And so, I was making good progress when I was suddenly struck by the situation that added 2 weeks to the project. The tire threads on the wheels from the kit are totally wrong. I checked the internet until I found these resin replacement tires for the Coyote from Gaso.Line shipped all the way from Canada. It was well worth the wait and gave the kit the correct tires.
 The resin wheels gives the vehicle the correct look!
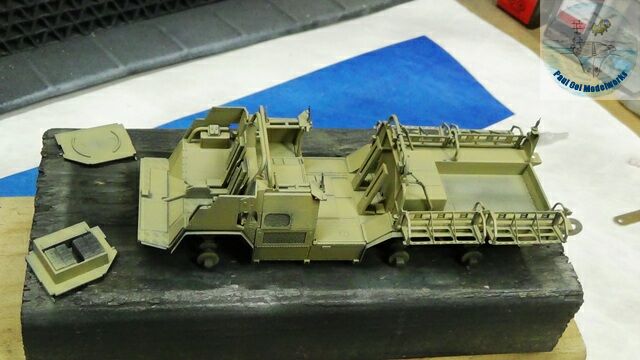 After my usual Tamiya Sky Grey and NATO Black under-shading, I sprayed the entire vehicle with Model Master Armor Sand, which came pretty close to the Humbrol 237 called out by the Airfix instructions. The latter has been phased out in can form by Humbrol, and so this color by Model Masters was a good substitute.
 And the wheels get attached!
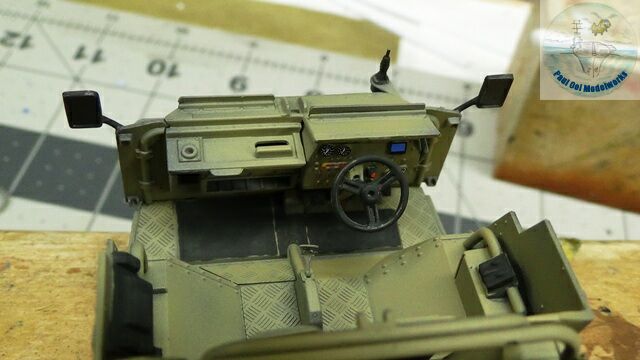 Dashboard decals for the dials and detailing the driver’s compartment.
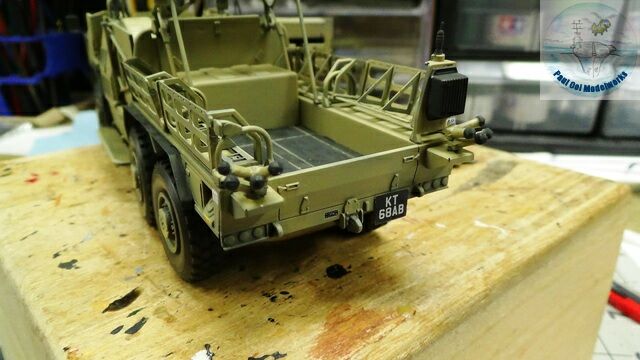 More decals for the truck, including this license plate number. Not that I have not yet painted the signal light array.
 After sealing in the decals with a satin varnish, I apply the 50:50 Burnt Umber and Lamp Black oil wash to the whole assembly.
 I paint in the headlamps and signal lights at this time.
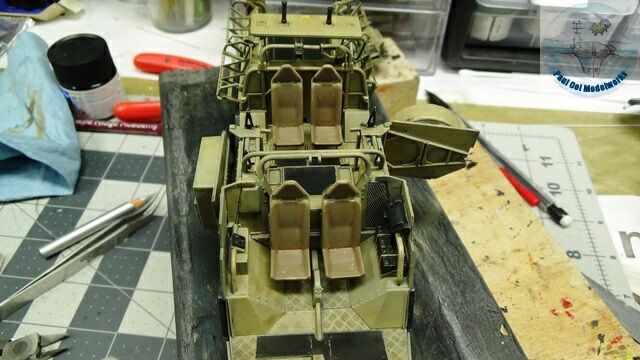 Crew seats get added in (these are painted Tamiya Khaki XF49).
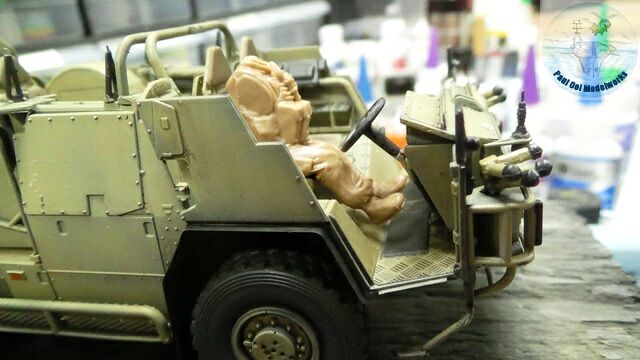 This is where I encountered the second problem (the first was the wheels) with the Airfix parts. The driver figure was proportioned in such a way that I could not get his feet to touch the paddles. This was a deal-breaker for me as I did not want to put in crew figures that did not interact properly with the control surfaces. To make the driver come into proper contact with the steering wheel and paddles, the seat would have to be relocated all the way down on the floor of the vehicle which is incorrect and looked funny when compared to actual photographs. Either the compartment was spaced incorrectly, or the figures were undersized. Or both. I decided to display the truck without any figures. Sigh.
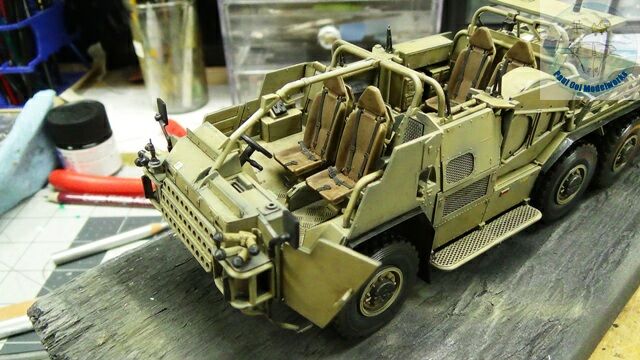 Seat belts and front doors added to the truck.
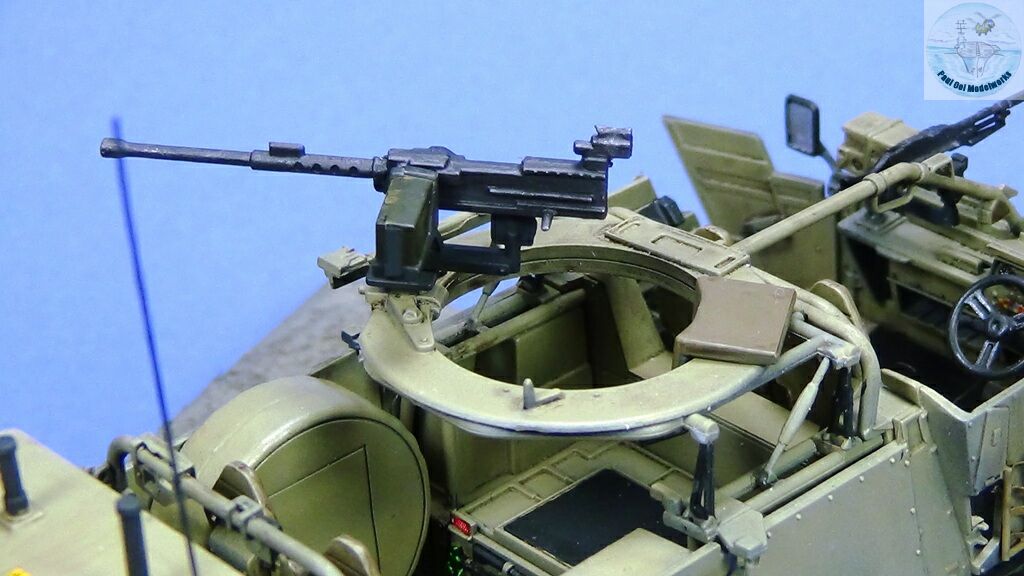
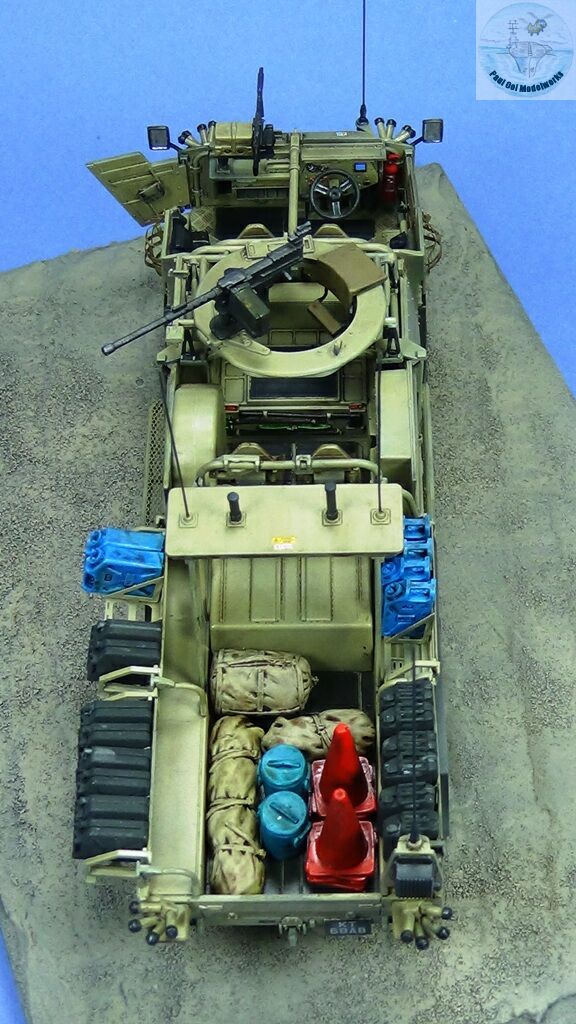
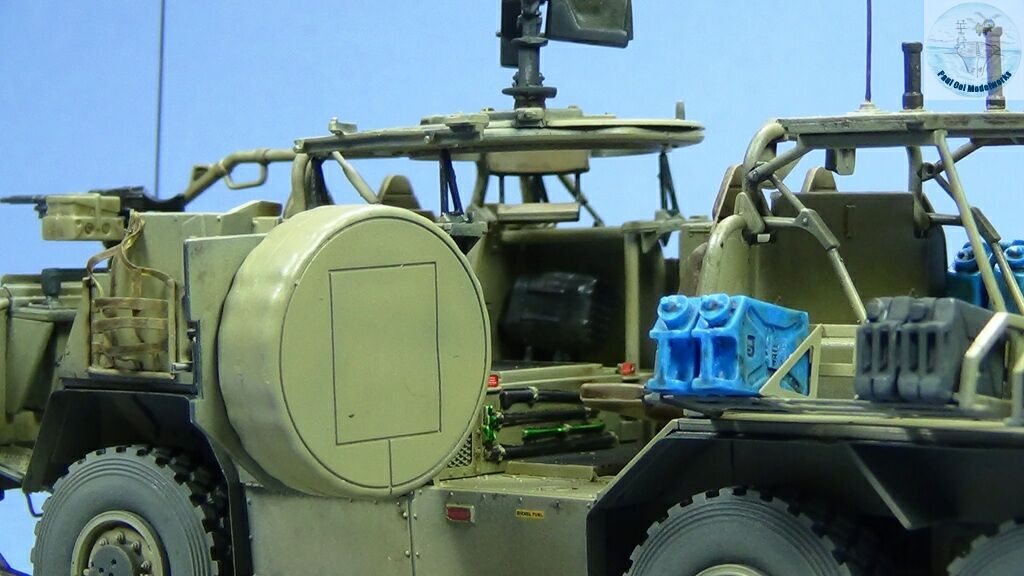
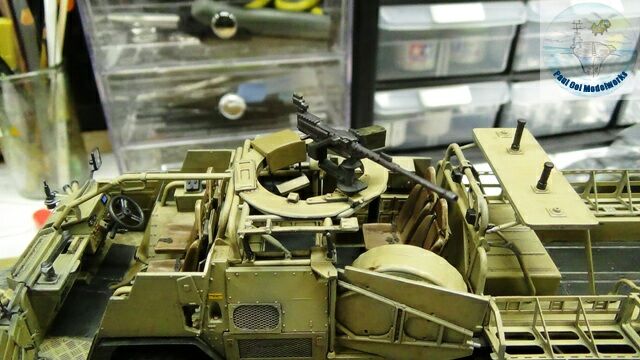 Next, the gun ring for the 50 caliber Browning gets added to the top of the vehicle. Looking good!
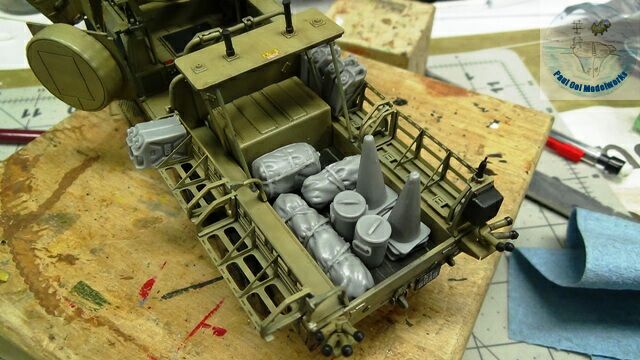
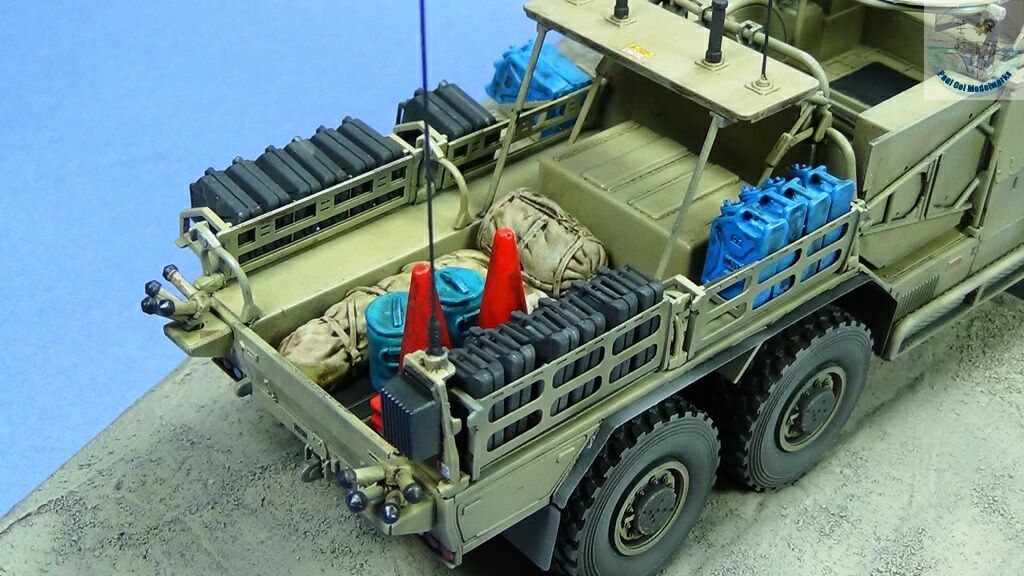
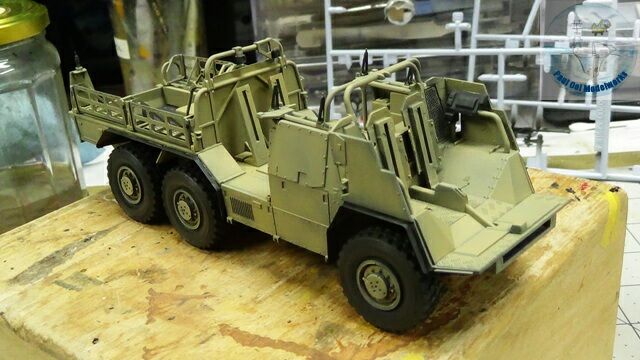
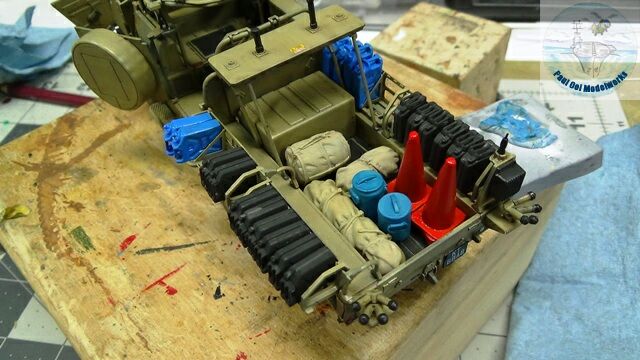 It is a crime to leave a flatbed truck without any cargo, so I added in these resin parts from Black Dog 1/48 Accessories with water cans, traffic cones (for road blocks), and the usual bundles of stuff one will find on military trucks.

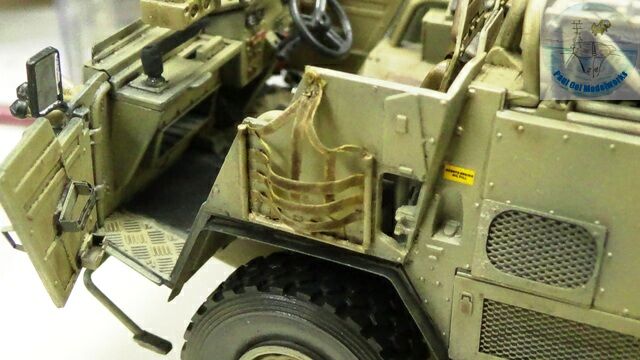 Remember the bungee strap basket carriers? I now scratch build these using strips of Tamiya masking tape, framed by Evergreen plastic rods, and painted in Khaki. They look so much better and more like the real things.
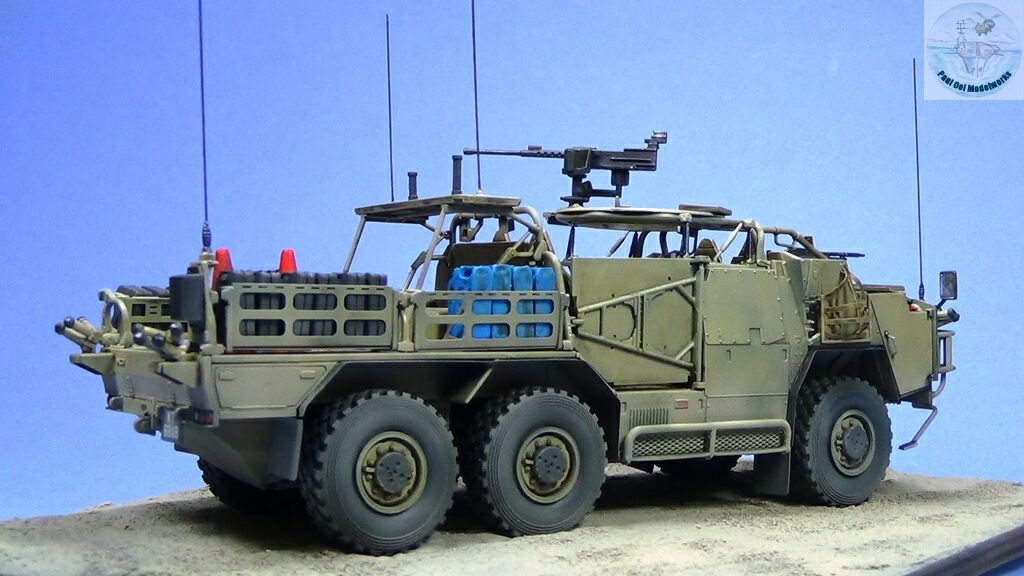
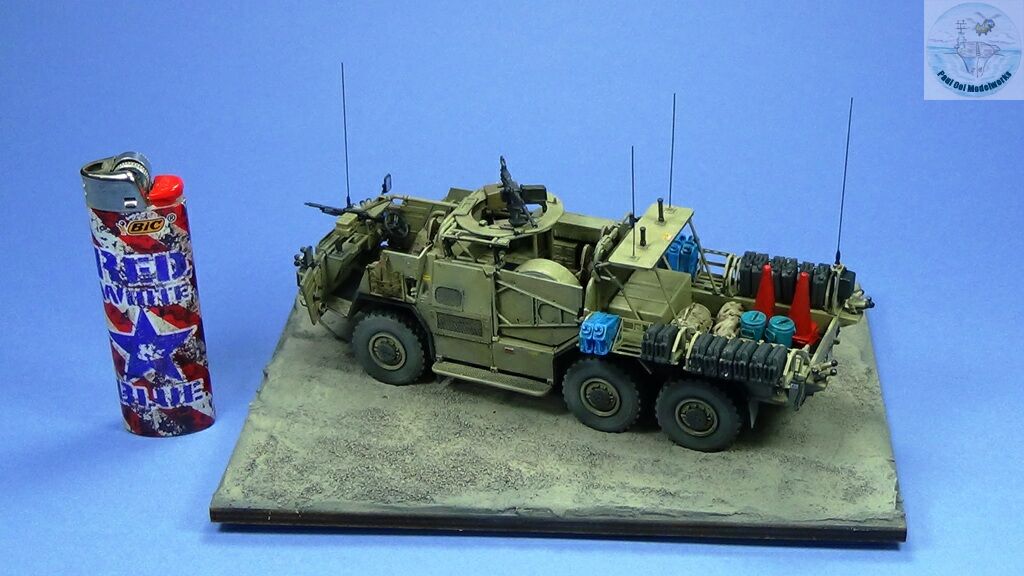
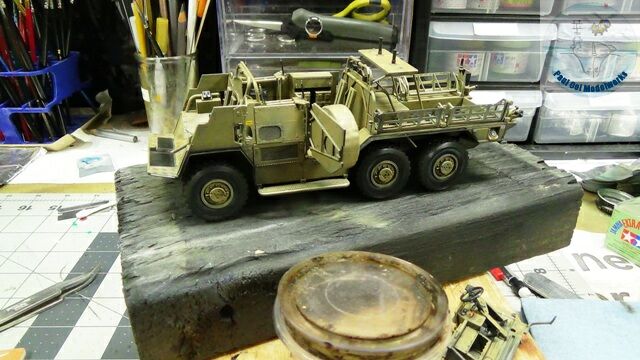
 Ready to hit the trail!
Leave a Reply