
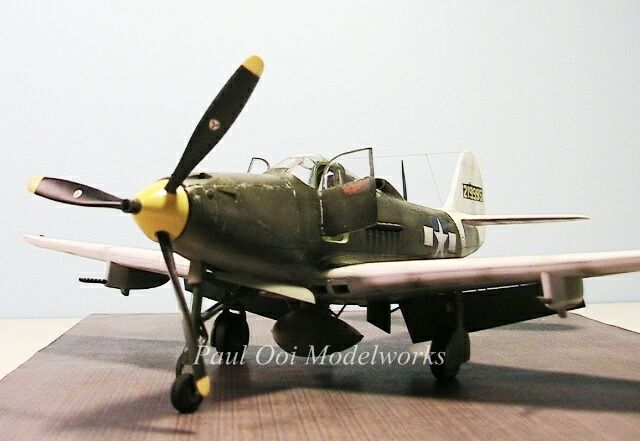
The Airacobra is a story of a fighter plane that “could have, would have” been a great legend in World War 2 if it hadn’t been for an unfortunate bureaucratic decision by an Army aviation committee to omit the supercharger that would have boosted the power performance at altitudes above 11,000 feet. Despite that, the Airacobra pioneered some design features that paved the way to modern designs that we see today, especially in its beautiful aerodynamic shape, great cockpit visibility and a tri-cycle undercarriage. The aircraft was built around the massive 37mm cannon through its nose and a liquid cooled engine tucked away behind the cockpit. The power transmission was a complicated arrangement from there, under the pilot’s seat and back up around the massive cannon in the nose cowling. Needless to say, in the rough conditions of the Pacific, the mechanics had a lot of complaining about that power arrangement.


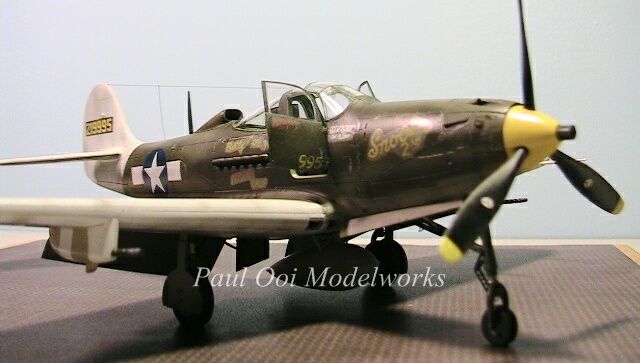
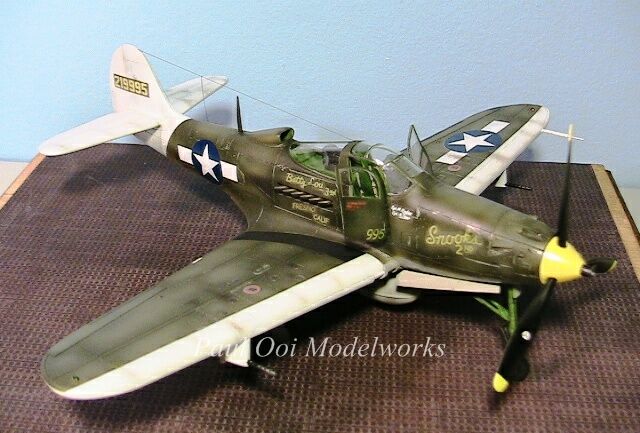
This customer’s kit is an Eduard Weekend edition, which means a good plastic-only kit and so I ordered the photo-etch cockpit details and wing flaps in order to get it to museum quality. You could actually build some of the other versions of the Airacobra from the plastic parts supplied in the kit, so it is very good value for money compared to other 1/48 scale kits available out there. The markings are for the aircraft flown by Medal of Honor winner Lt. William Schlomo in Papua New Guinea in 1944 and recovered from the jungle in 1974. The original is now restored and on display in Buffalo, New York.

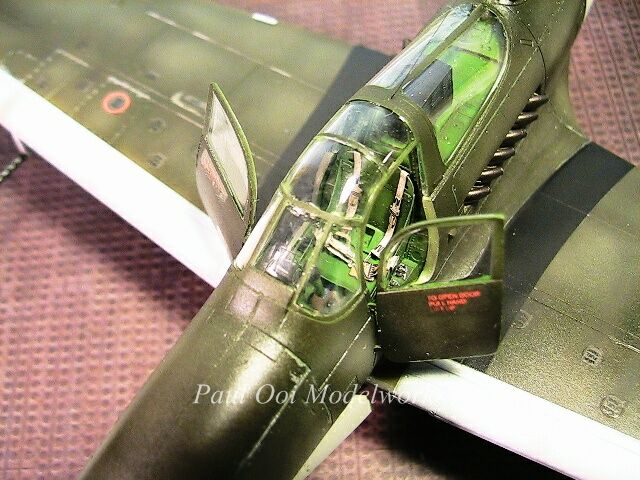
Build starts with the usual place, the cockpit. In this case, the assembly is a long continuous arrangement that starts from the engine compartment, the cockpit itself and the nose cowling area. The underside of the cowling area is the wheel well of the nose wheel and there is hardly any space for the much needed nose weight to prevent a tail-sitter. The assembly is painted USAAF interior green (the photo makes it look almost neon green, it is actually more subdued). I replaced the kit’s seat with a photo-etched one.
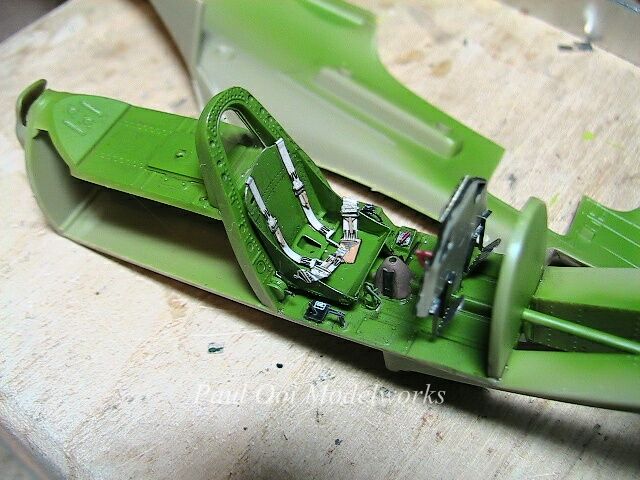

The cockpit details are even more critical in this aircraft because of the way the car-door arrangement opens up to reveal areas not normally seen in other planes. This is an opportunity to show some very nice details, so extra care was needed to make sure that nothing falls out of place. The dashboard was extremely crowded and I had to dry-fit many times to make sure that things will sit in snugly when the walls come together.

Crunch time comes when I put the fuselage halves together, given the unusual arrangement of the cockpit. A strong clamping force was needed at the cowling and the rear, alignment was critical to ensure a good fit of the canopy later on. Without the clamps, the fuselage tended to split either at tail or the nose depending on which way you press it together. I left it to dry over night.

Once the fuselage was ready, I inserted as many fish line sinkers as I could manage into the nose area. It would have required about 20 grams of ballast but there was insufficient space.

Once the fuselage was done, I shifted my attention to the other major undertaking in this project. In order to put in the flap details, I started out by cutting away the molded flaps on the wing underside. This was done with my heavy duty scriber tool and fine saw. I masked off the surrounding areas to prevent accidents (learnt the hard away many years ago).

The photo-etch insert sections are mini kits in themselves and require much patience and care is sizing to fit the cut spaces. Lots of trial fitting had to be done with the upper wing halves to make sure that enough space has been cleared from the plastic to neatly fit the metal parts.
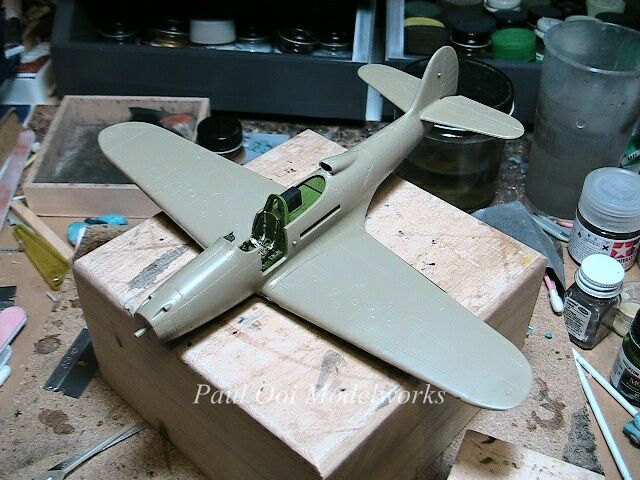
The wing sections were fitted to the fuselage, again with much dry-fit checking. The wing root area fitted nicely with very little gap and minimal filling needed.
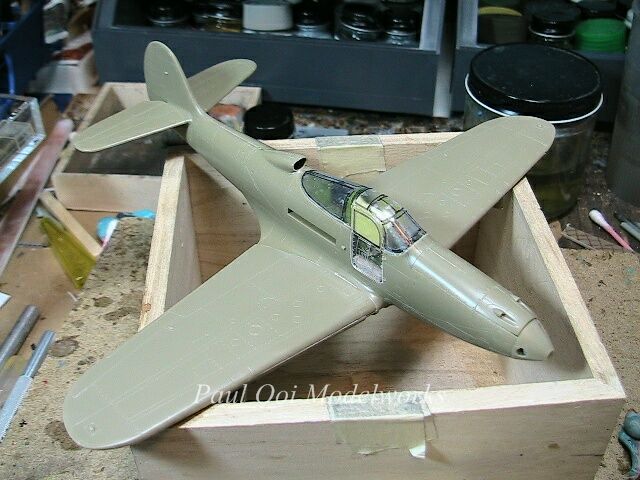
I then masked the main canopy and the 2 side car doors. After cementing the main canopy (this is where the earlier alignment check pays off), the two car doors are temporarily attached with a combination of tape and blu-tack. The nose wheel well is sealed off with wet tissue and tape.

In preparation for the spray booth, I also detail some of the other items, like drilling out the exhaust ports and gun barrels with micro-drills.


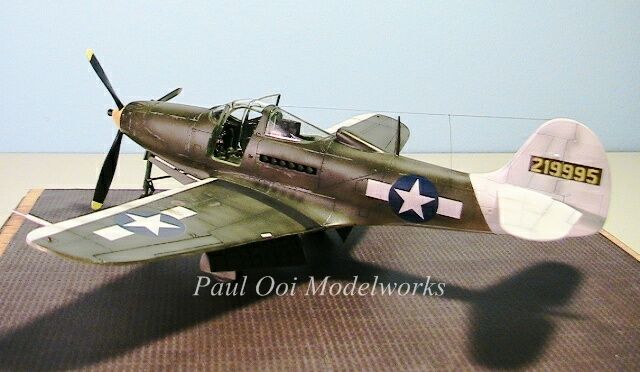
The paint job starts with an aluminum undercoat. The next color is Insignia White for the tail section (New Guinea operations marking) and the leading edges of the wings. I then mask off the white for the medium grey underside, followed by USAAF olive drab. There was the additional job of masking part of the white tail area to create the olive drab rectangle for the tail markings by measuring the decals to ensure good fit. I then highlight the individual panels with 1:3 white to olive drab mix. Finally, I scrapped of some of the olive drab to reveal the aluminum undercoat as part of the weathering. The paint job is then sealed with several coats of varnish.

While the paint dries, I work on the spinner and propeller blades. In this case, the blades are individual sections and they have to be separately angled (the instructions say 37 degrees to the vertical, my eye could make out 45 degrees approx but not much more). This is a drawback for this kit and it is a trade-off for the option to build a 4-prop version with the extra parts provided.

Finally the decals are applied. Generally the Eduard decals settle pretty well but some of the minor stenciling had incomplete prints.

Then I flip the model over on its back and detail the underside. First I work on the wheel assemblies, adding the doors with their photo-etched hinges shortly after.

The flaps are the last parts to be attached (since they are most fragile and easy to break off) on the underside, but the effect is well worth the wait. Once the plane sits on its wheels, I add the car door sections and the little fiddly bits (.50 cal guns, pitot tube, antennae). The finishing touch are the air-brushed soot marks at the exhaust pipes, dirt marks on the underside the undercarriage doors. The finished aircraft was placed on a base with a print of PSP runway boards. Now we are ready for a strafing run in the South Pacific!






Leave a Reply