
The Westland Lynx has achieved an unassailable reputation as a tough little helicopter that does well on land and at sea. It still holds the world record for helicopter speed set in 1986 and was the first fully aerobatic helicopter in the world. It is remarkable that this design which was first rolled out in 1977 is still fully deployed by 13 countries today.
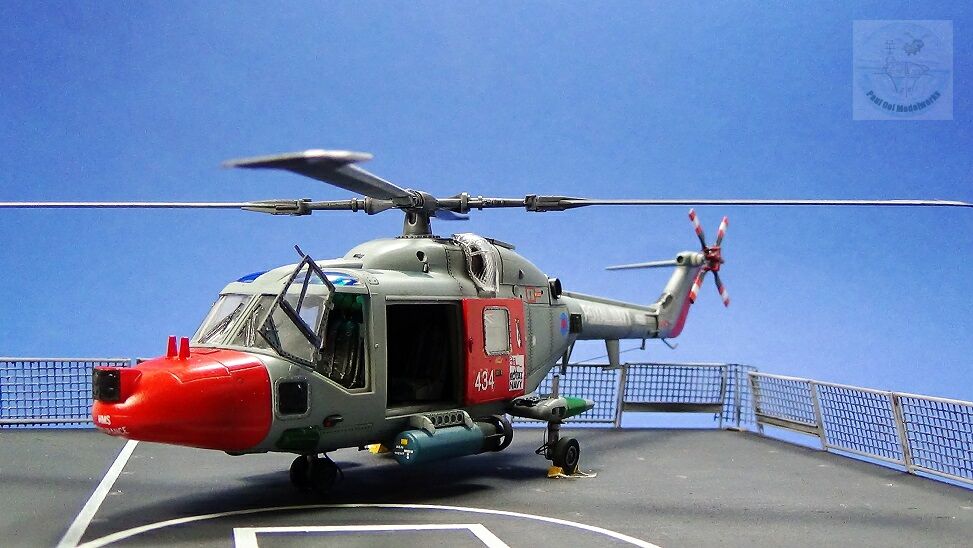
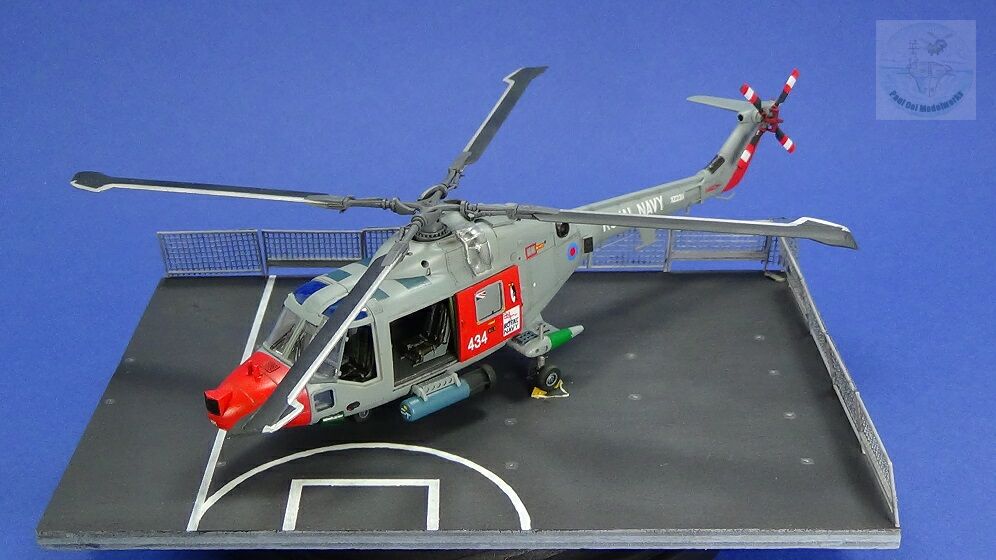
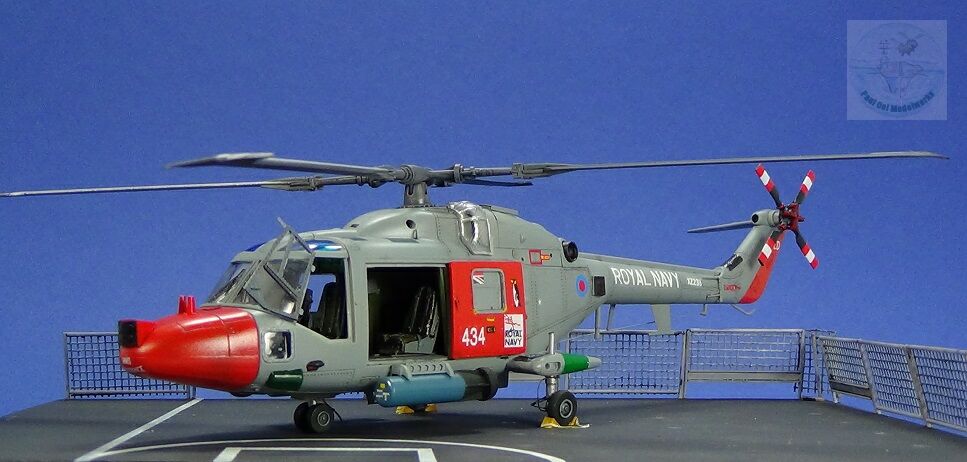
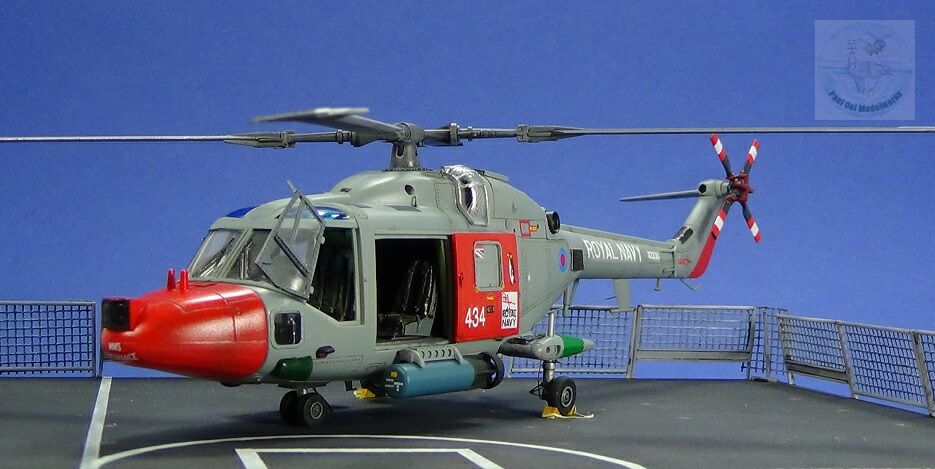
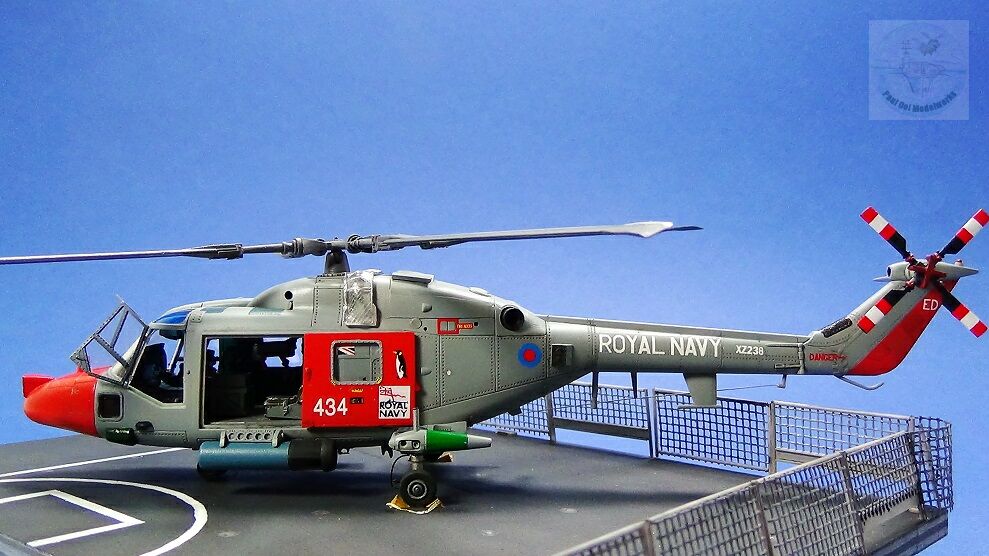
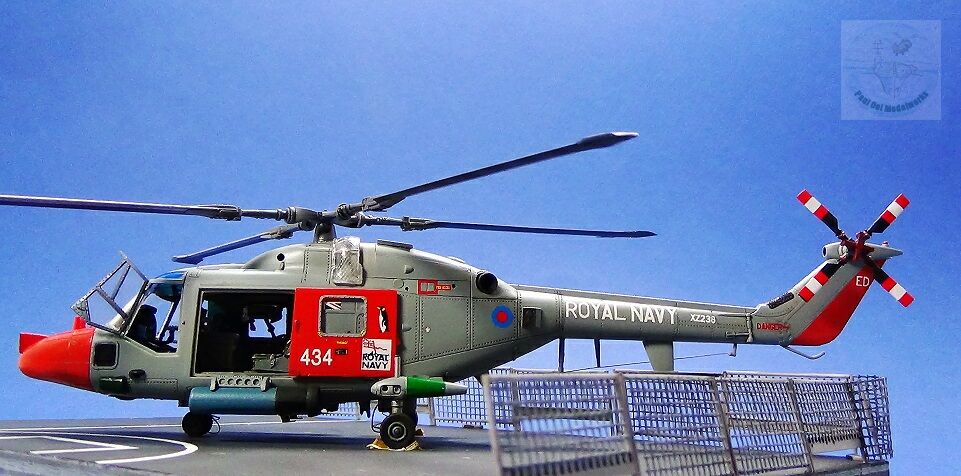
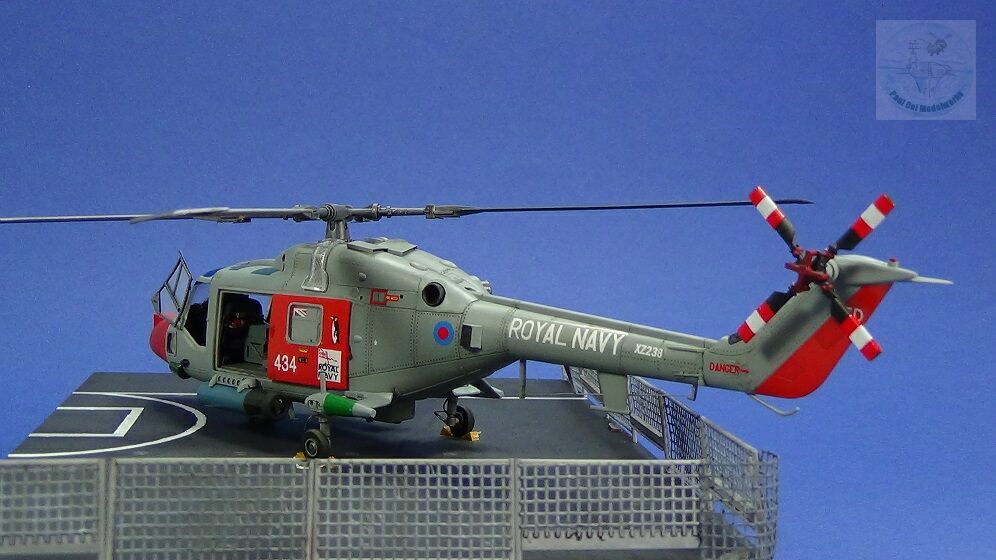
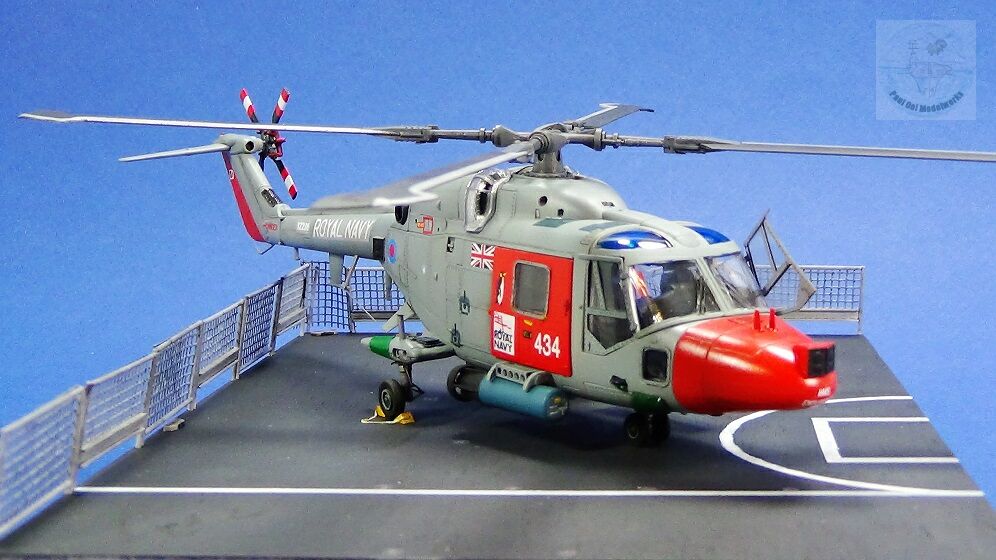
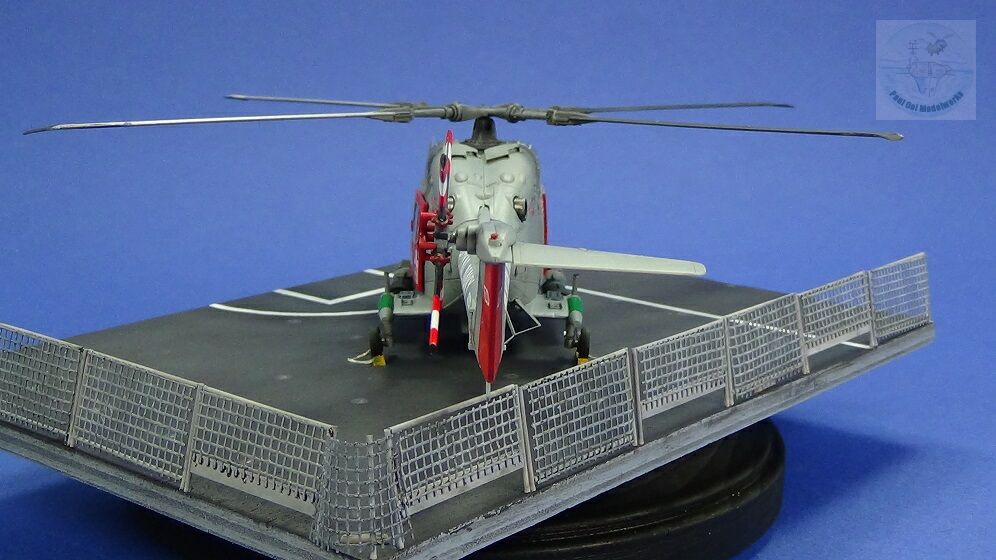
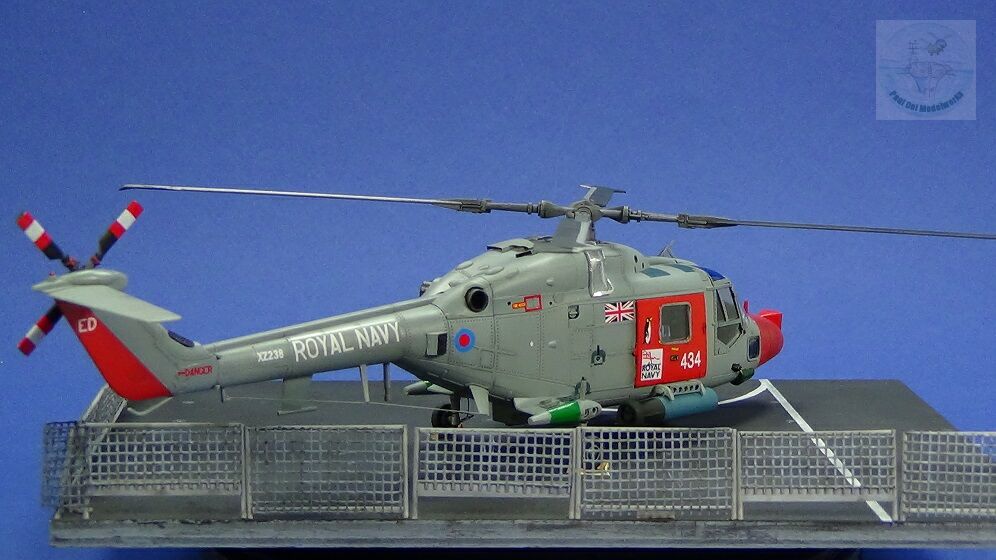
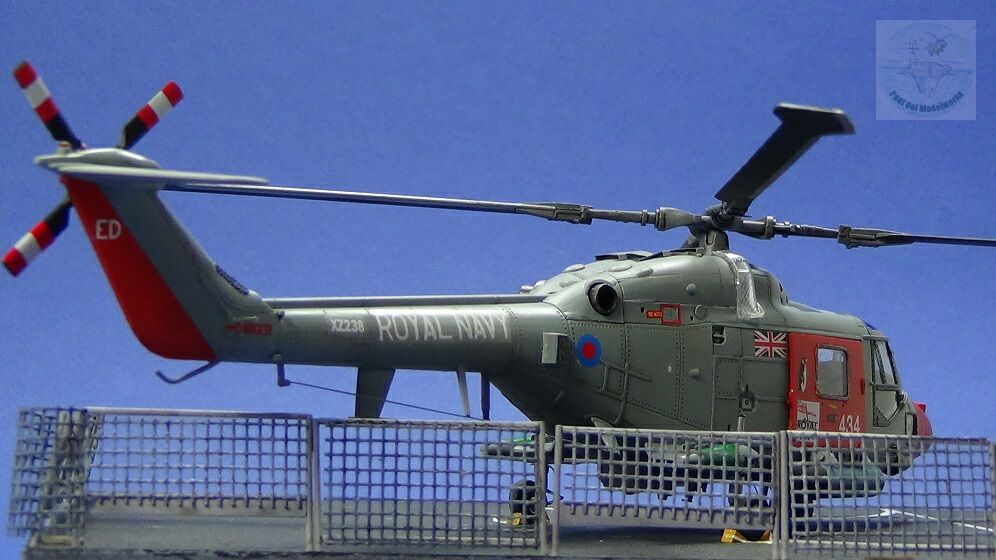
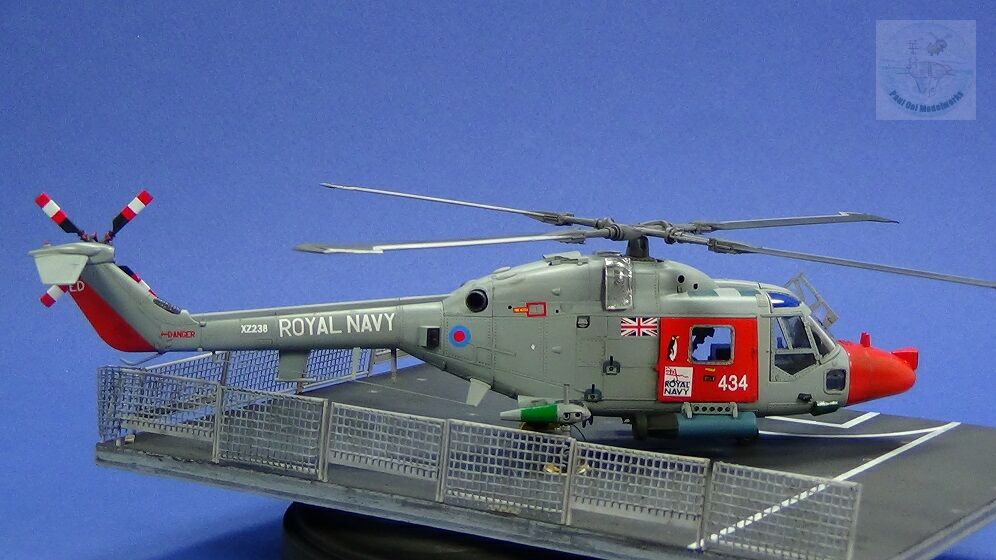
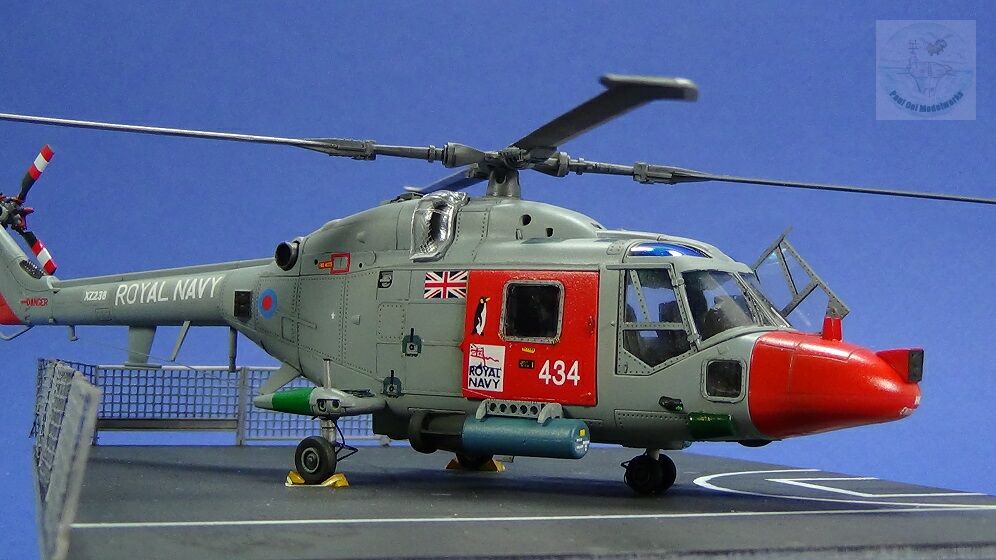
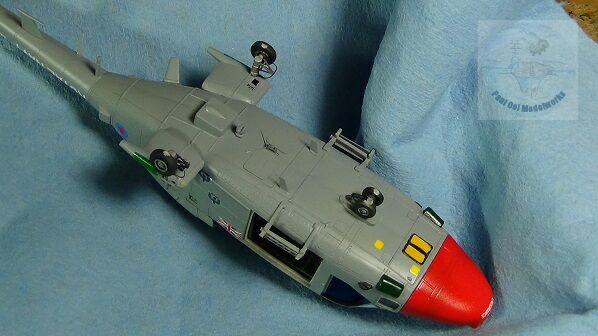
The Lynx HAS.3 version was first introduced in 1982 and it was the main variant for the Royal Navy for most of the 80’s and early 90’s. The Naval Lynx was a stable platform for multiple ordnance ranging from the Sea Skua anti-shipping missile to the Mk. 11 Depth Charge. The version that I have built is one of the Lynxes carrying the Antarctic mission livery flying out of HMS Endurance. Although the aircraft was disarmed during the expedition, it was later re-deployed with ordnance (here seen with Mk. 41 depth charges) for anti-submarine duty. As such, I displayed the Lynx in its working environment on the helipad of a destroyer surrounded by the array of deck barriers.
Gallery

Construction Notes
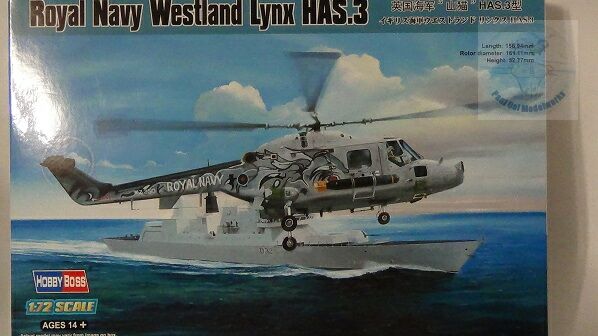
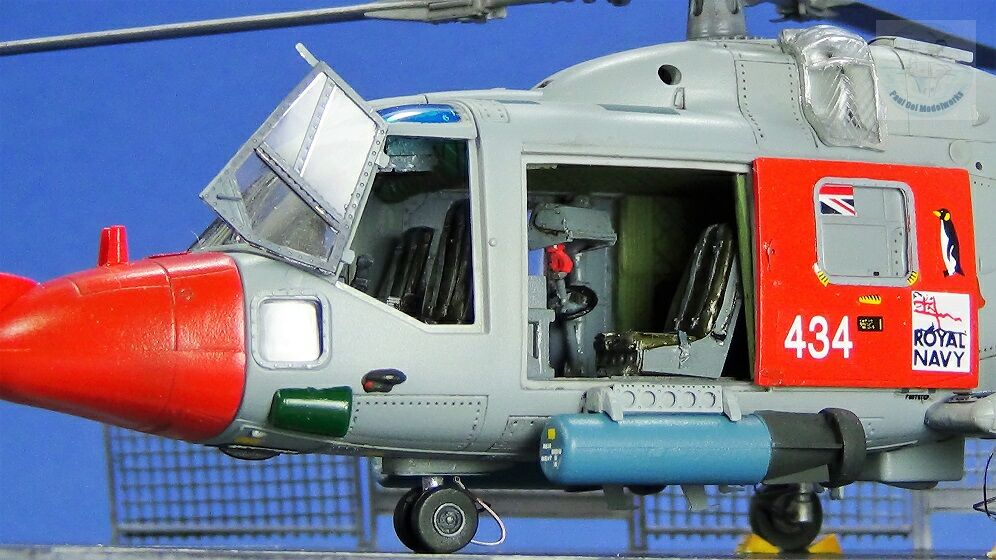
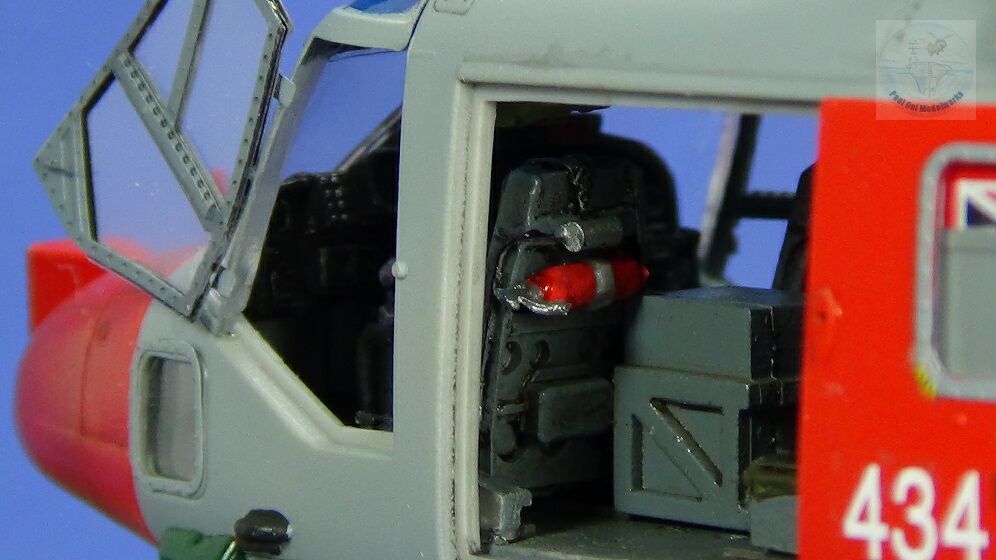
The starting point for this project is the 1/72 scale Hobby Boss kit with two livery choices. While the Lynx motif from the mid-section extending to the tail is attractive, I personally liked the whimsical penguin and flashes of high visibility red on the Antarctic Mission version. The kit interior was very basic, so I replaced it with the interior resin set from Pavla. I also obtained Eduard’s excellent photo-etch fret that provided both interior and exterior details.
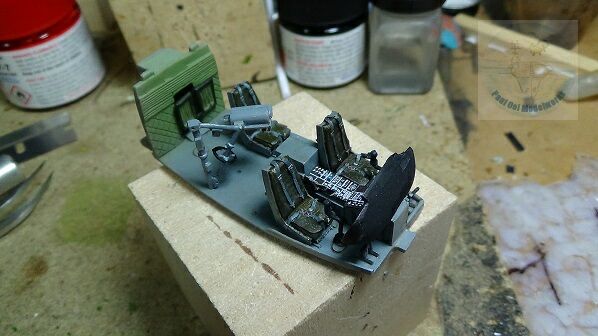
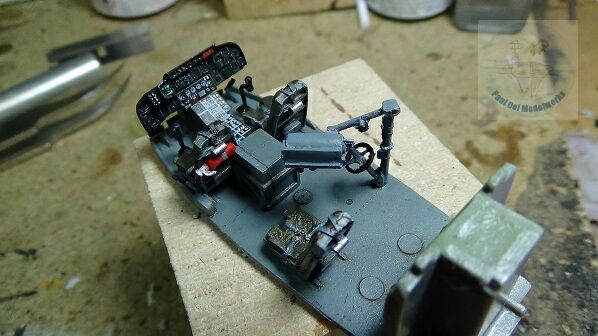
The interior walls are painted in Tamiya XF71 Cockpit Green. The flooring was painted with Tamiya XF82 Ocean Gray 2 (RAF). The seats are Olive Drab XF62. Some of the console panels are Eduard Zoom colored photo-etch pieces.
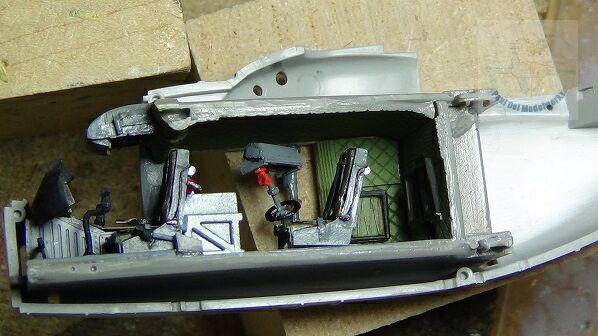
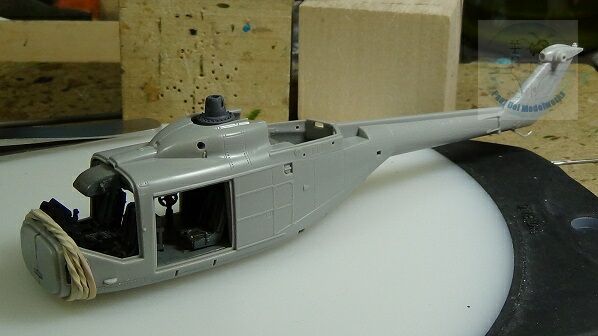
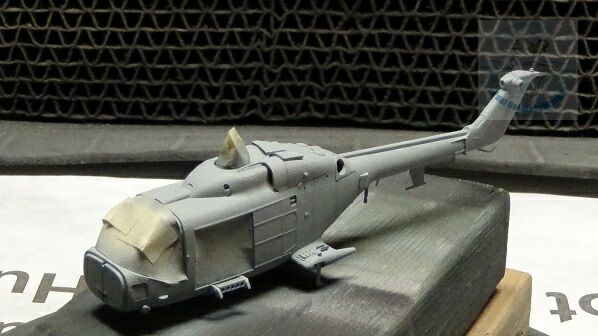
As the interior was being built, it was important to test the fit against the fuselage halves. The Pavla resin sections are very good fit but they need to be positioned correctly as the available space was snug. All that work is well worth the effort as the wall panels and fittings certainly make the interior resemble the original much more closely.
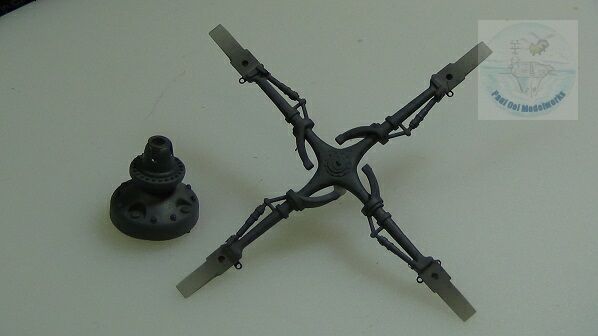
In order to complete the important bits and pieces that need to be inserted before the fuselage halves are put together, I assembled the main rotor hub and the root assembly for the quad blades. The assembly was painted in Gunship Grey FS36118.
Once the rotor hub is inserted, the fuselage halves are carefully aligned and glued together. The shallow section just in front of the main cabin needed a rubber band to hold it together.
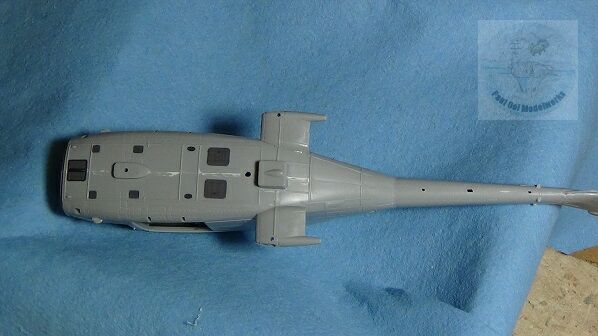
Once the fuselage is dry, I attached the starboard and port sponsons, and then attach all the details on the helicopter belly.
The nose assembly and main windscreen are dry fitted to test the fit.
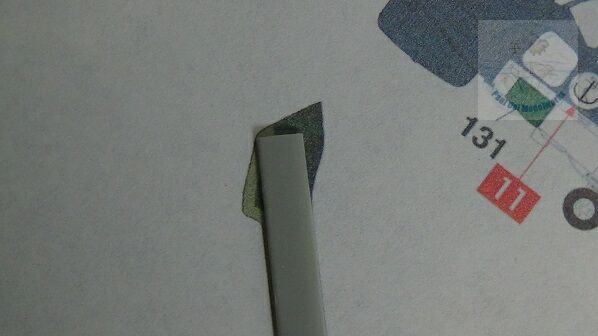
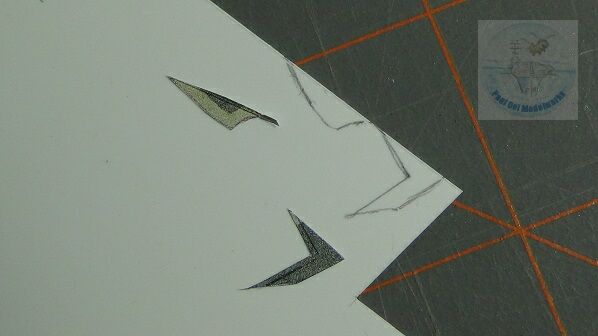
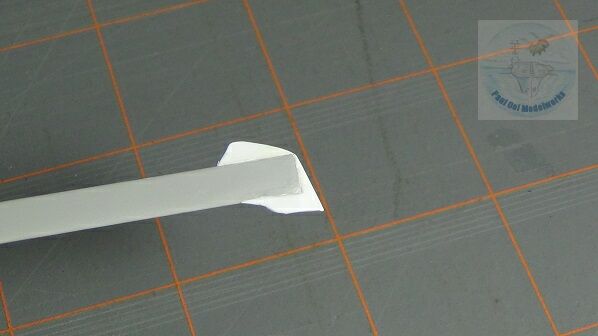
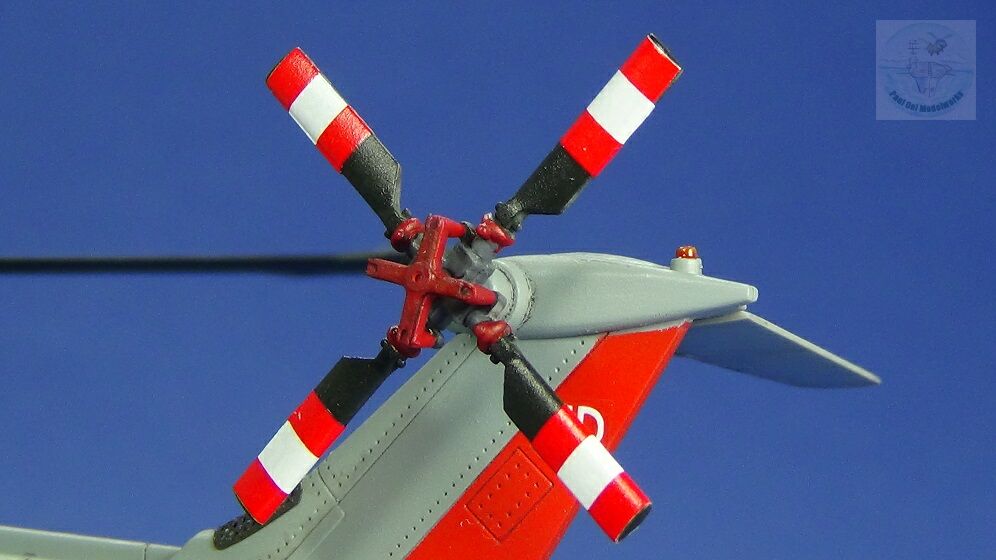
The square tipped rotor blades supplied by the kit were incorrect. The actual Lynx HAS.3’s had the high efficiency streamlined tips and was a major mistake in this kit to have left them out. To fix this, I started by shrinking the drawing of the blade found in the 1/48 Airfix Lynx kit (that I happen to have) to 67% to get the correct 1/72 scale projection. Then lined up the kit part to the new print and traced out the blade joints. Then the paper sections are cut out to form templates. I used the templates to trace 4 sets of plastic sections using 0.45mm thick plastic card. Once the sections are cut out, they are glued to the ends of each main rotor blade, the seams filled with liquid putty. The final touch is to file the tip to smoothen the joints.
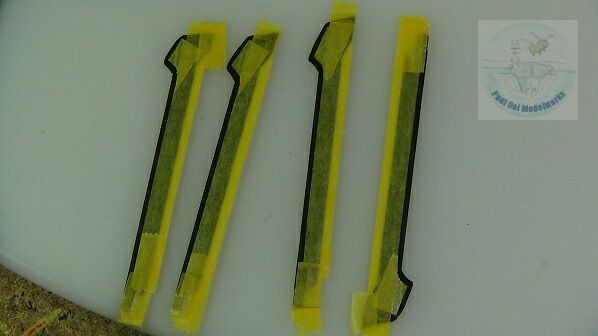
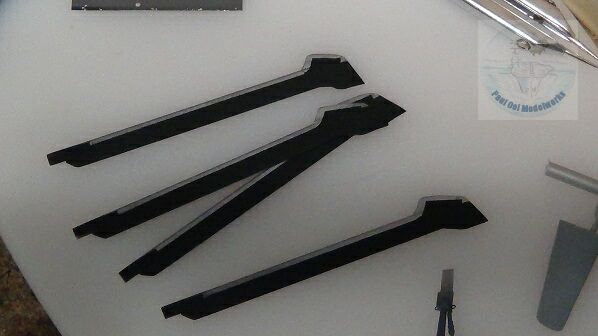
The blades are first painted in NATO Black XF69, then masked off for the edges to be painted with Model Masters Metallizer Steel.

Another important detail was the correction to the kit part for the torpedoes. The part (the lower assembly in the picture) did not look like any torpedo or depth charge in the UK’s inventory. Since the part most resembles the Mk. 11 Depth Charge, I shortened the main section, and reattached the tail with modified fins.

The spray-painting of the fuselage started with Model Master 2058 RAF Medium Sea Grey. This was followed by the side doors, nose section, and the rear stabilizer on the tail boom painted in Model Master 2719 Italian Red. The paintwork was sealed in Future floor polish.
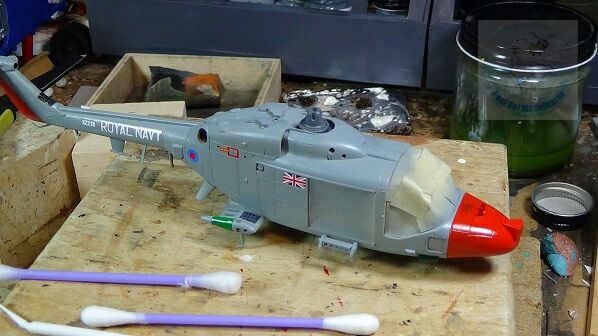
After 48 hours, I applied the decals for the aircraft.
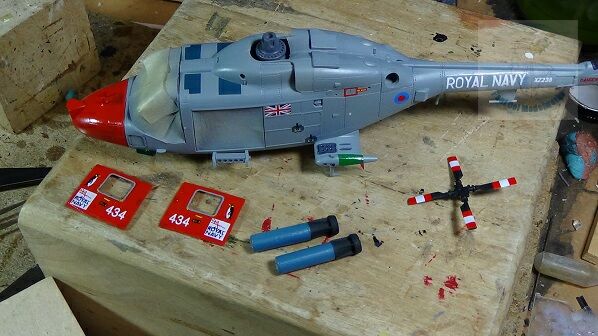
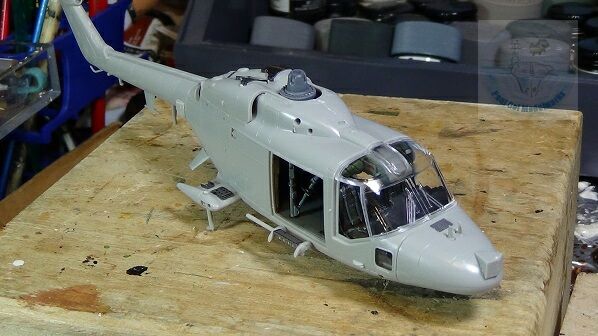
Before final assembly of the main sub-assemblies, I applied a layer of satin varnish over the sections. I also attached some weights into the nose cone to prevent the helicopter from tail-sitting.
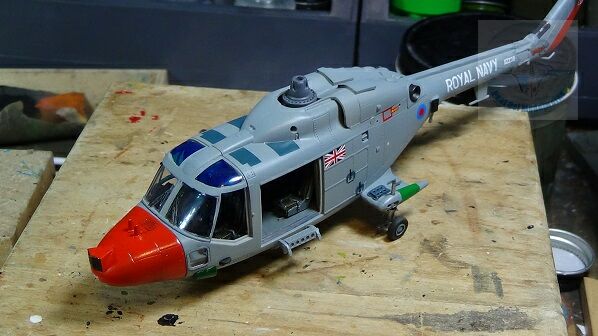
The wheels are attached to the fuselage, followed by the doors, rear rotor, and the main windscreen. The helicopter can now sit on its own three sets of wheels.
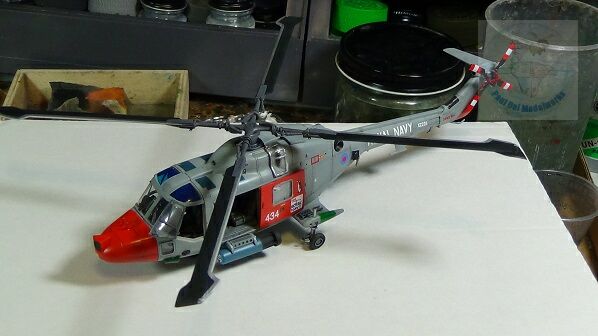
The man rotor is the last major sub-assembly to be inserted into the rotor hub.
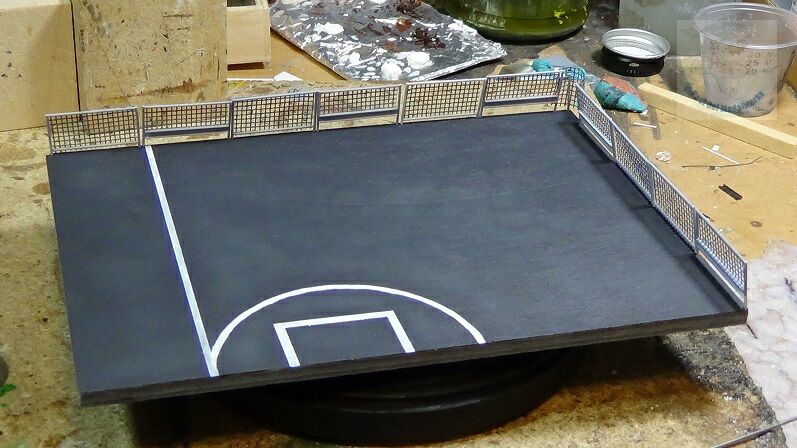
A helipad that suggests the flight deck of a Royal Navy destroyer (subject of a future tutorial) will help to show off the Lynx in its native environment.
Paul,
Another superb job. Your meticulous attention to detail seems to reach a new level with each successive work.
I’ve always liked the (relatively) sleek looks of the Lynx. If the Huey is a Ford Mustang, the Lynx is a Jag E-type.
And the yellow wheel chocks are a nice touch!
Keep ’em coming!
Dave
It appears that everyone wants to make the mk3 lynx with burp blades. These blades were not fitted full time to the mark 3 but were test fitted to some cabs and fitted permanently to the mark 8 unfortunately no one does a normal set of blades for the mark3 it would also be nice if some companies did some more accessories for 32nd sxale