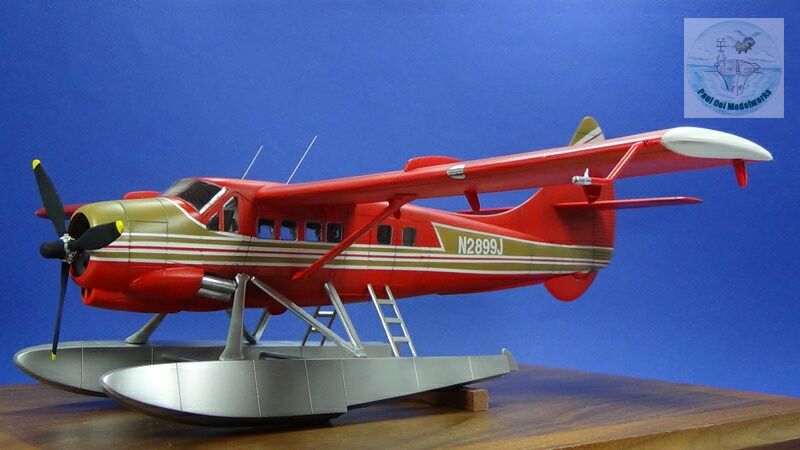
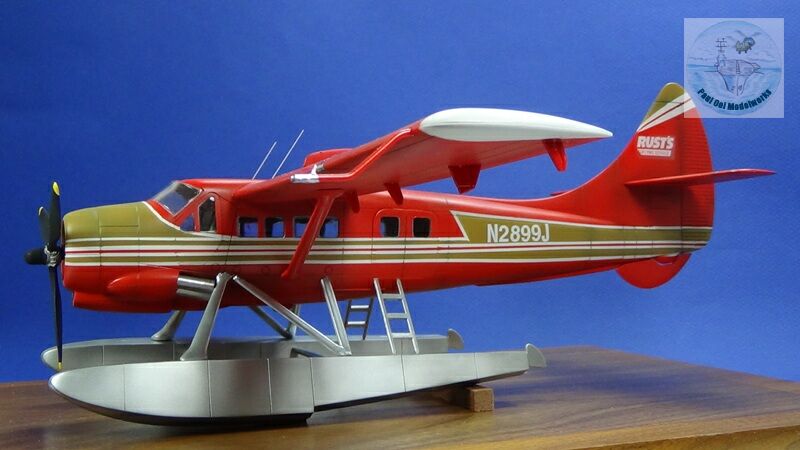
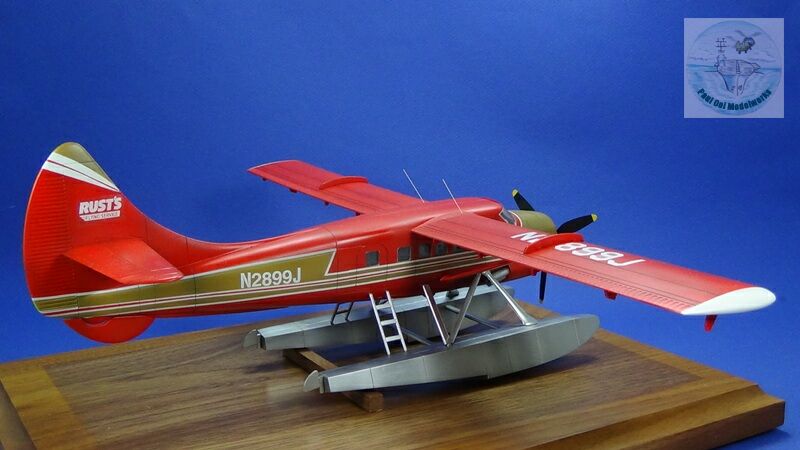
A world away from the huge international airports, in quiet stretches of isolated coves and beaches lie the domain of the frontier floatplane. Not requiring landing strips, bush pilots take this aircraft to places that other planes fear to tread (or fly) . The De Havilland Canada DHC-3 Otter is one of the most reliable workhorses in this often-times hostile environment. Rugged and steady, with a good capacity in the passenger/cargo hold area, this aircraft is a favorite of government agencies and private operators alike.
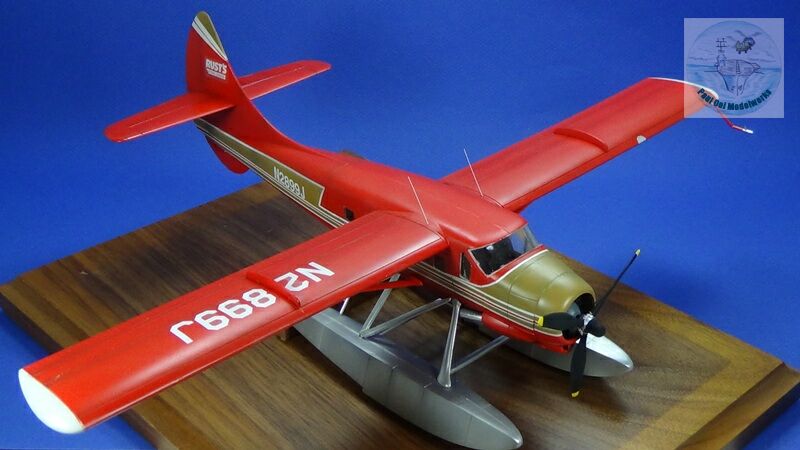
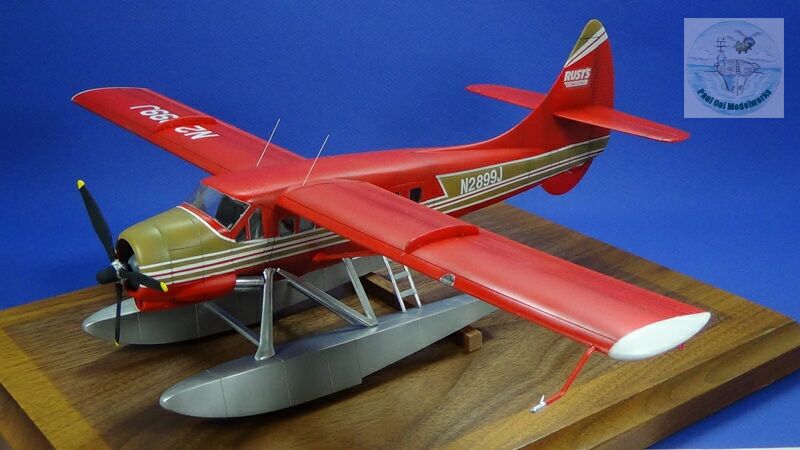
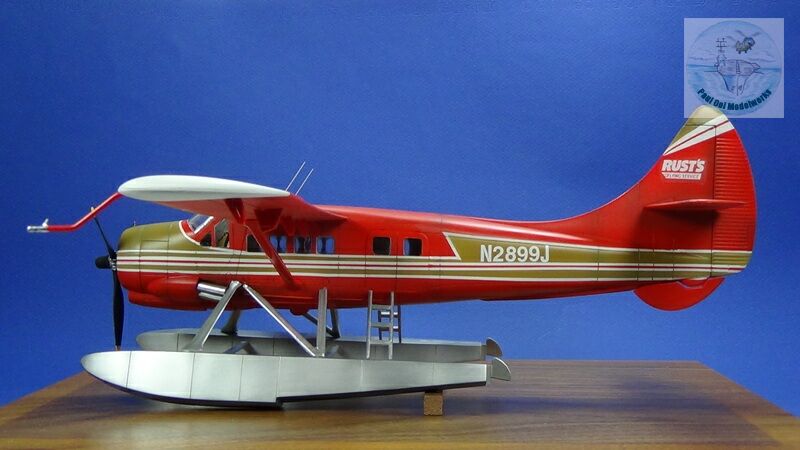
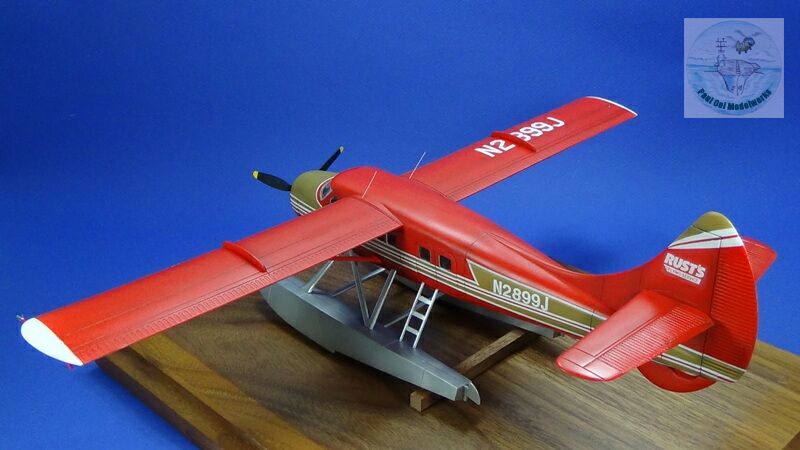
I was asked by a customer to build this replica in the striking livery of Rust’s Flying Service operating out of Lake Hood, Alaska. This family-operated service provides excursions deep into the Alaskan interior for sightseeing tours, hunters and fishermen. The DHC-3 has seating for up to 10 people in the passenger cabin and some more space for the equipment and baggage. Often mistaken for its smaller and more well-known cousin the DHC Beaver, the Otter has a larger capacity engine and a bigger, heavier fuselage.
Gallery

Construction Notes
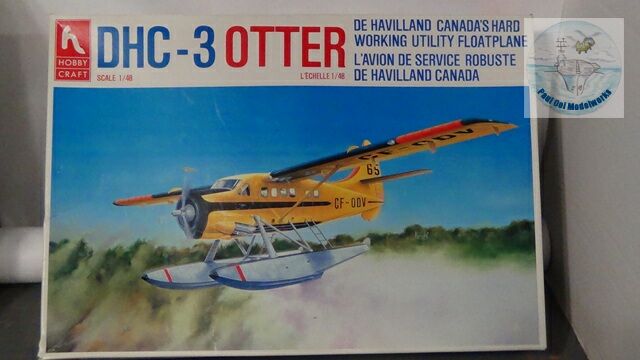
The kit that my customer passed on to me was the 1/48 scale issued by Hobbycraft Canada quite some time ago. The kit itself provided basic decals for The Ontario Ministry of Natural Resources and the US Air Force. However, since we are going to paint the aircraft in the bright red and brown livery of Rust’s Flying Service I had to make a whole different set of decals. Fortunately, the customer had previously obtained custom decals of the company logo (for the tail section) from another builder who returned the kit unbuilt to him. All I needed to do was to get white decals for the call sign numbers. This kit was ordered as an out-of-box build with no post-market parts.
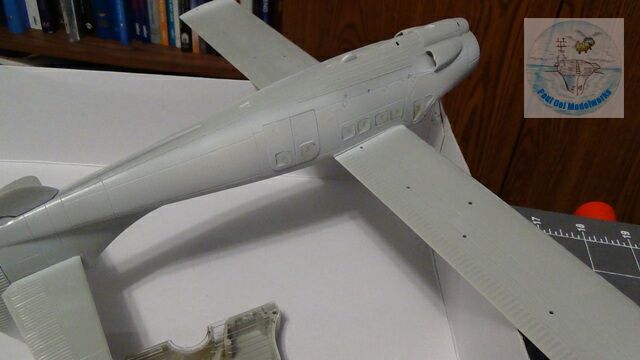
The fit of the kit parts were generally good but the alignment of the struts connecting the floats to the main fuselage left something to be desired. Also, the vintage of the kit was painfully felt in the clear parts, which were thick and somewhat opaque. The decals provided by the maker did not include any stencils that one takes for granted in modern 1/48 scale kits of today. Kit instructions did not provide any painting guide for the interior of the aircraft or any of the smaller details.
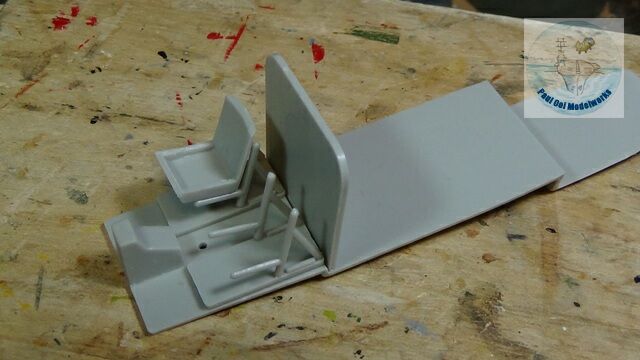
The cockpit details are very sparse and did not reflect the actual details of the aircraft. It is a consolation that given the opacity of the clear parts, these interior details cannot be seen.
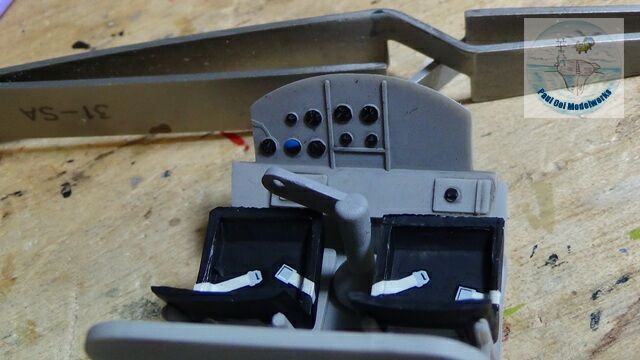
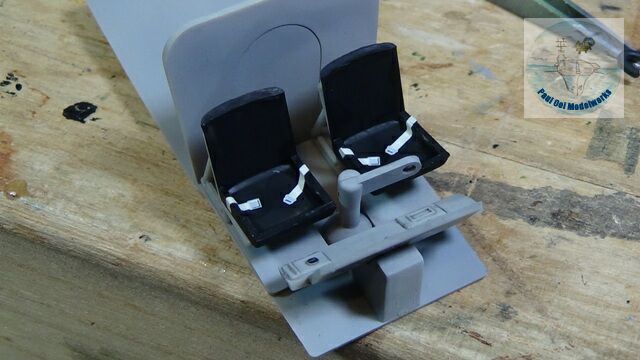
I painted the interior in neutral grey, and the seats black, as seen in actual photographs of the cockpit. The instrument panel is neutral grey with black dials. I applied seat belt decals from my stash of leftover 1/48 scale decals.
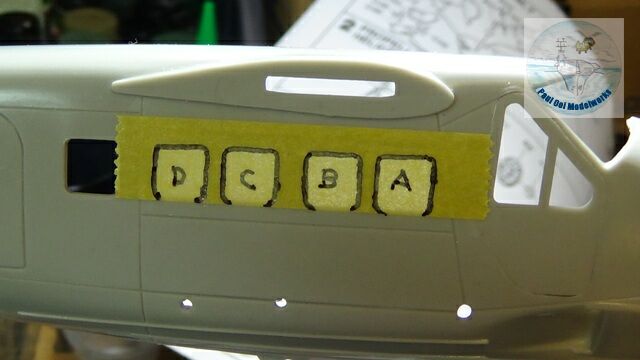
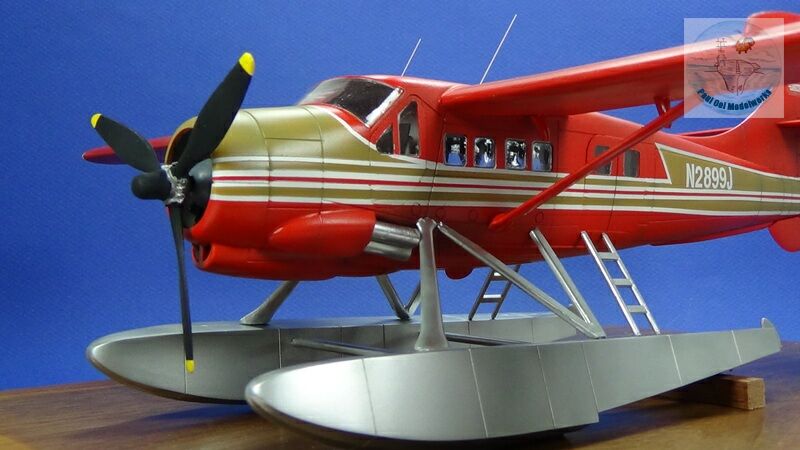
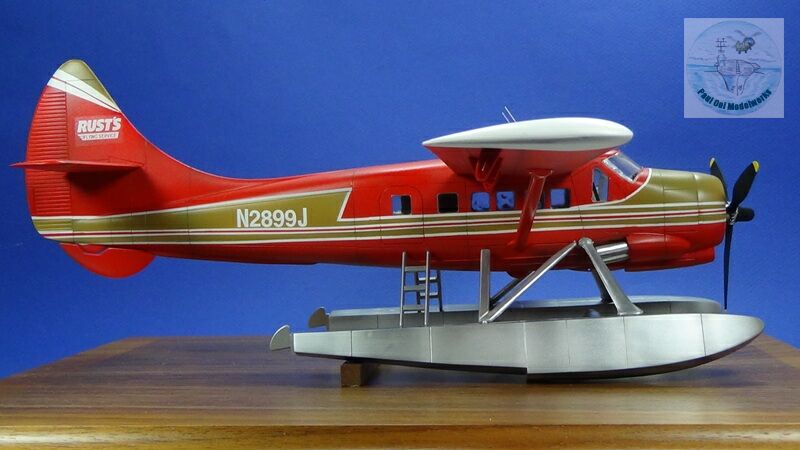
Since the windows lining the fuselage end up under the wings, it is much better to make the masking of the individual windows before the final assembly of the fuselage and the wings. This give better access and accuracy of the masks. I also label them because there are about 15 windows of very similar shape but not exactly the same.
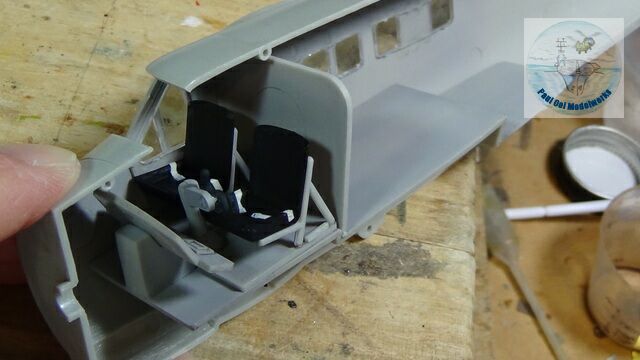
The cockpit section is inserted into the fuselage half, and the fuselage assembly sealed with some rubber-band clamping needed. I took care not to press upon the clear windows as I handled the fuselage so as to not have the dreaded “windows-fallen-inside-the-aircraft” syndrome.
Once the fuselage has properly dried, I applied the window masks that I had previously made by their location labels.
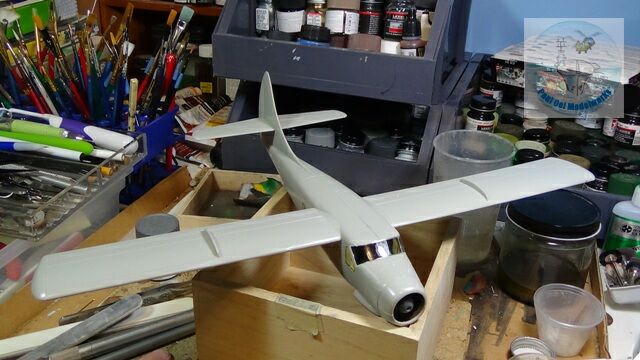
The wing attachments are extremely important. The attachment tab for each wing is extremely shallow and does not help to align the wing correctly to the fuselage (cantilever wings stick out approximately 90 degrees to the fuselage walls). I took my time to make sure that each wing was correctly attached and left to dry properly, first tacked in place by dots of cynoacrylate gel, and then the seams are “sealed” with liquid cement.
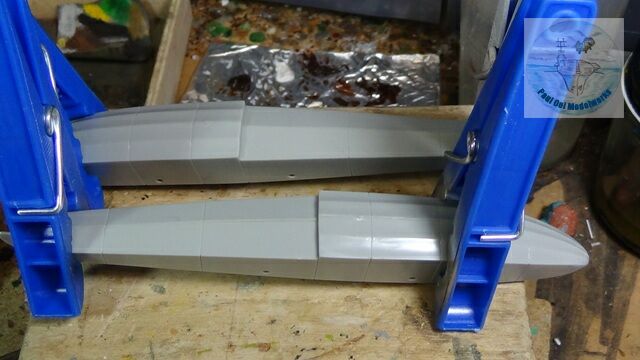
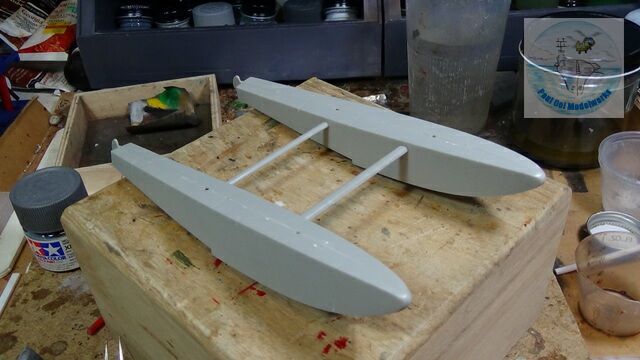
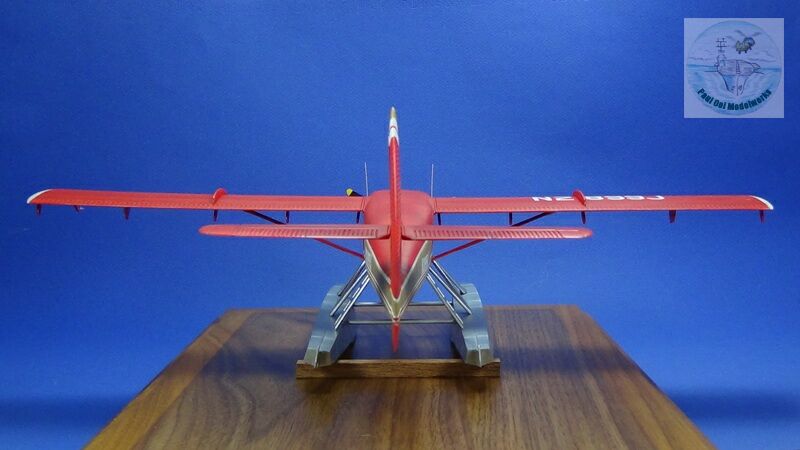
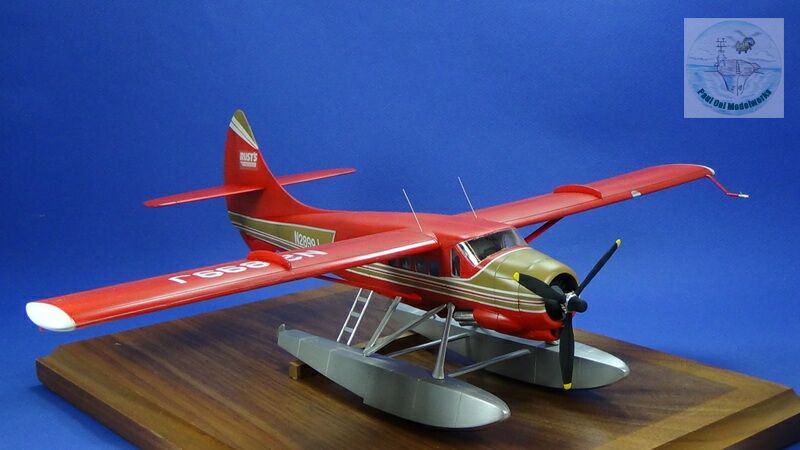
While waiting for the wings to dry properly, I proceed to build the floats. Making the “catamaran” assembly required care in ensuring that the two floats are parallel to each other, and that the bridging sections are similarly aligned parallel to each other.
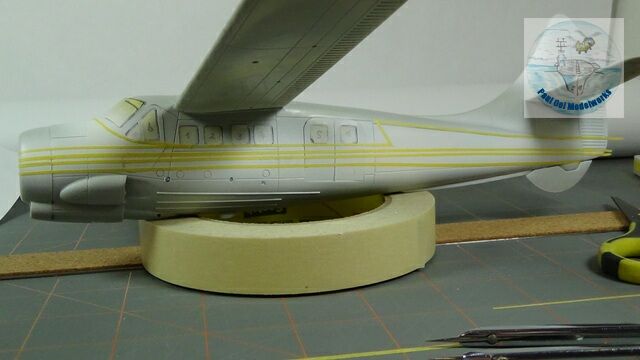
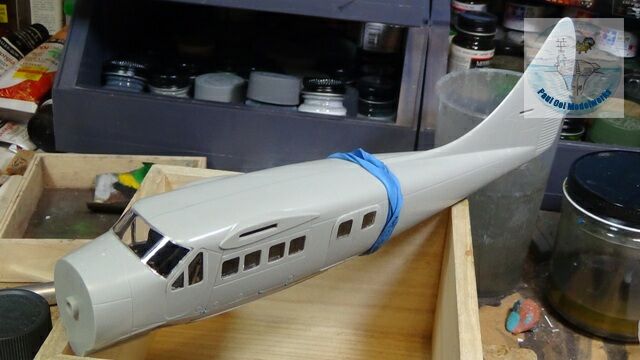
Once the wings have dried, painting can proceed. There are still two very large struts that connect the wings to the fuselage but I left these off so that the masking and painting of the fuselage will not be impeded. This is very important, so do not follow the order of assembly if you have similar striped color schemes. I start with flat Insignia White FS37875, followed by gloss white FS17875. Then the longs thin strips of masking tape are applied to these white sections.

Only after the white sections have been protected, do I apply the NATO Black under-shade. This prevent the white sections from becoming too much like grey in the final result.
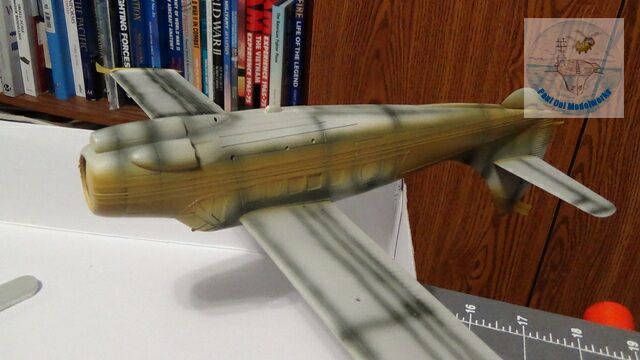
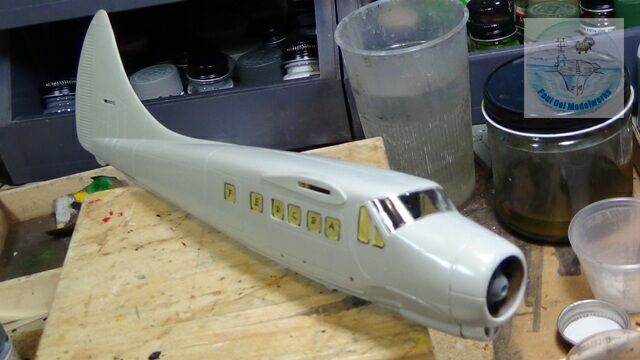
Next, I applied Model Master #2099, Afrika Grunnbraun ’41 which is the exact brown shade found on the Rust’s planes. After that, the sections to be left brown were also masked.
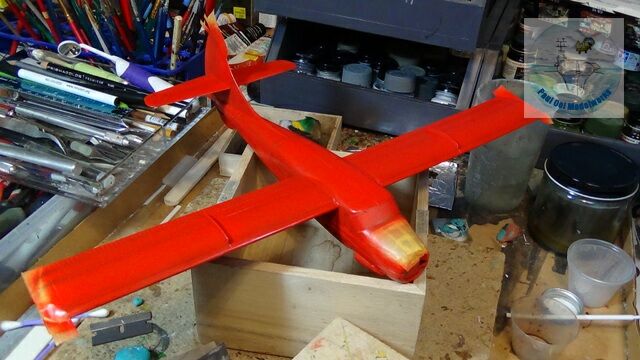

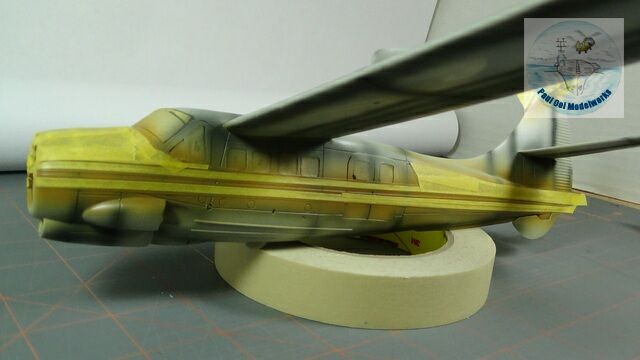
Finally I applied Model Master #2719 Italian Red all over the aircraft. Once dried, I removed all the masks except the ones for the clear windows to reveal the striking livery.
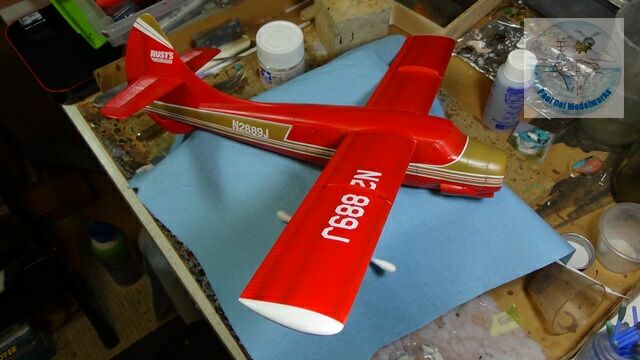
Next, I applied all the decals for the aircraft. Once the decals have dried, I sprayed the assembly with stain varnish to seal the paintwork.
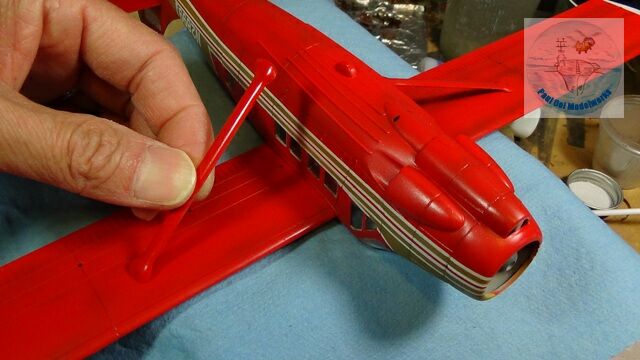
After the masks for the windows are removed, I finally attach the two large support struts from the underside of the wings to the fuselage.
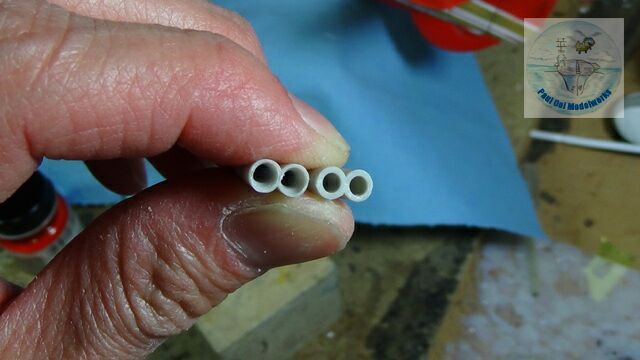
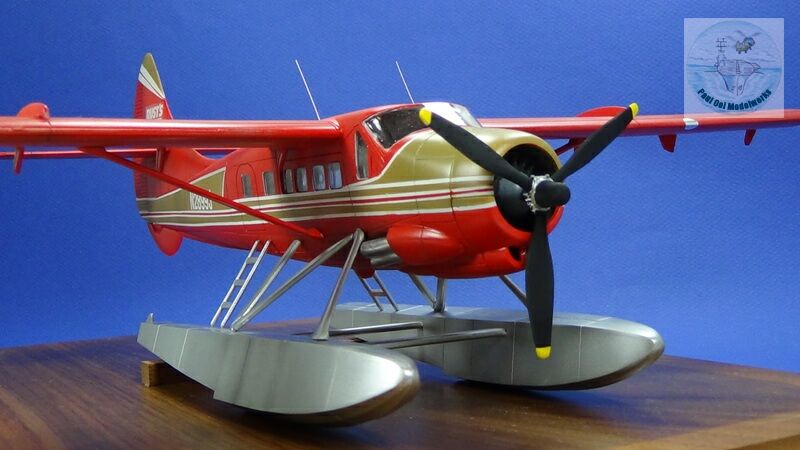
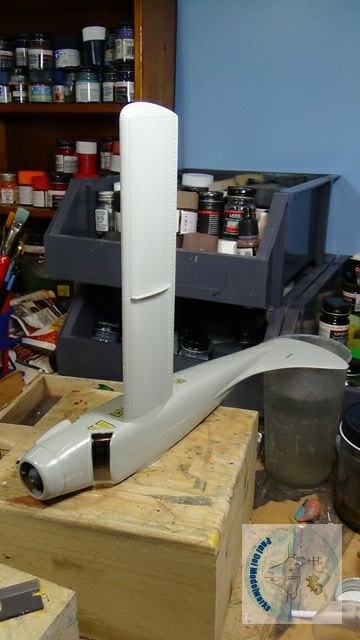
Other parts can now be attached to the fuselage like the high polished aluminum sheaths of the exhausts. The kit parts is pretty thick and so I re-machined the bore sizes to show the more correct thin rims.
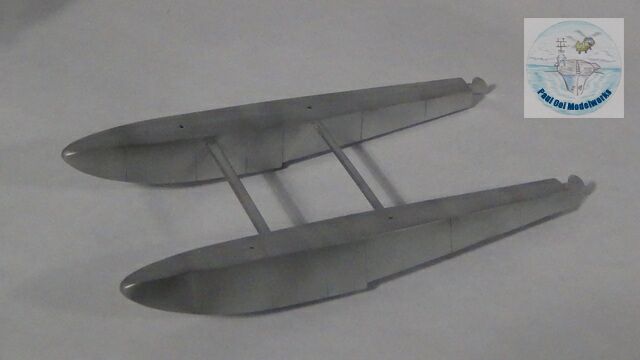
The floats and their connecting struts are painted with Model Master Metalizer Polished Aluminum. Some sections are highlighted with Metalizer Aluminum.
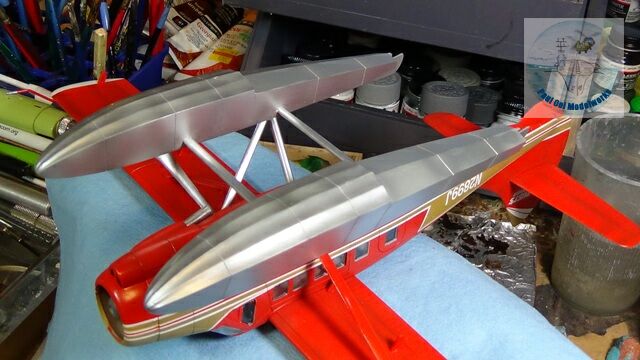
The most difficult part of the build comes at the very end. Attaching the float raft assembly to the assembly requires some fast works with the struts, first tacked with slow-curing cynoacrylate to allow alignment, followed by final curing of liquid cynoacrylate for all the remaining joints. This was done with the aircraft on its back to not exert any weight on the joints as they cure.
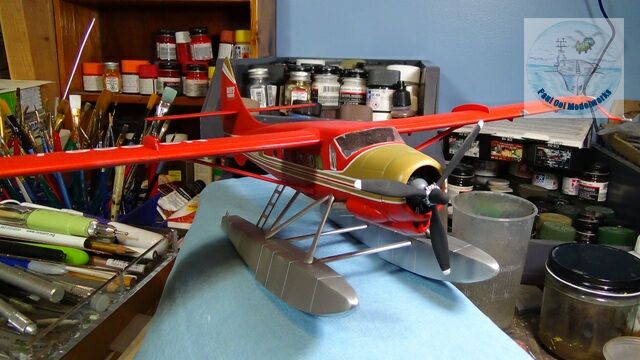
Once the assembly dries properly, I add the propeller (painted the typical black and Insignia Yellow tips) and addthe wing top twin antennae. As this model is to be presented in a formal format, I minimized the weathering of the aircraft to only the exhaust soot stains and slight shading of the panel lines. The bush floatplane is complete!
Great looking aircraft! Love to build one myself. Where can I get one?
Thanks .
Bob Berke
Hello Bob,
Hobbycraft Canada used to make this kits but they are no longer available except on EBay. I checked and there are several versions in 1/48 and 1/72 scale, depending on the version you wish to make.
Paul