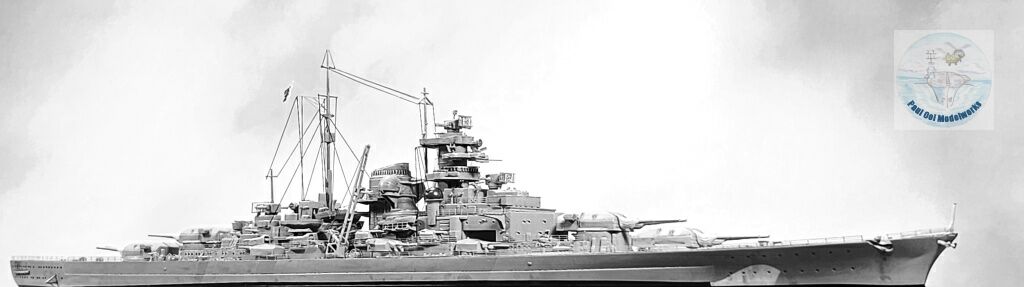
Those of us who grew up in the 60s may remember the hit song by Johnny Horton “Sink the Bismarck!”. The lyrics rang, “The Germans had the biggest ship, they had the biggest guns…” and the mystic of the menacing Bismarck grew large in my mind. Fact check moment: the Bismarck was a very large ship but at almost 52,000 tons, she was still dwarfed by the IJN Yamato (72,000 tons) and outsized by the later Iowa class battleships (57,000 tons). Her main guns were about equal in caliber to her rival the HMS Hood at 15 inches. The ill-fate Hood was no midget either, displacing 47,000 tons during her encounter with the Bismarck. However, what gave the Bismarck a fighting edge was the rate of fire using the latest shell loading and breech technology, capable of a full salvo every 18 seconds as compared to her Royal Navy rivals’ 40 seconds. Also, her gun directors had superior instruments that enabled her guns to put shells into a tighter pattern to ensure a greater hit rate.
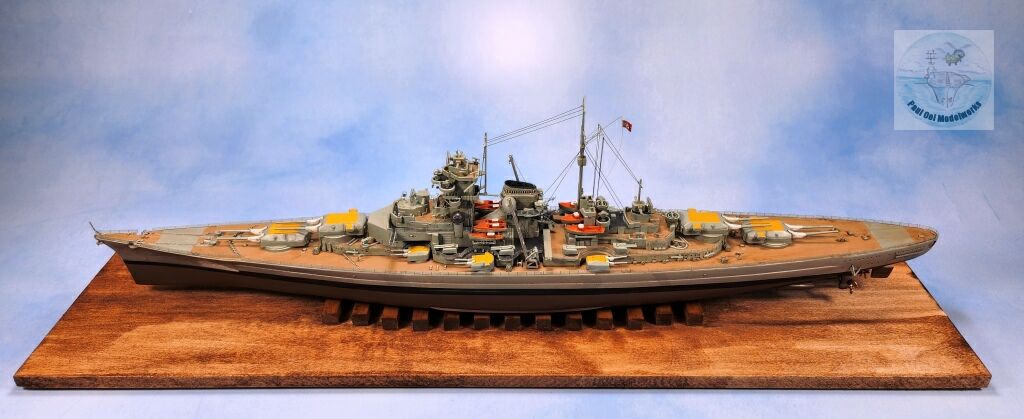
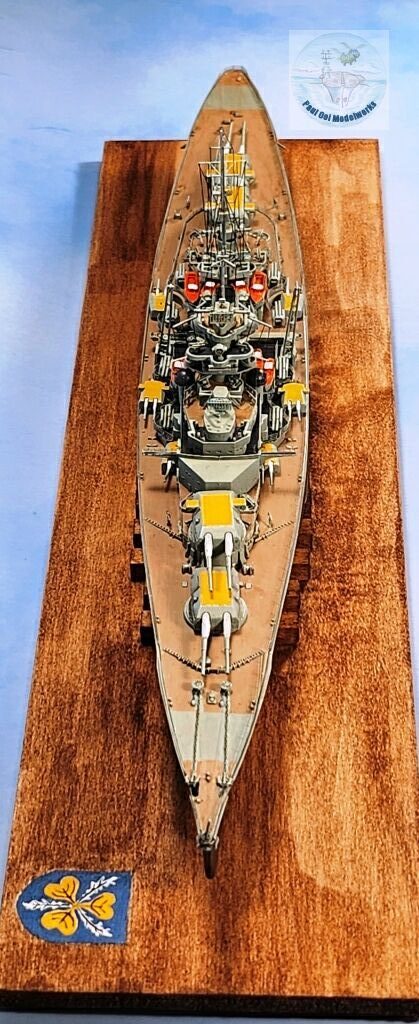
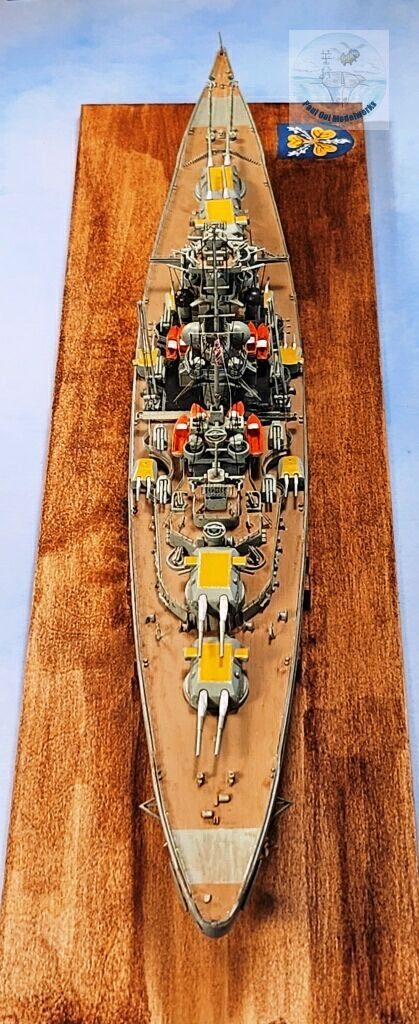
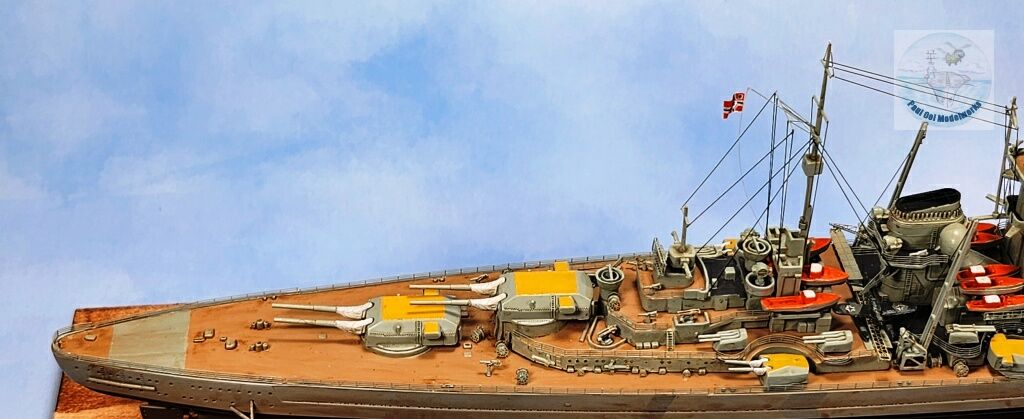
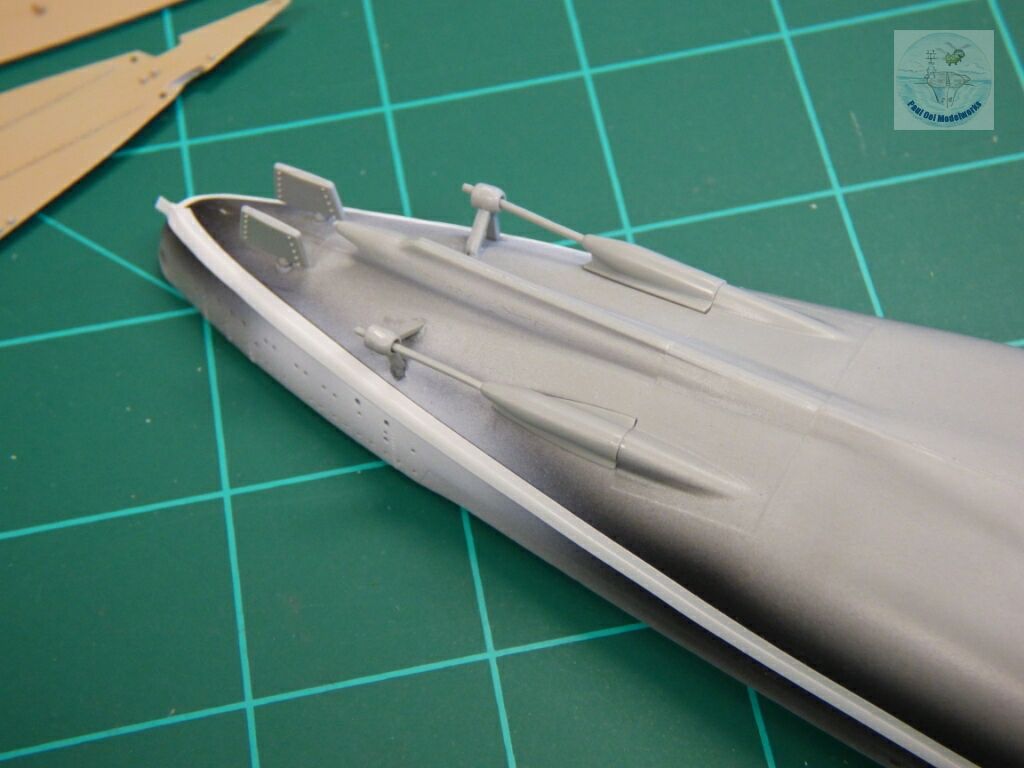
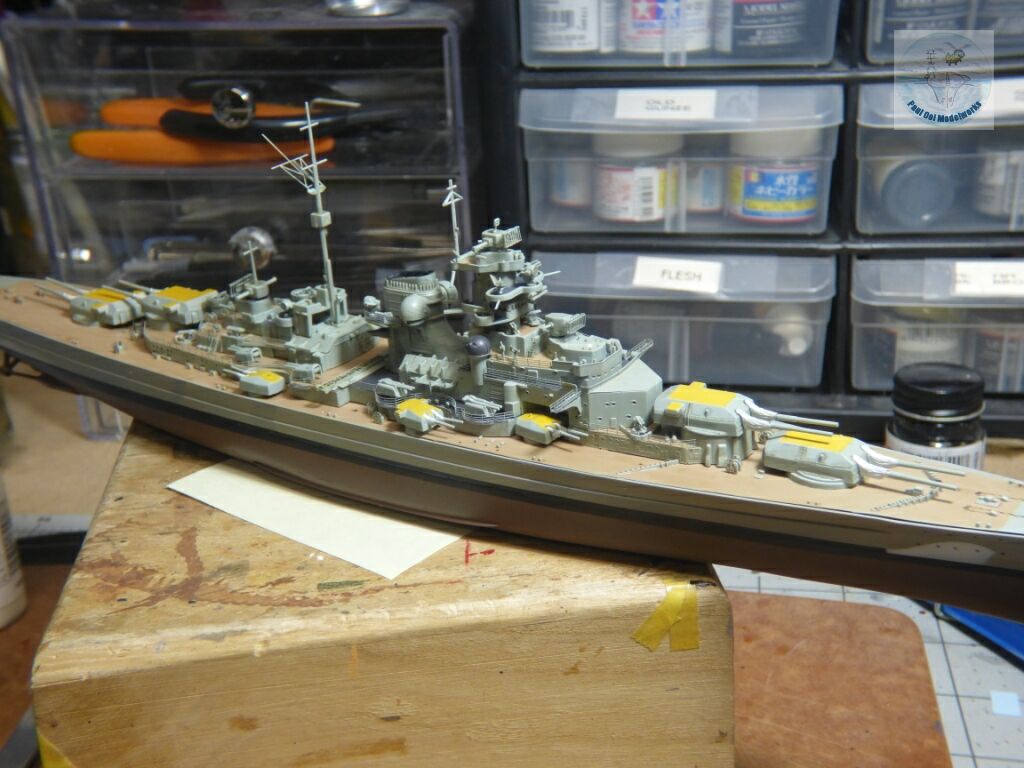
The camouflage pattern used by the Bismarck in her short 11-day battle career has been the subject of debate and speculation. The ship was repainted several times during her voyage from Norway into the North Atlantic, and even on May 6th on the eve of her destruction. It was this last battle appearance that I chose to model. According to the testimony of one surviving crewman, they were directed to paint the turret tops of the main and secondary batteries a bright yellow on the morning of May 6th 1941, and one British sailor remarked about the yellow-topped turrets as the ship capsized a day later. The bright and visible swastikas on the fore and aft main decks were erased with grey paint when they left Norway, and her visible black and white zig-zag patterns on the hull freeboard were also similarly blotted out. There was one lone Arado Ar196 float plane onboard on May 6th, that they had hoped to use to carry the ship’s log to safety, but the catapult system had been damaged by shelling from the HMS Prince of Wales. Instead the aircraft carrying the log records was punctured and pushed off the catapult into the sea.
Gallery
Construction Notes
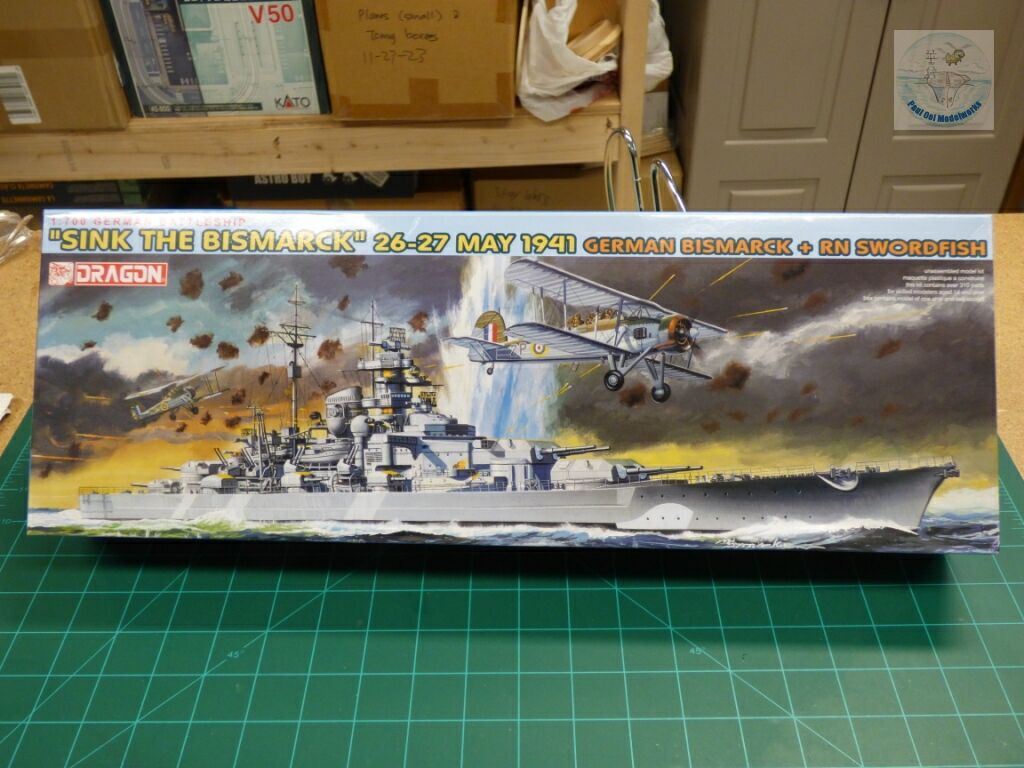
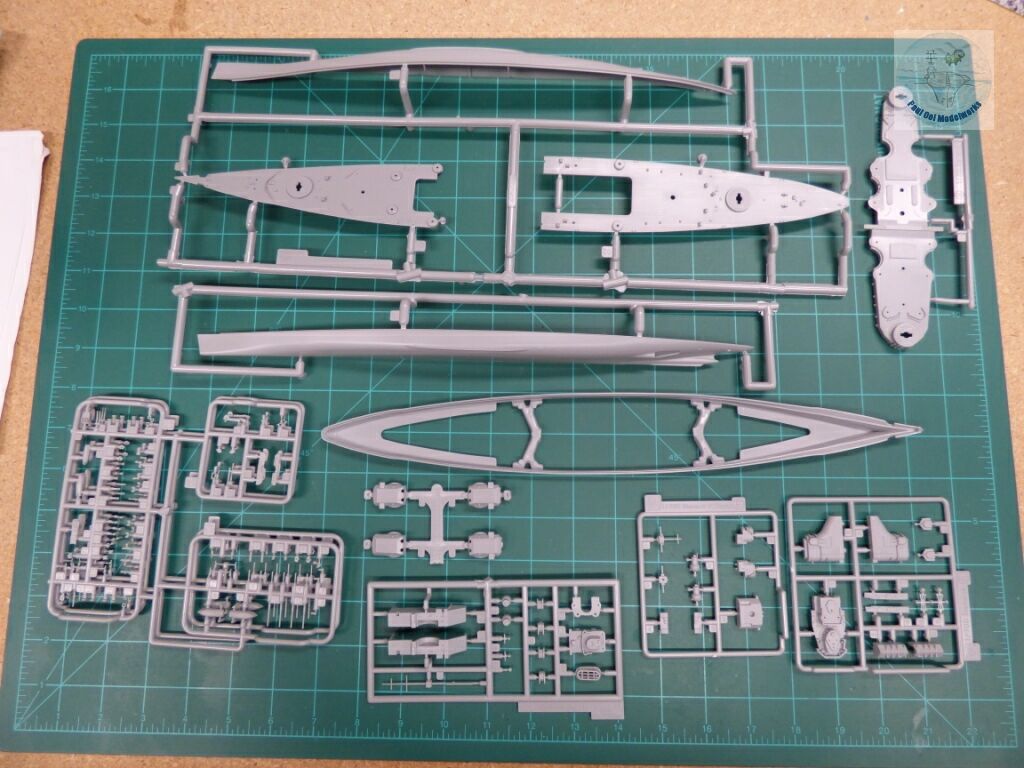
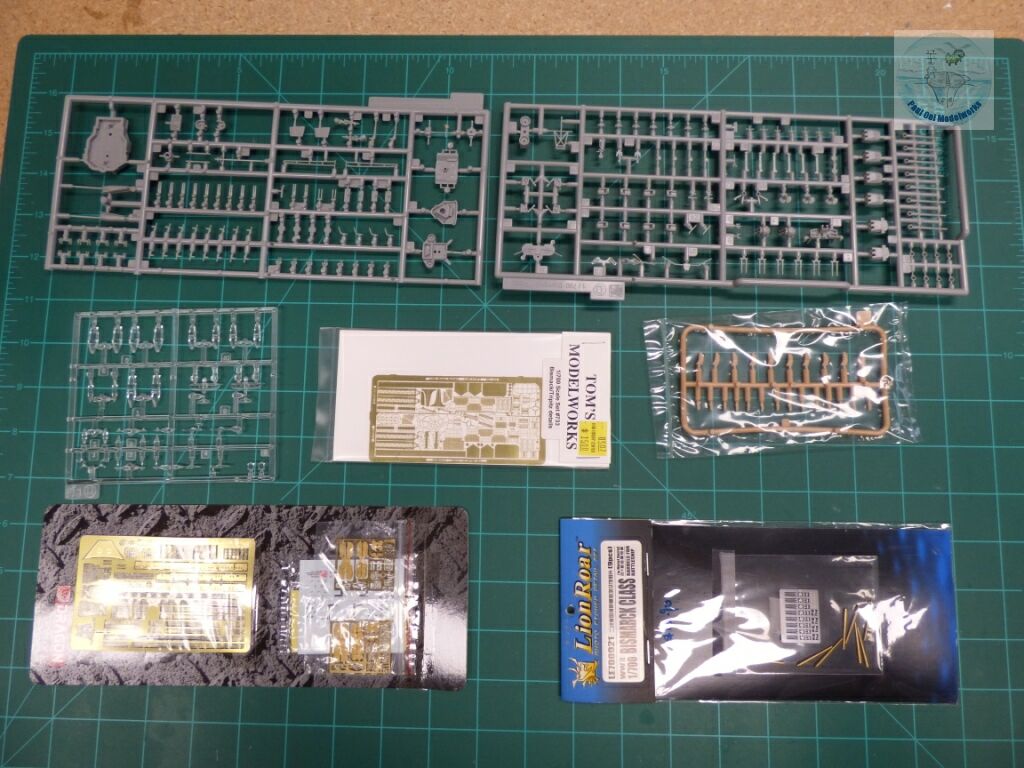
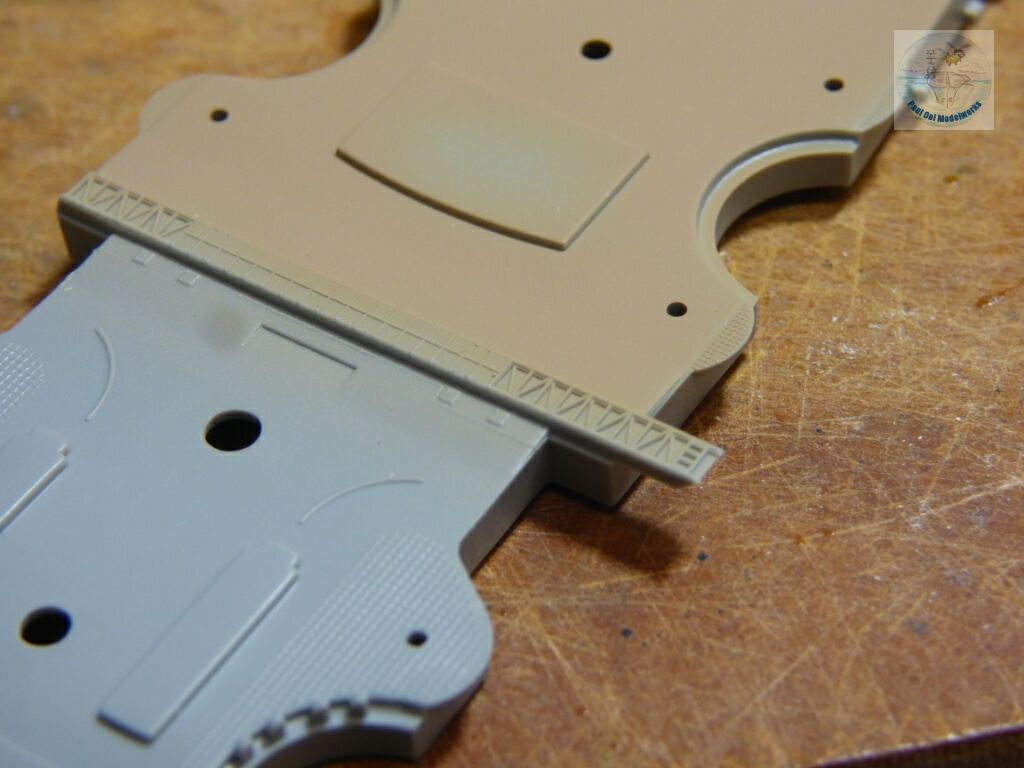
This 1/700 scale Dragon kit is pretty large with lots of spare parts, two Arado seaplanes, two RN Swordfish torpedo bombers, and over the years I had also gotten Tom’s Modelworks phot-etched fret for Bismarck/Tirpitz and Lion Roar’s brass barrels for the main guns. However, the Dragon kit itself is a disappointment as the fit was awful and I do not recommend it at all. All the pin-to-hole fits were bad as the holes tend to be undersized and either had to be re-drilled or I had to cut away the pins in some instances. For a ship build, that mean many holes and there were very few locations where the pins fitted at the first go. Furthermore, the instructions were also misleading in some places, and in one particular situation involving the quad AA guns, referred to parts that did not come in the kit. Lastly, the instructions did not include the rigging diagram. As an experienced modeler, I could overcome all these barriers but it could be a disaster for a beginner or even intermediate level builder just starting on naval models.
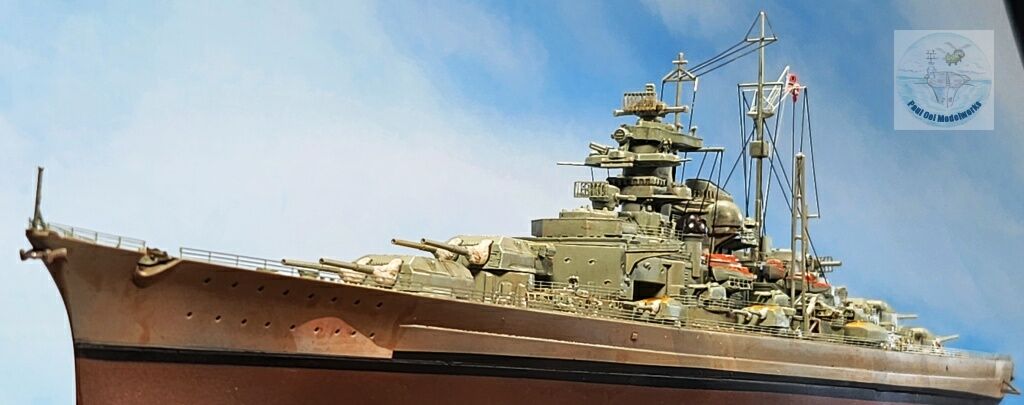
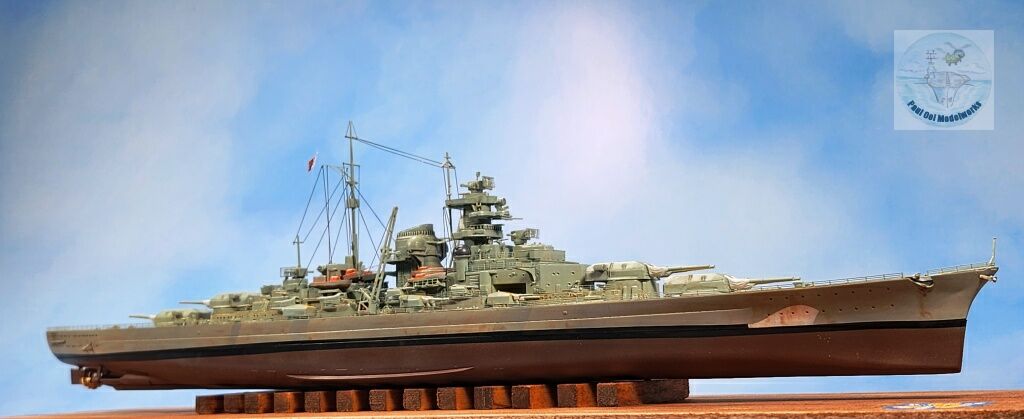
I decided to build this kit as a full-hull display placed onto drydock blocks. As mentioned earlier, I wanted to show her in the colors that she had when the main Royal Navy task force cornered her on her attempt to reach the French port of St. Nazaire.
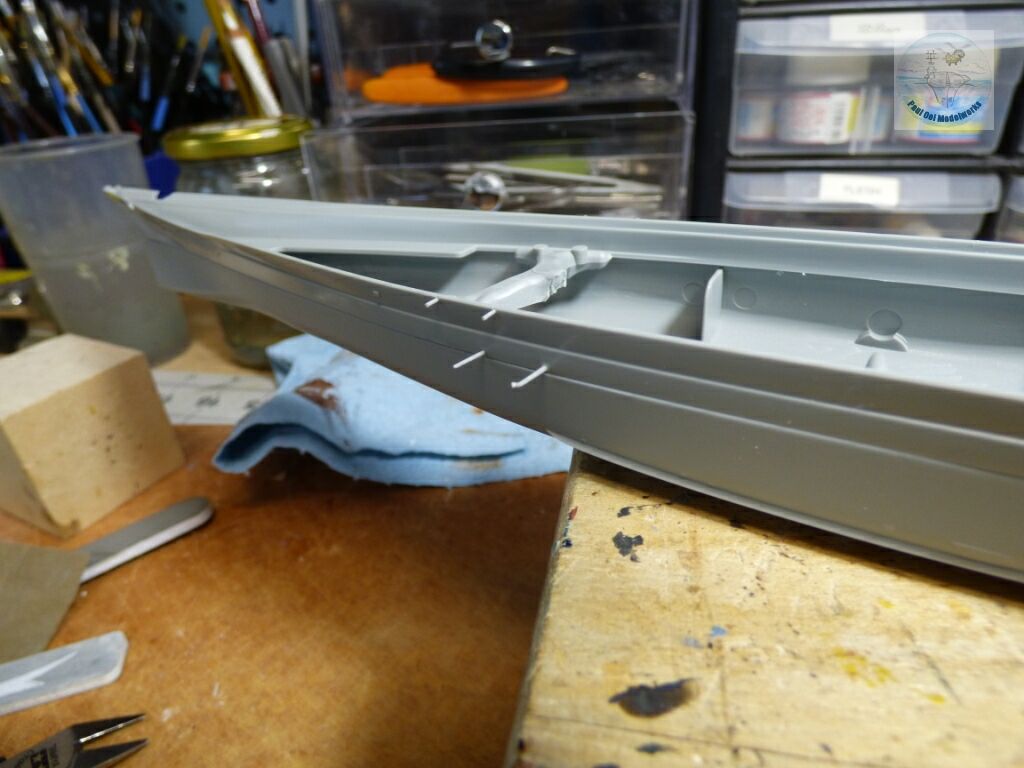
Dragon had the boarding gangway stairs at six locations around the hull with holes for mounting. Such gangways are only found when a ship is docked or in-port at anchor, and so I did not want to display those and chose to fill the holes using sprue plugs.
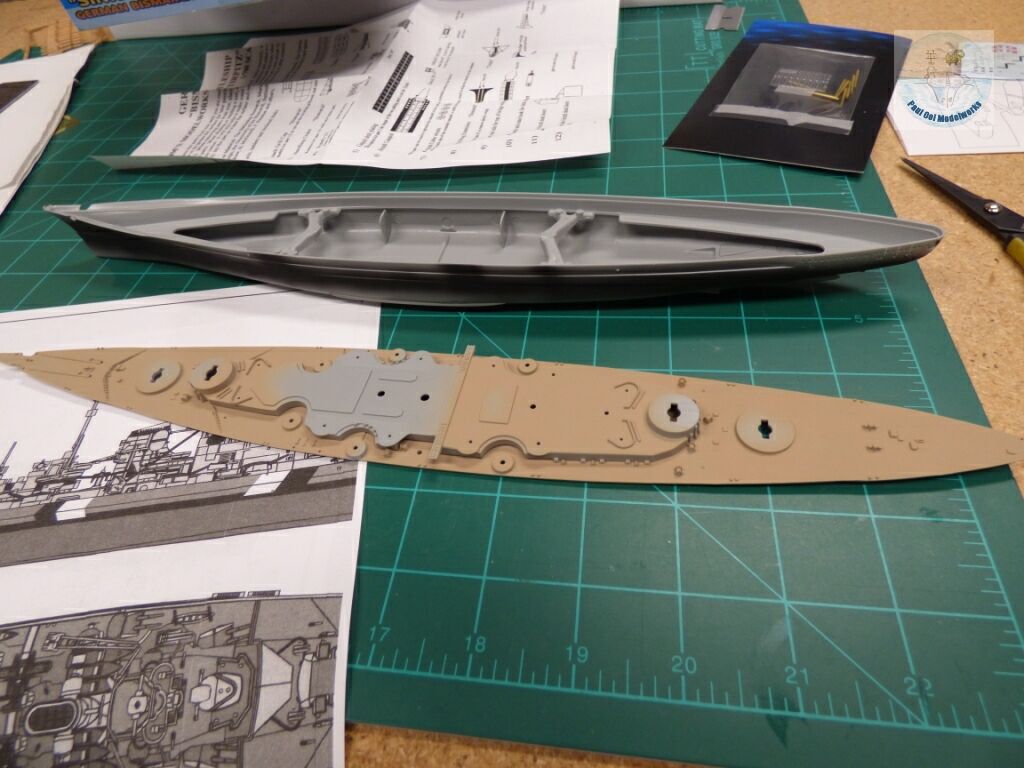
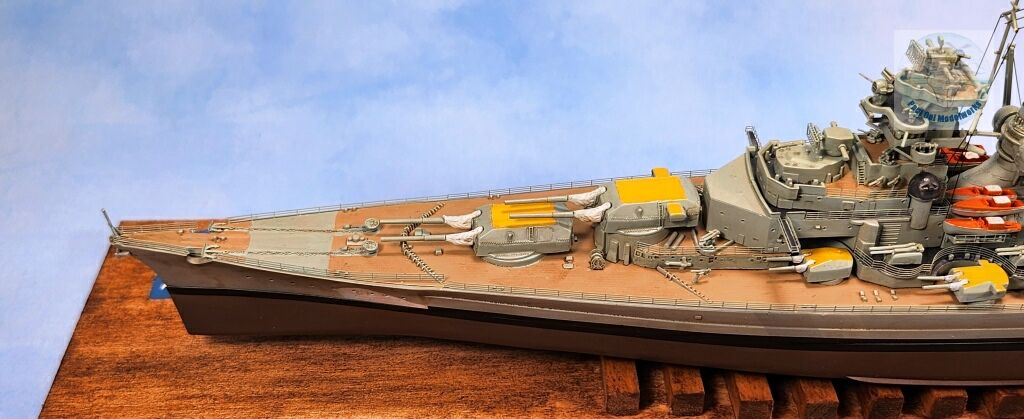
The main deck, and the boat deck are painted Tamiya XF78 Wood Deck Tan (the actual ship had teak deck boards).
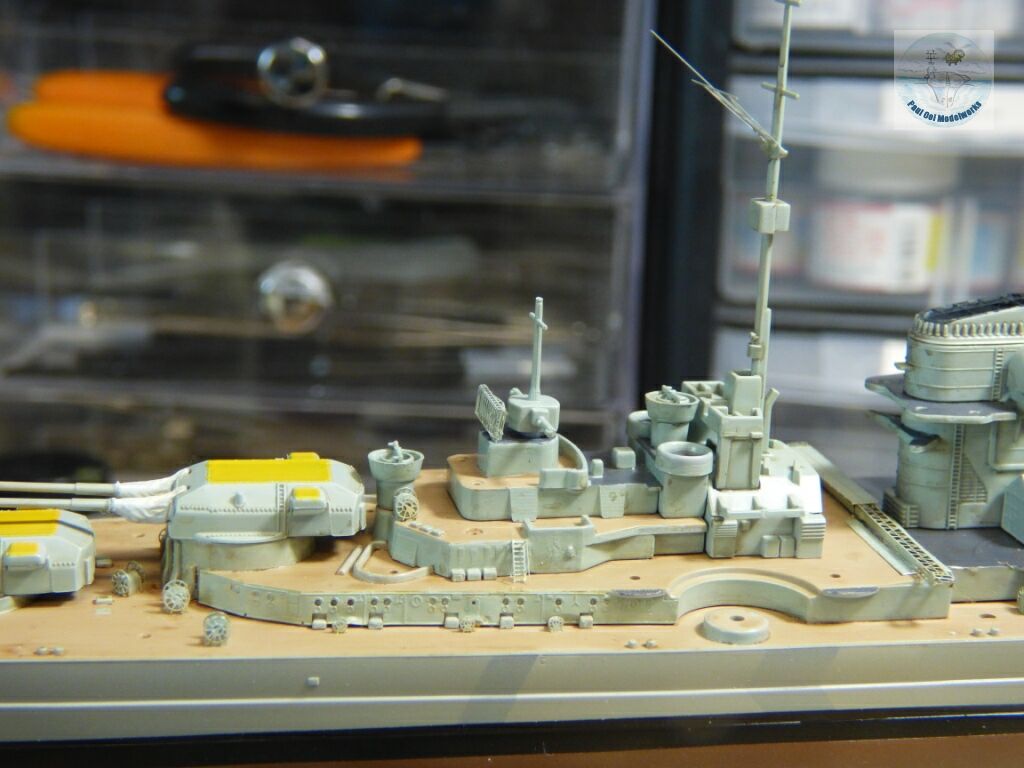
At this time, I also removed the molded plastic catapults to be replaced with photo-etched ones later.
In order to get the correct appearance of the stripes faded out, I still had to paint them on first. After painting the flat black stripes, I apply masks onto them, and also on the blacktopping strip along the waterline of the hull.
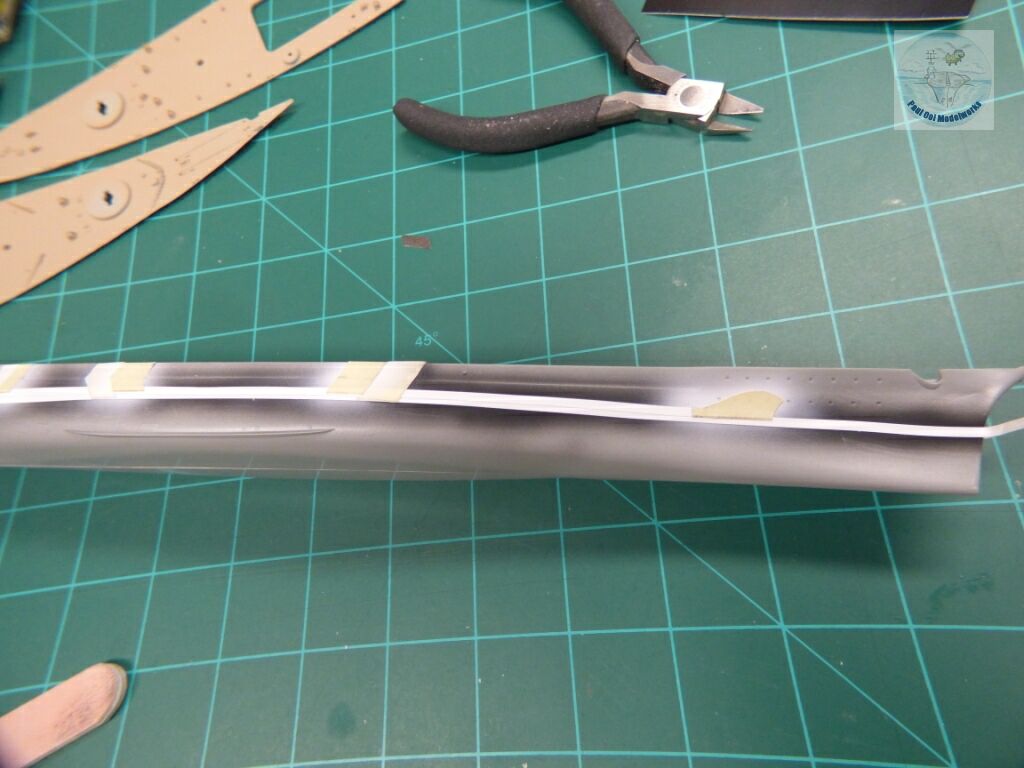
Then flat white is sprayed along the black stripes, and also at the false bow and wake wave patterns. Then the masks are applied over the white areas.
After the overall Tamiya XF20 Medium Grey has been applied over the entire hull approximating RAL Dunkelgrau, I remove the masks over the camouflage striped patterns and the rear wake wave . Then I carefully apply a light mist of XF20 over those patterns where you can still see a faint pattern of the underlying pattern.
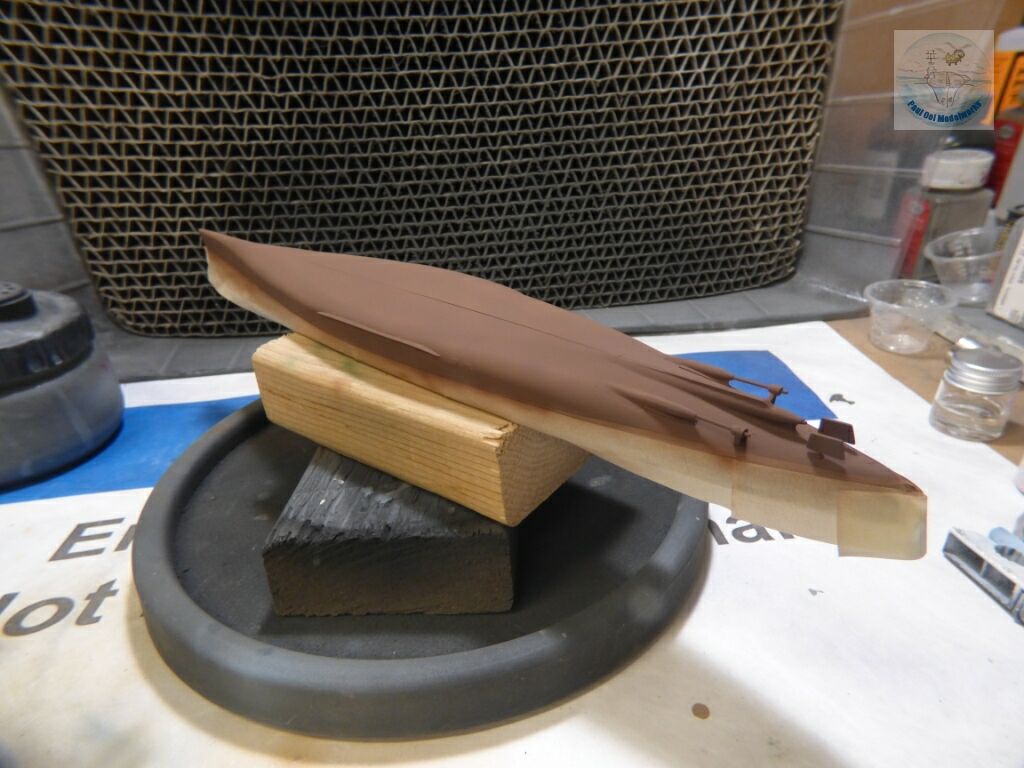
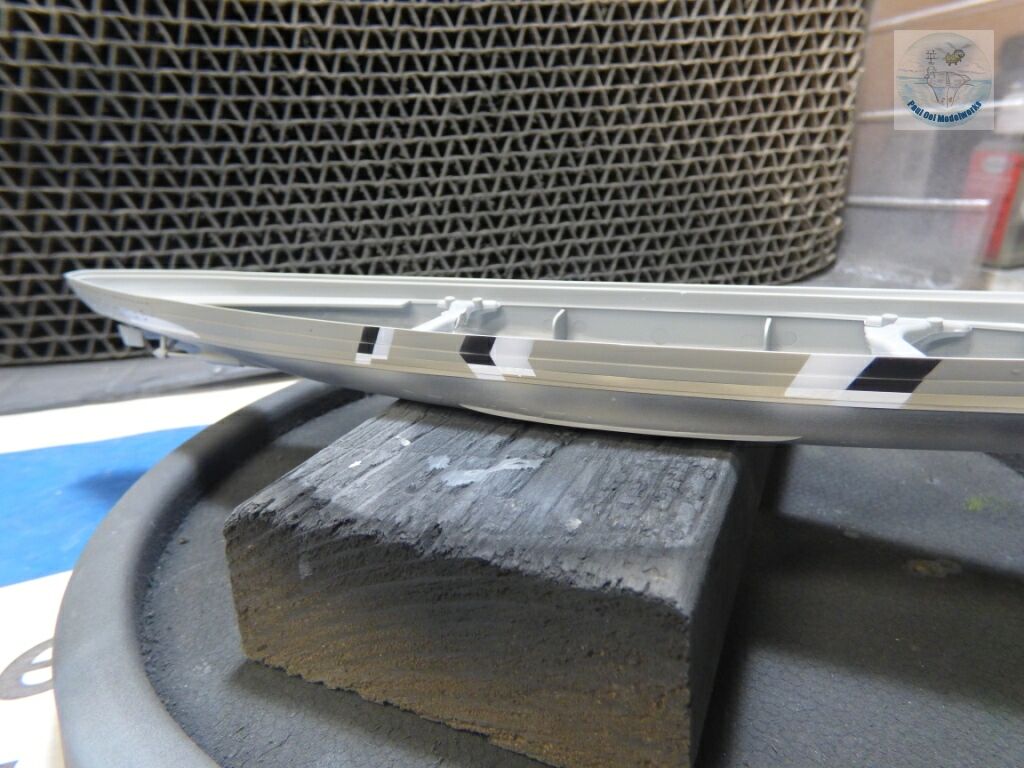
Once the freeboard area of the hull has dried properly, I mask that upper hull area, and then apply Tamiya XF64 Red Brown over the hull underside.
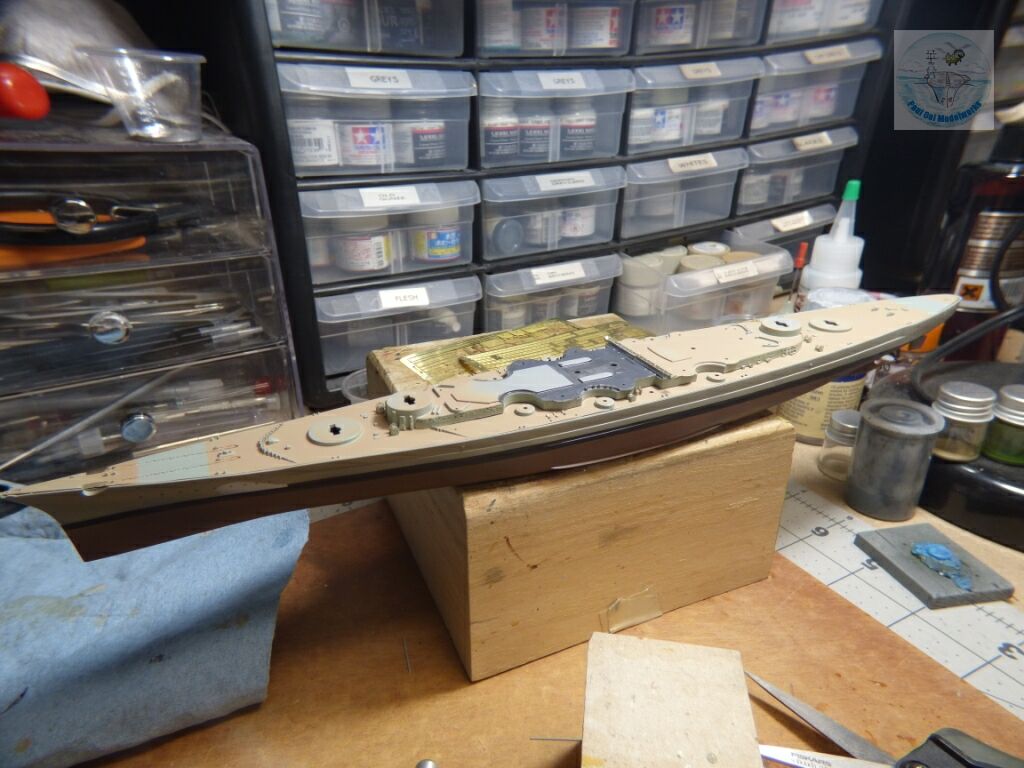
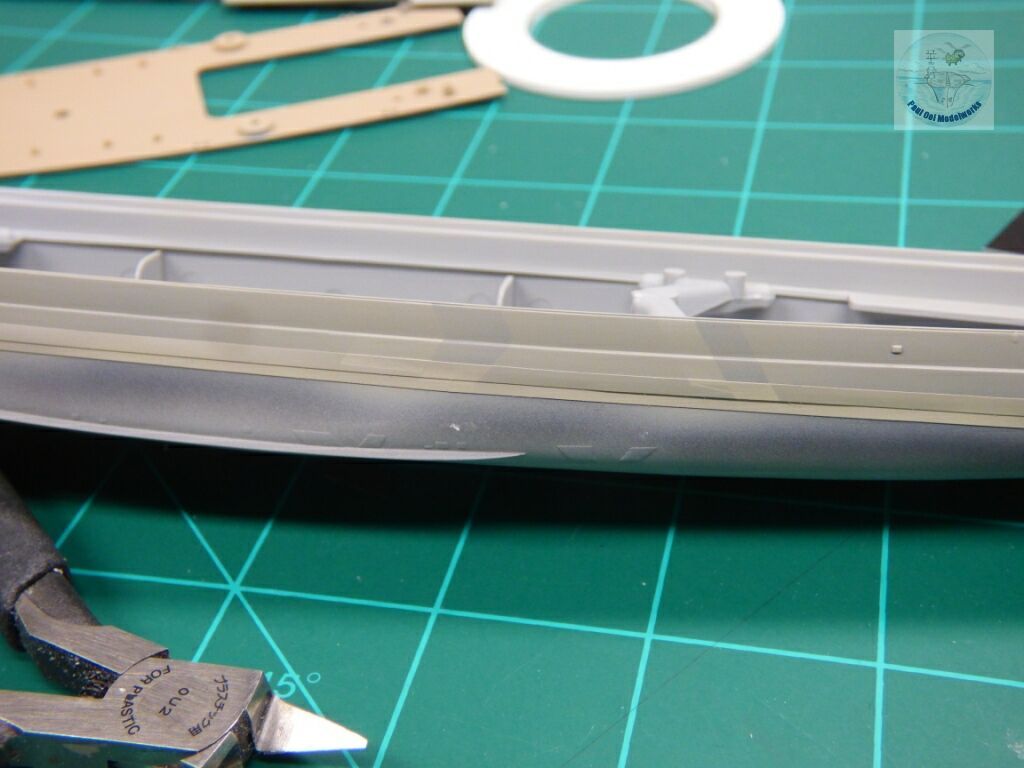
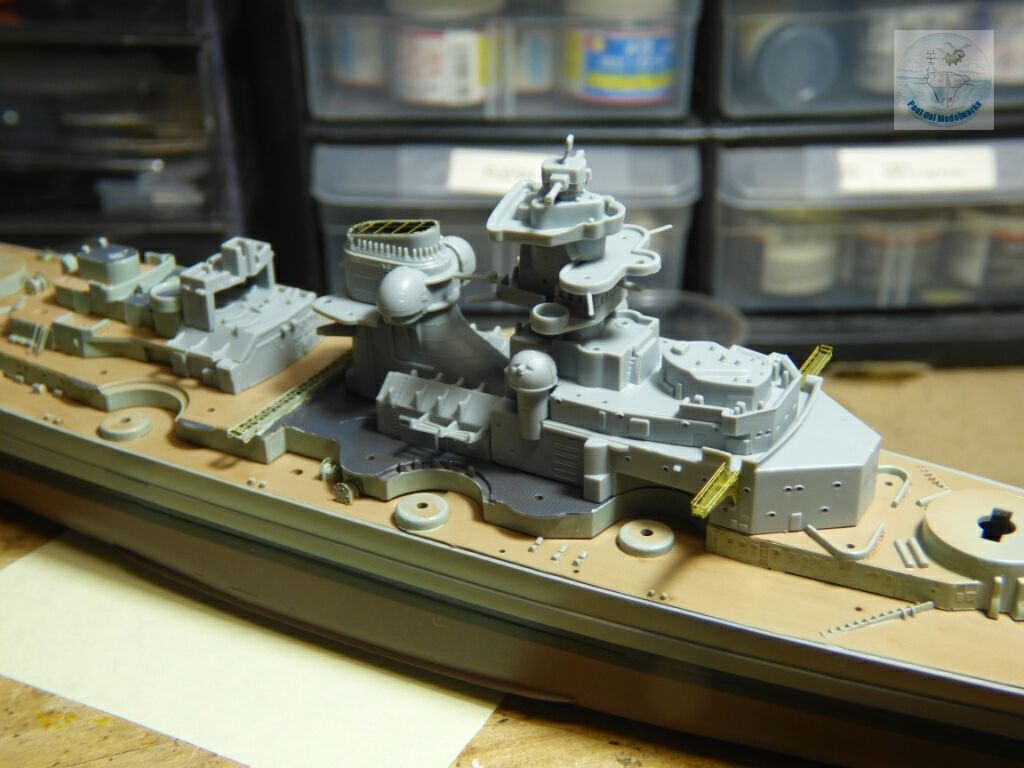
The main deck comes in two sections that do not align very well with each other or the hull. Furthermore, the quarter dock/boat deck section is too large as a single piece and does not align well with the two main deck pieces as well. This causes a fundamental misalignment early in the deck structure that causes secondary turrets and other deck features to get squeezed as we move along.
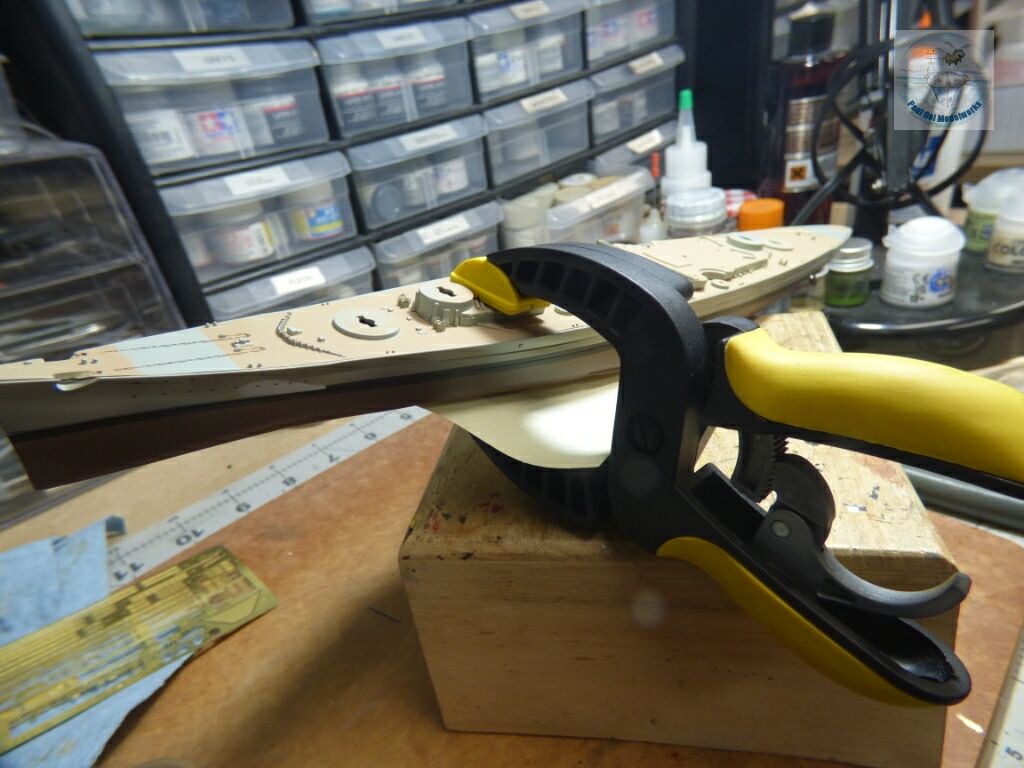
To get everything to sit properly, I use a large clamp to press the quarter deck onto the main deck.
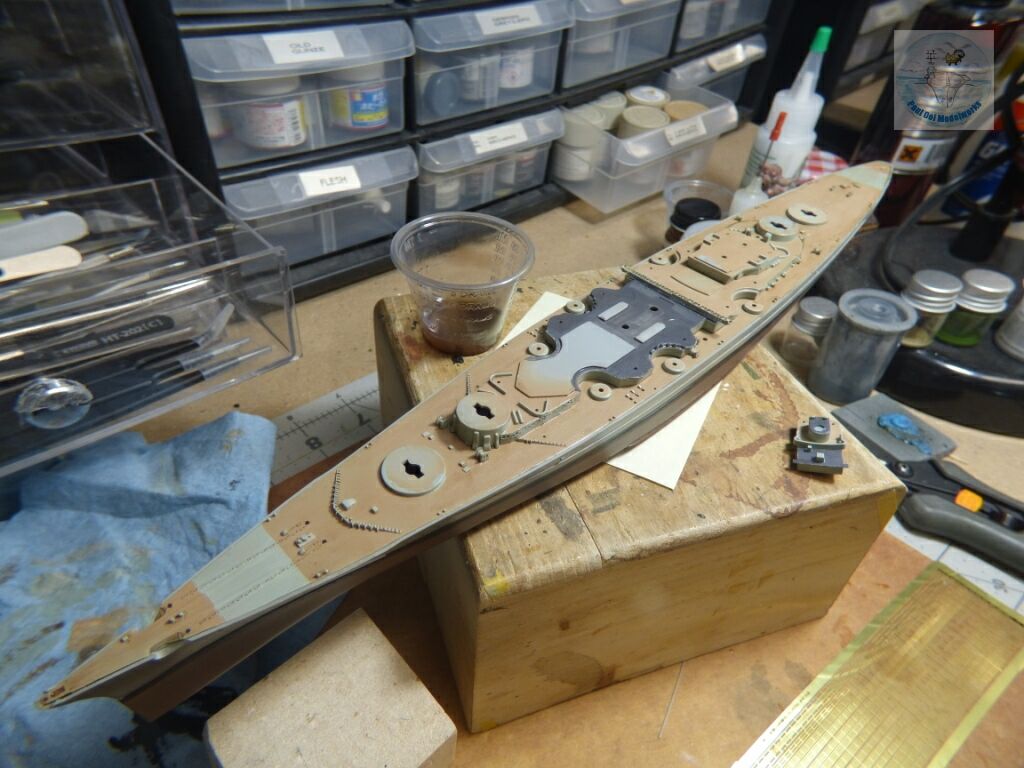
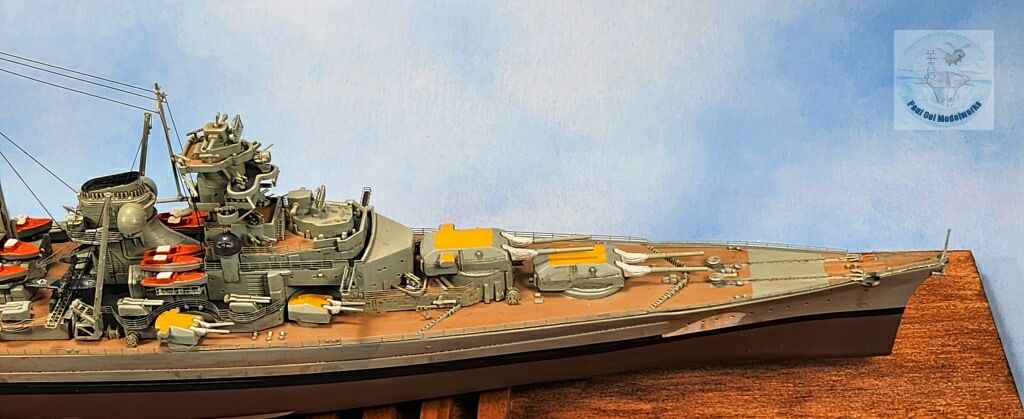
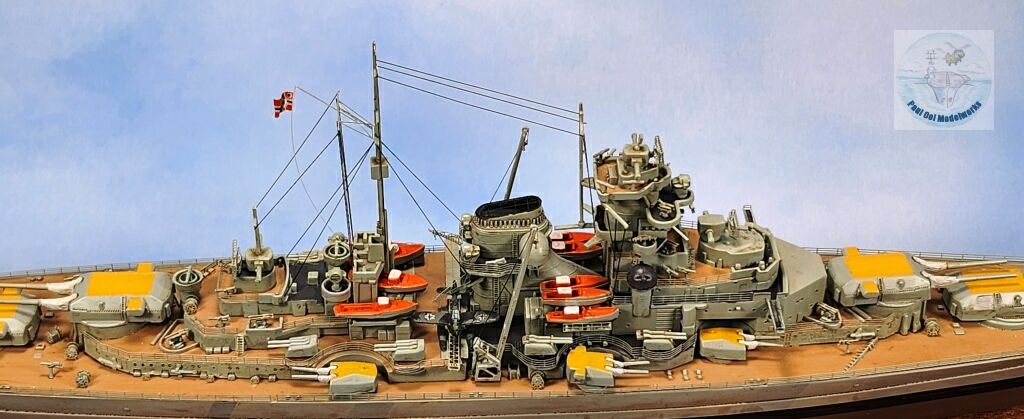
The walls of the quarter deck and boat deck sections are painted with Model Masters Japanese Army Grey which is close to the RAL Hellgrau used for the upper structures of the Kriegsmarin vessels. The fore and aft deck sections with the swastikas have also been painted over with RAL Hellgrau. Part of the quarter deck is painted with Tamiya XF24 Dark Grey. The wooden deck areas are stained with an oil wash of Burnt Umber.
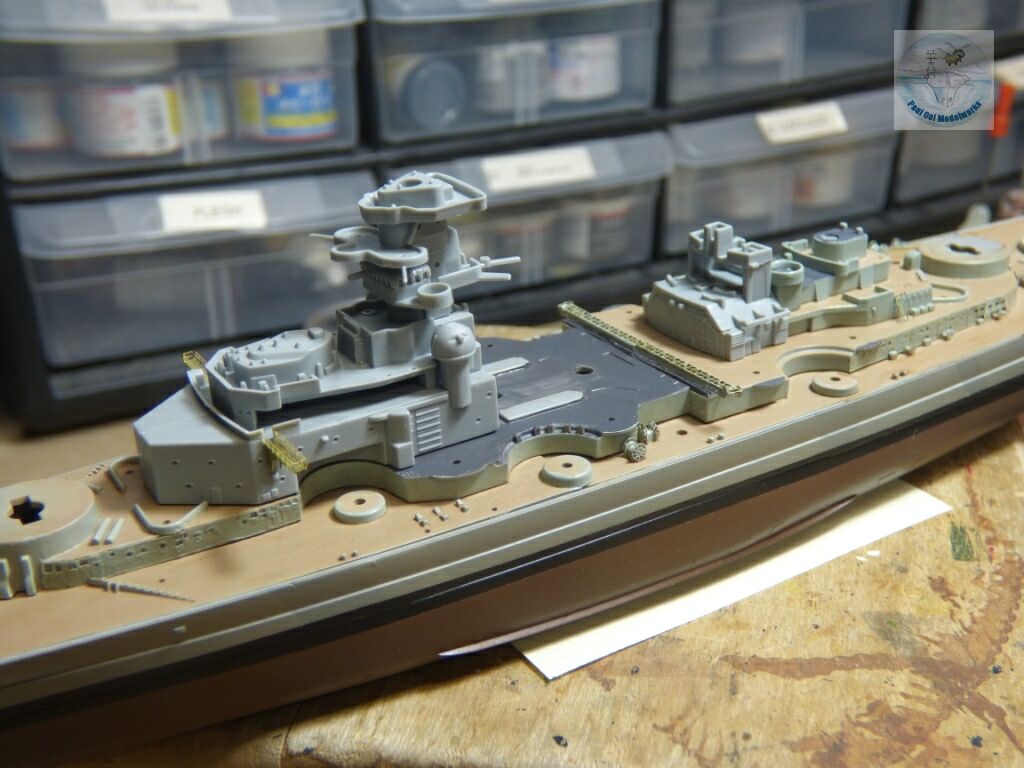
Work on the main superstructure and aft superstructure start layer by layer. I dry fit each layer, making sure they sit properly before the next level. Nothing is glued down at this time. This is where I kept encountering poor fit between locating pins and their holes.
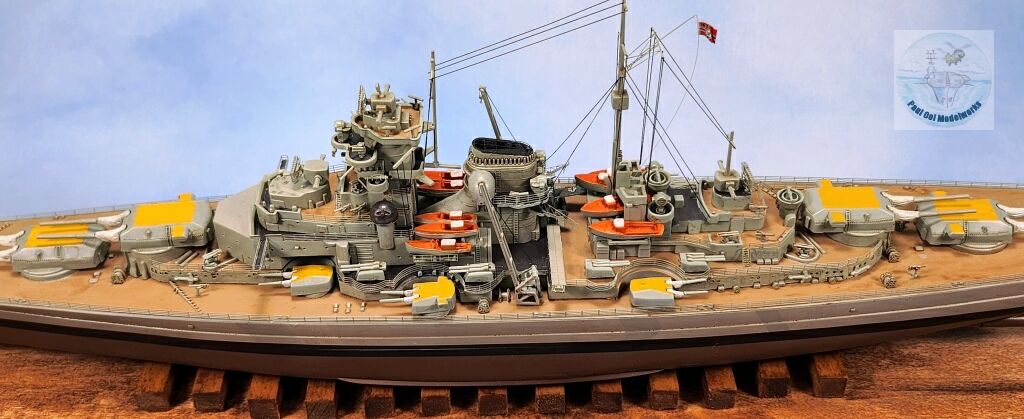
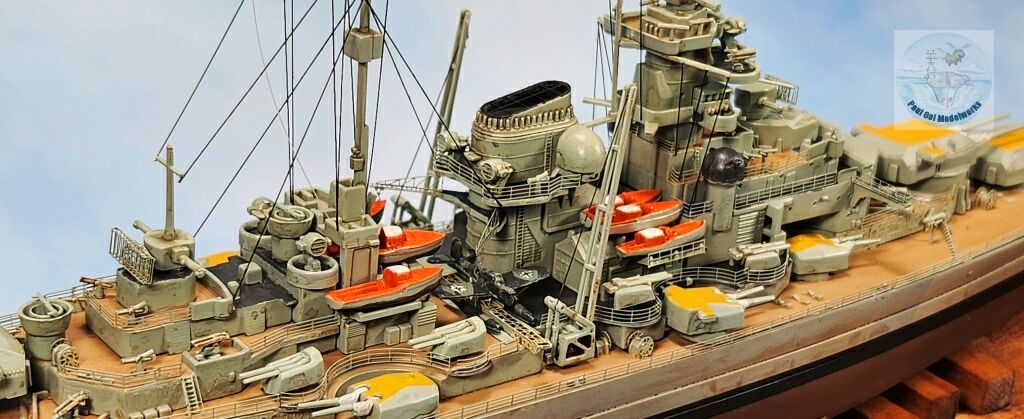
The center funnel assembly and the two boat huts are dry-fitted.
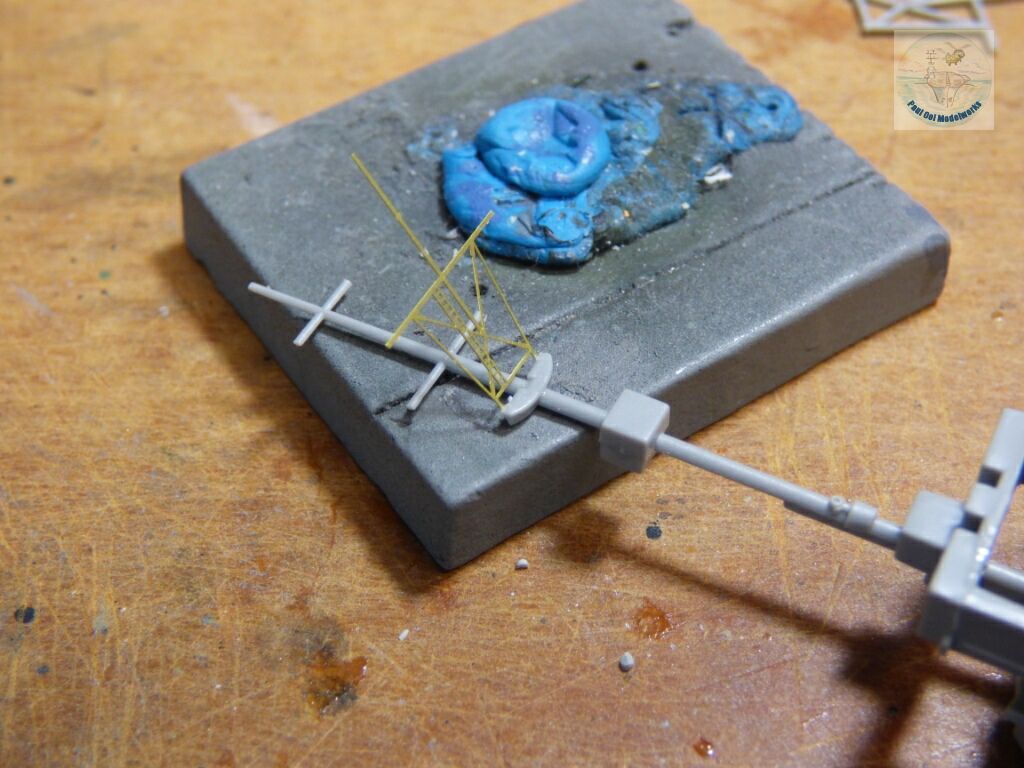
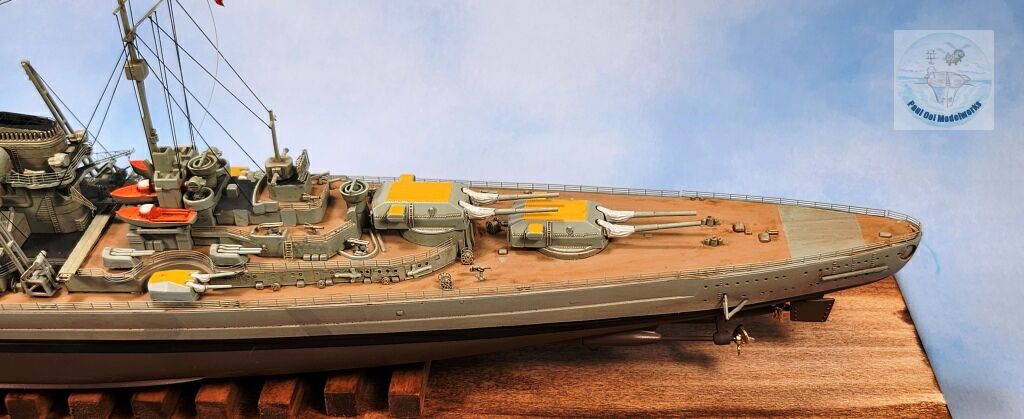
The main mast is assembled with the optional phot-etched flag yardarm attached.
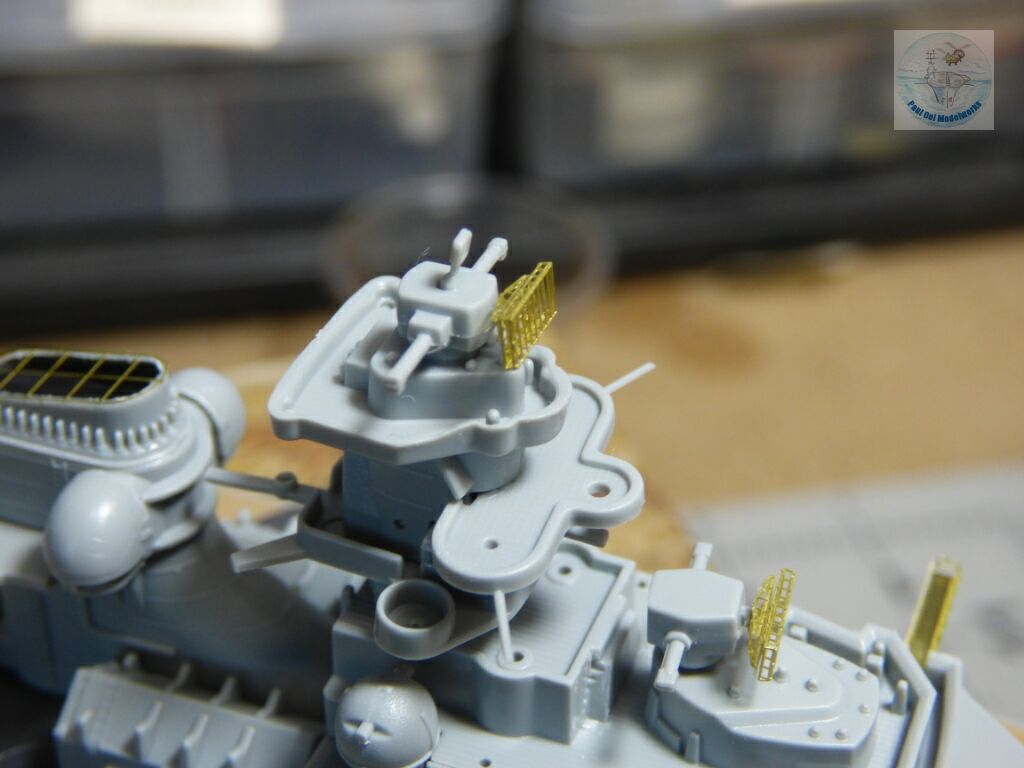
The delicate radar arrays for the FuMO 23 radar systems are carefully folded and attached to the gun directors.
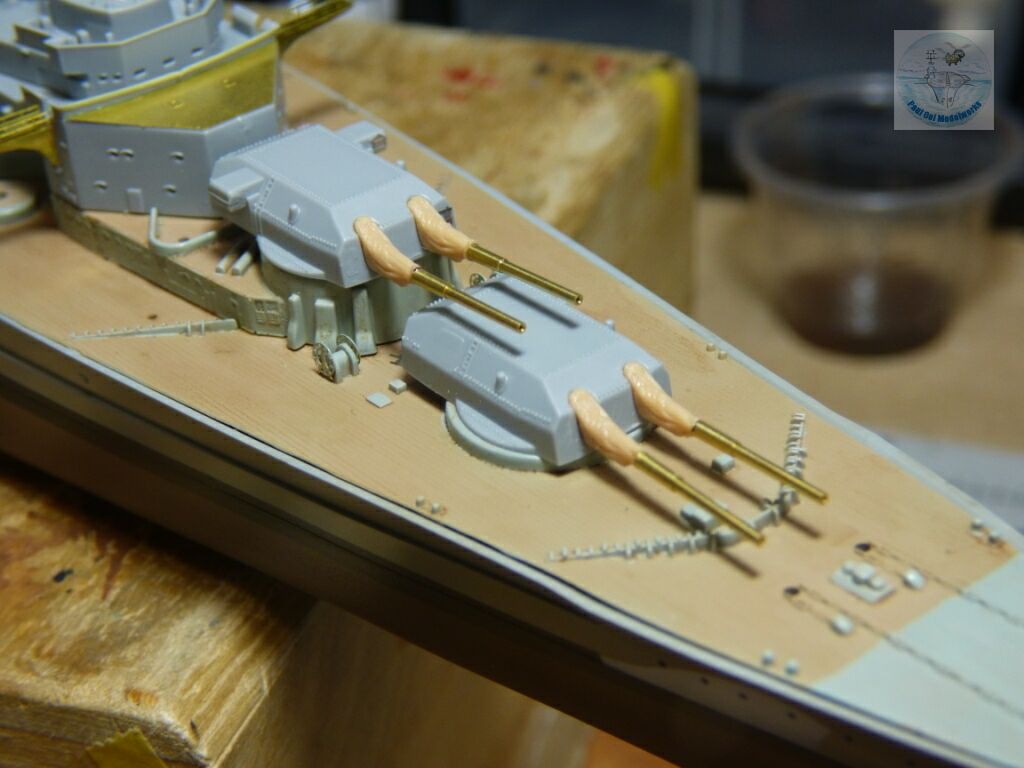
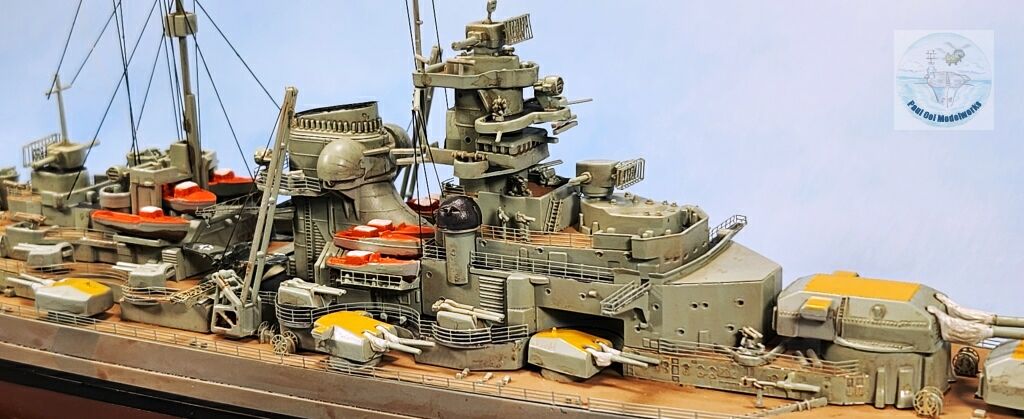
To attach the brass barrels to the gun bags, I had to saw off part of the barrel at the precise length, and then superglue each of them . These are gun turrets Anton and Bruno in place. I also encountered the fit problem with the gun turret pivots and had to cut them down to fit the holes in the deck.
After all the sections have been dry-fitted to fit, I removed everything above the quarter deck and spray painted them Model Master Japanese Army Grey.
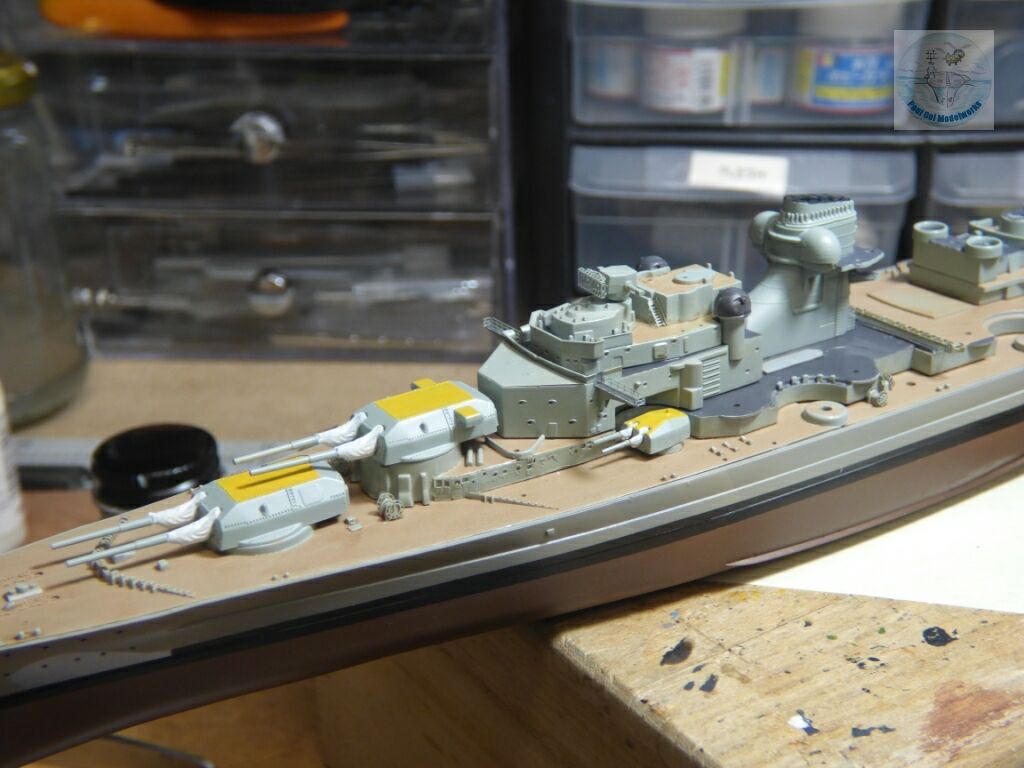
As each layer is permanently attached, the deck colors are painted, whether it is wood (Tamiya Wooden Deck Tan) or metal (Tamiya XF24 Dark Grey). The top of the turrets are painted Gelb RLM04, which is close to the RAL Gelb 1003.
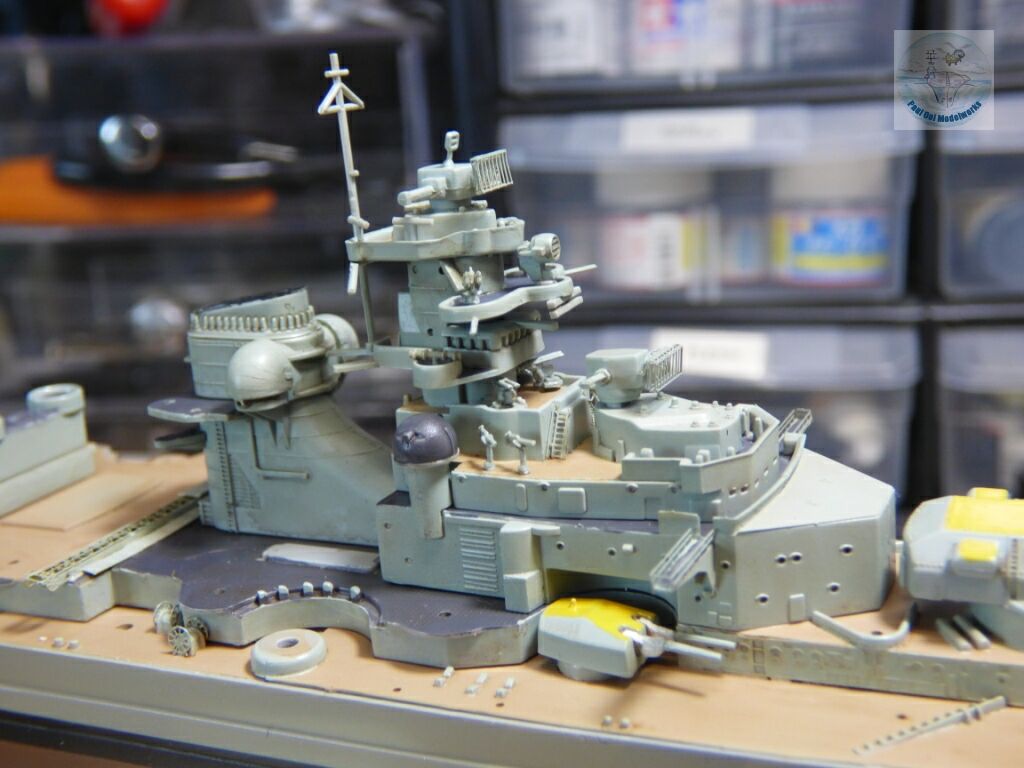
Main superstructure levels and funnel attached.
Rear superstructure and main mast permanently attached.
All guns, deck lifelines (railing) installed.
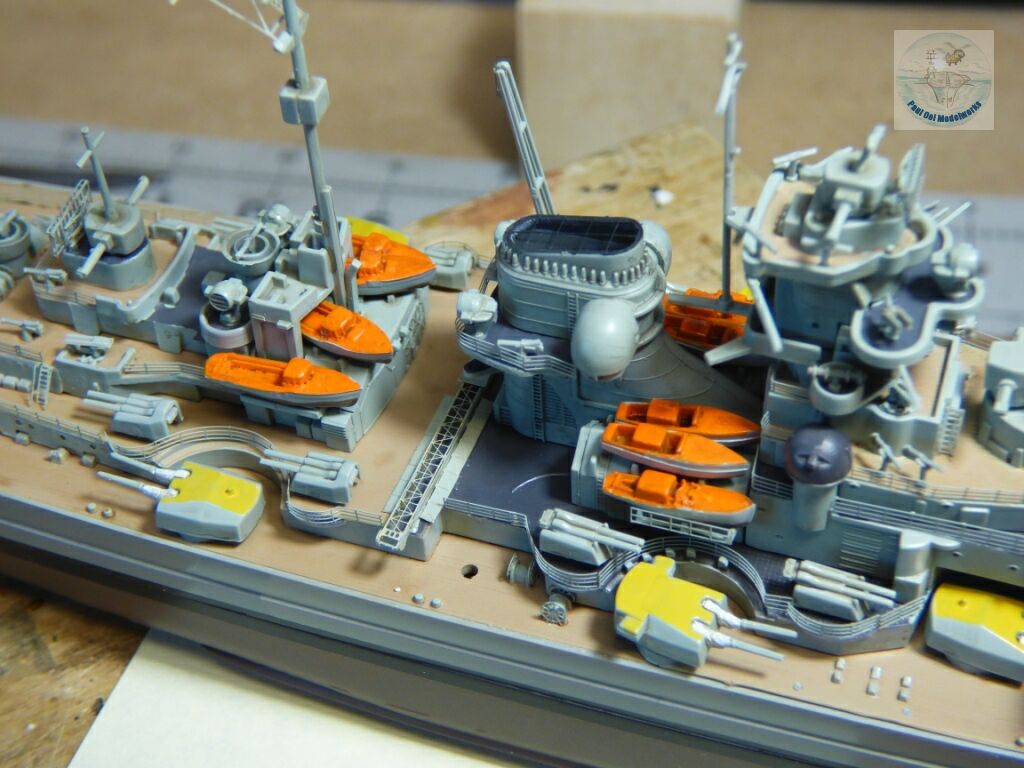
All motor launches attached to the boat deck. The boat uppers were painted orange (I used Citadel Trollslayer Orange). Later on, I added Flat White to the boat canopy tops. At this point, Bismarck has this oranges-and-lemons look to her.

The solitary Arado is painted RLM03 Grau and RLM72 Graugrun. The two Maltese crosses are hand-painted on.
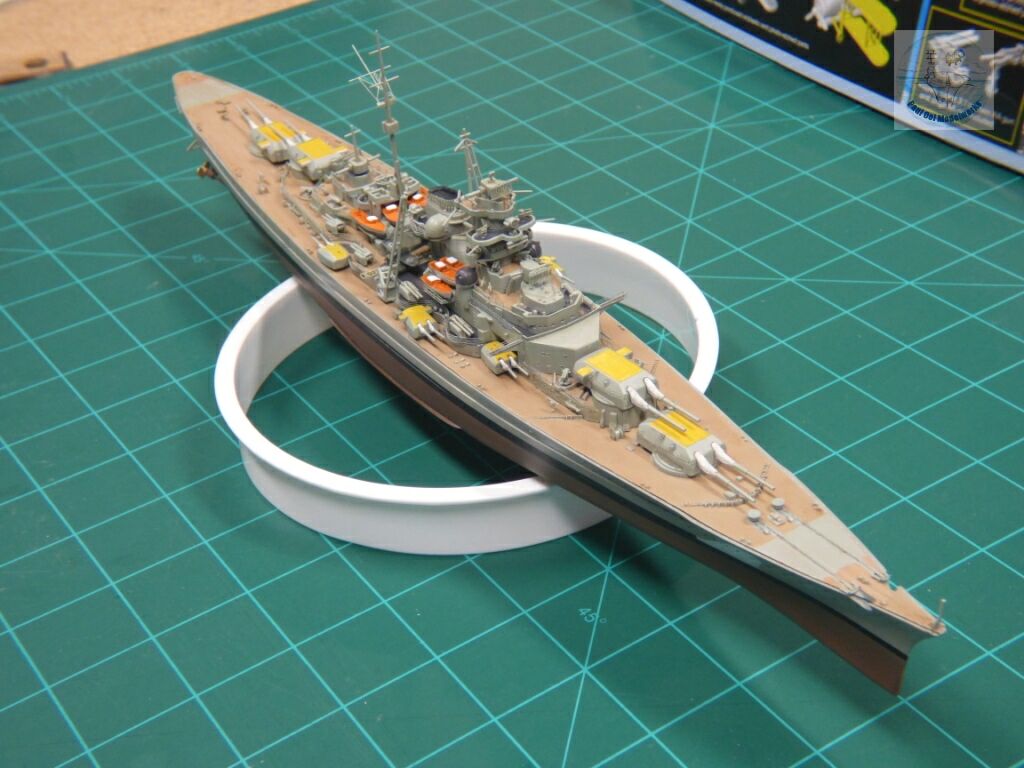
The ship is fully completed with kit and phot-etch parts except for the rigging and main deck lifelines.
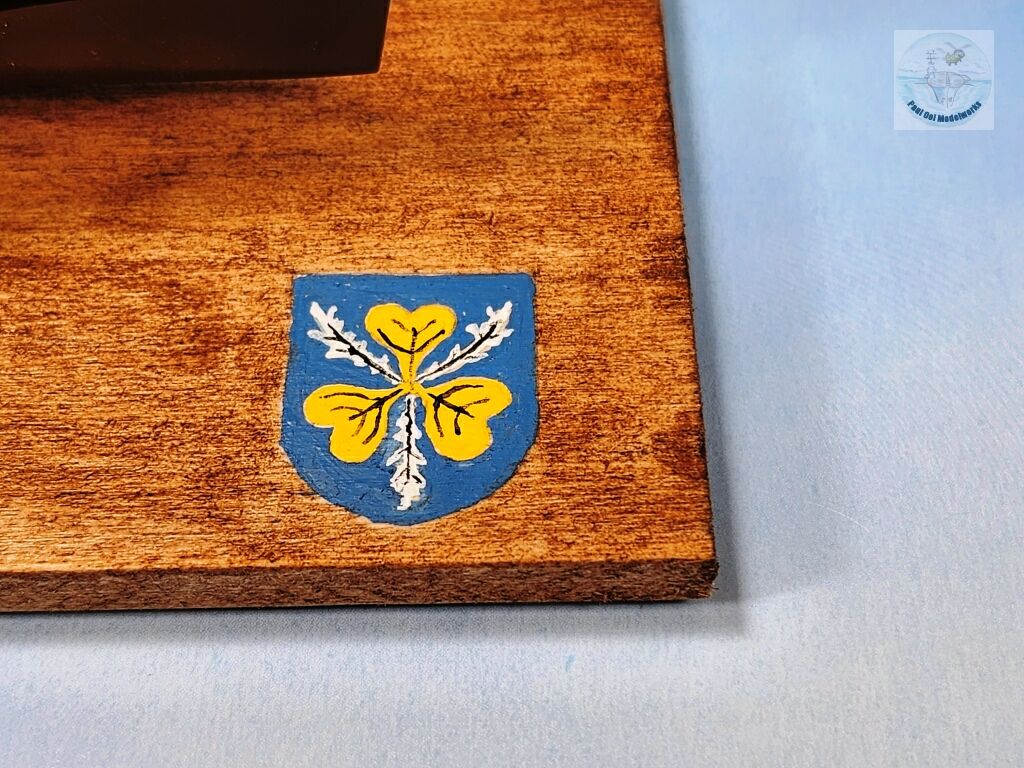
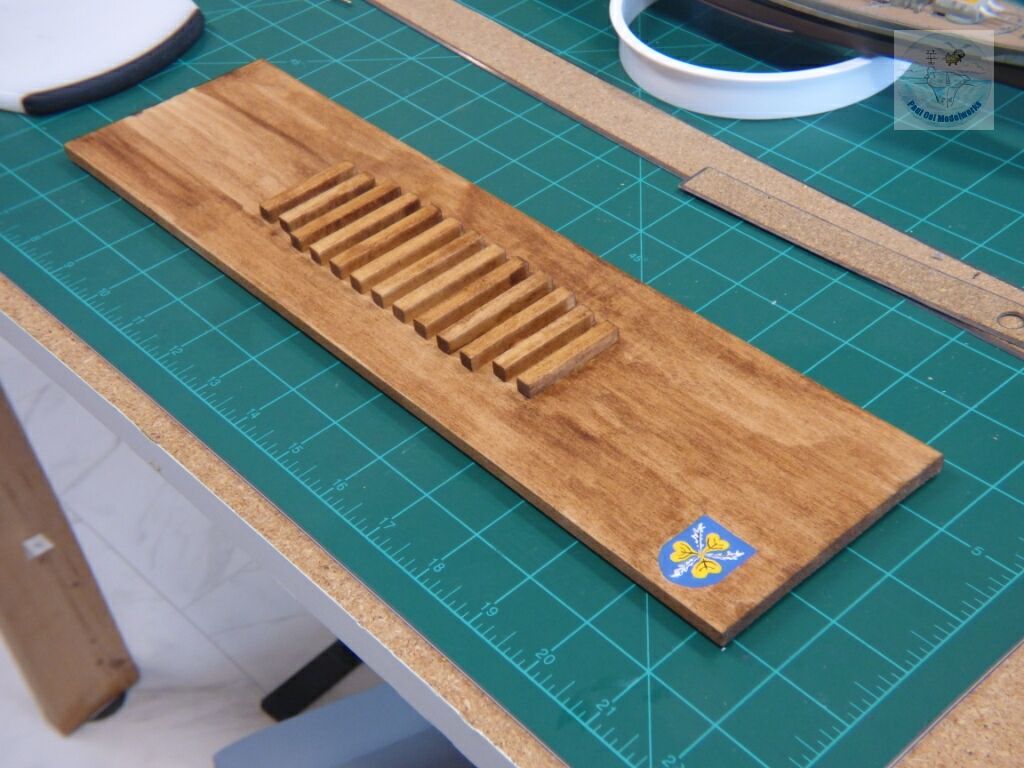
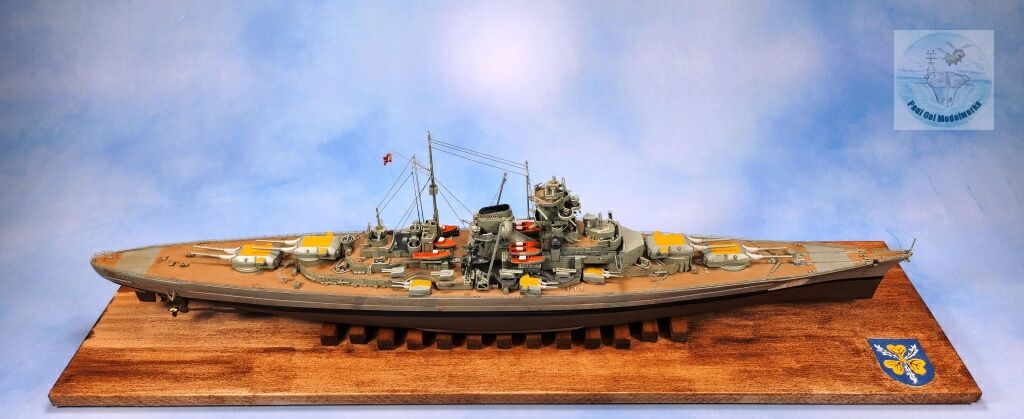
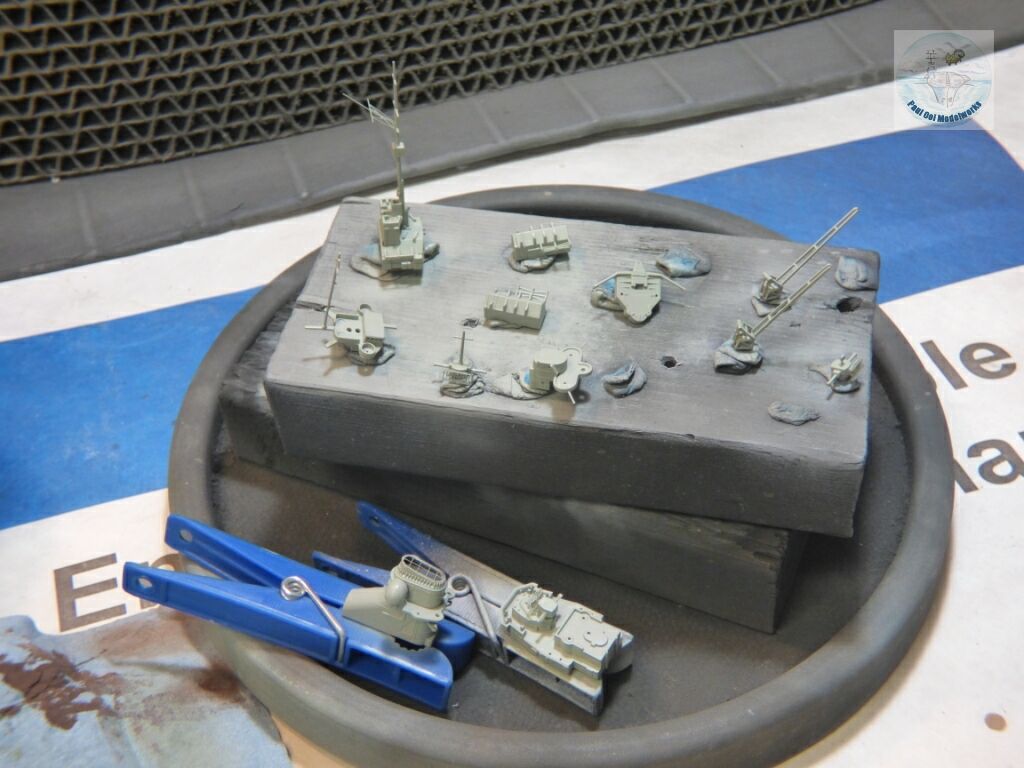
The ships crest is hand-painted onto the display base. It is also the coat-of-arms of the Count von Bismarck. The display base itself is made from bass-wood board and 1/8 square wood beams cut into 2″ and 1-3/4″ sections.
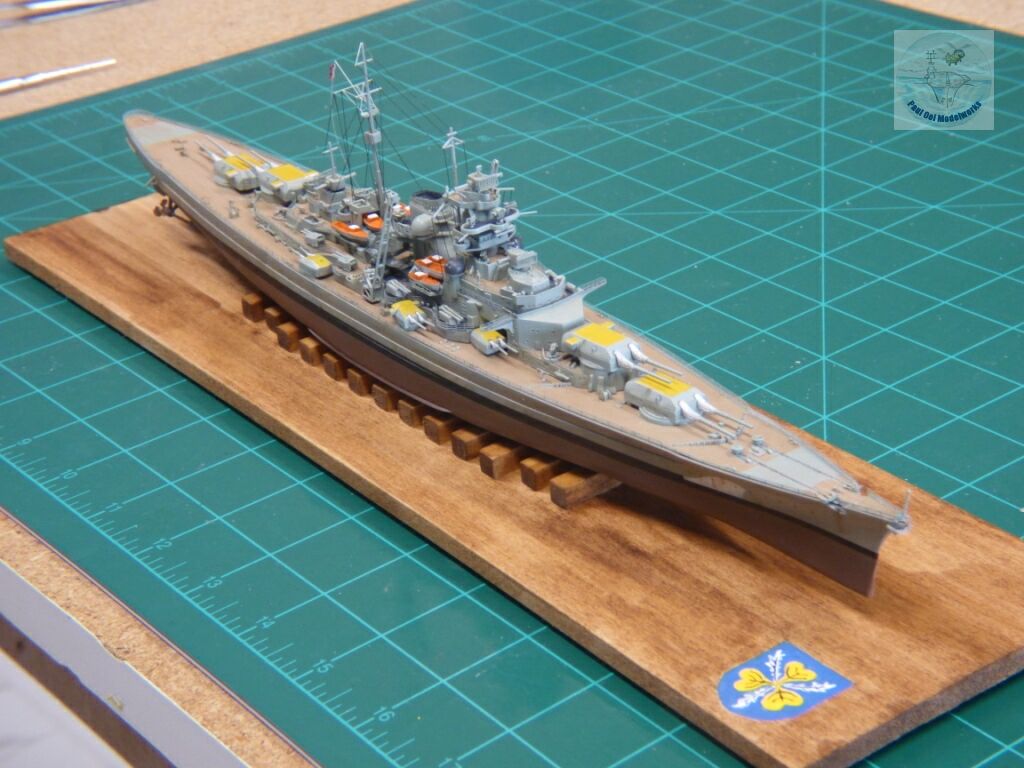
The model is carefully placed onto the base (glue drops already placed onto the blocks).
[…] I was building the HMS Hood, I could compare her design to that of the Bismarck that was the model I just built just before this. Although she had those big main guns, the Hood was not well equipped with a […]