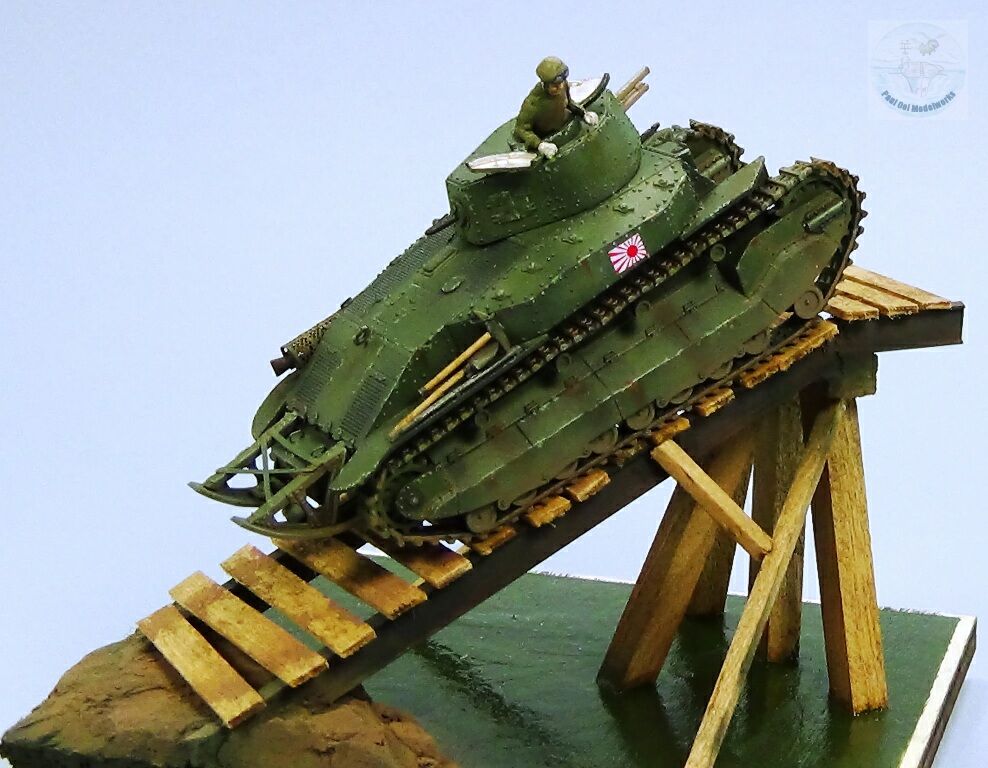
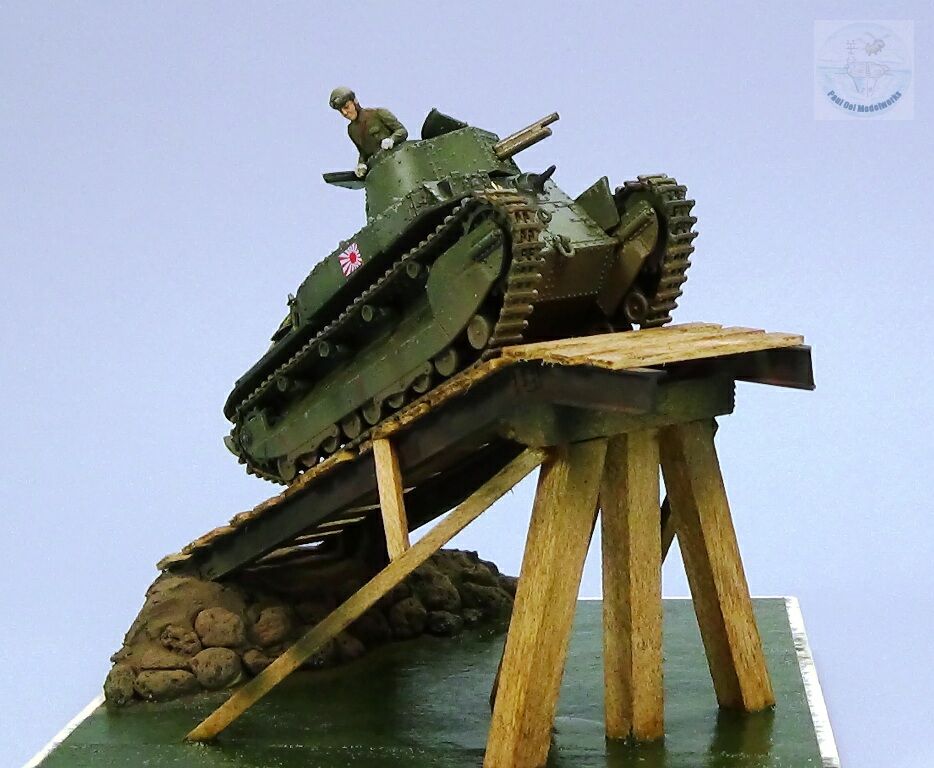
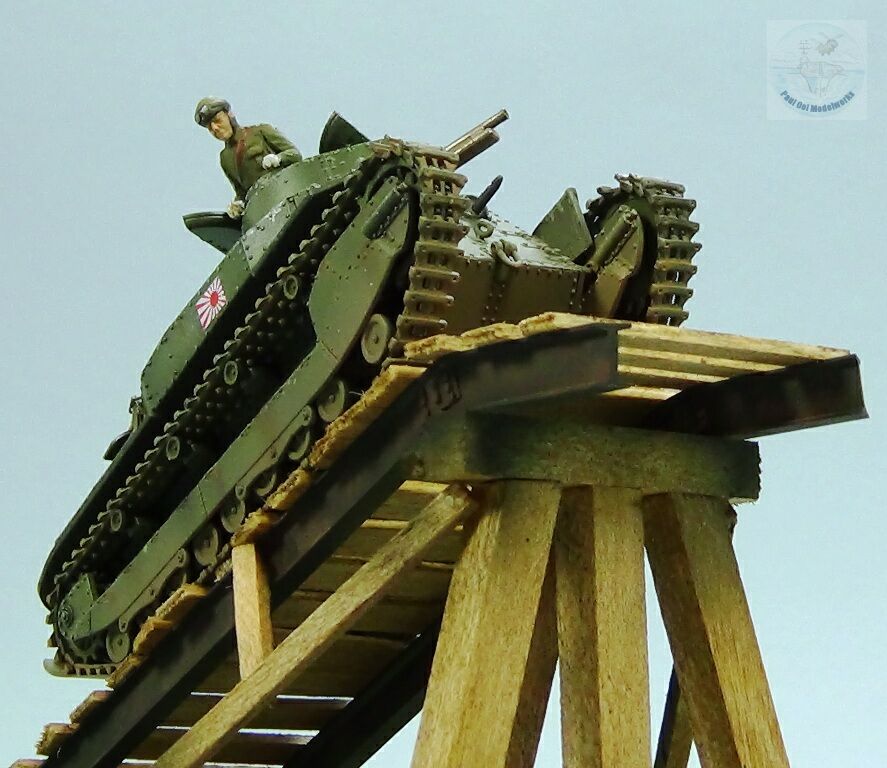
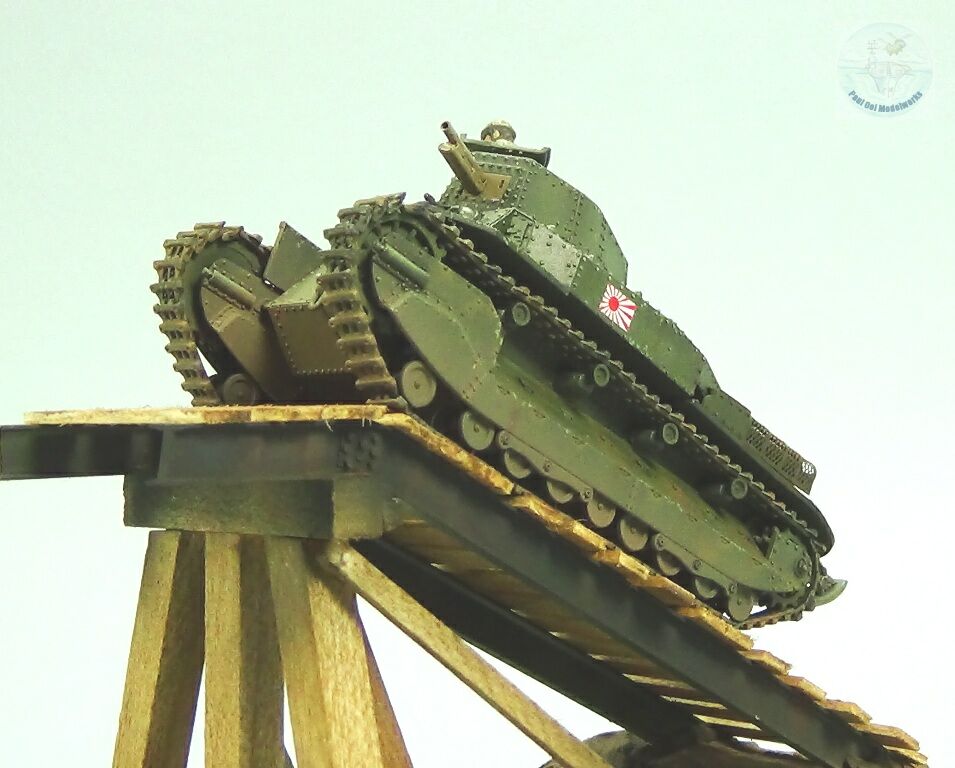
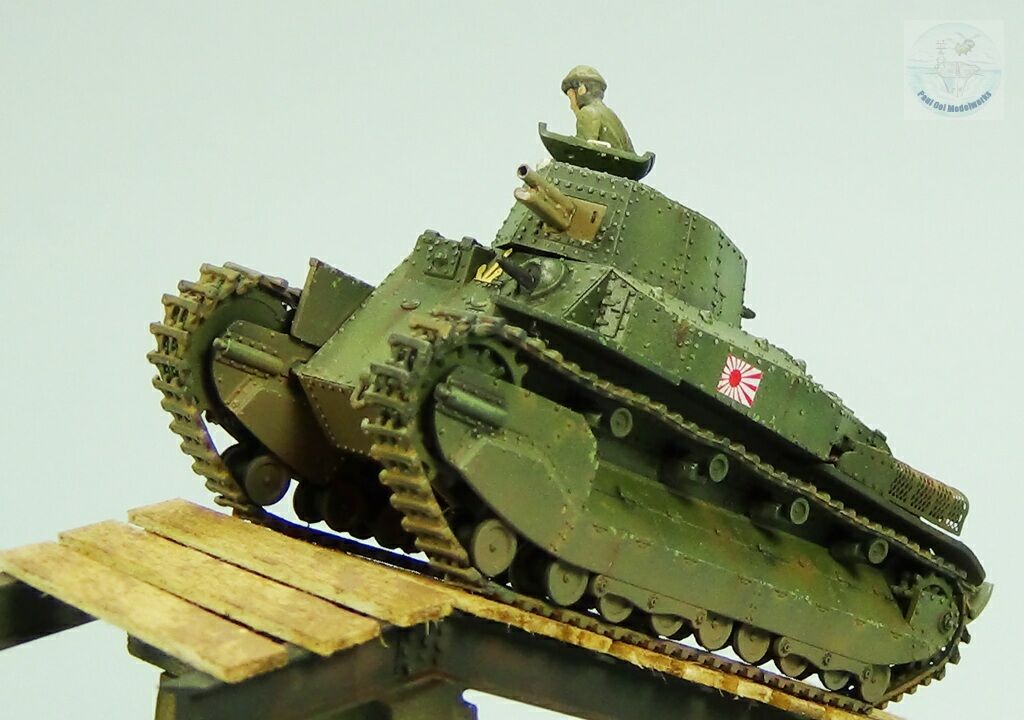
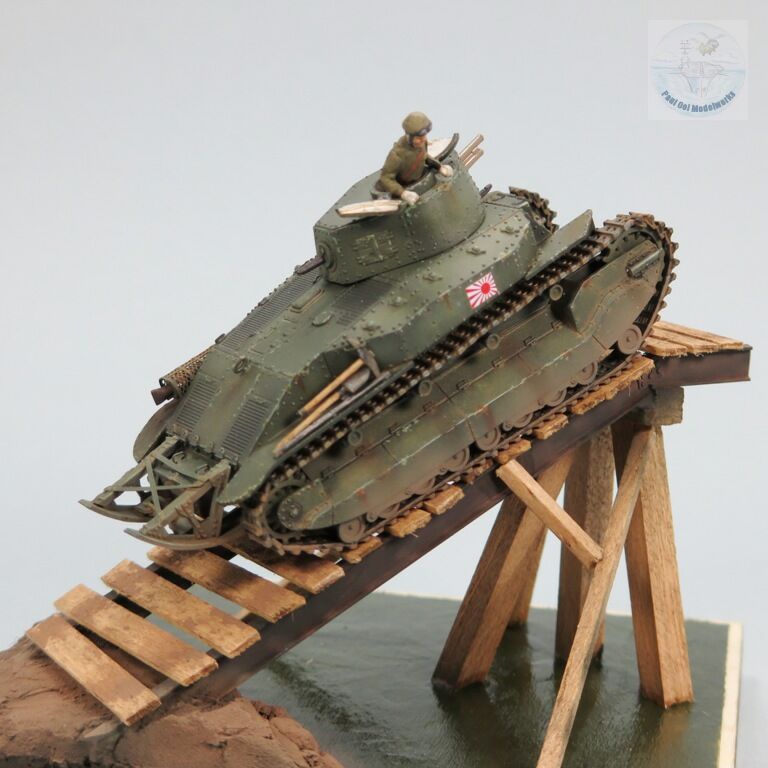
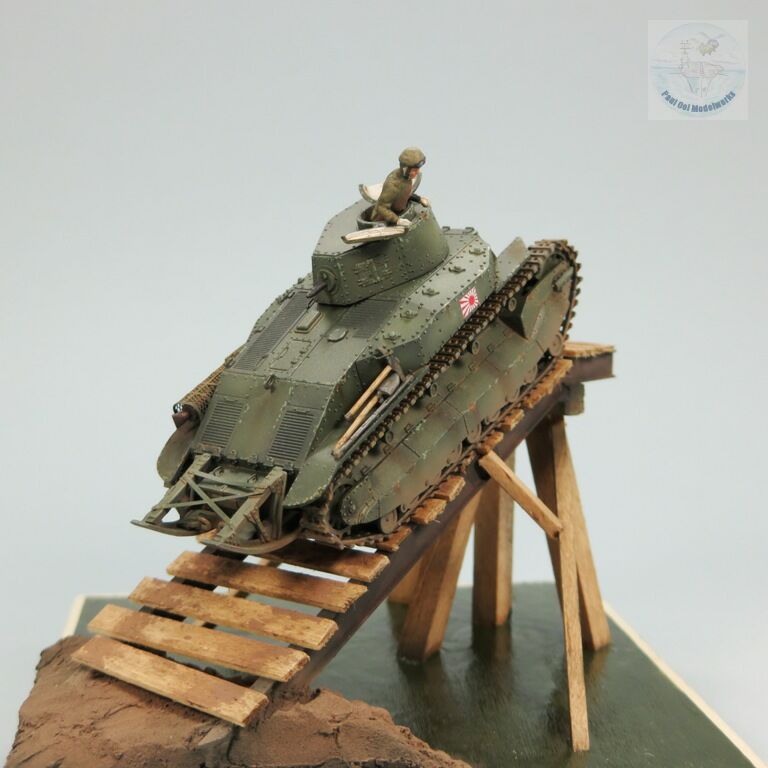
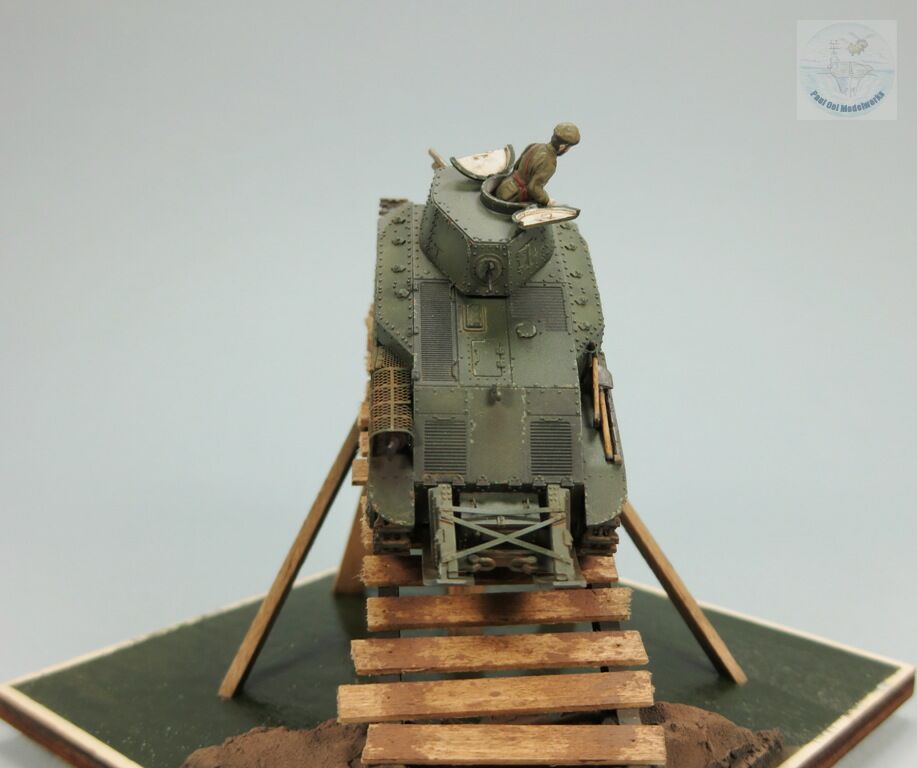
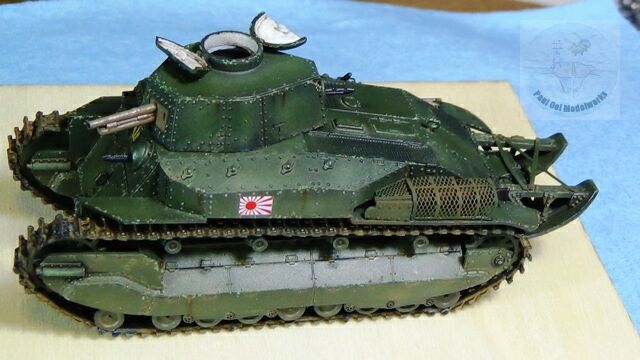
The Second Sino-Japanese War was actually the beginning of WW2 in Asia involving more Japanese troops than the rest of the Pacific War combined. A major battle for the city of Shanghai was fought in from August until November 1937 that resulted in large Japanese casualties and even larger Chinese losses. The Japanese assaulted Shanghai with Naval units, equipped with tanks landed along the Jiangsu coast. In the course of their advance, the armored units encountered many small and large crossings at the Yangtze River delta and had to use repaired bridges to get their units across. This diorama shows the late model Type 89 Medium Tank operated by the Imperial Navy precariously crossing a repaired railway bridge across a Chinese creek. The tank was developed in the 1920’s based off the concept of the Renault FT (the arrangement bears a strong resemblance) and was Japan first domestically produced tank. This tank was equipped with a 57mm short-barreled gun for tackling fortifications but did not do well against other tanks as demonstrated in the fight with the Soviets at Kalkhin-Gol in 1939. There is a Chinese Vickers tank counterpart to this project.
Gallery


Construction Notes
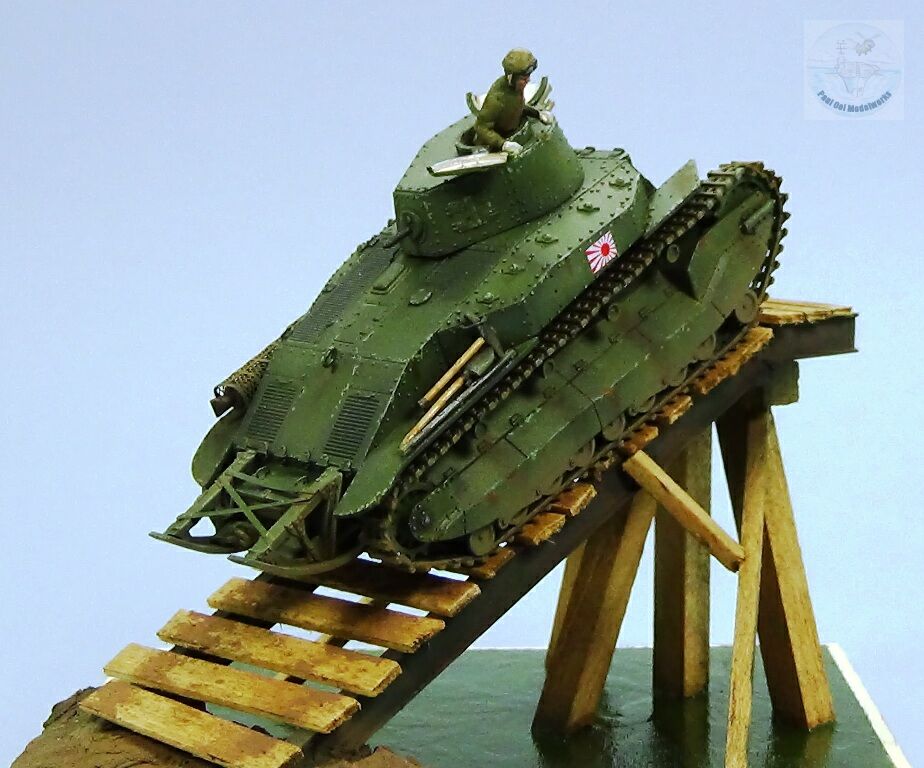
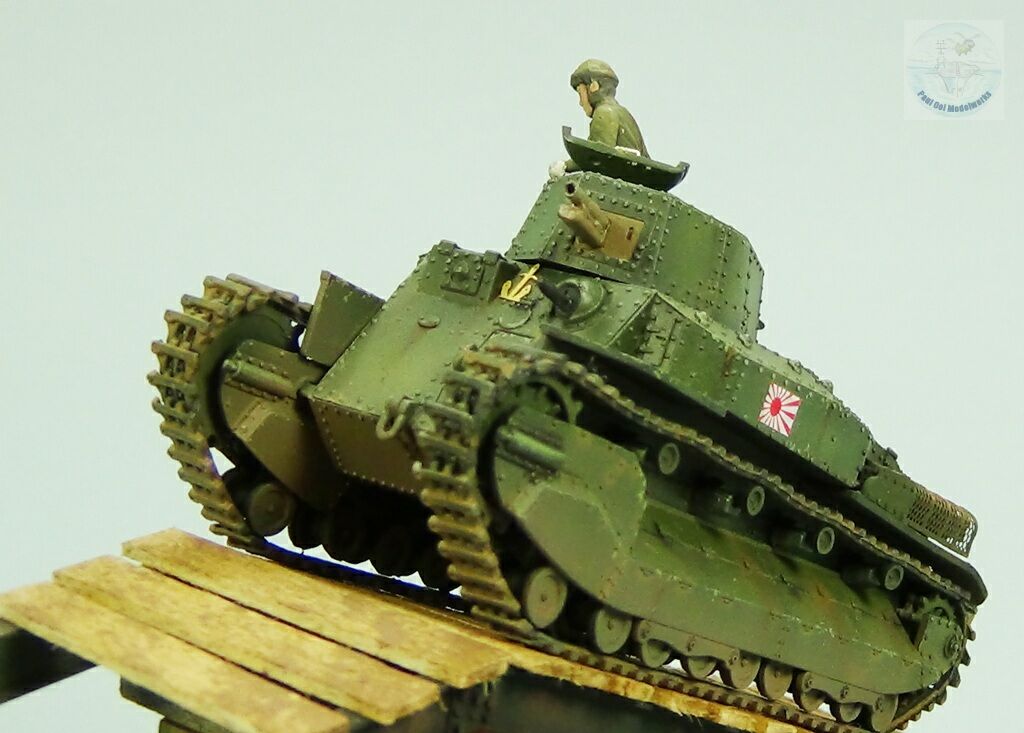
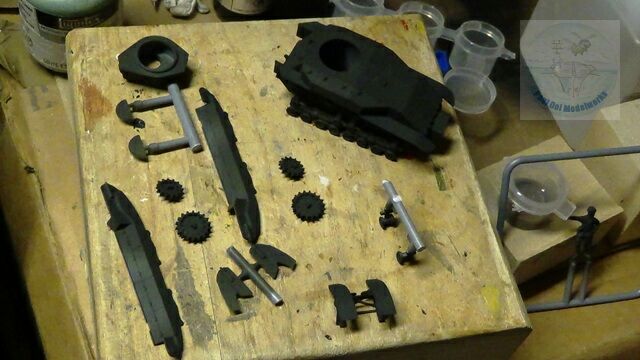
I picked up this 1/72 scale IBG Models kit in Osaka’s Yodobashi Camera store. This kit is very nicely molded and comes with a photoetch fret for the muffler cover and a few other sundry parts. The box art and painting guide was for a vehicle used in Luzon (curiously with a white star marking, sure to be confusing when fighting US troops there). I decided that I wanted to do something different and found the references for an Imperial Navy tank used in the 1937 Shanghai campaign. The basic color was Japanese Army green but I had a field day creating shades and tones to weather the tank after several weeks of fighting in the humid environment of the Yangtze River delta. I saw a photograph of such a tank (albeit in Japanese Army camouflage) crossing a pretty steep ersatz bridge during the battle of Shanghai and used this as an inspiration to build the bridge as part of the display. The fit of the plastic parts are very well done with no need for filler at all. The tracks are in separate sections, with the individual track links wrapping around the front and rear sprockets.
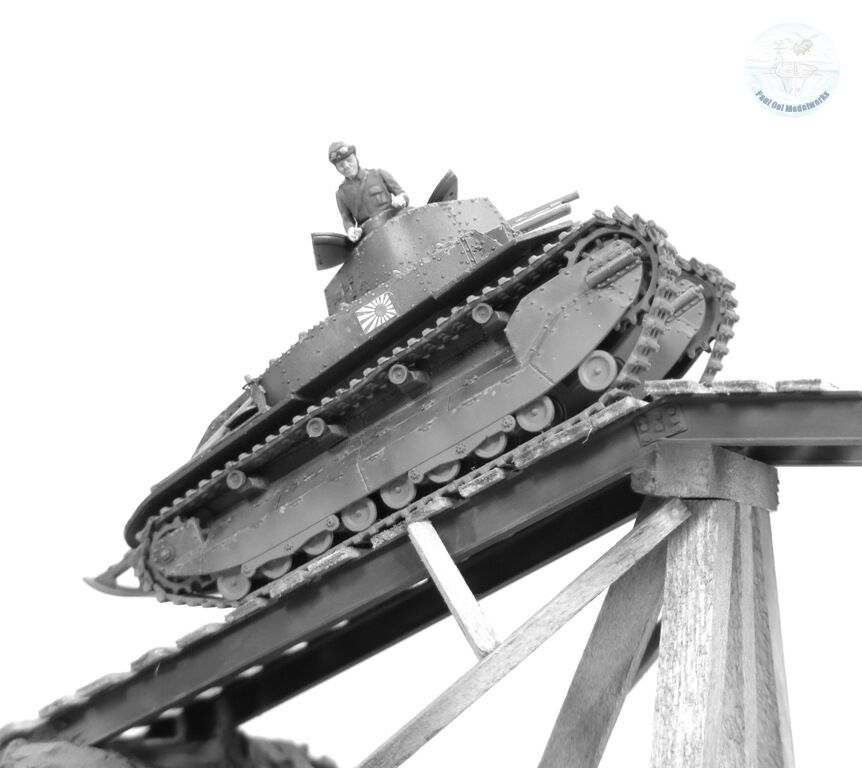
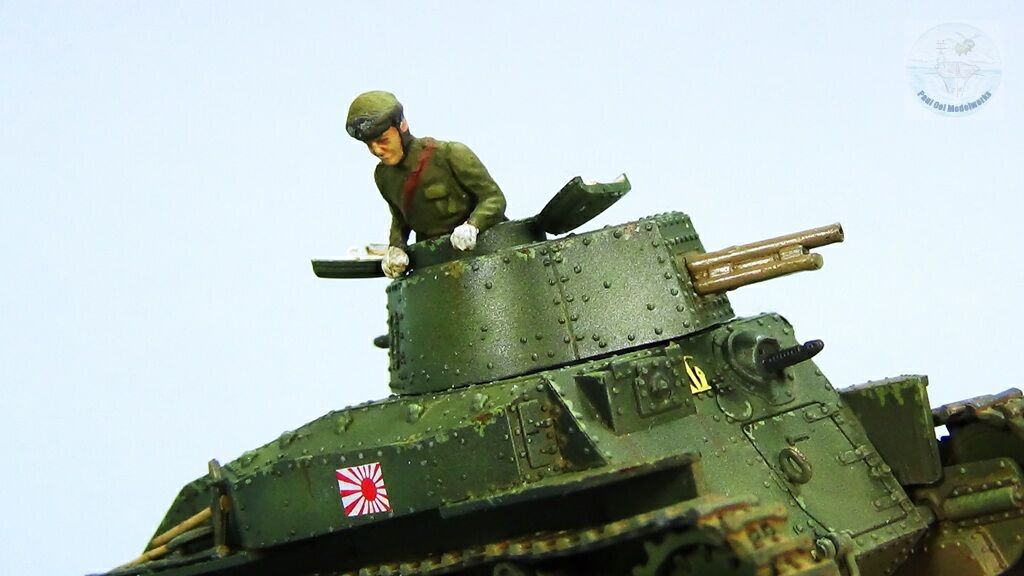
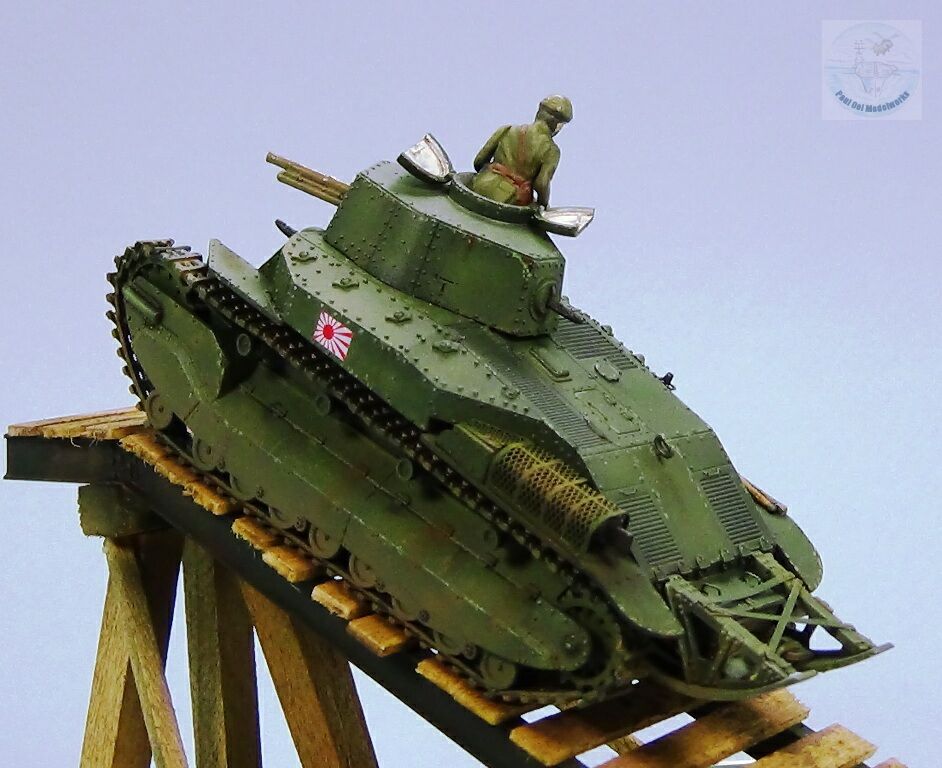
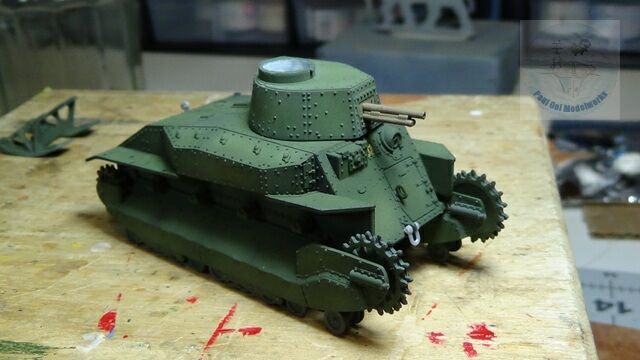
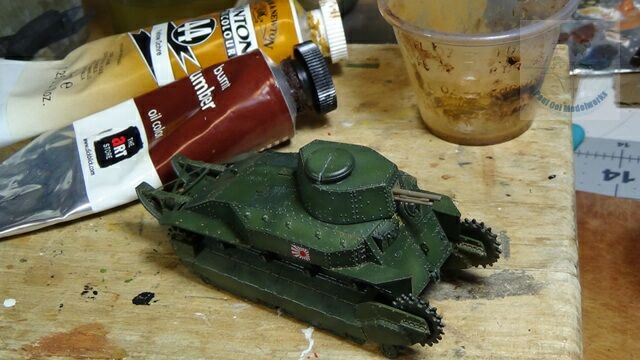
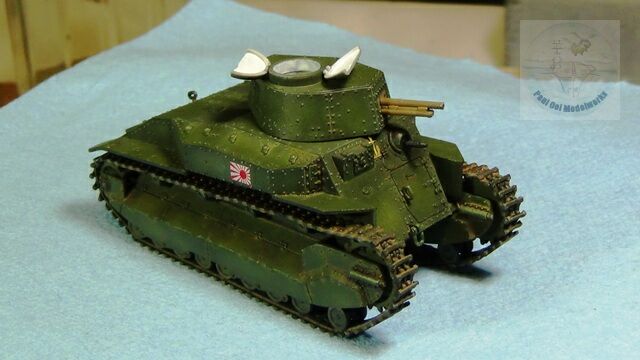
Since I am making the Navy version of this tank, I had do shave away the star on the front glacis section, and replace it with a small brass anchor that I happen to keep in my 1/700 scale ship photo etch parts.
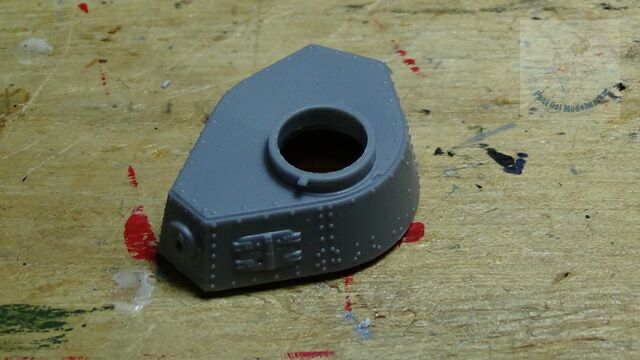
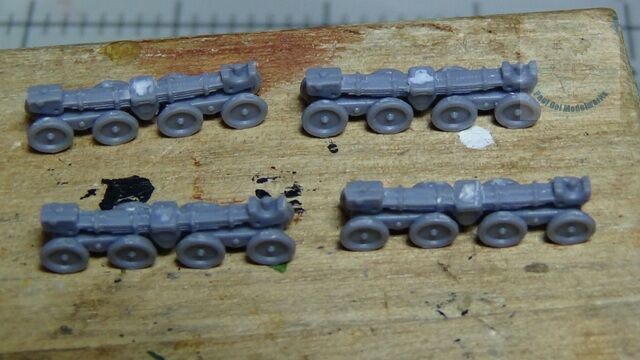
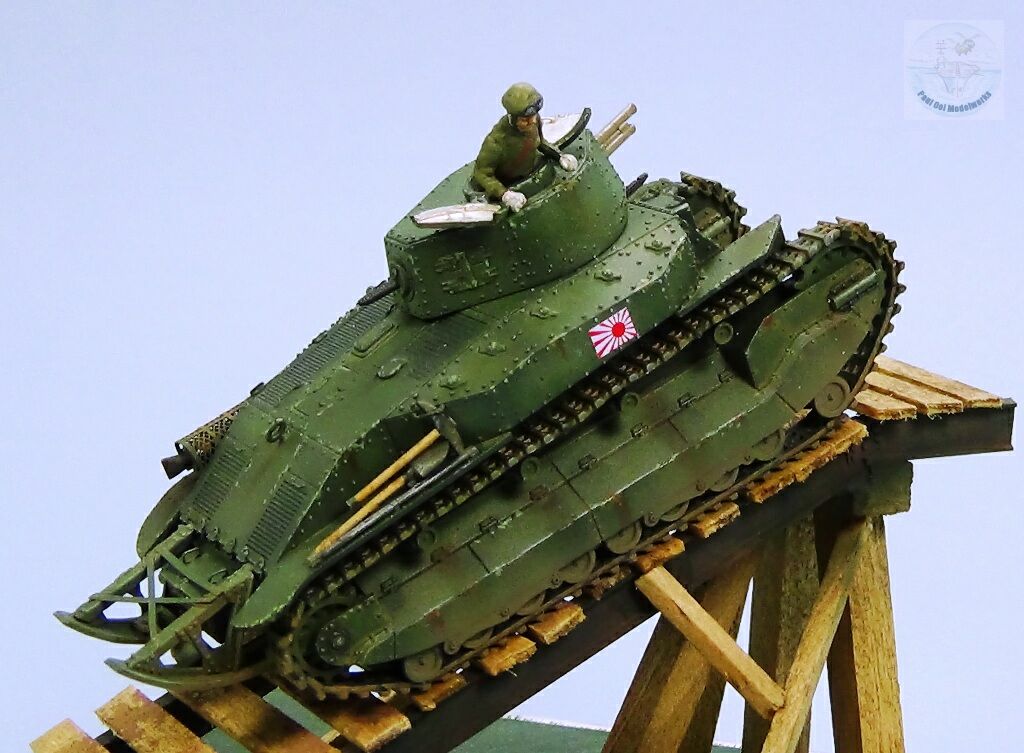
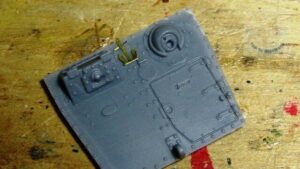
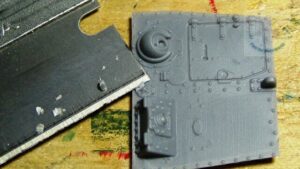
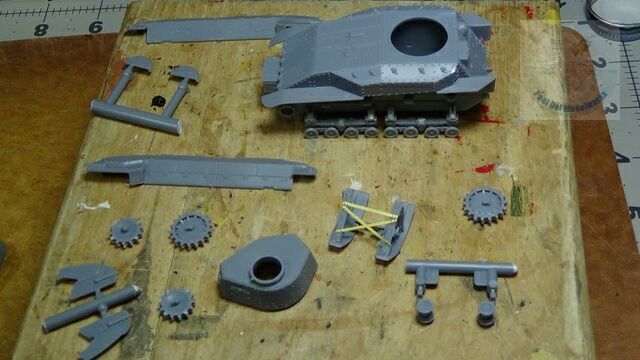
The individual main sections fitted together easily. I made the main hull, turret, road wheel assembly, and the rear skid rack.
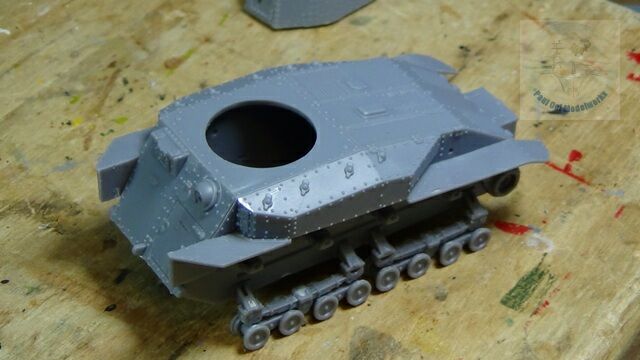
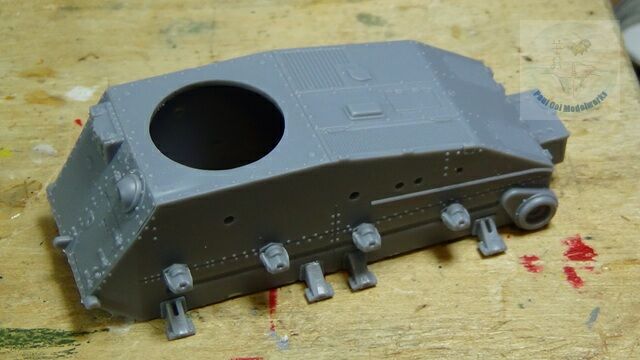
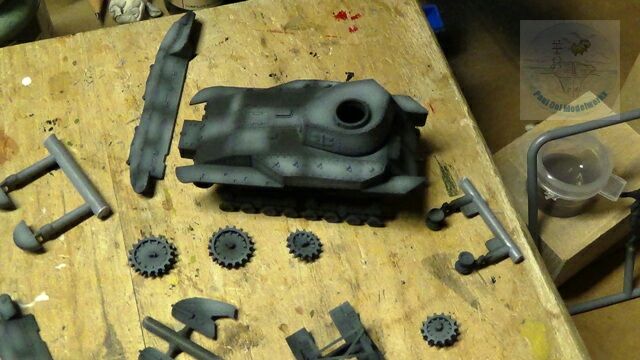
The side stowage compartments and wheel guards are added to the main hull.
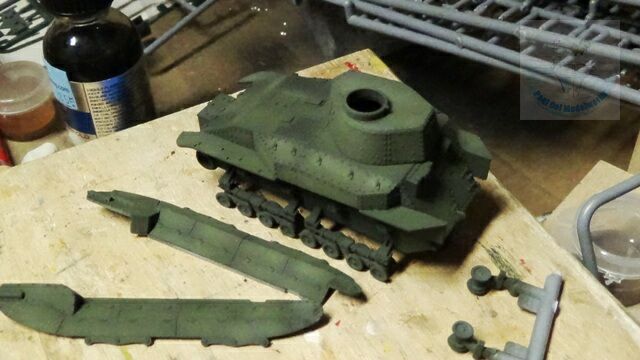
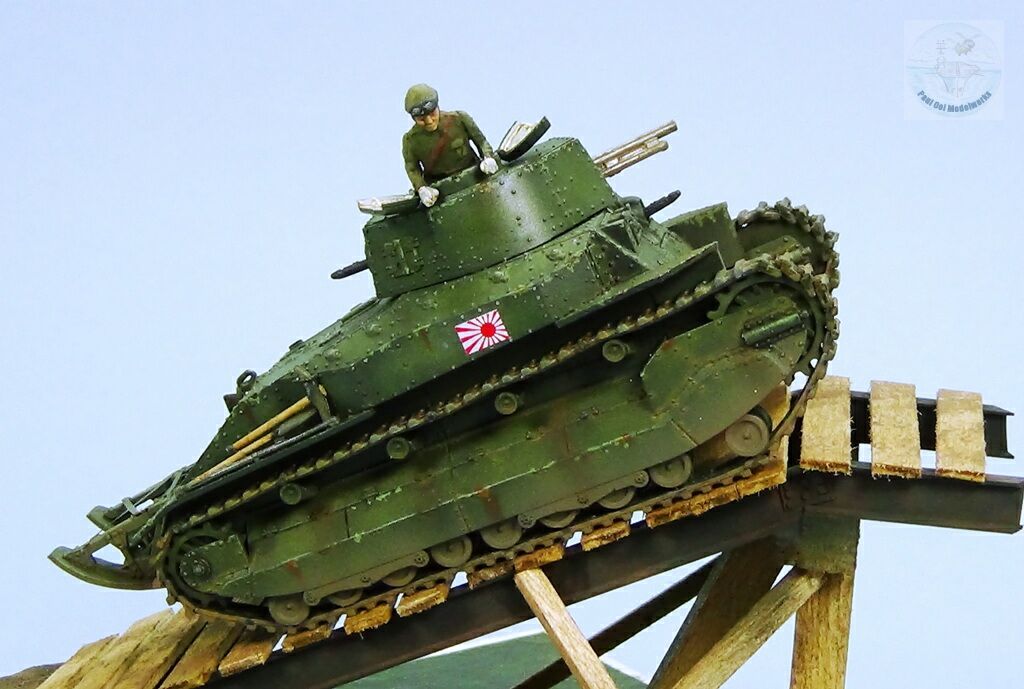
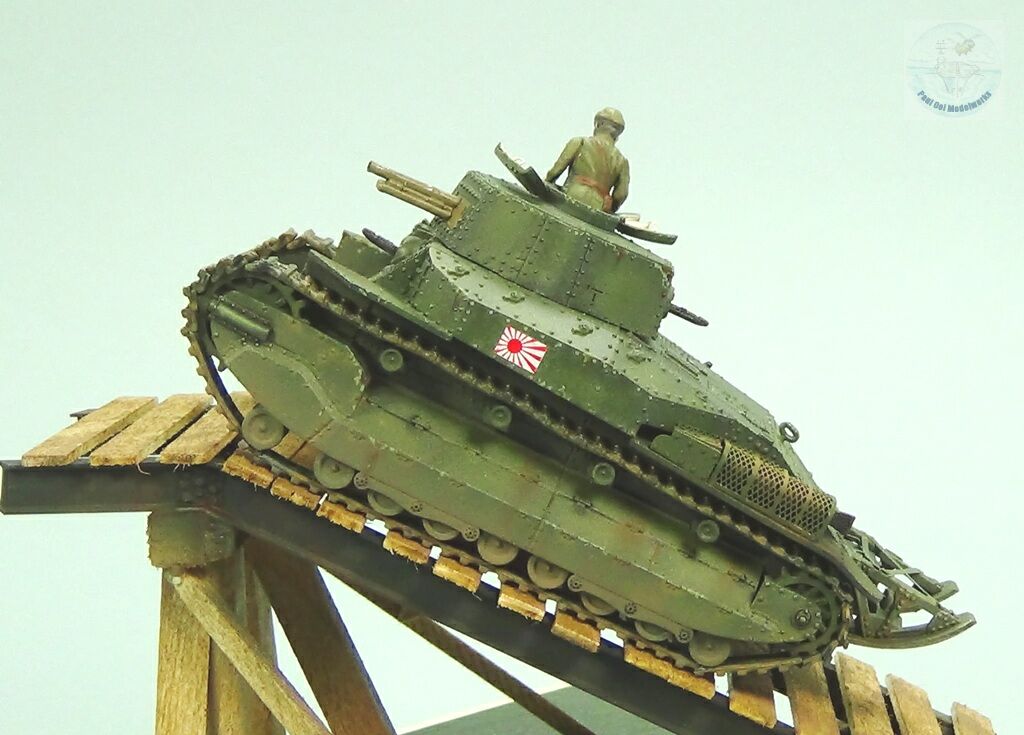
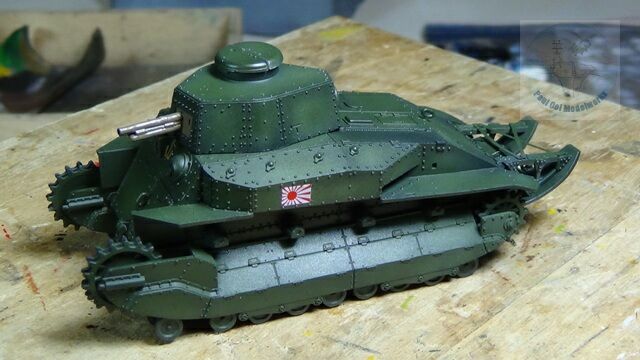
Painting goes with first all Tamiya XF69 NATO Black. then highlighting shade using Tamiya XF2 White, and then a uniform XF13 Japanese Army Green.
After the paint has dried, I fitted the road wheel shield and sprockets to the hull. The main gun is added, and hand-painted with Tamiya Khaki XF-49.
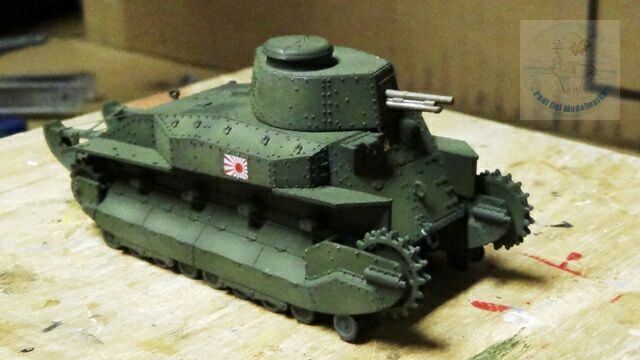
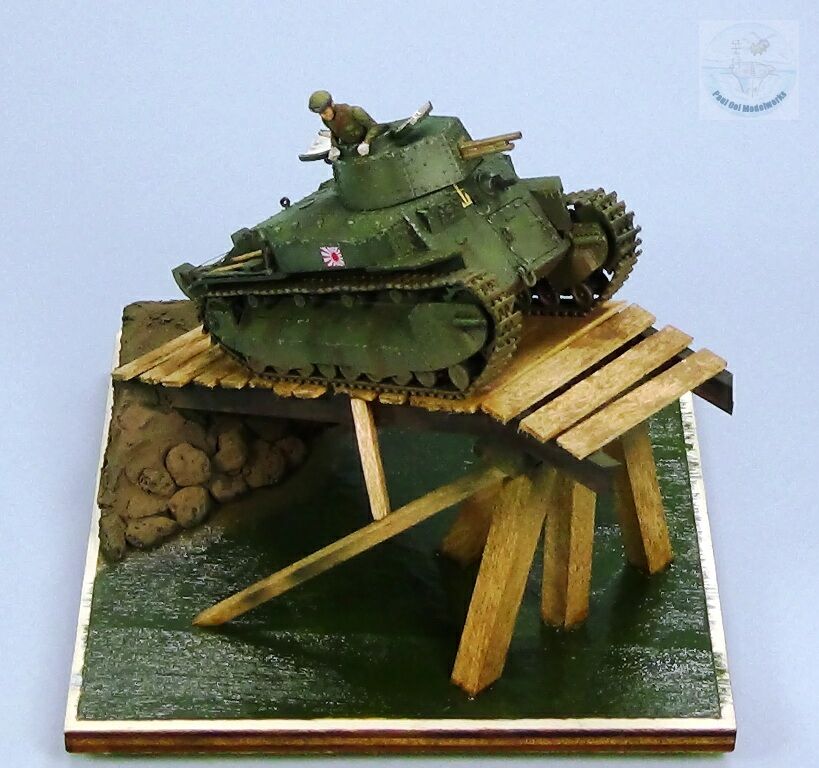
The two Naval ensign decals are applied to the hull (no vehicle numbers, based on historical pictures), and then given a protective overcoat of satin varnish.
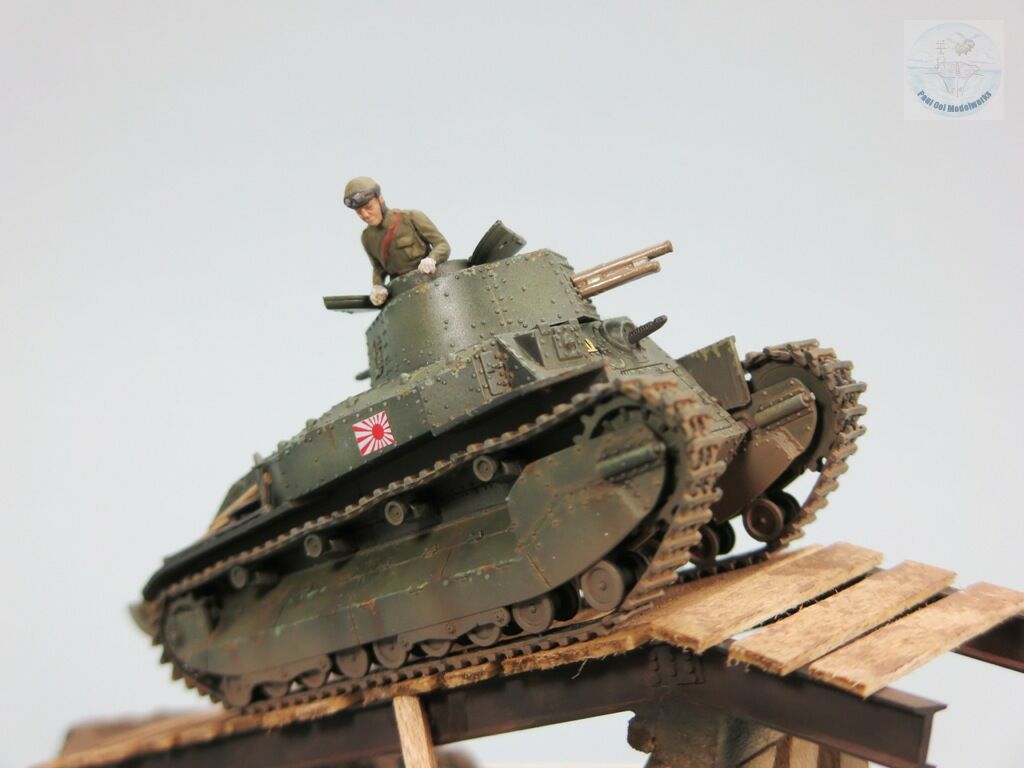
To give the vehicle that “rained on” look, I used an oil wash of 1:1 Yellow Ochre to Burnt Umber.
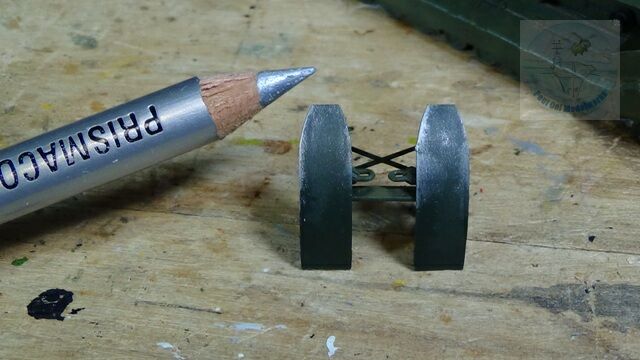
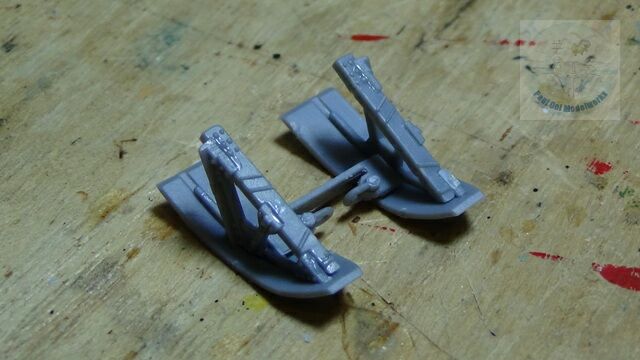
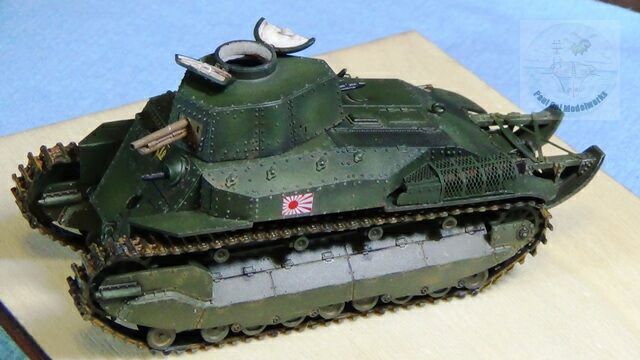
I give the ends of the rear skid that burnished steel look by apply Prisma Color Silver to the edges. The rest of the blades were later sprayed with a light mist of Dark Earth together with the rest of the tank’s undersides.
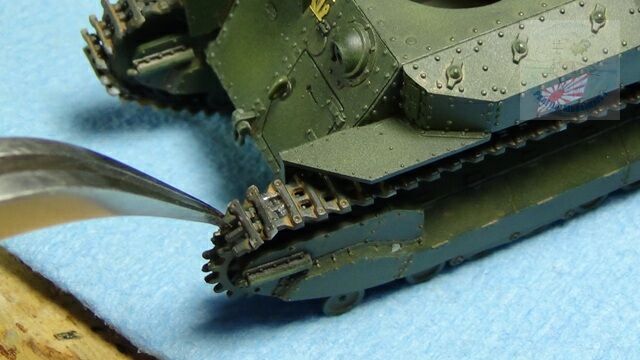
The tracks were first sprayed with Tamiya NATO Black and then given the same Yellow Ochre/Burnt Umber Wash. Then the highlights are made using Prisma Color Silver pencil. The tracks are applied carefully, especially where the individual tracks have to interlock with the sprocket gear teeth. A pin wash of 1:1 Burnt Umber/Ivory Black is also applied to mechanical areas to highlight the detail and simulate oil stains.
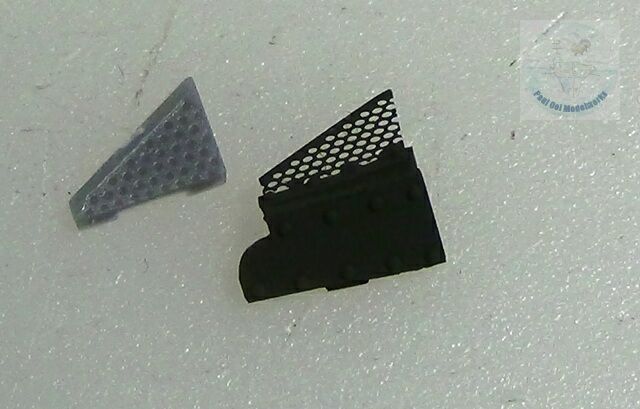
The exhaust guard and muffler assembly is done, first by replacing some of the kit parts with photoetched mesh (the main mesh is supplied but the little triangular piece is not). The muffler is painted in burnt iron.
Paint chips and rusted sections are now applied by a fine brush. First I paint on light green chipped paint (Tamiya Cockpit Green XF 71) near areas of maintenance and also high traffic areas. Then I paint rust patches using varying shades of Burnt Sienna and Burnt Umber. Rust streaks are the same oil paints dragged down with a fine brush.
As a finishing touch to the vehicle, I apply soot and more rust stains using chalk pastel pigments.
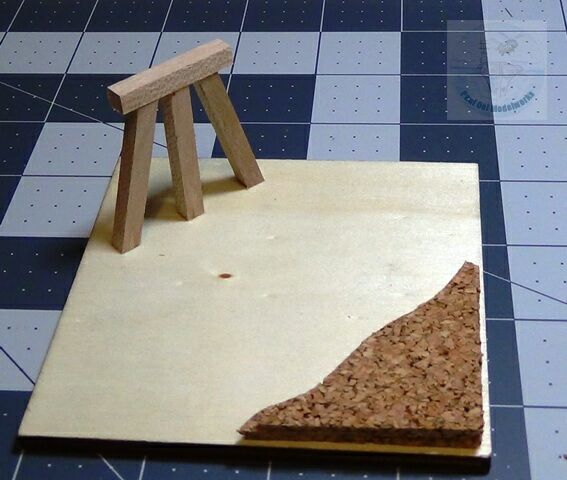
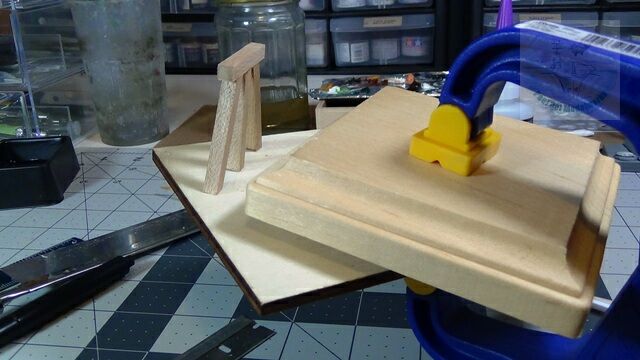
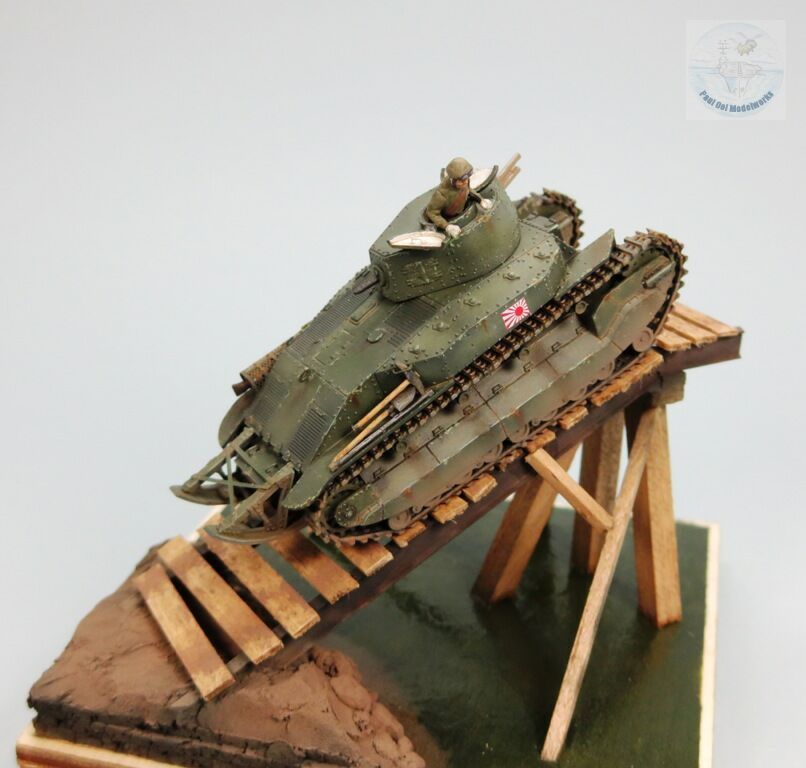
To make the bridge base, I start with two main structure. The shoreline is made by clamping together three layers of cork sheet cut in the shape of the approximate shore. The main bridge trestle is made with square bass wood sections.
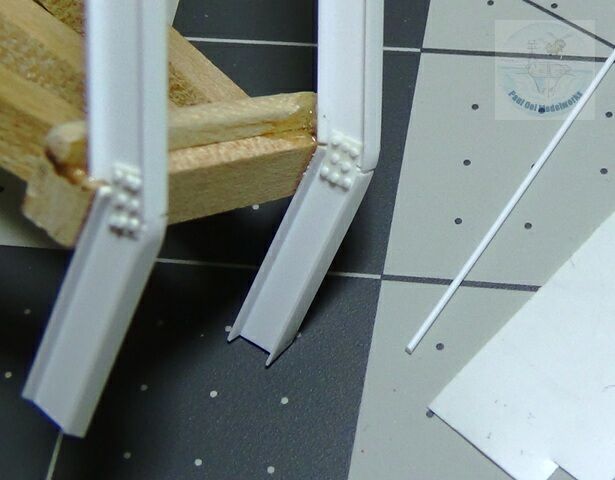
The steel girders for the bridge section are made from Plastruct I-beams plastic stock (available at the architectural section of some hobby stores). When joining the I-beams, as in real life, I make gusset plates and rivets using think plastic sheet stock, and rivet heads using thinly sliced circular rods.
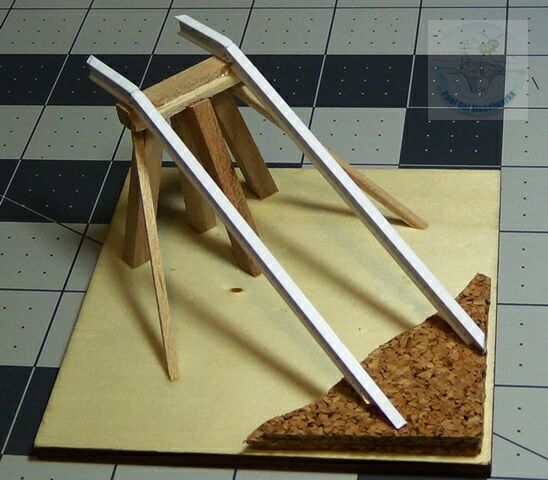
After positioning the main bridge members carefully, we are ready to paint the base.
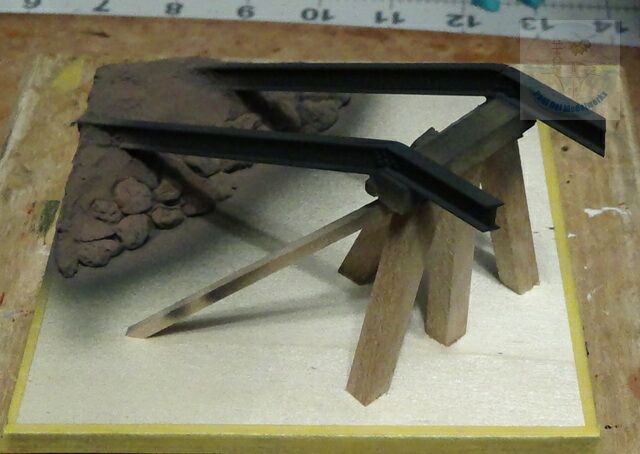
The shore area is coated over with plaster to cover the cork layers and blend the I-beam sections into the ground. I insert railway large talus as embankment rocks. I undercoat the bridge and the shore with NATO Black, and then highlight the soil with Tamiya Dark Earth. The river is undercoated with Tamiya JA Green. All bridge wooden parts are stained with Burnt Umber wash.
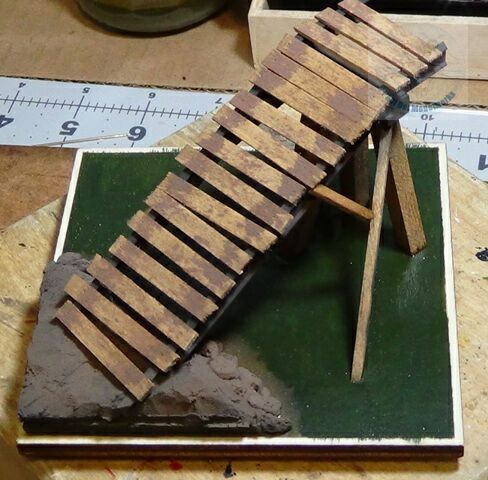
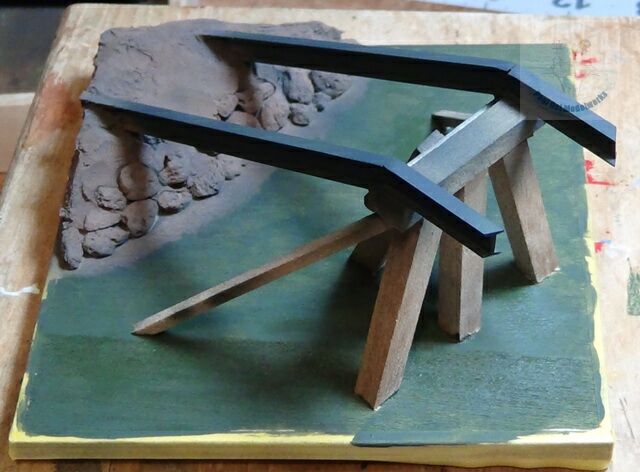
Poluyurethane varnish is used to provide the high gloss of the water surface. The bridge planks are hobby railway stock material, also stained with Burnt Umber, and then a “mud wash” of Raw Earth applied onto the planks.
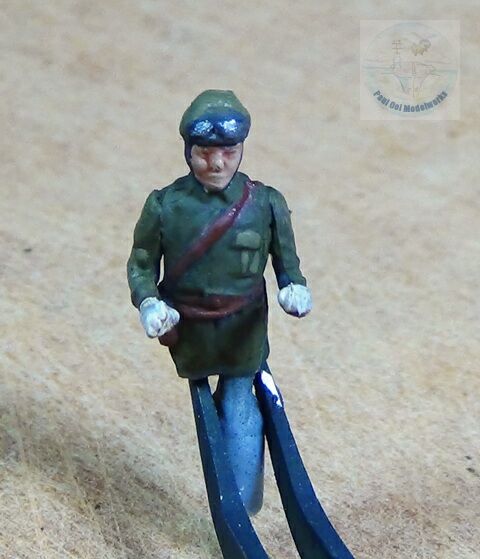
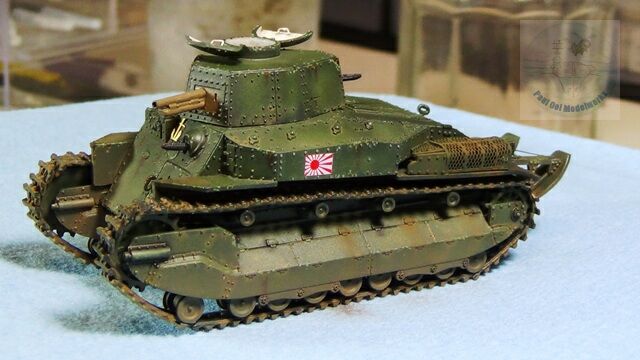
The Japanese tank commander figure is painted in Navy infantry uniform colors of a lightened olive drab (1:2 Deck Tan: Olive Drab), Khaki Drab helmet straps.
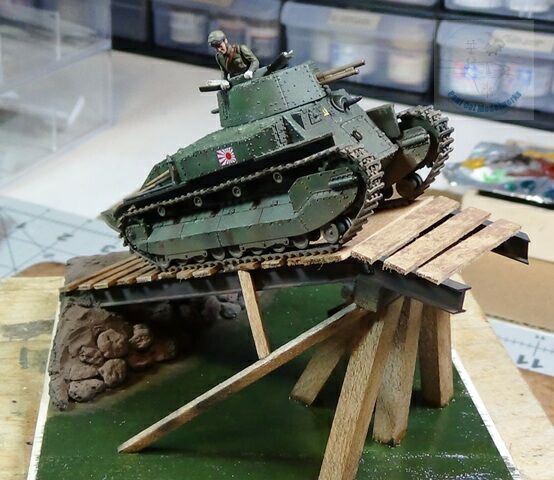
And the tank is attached to its base with the commander peering nervously over the side to check that his track are still on the bridge.
[…] against it until it was disabled by artillery fire. This project is a counterpart to the earlier Japanese Type 89 Otsu tank involved in the same […]