Almost 80 years ago, World War 2 in Asia actually started in China triggered by the Marco Polo Bridge incident. After the initial fight in Northern China around Beijing and Tianjin, a new front opened up in Shanghai in August 1937 when the Republic of China committed two elite divisions in an attempt to evict the occupying Japanese Naval troops from the city. The resulting fight became a three-month long bloodbath involving one million troops in house-to-house fighting. The tenacity of the Chinese defenders and the large number of Japanese casualties stunned the Japanese public. At one stage in the battle, the Chinese army deployed two tank battalions in an attempt to flush Japanese troops out of the much contested Hueishan docks. The Vickers 6-ton tank was the most advanced tank that the Chinese nationalist army had but they were sent in without infantry support and suffered 50% casualties in the ensuing street fight. The 47mm howitzer on the Vickers was actually quite effective against Japanese troop positions and the armored cars. A lone Lewis tank held a key road junction for a long while, taking out Japanese armored cars and infantry sent against it until it was disabled by artillery fire. This project is a counterpart to the earlier Japanese Type 89 Otsu tank involved in the same battle.
Gallery
Construction Notes
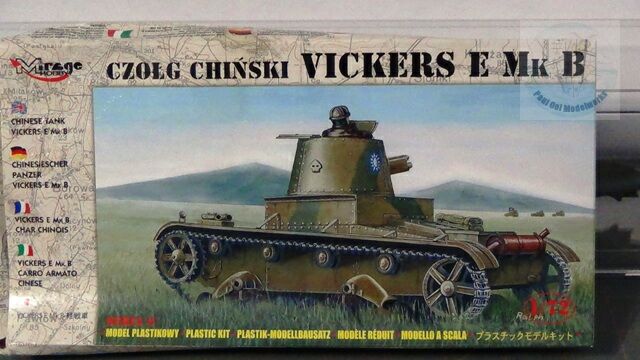
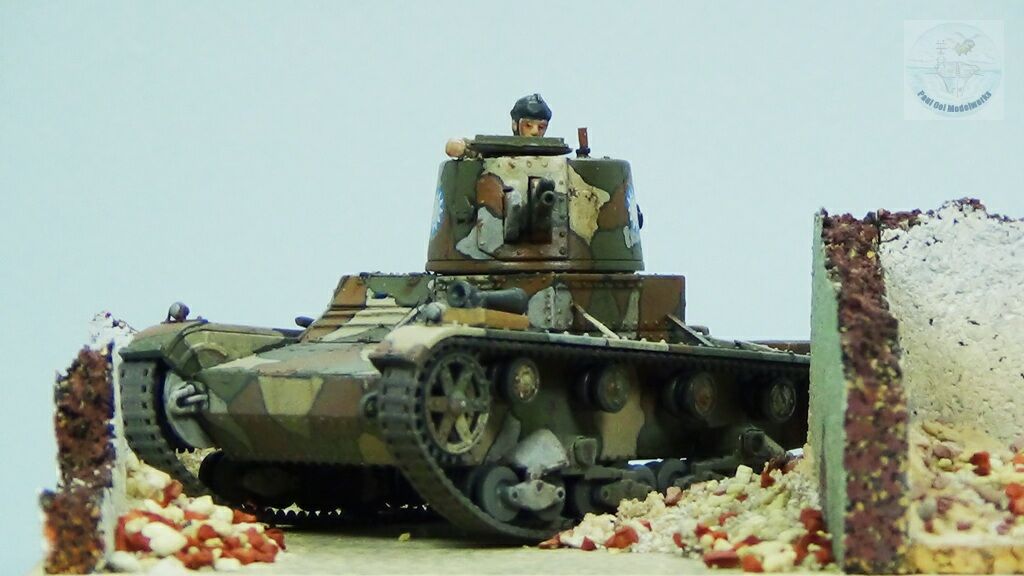
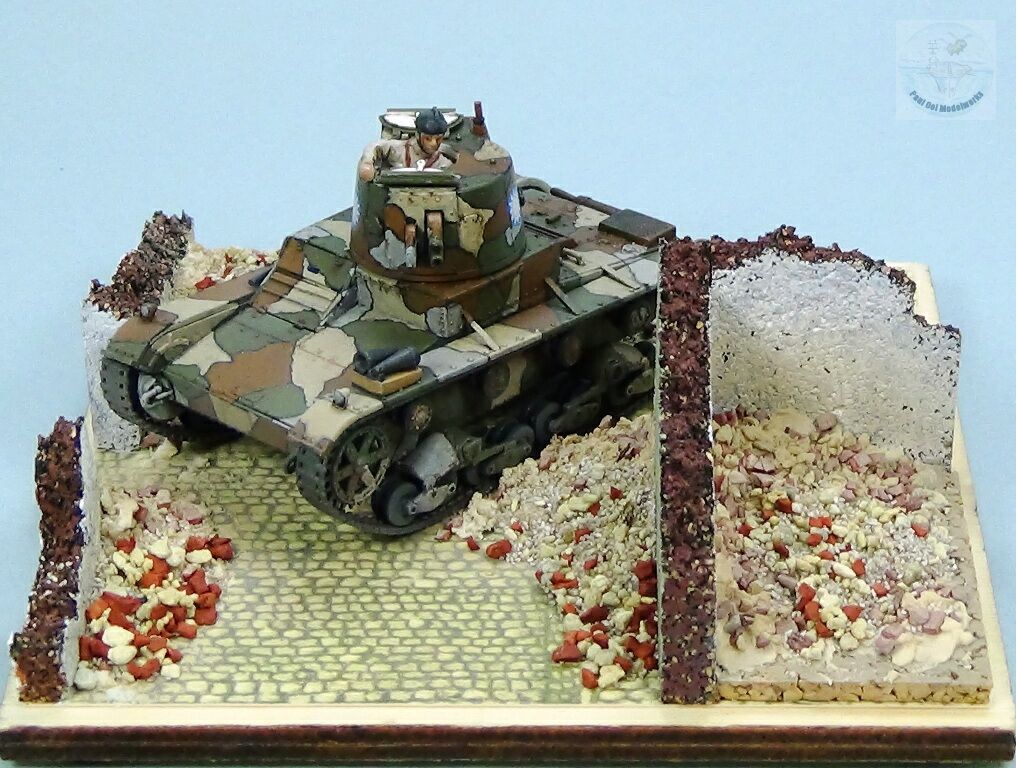
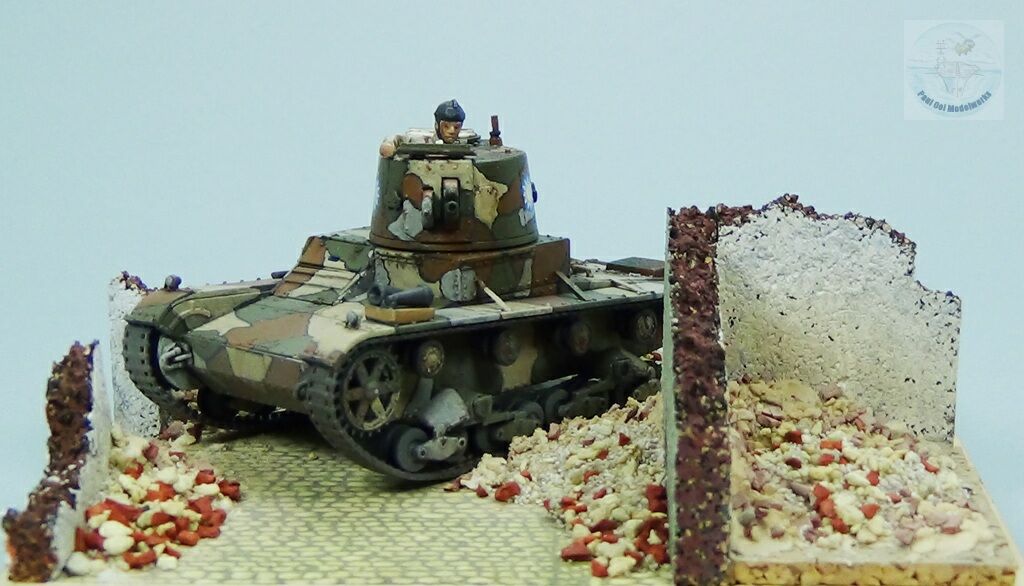
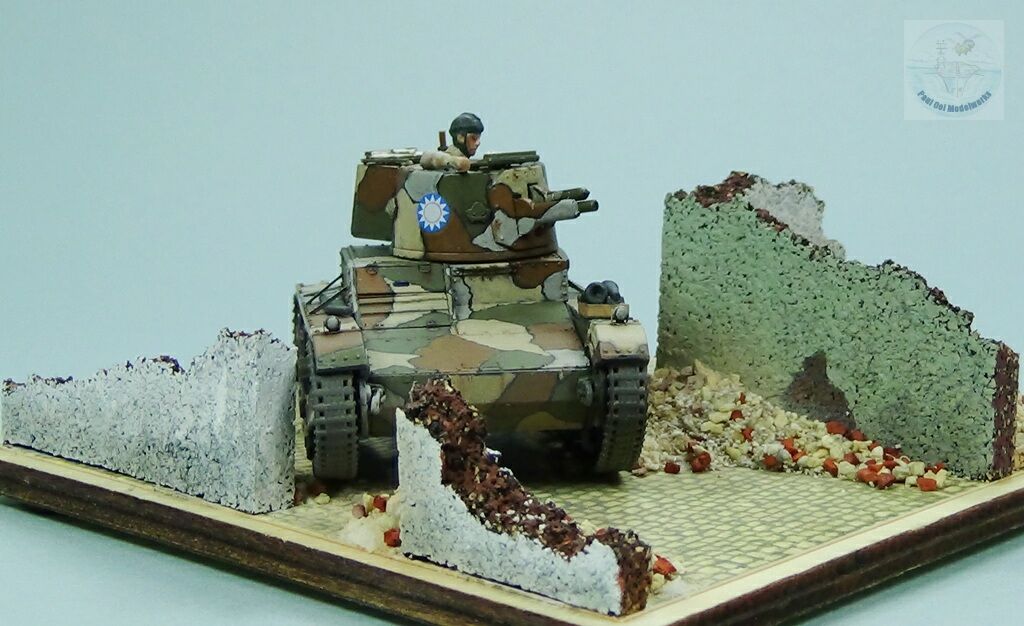
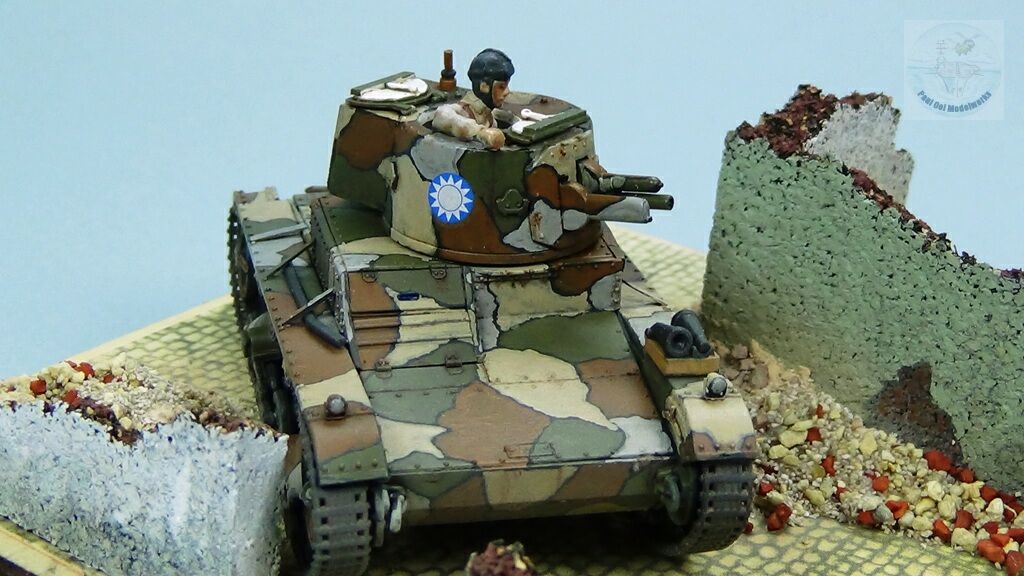
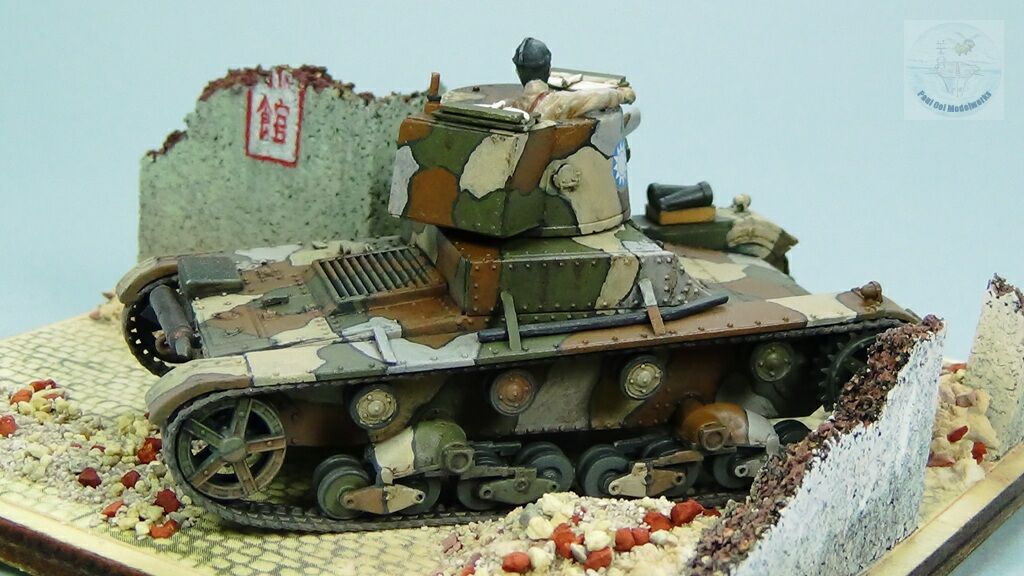
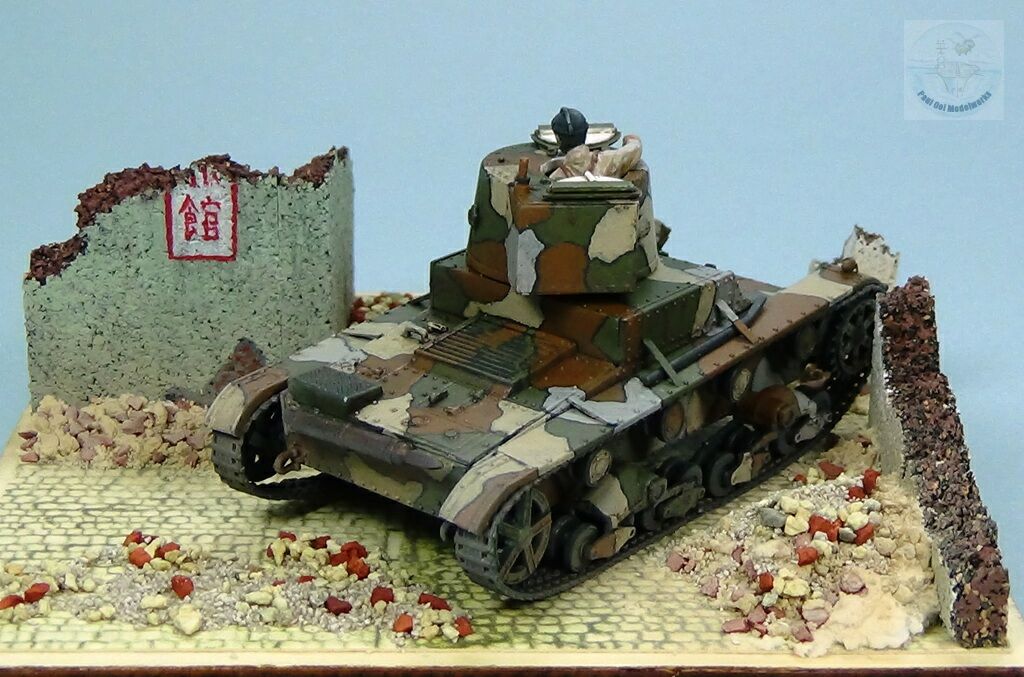
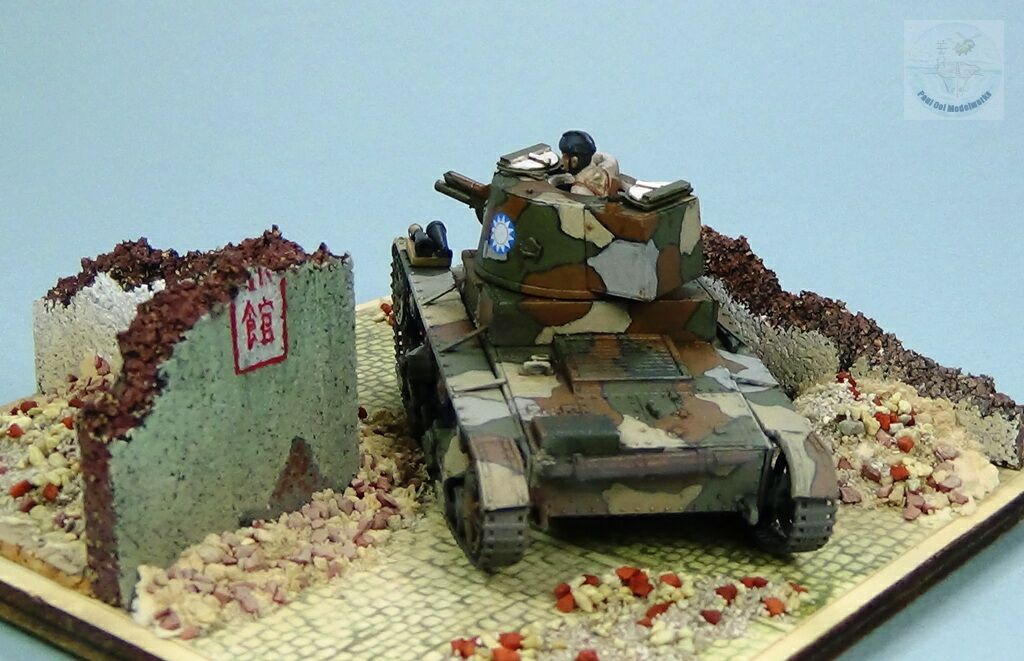
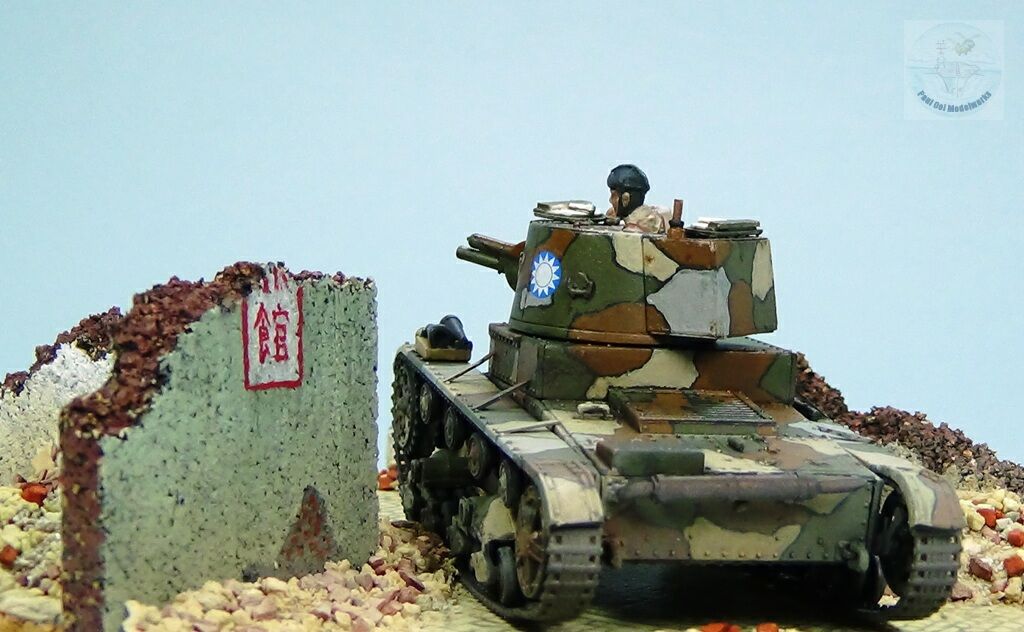
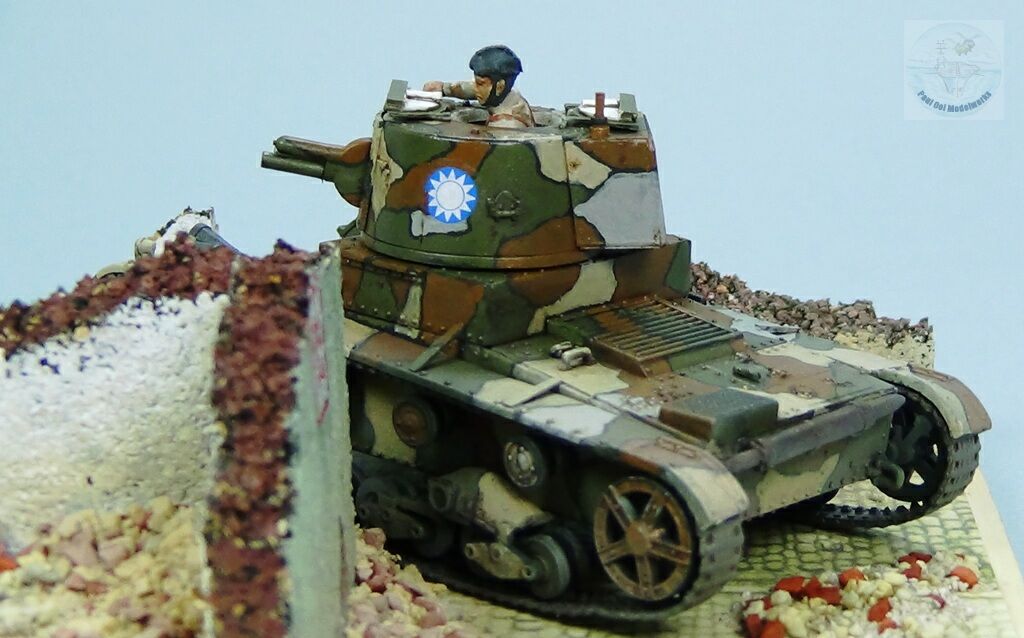
This 1/72 scale kit of the Vickers 6-ton E Mk B was issued by Mirage Hobbies of Poland with pretty good level of detail. I was inspired by a picture of a lone Chinese tank taking on several Japanese armored cars, but the tank shown had a Type F turret. I decided that I was going to do some scratch-building of the Type F turret. The kit flexible tracks were nicely detailed but fragile and cannot be stretched too much or it would break. The kit parts are nicely molded but there was some flash. Markings were provided for the Chinese and Finnish versions. Also , the painting guide for the Chinese tanks used in the Battle of Shanghai was incorrect, showing only three camouflage colors (brown, olive green, buff) when in fact there were four (the missing one was grey).
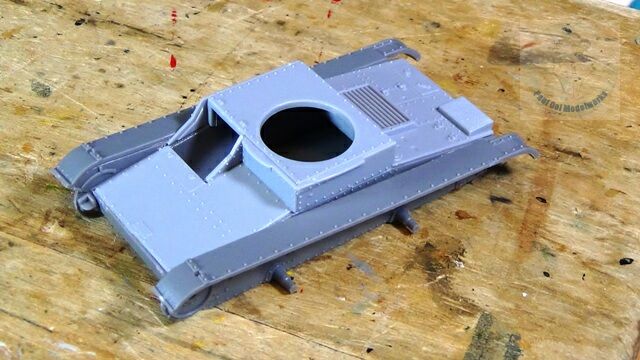
The hull was a small shallow box where one has to carefully make sure that the two main side walls are fitted perpendicular to the floor base or the idler wheels and sprocket would be out of alignment. Also, match the side wall panels of the upper hull carefully as the kit provides several other similar-looking panels for the twin turret version of this tank.
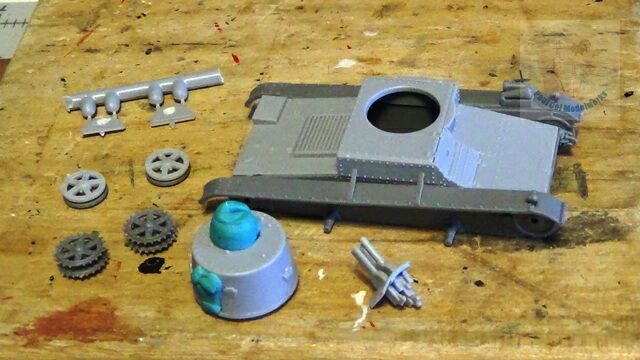
I assembled the turret, gun assembly and sprocket wheels in preparation for painting.
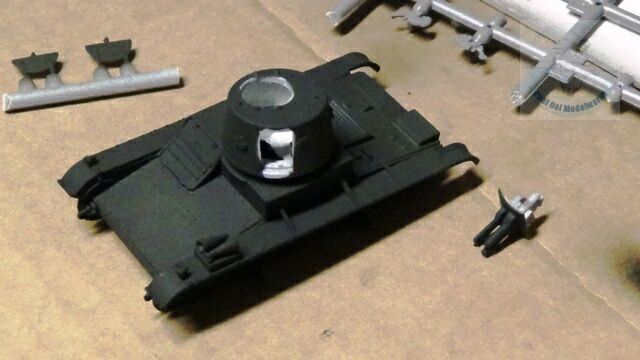
As per my normal practice, I undercoat the hull and main sub-assemblies in Tamiya NATO Black XF-69. This time, I did not lighten the panels with white as that effect cannot be seen in the dense camouflage pattern used for this model.
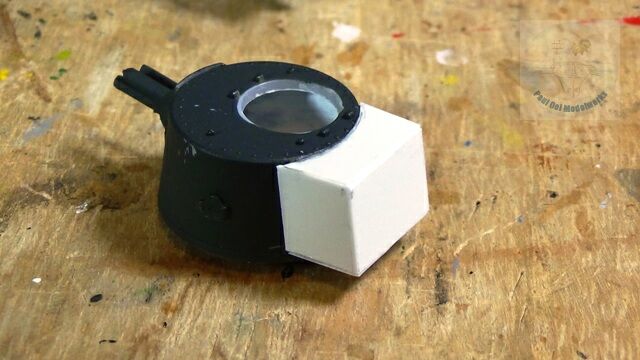
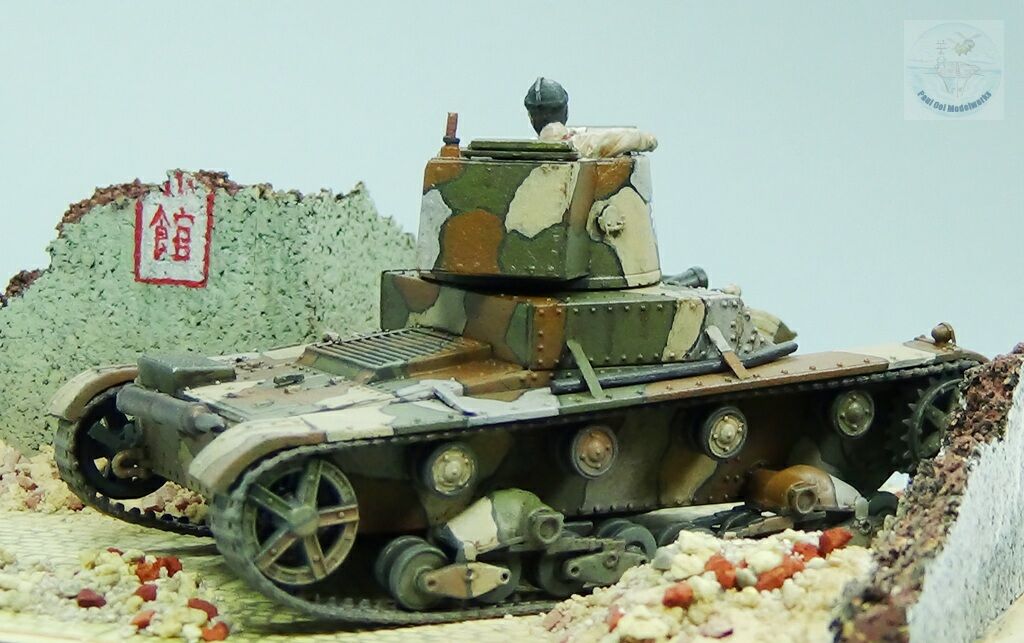
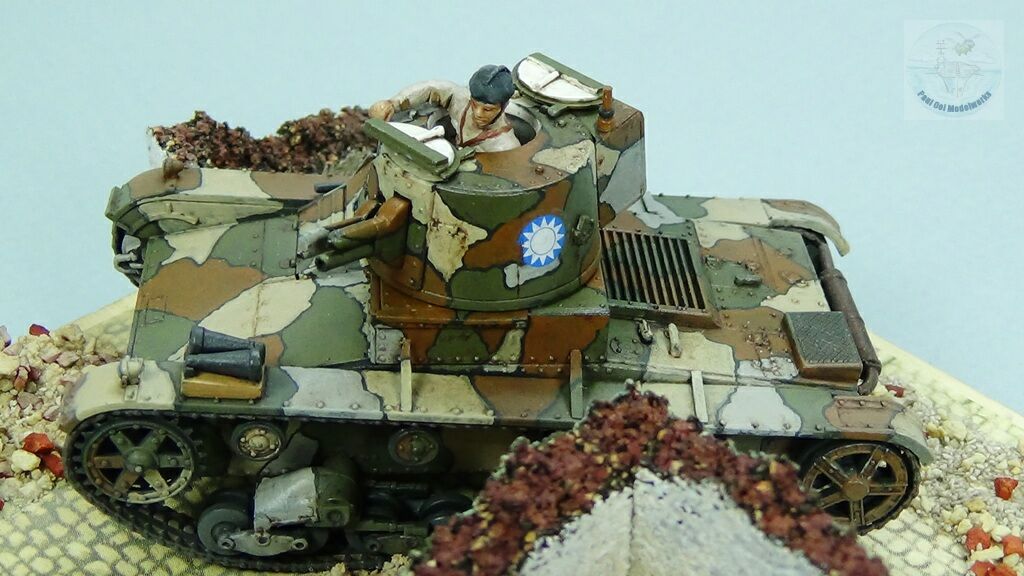
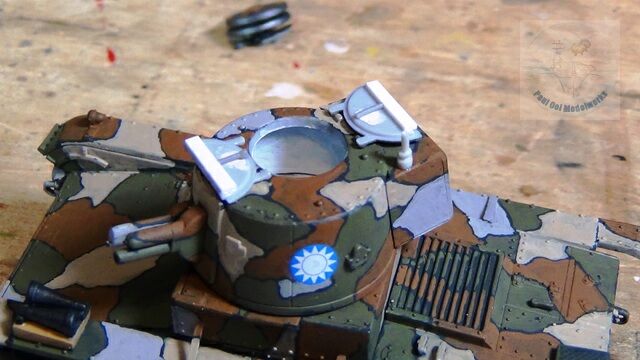
I constructed the type F turret compartment using plastic card stock, and checking the dimensions against known pictures for scale and positioning. Rivets were made using superglue blobs applied with a pin.
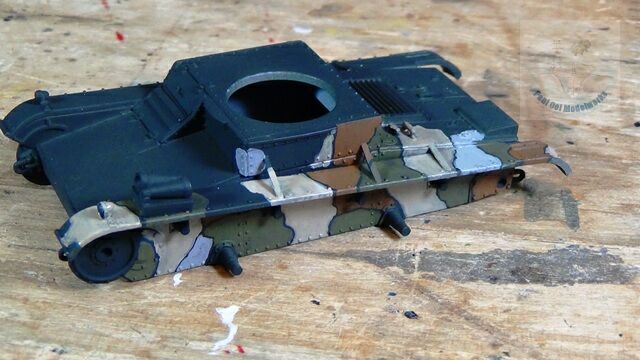
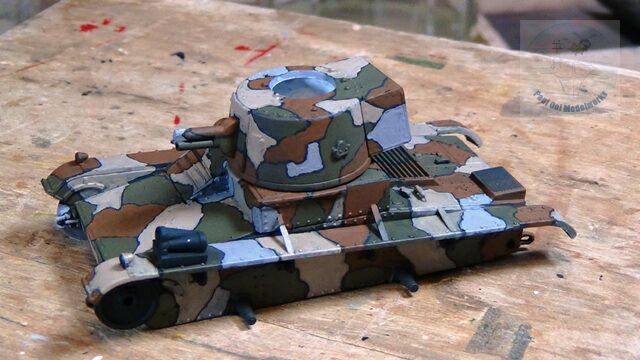
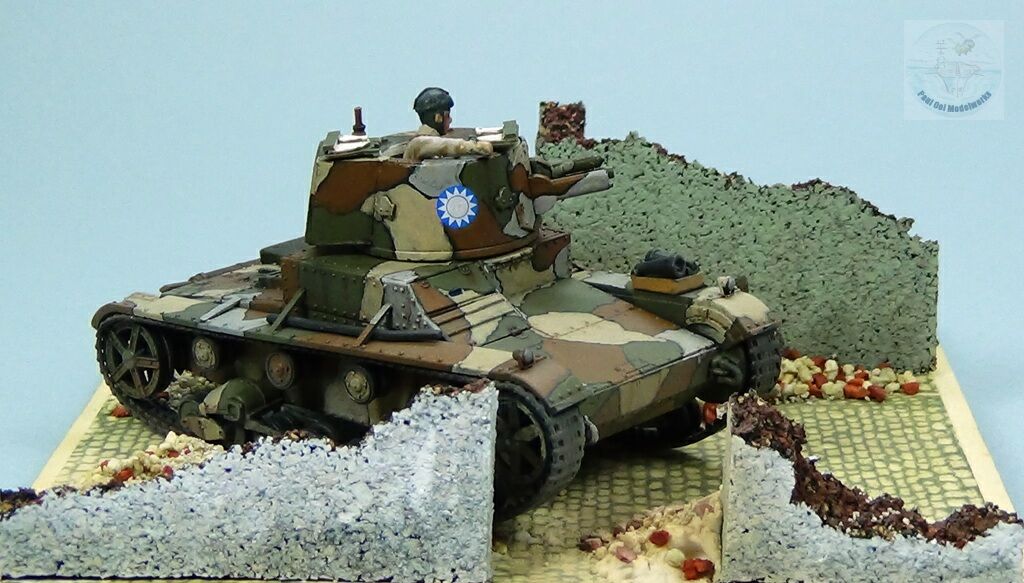
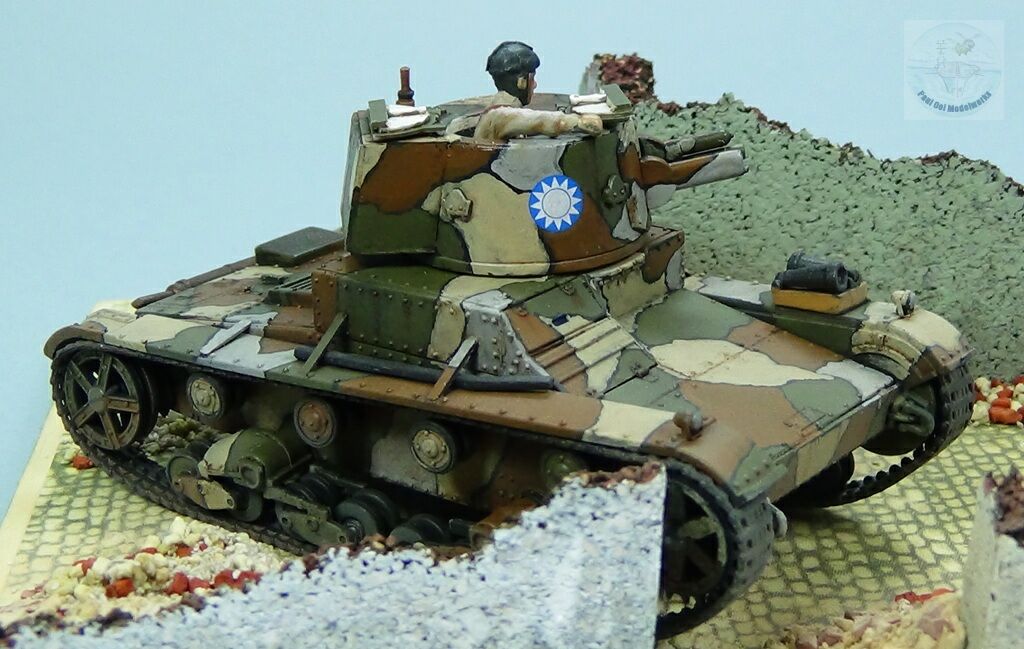
This picture shows the painstaking hand-painting of the 4-tone camouflage pattern using a fine tipped brush, working in a small area at a time. The pattern required a hard thin black line between colors, so I painted in the colors and left the background NATO Black to form the line. It took me about four evenings to complete the main camouflage pattern. Colors used were Vallejo 887 Brown Violet, Vallejo 983 Flat Earth, Tamiya XF-57 Buff, and Tamiya XF-19 Sky Grey.
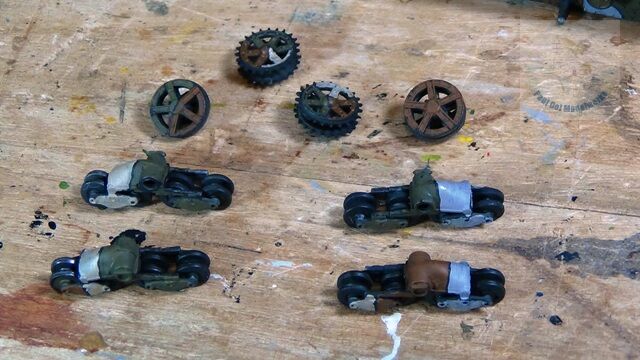
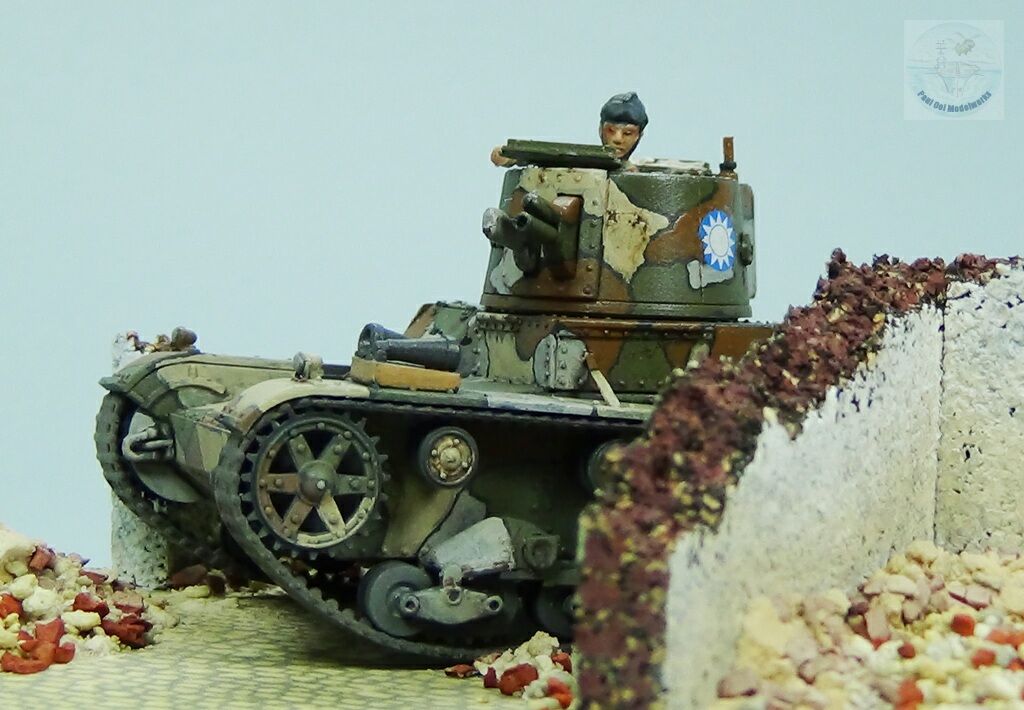
Next I worked on the bogey cars (there are four distinctively different and unique ones, and the instructions are not very clear about this important fact), idlers, front sprocket wheels and the rear idler assembly. The best way to keep track of getting the bogey cars right is to build one at a time and arrange them in their relative positions to the hull. The cars themselves had large sink marks that I filled in with Squadron White putty and sanded over. I also painted them with the same camouflage pattern as the main hull, being careful to match each wheel pattern to the surrounding hull.
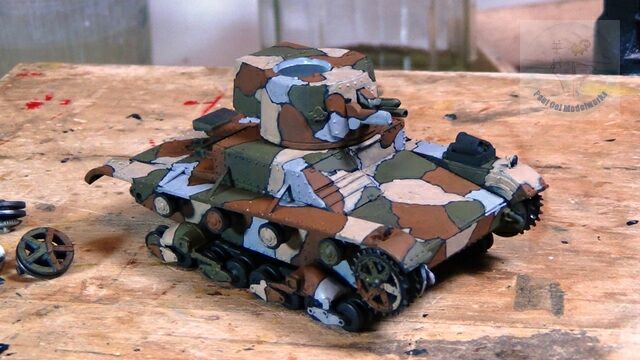
Finally I get all the wheel parts on except for the rear idlers kept off until last before installing the tracks.
Since I was going to have a commander figure for this model (I had a leftover Japanese tank commander figure), the cupola doors were built in the open position, with scratch-built plastic card and rod details.
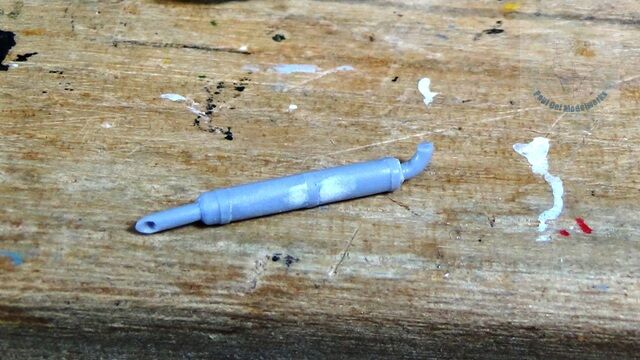
Another piece that is left to the very end was the rear muffler. I drilled out the exhaust pipe, and filled in the significant sinkholes with white putty as well, before painting with Metallizer Burnt Iron.
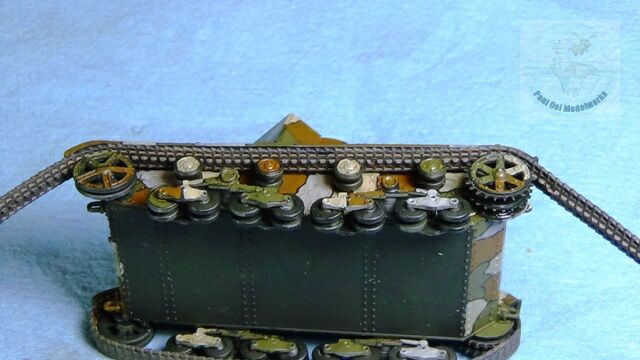
The flexible tracks were washed in diluted Tamiya XF-52 Flat Earth (I never use lacquers or enamels as the solvents may attack the soft track plastic). Installing them was very tricky as the clearance between the front sprocket wheels and the top mud guards were very tight. It requires some tenacity and patience. The instructions also advice that you fit the tracks, check for excess and then carefully cut that extra length off, and then glue the remaining ends using superglue. I ended up removing about 5mm of track. This being soft plastic, I used a primer (Loctite 770) before applying the superglue and it worked like a dream, bonding within seconds.
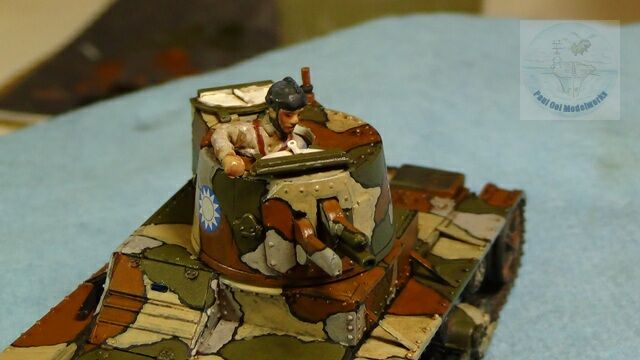
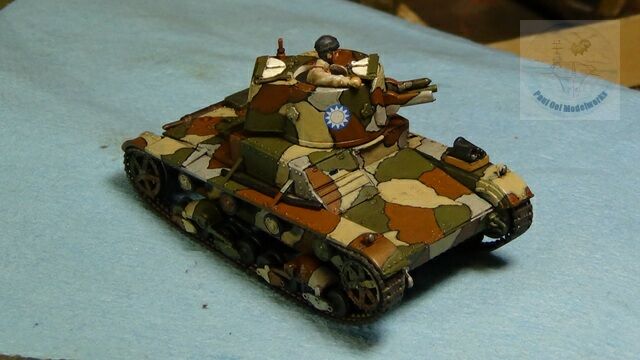
The commander figure was a Japanese tank commander from my spare box. In the 1930’s both the Chinese and Japanese tank crew had very similar uniforms, with the Chinese wearing a ribbed leather version that is easily converted from the smooth dome Japanese helmet by just adding a softened stretch sprue to make the middle rib. The helmet was painted NATO black, and the uniform was Khaki Drill, or Tamiya XF-57 buff with Tamiay XF-68 NATO Brown belts.
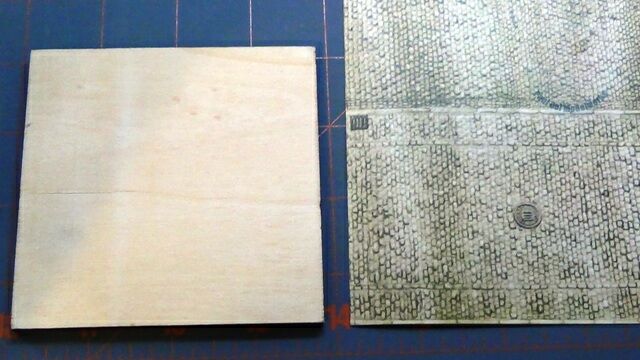
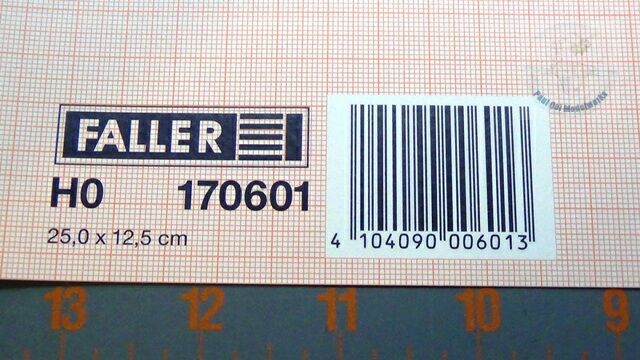
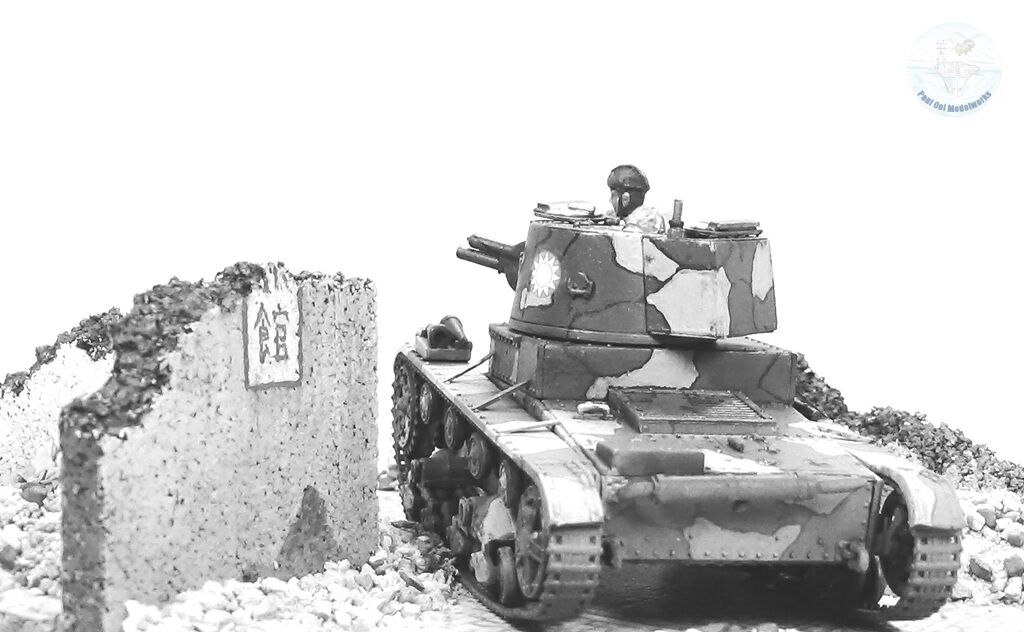
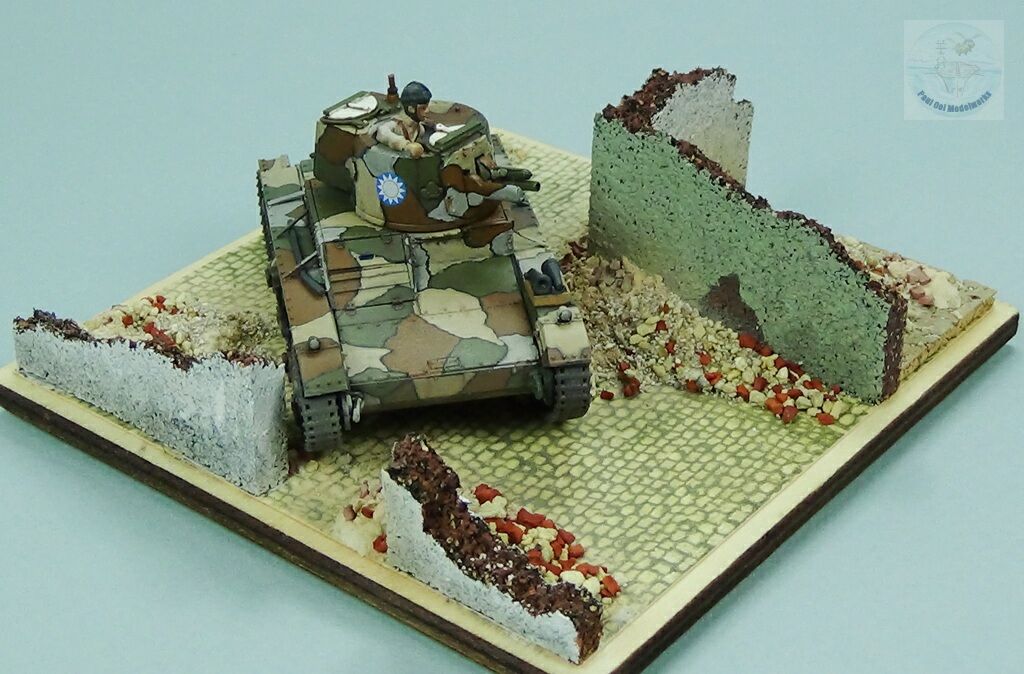
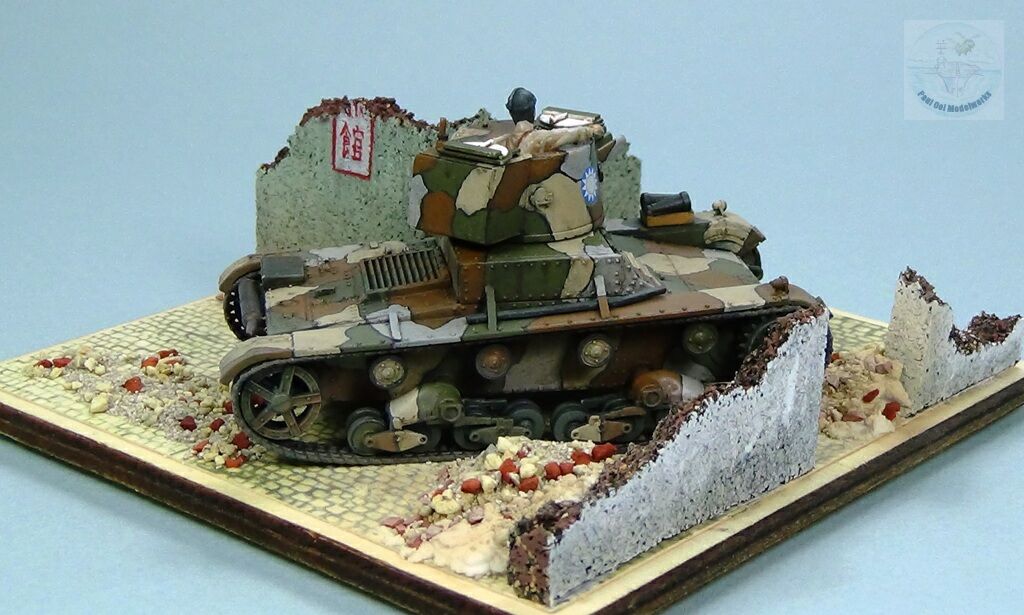
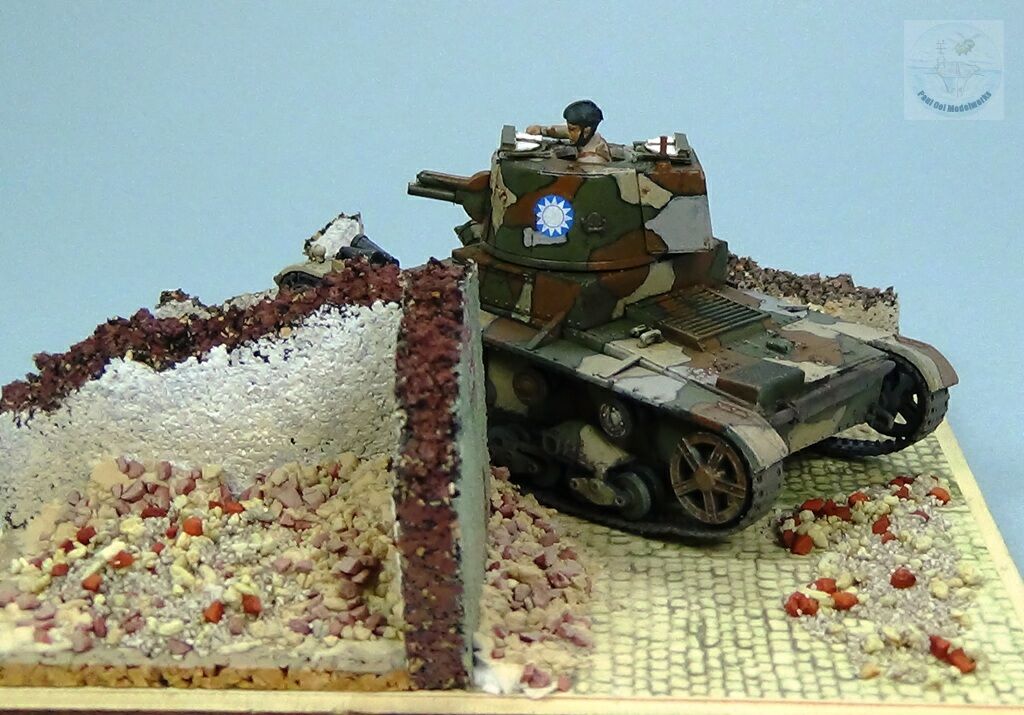
The base comprises a plain square laser cut plywood 3-1/4″ square. The pre-war Shanghai cobble-stone streets are nicely provided for using a sheet from Faller, part 170601.
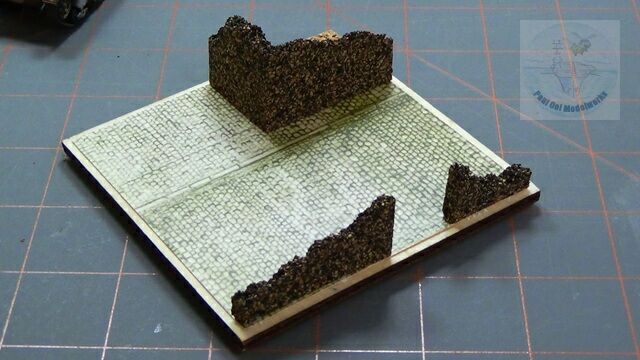
Ruined wall sections are railroad cork beds measured, cut, and then carefully broken off to provide suitable jagged edges. These are then glued into position around the base to form street corners.
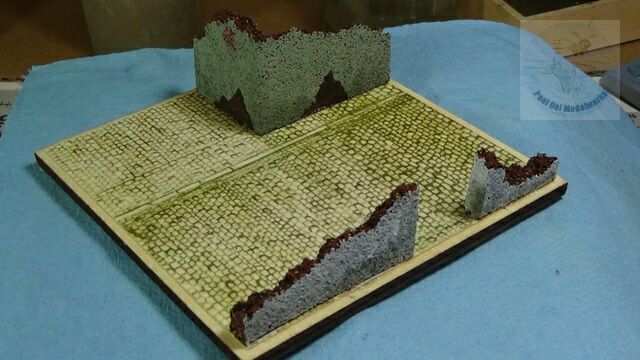
Wall sections are then painted and weathered with black and brown washes. Inner brick layers are painted with a mix of Tamiya Hull Red + Flat White + Flat Yellow.
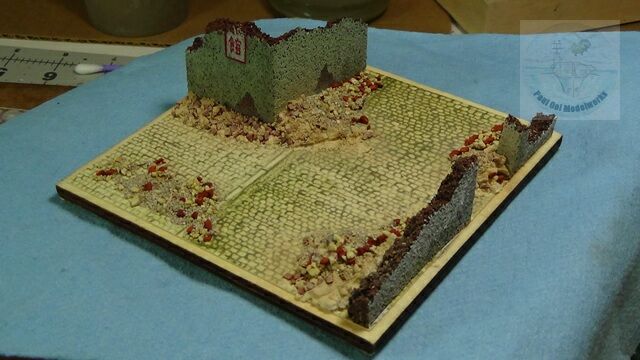
Street debris are made, first by making piles using white plaster, and then a mix of several grades of grey talus and red ore (from the railroad supply section) pressed into the plaster. Once dry, I dusted the piles with Tamiya XF-57 Buff. More loose pieces are added by spreading the same talus mix on the base, fixing them in place with diluted white glue applied using an eye-dropper. Once dry, war-torn Shanghai is ready for the Vickers tank.
you`re a maniac!!!!
Hello Paul, really nice diorama of the vickers 6 tons you have there. I have an interest in the Second Sino Japanese war and I have found plenty of documents regarding the Japanese armour. But for the Nationalist Chinese, it is quite rare to find one written in English or French (The only thing I’ve found so far is the Steel Master 88). So if I want to paint a Chinese vehicle, for example Vickers 6 tons mk E (without the turret basket), which document should I consult ?
Hello Quang, There are very few references on the Nationalist Chinese because unlike the Japanese, very few surviving photographs of early Chinese tanks remain. Bison Decals has a pretty good decal sheet of Nationalist Chinese tank markings that can be used as a starting point for painting any Chinese vehicle. The 4-colored scheme that I used here can be seen in Bison’s decal sheet illustration: http://www.1001modelkits.com/t-26-model-kit/5864-bison-decals-bd35097-chinese-tank-markings-1930-40s-11-pz-kpfw-ia-t-26-m-1933-vickers-6-ton-vickers-amphibious-tank-generic.html
Apart from this, one can assume that during the course of WW2, Chinese tanks were painted in the same standard color of the country that supplied them. The Panzer 1 used in the late 1930’s were generally German Panzer Grey, Russian T-26’s were Soviet Tank Green, and M3A1 Honey and M4A1 Sherman tanks were US Olive Drab. Captured Japanese tanks had their original color scheme except that the big national insignia are painted on them (Chinese communist army painted a red star with the Chinese character “zhong” in the middle, Nationalist with the white sun on blue field).
I hope this helps.