
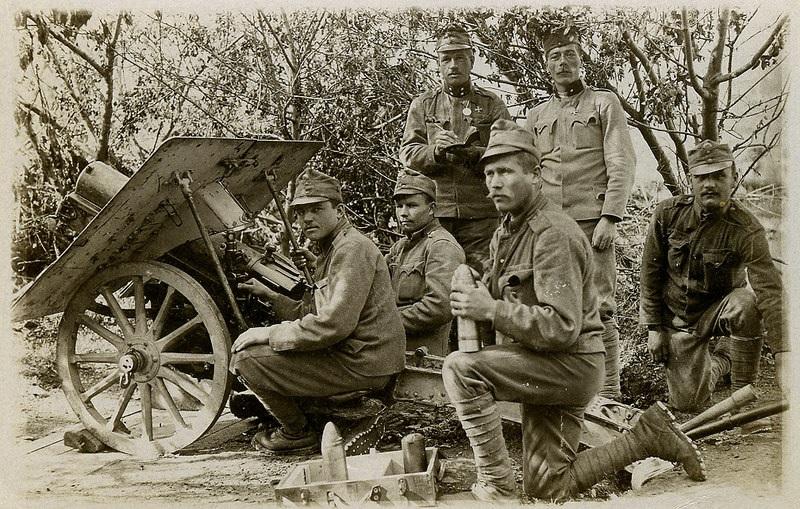
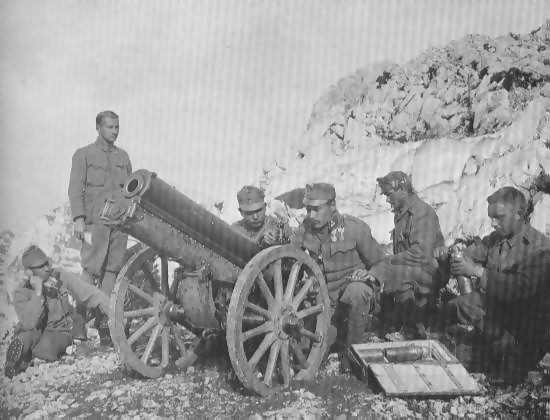
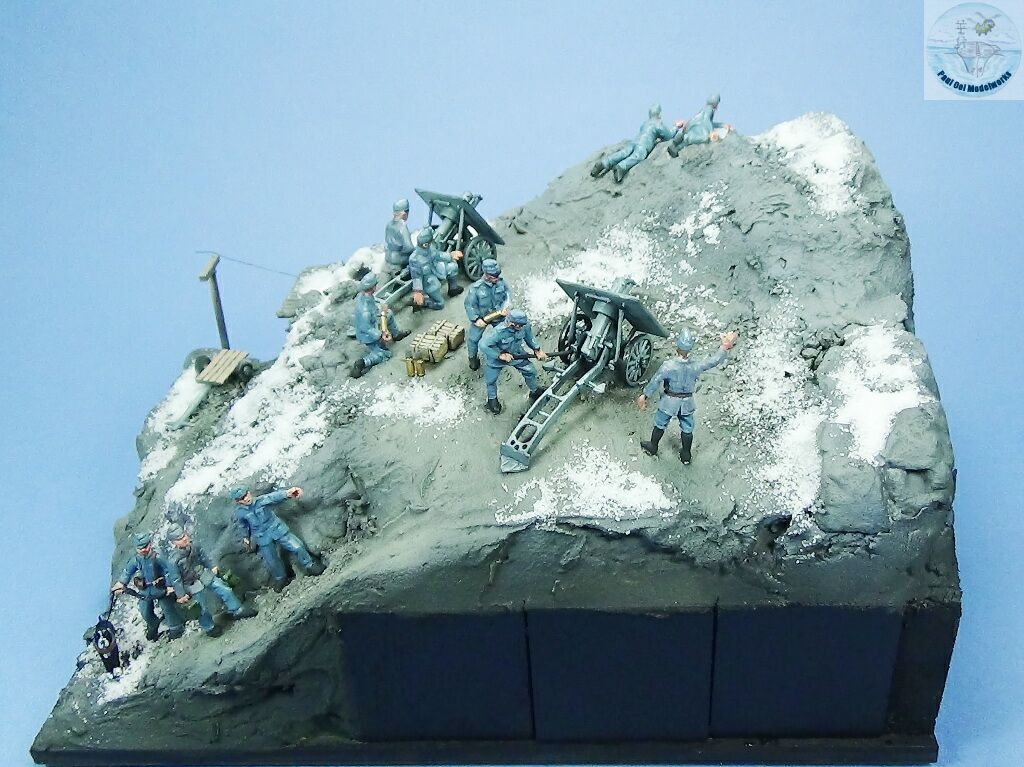
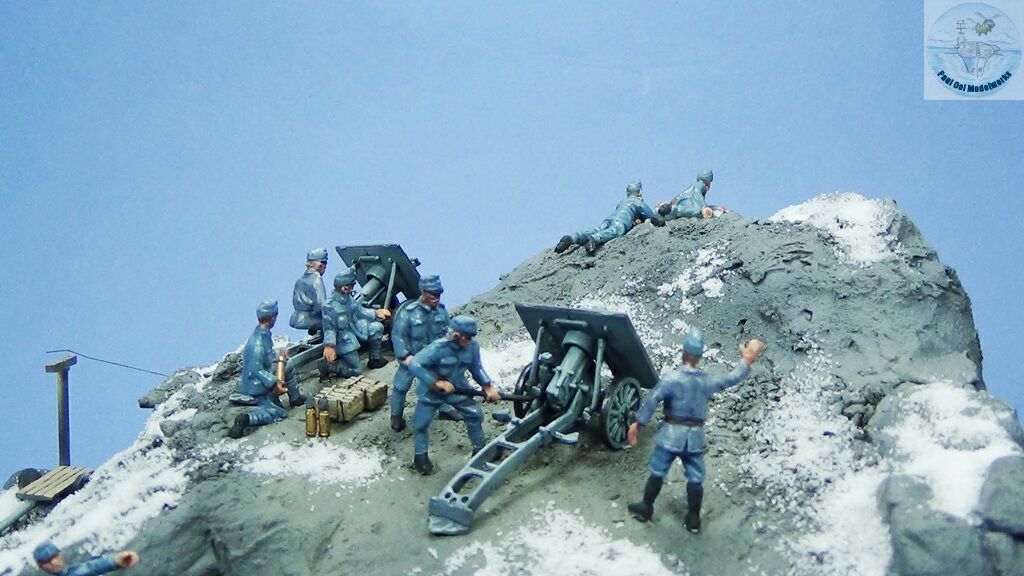
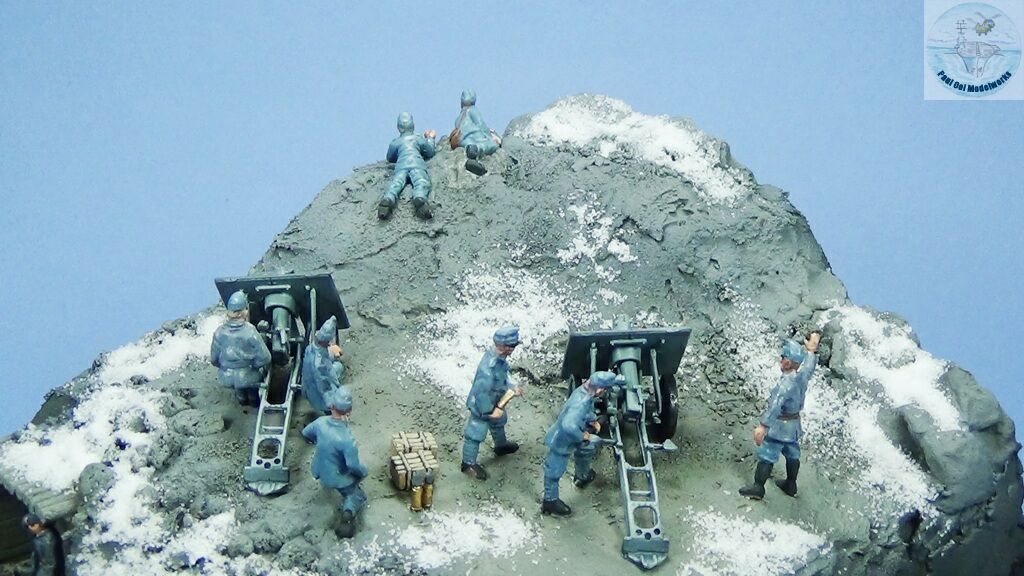
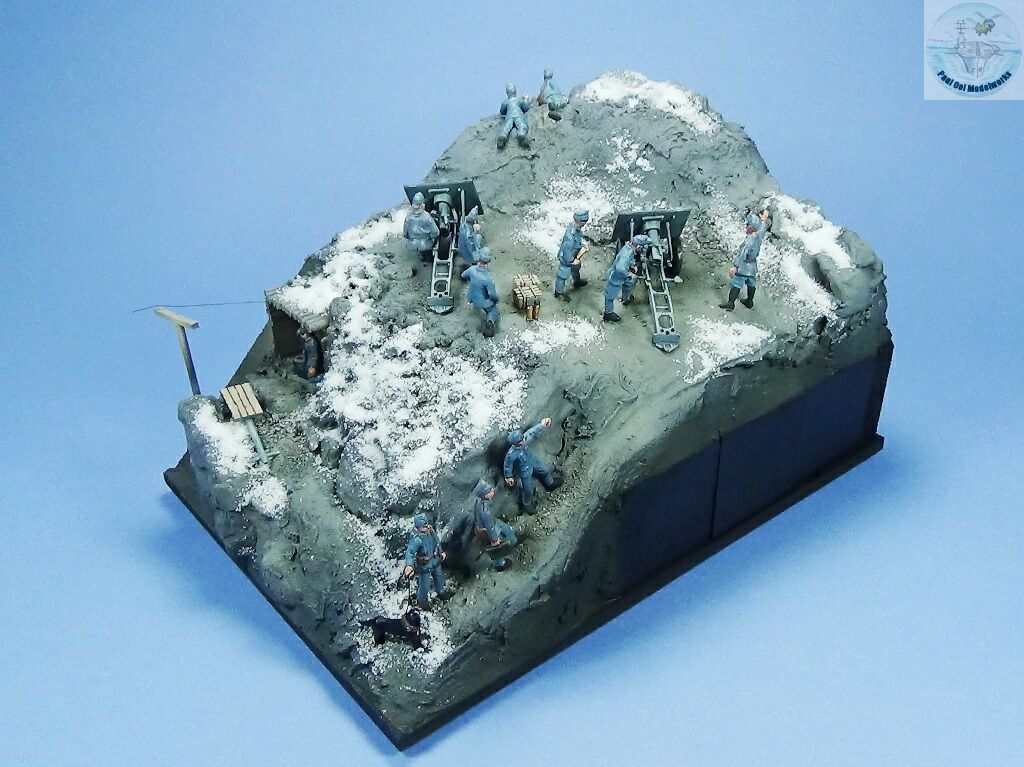
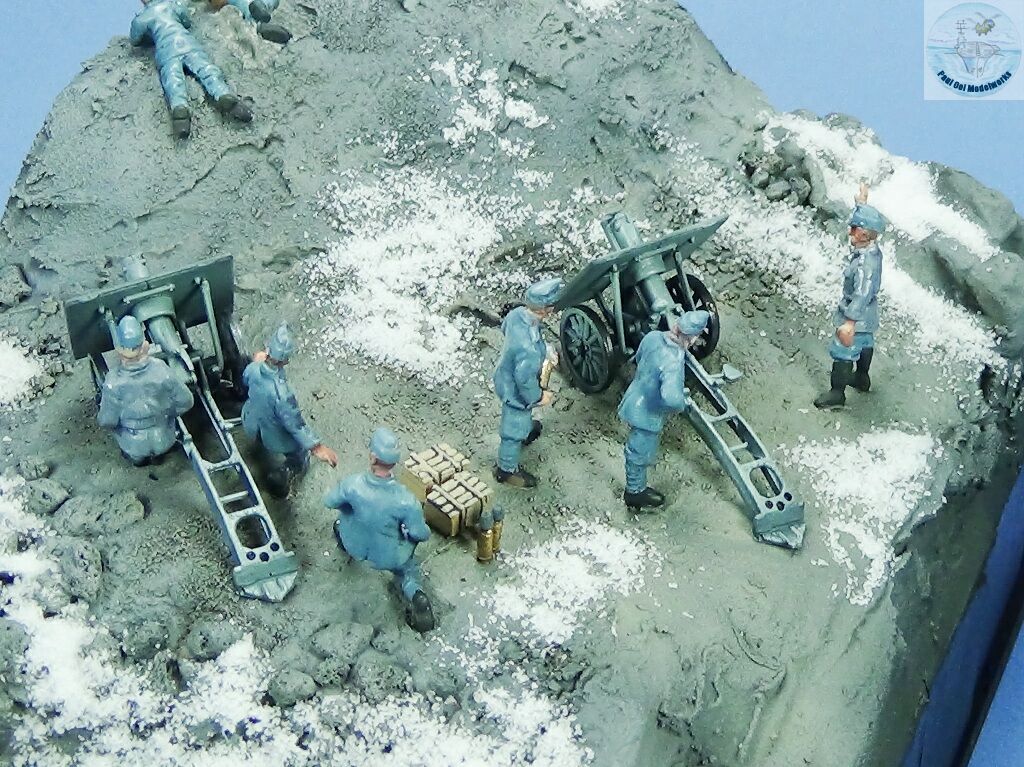
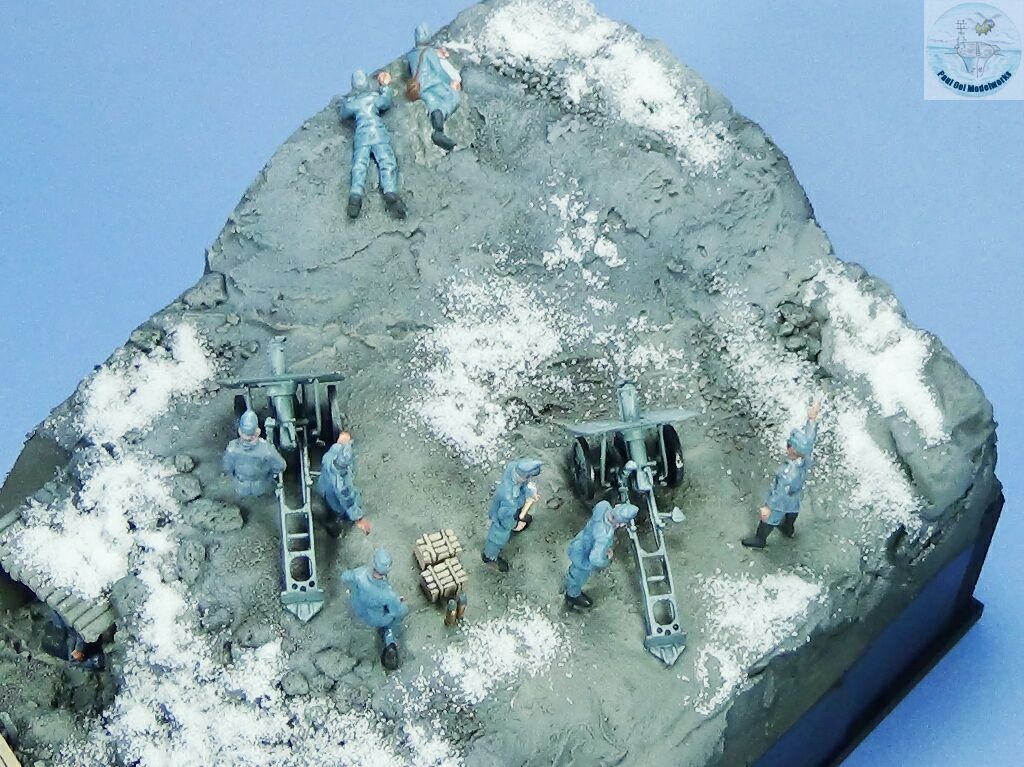
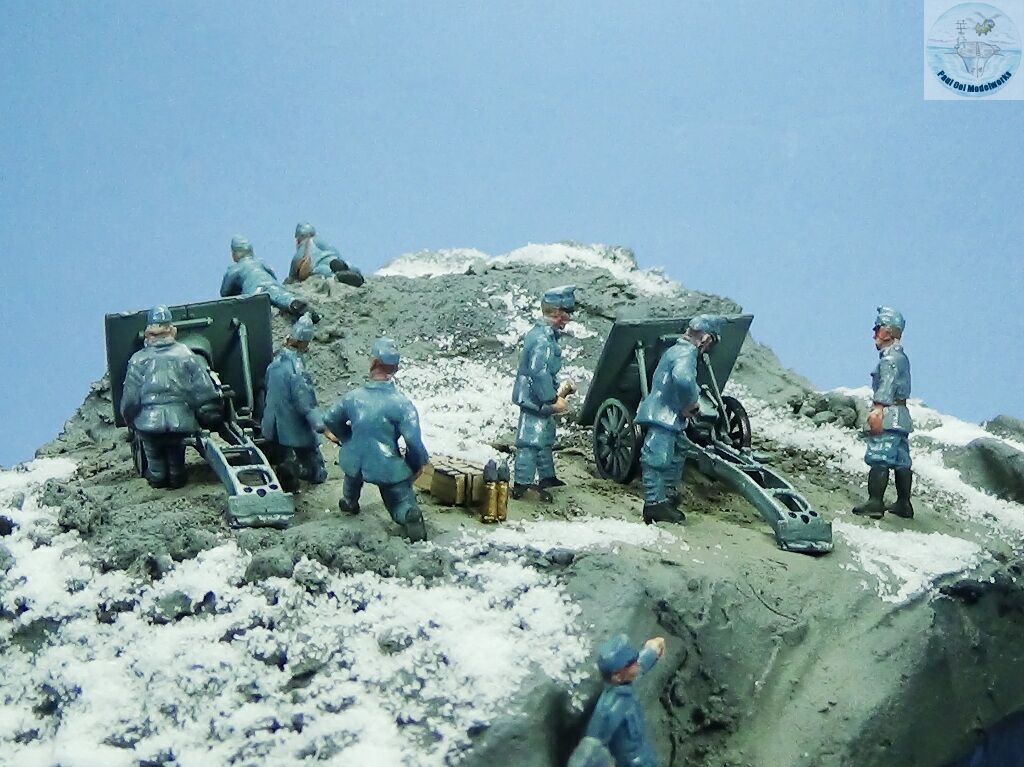
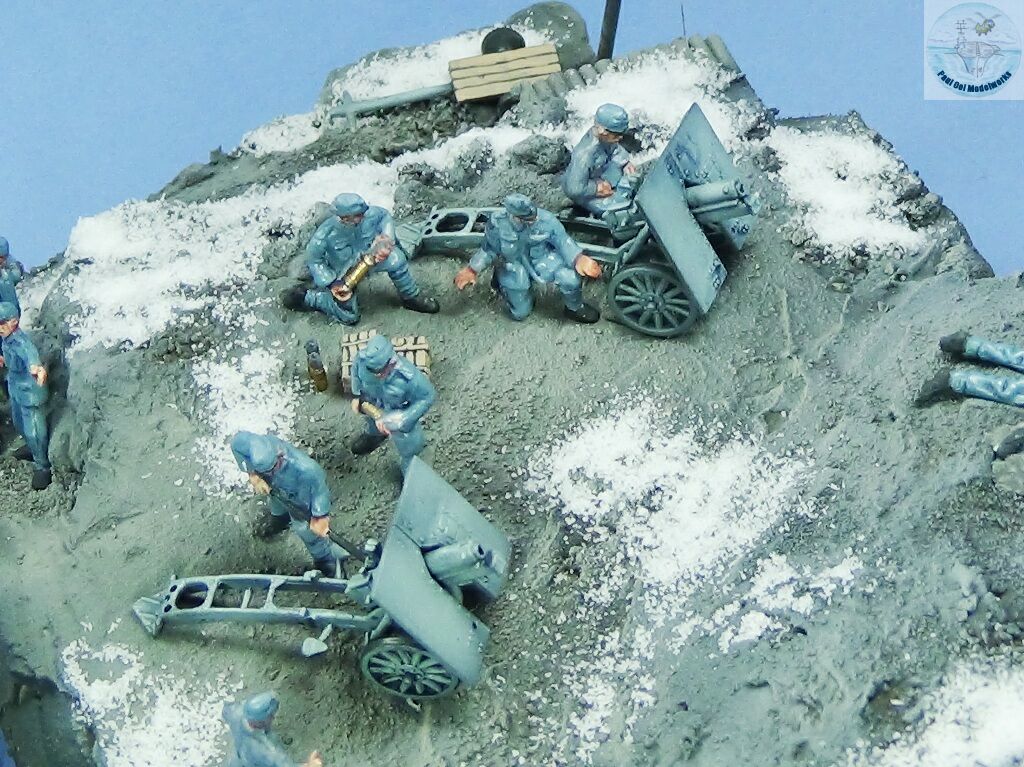
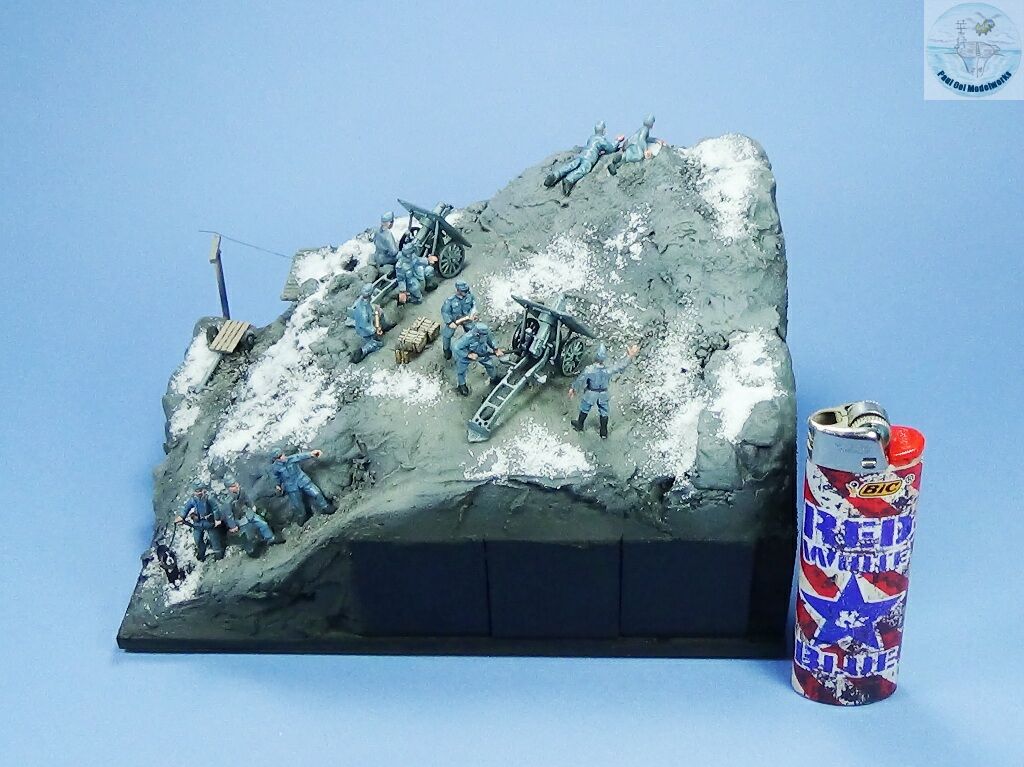
One of the lesser known theaters of World War 1 was the face-off between the Austrians and the Italians along the Alps. In the spring of 1916, the hills were alive, not with music, but the roar and thunder of mountain artillery batteries. Many positions were at high altitude above the tree line along the Dolomites separating Southern Austria from Northern Italy. Even along high mountain passes and ridges, fortified artillery positions and trenches were built and soldiers fought under very inhospitable weather conditions. This diorama portrays a pair of Austrian 75mm Skoda mountain howitzers positioned high upon a mountain ridge overlooking Italian positions in the valley below. Everything at this altitude required either being hoisted with winches, or hand-carried by troopers and dog-carts. In May 1916, The Austrians launched an offensive in Trentino in an attempt to gain the cities of Asiago and Arsiero. There were still patches of snow above 12,000ft but the Austrians managed to push on into the valleys below but soon ran out of artillery support. The front line reverted to a stalemate until the Italian collapse in the Caporetto Offensive of 1917.
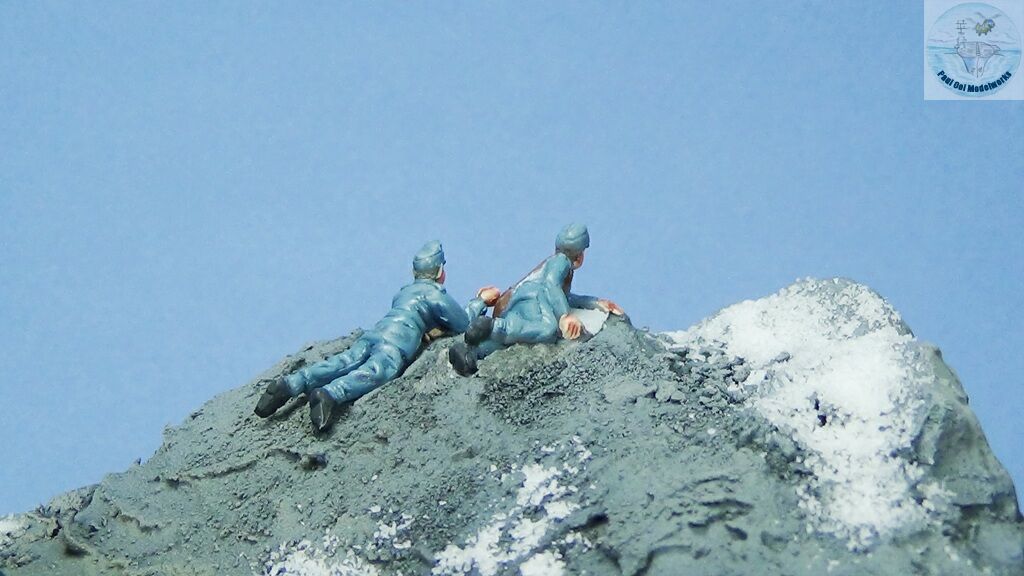
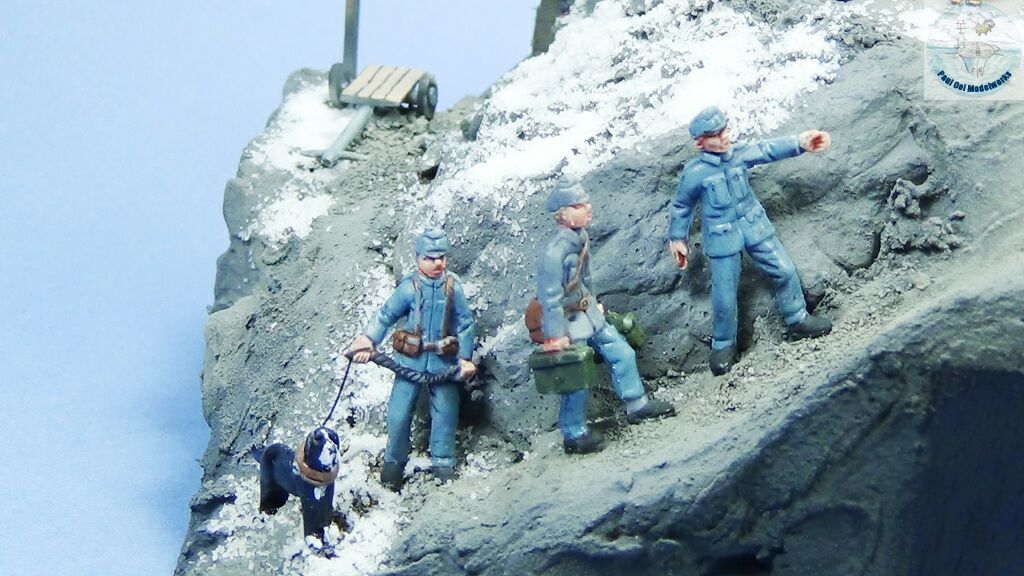
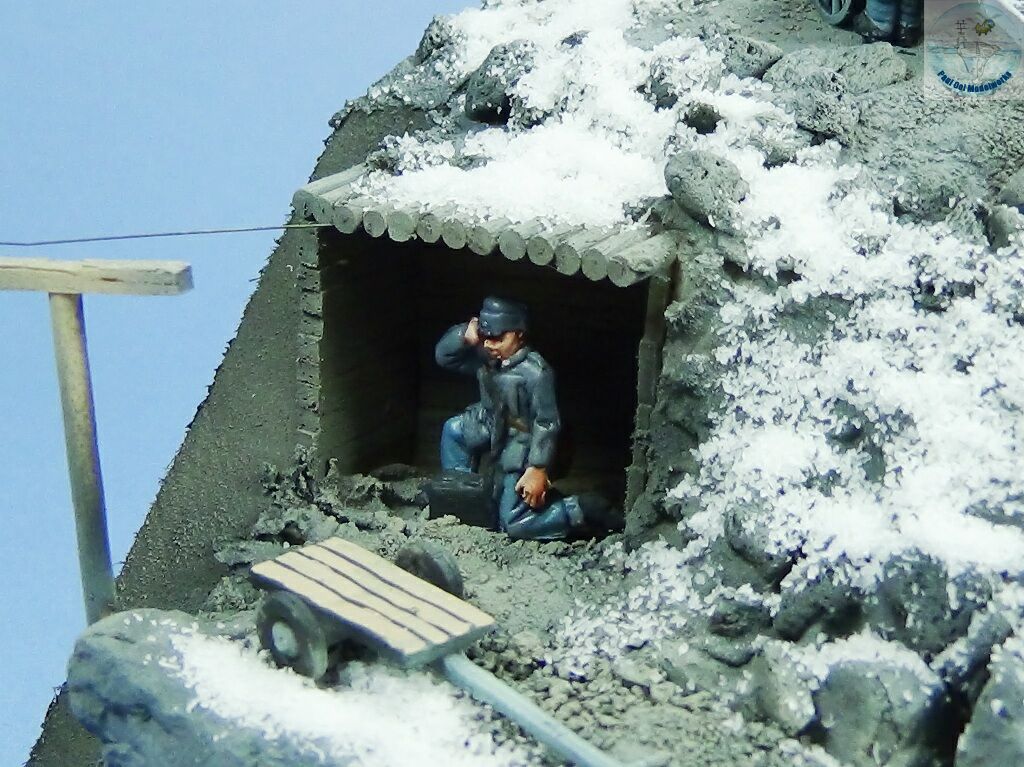
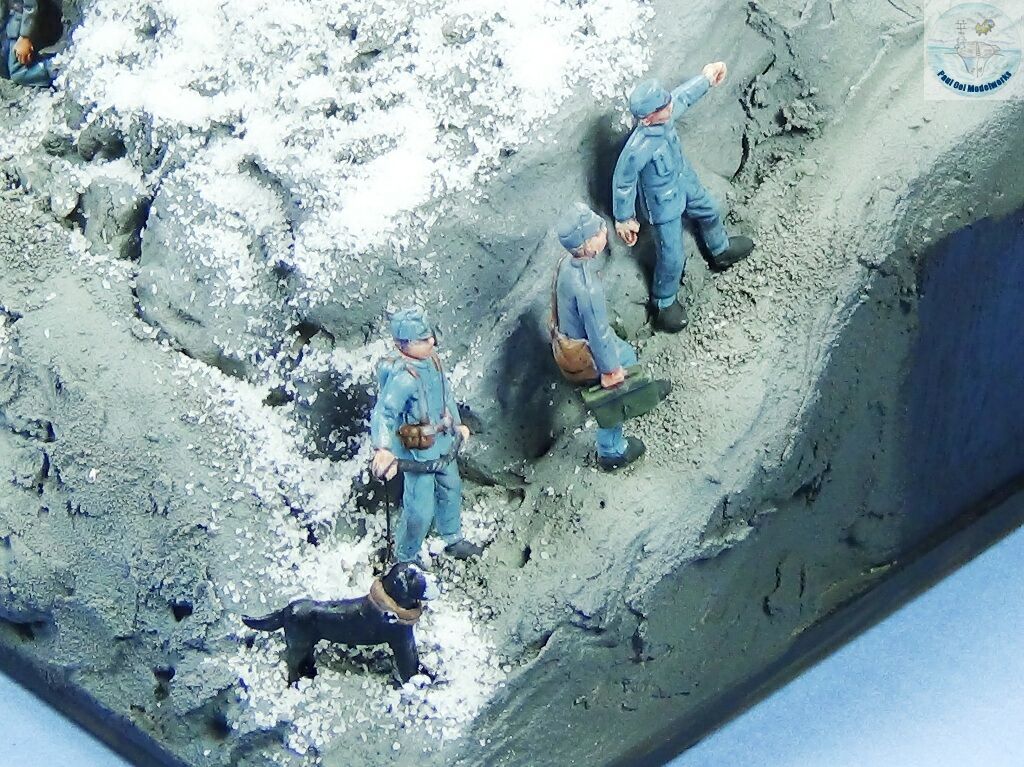
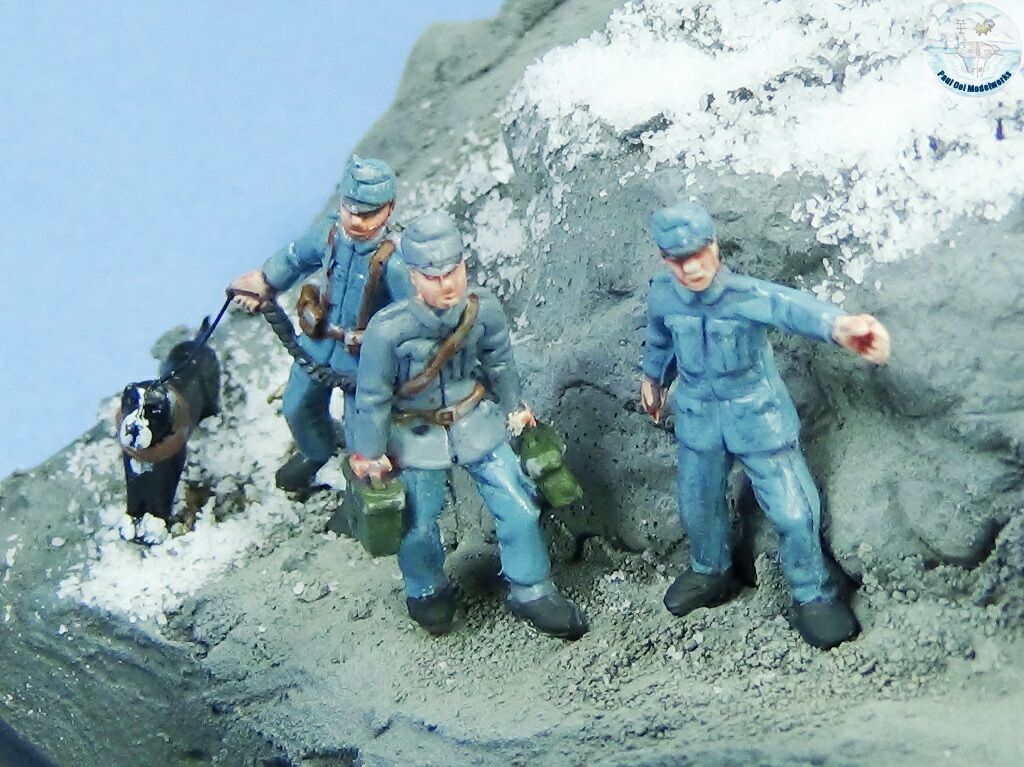
If you see the diorama carefully, I have included several other noteworthy elements about this Austrian artillery unit. They have two observers marking down where the shells are landing among the Italian positions below, perched at a ledge overlooking the ridge. There is also a telephone operator in the crude weather shelter just below the gun positions. Some troopers are coming up the trail with machinegun ammunition and one of them has a pack dog on a leash for the dog cart parked just outside the weather shelter. The Austrians wear the signature blue-grey uniform (Hechtgrau) but some were beginning to change-over to field grey more similar to the German army.
Gallery
Construction Notes
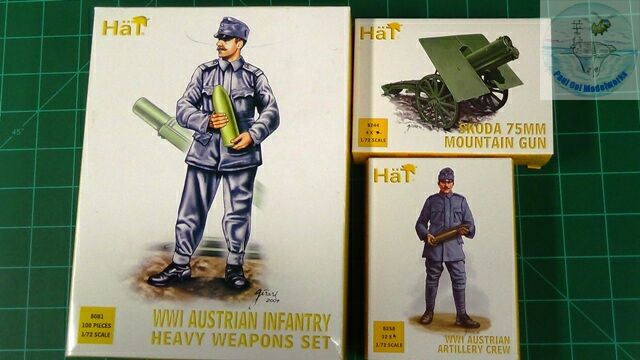
While Austro-Hungarian subjects from WW1 are rare, I did manage to get these 1/72 sets by Hat (Haet). By combining figures from two kits, I get enough variety and poses to populate the diorama. It also helped that the artillery hardware from the Heavy Weapons Set and the Mountain Gun Set are exactly the ones I wanted to portray here, including a field phone operator and artillery observers. In fact, my challenge was to narrow down the number of figures so that I did not overcrowd the layout.
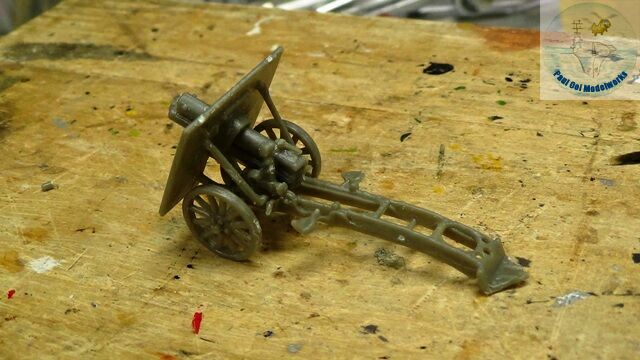 I start with the Skoda 75mm howitzers. The kit came with 4 artillery pieces, but I built only two as that was all I had space for. These are pretty cute and for the simplicity of construction, there was a good level of detail on the guns. I did have to drill out the barrels.
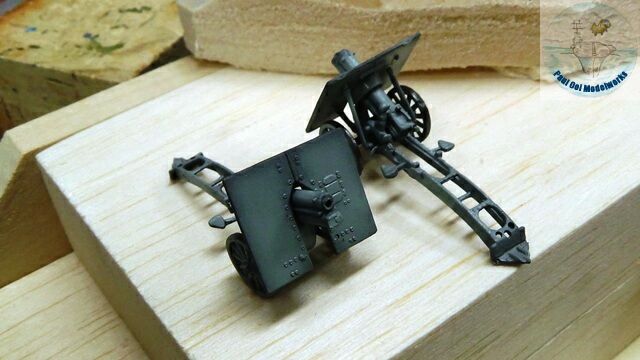 I primed the guns with Tamiya NATO Black, and then I chose to use Tamiya Light Blue XF23 (very similar to Hellblau RLM76). Austro-Hungarian field pieces came in two colors, a bronze green and this light greyish blue. Later on in the war, they also started painting camouflage patches of orange, and yellow but I much preferred these plain.
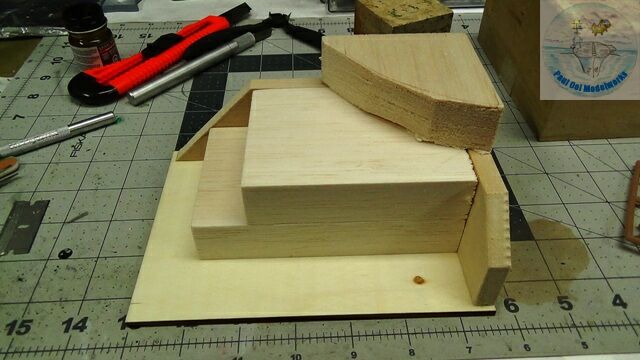 I start construction of the mountain slope diorama by gluing together blocks of plywood, bass wood, and balsa blocks to fill in the topography and reduce the amount of plaster needed.
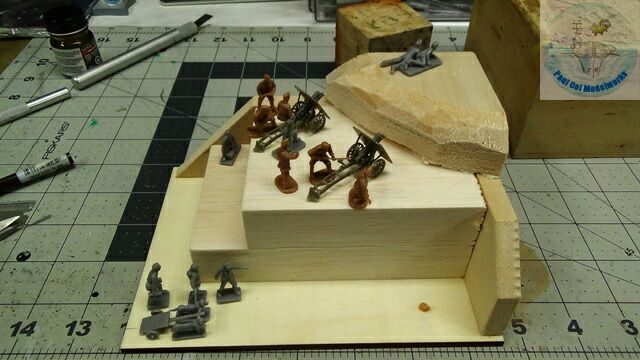 Then I positioned some of the figures to see where I can fit the artillery pieces and their crew, the supply team, and the observation team.
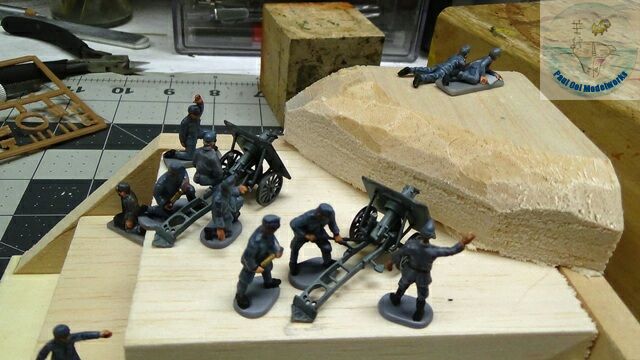
I painted the 1/72 scale figures (future tutorial) with Model Master Navy Blue Grey that is a close match for the historical Hechtgrau used by the Austrians. For ink shading, I used an oil wash of Payne’s Grey. I also alternated some tunics with Model Master German Uniform Field Grey. While the Austrian field grey is actually more greenish than the German version, in 1/72 scale, it is hard to tell apart.
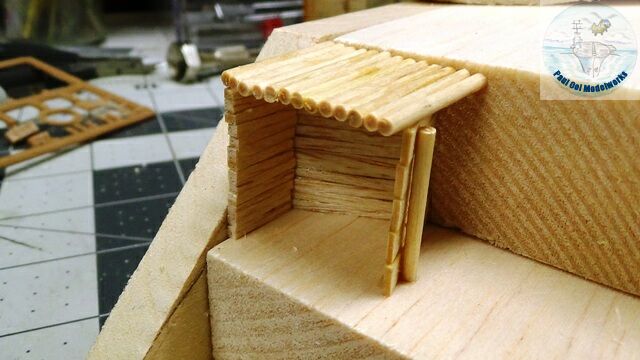 Before adding plaster, I built the weather shelter for the phone operator using balsa sticks, and toothpicks.
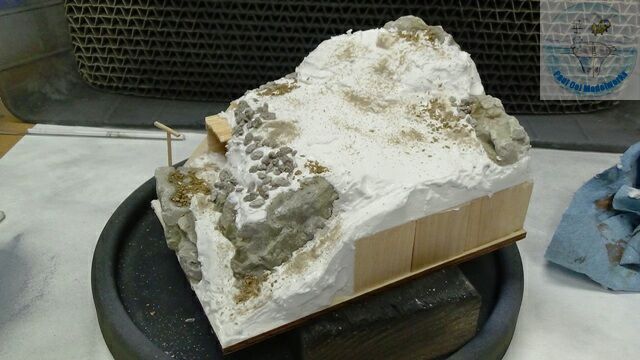 Plaster is added to make the rocky ridge, followed by several large pre-cast Rock Outcrops JTT Scenery Products (95352) to form huge rock ledges and faces, Then rough talus (Woodland Scenics) are added on the slopes, followed by fine talus. All these are then attached with diluted white glue using an eyedropper dispenser.
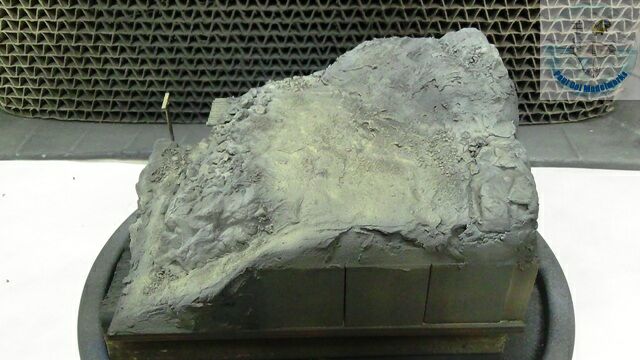 The whole landscape is first primed in Tamiya NATO Black, and then sprayed with differing layers of Tamiya Sky Grey (XF19), followed by Tamiya Buff (XF57).
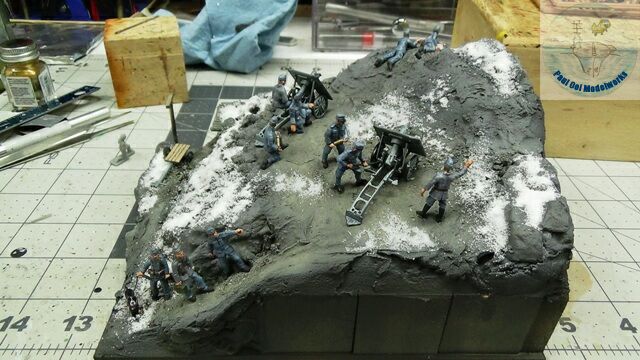 Finally, I removed the figures from their support plastic plates and then carefully attached them to the diorama with superglue.
Leave a Reply