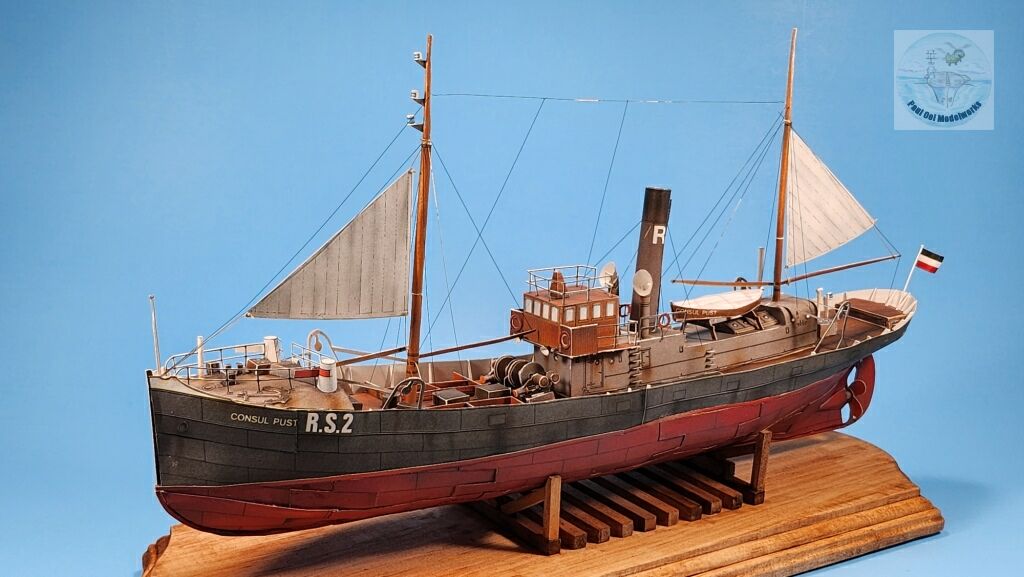
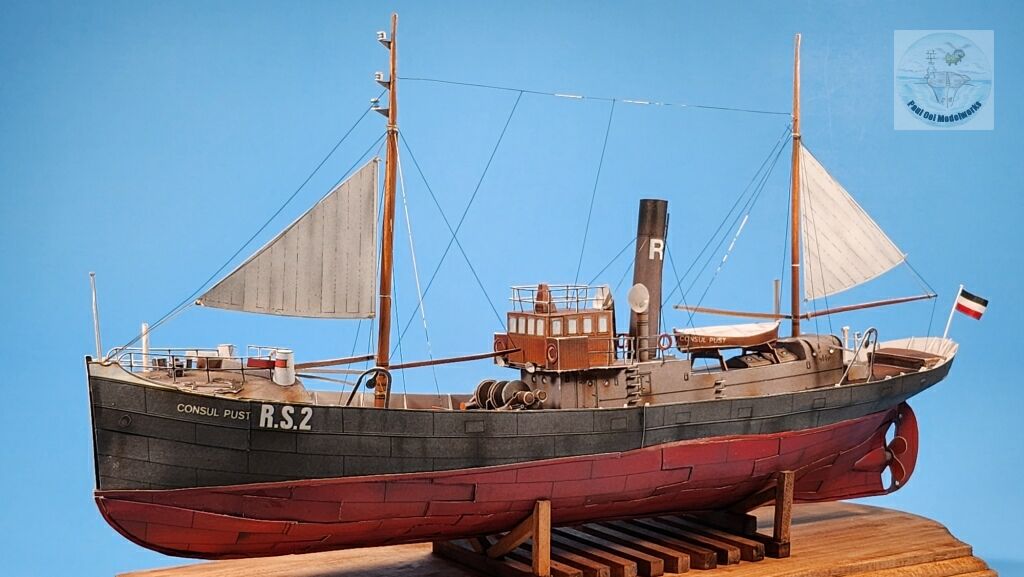
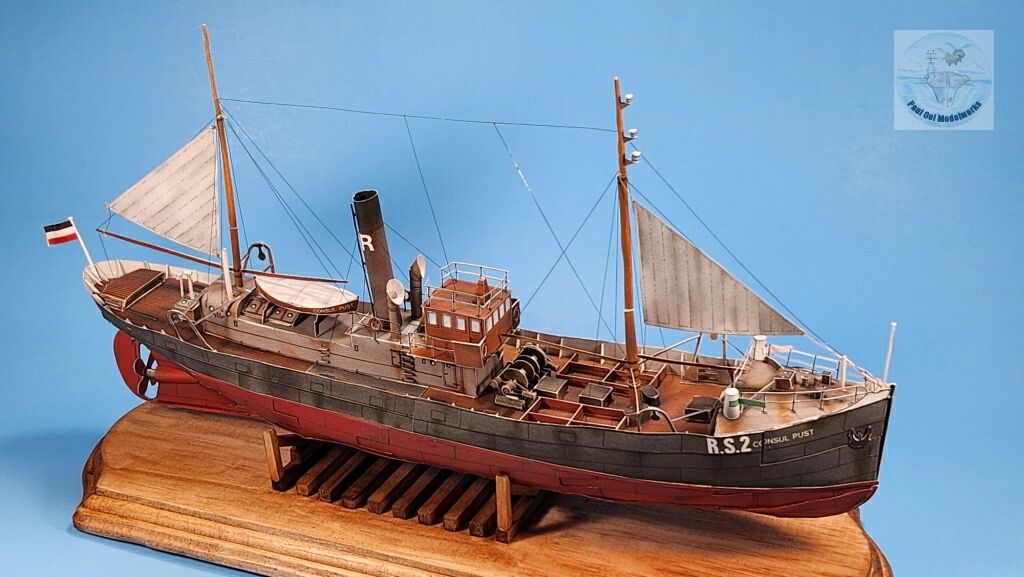
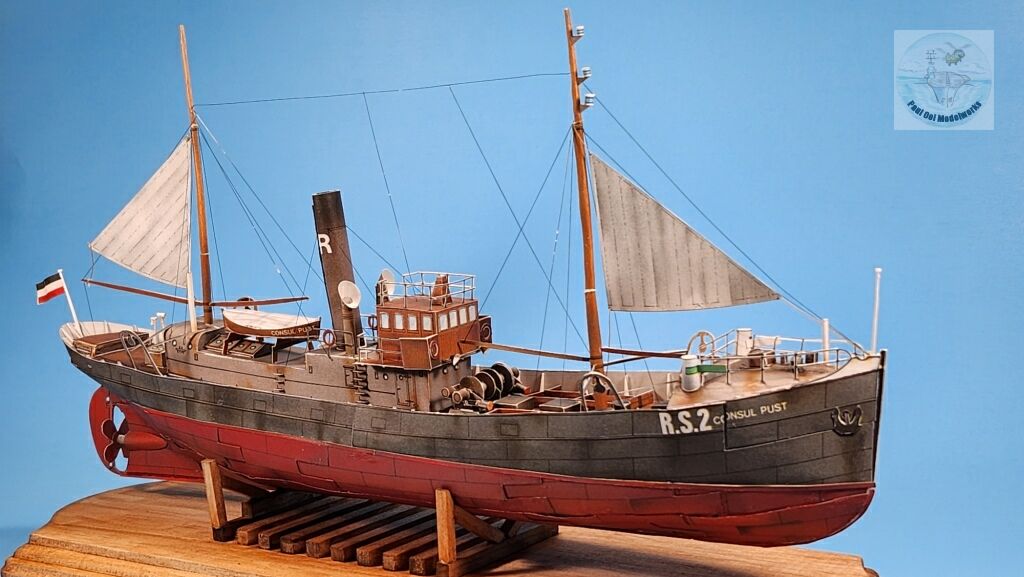
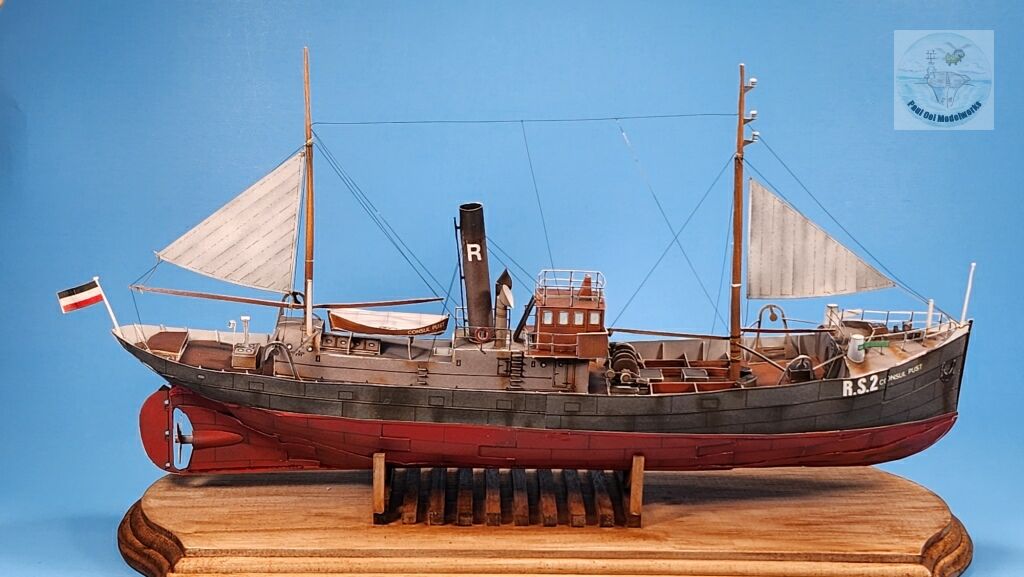
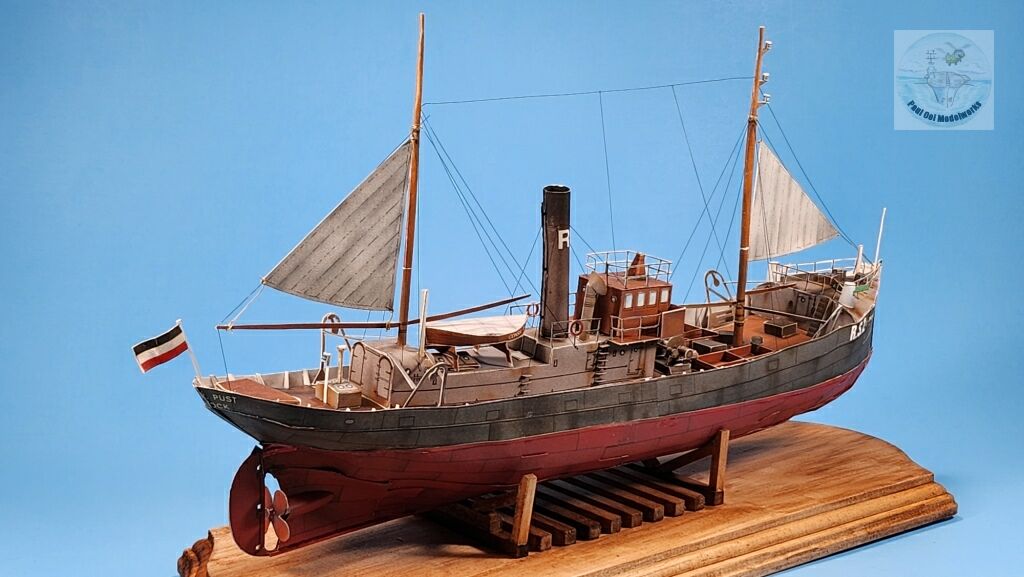
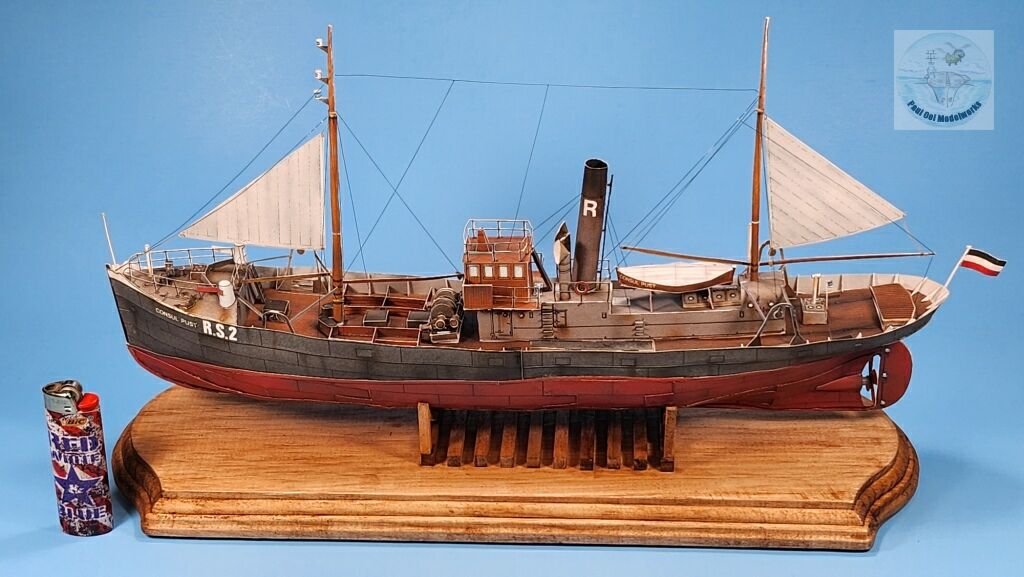
The Consul Pust was a fishing trawler built in Rostock, Germany in 1919 at a time when it was still common to see sail and steam featured together in a single vessel. In 1932, the vessel was sold to a French company operating out of the port of Lorient in Britany and renamed the Monique Andre. In a strange twist of fate, she was requisitioned by the French Navy in 1940, and with the fall of France, taken over by the Royal Navy as HMS Monique Andre, and used as a minesweeper against her former country for the duration of World War 2. She survived the war and was returned to her French owners in 1946. The trawler was scrapped in 1957.
Gallery


Construction Notes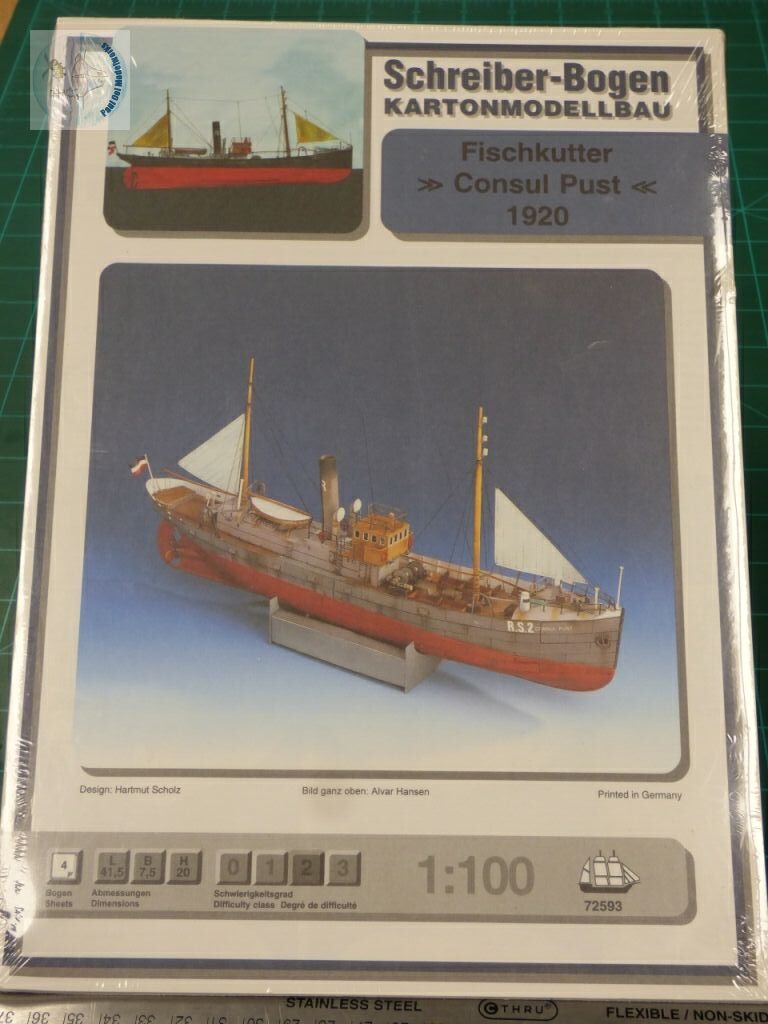
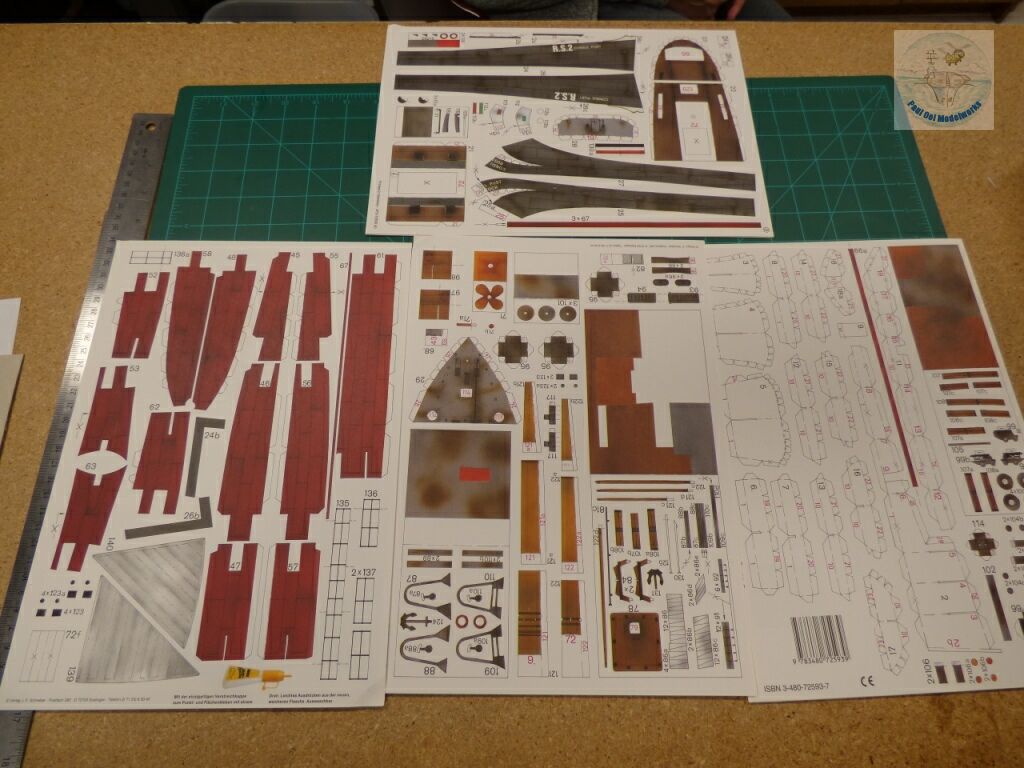
I bought this paper card model from Spielwaren Kurtz at the Marktplatz in Stuttgart almost thirty years ago. It is a 1:100 scale model of a turn-of-the-last century steam trawler with sails and I did not think much about its level of difficulty, but I was attracted by the antiquated look of the ship. This traditional printed model without the benefits of laser-cutting is quite different from the other paper and card model builds that I had featured in this website. Every piece has to be precision cut by hand (scissors and hobby knife) and the complicated shapes and details are not at all simplified (including items like the ship’s life-lines), thus adding to the challenge. I use a strong paper and wood white glue from Elmers (non-acidic) for the build. .I have since looked for similar sail-and-steam ships in plastic format, but apart from a few like the Great Western, there aren’t many to choose from.
I thought making this paper model will give me a short one-week break from the painting and sanding work associated with the regular plastic model kit. Little did I realize that this paper model had its own challenges and it took me 3 weeks to finish the build. But it was very enjoyable, and very satisfying at the end.
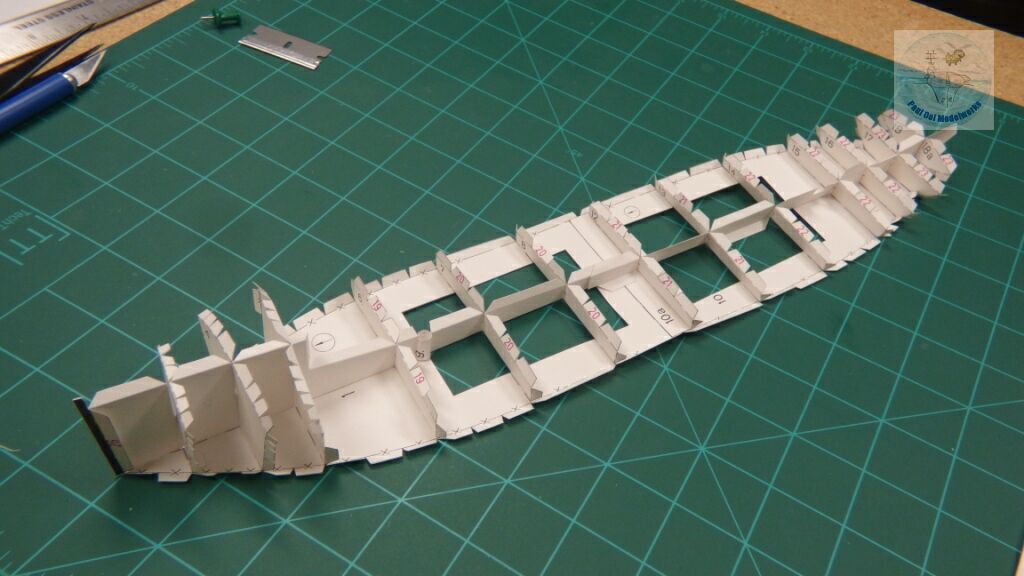
Very similar to an actual shipyard construction, we start with the hull sub-structure, with the longitudinal and transverse members being put together to shape the hull form. In hindsight, I should have thickened these structural members by laminating them with more paper to stiffen them up. The central longitudinal frame would have benefitted from a stiffer structure to reduce the warpage of the hull.
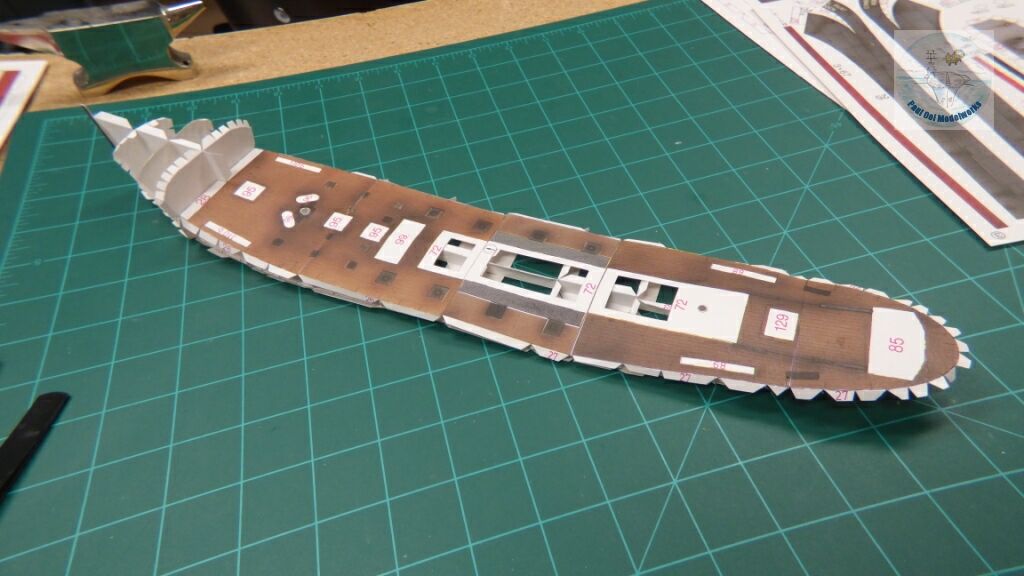
The main deck pieces are added on, giving the structure a “slipper” look. Note that there is actually a camber to the deck.
Next, I attached the freeboard vertical walls of the upper hull to the hull frame. Given the long strip of paper to glue on, I worked one small section at a time so that the glue will not dry out before attachment.
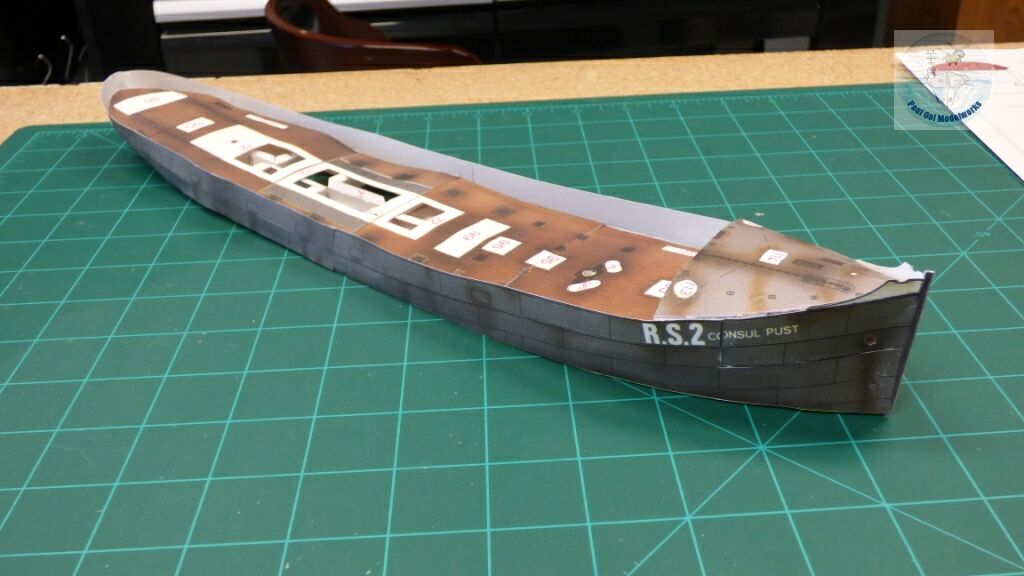
After both port and starboard freeboard walls have been installed, I glued on the forecastle deck with a very pronounced camber.
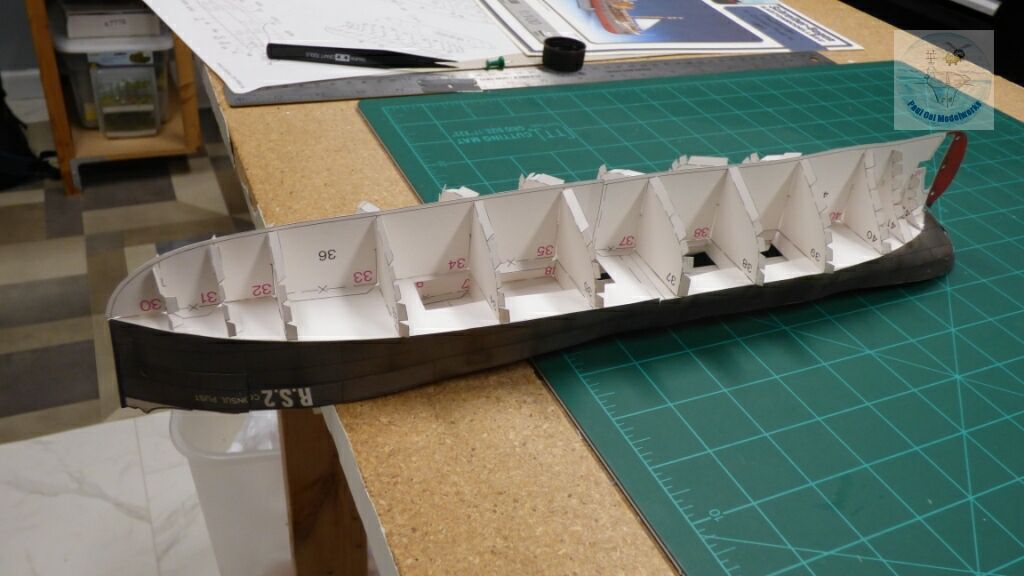
The main longitudinal plate the forms the keel and its supporting transverse sections and bulkheads are added next. Again, in hindsight, I should have stiffened up these pieces with additional laminate.
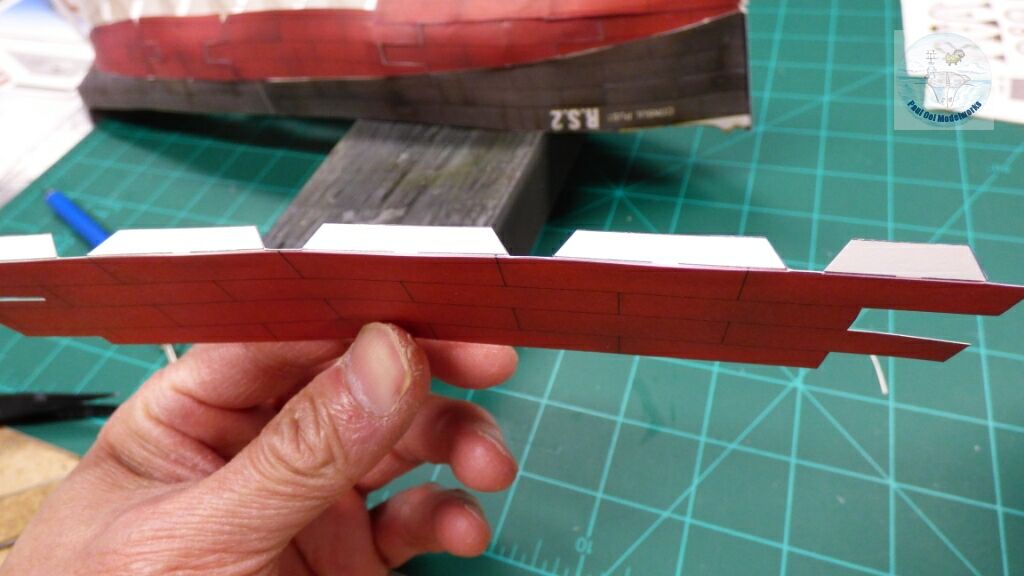
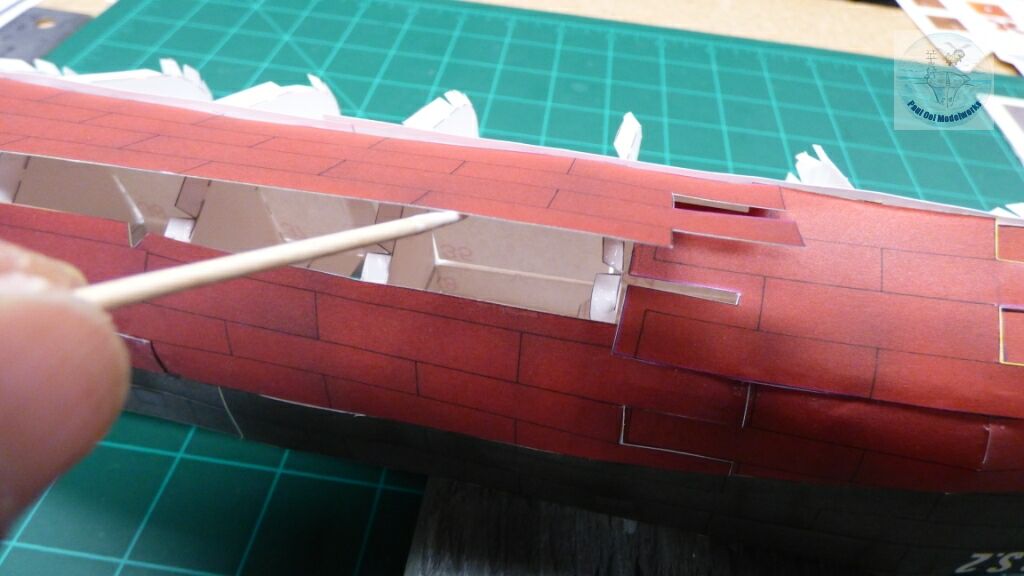
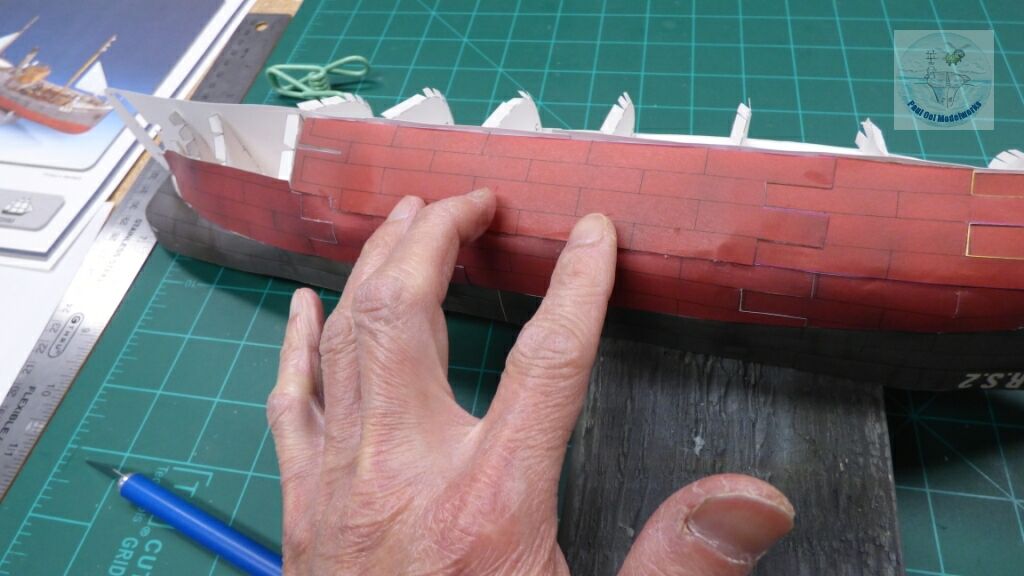
Now come this tricky part of applying the underside hull plates against the hull form. The sequence is to start by applying glue to the flaps along the top line to attach the piece onto the hull. Once that piece is properly attached, and the glue dried, more glue is applied to the periphery of the piece. Then we can press down the piece onto the hull and smoothen out the edges.
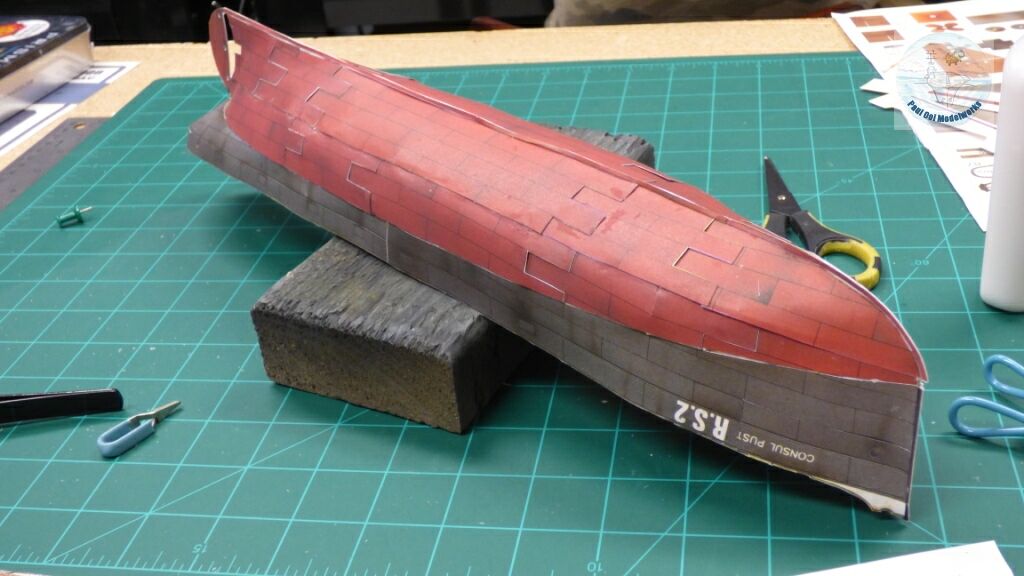
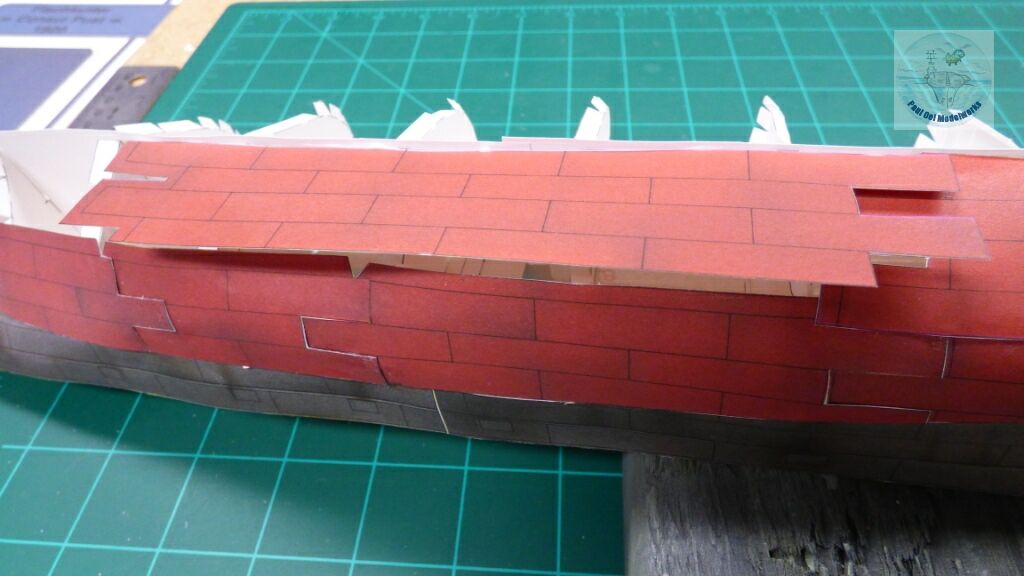
Slowly but surely, we cover the entire lower hull with the plate pieces.
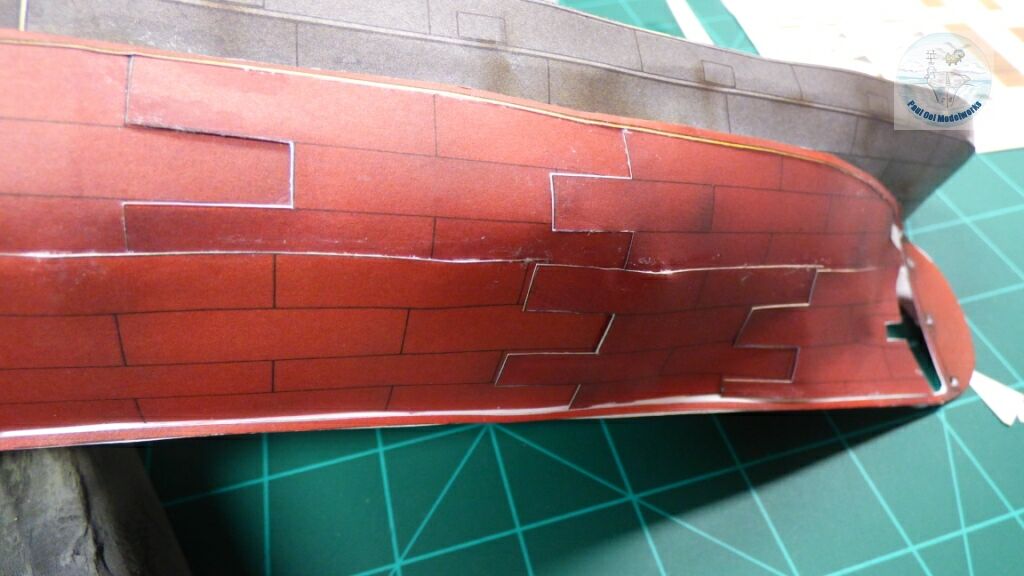
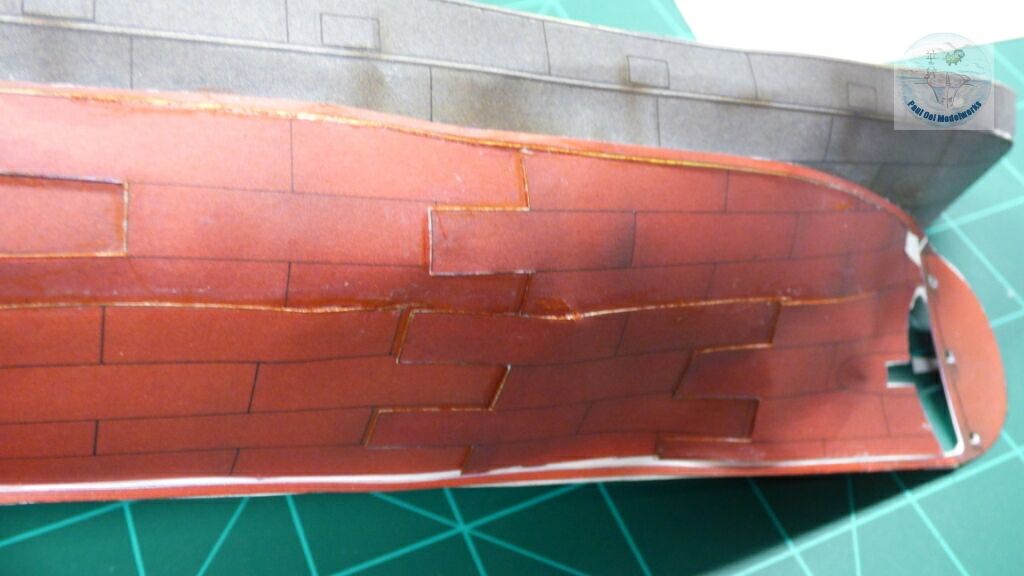
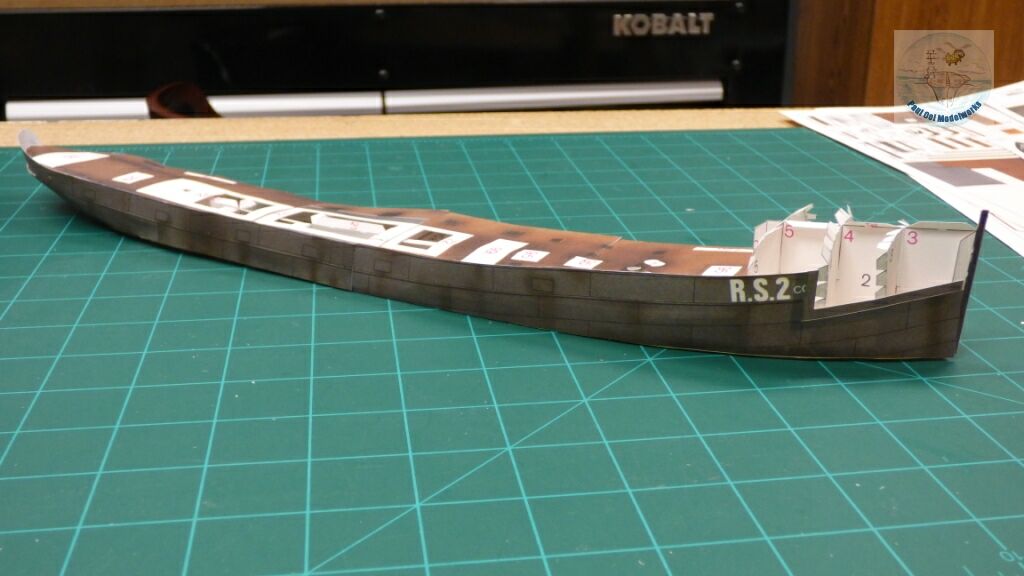
The cut edges of the plates stand out against the hull red background, so I tone these edges down with a red color pencil.
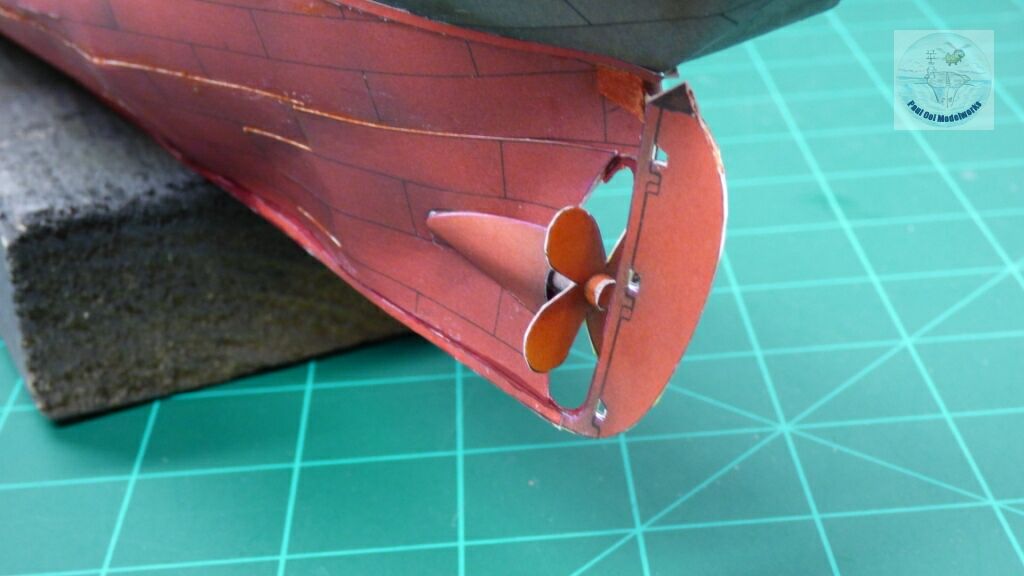
Finishing off the area under the waterline, I assembled the propeller and rudder.

The main superstructure that includes the boat deck is added.
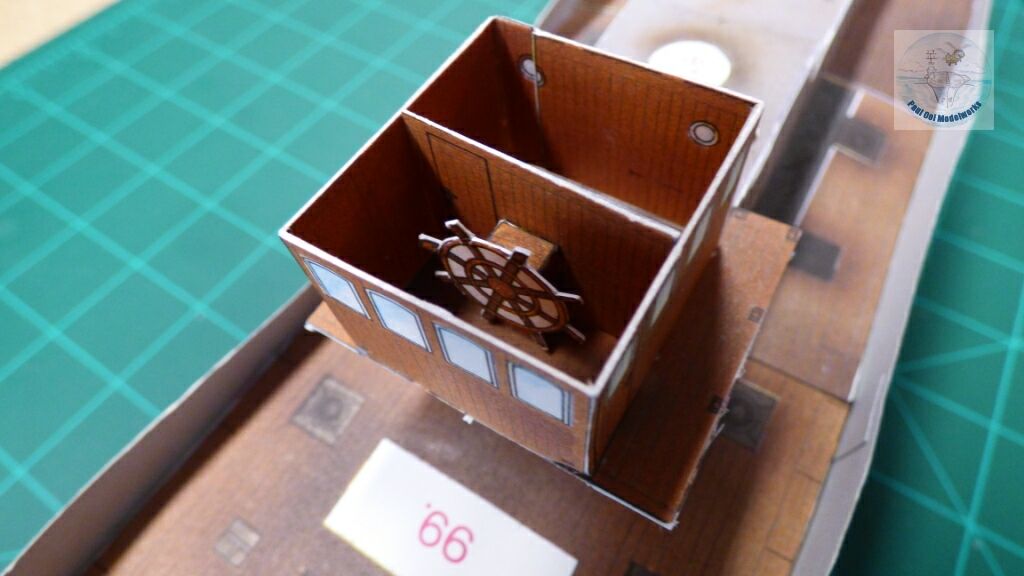
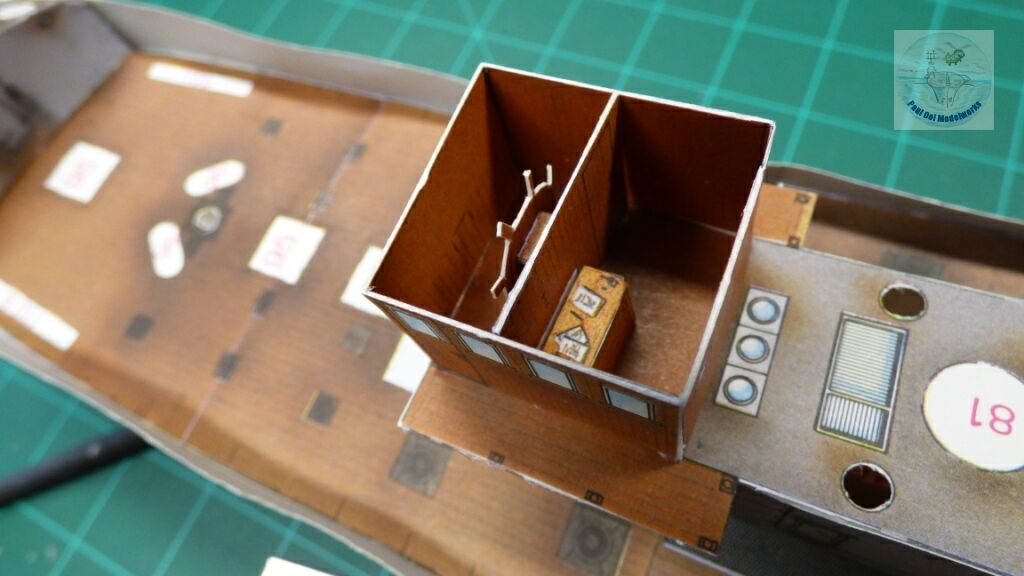
There are some nice details inside the wheelhouse, but it is a pity that I was going to seal it up under a roof structure.
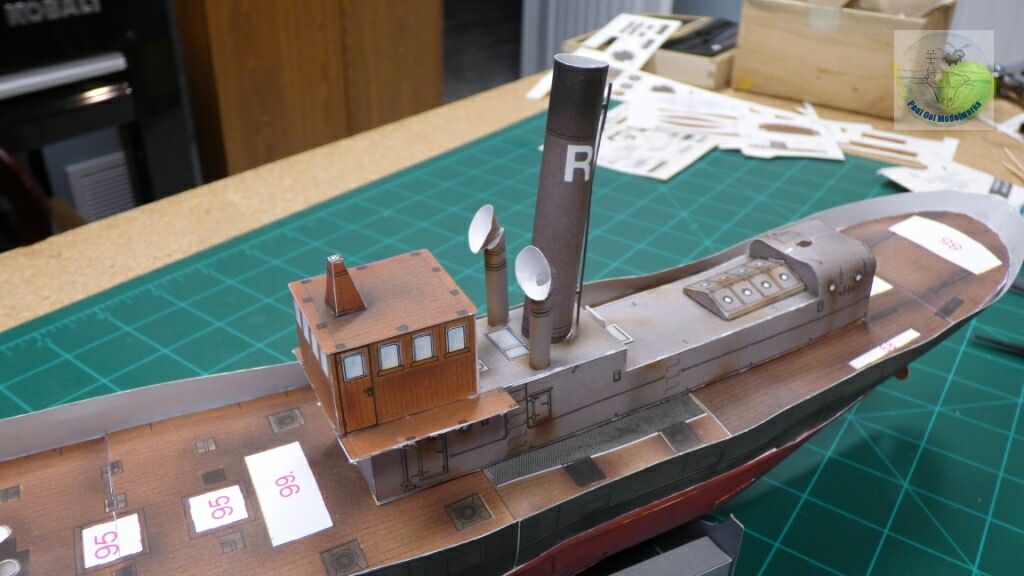
The funnel, air scoops and wheelhouse completed.
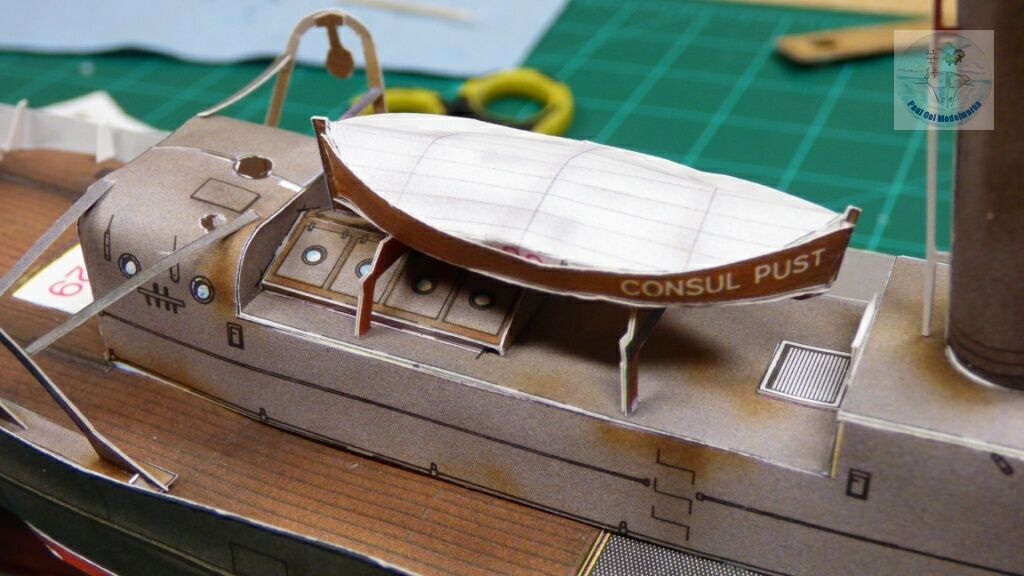
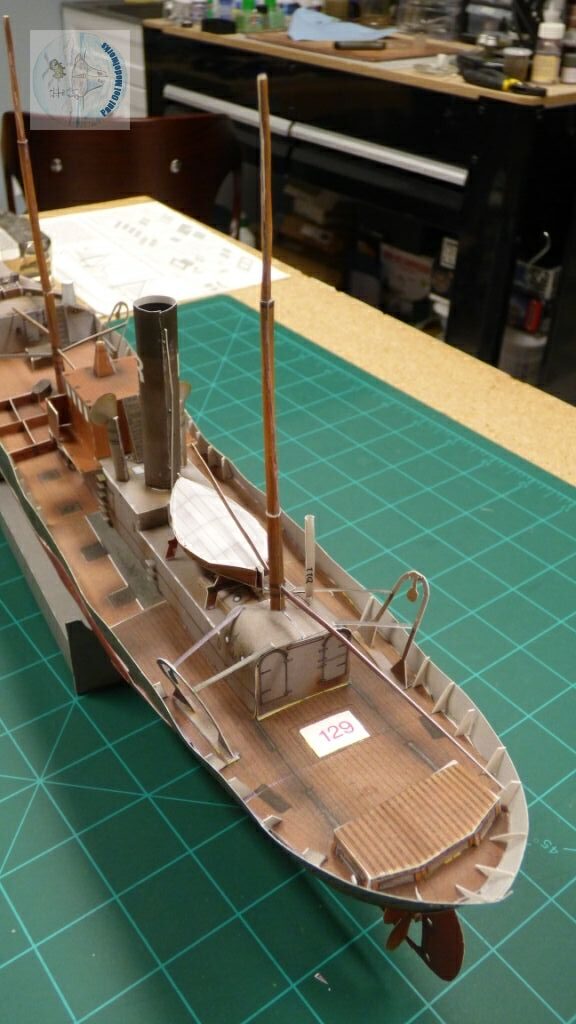
The lifeboat is a mini boat construction project in itself.
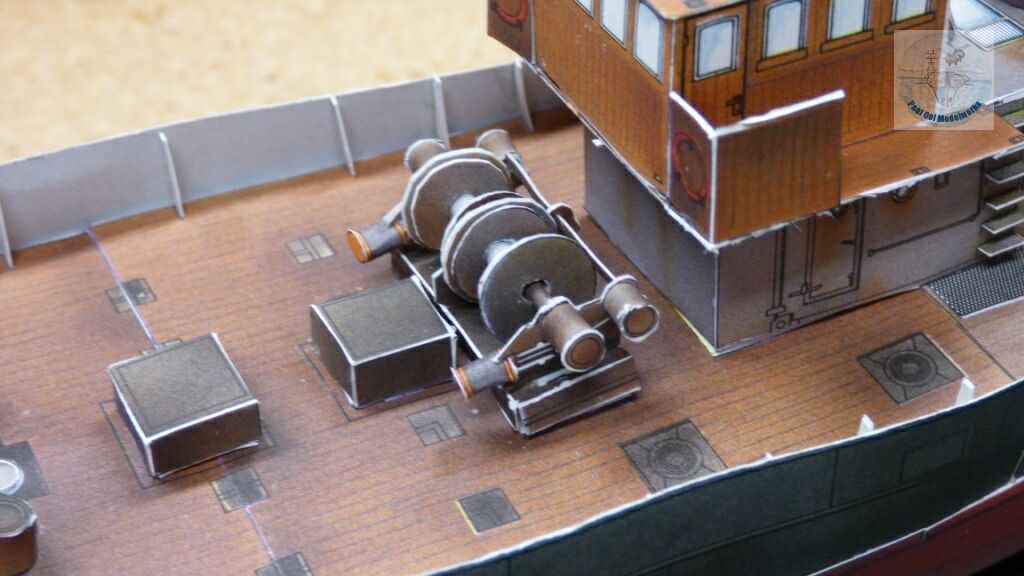 The winch assembly took quite a while to build, all of paper.
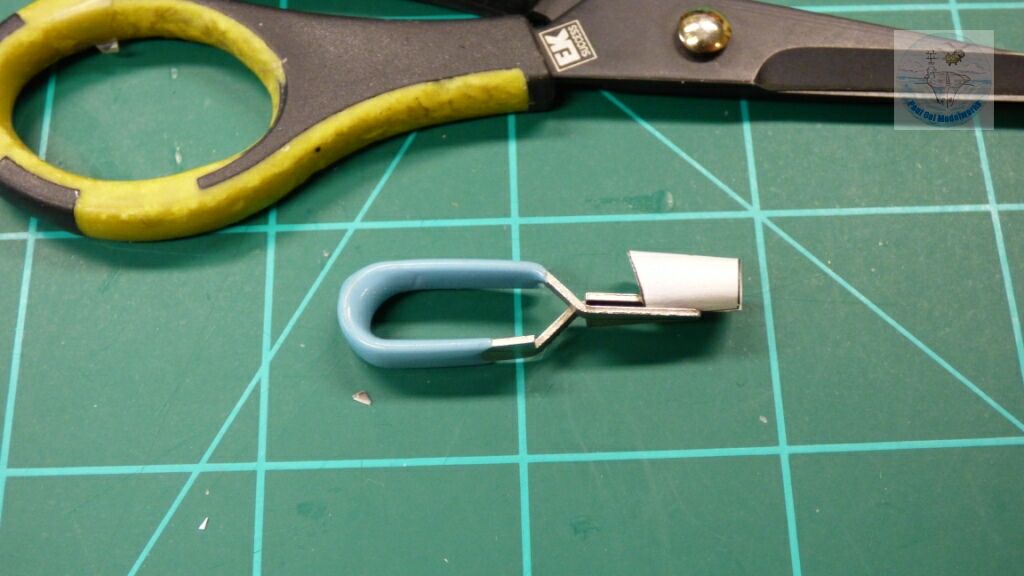
I used all kinds of clips to hold the paper joints while the glue dries (not instant glue). This is the tiniest clamp that I have, only 1/2″ clamping length and really great for the tiny cylinders in this kit.
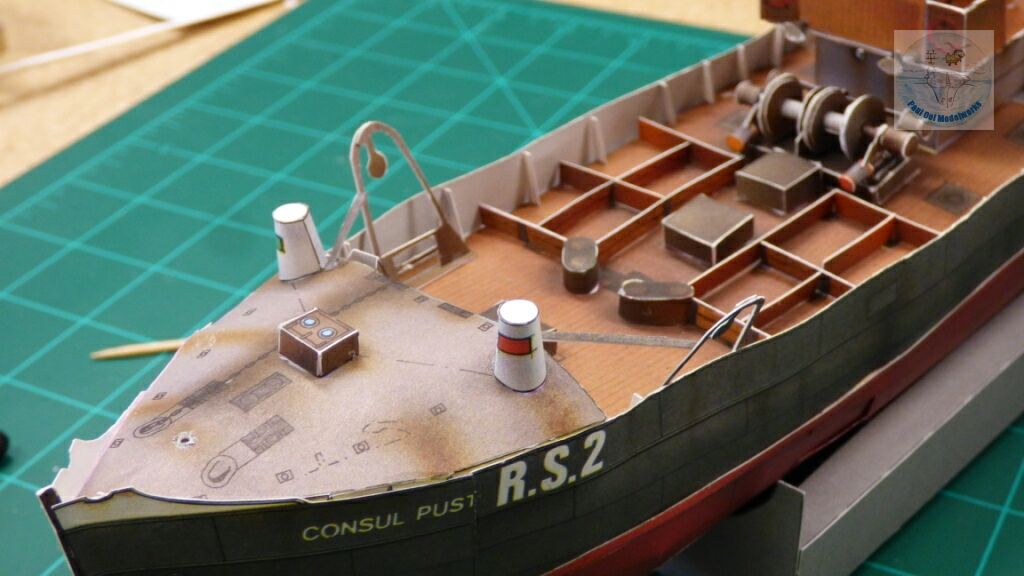
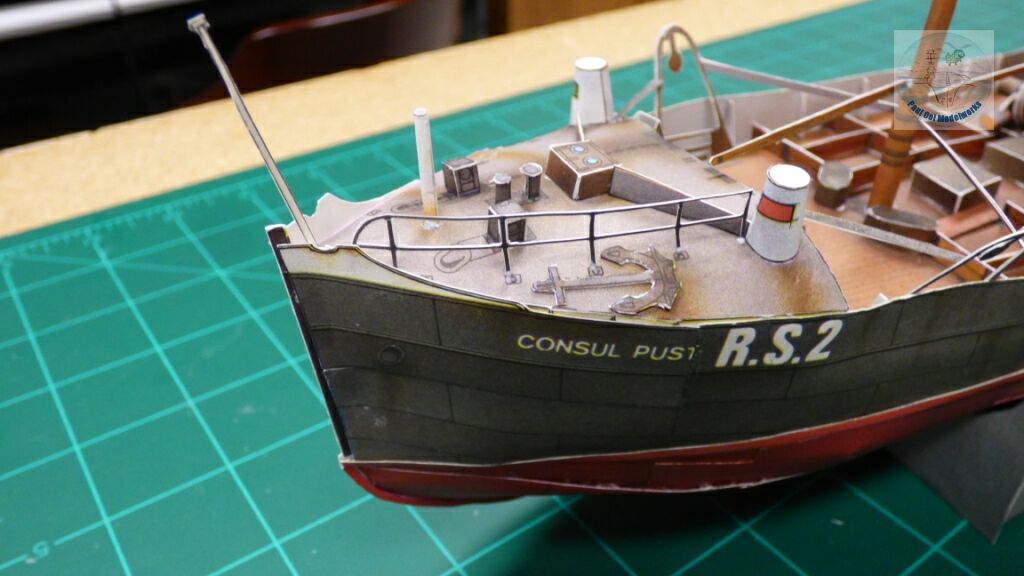
Adding details to the forecastle deck, like the navigation lanterns and also the trawler net pulleys.
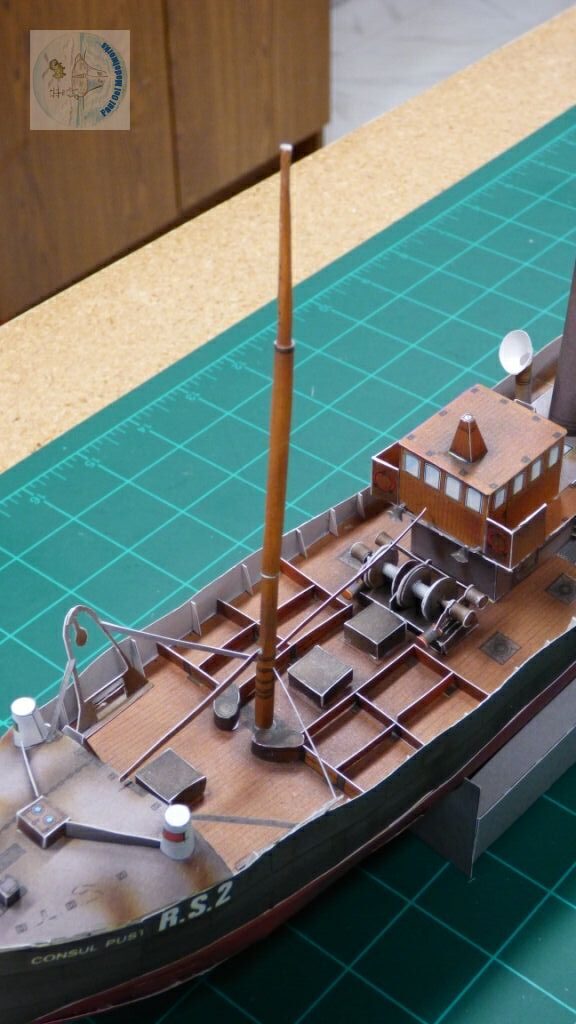
Foremast made from three segments of tightly rolled paper, followed by the hoists and derricks.
Main mast added near the boat deck.
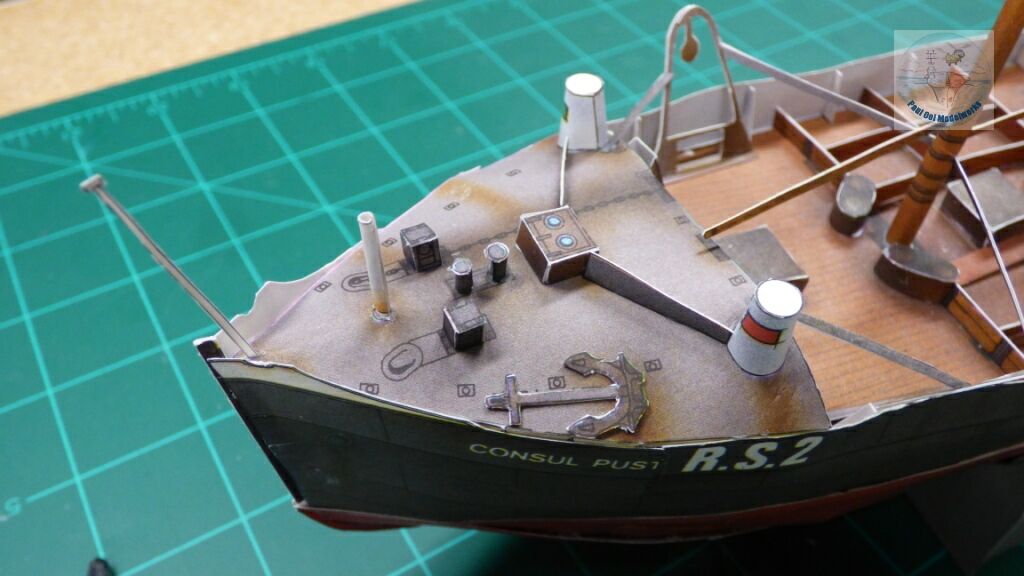
More stuff added to the forecastle, shown here is the ship’s anchor, capstans, and bow flag mast.
Tons of patience and care needed to cut out the lifelines (railings) from the paper sheets. They look really good once installed on the ship.
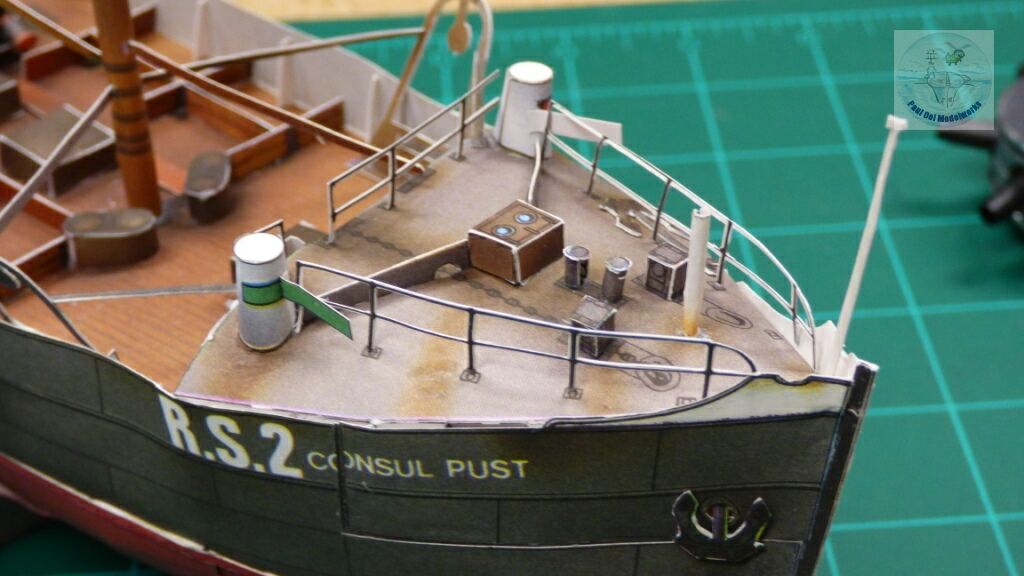
Forecastle railings fully installed.
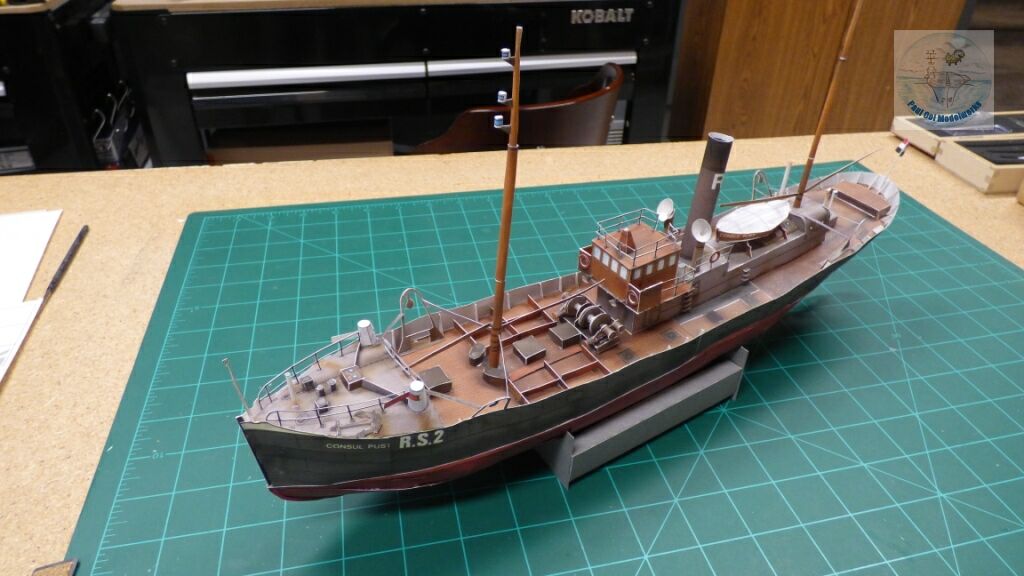
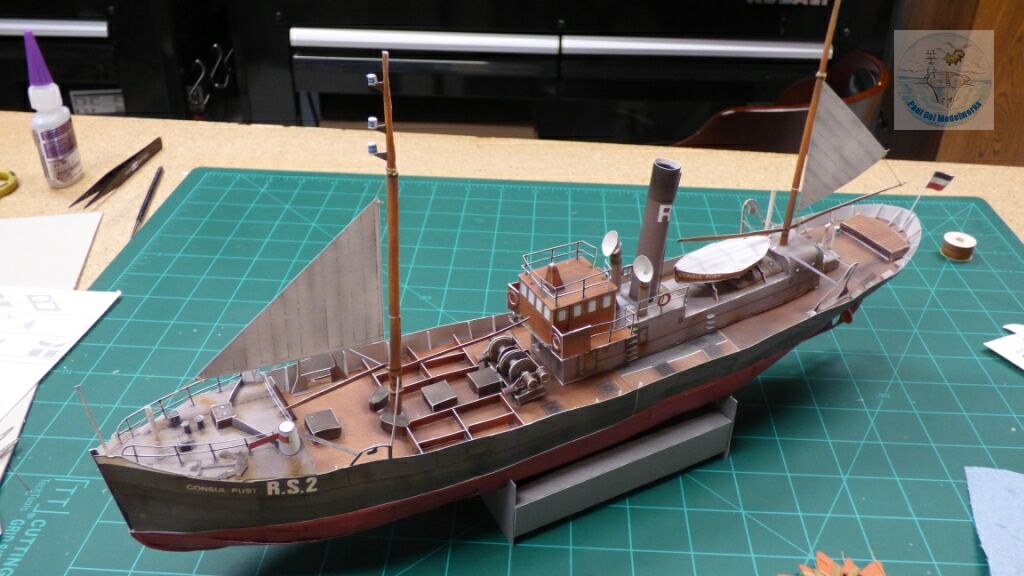
All deck elements have been installed. Only the sails are left to be installed.
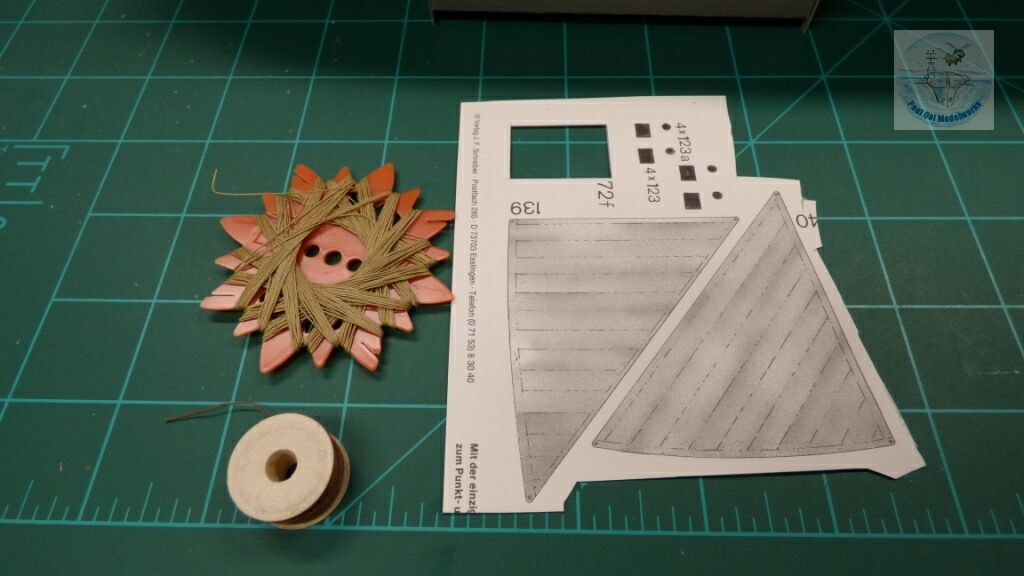
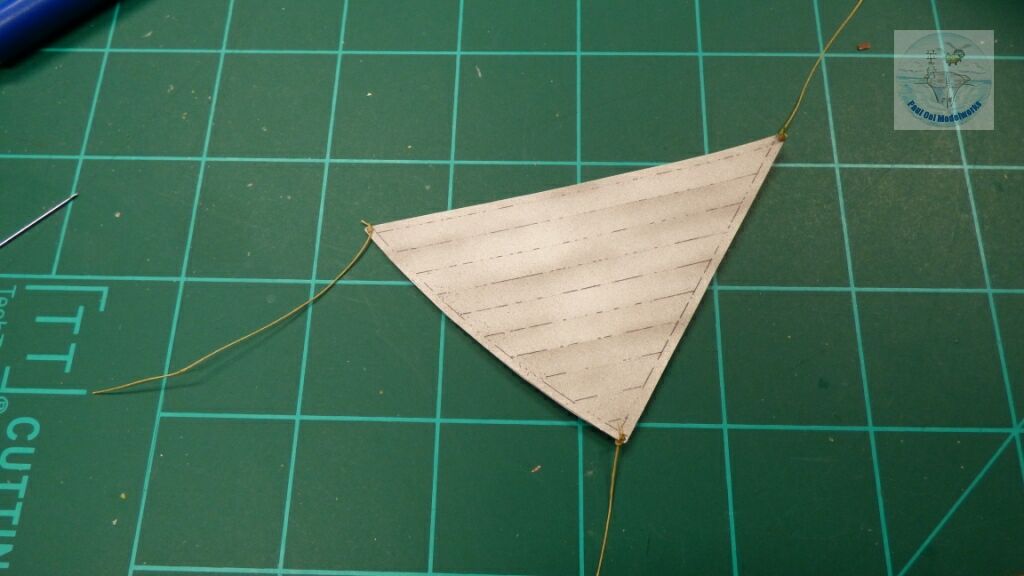
I used thread to string through the corners of each sail.
The sails are carefully tied and glued to each mast.

Rigging using .006″ diameter brass wire.
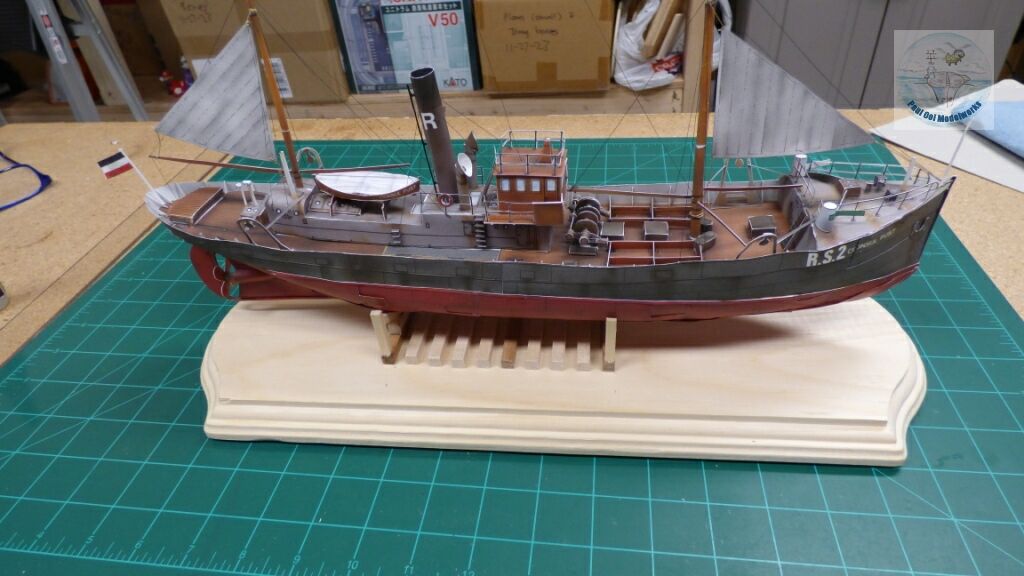
All the while, I had been using the ship’s cradle supplied with the kit. Now, I build a wooden base to replace the crude paper cradle.

The base and cradle made from bass wood is stained with burnt umber oil wash.
Leave a Reply