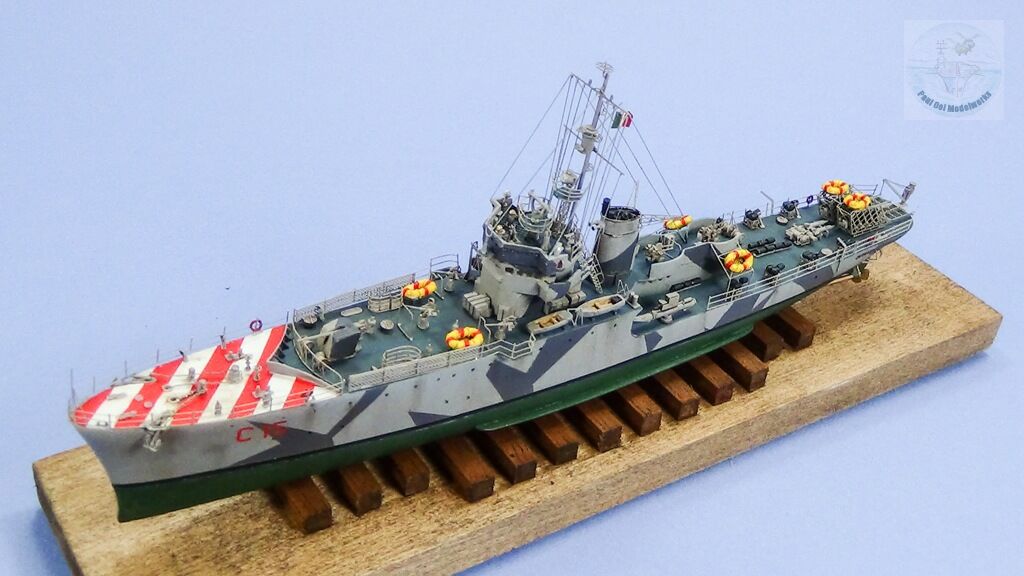
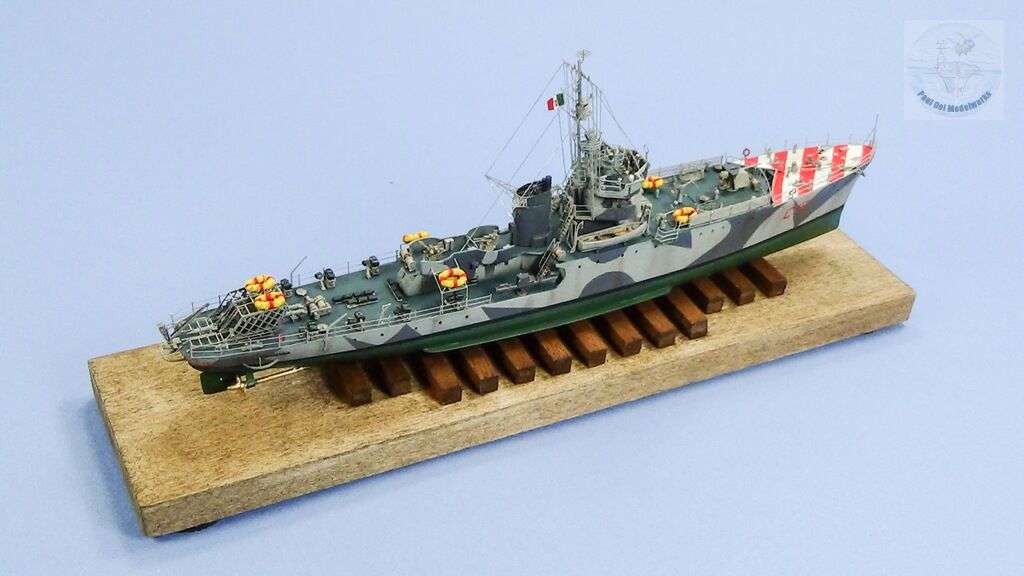
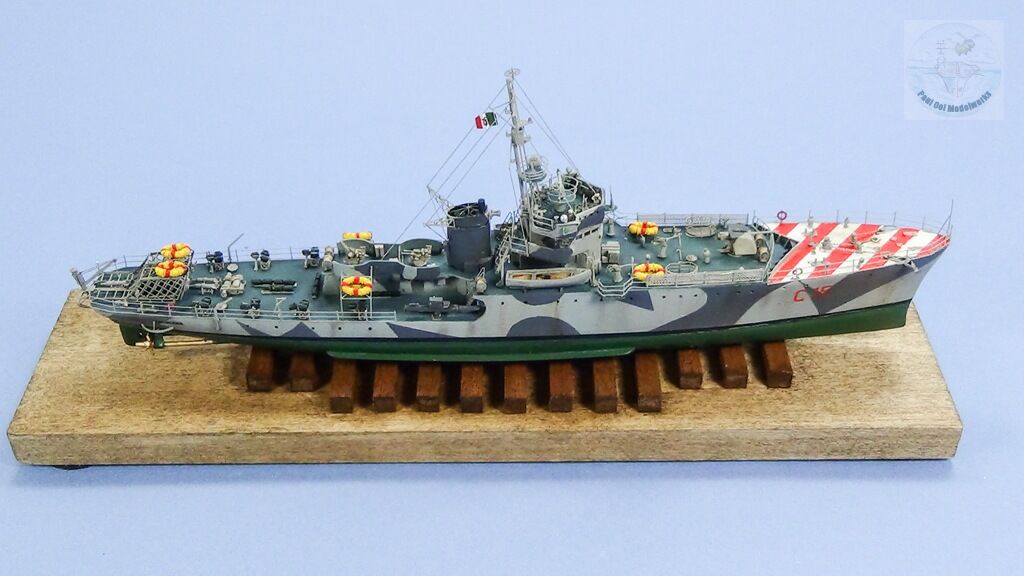
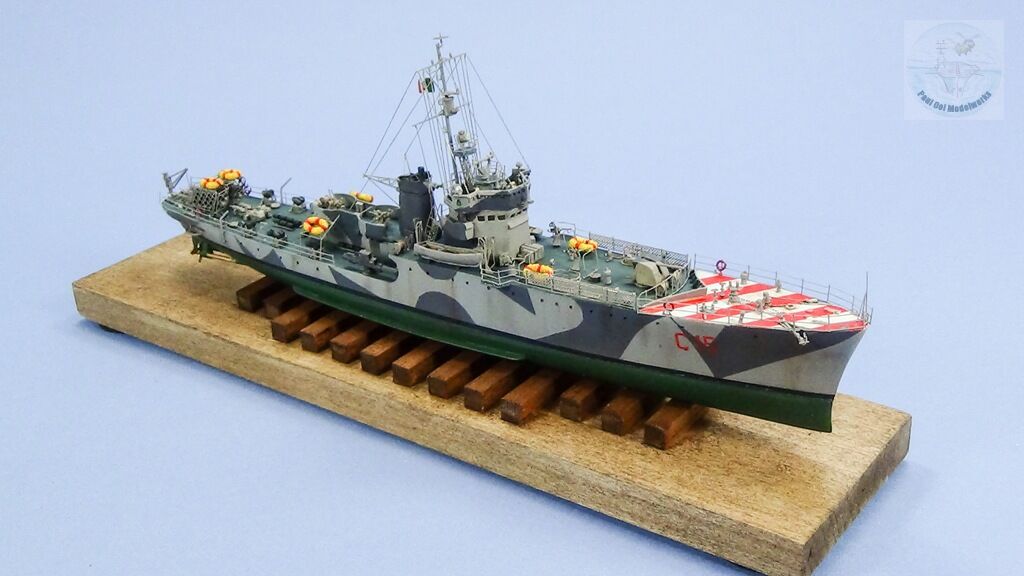
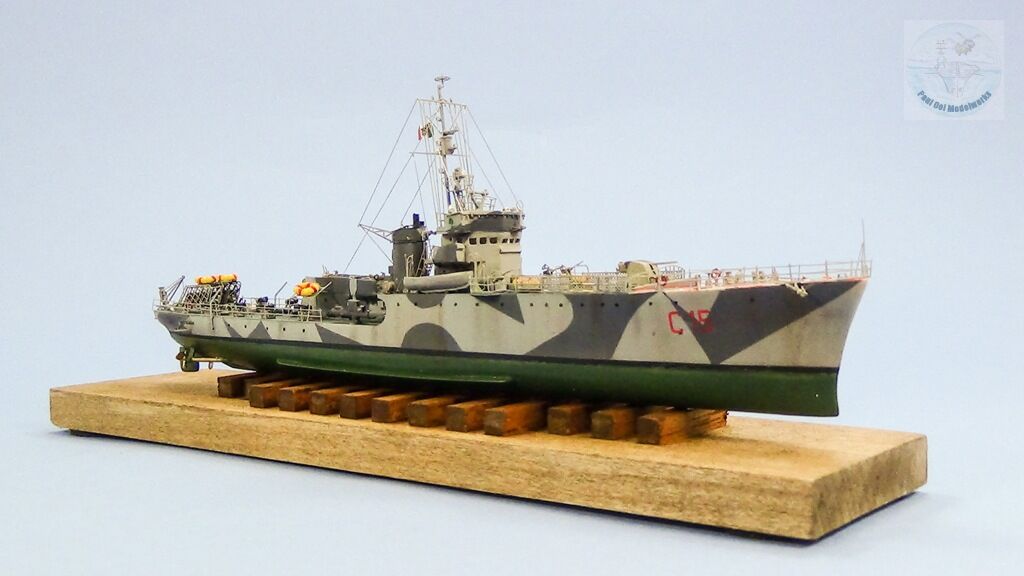
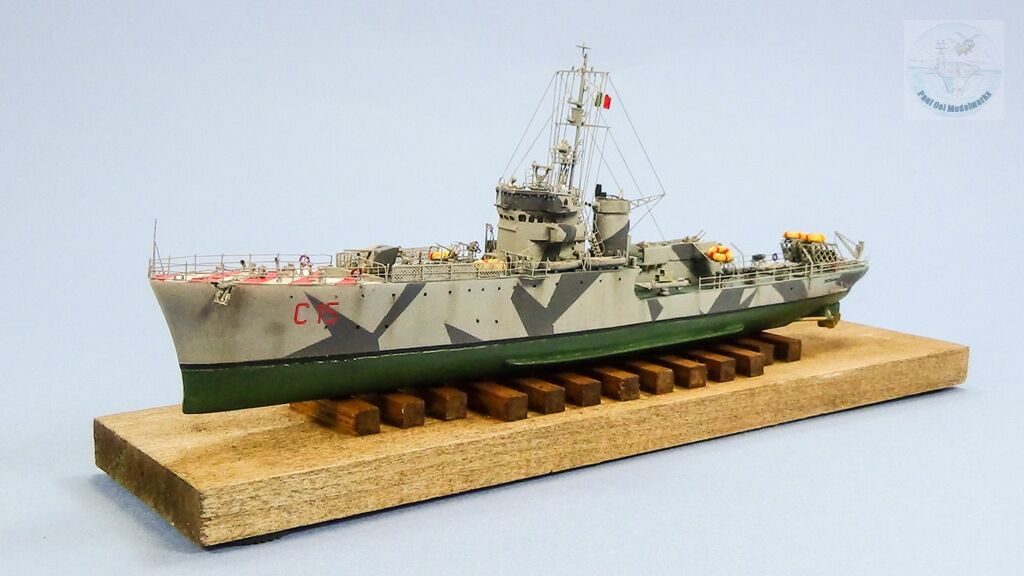
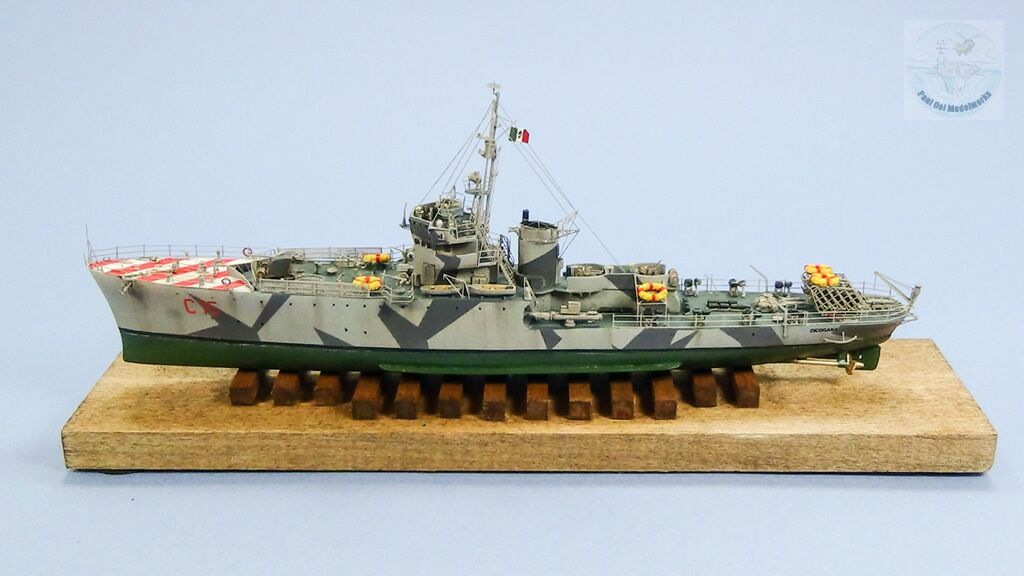
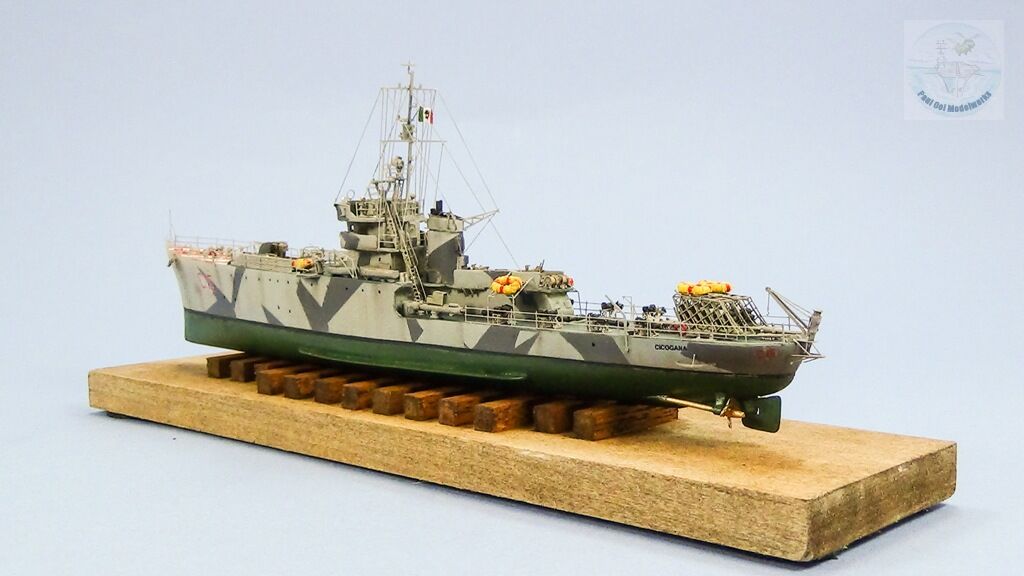
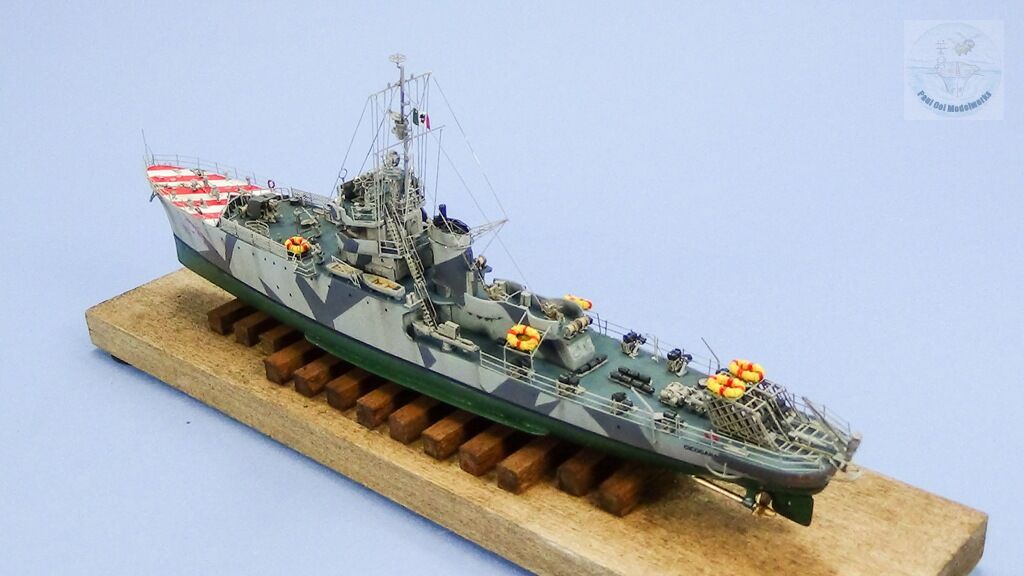
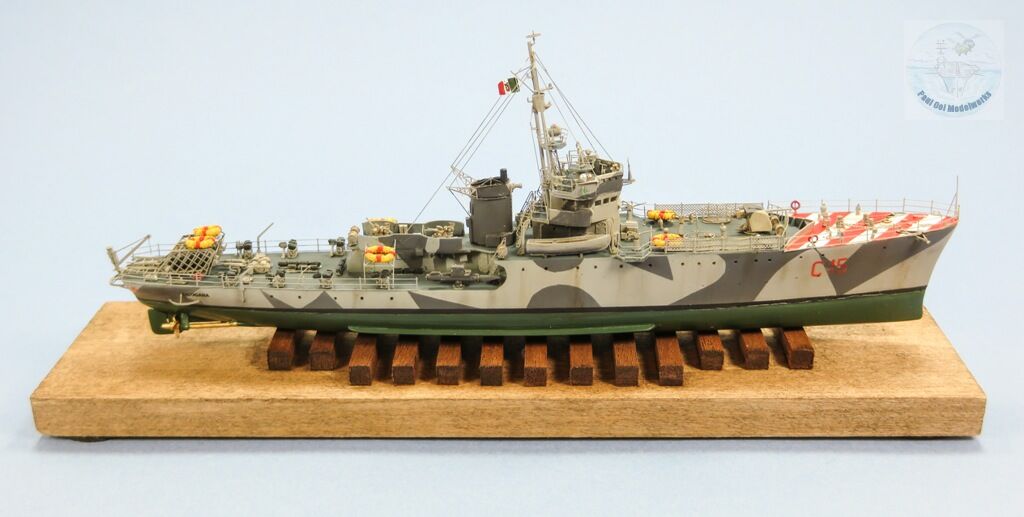
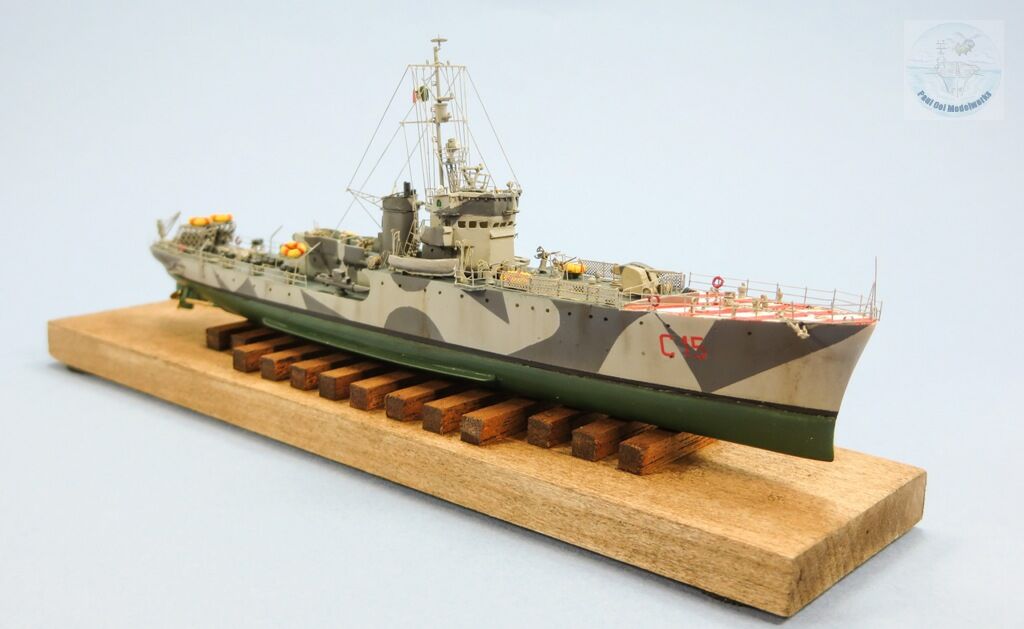
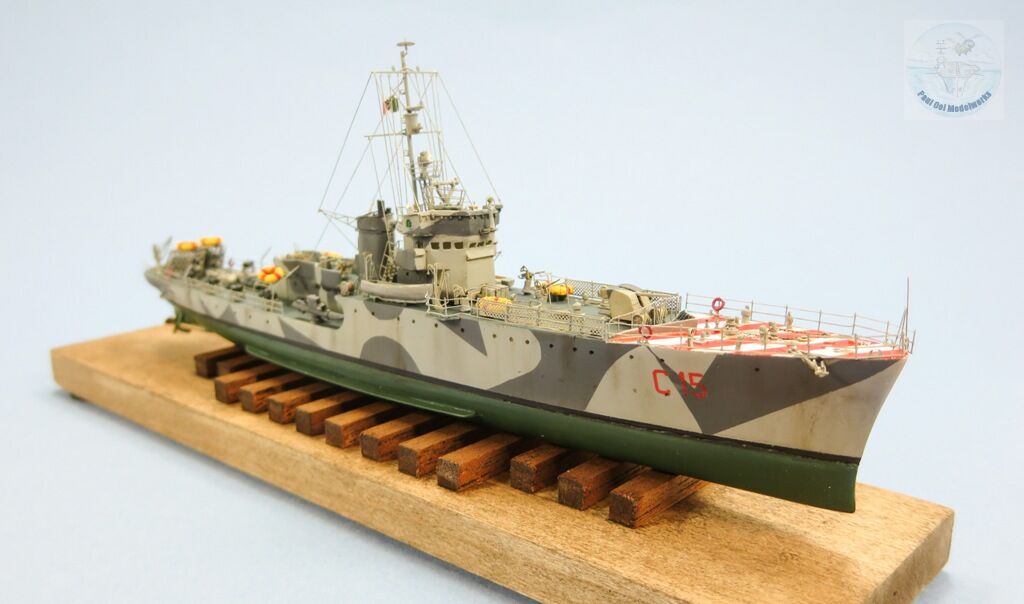
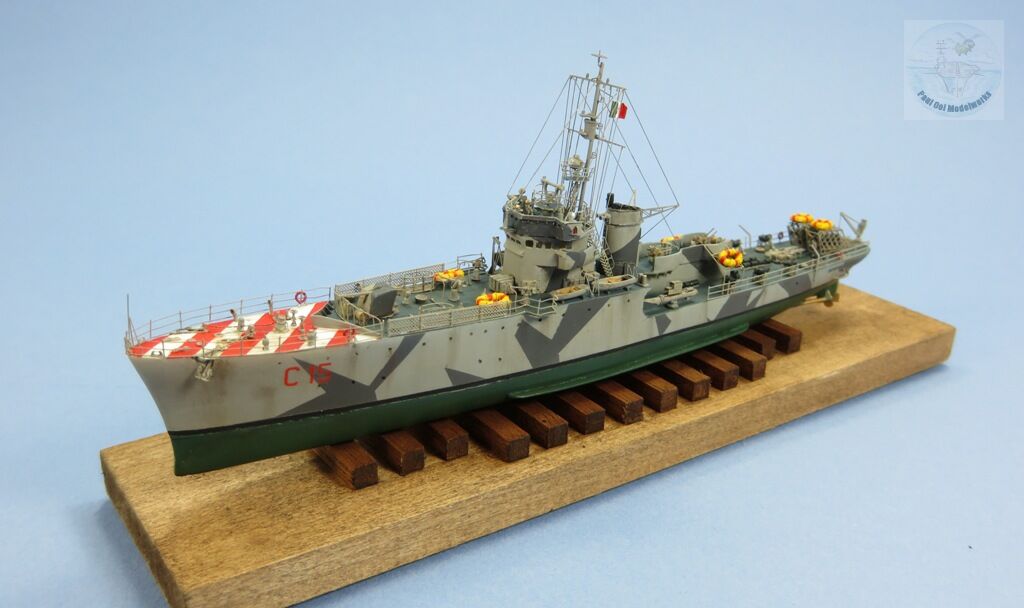
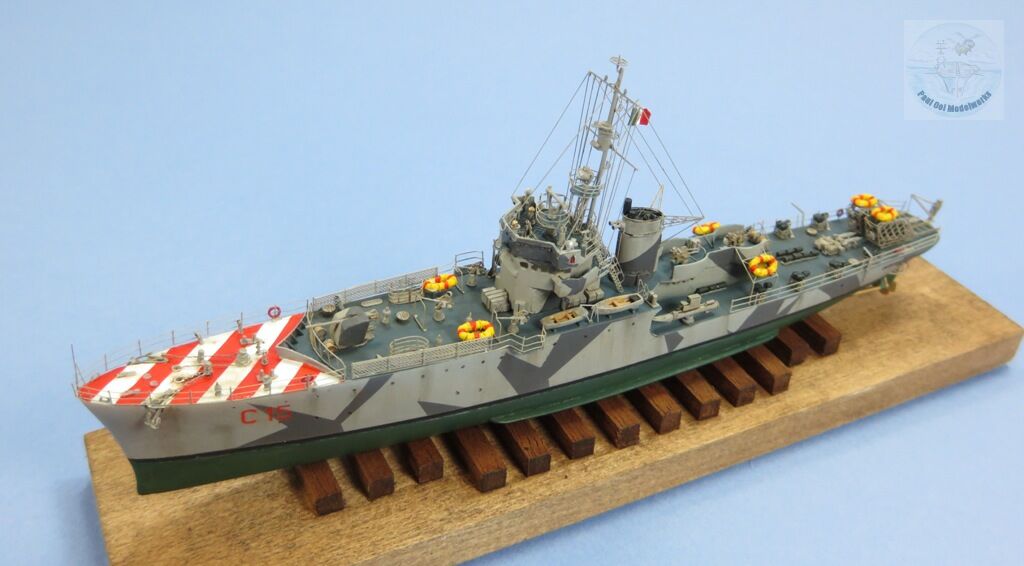
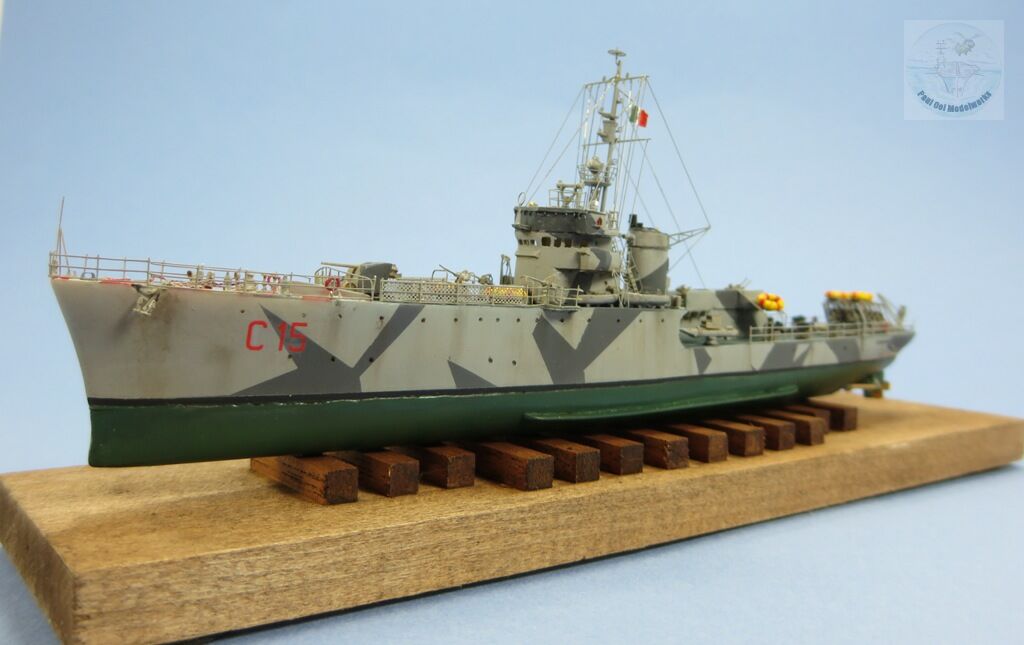
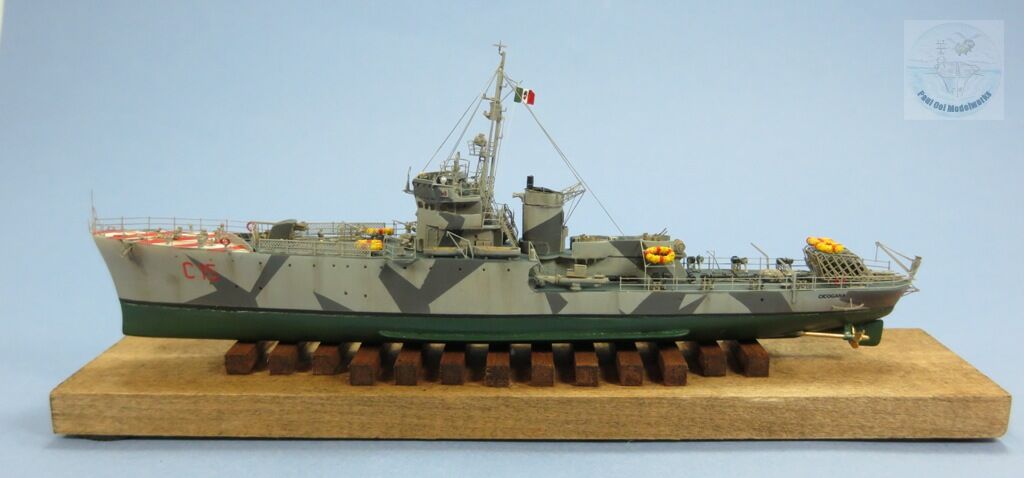
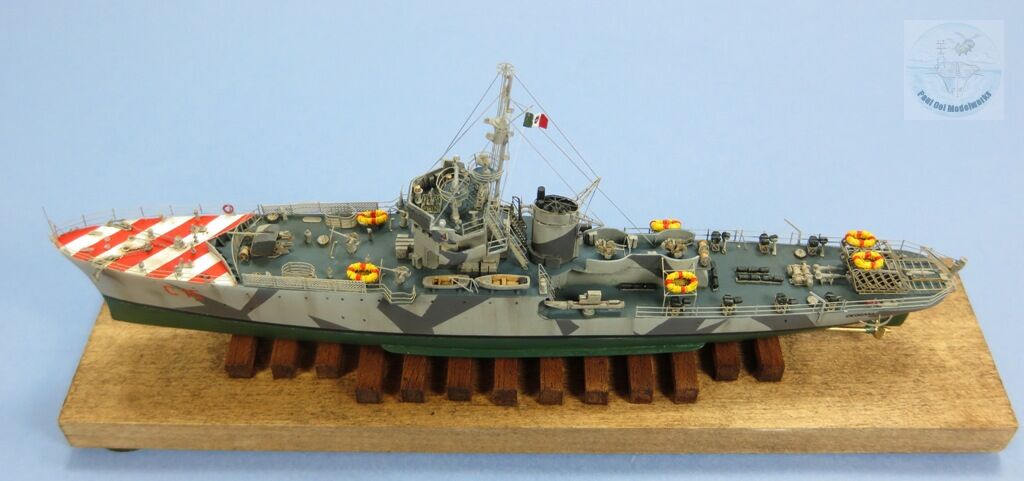
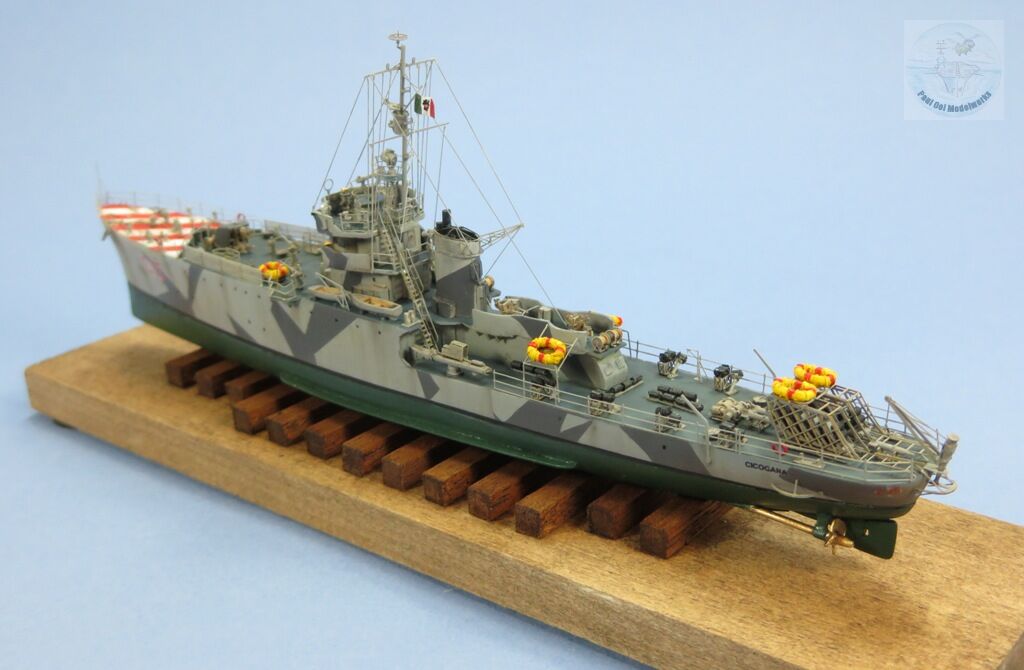
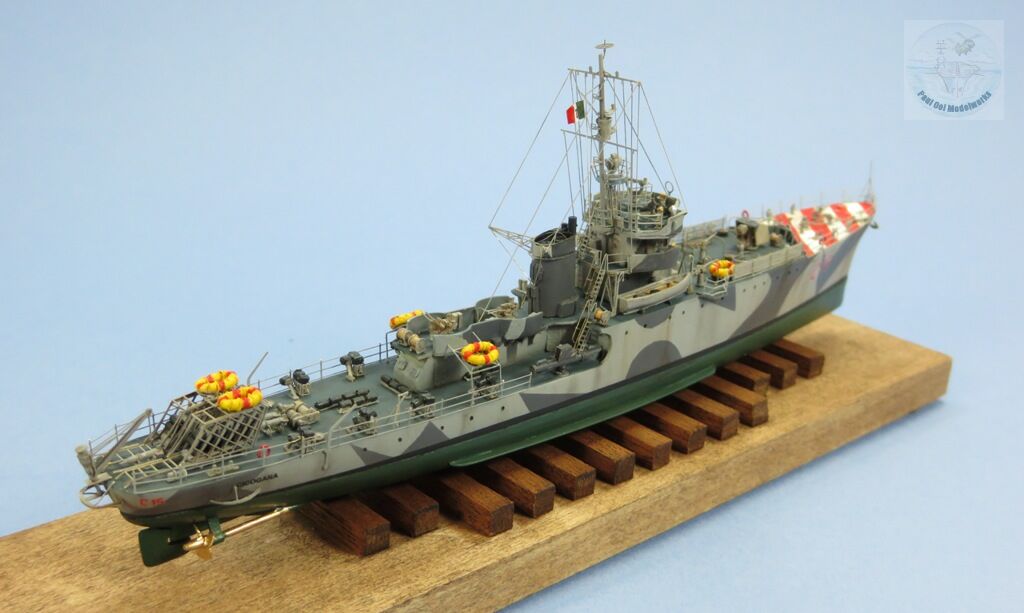
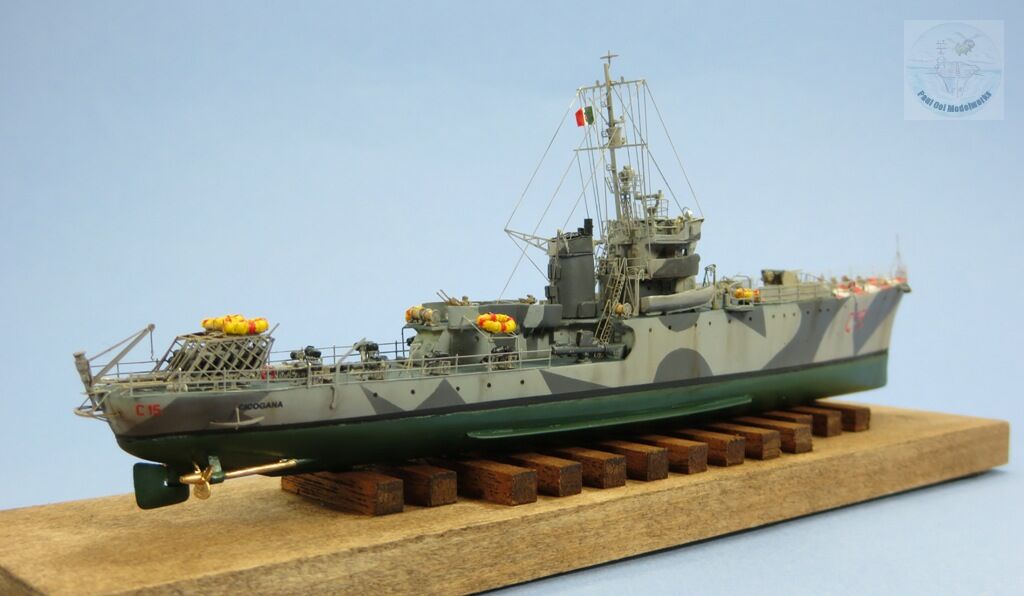
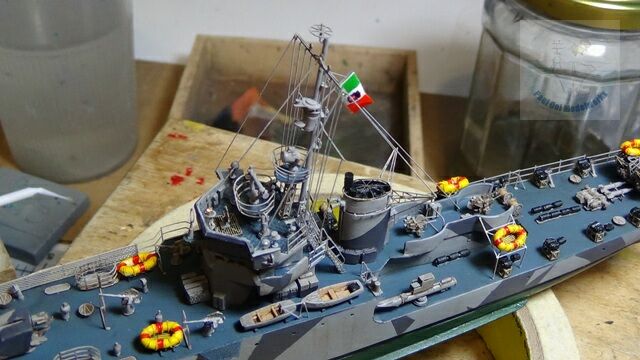
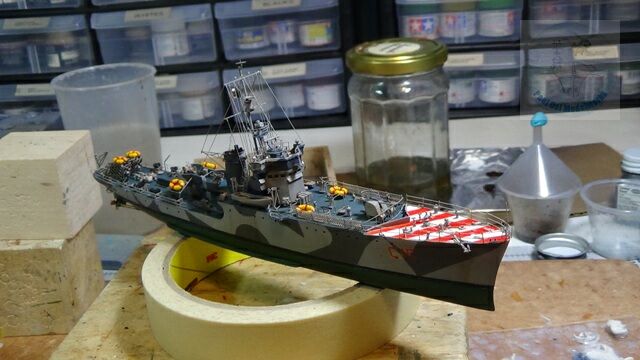
During the Mediterranean campaign in WW2, the Germans relied on the Italian Navy or Regia Marina to secure the supply routes from Europe to North Africa. While many would hear of the exploits of the Afrika Korp, little is heard of the formidable role played by the Italian Navy against the Royal Navy as they struggled for control of the Mediterranean. In the early part of the war, the Axis controlled much of the airspace over that theater so Italian ships were less worried about air attacks but they were threatened by Allied submarines. The Gabbiano class corvette escorts of which Cicogna C15 was the fifth ship built, were designed to counter the submarine threat and this is reflected in its armament of ten depth charge throwers and two large depth charge racks. The corvette also had a special “silent running” engine mode at 6 knots when hunting for subs, and equipped with sonar and hydrophones. The Cicogna was very effective in that role, and known for sinking HMS Thunderbolt in March 1943.
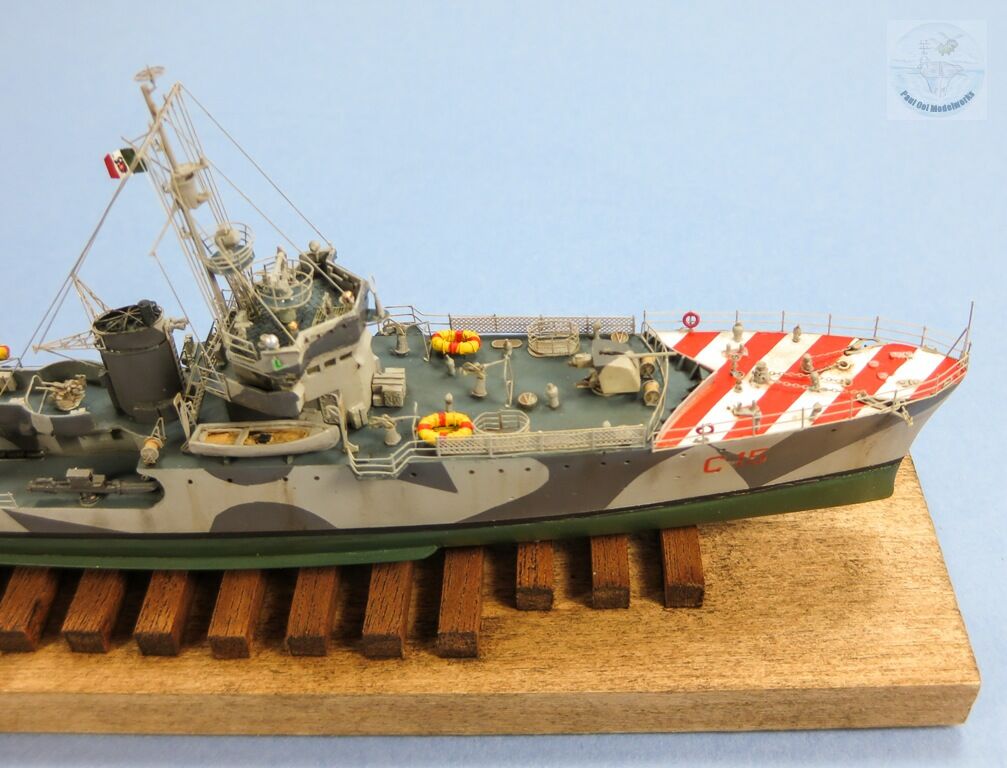
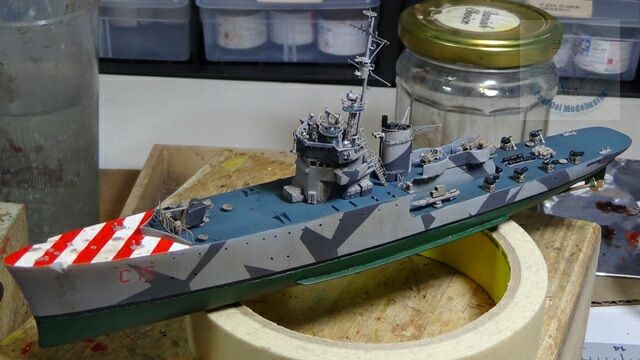
The Cicogna was painted in a disruptive light grey and dark grey hull pattern suited for anti-submarine operations. At the same time, the fore deck was painted in that distinctive Italian red and white barber pole strip pattern for Axis aircraft identification, a testament to their control of the air at that time, or so they thought. So it was such an irony that the Cicogna was lost after suffering damage from British bombers in the Straits of Messina in July 1943.
Gallery


Construction Notes
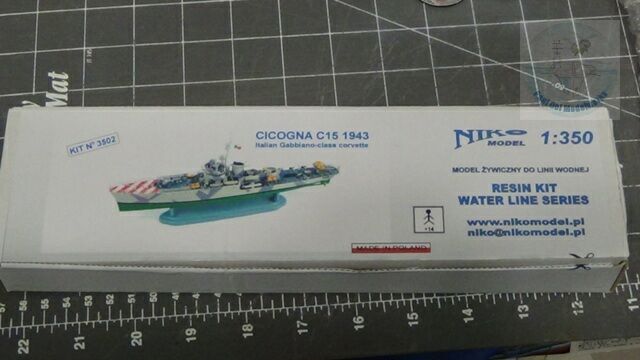
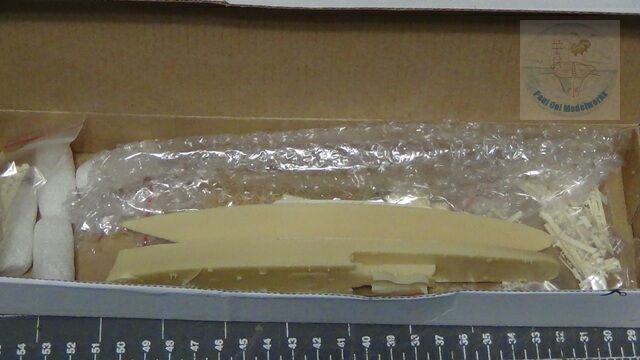
Niko Models of Poland have been issuing great resin kits of rare and interesting warships, mostly from the WW2 era. The Cicogna kit is in 1/350th scale and highly detailed with both resin and photoetched parts. Resin kits tend to be very good in details but can be quite challenging in fitting some parts together so much patience is needed. I enjoyed building this good-looking corvette and look forward to similar type releases from Niko in the future.
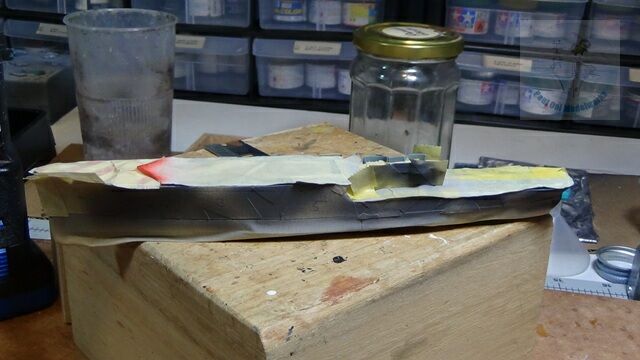
I started by joining the lower hull onto the main hull to make a full hull model instead of the waterline version. The two large resin parts do not match very well so quite a bit of filling and planing had to be done around the waterline.
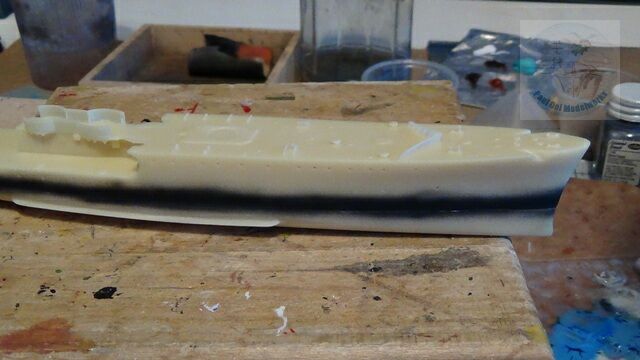
Next I spray painted Tamiya NATO Black XF69 to form the black waterline. I then apply a tape mask over the black section before overspraying with the main hull camouflage pattern.
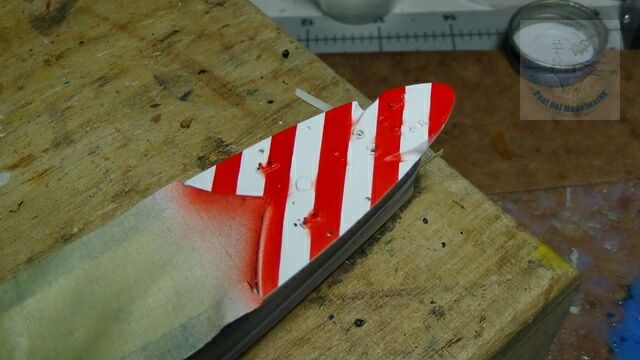
The main deck is painted with Tamiya Medium Blue XF18, while the fore deck is first sprayed with Flat White and then masked off before applying Flat Red.
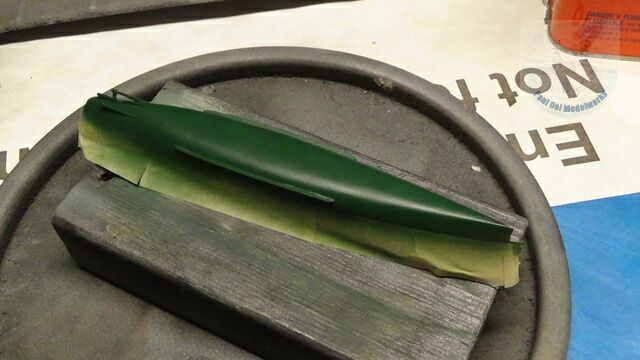
For the bottom of the hull, I decide to use Tamiya Dark Green 2 XF70 which is a little more somber than the box illustration where the green seems a bit bright.
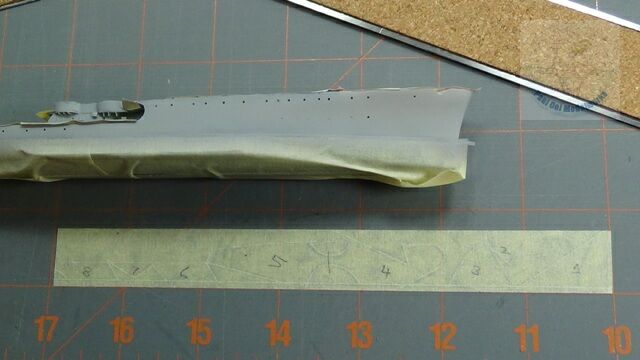
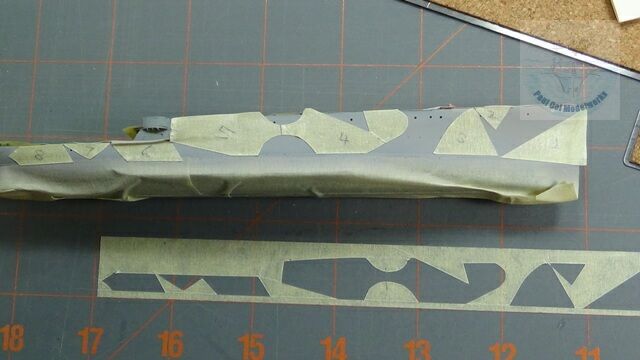
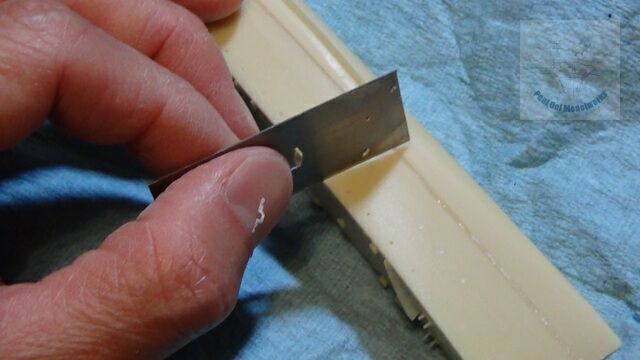
I noticed that Niko provided almost exact 1/350 scale side profile prints of the camouflage patterns, so I traced these onto masking tape. These are then carefully cut out for masking of the hull. First Tamiya Sky Grey XF19 was painted on the hull, and then the masks were applied.
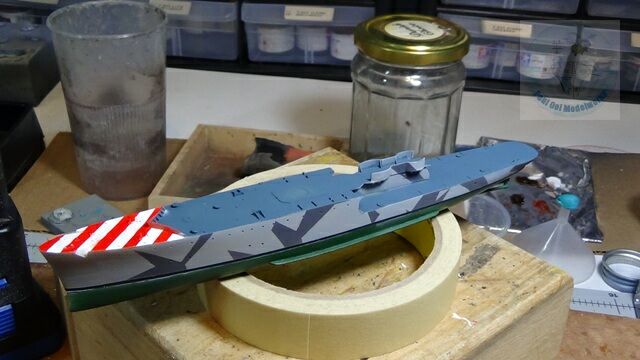
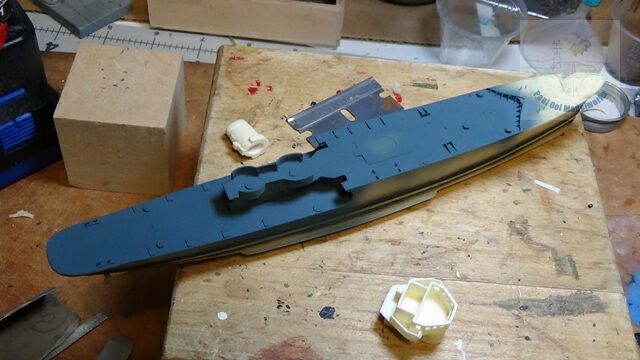
The masked hull is oversprayed with Tamiya Dark Grey XF24. Once the masks are removed, the hull camouflage is complete.
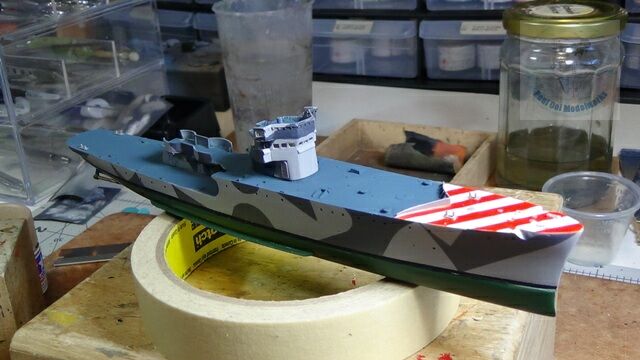
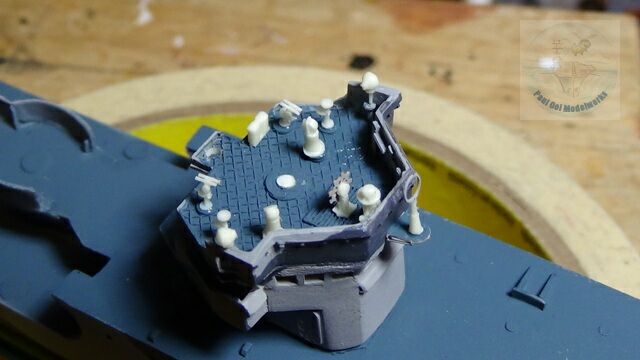
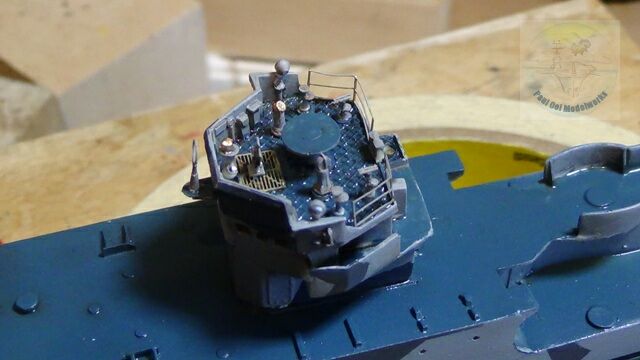
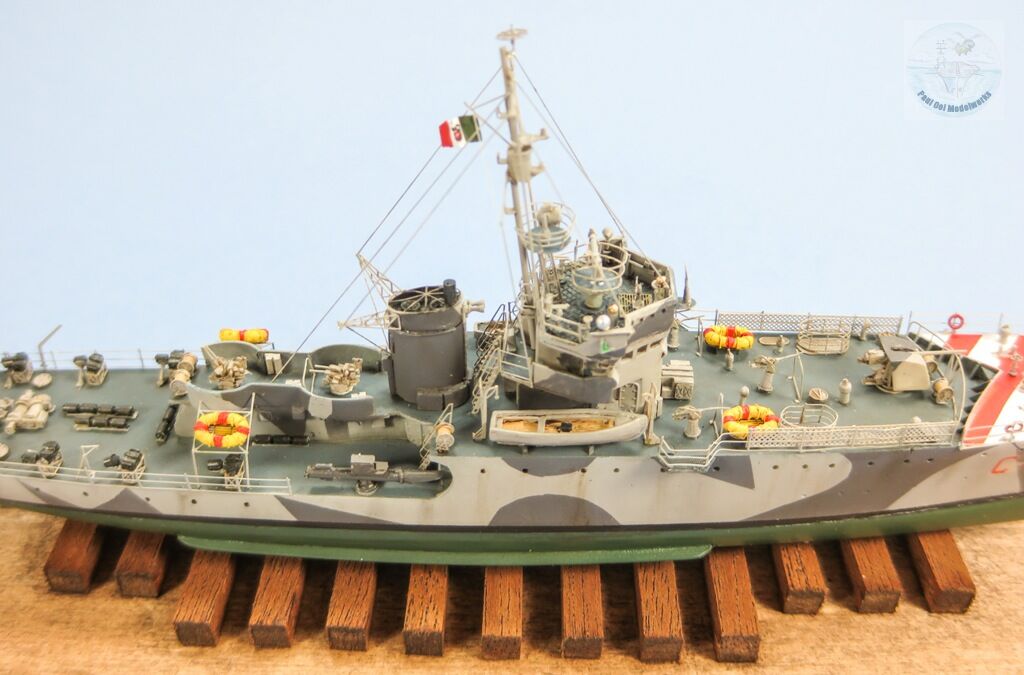
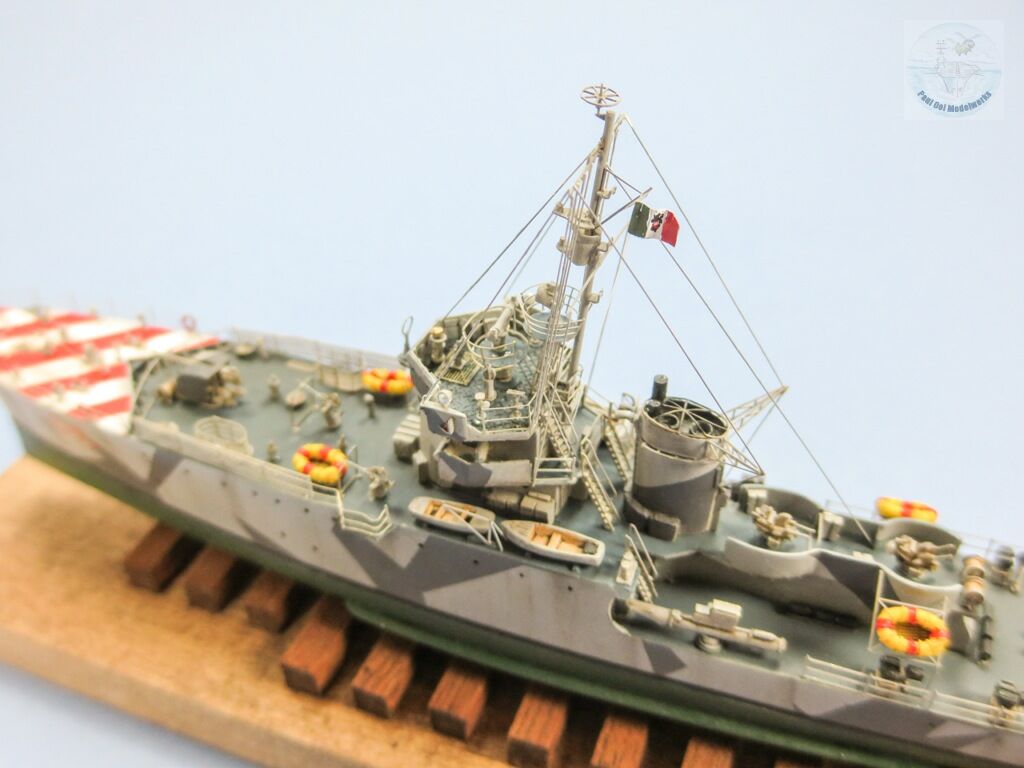
A lot of details are crammed into the main superstructure. I start with installing the superstructure, and then install the details on the command deck. Notice that the camouflage pattern continues through the superstructure (and also the funnel section later). At key junctions throughout the subsequent sequence, I would stop to apply weathering wash of Raw Umber + Lamp Black turpenoid wash.
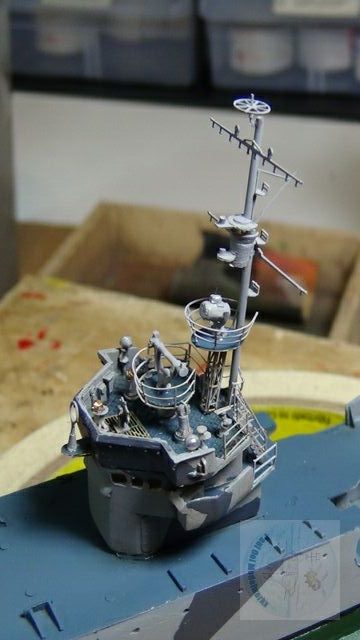
The main mast is scratch built from brass rods and kit photo-etched parts. Niko has provided exact 1/72 scale diagram that you can use as a template to get the exact lengths for the mast and relative positions of the kit parts. I was very pleased with the results.
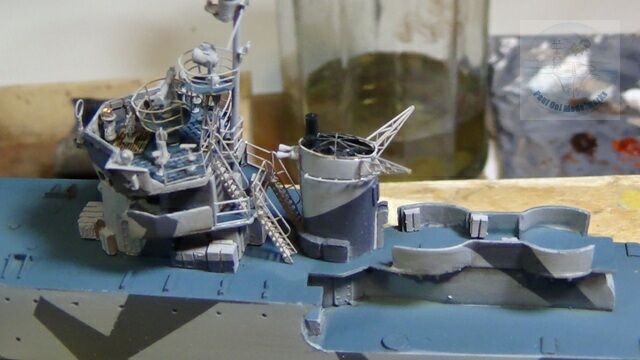
The next major sub-assembly added was the funnel.
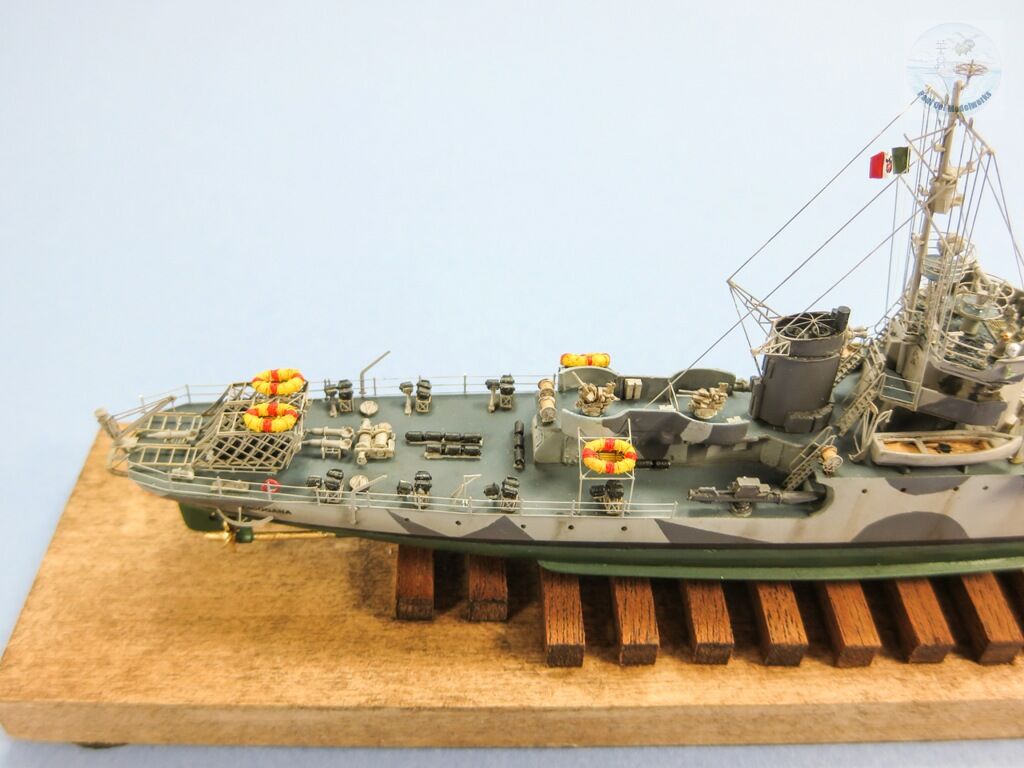
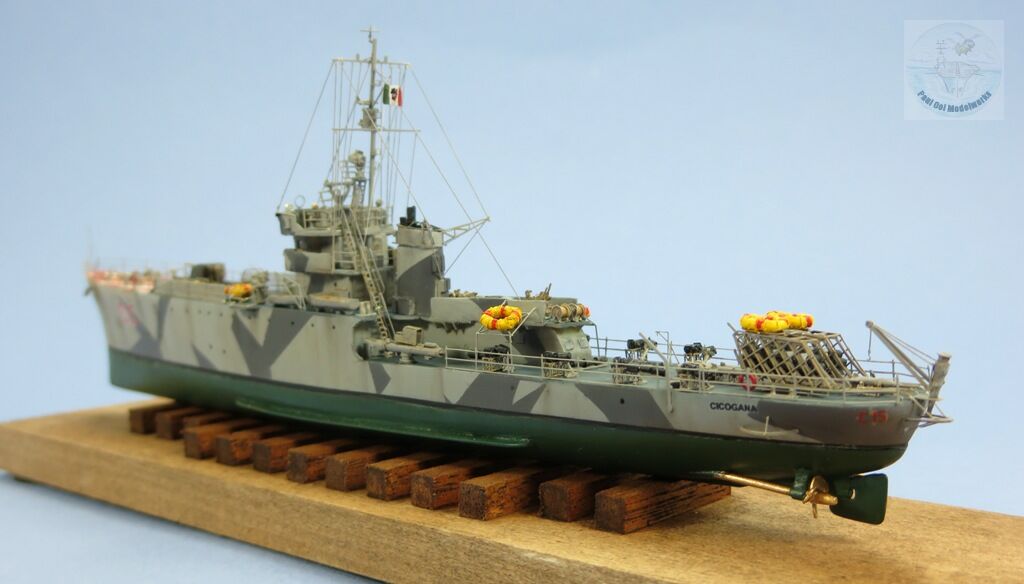
Next, the anti-submarine equipment and depth charge throwers are added to the aft deck.
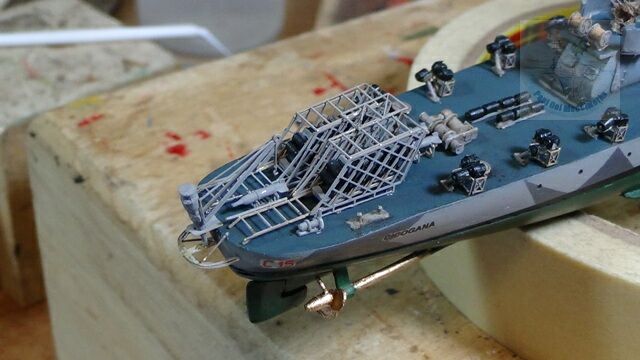
The two large depth charge racks and the aft crane were mini-projects in themselves but the results are well-worth the effort.
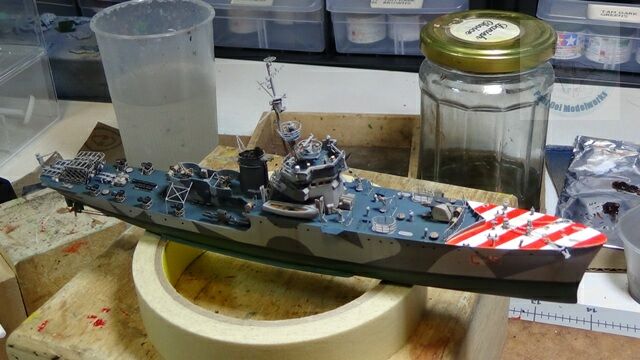
Lifeboats and launches were added to the ship.
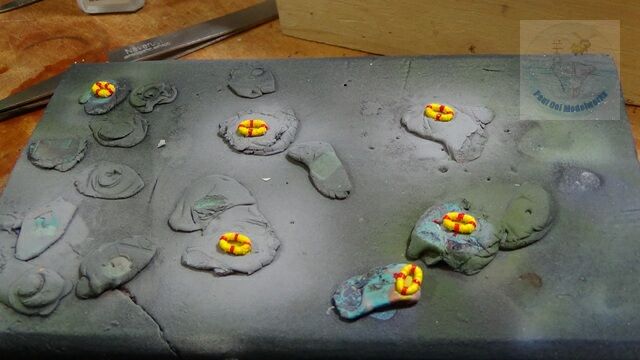
The six life rafts were painted Flat Yellow, followed by Flat Red stripes. These add a lot of color to the deck.
.006 inch brass wire rigging was added to the main superstructure.
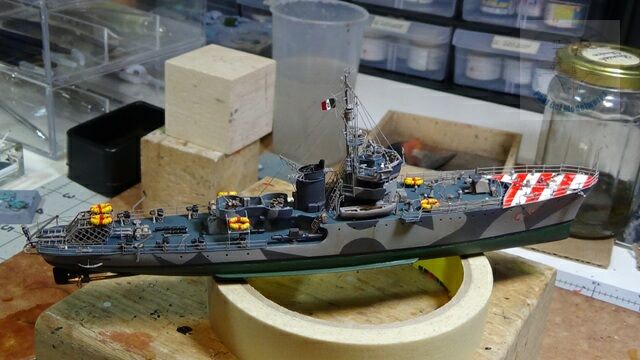
Lifelines added around the main deck. Also the flag decal provided with the kit was too shiny, so I substituted it with an aluminum foil flag painted with the Italian ensign.
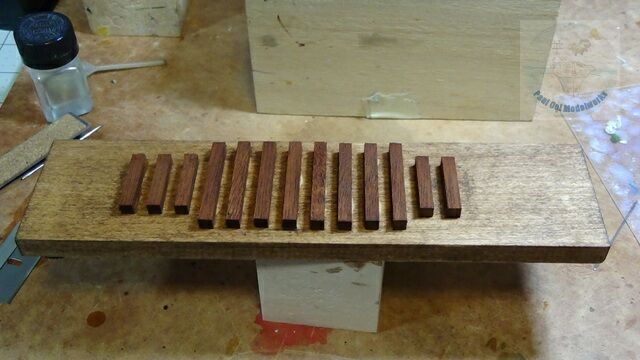
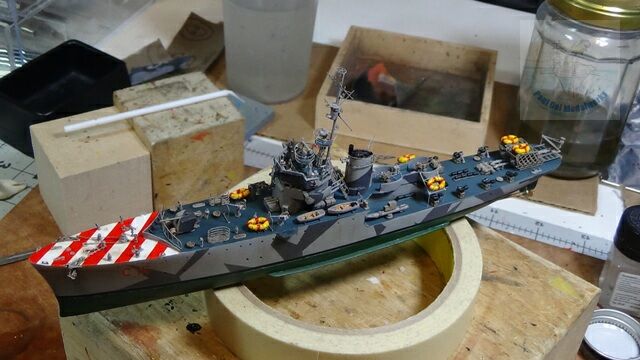
The base is made from 2″ x 8″ bass wood and 3/16″ square cherry wood sections, stained with Raw Umber and turpenoid wash.
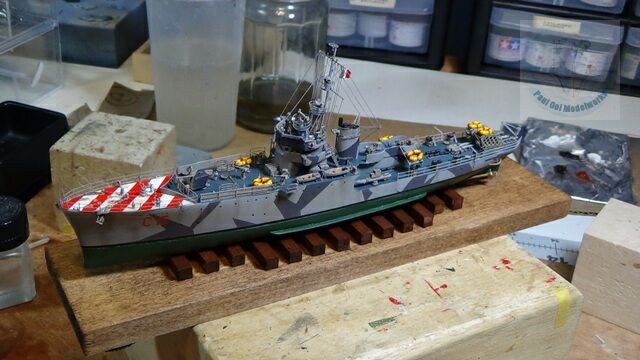
The model is carefully mounted onto the wood base and then weathering added with chalk pastels.
Leave a Reply