The Royal Malaysian Armored Corp was originally formed by the British in 1952 primarily operating scout cars and light armored cars for anti-insurgency actions. Until the 1960’s the predominant thinking was that only wheeled vehicles and light scout tanks were suitable for tropical operations. The terrain in Malaysia (both East and West) were dominated by ragged mountainous interior and river valleys with a lot of swamps, generously covered by thick jungle vegetation. The Vietnam War changed those assumptions and neighboring Singapore’s acquisition of the AMX13/75 in 1969 was another nail in the coffin of that military doctrine.
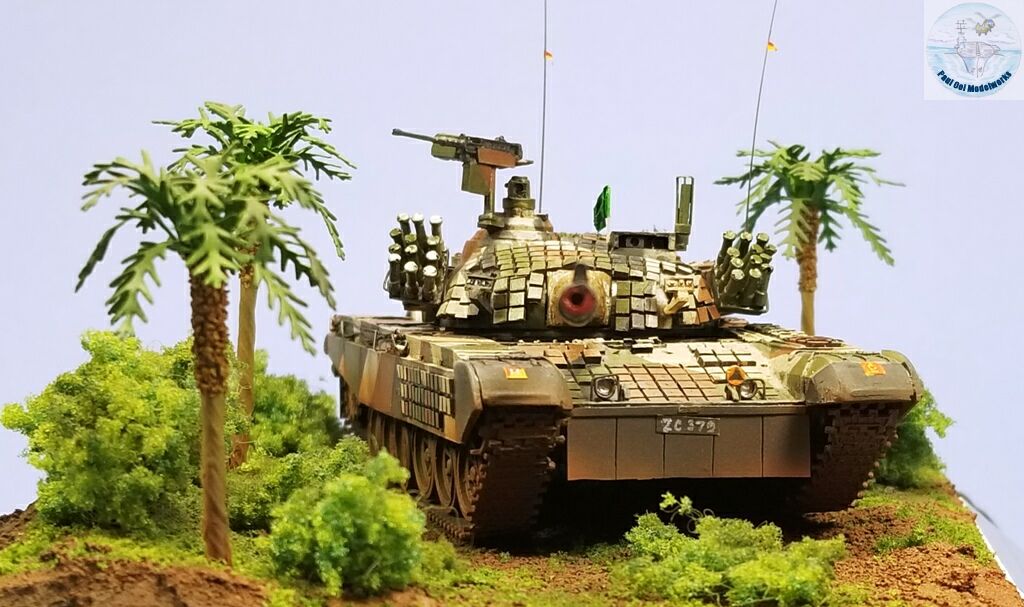
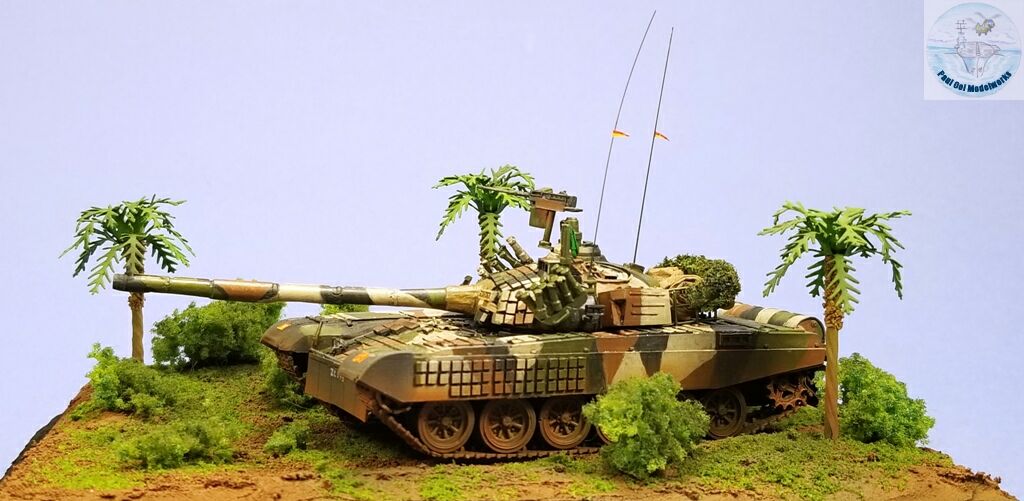
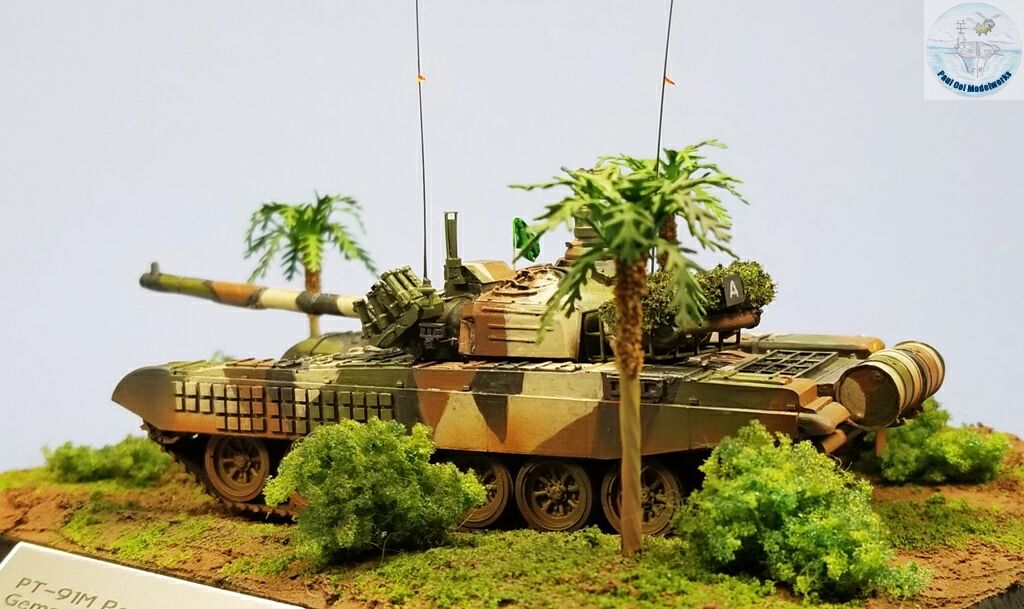
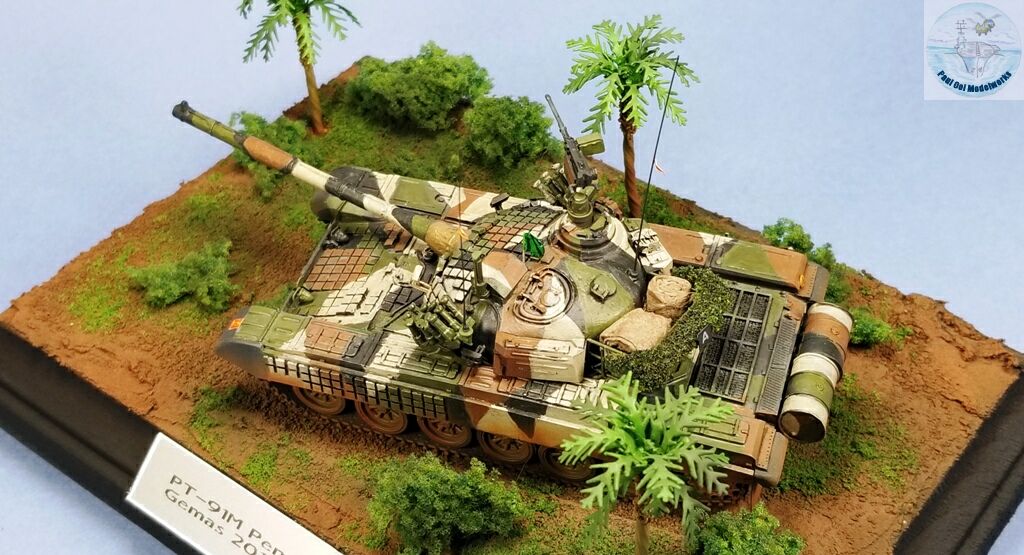
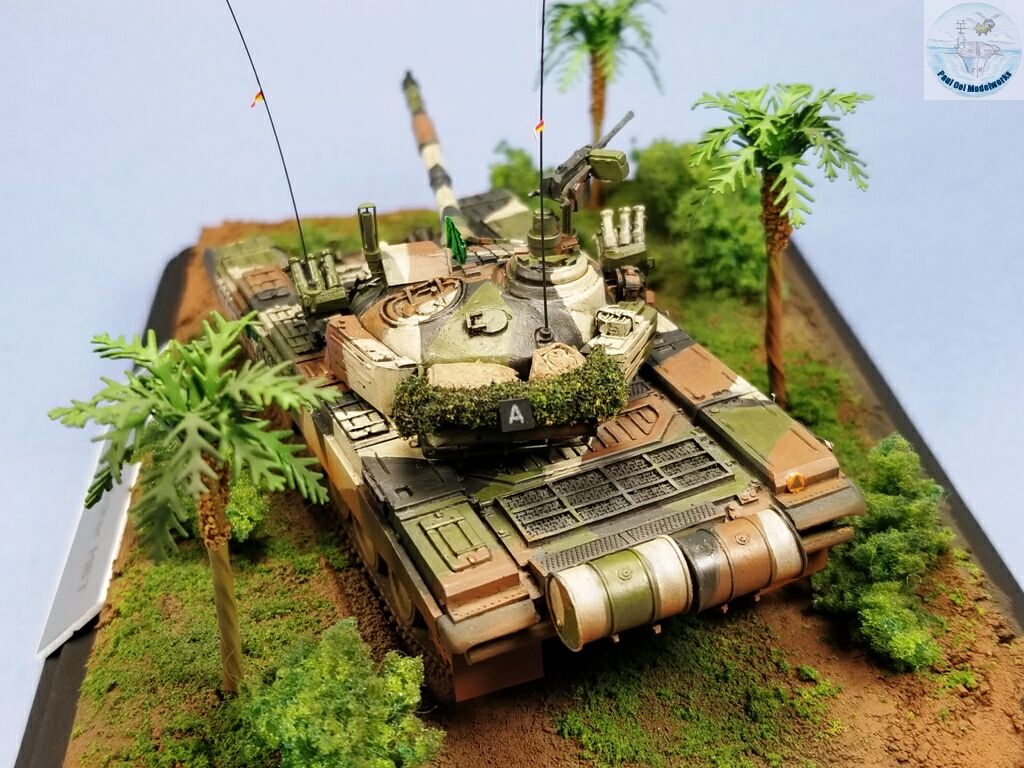
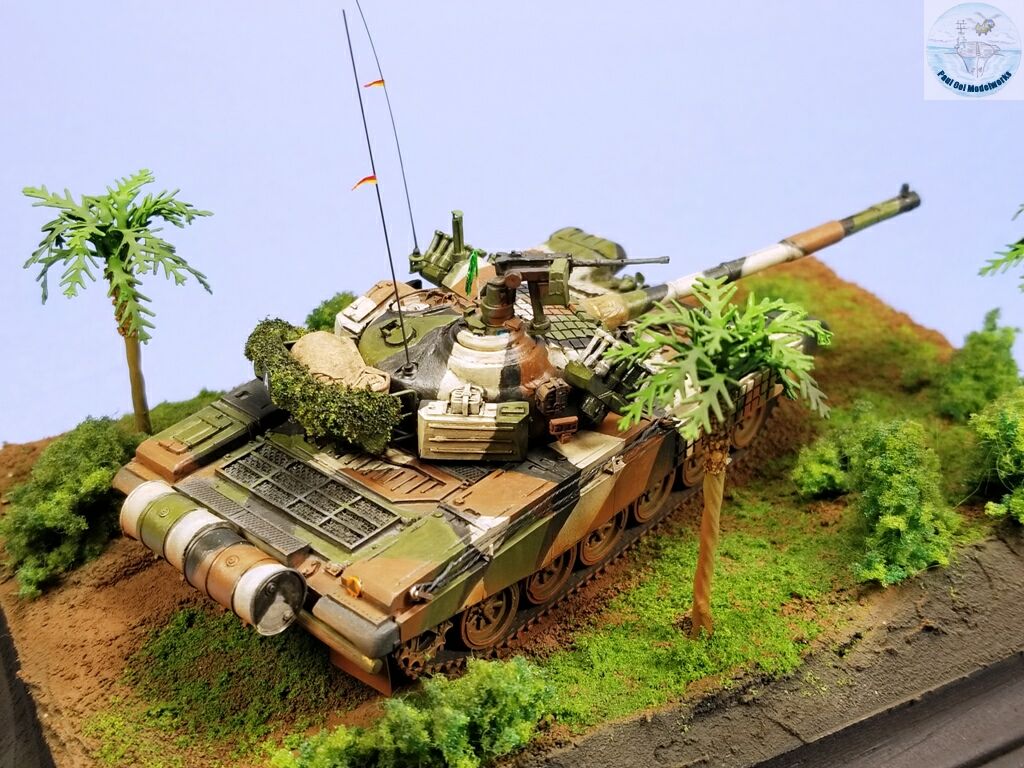
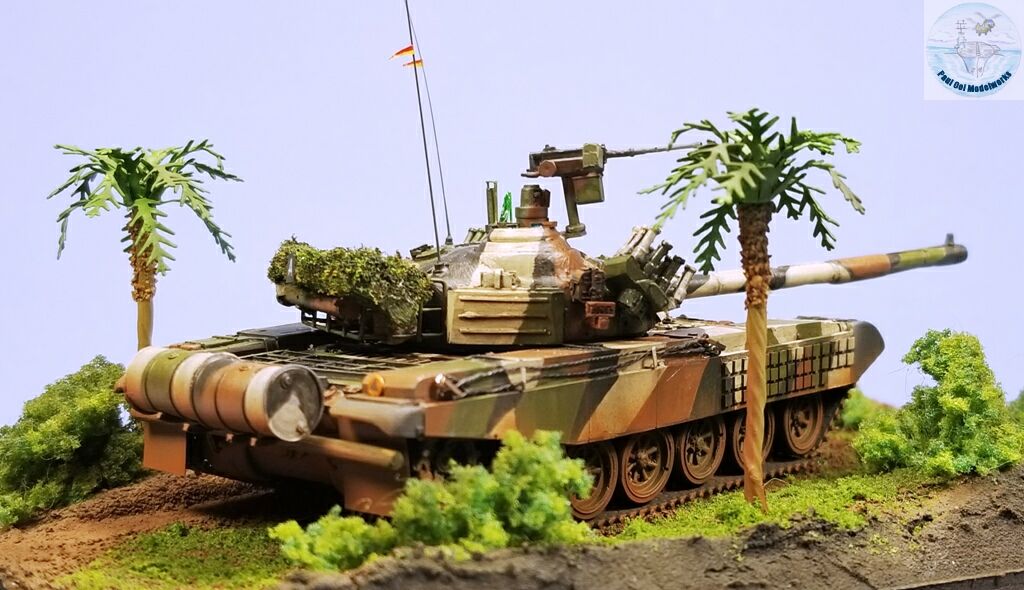
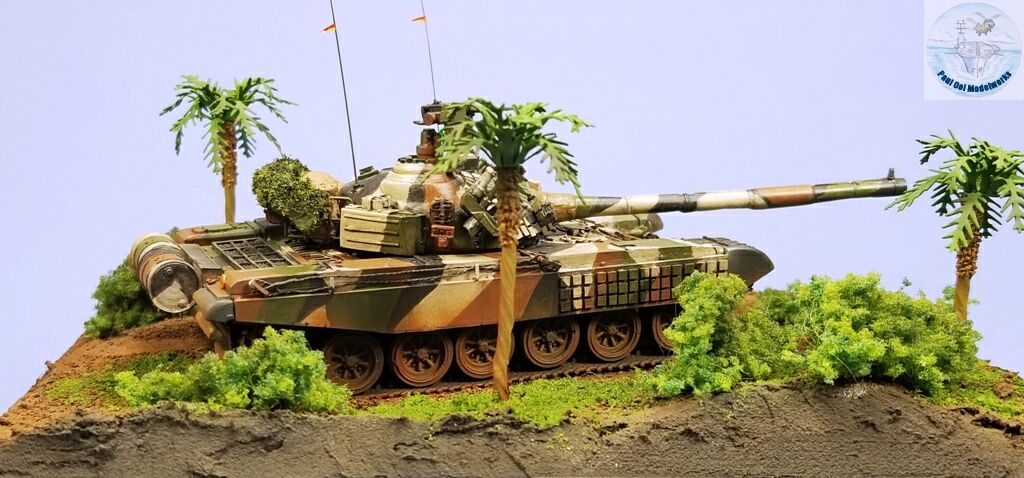
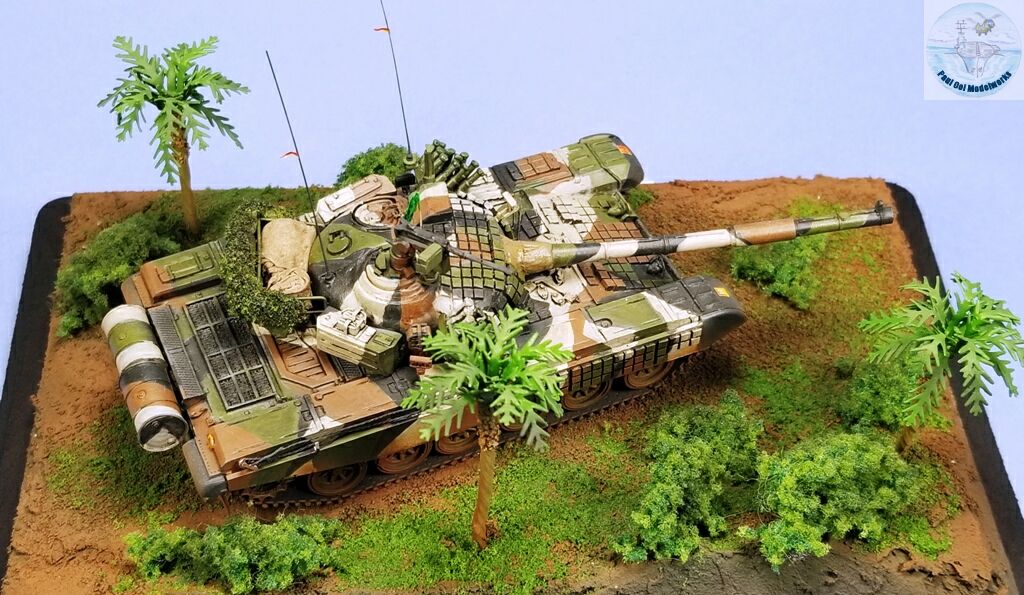
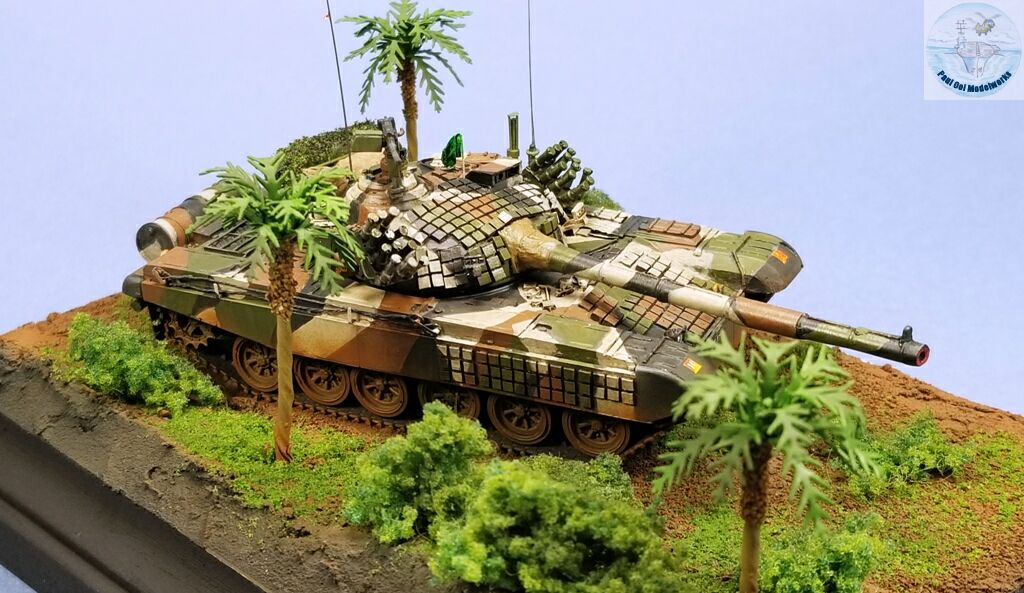
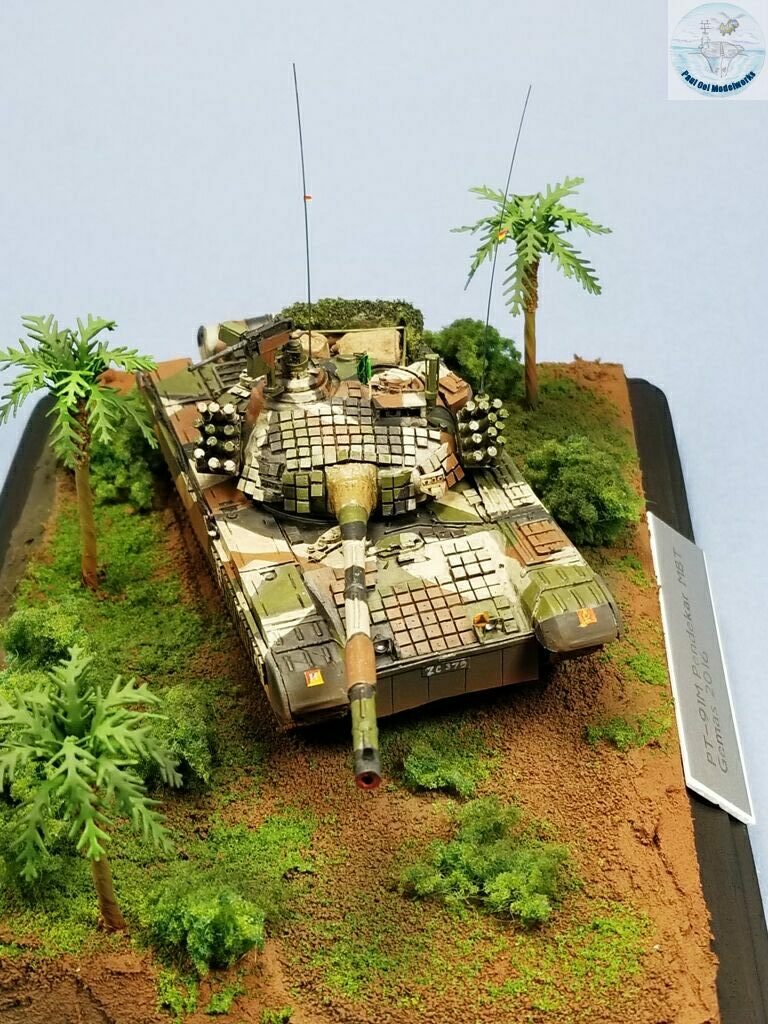
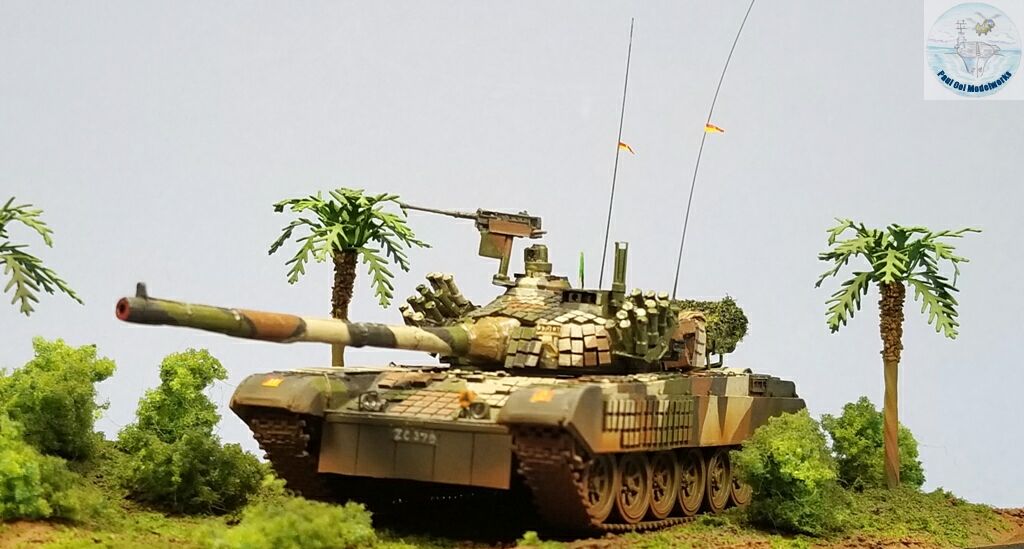
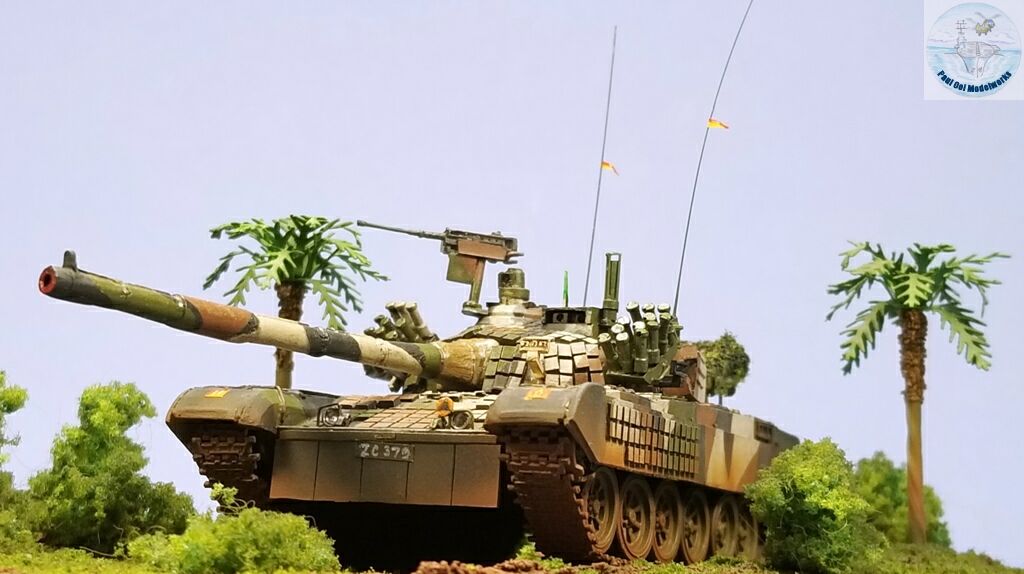
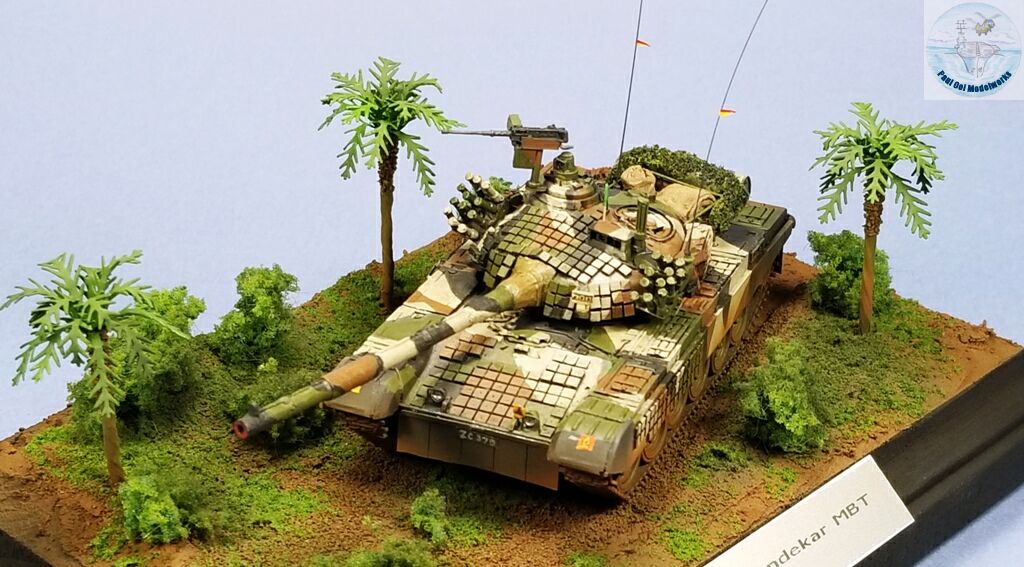
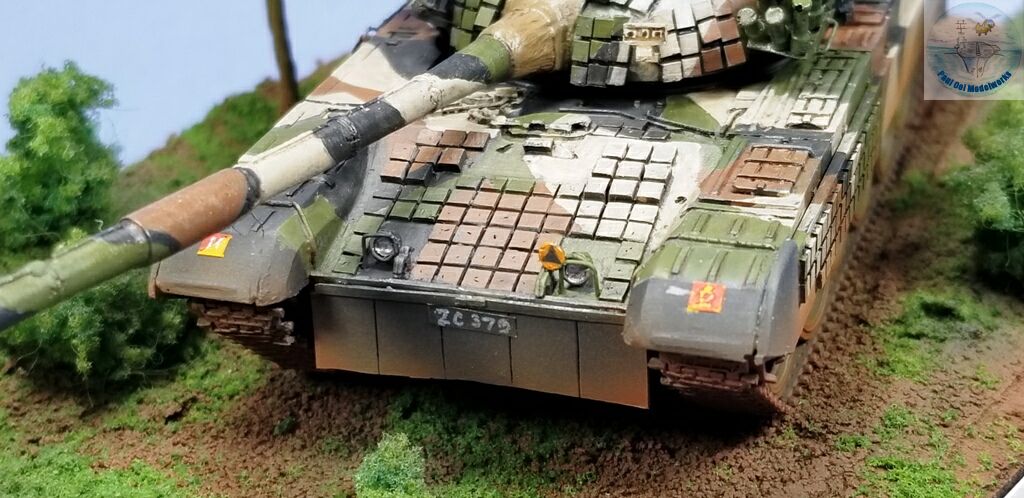
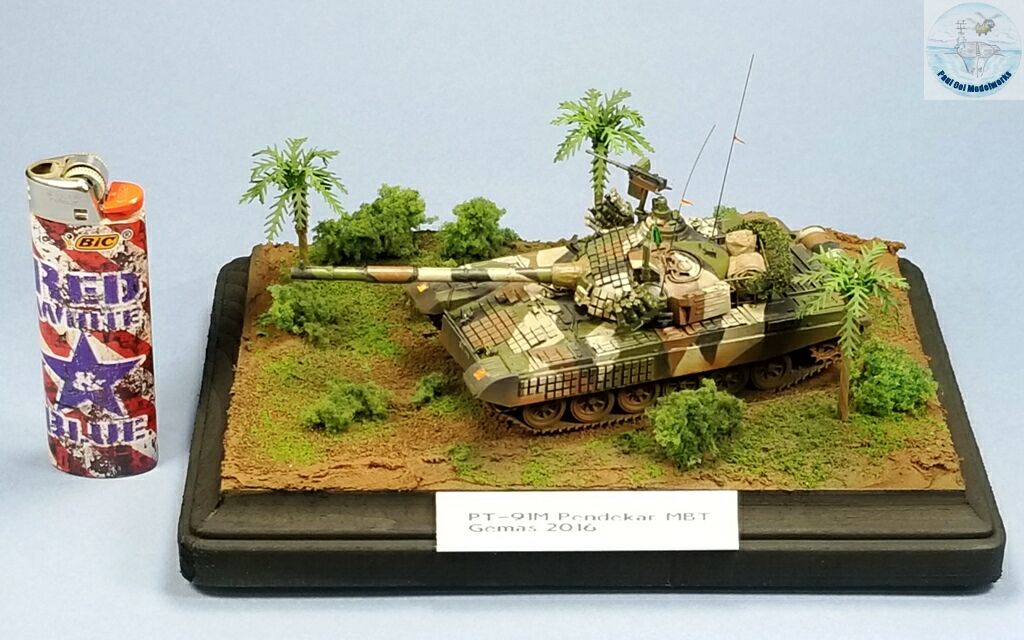
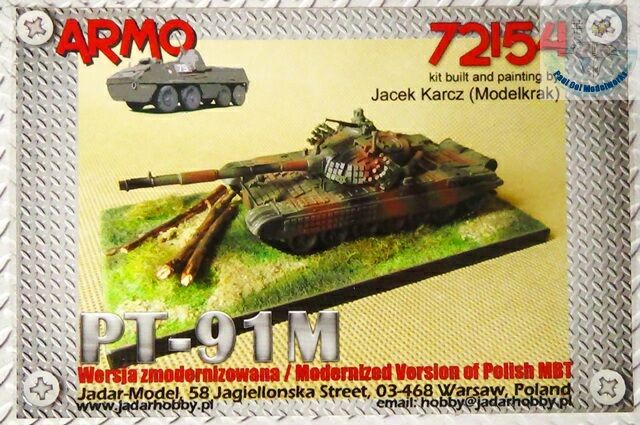
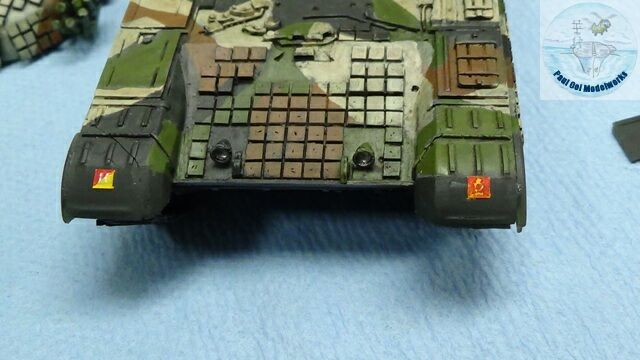
In 2003, Malaysia decided to get a full-sized MBT to defend its southern approaches to Singapore and also its land border in Borneo with Indonesia. They ruled out any MBT heavier than 50 tons, and finally chose the Polish-made PT-91M “Pendekar” or Warrior in Malay which the Poles had modernized from the basic Soviet T-72 design. The Malaysian version carries a Slovak 125mm smoothbore, ERAWA2 explosive reactive armor, upgraded 1000hp engine and German tracks. The tank is light and narrow enough to maneuver through the maze of oil palm plantations that cover the rolling hills and plans of Johor while packing a big punch with the 125mm. The tank carried the random 4-tone angular camouflage pattern until 2019 when it was replaced by a digitized 4-tone pattern.
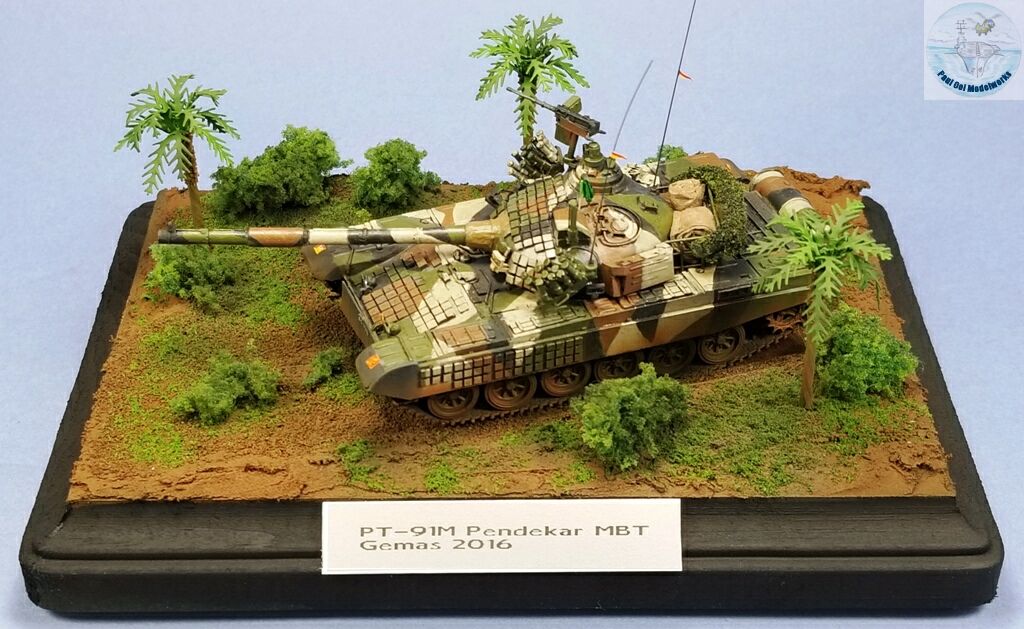
Malaysia’s acquisition of the PT-91M in the mid 2000’s sparked another regional arms race in South East Asia to upgrade the aging 1970’s tanks, resulting with Thailand obtaining the Ukrainian T-84, while Singapore and Indonesia opted for Leopard 2s. This diorama shows the Pendekar MBT making its way among young oil palms on an overgrown plantation road typical in the south of the Malay Peninsula.
Gallery
Construction Notes
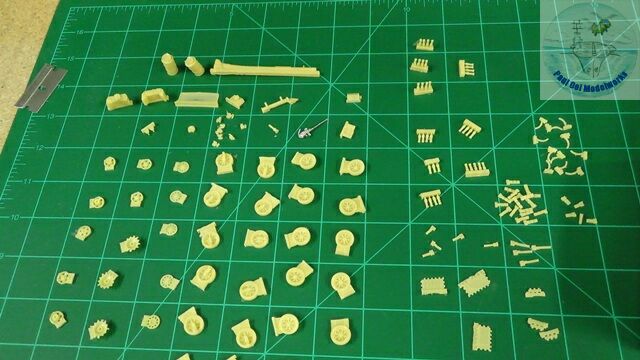
I came across this Polish resin kit in 1/72 of this rare subject and immediately knew I wanted to build it. The kit is made by Jadar Models of Warsaw and I ordered it directly from them. There are many little bits of resin parts (some are spares) and it was best to sort them out by shape for ease of organization and cleaning. The details on the hull are good and very faithful to the actual tank. The instruction sheet is very simple and you do have to figure out for yourself as to what-fits-where. My biggest complaint was that the way the tracks were molded, removing the excess resin bits often damaged the edges. Also, this kit has no decals whatsoever. This resin kit is suitable for experienced modelers.
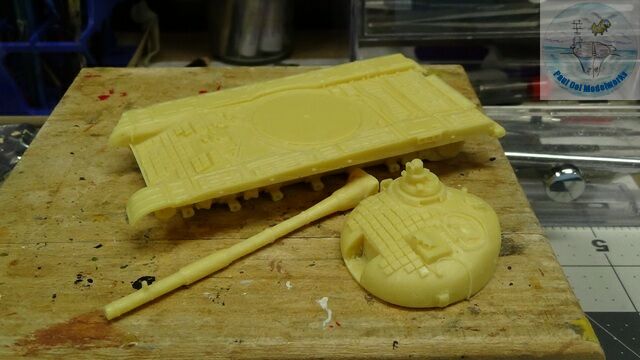
The first task was to grind off the excess molding blocks attached to the undersides of the hull, turret and main gun. Given the huge sizes of those excess blocks, it took quite a bit of grinding with a Dremel tool. Given that these parts were resin, the dust was nasty and it was a good thing I wore my N95 particle mask.

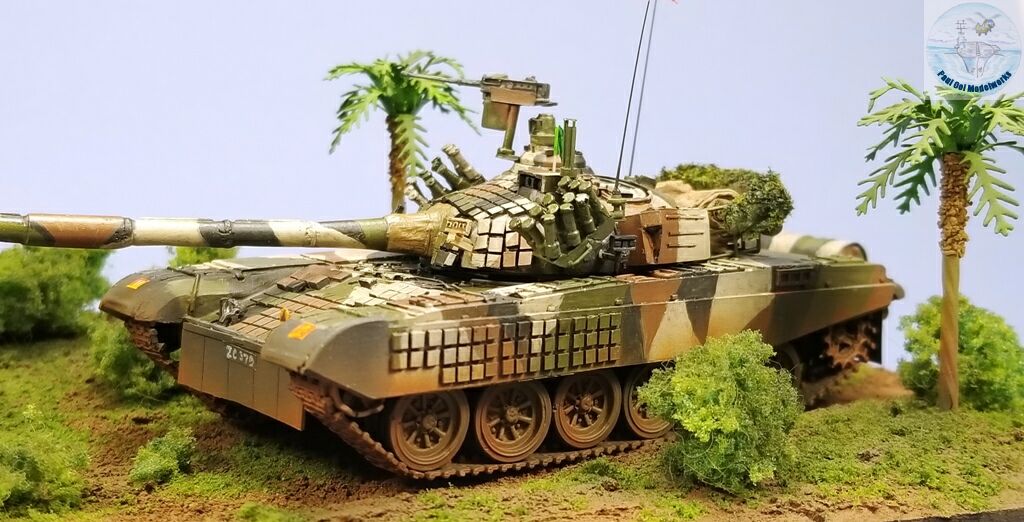
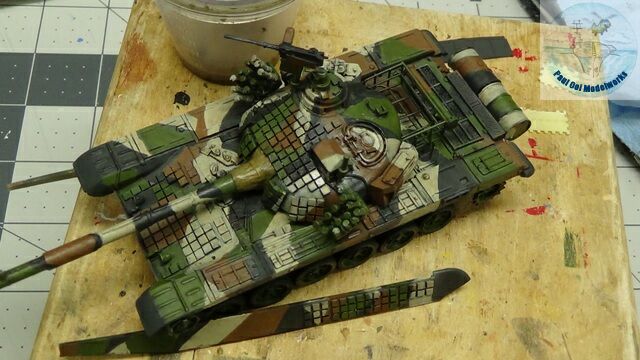
The instructions were not accurate about the placement of the turret exterior stowage boxes for the actual Malaysian version. The rear compartment was actually moved to the port side.
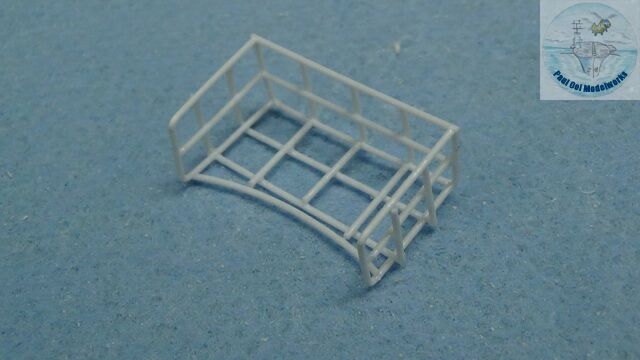
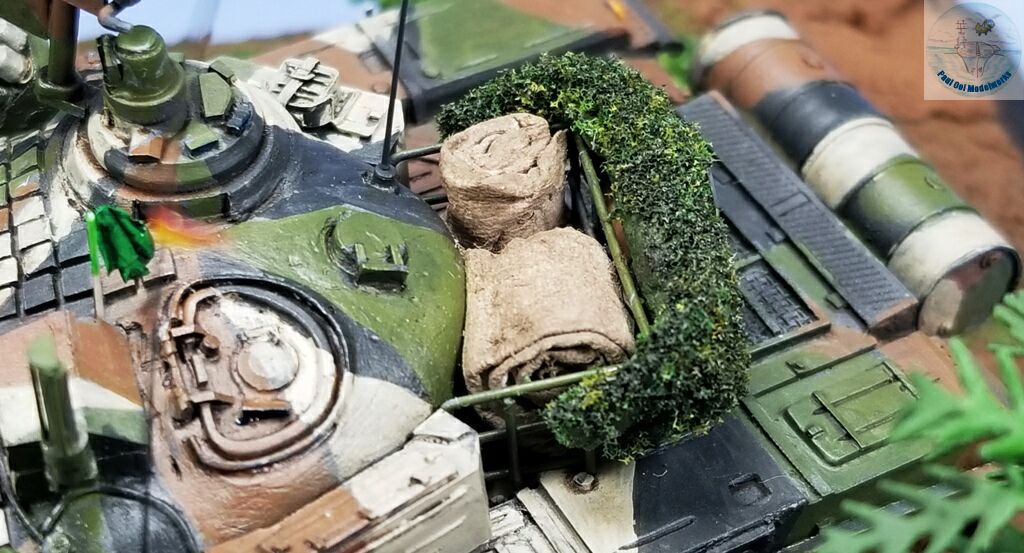
I then scratch-built the rear carrier basket (nicknamed “bakul durian” or Durian fruit basket by the crew) using Plastruct 0.5mm rods and using actual pictures of the tanks doing their annual life firing exercises at the Asahan Range.
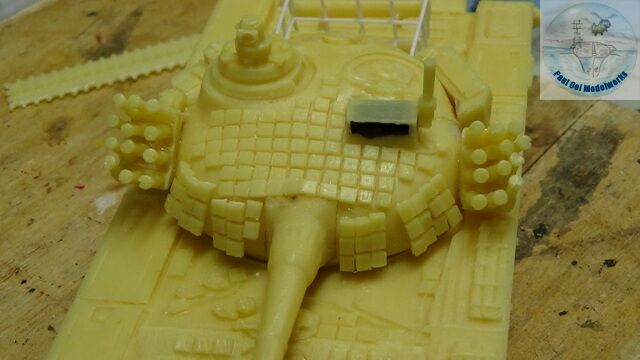
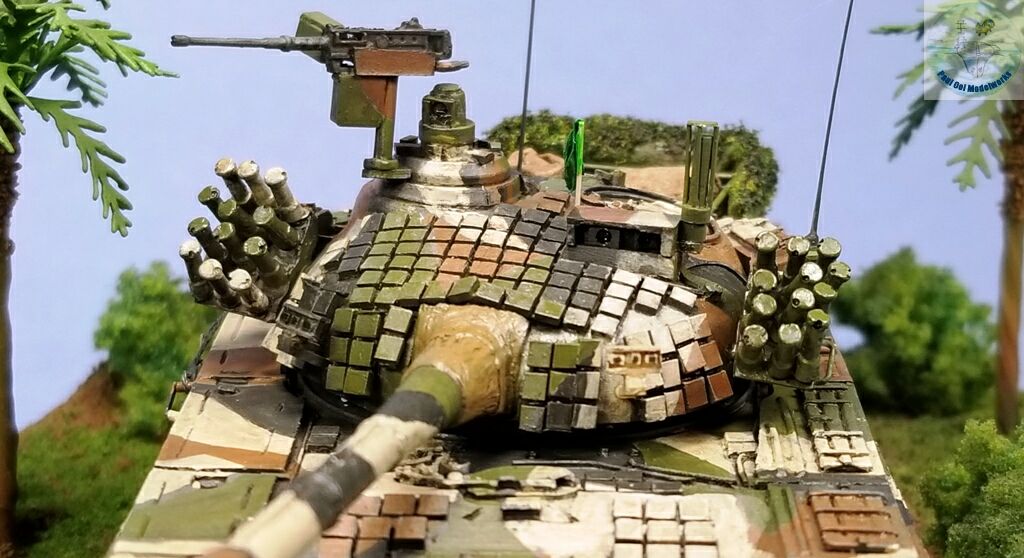
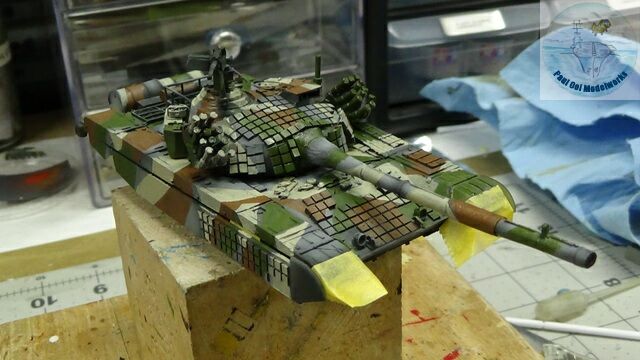
The most intensive assembly work was centered at the turret. Here the weaponry targeting system fixtures are added, plus the two prominent “hedgehog”-like smoke grenade arrays on each side. Note the rear basket attached to the turret’s rear.
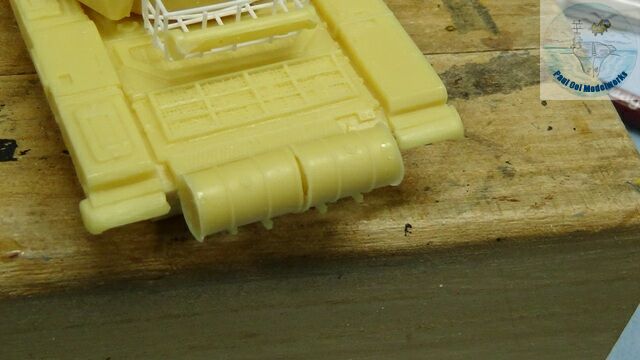
The largest items to be attached to the main hull are these two external spare gas tanks, a typical arrangement for designs based on the Soviet T-72.

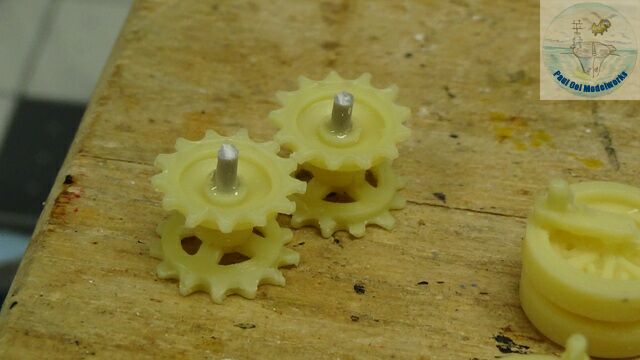
In order to be able to properly attach the front and rear sprockets, some initial drilling had to be done on the hull, followed by inserting plastic rods into the sprockets for proper attachment.
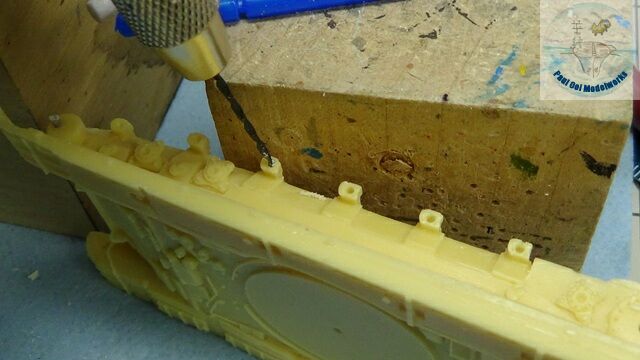
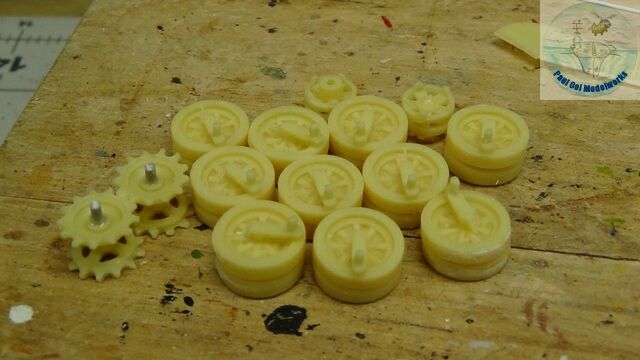
Even the holes for the road wheel attachments needed to be drilled in for proper fixing.
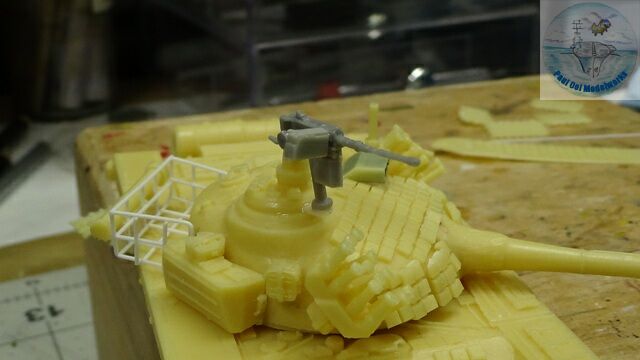
I added a .50 caliber Browning HMG (rummaged from my spare parts box) mounting onto the commander’s side. The mounting was also scratch built from odds and ends.

Painting of the tank starts as usual with prinming with Tamiya Acrylic XF69 NATO Black. Highlight shading uses Tamiya XF-24 Sky Grey. Note that I have masked off the front mud guards.
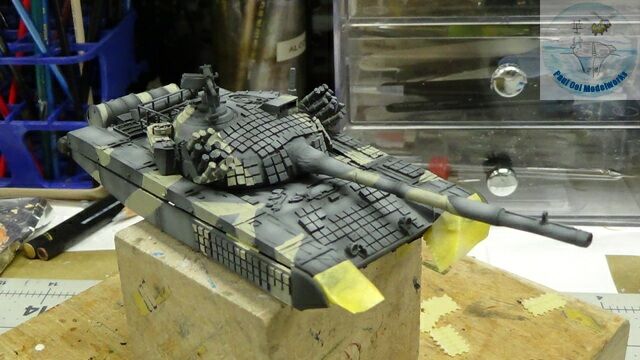

Now comes this painstaking part of hand-painting with somewhat 25% thinned acrylic paint for the camouflage pattern. I referred to the pictures of several tanks, and from them, I created a composite design.
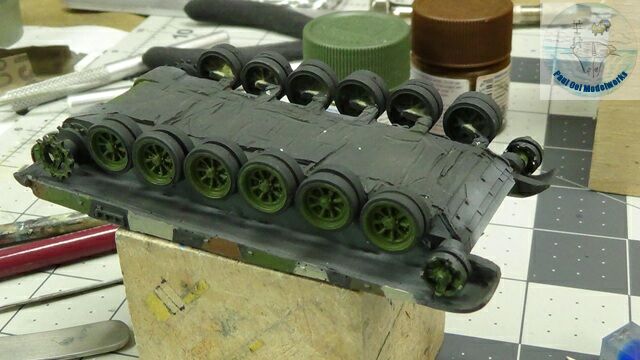
Attaching the wheels to have a level and balanced tank is tricky. I used a rule and the spirit level to make sure they were co-planar. Wheels were painted NATO Green.
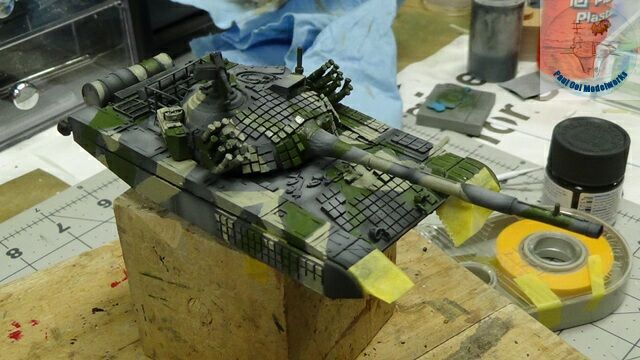
Since all the colors are acrylic paint, I could apply turpenoid wash of 70% Lamp Black: 30% Burnt Umber without sealing under a satin Pledge varnish.
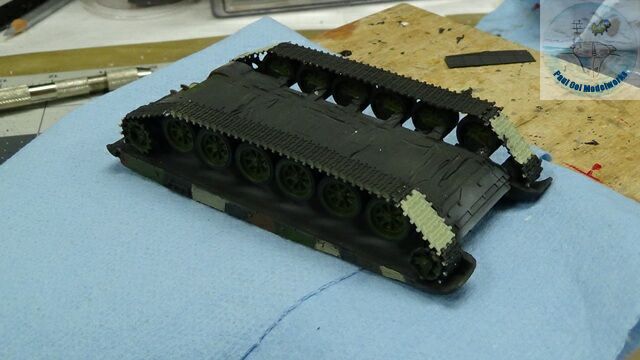
Once the wash is dry, it was time to apply sections of the tracks . Much car has to be taken to try and keep the track sections in place.
Unit markings for the Tank Regiment was hand-painted with the help of fine masking tape.
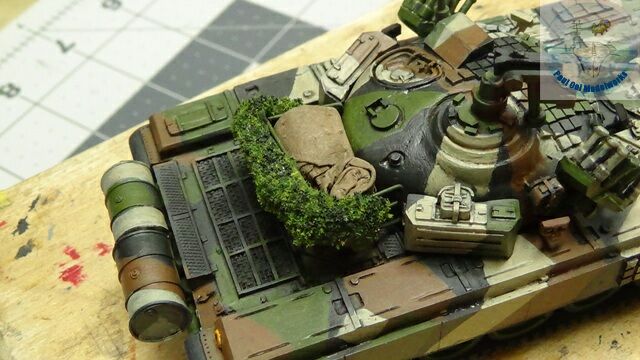
Two tent rolls were added into the rear carrier basket, and then a specially-made wet tissue/white glue coated with grass powder roll to portray the large camouflage foliage net that all Malaysian PT-91M’s carry wrapped along the outer edge of the basket rails.

Final fine turret details, in this case some vertical elements for the targeting system and antennae.
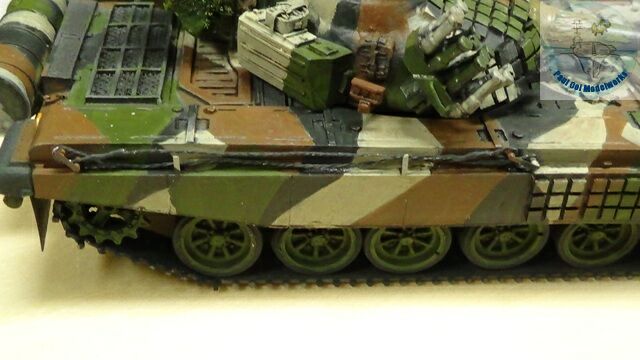
And the tank would not be complete without the utility tow cables.
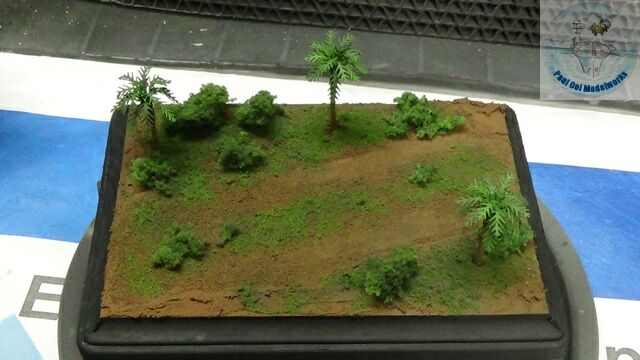
The base of plantation and secondary forest foliage was prepared using oil palms from JTT Scenics and the ground is painted a mix of NATO Brown + Orange. The soil in parts of Malaysia are brilliant red-brown due to the high iron content.
Leave a Reply