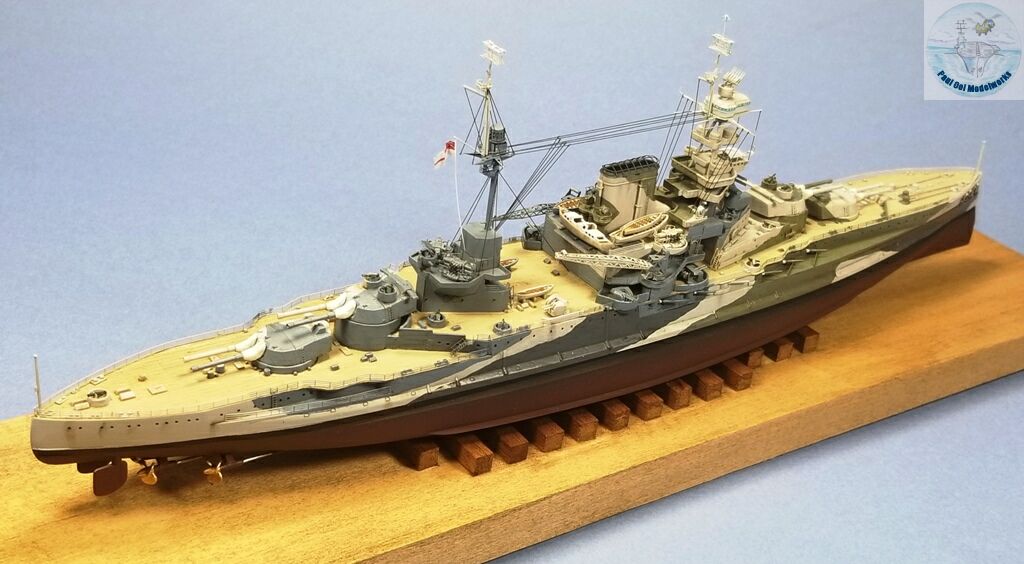
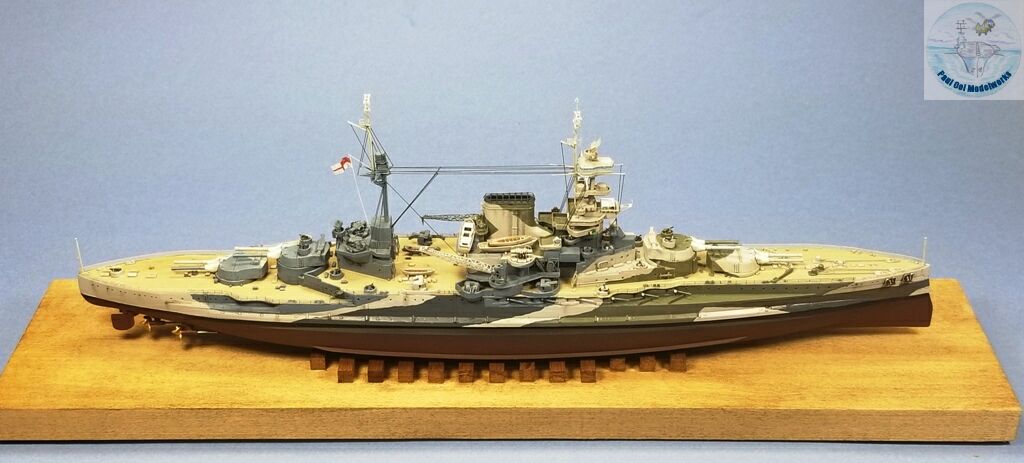
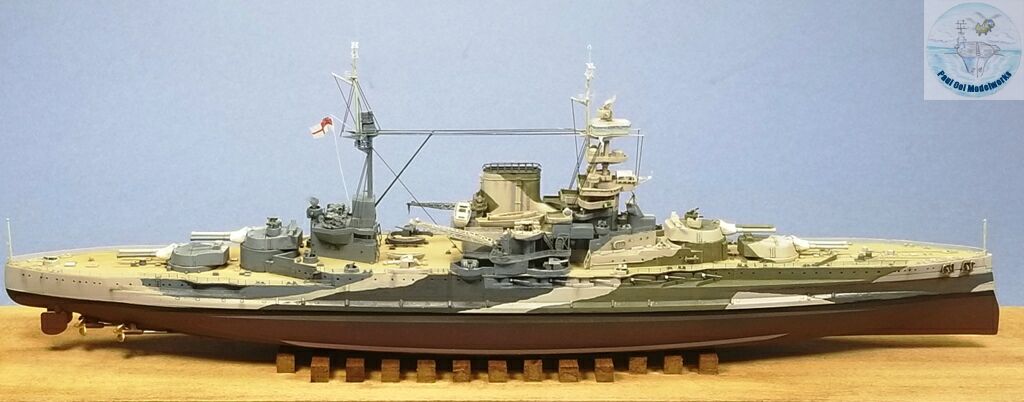
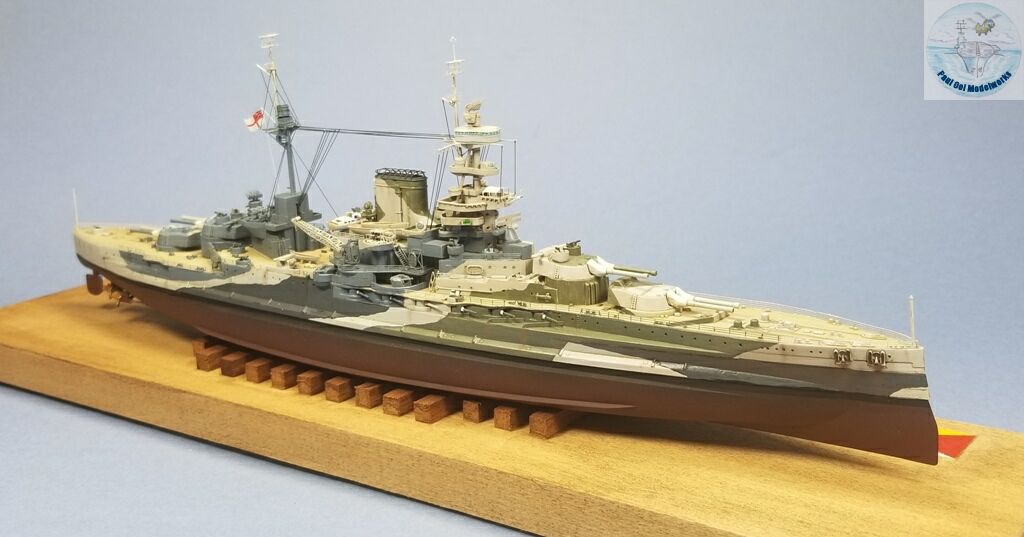
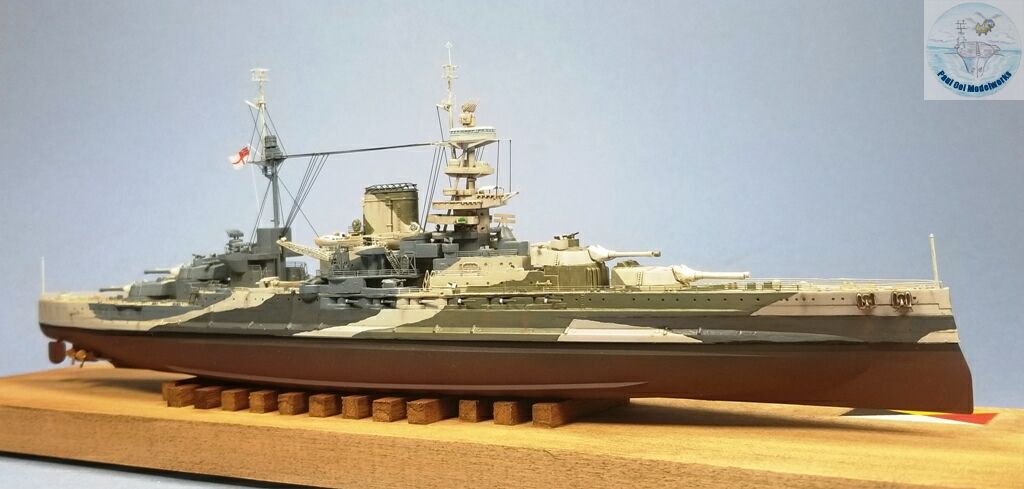
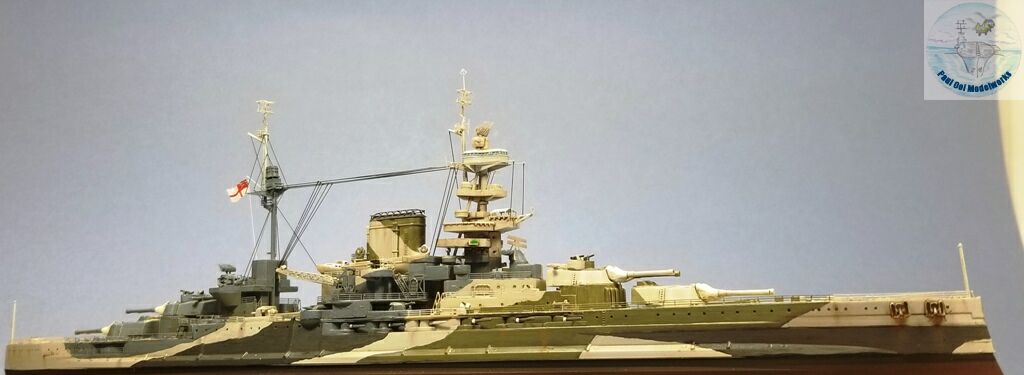
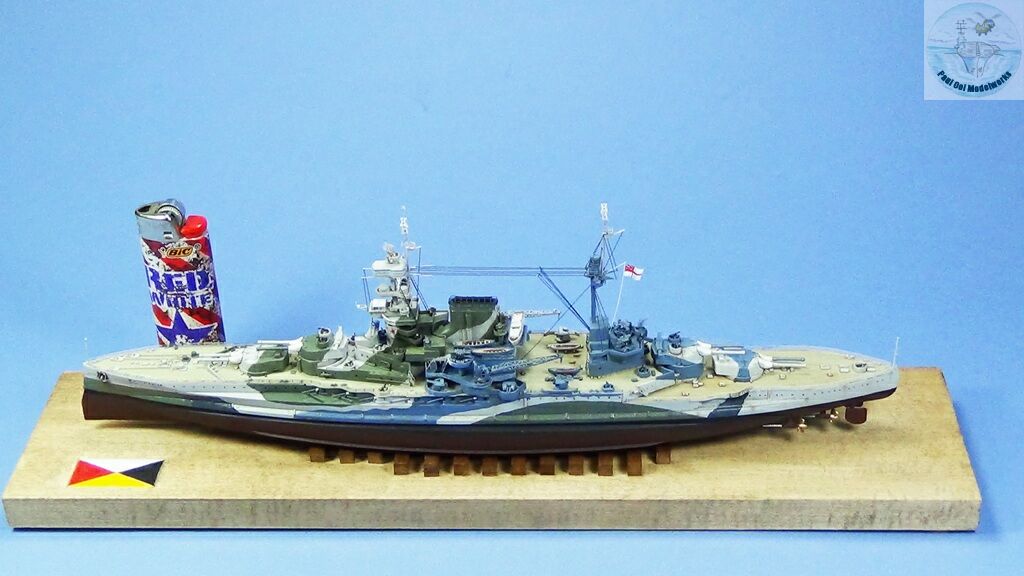
HMS Malaya was a Queen Elizabeth class battleship of the Royal Navy built on the eve of The First World War. The fifth and last of that class that included the Warspite, and the Barham, the Malaya was a fast and heavily armed super-dreadnought in 1916. She was funded with contributions from The Federated Malay States, hence her name after that British protectorate. Her motto was “Malem Fero Malis”; I bring evil to the evil. The battleship took part in the Battle of Jutland in 1916 flying the ensign of that territory (white, red, yellow and black) during that battle. She pretty much retained her WW1 profile except for changes made to her funnel and addition of anti-aircraft and radar stations in WW2. HMS Malaya served in the Mediterranean and the Atlantic in WW2, suffering U-Boat attack damage and was the first British warship to be repaired in New York. After the end of convoy duties, the ship served one last time as a bombardment ship for the Normandy landings, after which it was retired to Scapa Flow and finally scrapped in 1948.
When I was an officer intern (Malaysian equivalent of ROTC) at the Royal Malaysian Navy, I was intrigued that the HQ at the main naval base in Lumut was named KD Malaya (which is Malay for HMS Malaya). I was delighted to find out that there was once this HMS Malaya from WW1 and WW2. The HQ still holds a bell from this battleship.
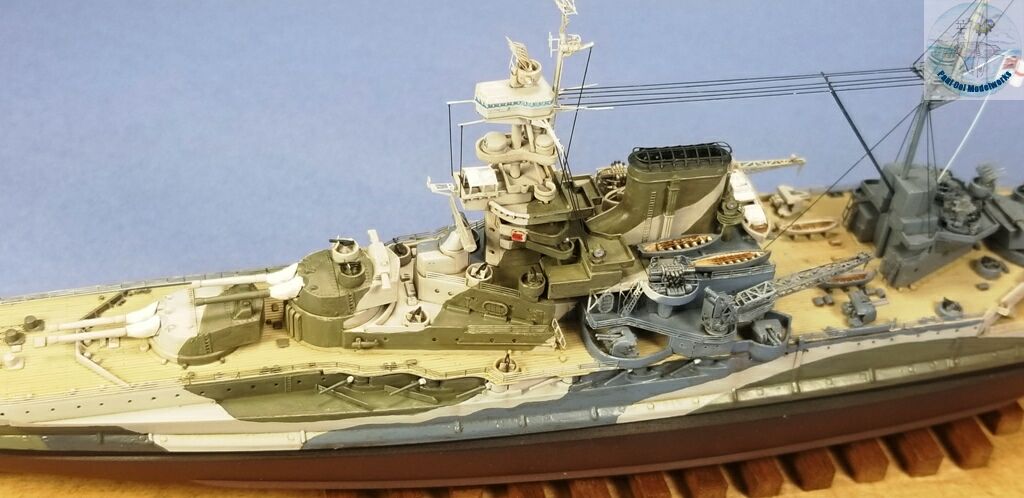
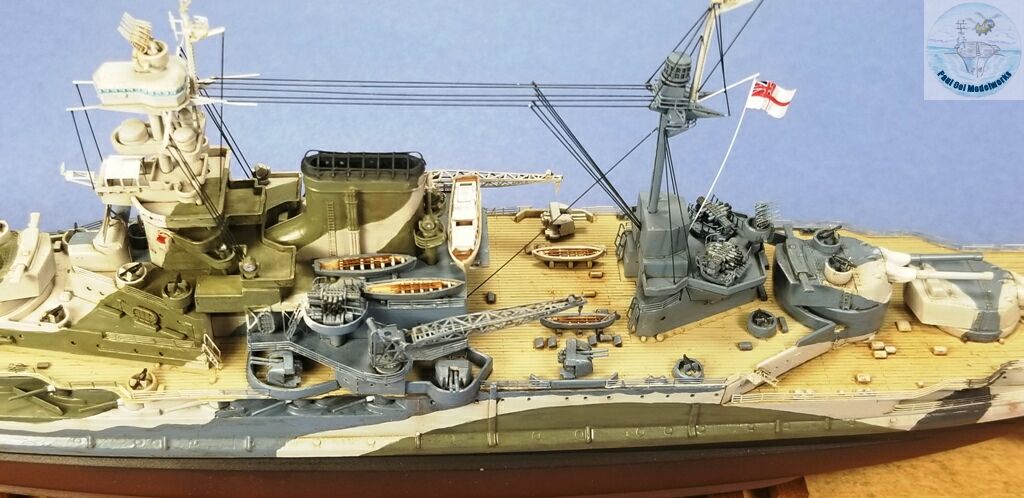
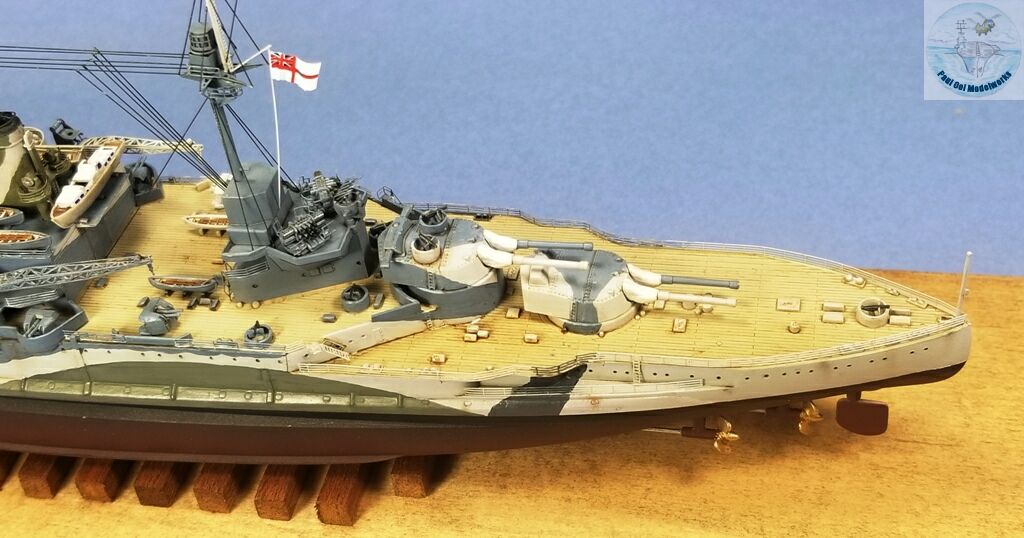
Gallery
Construction Notes
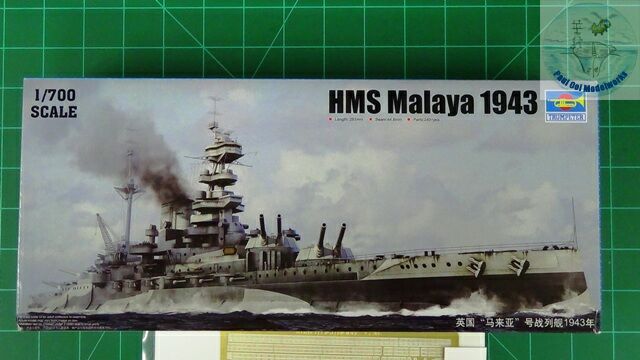
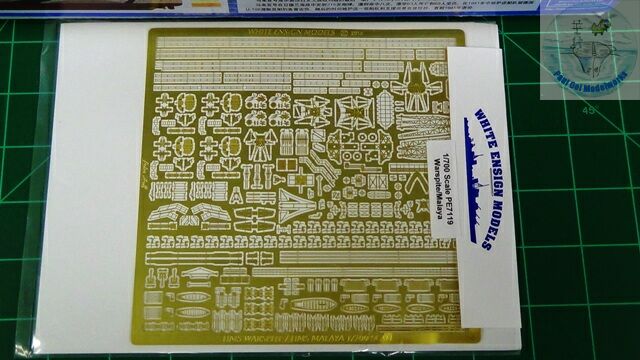
Trumpeter came out with this 1/700 scale kit of the Malaya as part of their release of the entire class of Elizabeth battleships in both their WW1 and WW2 configurations. The kit itself is very detailed and nicely molded and comes with a small photo-etch fret for the funnel cap and Yagi radar elements. White Ensign Models released a full photo-etch fret for super-detailing the Malaya which really made it very detailed, although the instructions were pretty sketchy for the Malaya version and took quite a bit of reading and comparing with historical photos to get some of the parts to be fitted.
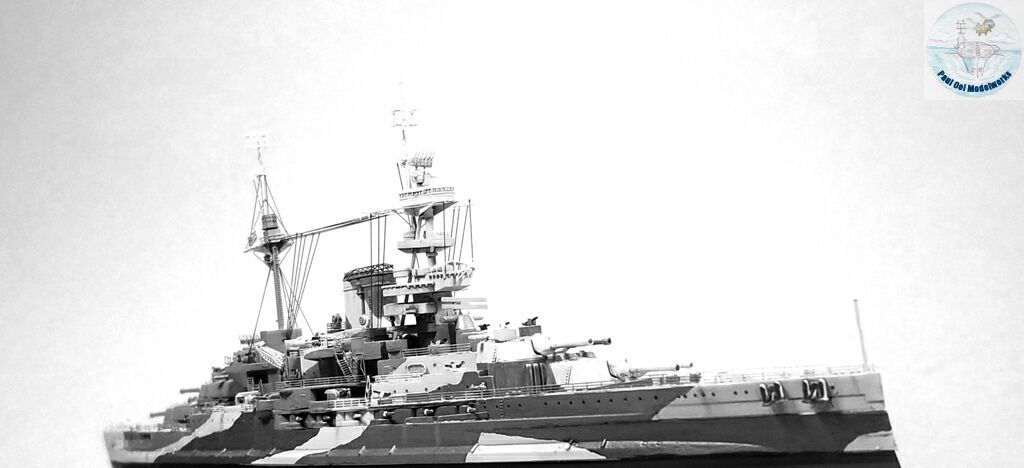
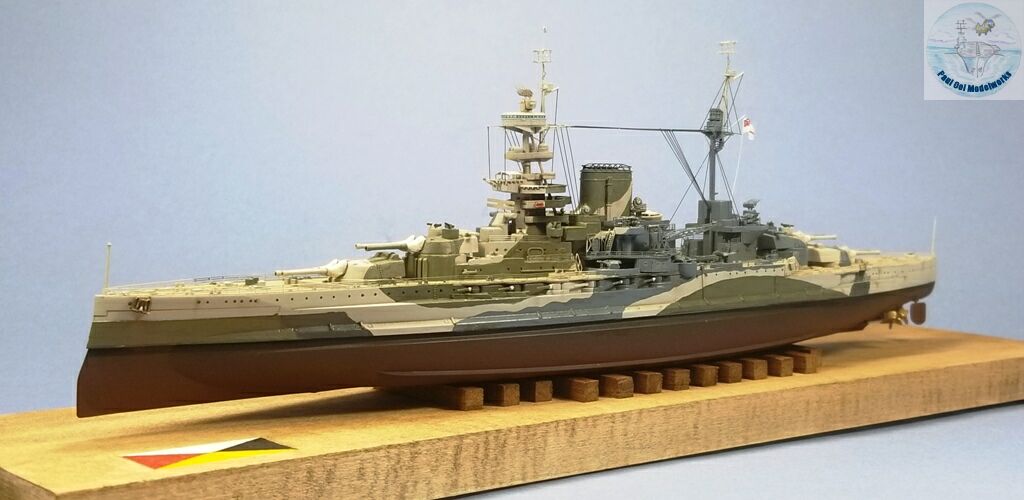
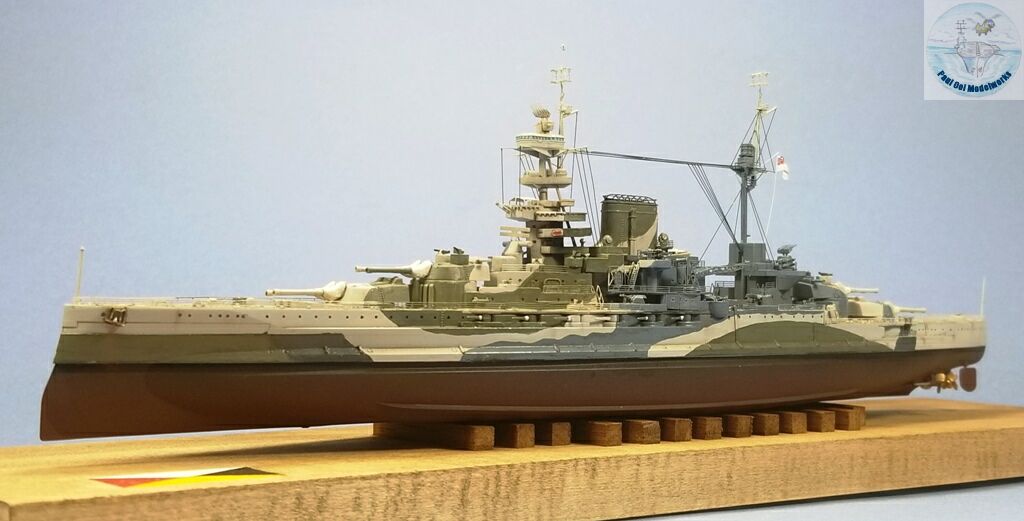
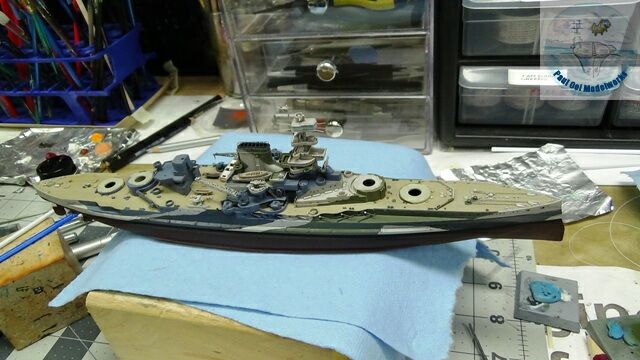
I chose to build HMS Malaya as she appeared in late 1943 after her long service in the Atlantic and carrying that interesting 4-toned camouflage for anti-submarine protection. Ironically as I mentioned earlier, she was struck by a torpedo from U-106 during convoy duty in the Atlantic.
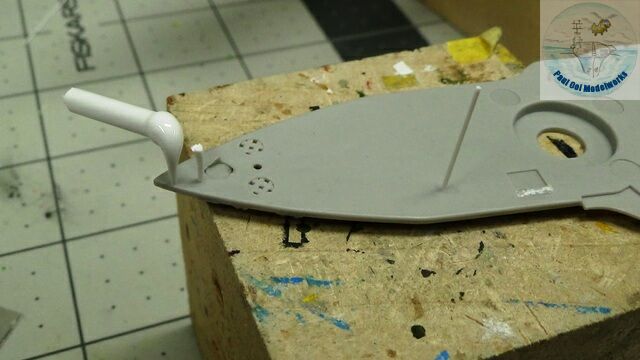
This build starts with patching up three tiny holes that were part of the Warspite layout but not used in the Malaya. I used stretched sprue to fill those holes neatly before proceeding with the main build.
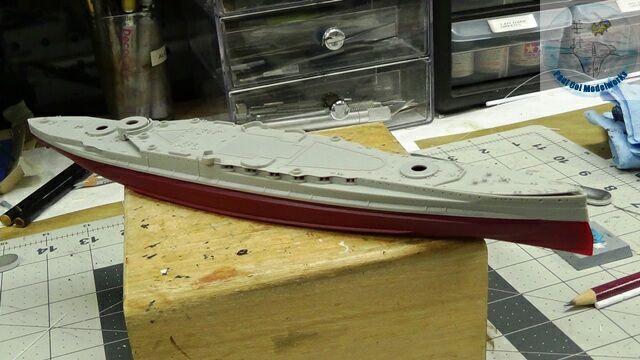
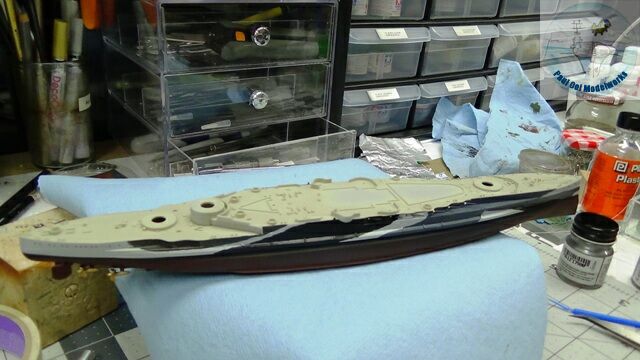
Building the main hull was pretty straight forward except that one has to remember to install the 6 inch guns lining the casemates on both sides before gluing on the main deck. Here I am dry fit testing the main deck after joining the hull to the full hull section below instead of a waterline flat plate.

The main deck and quarter deck were painted Tamiya Deck Tan XF-55.

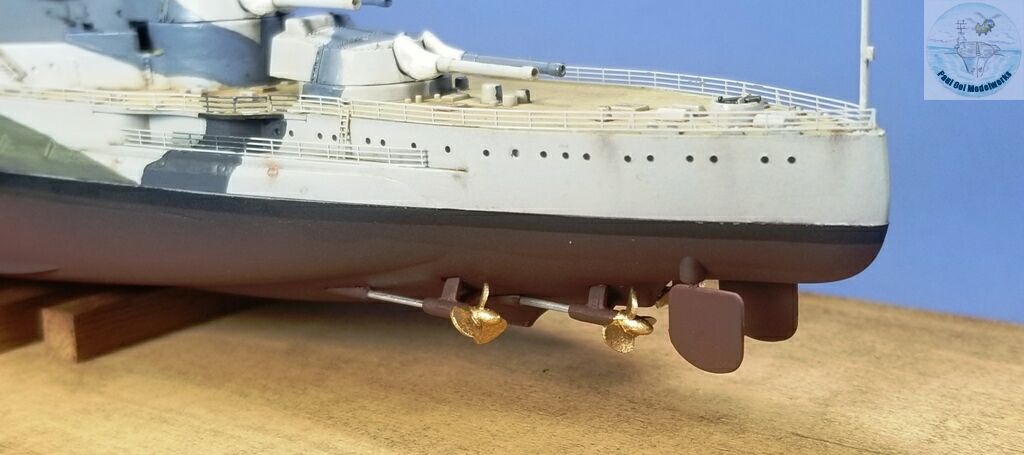
After masking the quarterdeck (the main deck has not been fitted yet, just there for dry-fitting), I painted the boot topping at the waterline with Tamiya Flat Black XF-1.
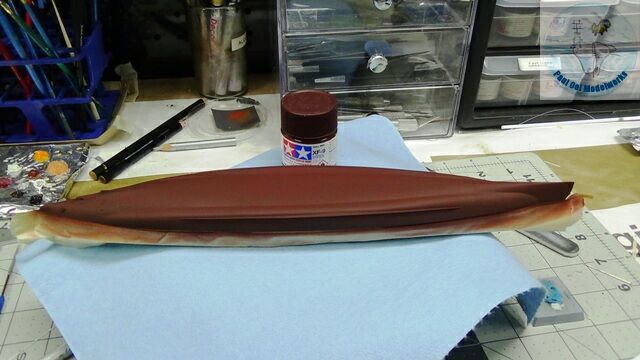
After masking the boot topping line, I painted the hull with Tamiya Hull Red XF-9.

The freeboard area of the hull is painted Royal Navy Light Gray 507C (Model Masters Acrylic )
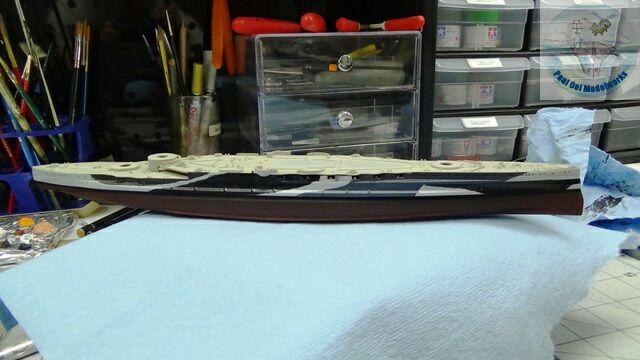
Here’s where I have a bone to pick with Trumpeter’s paint guide. Initially trusting their paint codes, I painted the ship with flat black, RN Gray 507A, and RN Dark Grey G10 on top of the base coat 507C. It looked too dark when I looked at old photographs. Then I came upon a color guide in Pinterest that pretty much matched the shade of the old black and white photographs which was RN Gray 507A, B5 (RN Blue Grey, very close to Ocean Grey), MS3 (Green Grey, or Slate Grey), over the 507C base coat. I had to carefully repaint over the camouflage patterns.
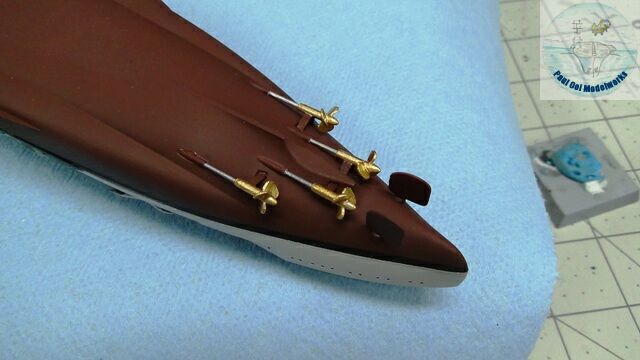
I then installed the propeller assemblies and rudders. The propellers were painted Testors Metallic Gold.
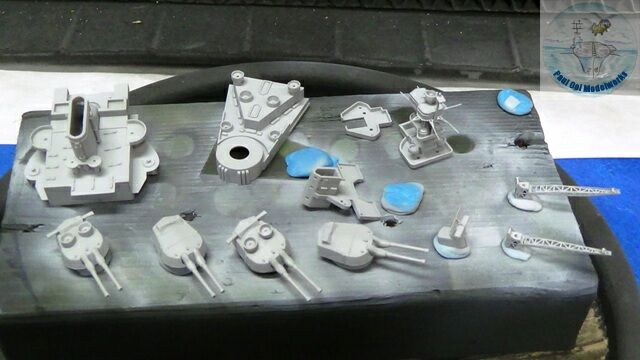
After installing the 6 inch guns into their casement windows, I glued on the main deck.

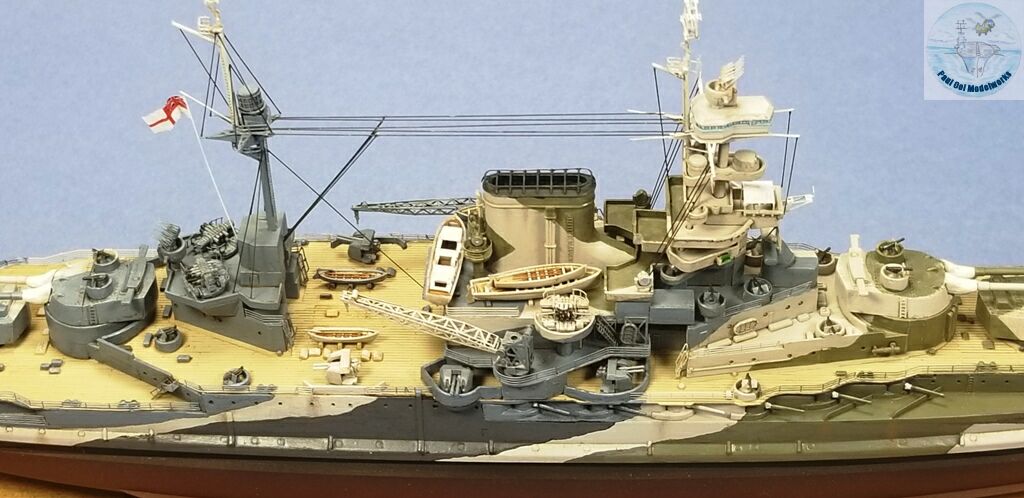
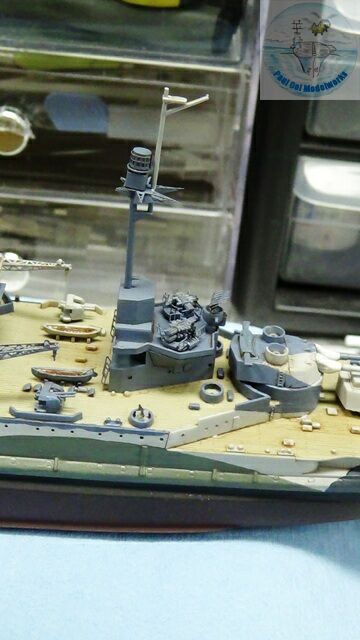
I started building the midship funnel and boat deck module. Note that I did not glue the module onto the main deck but dry fitted just to get the correct alignment.
Next, I worked on the aft superstructure house, and the aft turrets C and D. Again nothing has been glued down on the main deck.
Now the forward superstructure’s lower layers were stacked (without being glued together, just dry fit), as is the barbette housing for B turret.
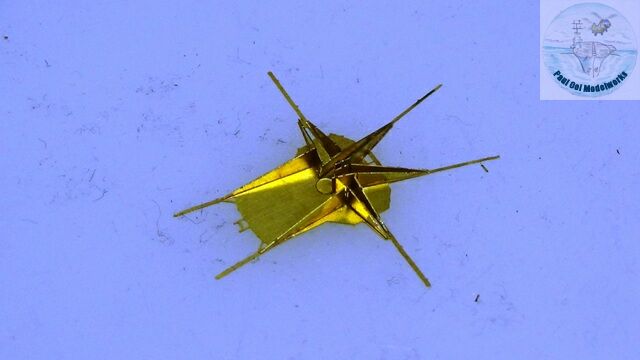
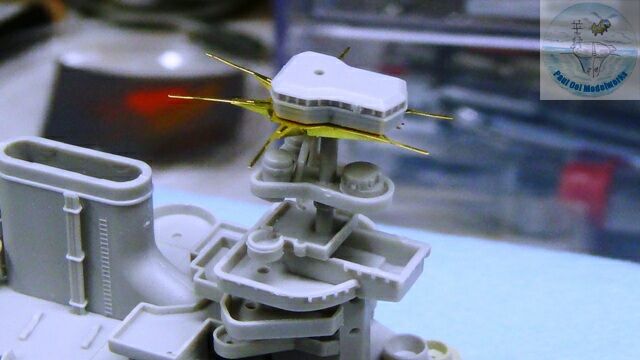
Now comes this delicate photoetched fore mast “starfish” platform that supports the wheelhouse.

Similarly, there is another smaller “starfish” installed onto the main mast.
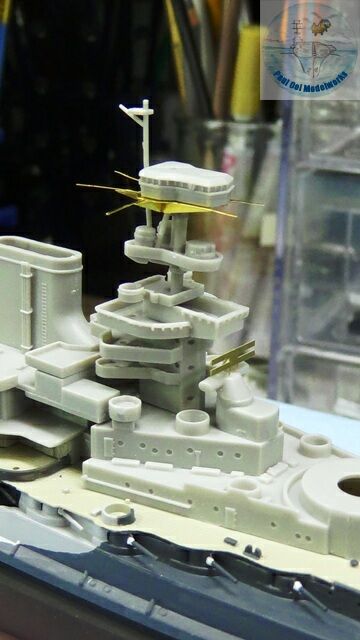
The foremast and main superstructure “stack” or “pagoda” is trial fitted (again, the layers are not yet glued together).
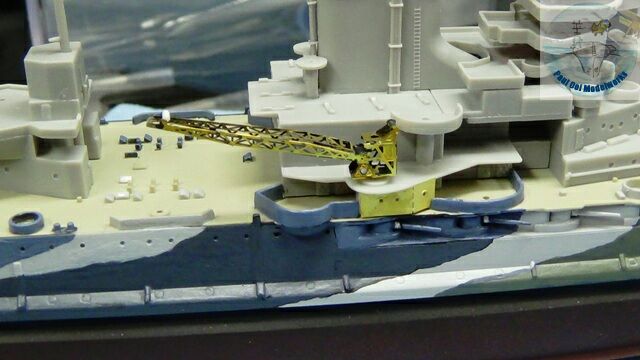
The delicate crane units port and starboard sides are built slowly and patiently.
Having made sure that everything fitted together, I remove all the modules and paint them a base color of RN 507C.
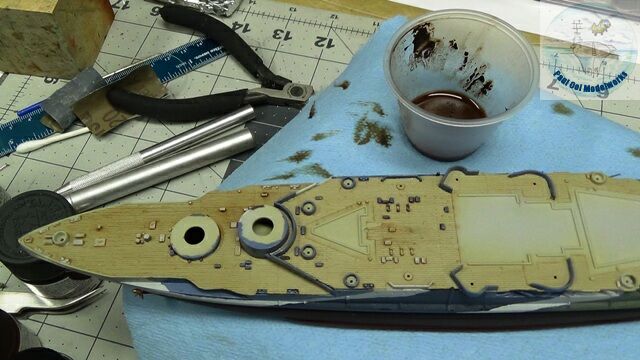
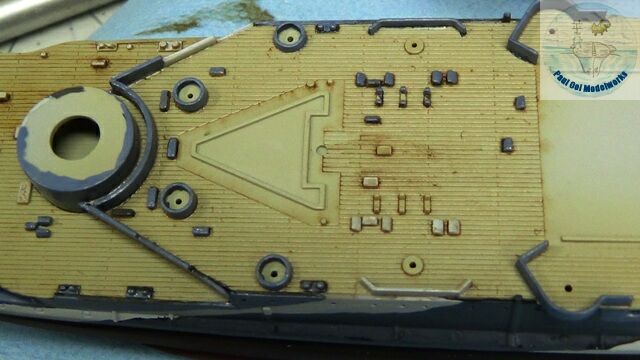
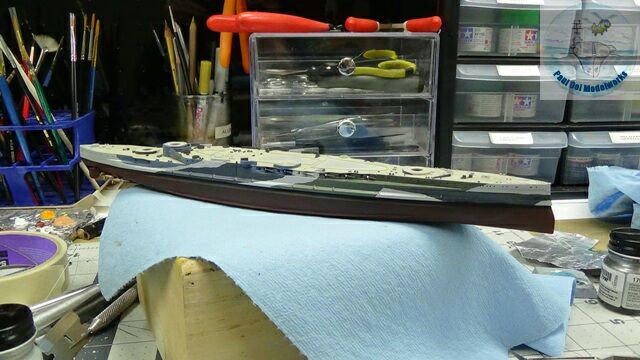
Meanwhile the timber main deck was given a Burnt Umber oil paint + turpenoid wash to bring out the planking details.
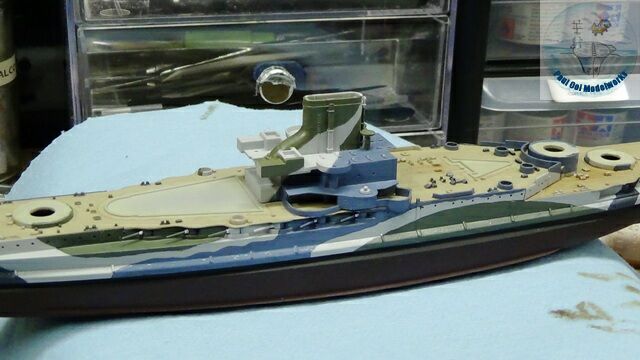
Then the funnel and boat deck module is properly fitted, glued down and painted with camouflage to match the freeboard hull.

Next goes the barbette and base of the front superstructure.
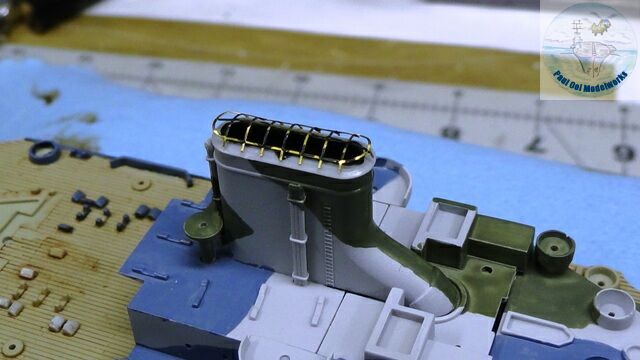
Now I fix the funnel cap together with a grating from the photo-etch set. The sub-assembly is subsequently painted NATO Black XF-69.
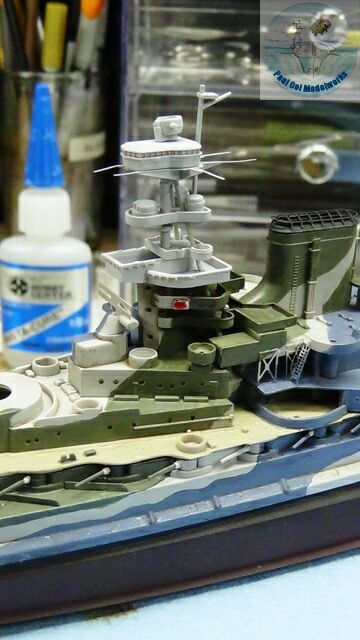
The upper superstructure sub-assembly is carefully fixed onto the main superstructure.
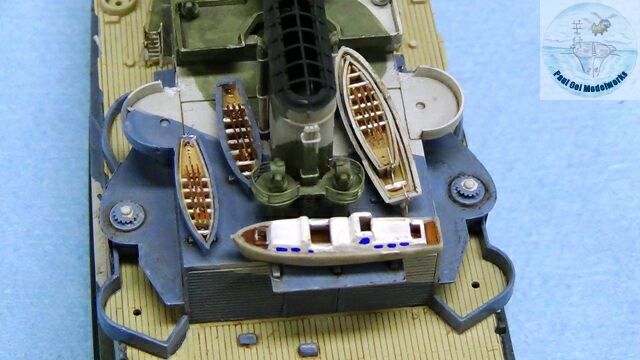
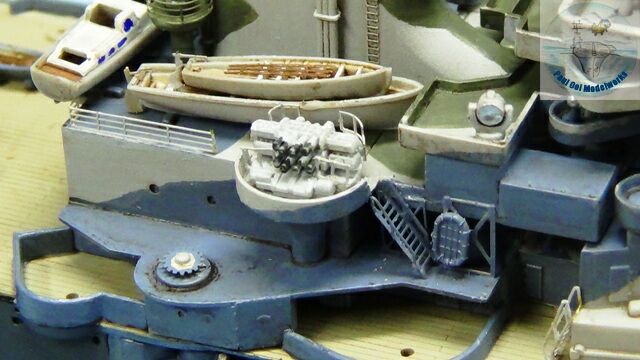
Next, the boats and launches are painted separately, and then carefully stacked onto the boat deck.
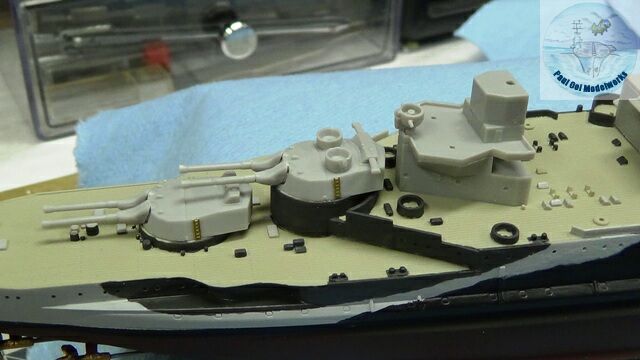
The Pom-pom batteries (there are 4 of them) are then added to the superstructure.
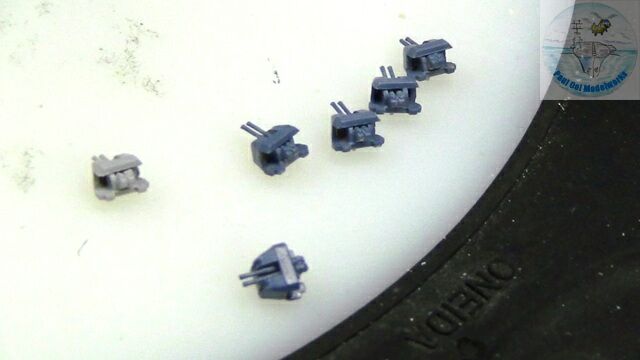
Twin 4″ AA mounts for the midship section.
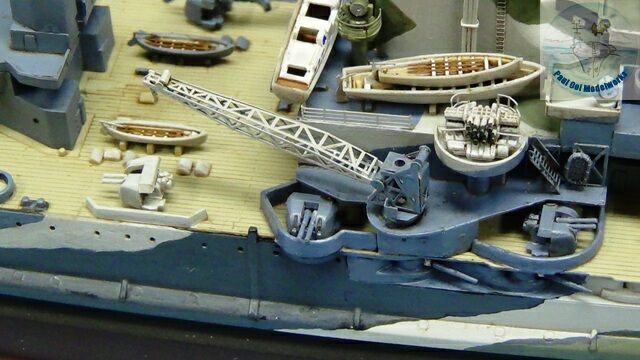
Twin 4″ AA turrets and aircraft crane units installed (although there were no longer any aircraft onboard).
Main superstructure, midship funnel section, and aft superstructure house installed minus the turrets.
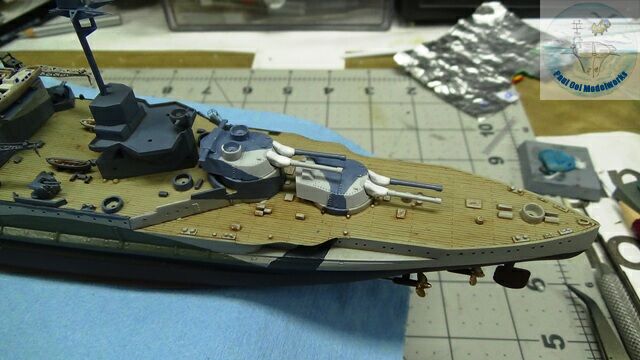
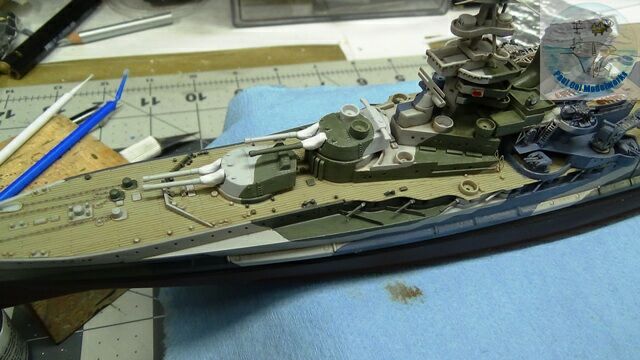
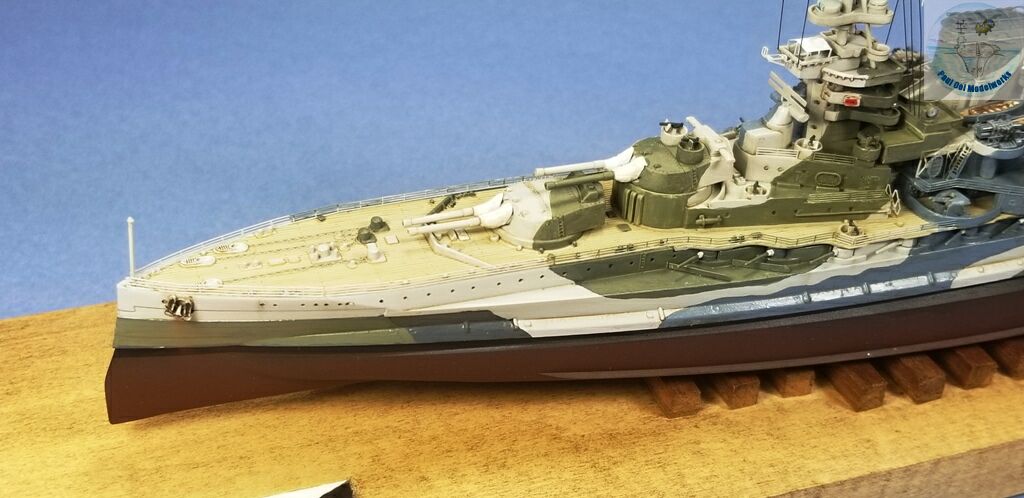
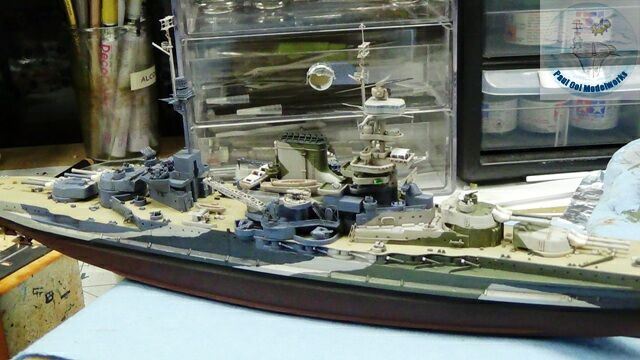
After that, all four main 15″ gun turrets are installed! Boom!
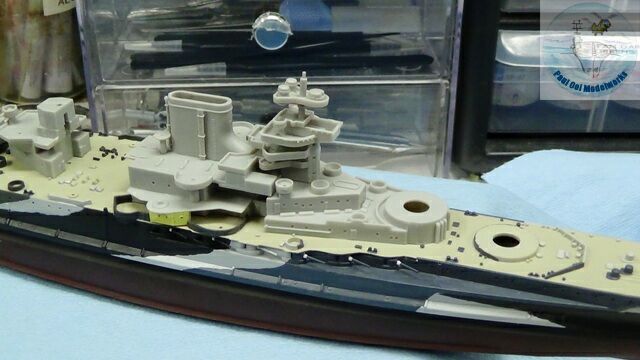
More details for the main mast, topped with a radar lantern.
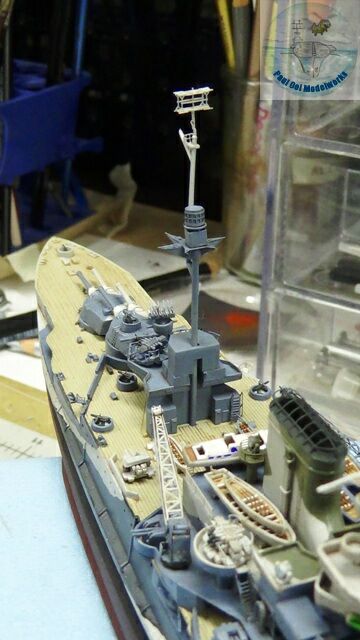
I started to add the photoetched mast top radar arrays. This one is 281 radar array on the fore mast. There another one for the main mast.
More minute things installed: more AA guns in the nests, many tiny photoetched items to add in.
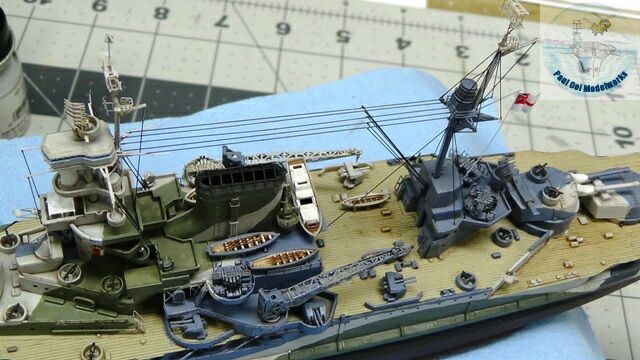
I use .006in brass wires for the rigging. The flag is a kit decal mounted onto aluminum foil, then attached to a white strand of stretched sprue.
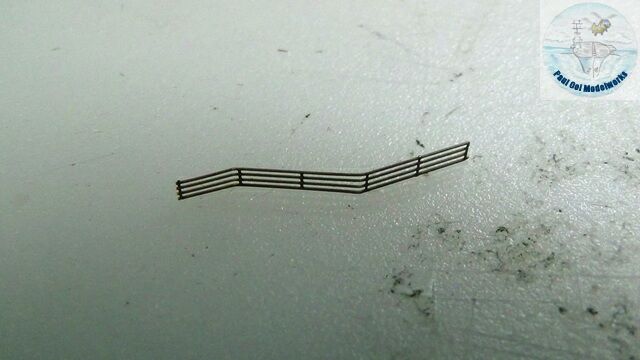
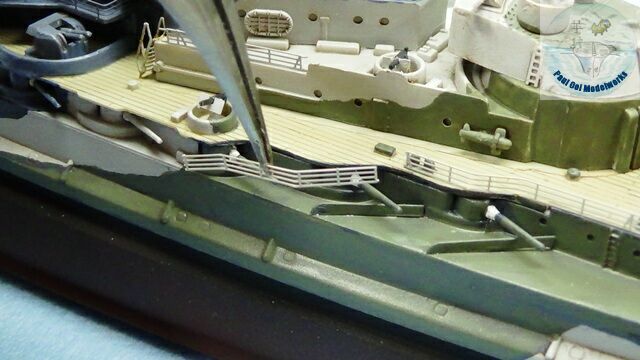
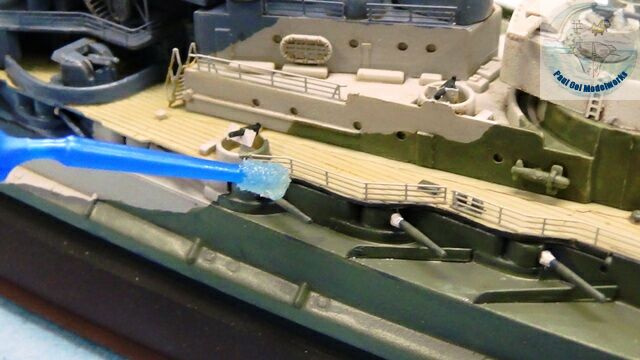
Adding railings and lifelines to the ship. First, form the strip of railing to fit the profile. Then I line the lower edge with slow curing cyanoacrylate adhesive, and once properly positioned, I fix it with a dab of Super Glue Accelerator.
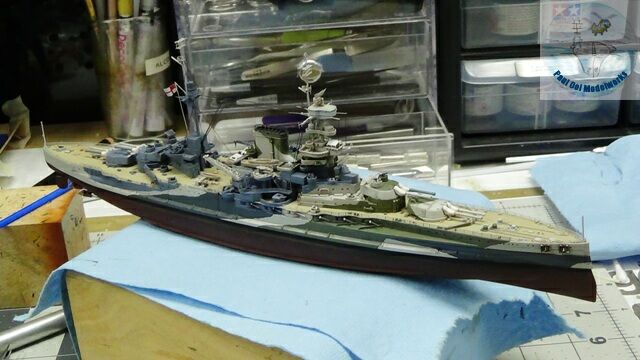
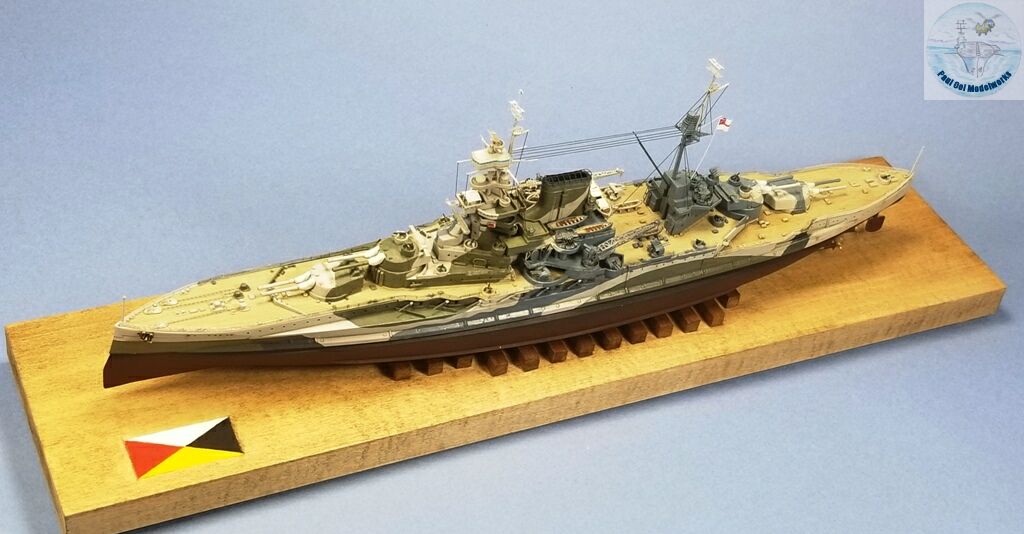
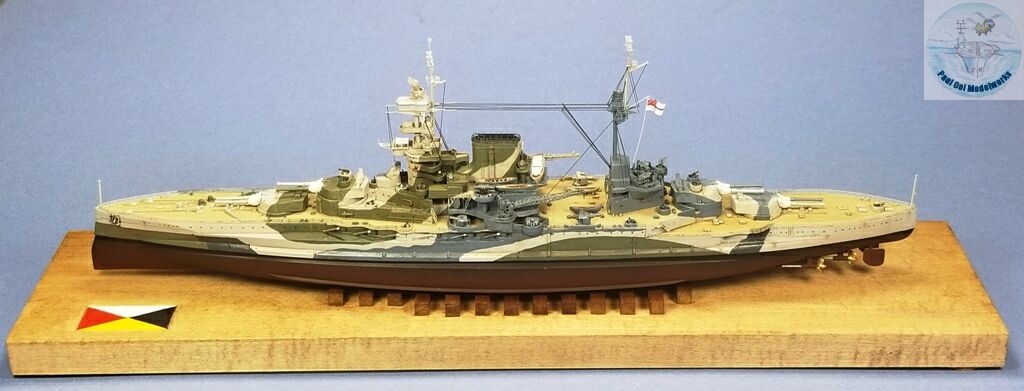
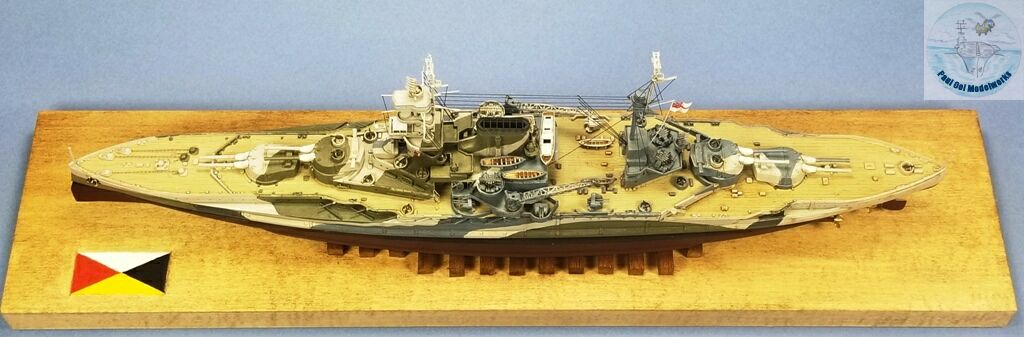
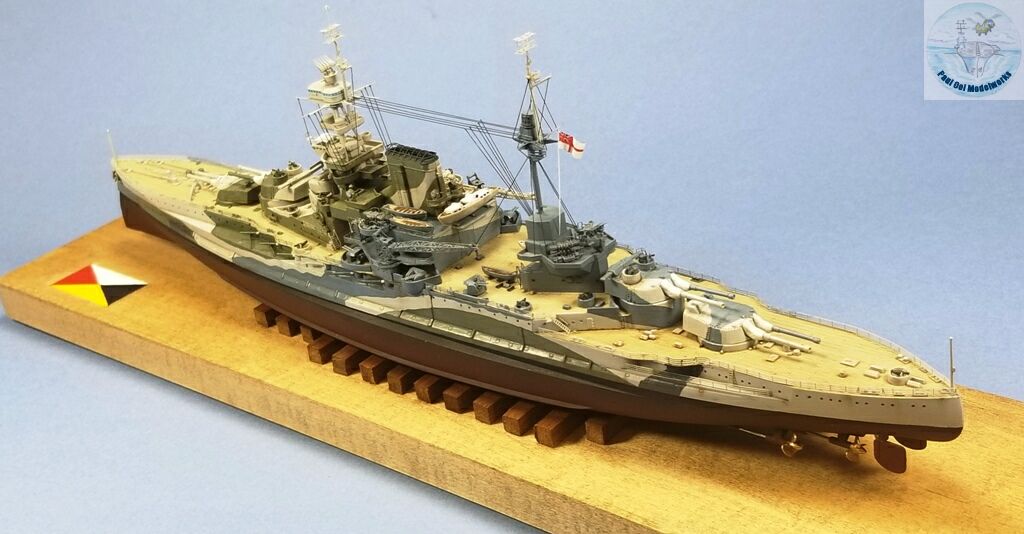
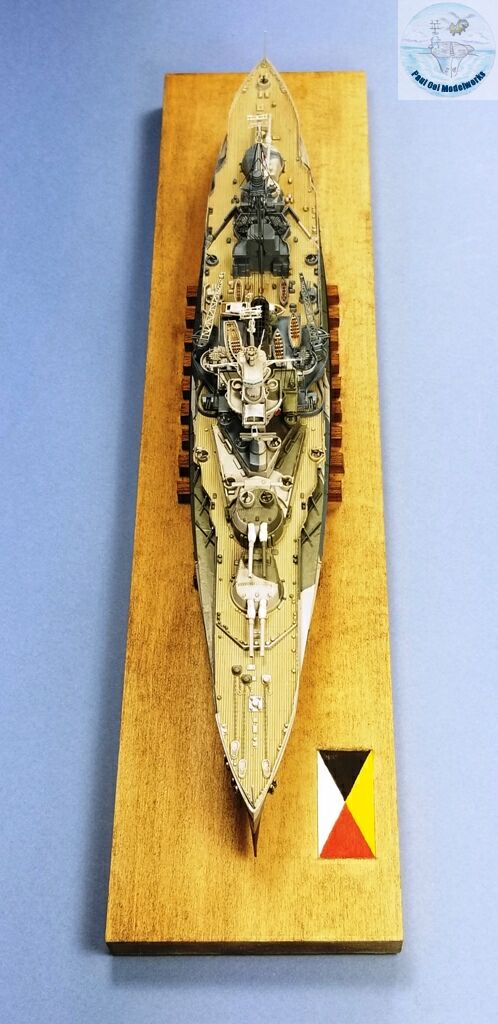
The HMS Malaya is completed!

The display base is made from 3″ wide basswood while the supporting wood strips are 3/8″square cherry wood. The Federated Malay States ensign is hand-painted onto the wood base.
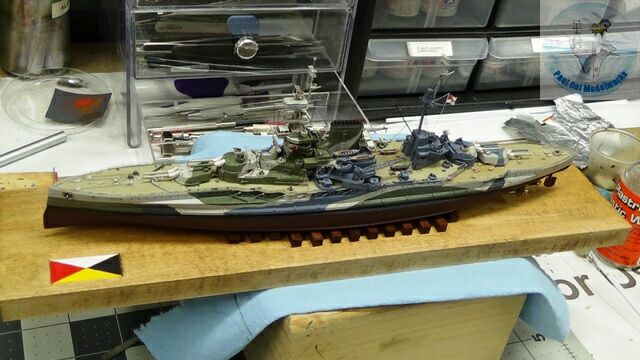
Ship and base are now united.
Leave a Reply