
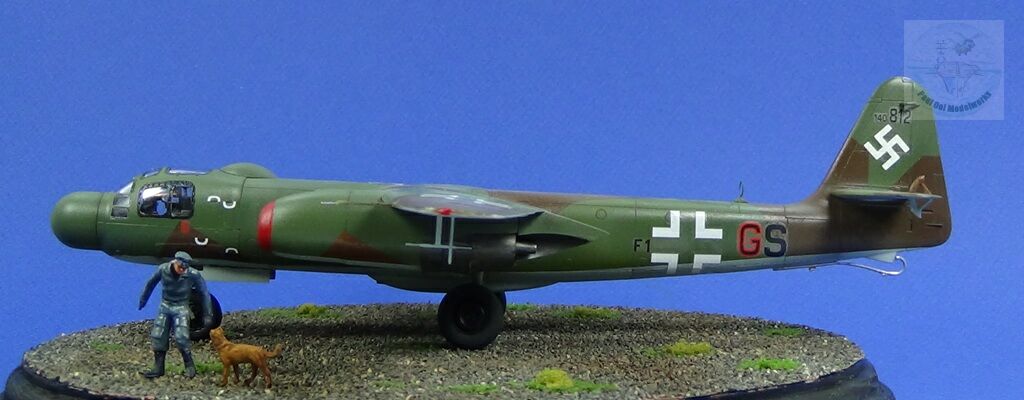
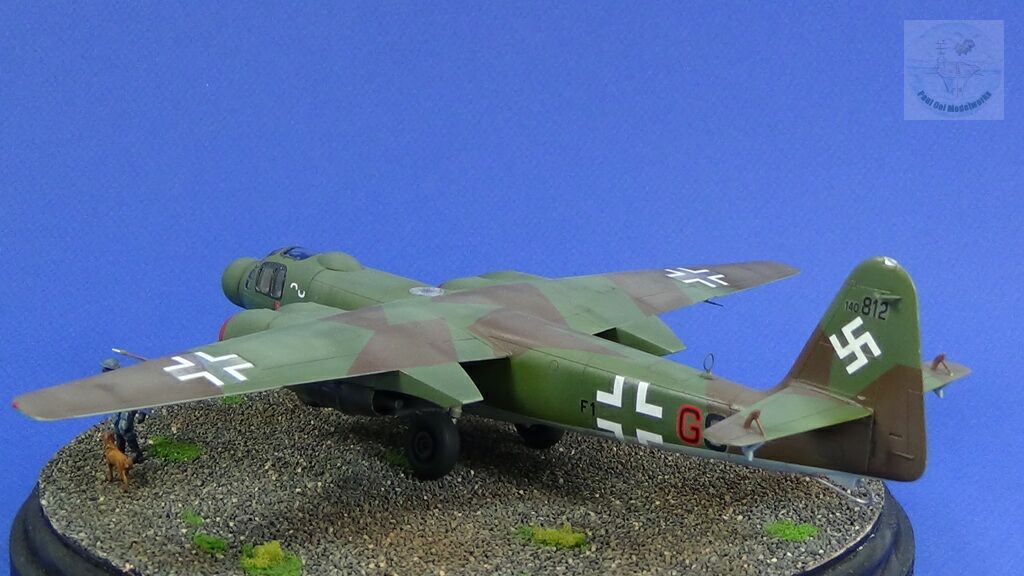
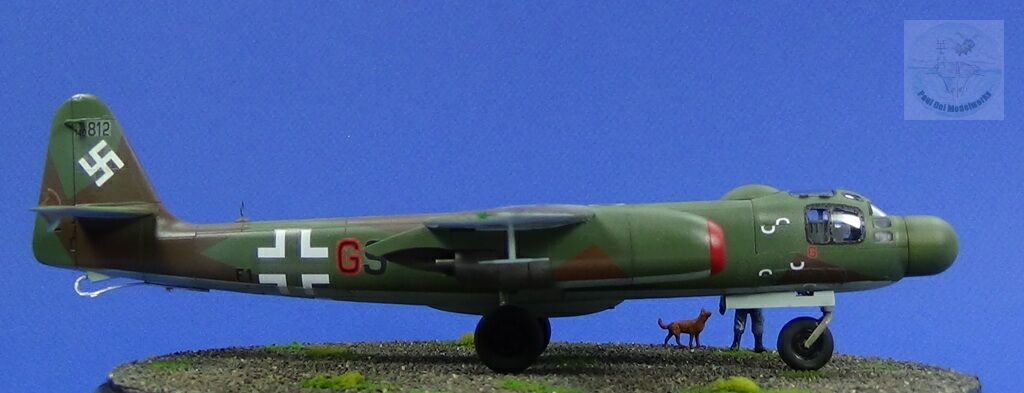
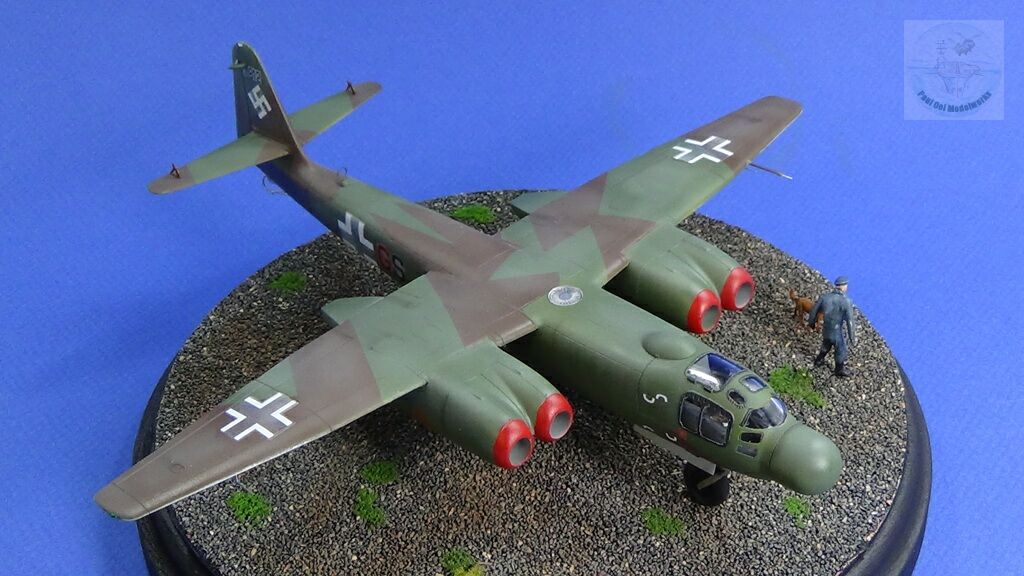
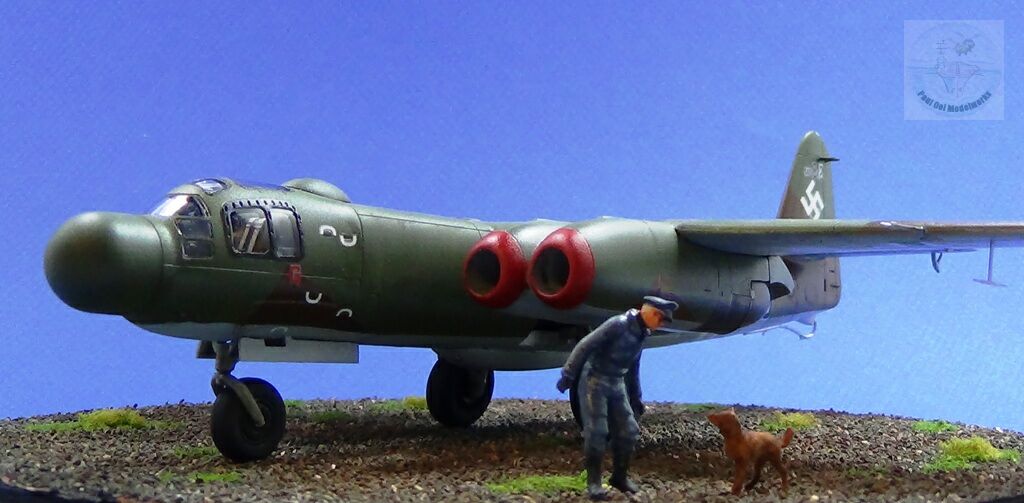
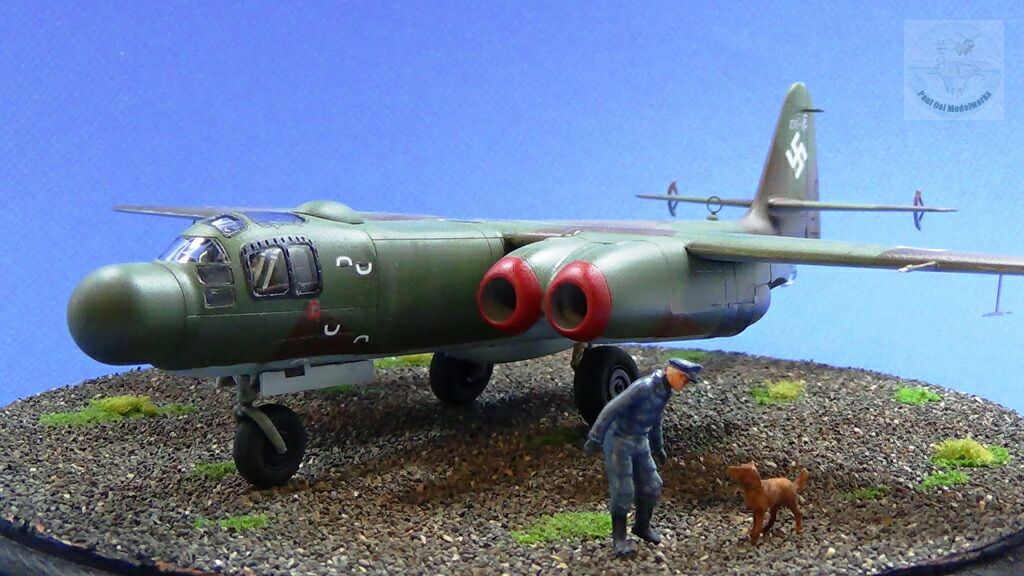
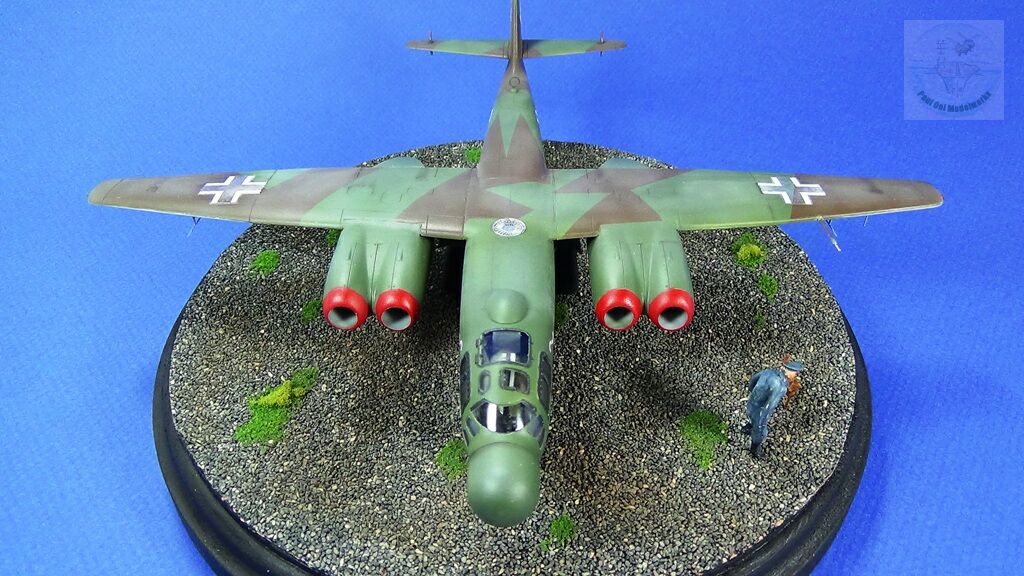
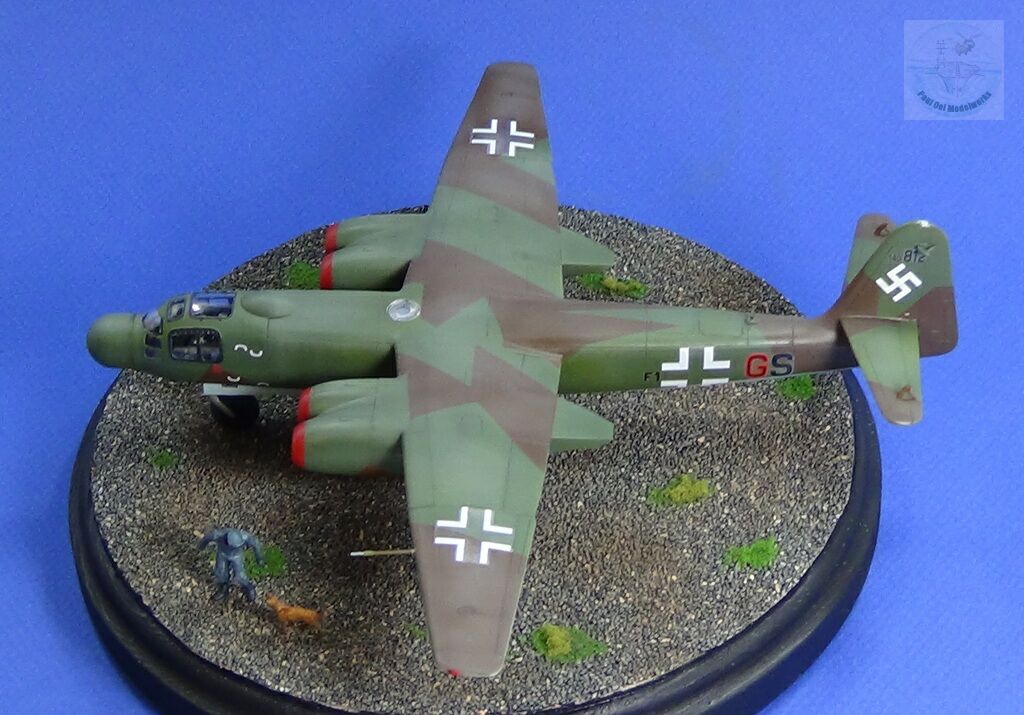
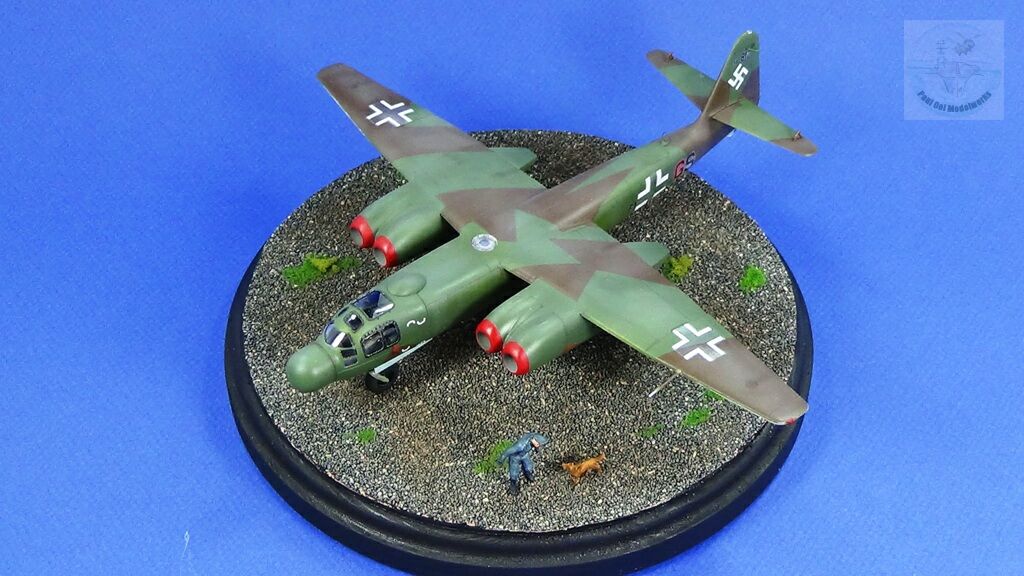
Towards the end of WW2, the aircraft designers for the Third Reich reached new heights of experimentation even as the empire that they seek to preserve was being grounded to dust by the combined weight of Allied air power and ground offensives. One of the most intriguing jet designs to emerge from the twilight of Nazi Germany was the Arado Ar234 Blitz Bomber. The Ar 234P was an interesting heavy fighter version equipped with a prototype nose cone to protect the radar dish, an arrangement that has now become common place in modern fighter jets. When combined with the dual Jumo jet engines on both sides, the aircraft cuts a curious look that predicted the shape of modern transport aircraft.
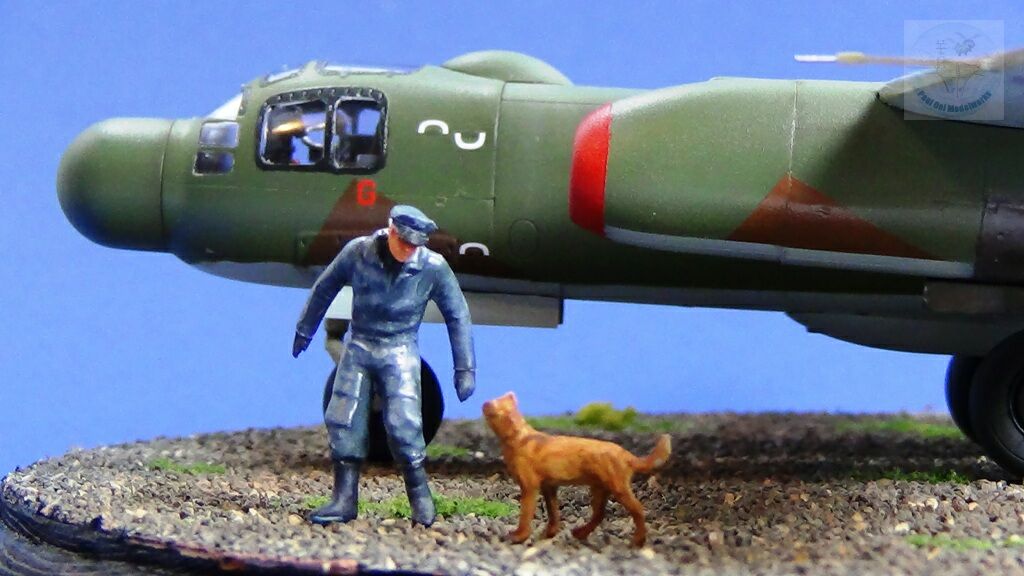
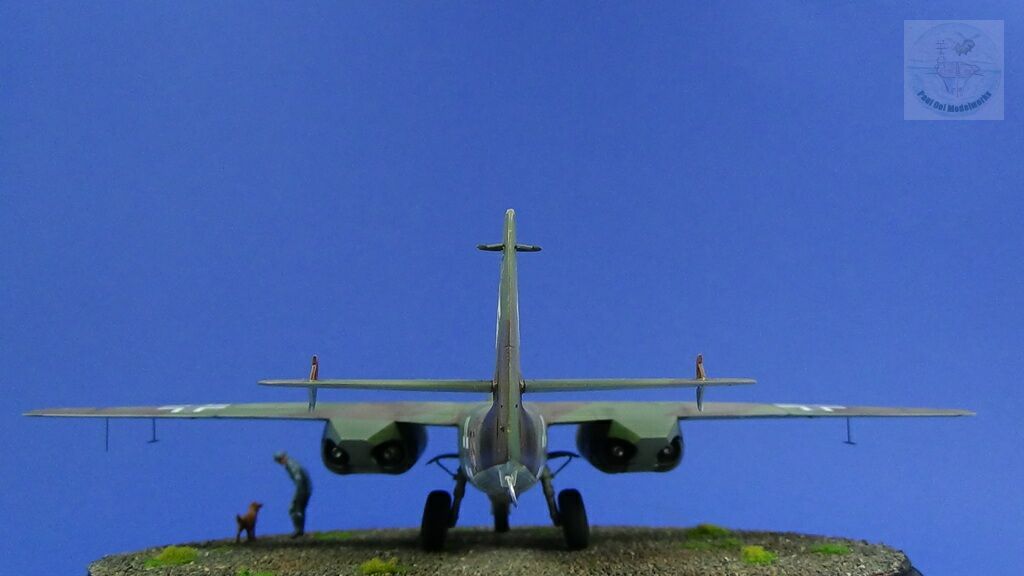
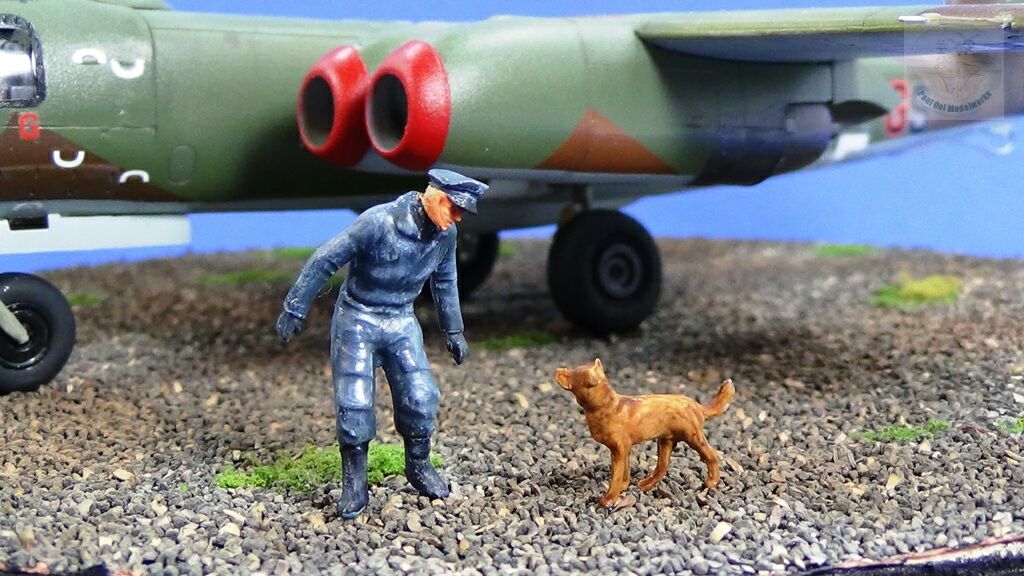
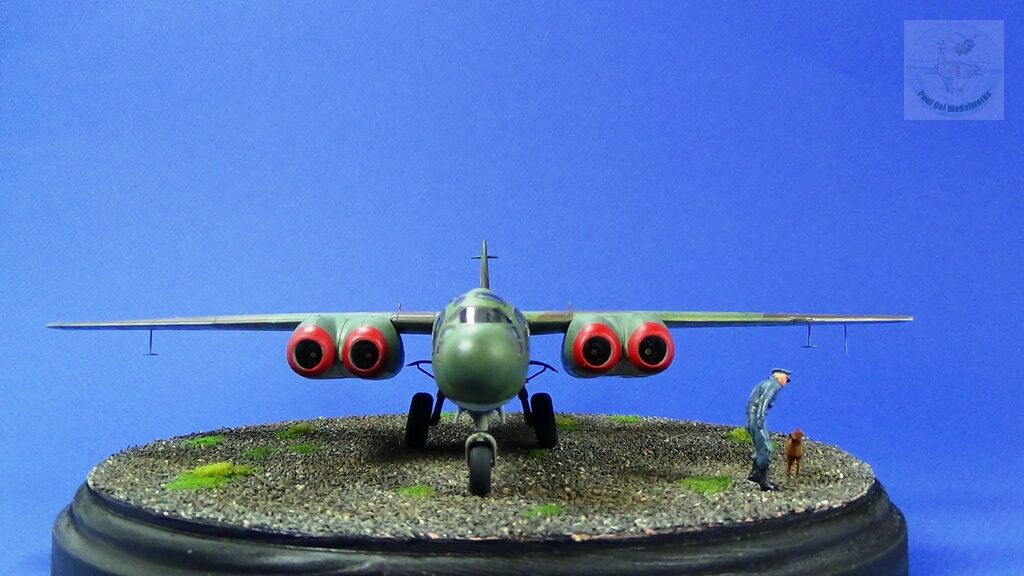
I have decided to build this Luftwaffe ’46 project suggesting that maybe the Ardennes Offensive did reach the Channel Ports, the Western Allies did negotiate a separate peace in the west, and Germany threw her remaining defensive weight and stopped the Soviets in East Prussia. A Luftwaffe operating in 1946 would use revetments similar to those found in forest areas close to Autobahns doubling up as runways. The jet wears the Defense of the Reich colors, and sits in a rough asphalt stand surrounded by trees and bushes. In order to take off, the jet is towed by tractor along country lanes until it reaches the Autobahn for take-off. Take-off distance is further shortened if they used auxiliary RATO (Rocket Assisted Take Off) pods. Nearby, the pilot plays with his pet dog.
Gallery:

Construction Notes:
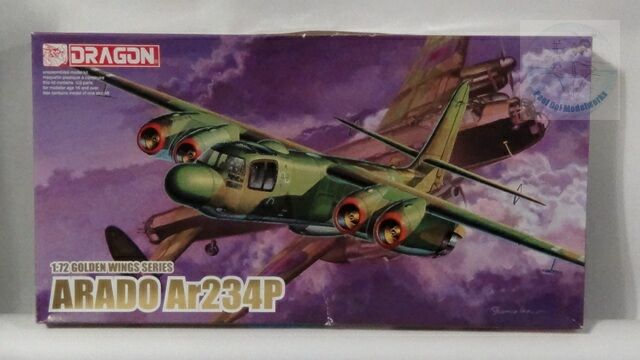
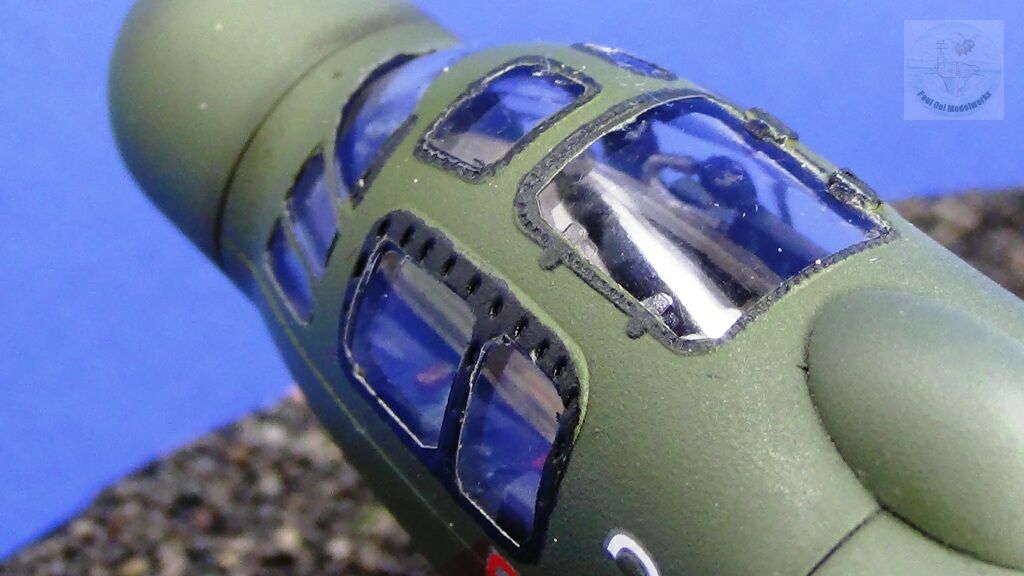
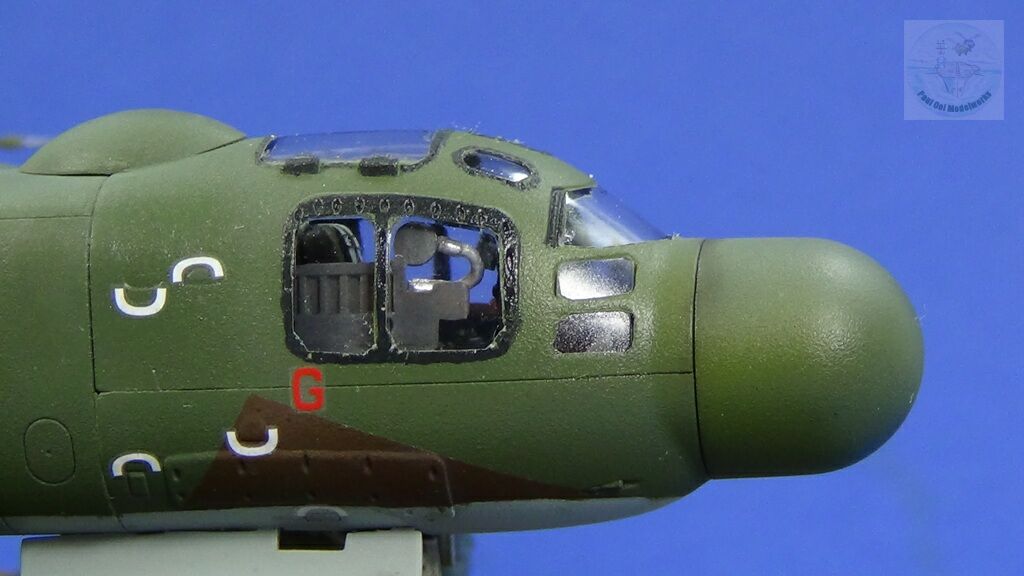
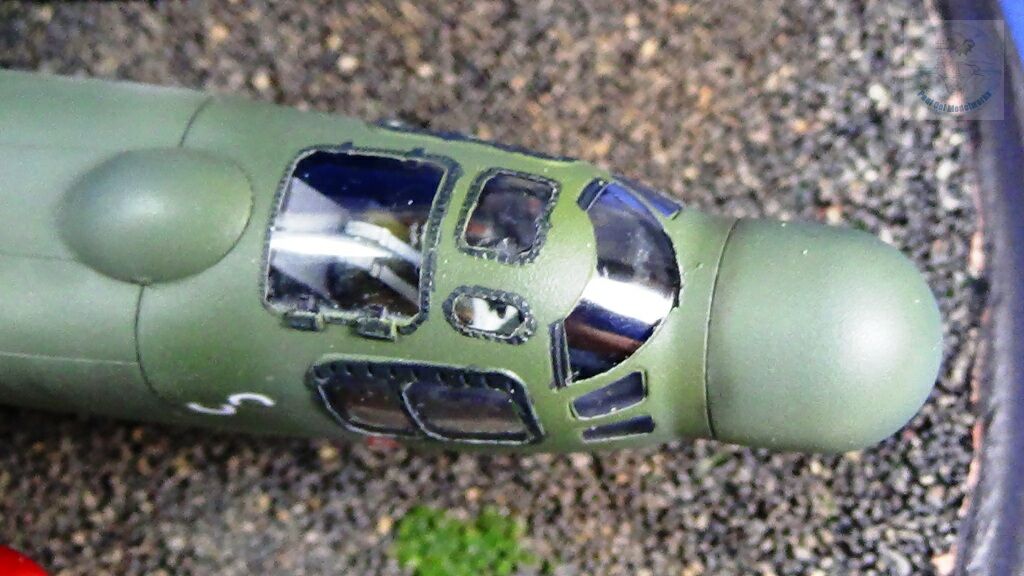
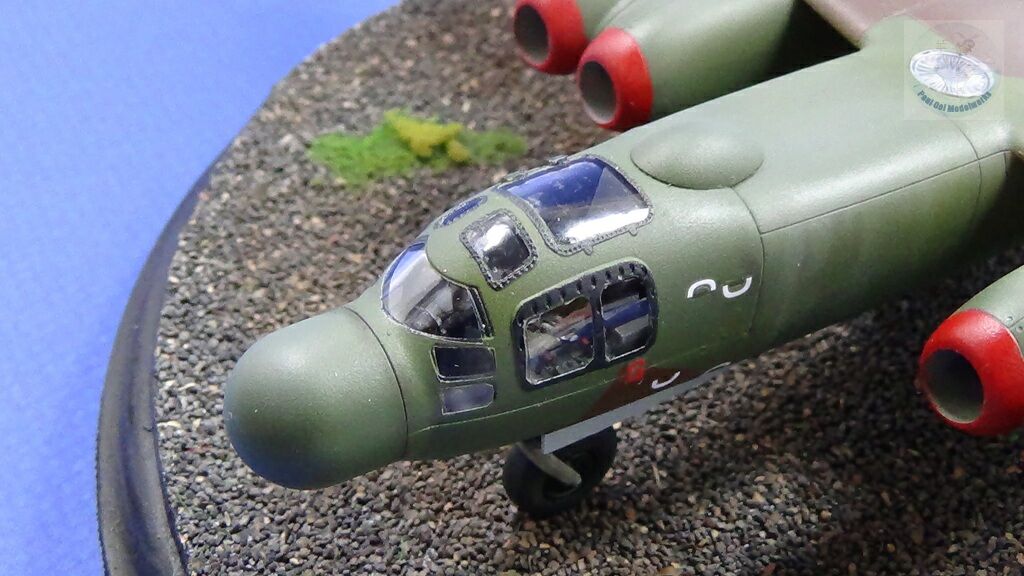
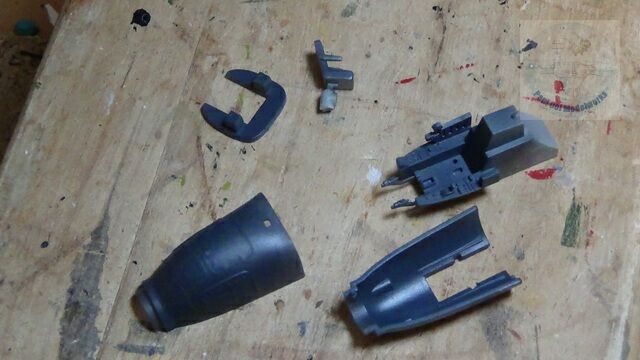
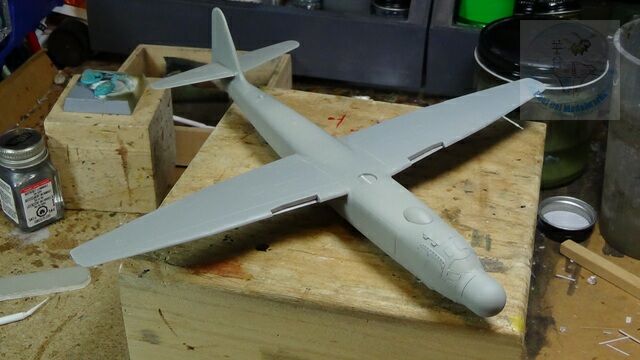
I was delighted to spot this 1/72 scale Dragon kit of a relatively rare subject during my recent trip to Singapore.The box art was pretty unique (shades of green and purple!) and the subject was even more so. The kit came with an entire cockpit section molded in clear plastic for the 234P bottle nosed section. While the kit parts were pretty well-molded, and came with a small photo etch fret of parts (why not a few more parts for the undercarriage!), the decals were a disappointment (more of that later).
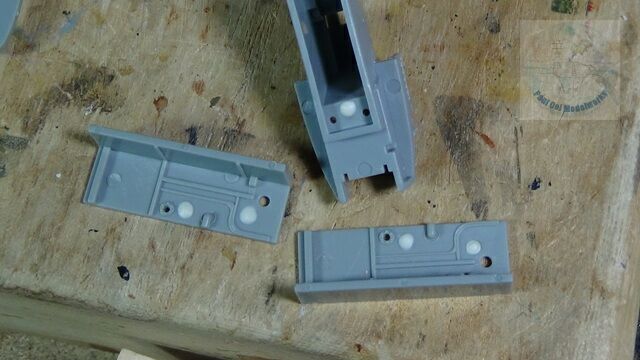
It was important to attach the nose weight (a small one in the bottle nose, two heftier ones behind the cockpit wall), or this bird will tail-sit. The instructions made no mention of nose weights at all, so beware. I also filled in some the ejector pins in the fuselage wheel wells.
Next, the clear cockpit sections are masked, and then painted with RLM70 Schwarz Grun.
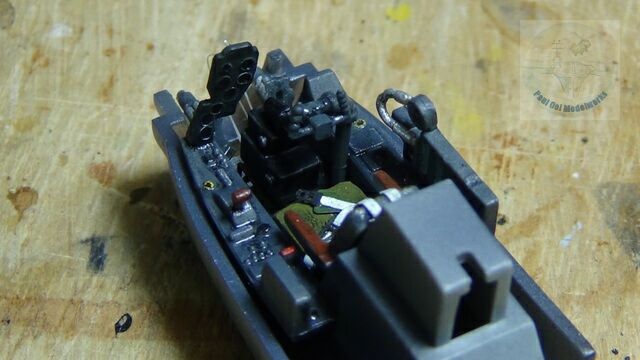
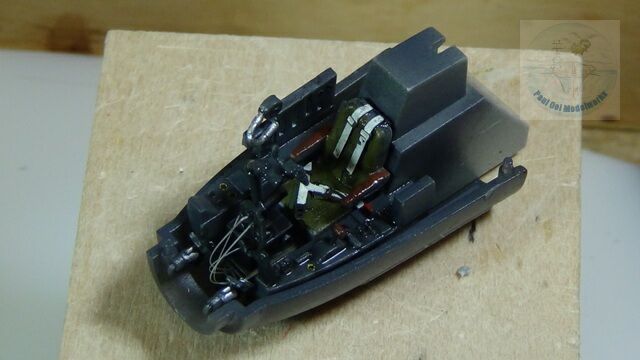
The cockpit section is very tight an cramped, just like in real life. The only additional I made that was not from the kit was a set of Luftwaffe seat belts that I found from my spare parts stash. I also added stretch sprue cables for the instrument panels exposed rear section.
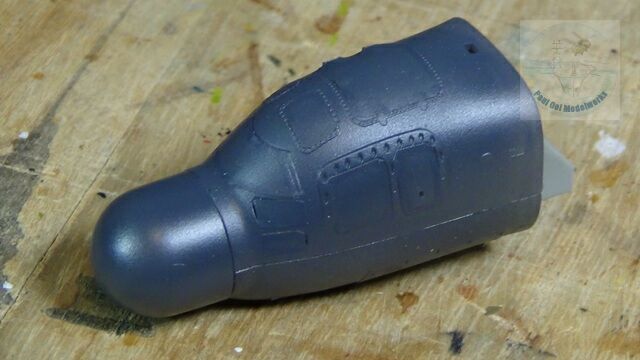
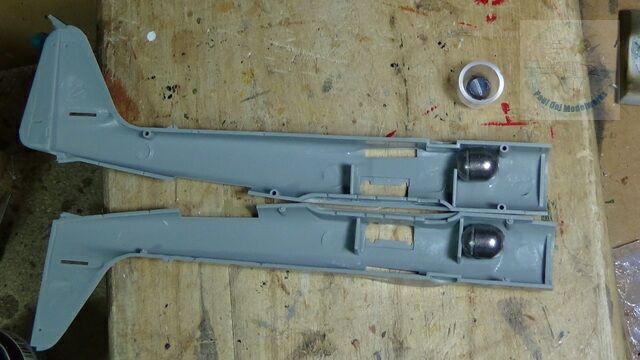
Then the forward cockpit section and radome are assembled, and the same for the fuselage with all the wheel wells in place and painted in RLM 02.
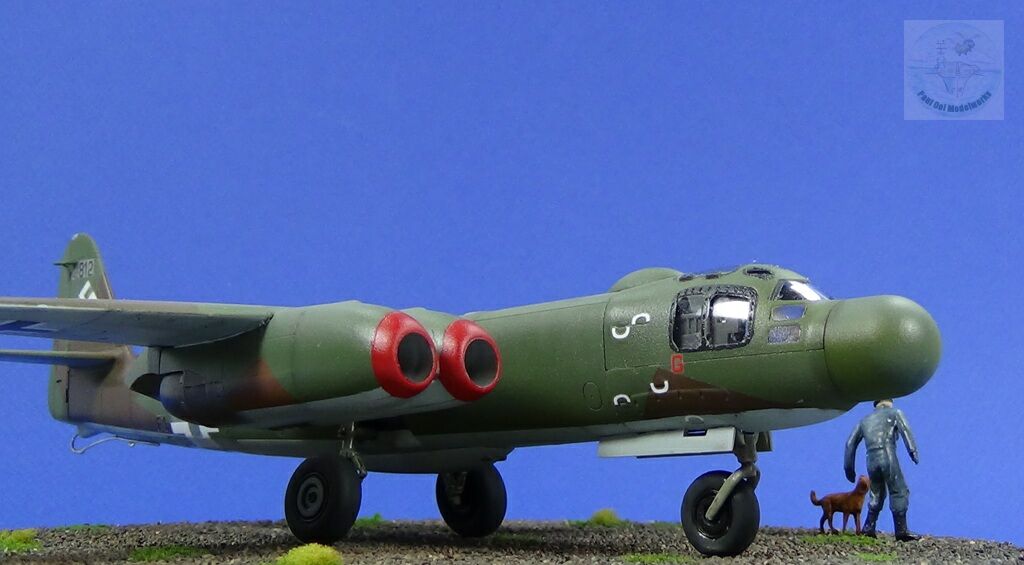
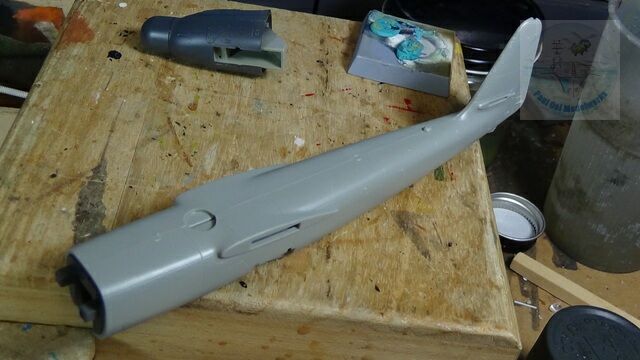
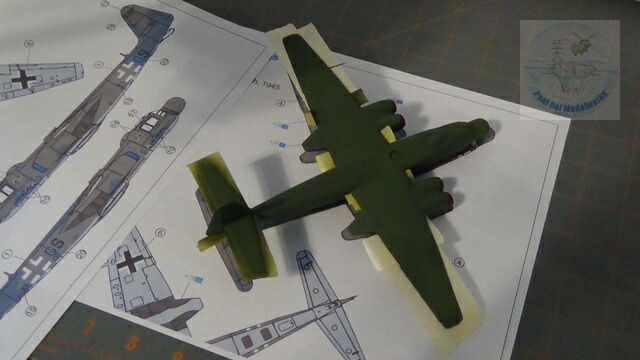
The main fuselage assembly was pretty much completed with the main wings and rear stabilizers in place. So far so good. The wing roots do have some tiny seam gaps that needed filling (see gap-filling tutorial). The dilemma was whether to assemble the engine pylons into the wings (hard to paint between pylon and fuselage), or leave them off but having to do a repeat paint job at the joints later on.
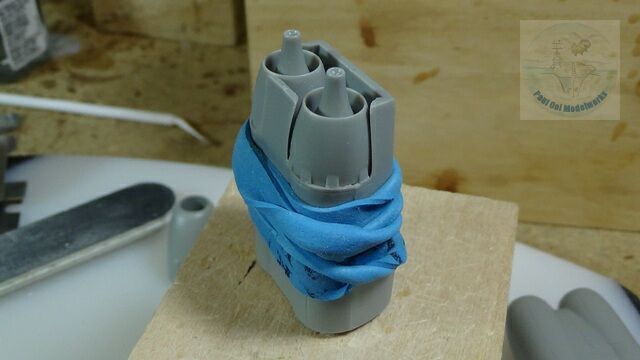
The twin engine sub-assemblies were very tricky since it was squeezing in two larger tubes into two halves of the engine nacelles that did not have space. I resorted to forcing the fit by tight rubber-banding.

Then I did some dry-ftting of the engine pylons to the wings. The fit was BAD. I was going to need some fairly major joining work right at were the pylons bet the wings. Plus, I couldn’t escape having to do a twice-over spray job at the nacelle joints.
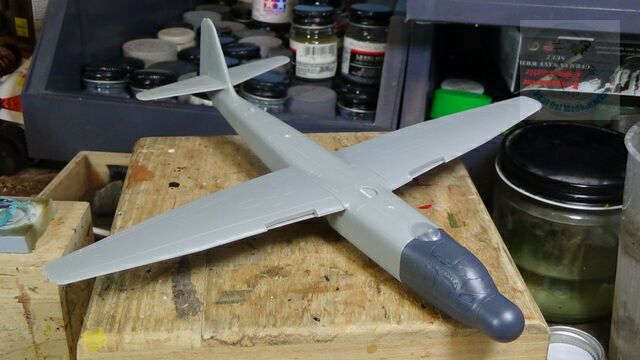
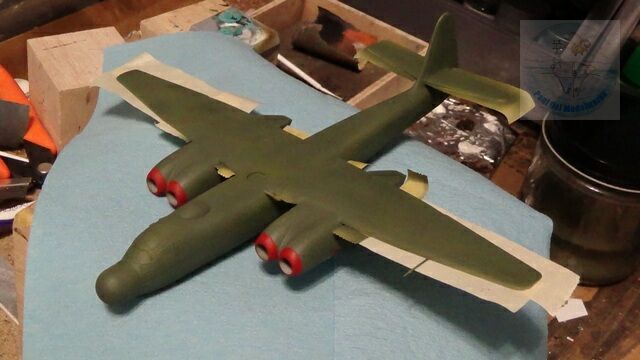
All other parts integral to the main fuselage are attached and all cavities plugged in preparation for airbrushing.
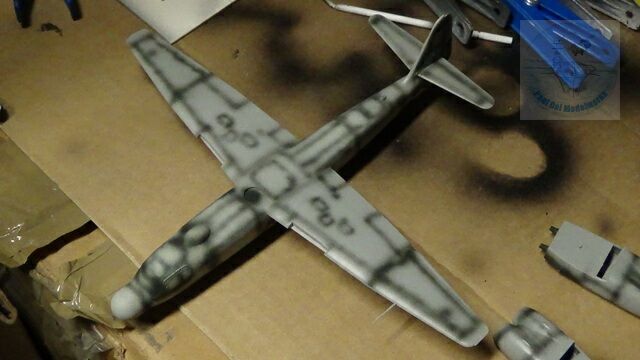
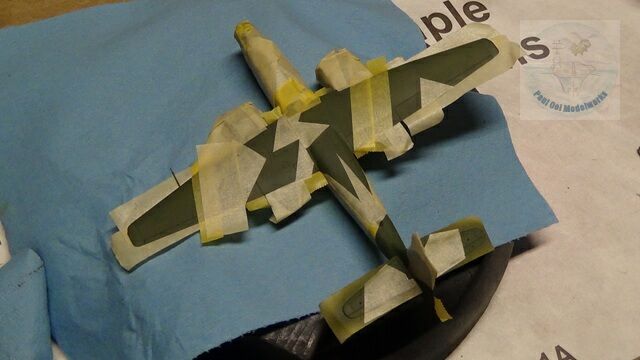
First, I spray light gull gray over the clear sections to achieve uniformity. Once dried, I apply Tamiya NATO Black under-shading over the panel lines.
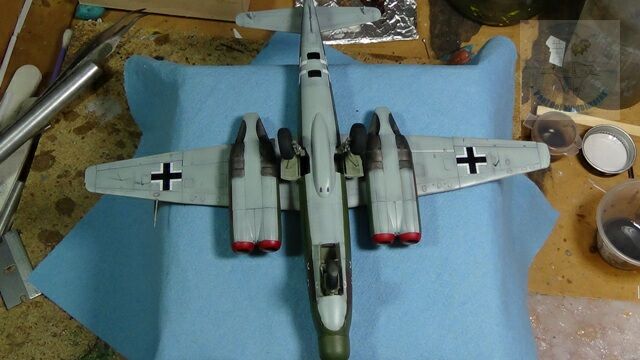
Then RLM 76 Licht Blau was applied on the underside, then masked. Over this, I sprayed RLM 83 Hell Grun.
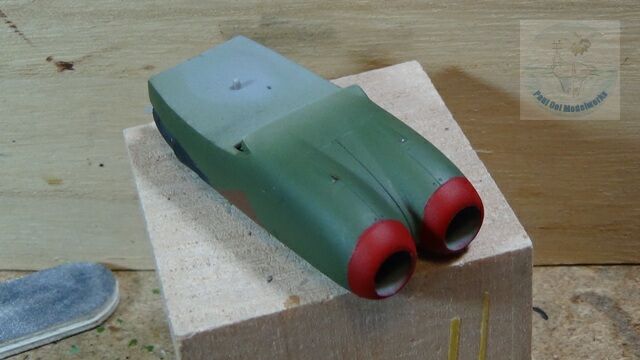
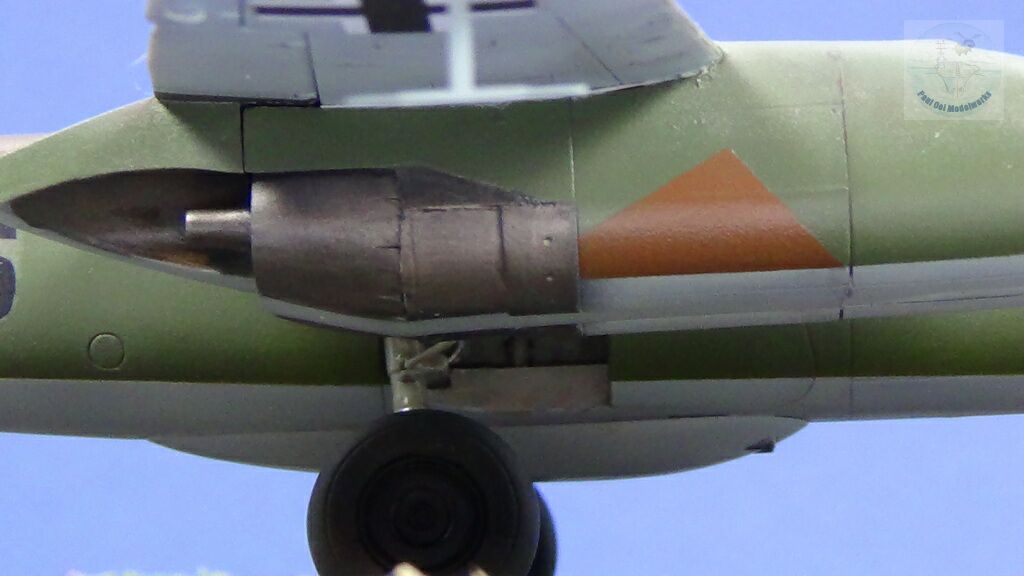
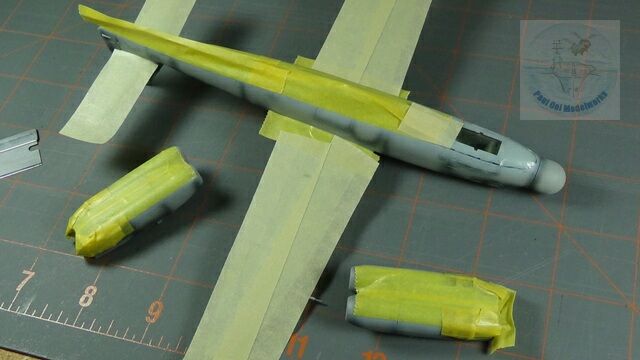
The engine nacelles are painted separately, including the red cowlings.
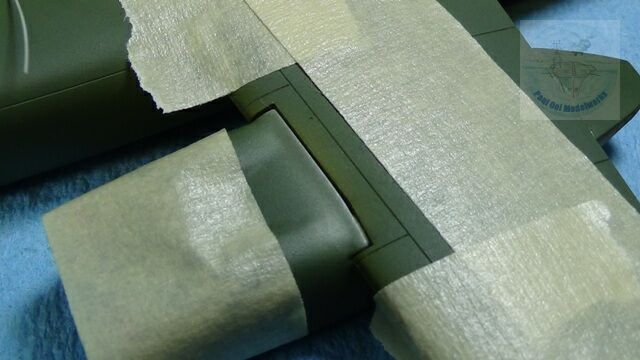
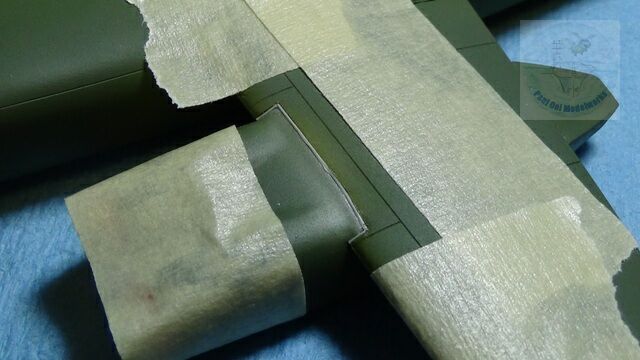
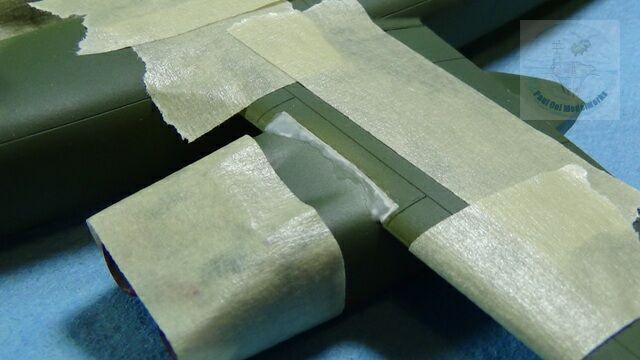
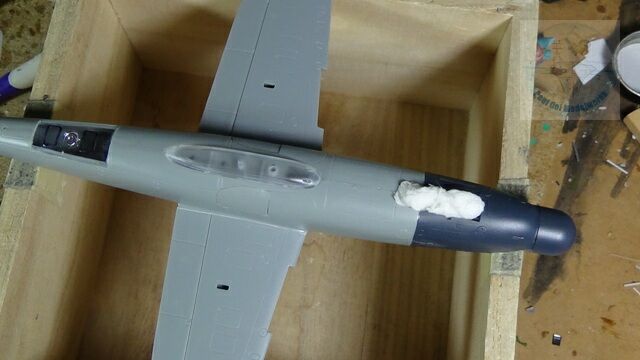
After attaching the engine nacelles to the wing, I had to seal a large gap in the seams. I started by apply a piece of stretched sprue to bridge the gap. Then I applied Mr. Hobby Dissolved Putty on the joints, and then sand them down to smooth. After that, I applied another layer of RLM 83 Hell Grun to cover the seam work.
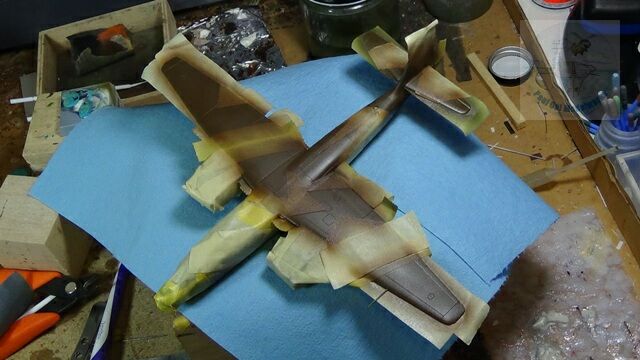
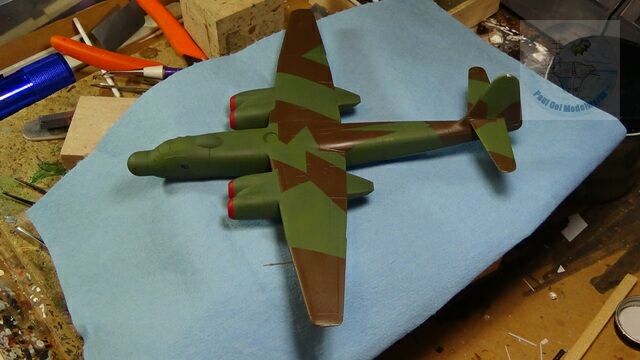
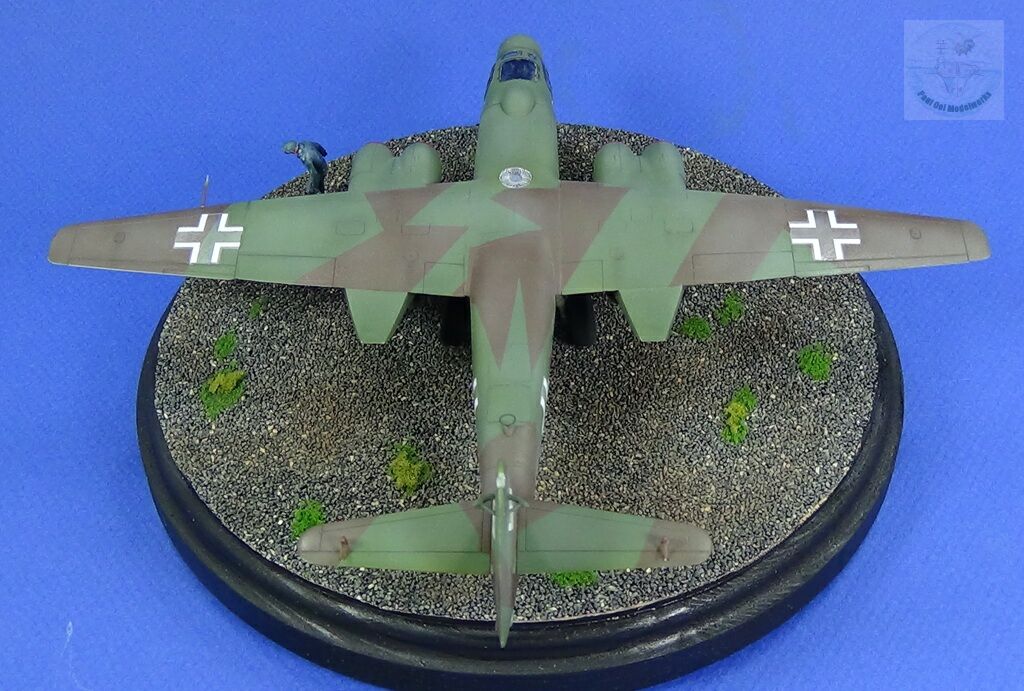
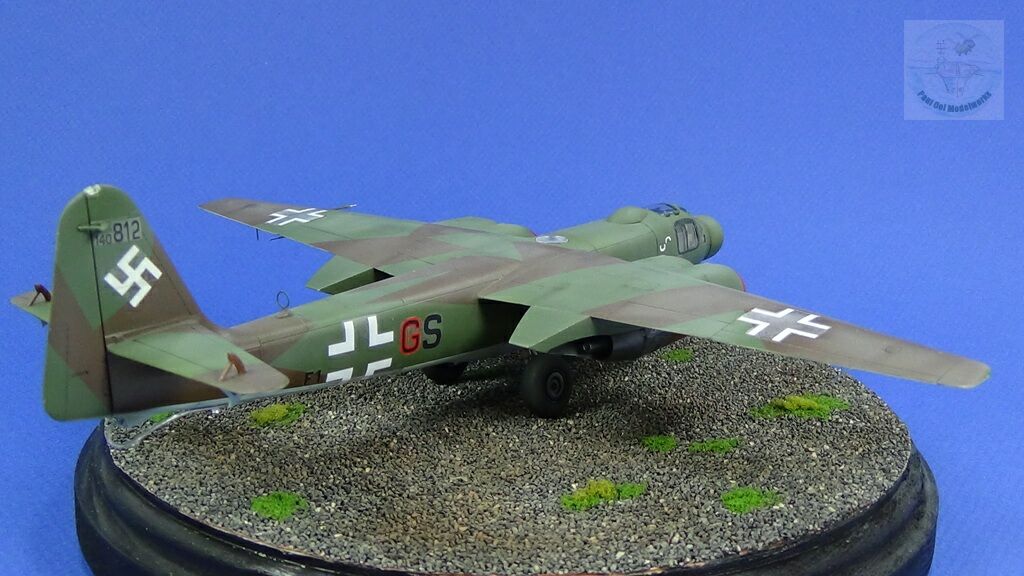
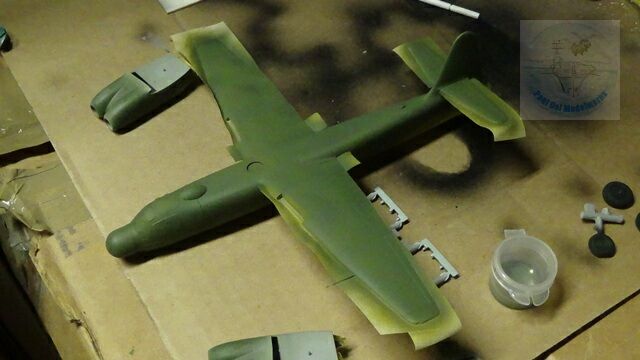
To achieve the late war splinter camouflage, I enlarged the coloring chart in the kit by 60% and achieved the correct 1:1 scale with the model. Then I traced out the masks from the enlarged diagram directly onto masking tape. After that I applied RLM 81 Violett Braun. I sealed the paintwork with floor polish varnish.
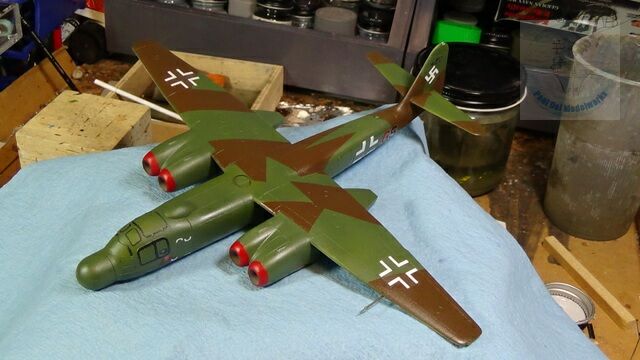
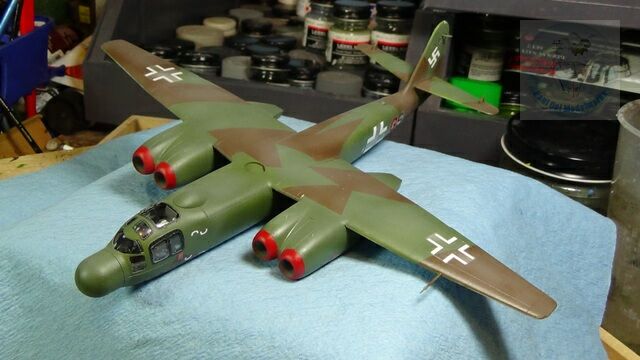
The decals were then applied to the model. I was not happy with the heavy silvering that I still got from this set of decals. Once dried, I sealed the decals under another layer of varnish, and then weathered the paintwork with a fine spray of Medium Grey to break the abruptness of the splinter camouflage.
I finish installing the tri-cycle underccarriage design and the final detailing of the underside of the aircraft.
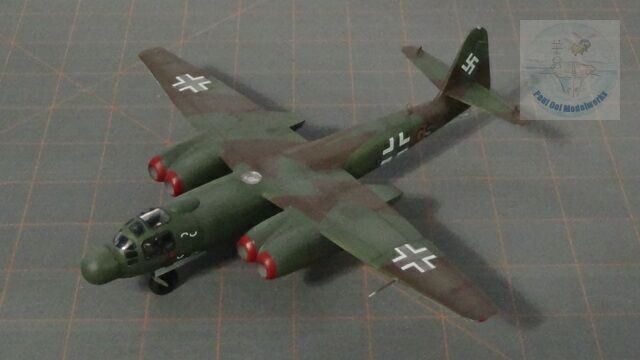
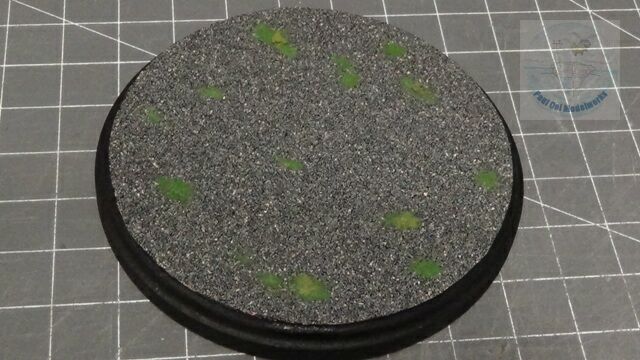
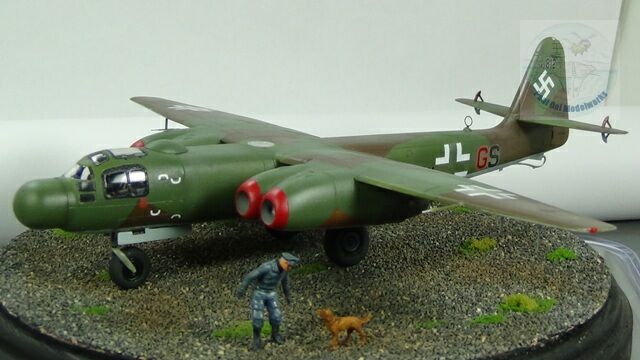
I combined the finish aircraft with a base simulating asphalt with some weeds growing through the cracks, and added in 1/72 scale Preiser Luftwaffe figures (flight officer and a pet dog).
Paul,
Excellent work as always. Amazing that anyone makes a model kit for the AR 234 – even in Asia. I had to look up Dragon on Wikipedia to learn about this outfit.
I’m curious about the visible brackets on the trailing edges of the empennage. I assume these are control cable fulcrums to manipulate the rudder and elevator control surfaces. I’ve seen them exposed like this on WWI vintage planes – but never on a WWII aircraft. Did the Arado designers do this because the horizontal and vertical stabilizers are too thin to contain internal mechanisms? Or was this simply a relatively crude cost-saving measure given the constricted availability of material and labor which faced Germany that late in the war?
If anyone knows the answer – it will be you. Thanks!
Dave H.
my friend
thank you for your help, I started it and I did this kit
Hello Michael,
Glad to be of assistance. Such a fun project.
Pasul